Module Replacement - Power Window Buick
Removal Procedure
- Remove the trim panel. Refer to
Door Trim Panel Replacement
.
- Remove the water deflector. Refer to
Door Water Deflector Replacement
.
- Remove the inner belt strip.
- Remove the window retaining bolts.
- Remove the door glass. Refer to
Door Window Replacement
.
- Raise the regulator to the top travel.

Important: Remove any pieces of rivet that fall inside of the door. Pieces left
in the door may cause rattles.
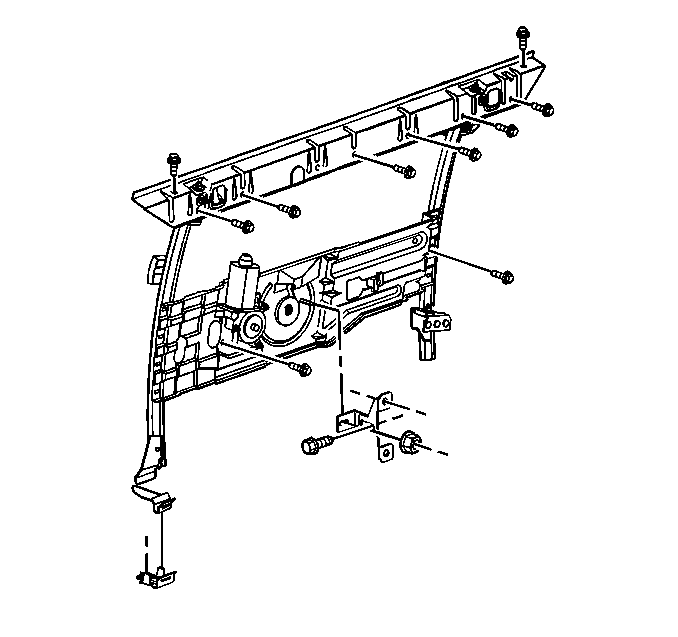
- Drill out the 8 rivets on the module belt member using a 6 mm
(1/4 in) drill.
- Disconnect the window motor electrical connector.
- Mark all of the adjustments for future glass adjustment.
- Loosen the adjustments.
- Remove the lower rear adjustment bracket.
- Pull up on the module belt member in order to remove the module
assembly.
Installation Procedure

- Perform the following
steps in order to install the module in the door:
| 1.1. | Align the front lower blade bracket into the adjuster. |
| 1.2. | Orient the adjuster against the inner panel. |
- Using the previous drill holes as locator holes, loosely install
the following components in place of all of the rivets:
- Push down and out during assembly in order to ensure that the
belt member is tight to the door sheet metal.
- Push out the bottom of the module as far as possible.
Place the adjuster onto the module stud.
- Install the nut.
- Lower the bracket.
Verify that the bracket has minimum slip fit relative to the guide channel
bracket.
- Adjust the bracket to the original position, as marked, in order
to prepare for the window adjustment.
- Connect the electrical connector.
- Lower the regulator.
- Install the window. Refer to
Door Window Replacement
.
- Adjust the door, as necessary, in order to fit the body. Refer
to
Door Hinge Replacement
.
- Adjust the door window. Refer to
Door Window Adjustment
.
- Install the water deflector. Refer to
Door Water Deflector Replacement
.
- Install the inner belt strip.
- Install the trim panel. Refer to
Door Trim Panel Replacement
.
Module Replacement - Power Window Oldsmobile
Removal Procedure
- Remove the trim panel. Refer to
Front Side Door Trim Panel Replacement
or to
Rear Side Door Trim Panel Replacement
.
- Remove the armrest bracket.
- Remove the water deflector. Refer to
Door Water Deflector Replacement
.
- Remove the inner belt strip.

- Remove the window retaining
bolts (2).
- Raise the regulator to the top travel.
- Remove the door glass. Refer to
Door Window Replacement
.

Important: Remove any pieces of rivet that fall inside the door. Pieces left in
the door may cause rattles.
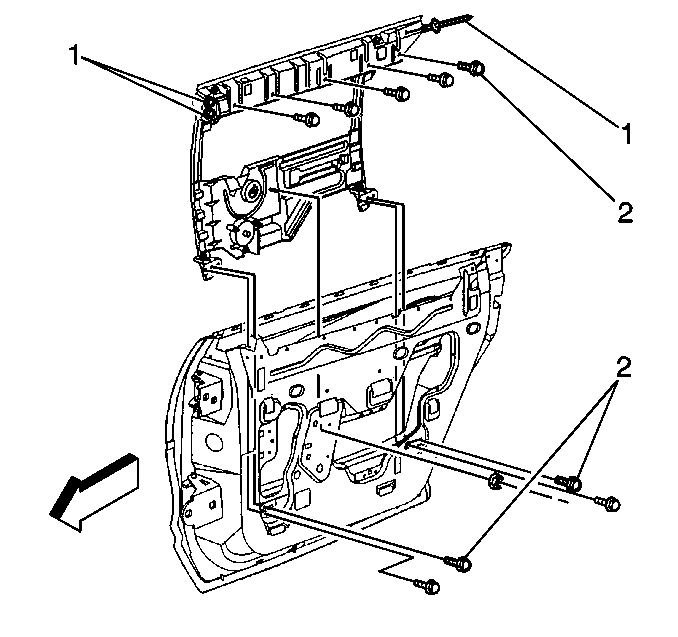
- Drill out the 8 rivets on the module belt member using a 6 mm
(1/4 in) drill.
- Disconnect the window motor electrical connector.
- Mark all of the adjustments for future glass adjustment.
- Loosen the adjustments.
- Remove the lower rear adjustment bracket.
- Pull up on the module belt member in order to remove the module
assembly.
Installation Procedure

Important: Do not allow the fasteners to fall into the door cavity during assembly.
- Perform the following steps in order to install the module in the door:
| 1.1. | Align the front lower blade bracket into the adjuster. |
| 1.2. | Orient the adjuster against the inner panel. |
- Install the short bolt in the top rear hole of the module.
- Using the previous drill holes as locator holes, loosely install
the following components in place of all of the rivets:
- In order to ensure that the height adjustment is not lost, perform
one of the following routines:
| • | For the rear door, hold up on both the front and the rear of the
module while securing the bolts. |
| • | For the front door, hold up on the rear of the module while securing
the bolts. |
- Push out the bottom of the module as far as possible.
Place the adjuster onto the module stud.
- Install the nut.
- Lower the bracket in order to ensure that the bracket has minimum
slip fit relative to the guide channel bracket.
- Adjust the bracket to the original position, as marked, in order
to prepare for the window adjustment.
- Connect the electrical connector.
- Lower the regulator.
- Install the window. Refer to
Door Window Replacement
.
- Adjust the door, as needed, in order to fit the body. Refer to
Door Hinge Replacement
.
- Adjust the door glass. Refer to
Door Window Adjustment
or to
Rear Side Door Window Adjustment
.
- Install the inner belt strip.
- Install the water deflector. Refer to
Door Water Deflector Replacement
.
- Install the armrest bracket.
- Install the trim panel. Refer to
Front Side Door Trim Panel Replacement
or
Rear Side Door Trim Panel Replacement
.


