Tools Required
| • | J 41476 Front and Rear Cover Alignment (Crankshaft Oil Seal Area) |
| • | J 41478 Crankshaft Front Oil Seal Installer |
Removal Procedure
- Remove the water pump. Refer to Water Pump Replacement in Engine Cooling.
- Remove the crankshaft balancer. Refer to Crankshaft Balancer Replacement .
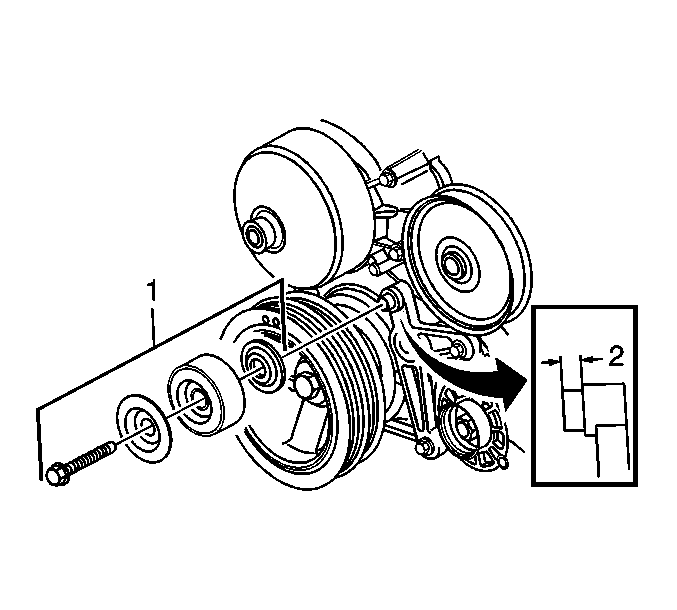
- Remove the drive belt idler pulley bolt and pulley (1).
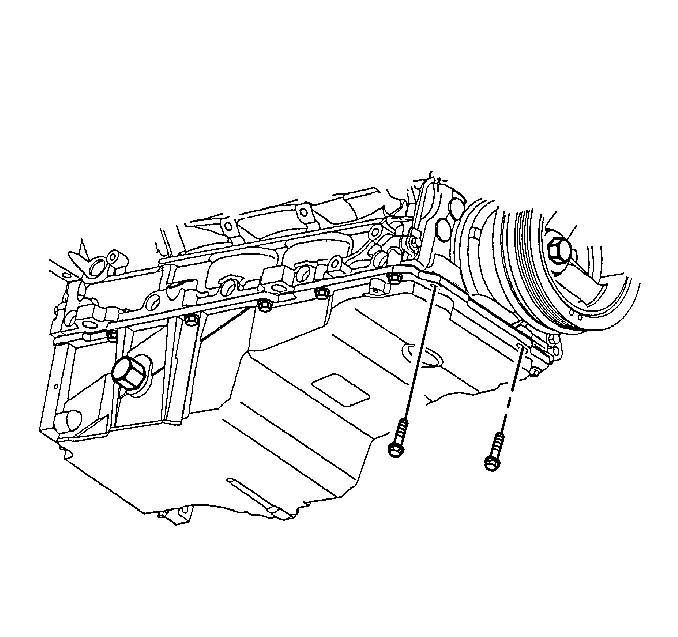
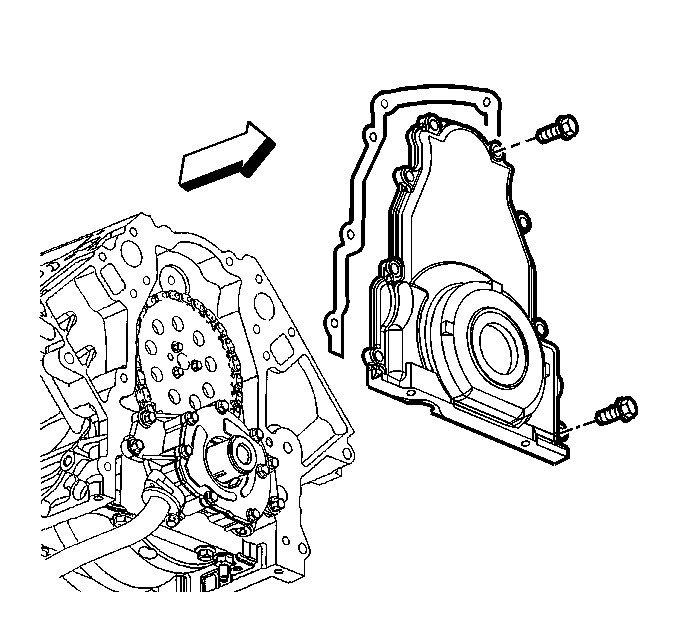
- Remove the oil pan-to-front cover bolts.
- Remove the front cover bolts.
- Remove the front cover and gasket.
- Discard the front cover gasket.
- Clean and inspect the engine front cover. Refer to Engine Front Cover Cleaning and Inspection in Engine Mechanical - 5.7 L Unit Repair.
Installation Procedure
Important:
• Do not reuse the crankshaft oil seal or front cover gasket. • Do not apply any type sealant to the front cover gasket (unless specified). • The special tool in this procedure is used to center the crankshaft
front oil seal. • All gasket surfaces should be free of oil or other foreign material
during assembly. • The crankshaft front oil seal MUST be centered in relation to the crankshaft. • An improperly aligned front cover may cause premature front oil seal
wear and/or engine oil leaks.
- Apply a 5 mm (0.20 in) bead of sealant GM P/N 12378190 or equivalent 20 mm (0.80 in) long to the oil pan to engine block junction.
- Install the front cover and gasket.
- Install the front cover bolts until snug. Do not overtighten.
- Install the oil pan-to-front cover bolts until snug. Do not overtighten.
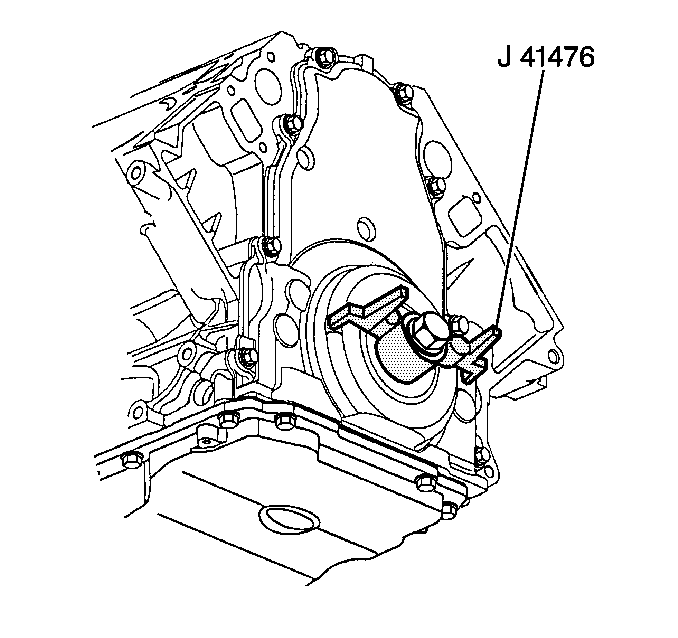
- Install the J 41476 and crankshaft balancer bolt to the front cover.
- Align the tapered legs of the J 41476 with the machined alignment surfaces on the front cover.
- Install the crankshaft balancer bolt until snug. Do not overtighten.
- Tighten the oil pan-to-front cover bolts to 25 N·m (18 lb ft).
- Tighten the engine front cover bolts to 25 N·m (18 lb ft).
- Remove the J 41476 .
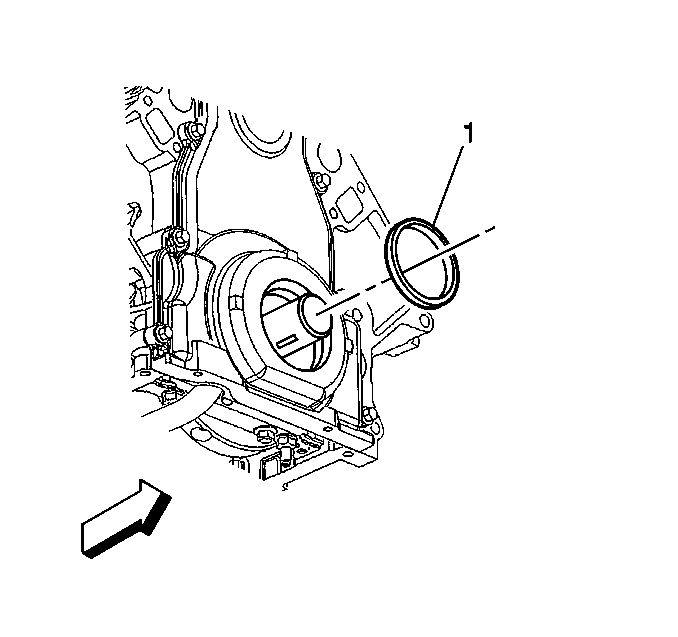
- Lubricate the outer edge of the oil seal (1) with clean engine oil.
- Lubricate the front cover oil seal bore with clean engine oil.
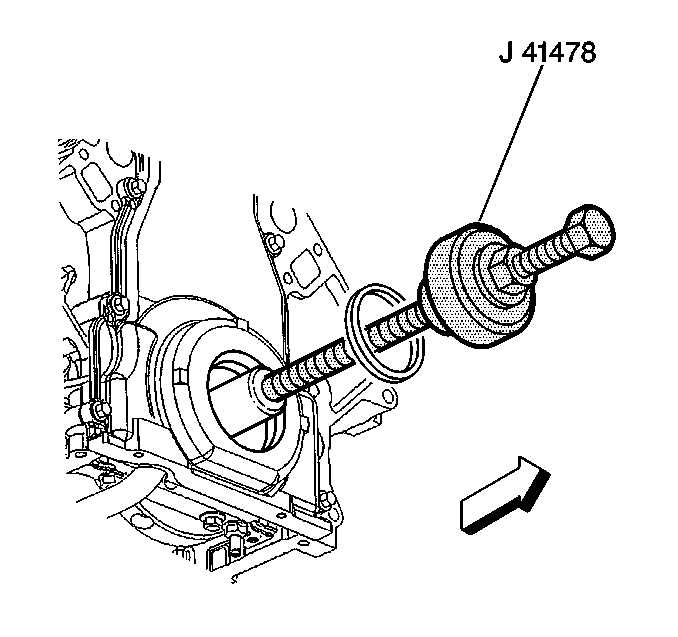
- Install the crankshaft front oil seal into the J 41478 guide.
- Install the J 41478 threaded rod (with nut, washer, guide, and oil seal) into the end of the crankshaft.
- Use the J 41478 in order to install the oil seal into the cover bore.
- Install the idler pulley assembly (1) onto the generator bracket post.
- Install the drive belt idler pulley bolt until snug.
- Install the crankshaft balancer. Refer to Crankshaft Balancer Replacement .
- Install the water pump. Refer to Water Pump Replacement in Engine Cooling.
Notice: Use the correct fastener in the correct location. Replacement fasteners must be the correct part number for that application. Fasteners requiring replacement or fasteners requiring the use of thread locking compound or sealant are identified in the service procedure. Do not use paints, lubricants, or corrosion inhibitors on fasteners or fastener joint surfaces unless specified. These coatings affect fastener torque and joint clamping force and may damage the fastener. Use the correct tightening sequence and specifications when installing fasteners in order to avoid damage to parts and systems.
Tighten
Important:
• Do not lubricate the oil seal sealing surface. • Do not reuse the crankshaft oil seal.
| • | Use a wrench and hold the hex on the installer bolt. |
| • | Use a second wrench and rotate the installer nut clockwise until the seal bottoms in the cover bore. |
| • | Remove the tool. |
| • | Inspect the oil seal for proper installation. The oil seal should be installed evenly and completely into the front cover bore. |
Important: Be sure that the idler pulley rear dust shield is fully seated against the shoulder on the generator bracket post (2) before tightening the bolt.
Tighten
Tighten the drive belt idler pulley bolt to 50 N·m (37 lb ft).
