Engine Compartment Front Outer Side Rail
Before attempting to remove the engine compartment front outer side rail, visually inspect the damage and restore as much of the damage as possible to factory specifications. The engine compartment front outer side rail is attached to the front wheelhouse panel upper side rail assembly with spots welds. To remove the outer side rail, the spot welds must be drilled out. Plug weld holes must be drilled in the same location as the original spot welds. On the service part, outer side-rail, plug weld holes are not included.
Removal Procedure
- Remove the front fender assembly, the hood assembly and the hood hinge assembly.
- Drill out all related factory welds.
- Remove the outer side rail.
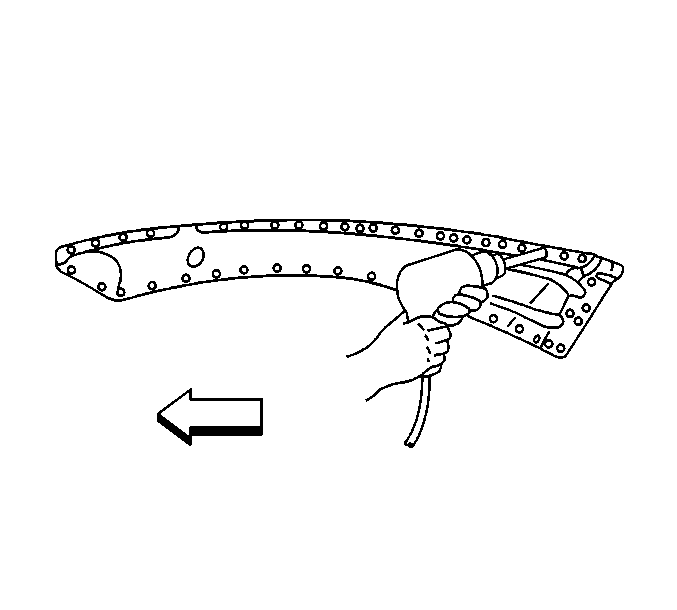
- Remove the air baffle material (1) from the side rail assembly.
- Remove sealant from side rail assembly as necessary.
Important: Note the number and location of the welds for the installation of the new outer side rail.
Installation Procedure
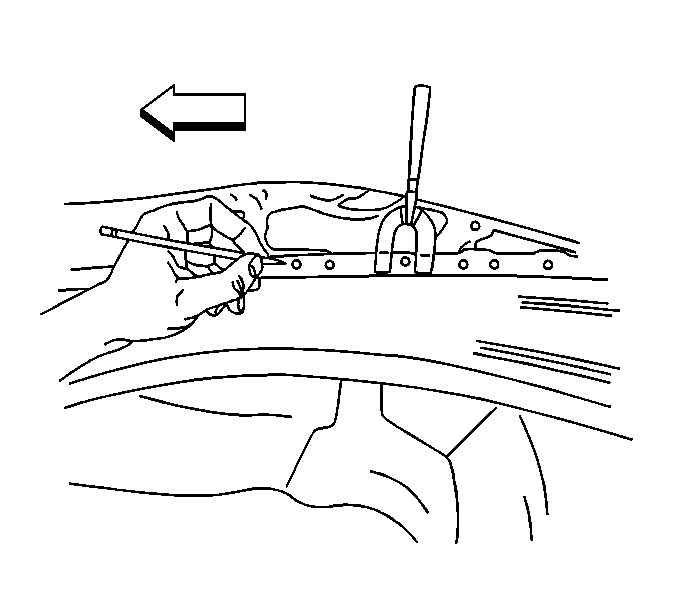
- Position the new outer side rail to the inner side rail and clamp in place.
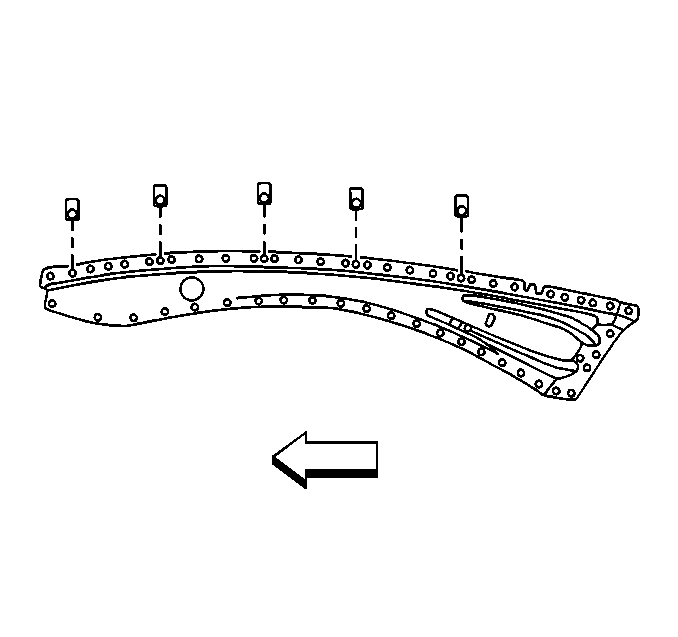
- Mark the 7 formed and pierced locations from the side rail assembly to the new outer side rail.
- Mark the hood hinge hole locations.
- Remove the clamps and the outer side rail.
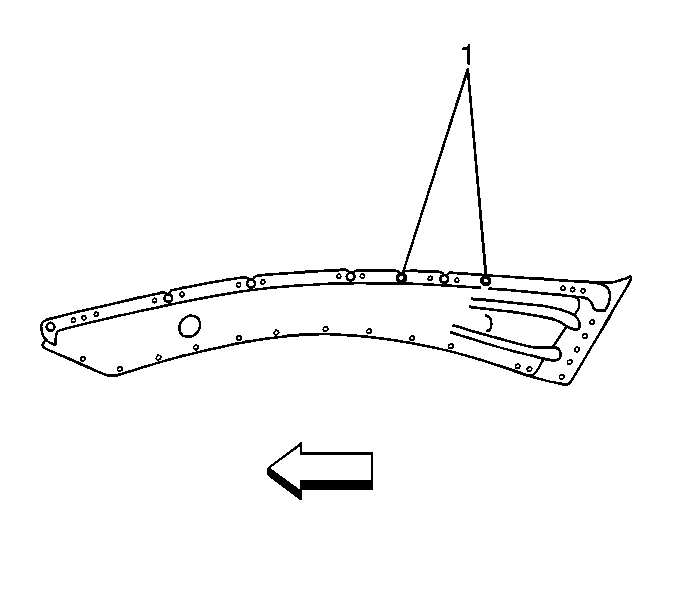
- Drill 1/8 in holes in marked locations on the new outer side rail at formed and pierced locations.
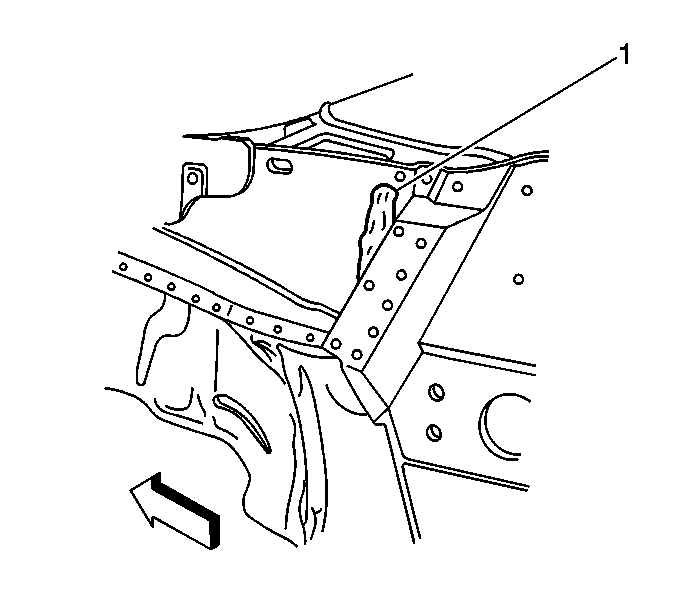
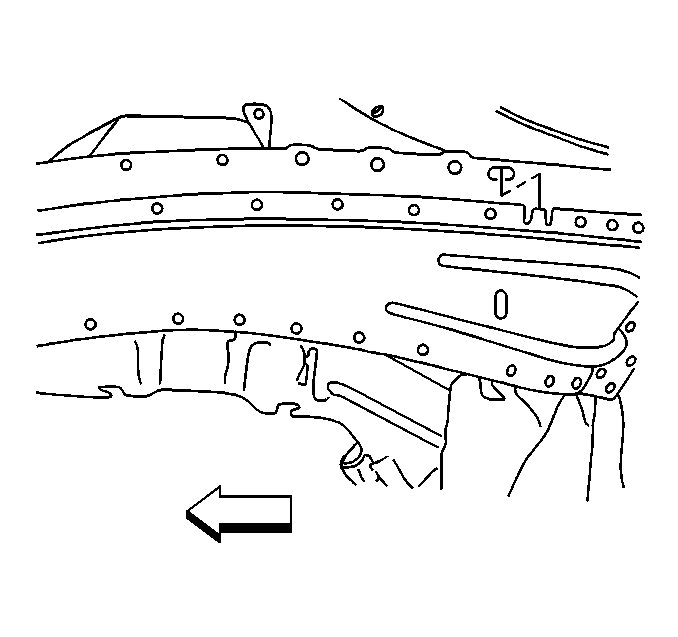
- Drill 2 10 mm (3/8 in) holes at hood hinge hole locations (1).
- Drill 8 mm (5/16 in) plug weld holes in welding locations, fore and aft of the 7 formed and pierced locations.
- Drill 8 mm (5/16 in) holes through remaining locations as noted from old outer side rail.
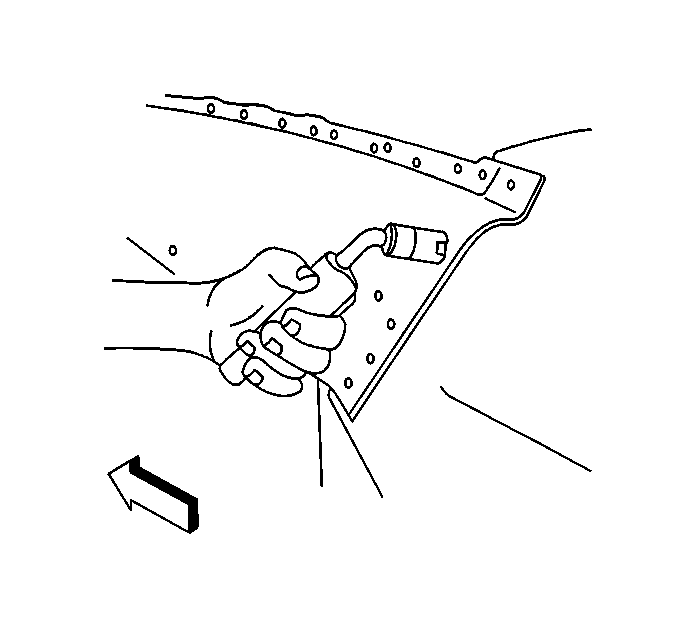
- Install J-Clips included with rail, GM P/N 10079170, through 5 formed and pierced locations.
- Position the new outer side rail in place, insert locating tab through slot.
- Install the fender mounting bolts/screws included with rail, GM P/N 11505023, at 5 J-Clips to secure outer side rail in place.
- Follow the next steps accordingly:
- Using a MIG welder randomly plug weld new outer side rail in place.
- Clean and prepare welded surfaces. Apply 3M Brushable Seam Sealer, part number 08361 or equivalent as necessary.
- Apply HANDI FOAM to replace air baffle material. HANDI FOAM kit is available from FOMO Products Inc., 2775 Barber Rd., P.O. Box 1078, Norton, Ohio 44203 or call 1-800-321-5585 or 216-753-4585.
- Prime with 2-part catalyzed primer.
- Apply anti-corrosion material as necessary.
- Install the hood hinge assembly, the hood assembly and the front fender assembly.
Important: If the original outer side rail is damaged beyond recognition, place holes for welding approximately 40 mm (1 1/2 in) apart.
Important: 2 formed and pierced locations at hood hinge mounting panel do not require J-Clips.
Important: The new outer rail may be manually positioned to accommodate the J-Clips at the 5 formed locations.
| • | Outer Rail Replacement Only. Match the new outer rail to the contour of the 2 formed locations at the hood hinge. (Use hood hinge bracket with original spacers intact.) |
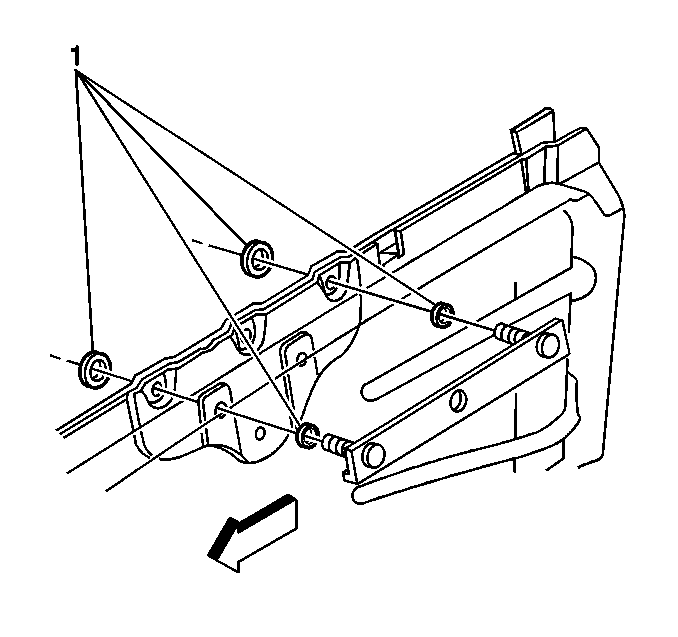
| • | Inner and Outer Rail Replacement. Replace original 2 spacers on hood hinge bracket bolt/screw with 2 washers provided (1). Install hood hinge bracket upside down, washers and bolts/screws to outer side rail assembly at hood hinge mounting panel. |
Important: Be sure to measure continually throughout welding process to maintain correct dimensions.
Important: Test a small amount of expandable foam into a disposable container to become familiar with the rate of discharge.
Important: Prior to refinishing, refer to GM 4901MD-99 Refinish Manual for recommended products. Do not combine paint systems. Refer to paint manufacturer's recommendations.
