Removal Procedure
- Ensure that the tires are in the straight forward position. Remove the key from the ignition.
- Raise the hood.
- Disconnect the negative battery cable. Refer to Battery Negative Cable Disconnection and Connection .
- Relieve the fuel system pressure. Refer to Fuel Pressure Relief .
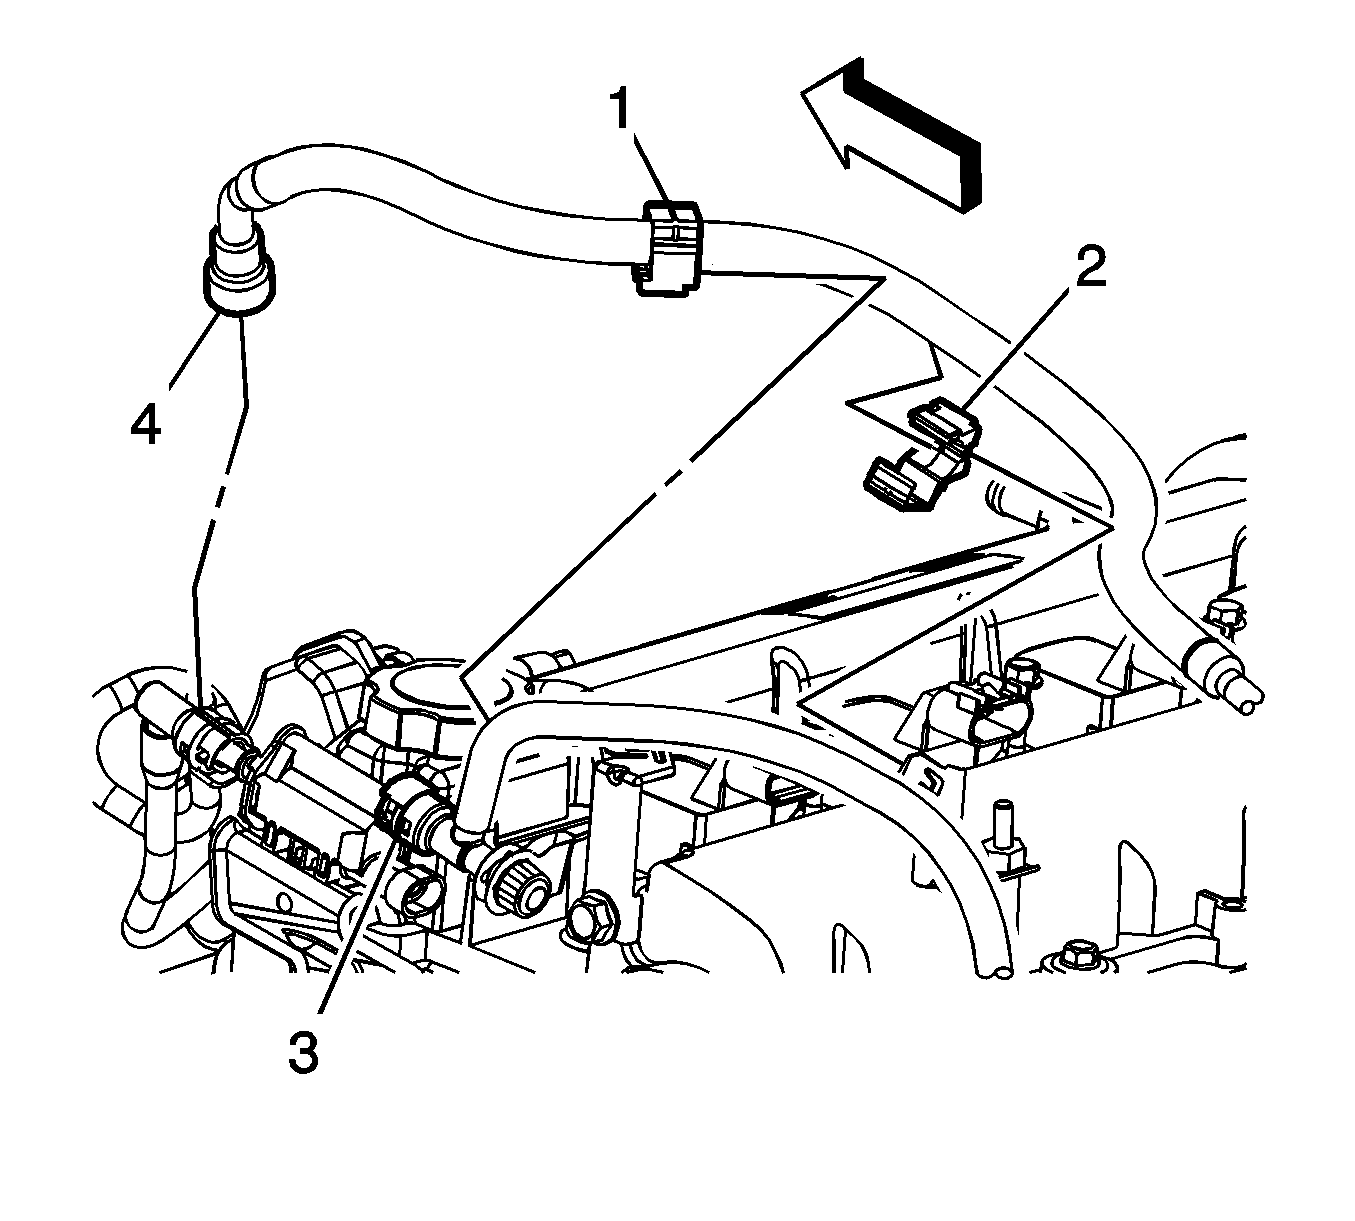
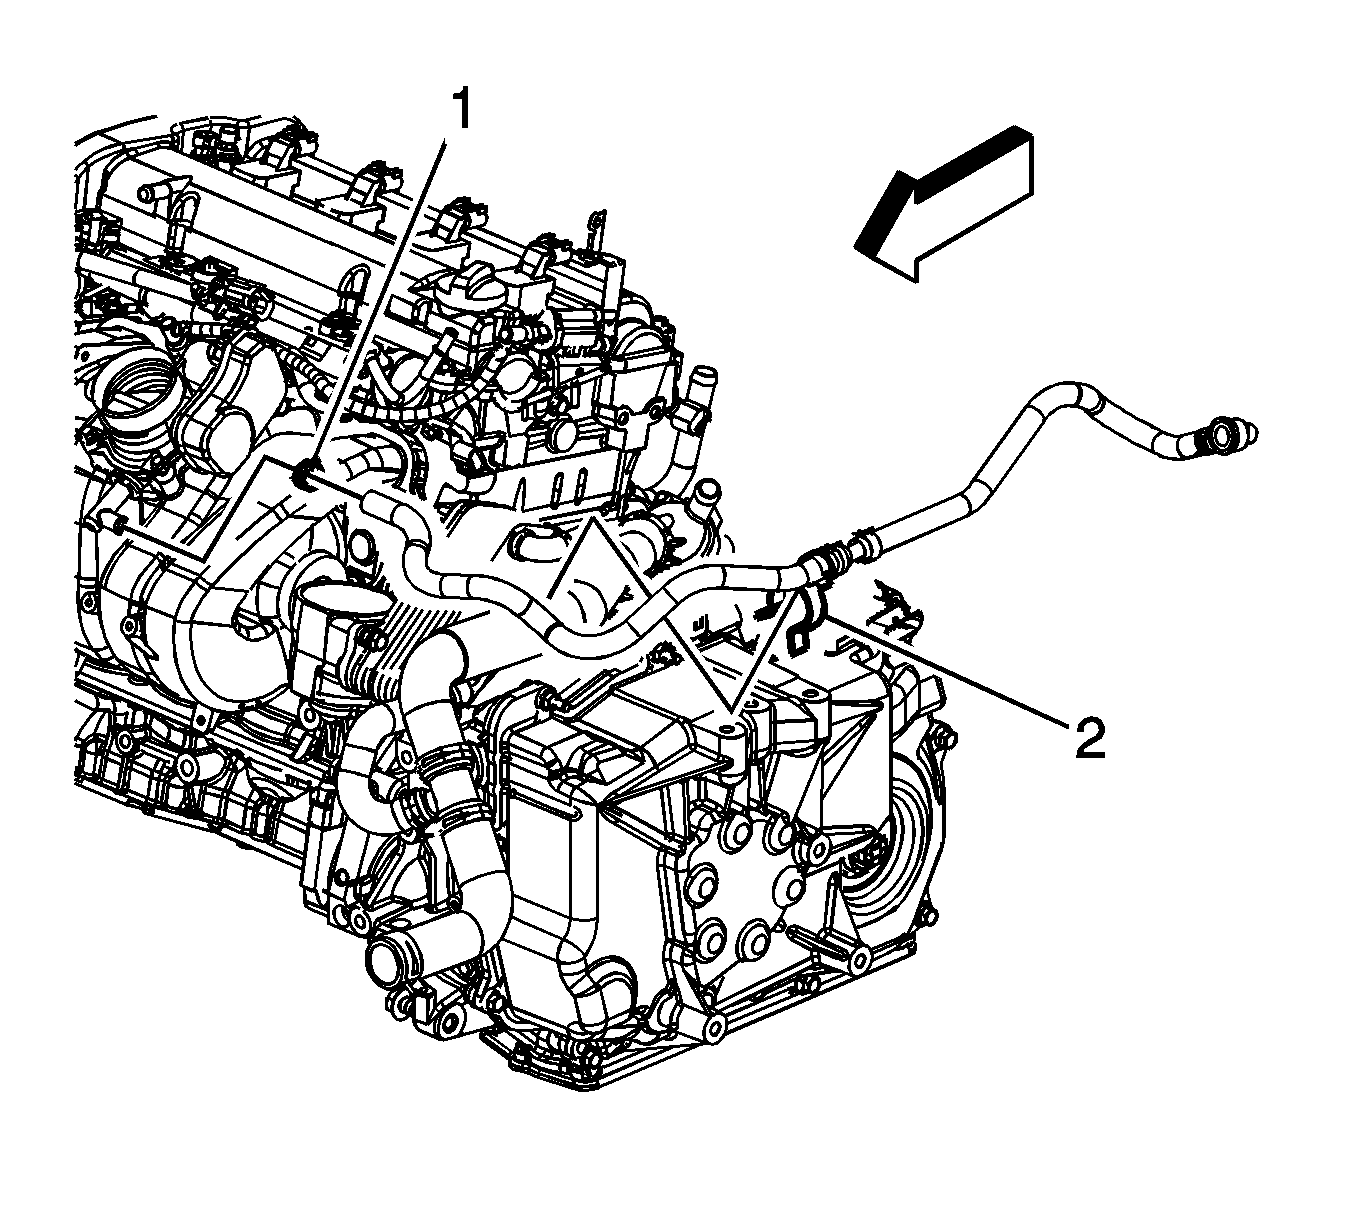
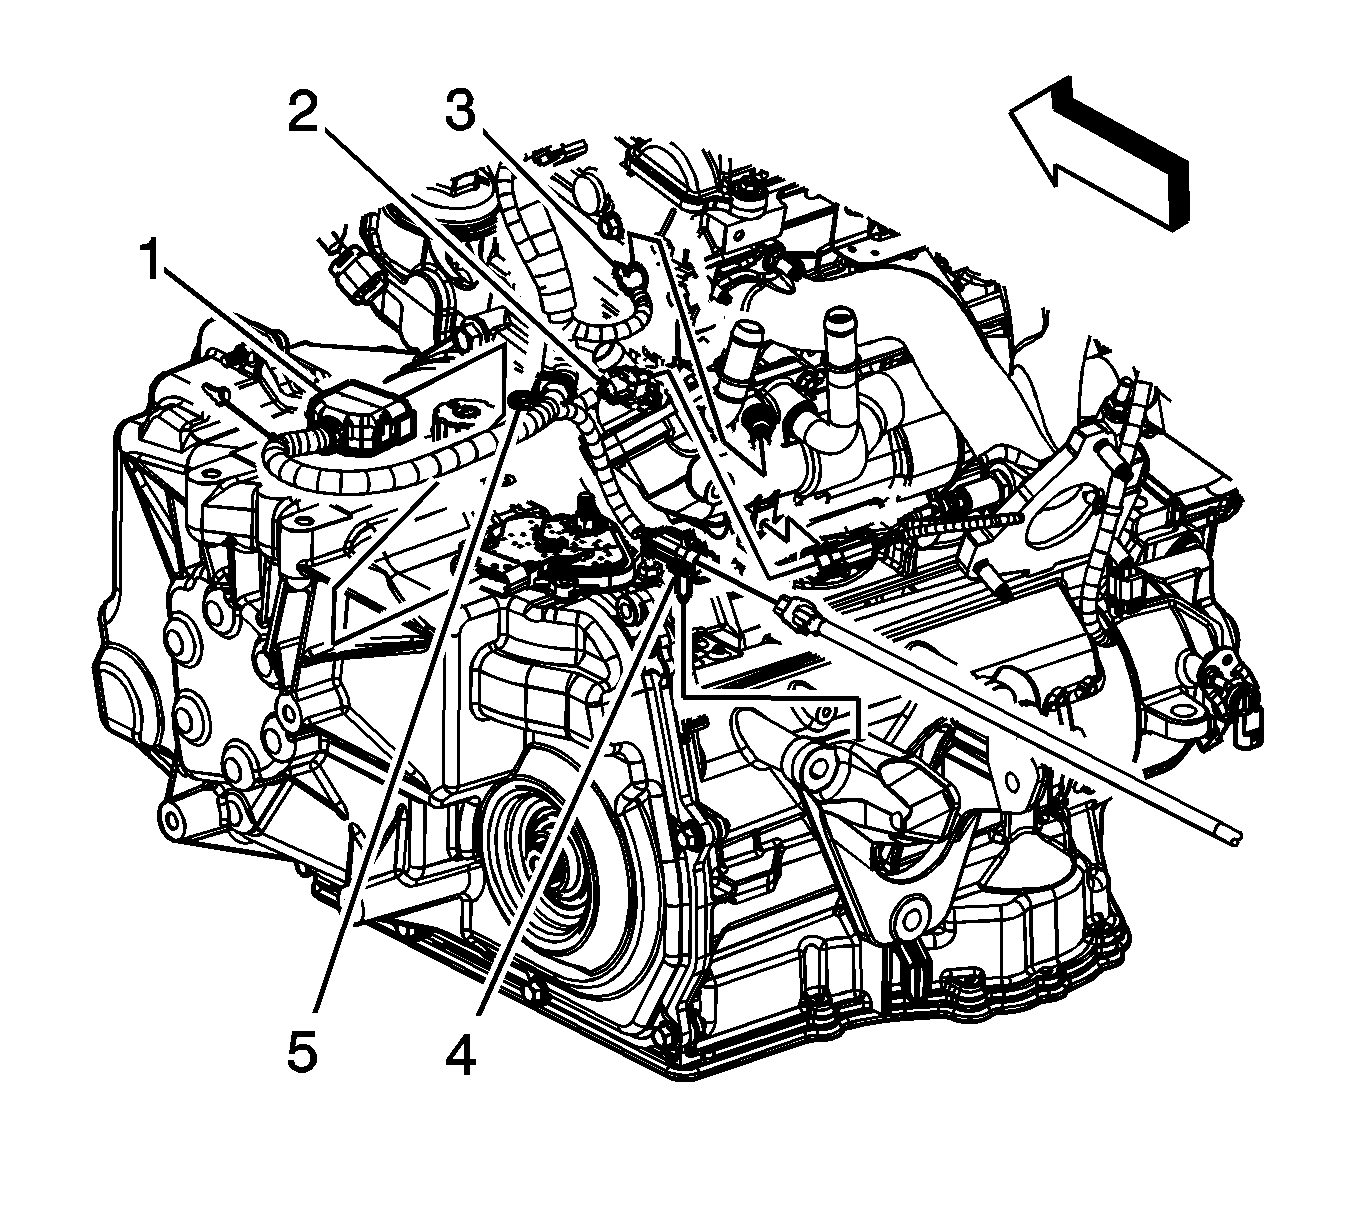
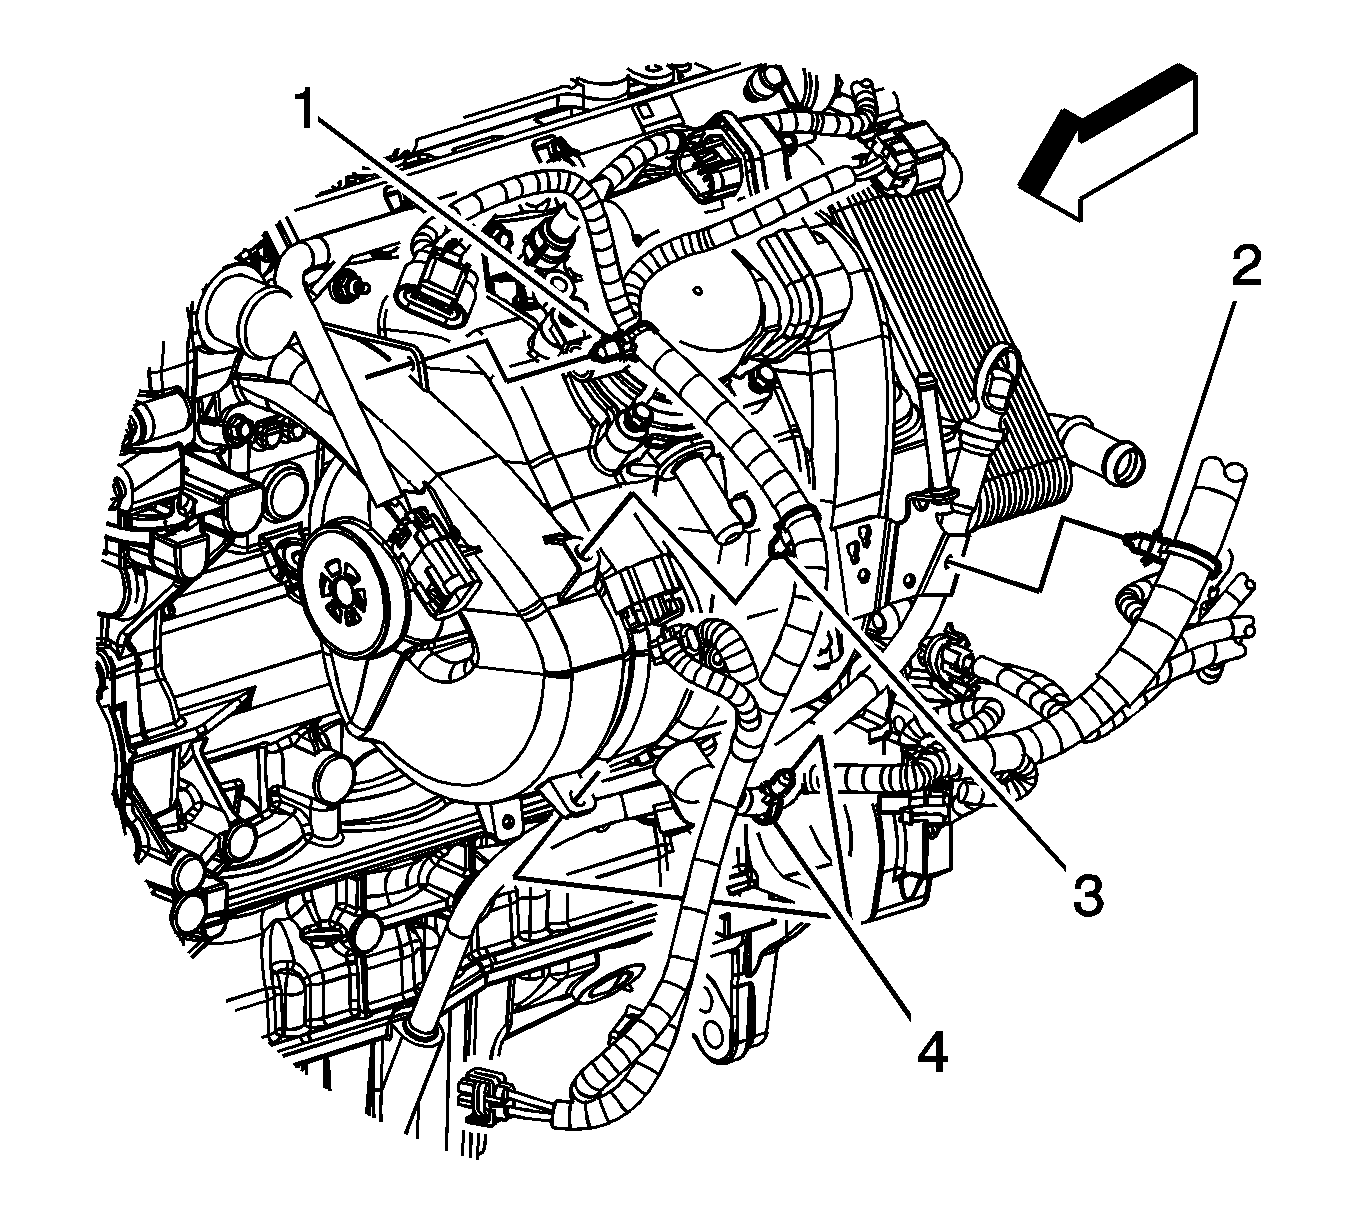
- Disconnect the fuel feed line quick connect fitting (4) from the fuel rail. Refer to Metal Collar Quick Connect Fitting Service .
- Disconnect the evaporative emission (EVAP) line quick connect fitting (3) from the EVAP purge solenoid. Refer to Plastic Collar Quick Connect Fitting Service .
- Remove the fuel line clips (1, 2) from the engine brackets.
- Drain the cooling system. Refer to Cooling System Draining and Filling .
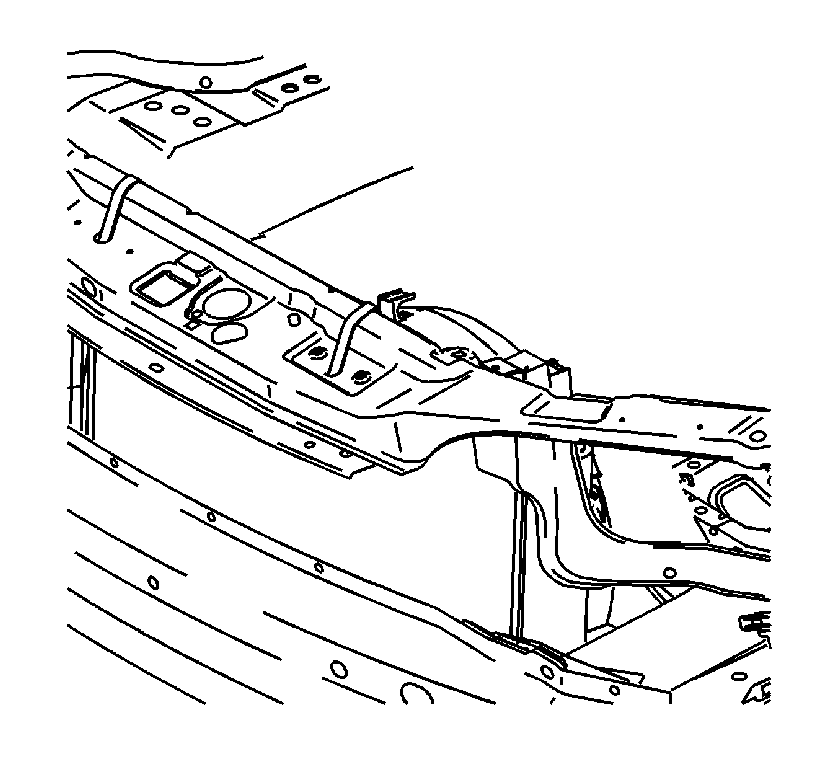
- Secure the cooling module to the upper body structure.
- Remove the engine drive belt. Refer to Drive Belt Replacement .
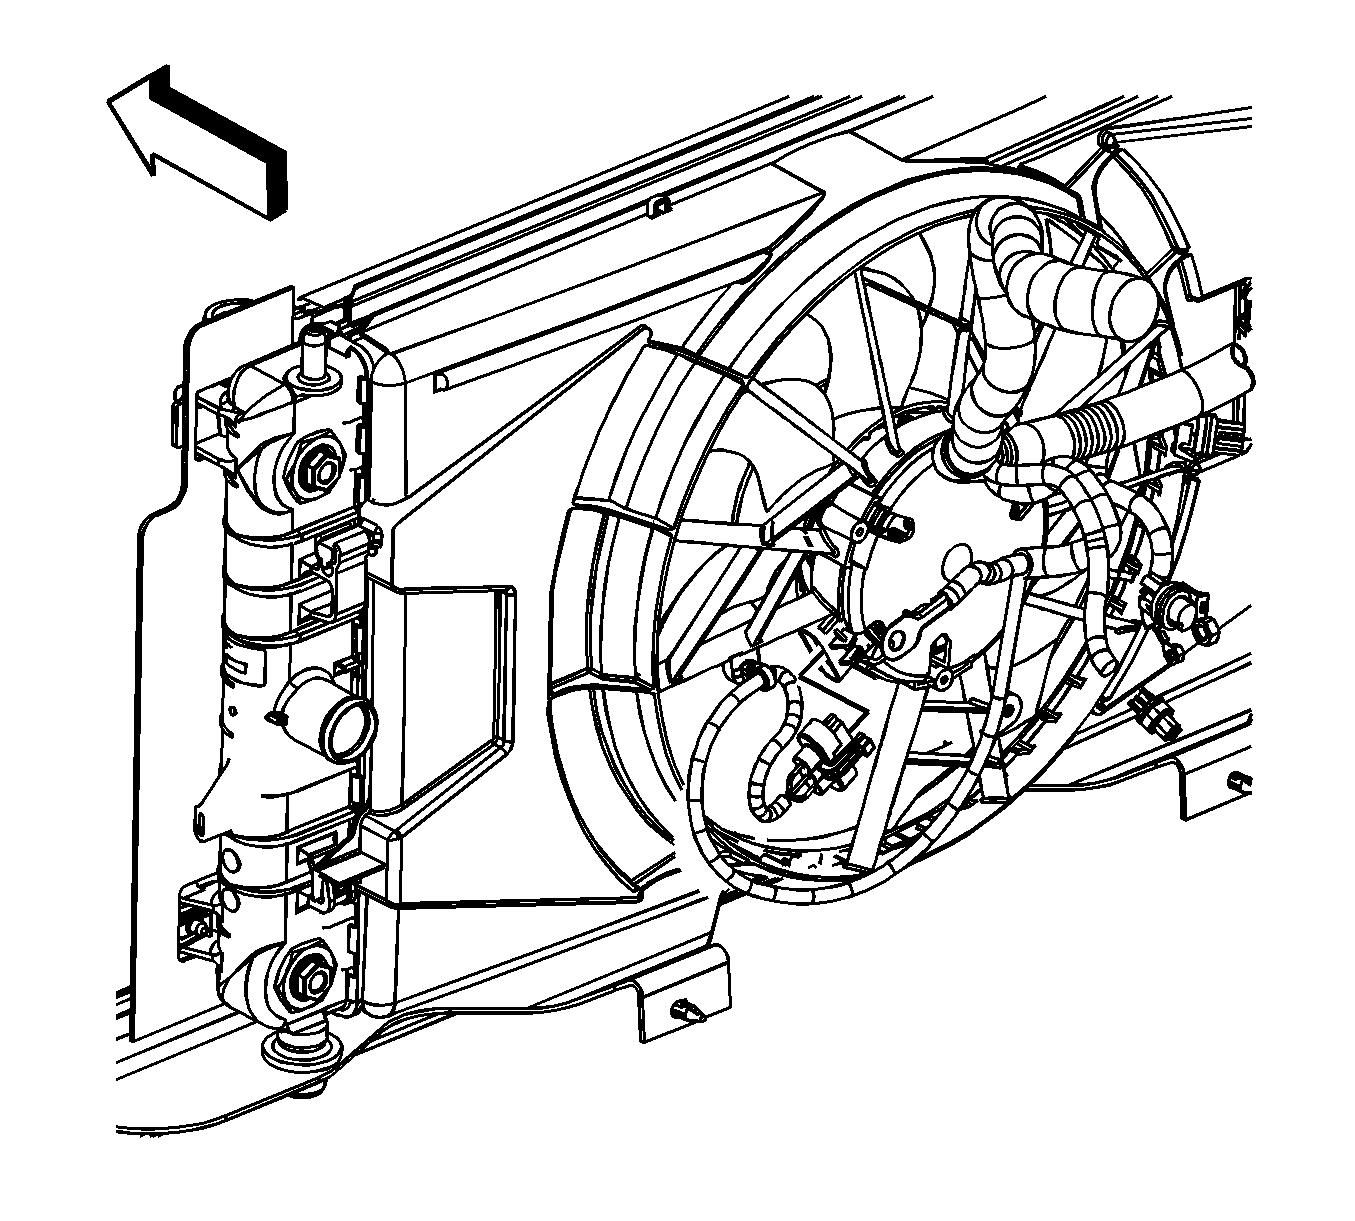
- Disconnect the cooling fan electrical connector.
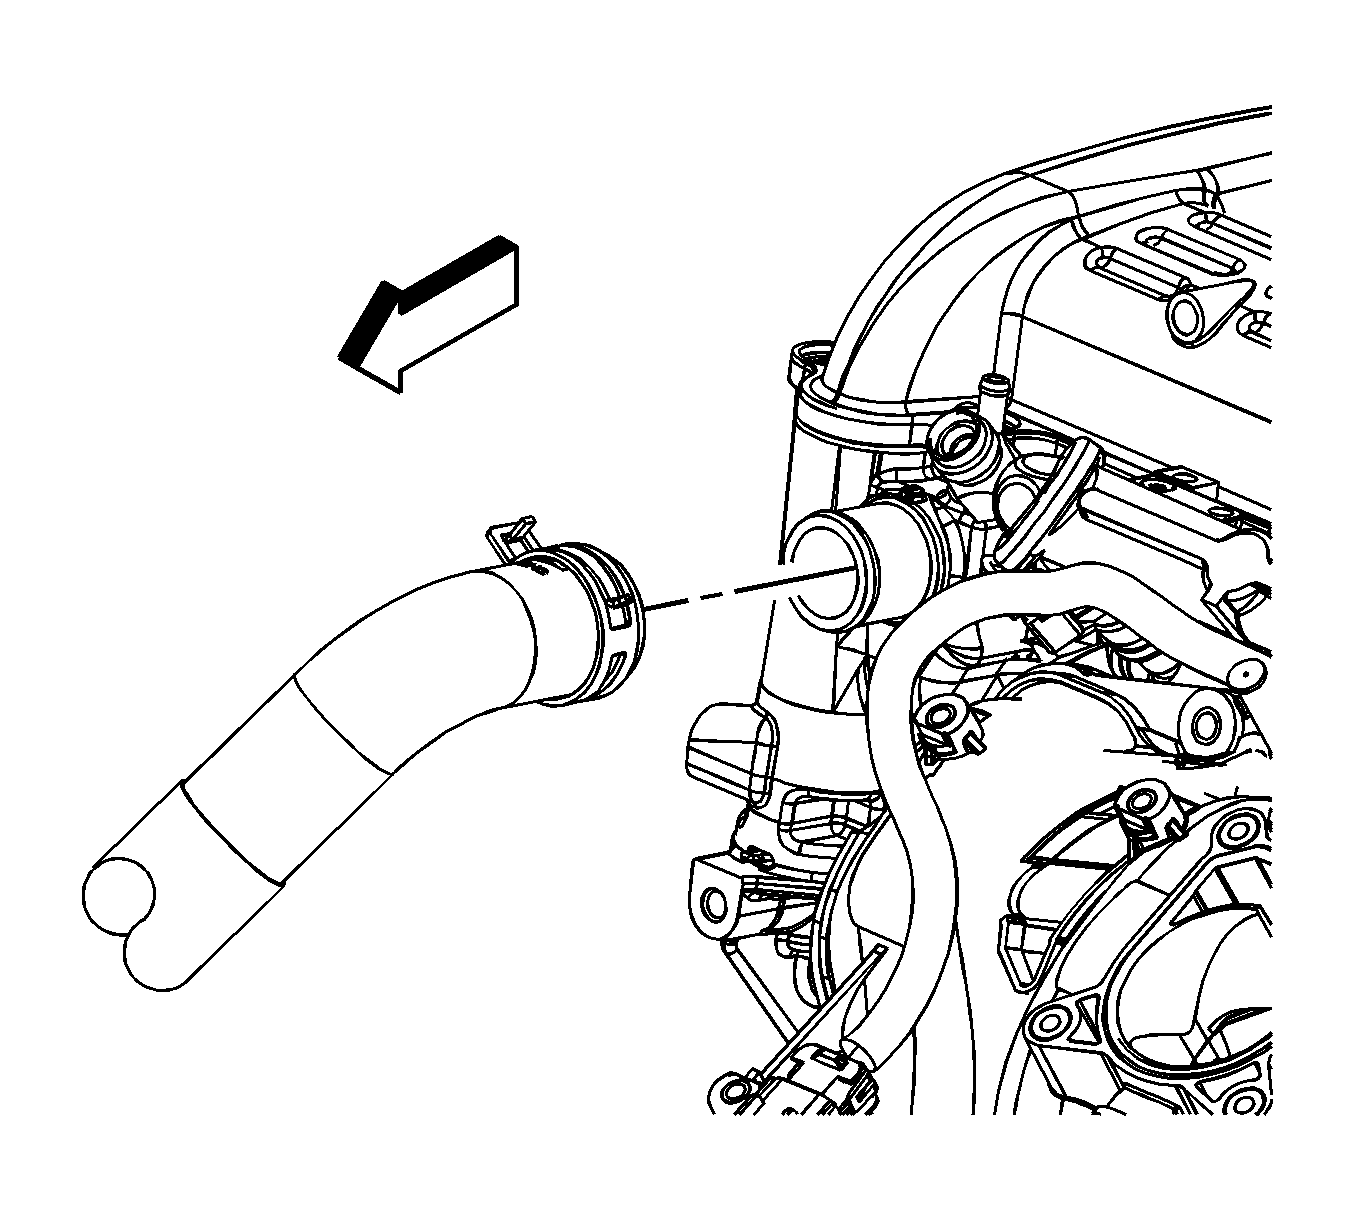
- Reposition the radiator inlet hose clamp at the engine.
- Remove the radiator inlet hose from the engine.
- If the vehicle is equipped with a engine oil cooler perform the following steps, otherwise proceed to step 19.
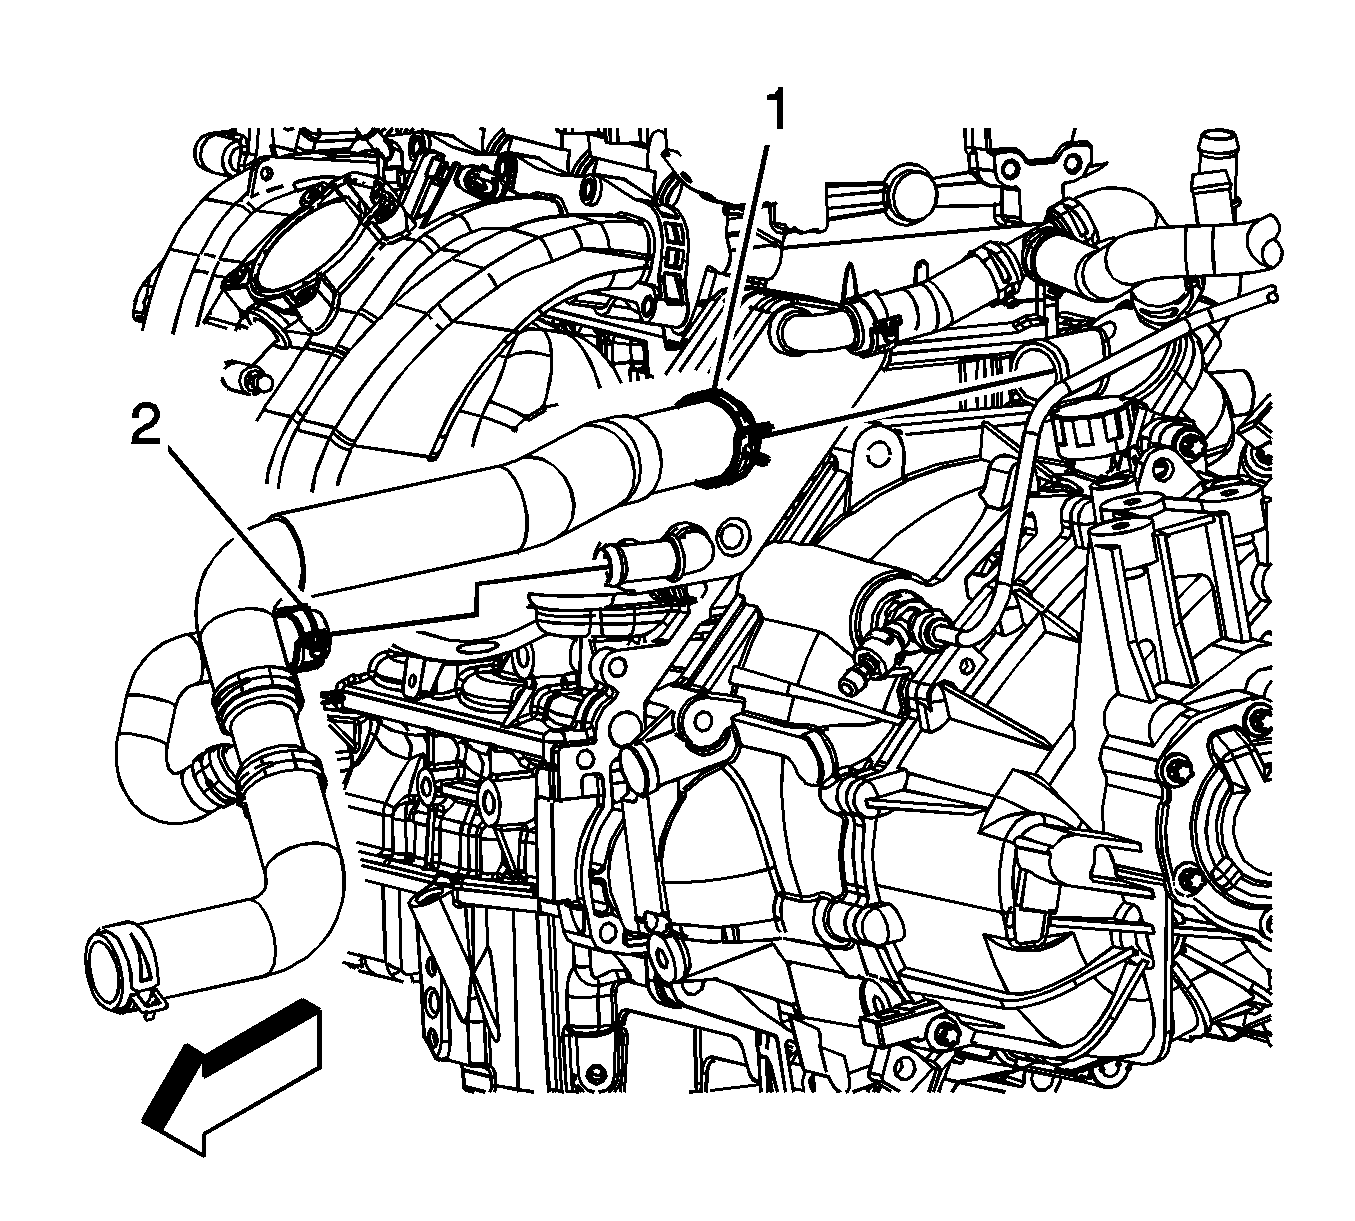
- Reposition the radiator outlet hose clamp (1) at the water outlet.
- Reposition the radiator outlet hose clamp (2) at the oil cooler.
- Remove the radiator outlet hose from the water outlet.
- Remove the radiator outlet hose from the oil cooler. Proceed to step 23.
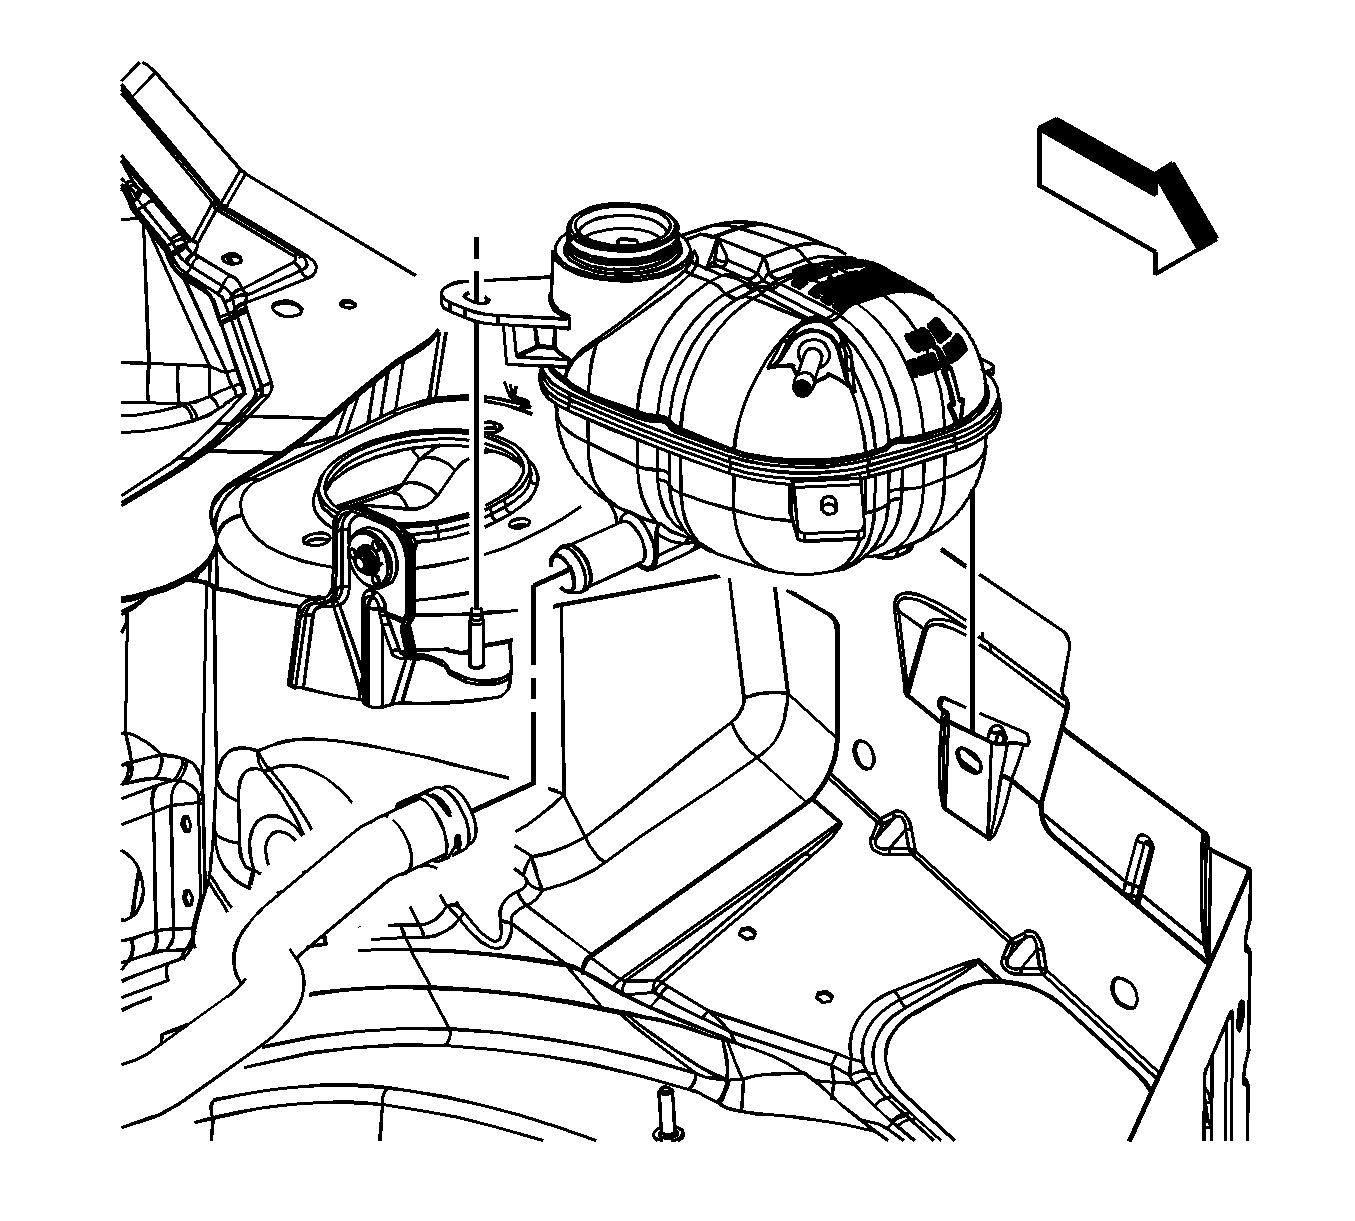
- If the vehicle is not equipped with a engine oil cooler, reposition the surge tank outlet hose clamp at the surge tank.
- Remove the surge tank outlet hose from the surge tank.
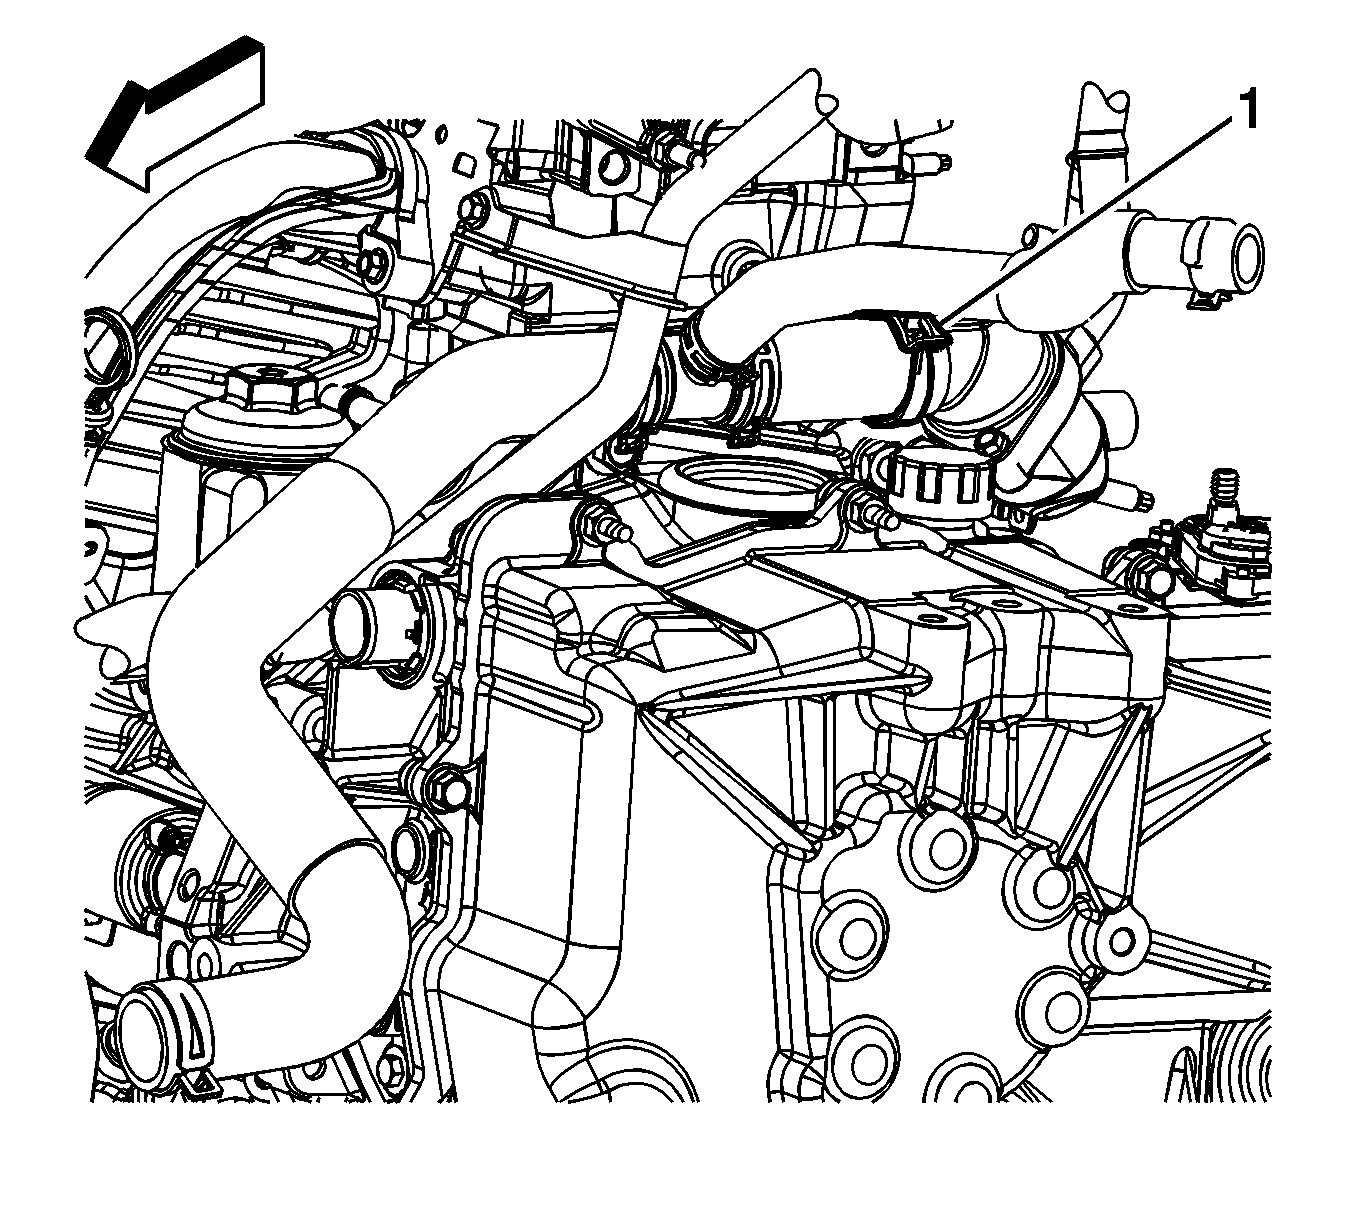
- Reposition the radiator outlet hose clamp (1) at the thermostat cover.
- Remove the radiator outlet hose from the thermostat cover.
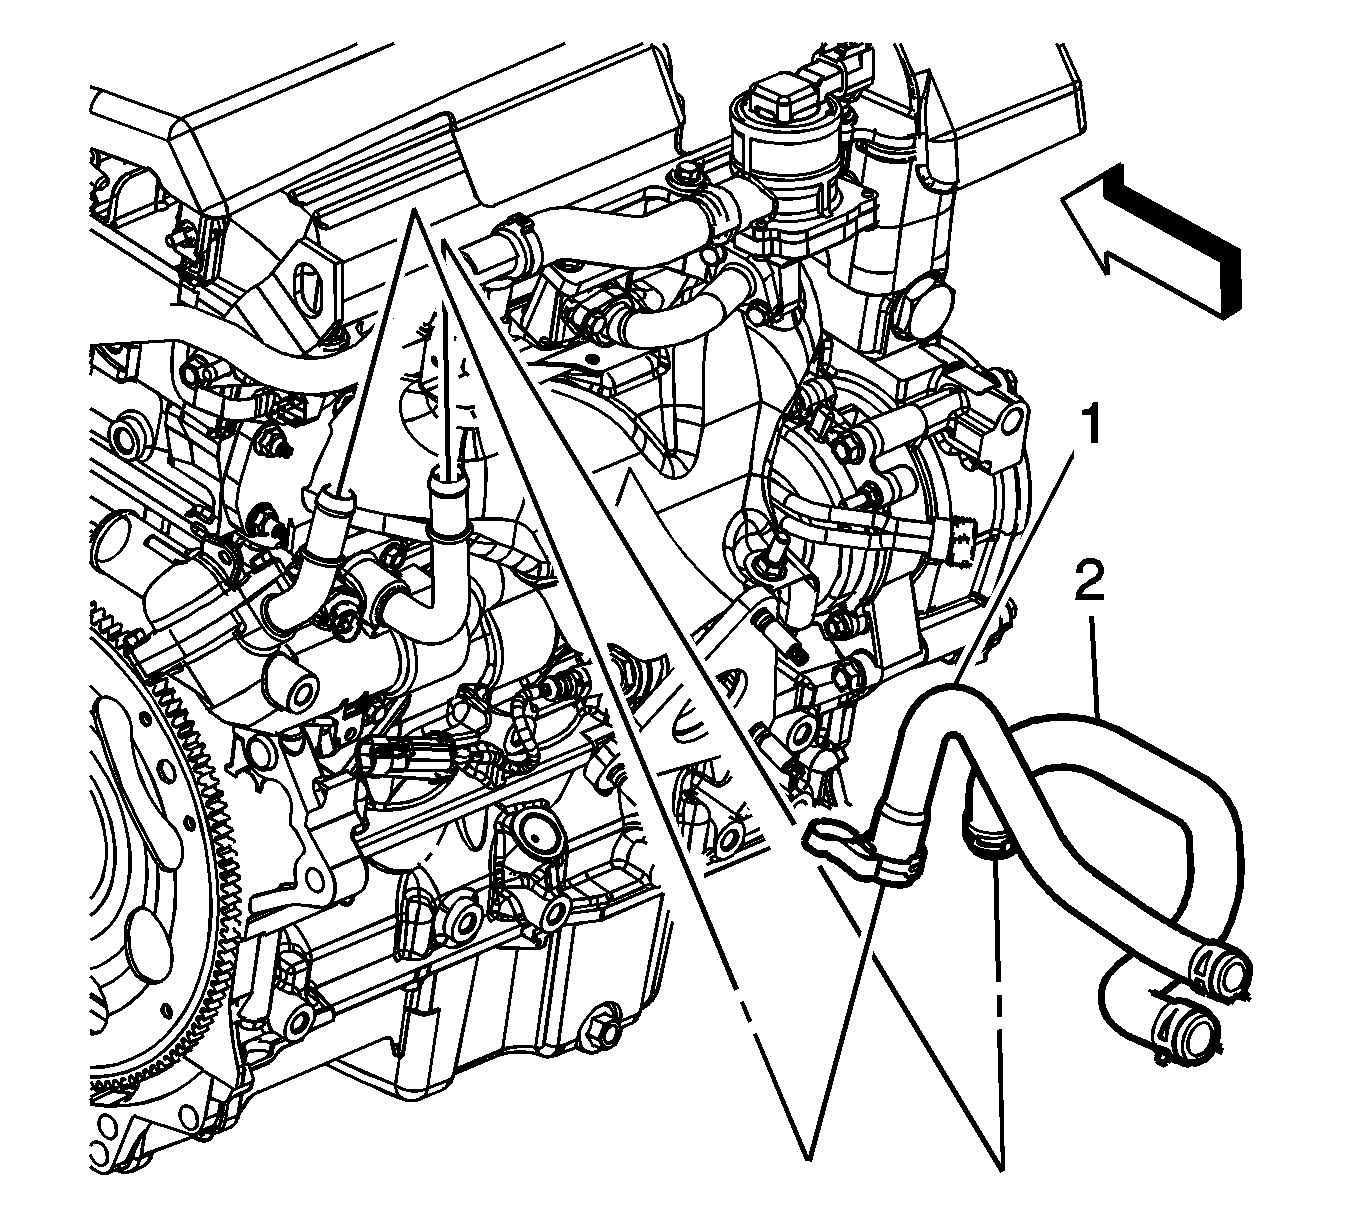
- Reposition the heater inlet and outlet hose clamps at the thermostat housing.
- Remove the heater inlet (2) and outlet (1) hoses from the thermostat housing.
- Reposition the brake booster vacuum hose clamp (2) at the intake manifold.
- Remove the brake booster vacuum hose from the intake manifold. Reposition the hose.
- Disconnect the following electrical connectors:
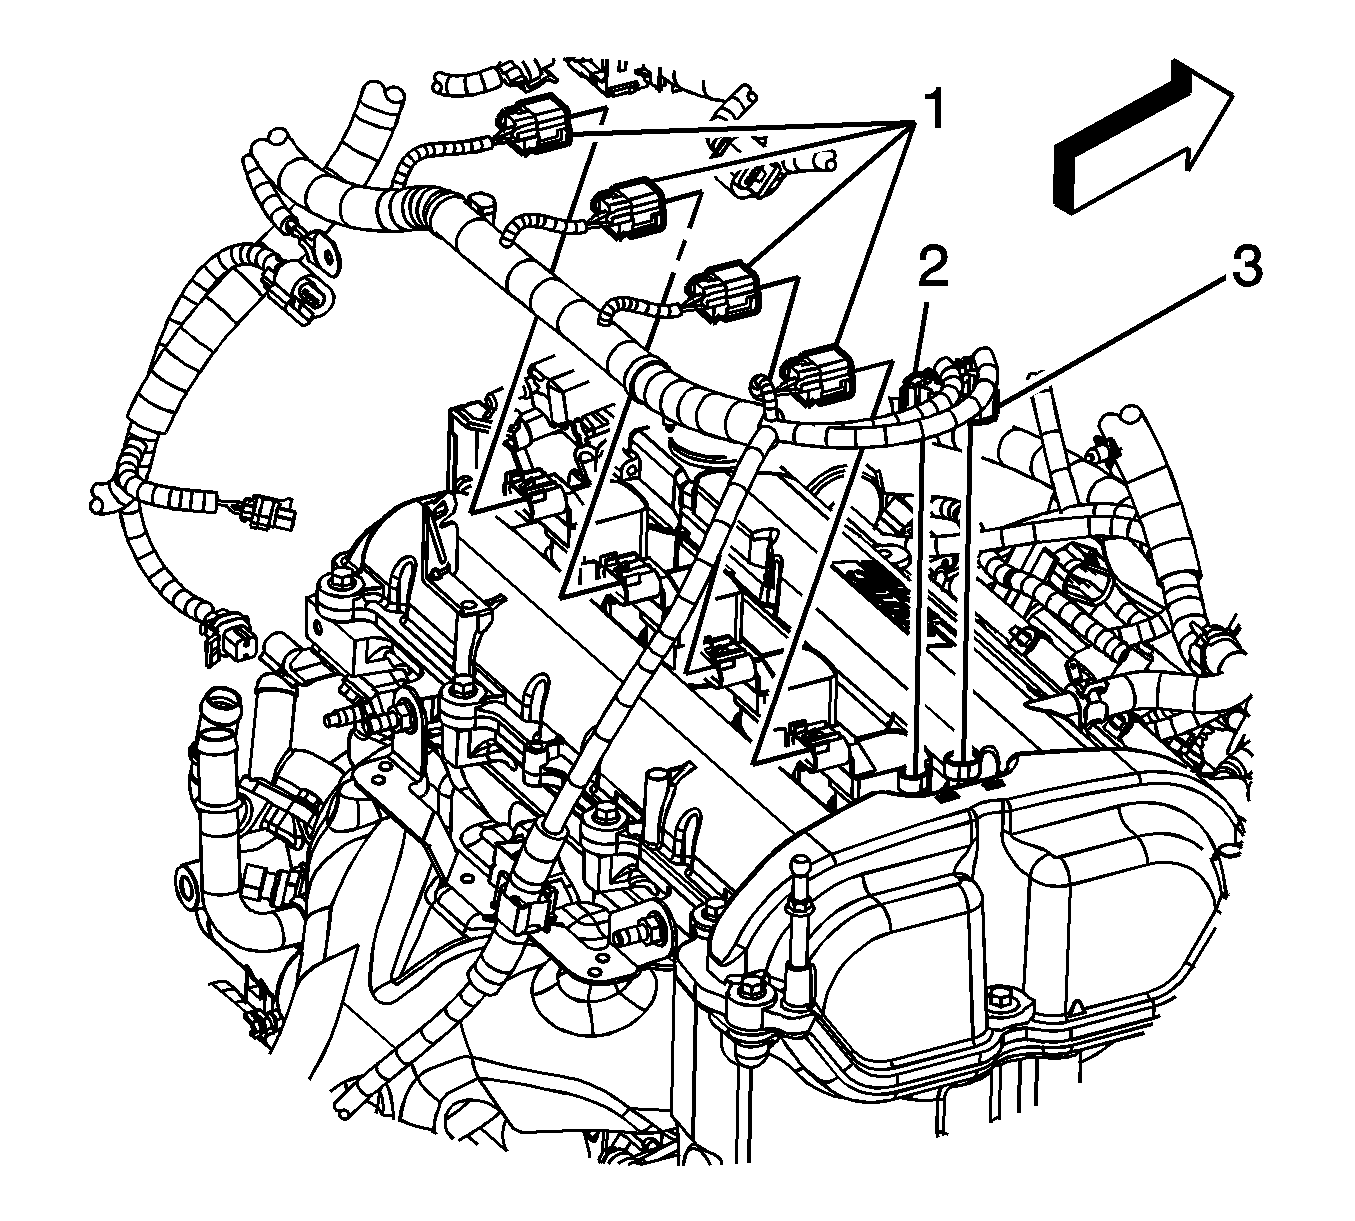
- Disconnect the engine harness clip (2) from the oil level indicator tube.
- Disconnect the engine harness clips (1 and 3) from the intake manifold.
- Disconnect the ignition coils electrical connectors (1).
- Disconnect the intake (3) and exhaust (2) camshaft position actuator electrical connectors.
- Remove the engine harness clips (1 and 2) from the camshaft cover.
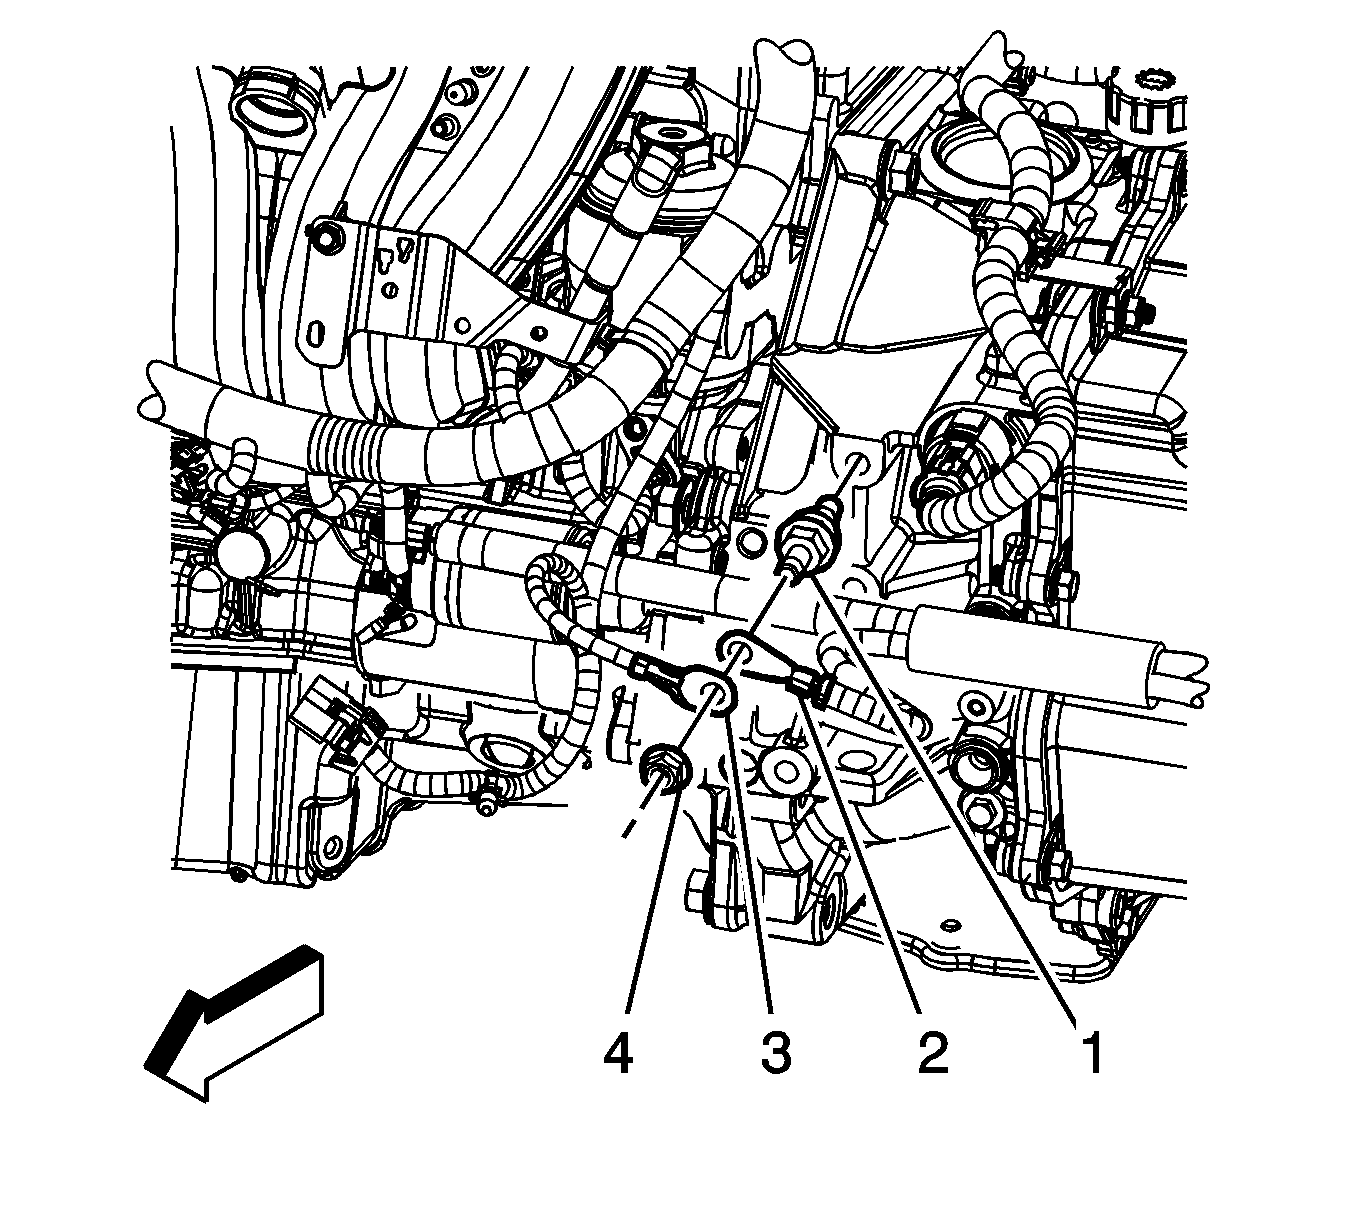
- Remove the negative battery cable ground nut (4).
- Remove the engine harness ground terminal (3) from the stud.
- Remove the negative battery cable ground terminal (2) from the stud.
- Disconnect the following engine harness electrical connectors:
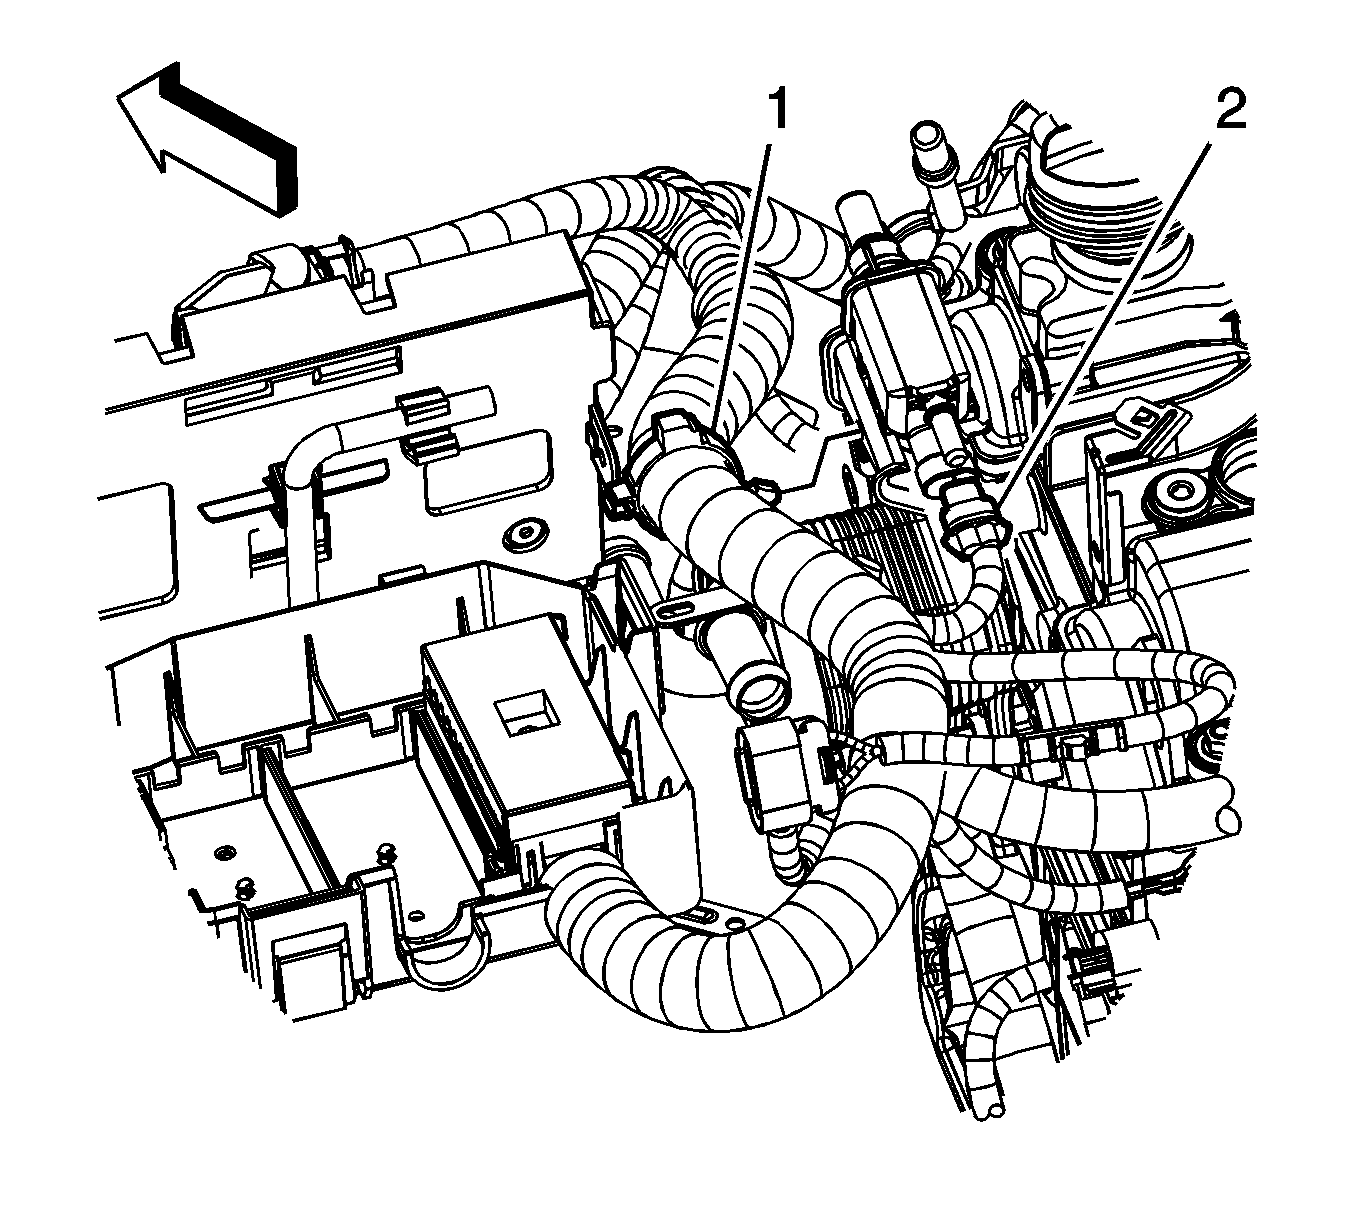
- Disconnect the EVAP purge solenoid electrical connector (2).
- Remove the engine harness clip (1) from the purge solenoid bracket.
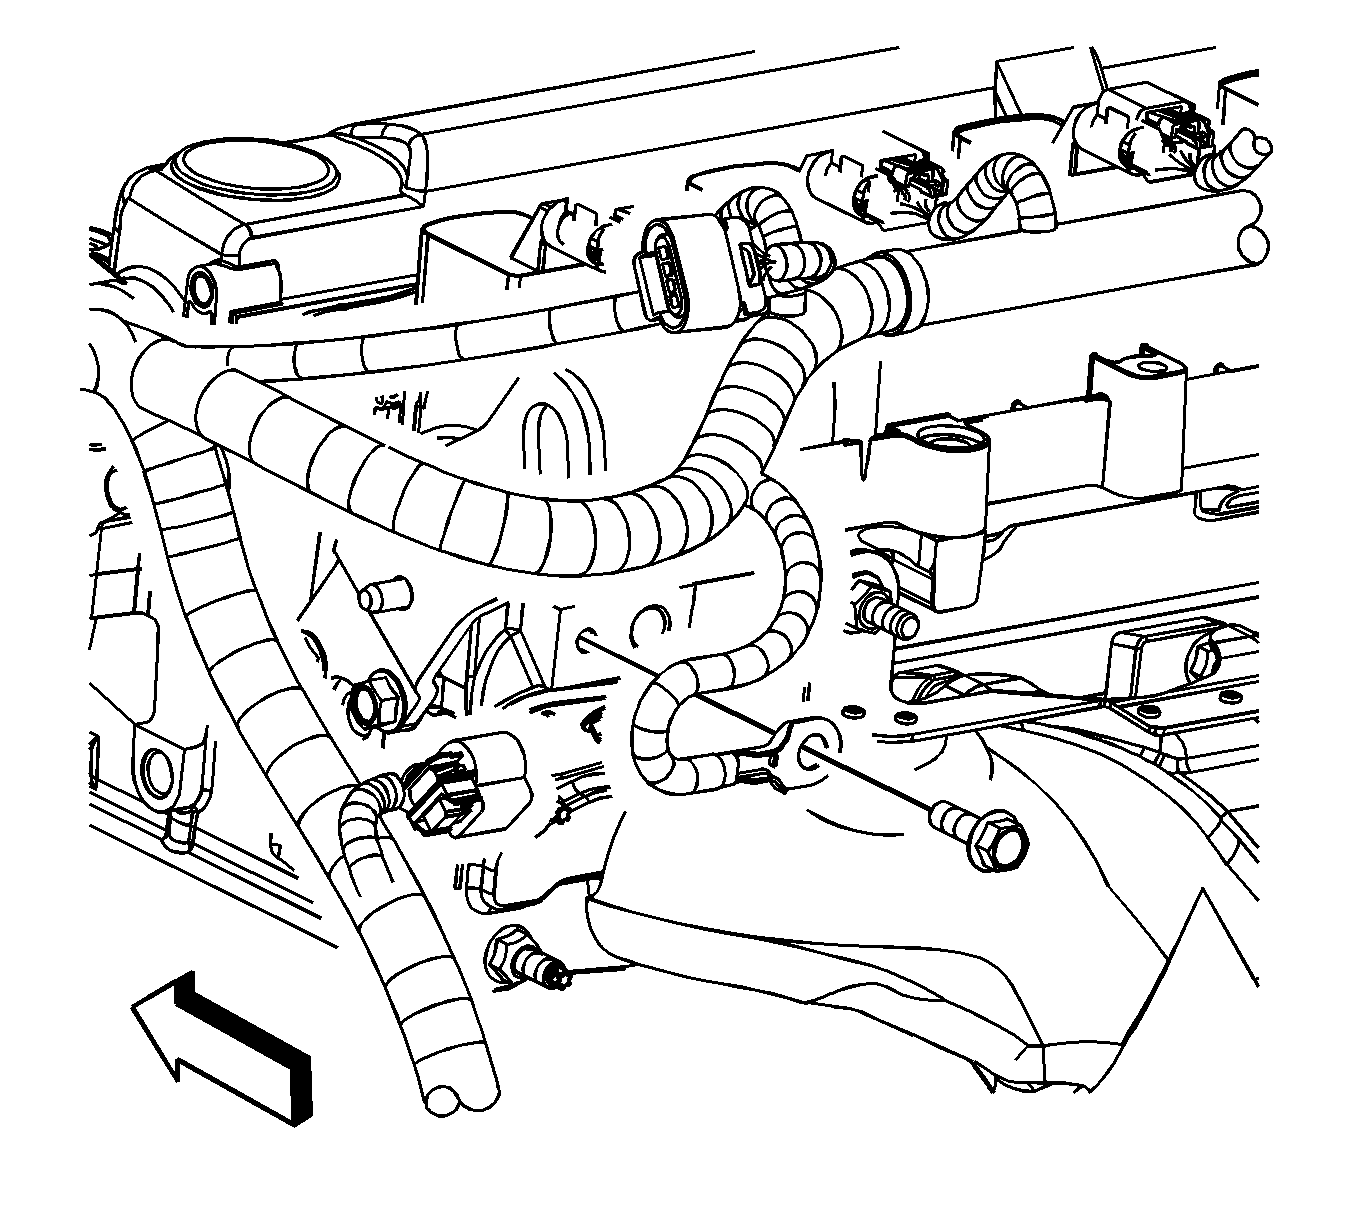
- Remove the engine harness ground bolt.
- Reposition the engine harness ground terminal.
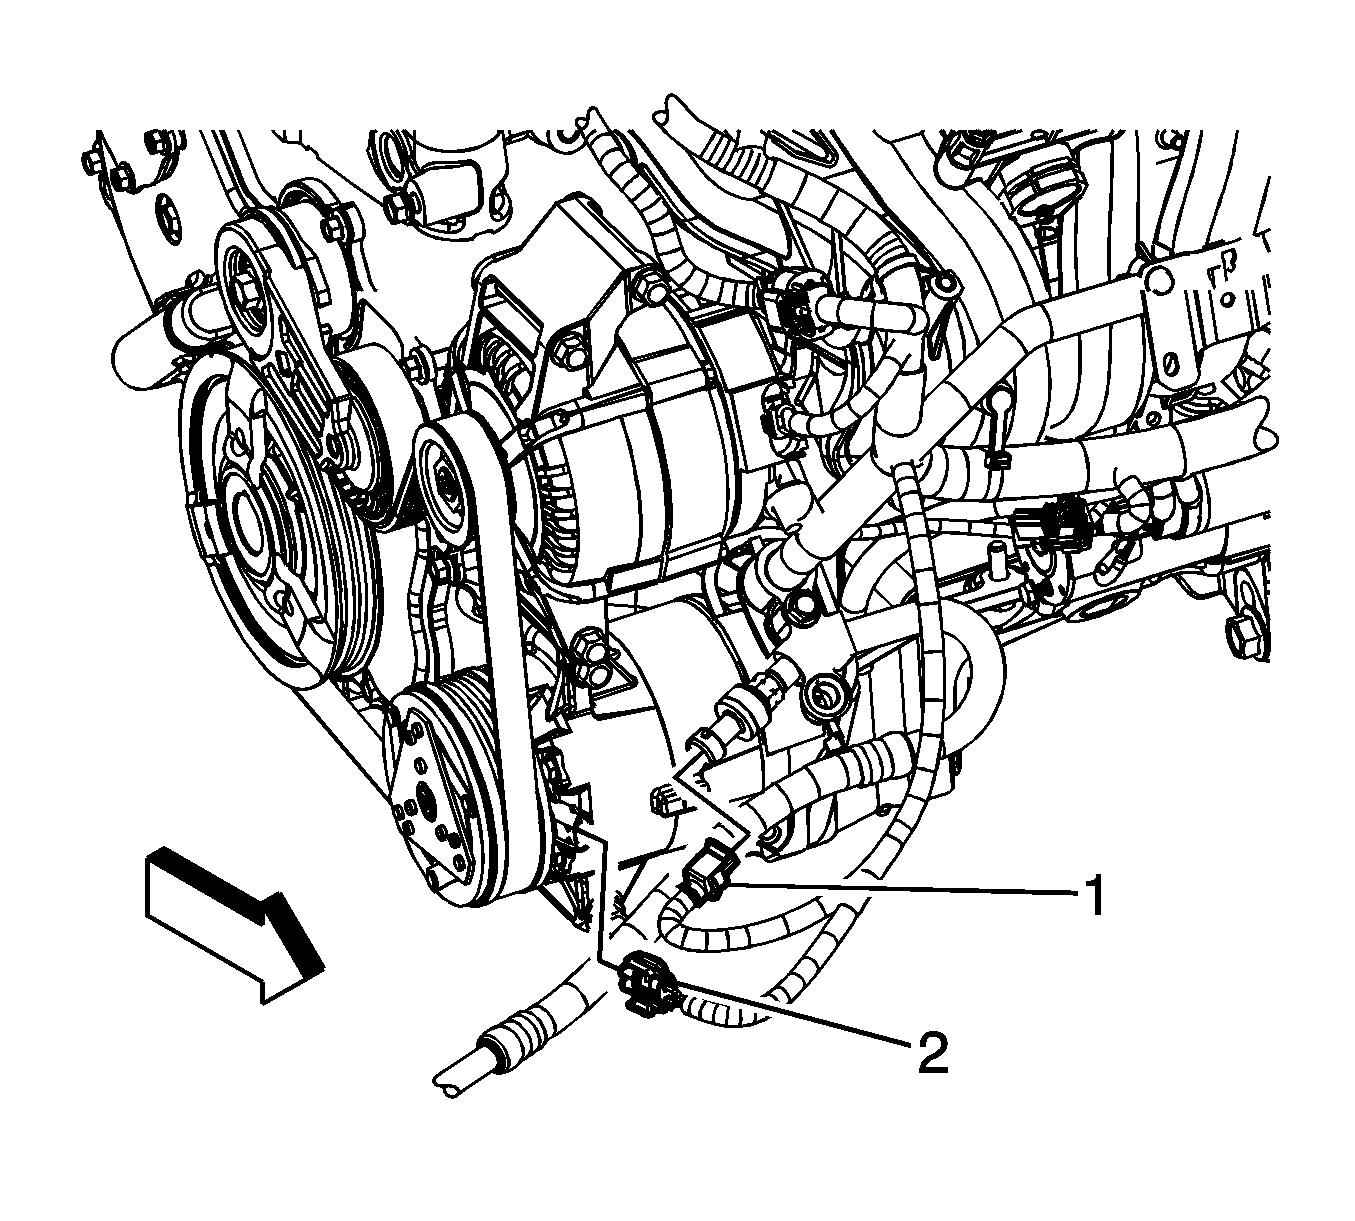
- Disconnect the engine harness electrical connector (1) from the air conditioning (A/C) pressure switch.
- Disconnect the engine harness electrical connector (2) from A/C compressor.
- Unbolt and reposition the AC compressor aside.
- Raise and suitably support the vehicle. Refer to Lifting and Jacking the Vehicle .
- Drain the engine oil. Refer to Engine Oil and Oil Filter Replacement .
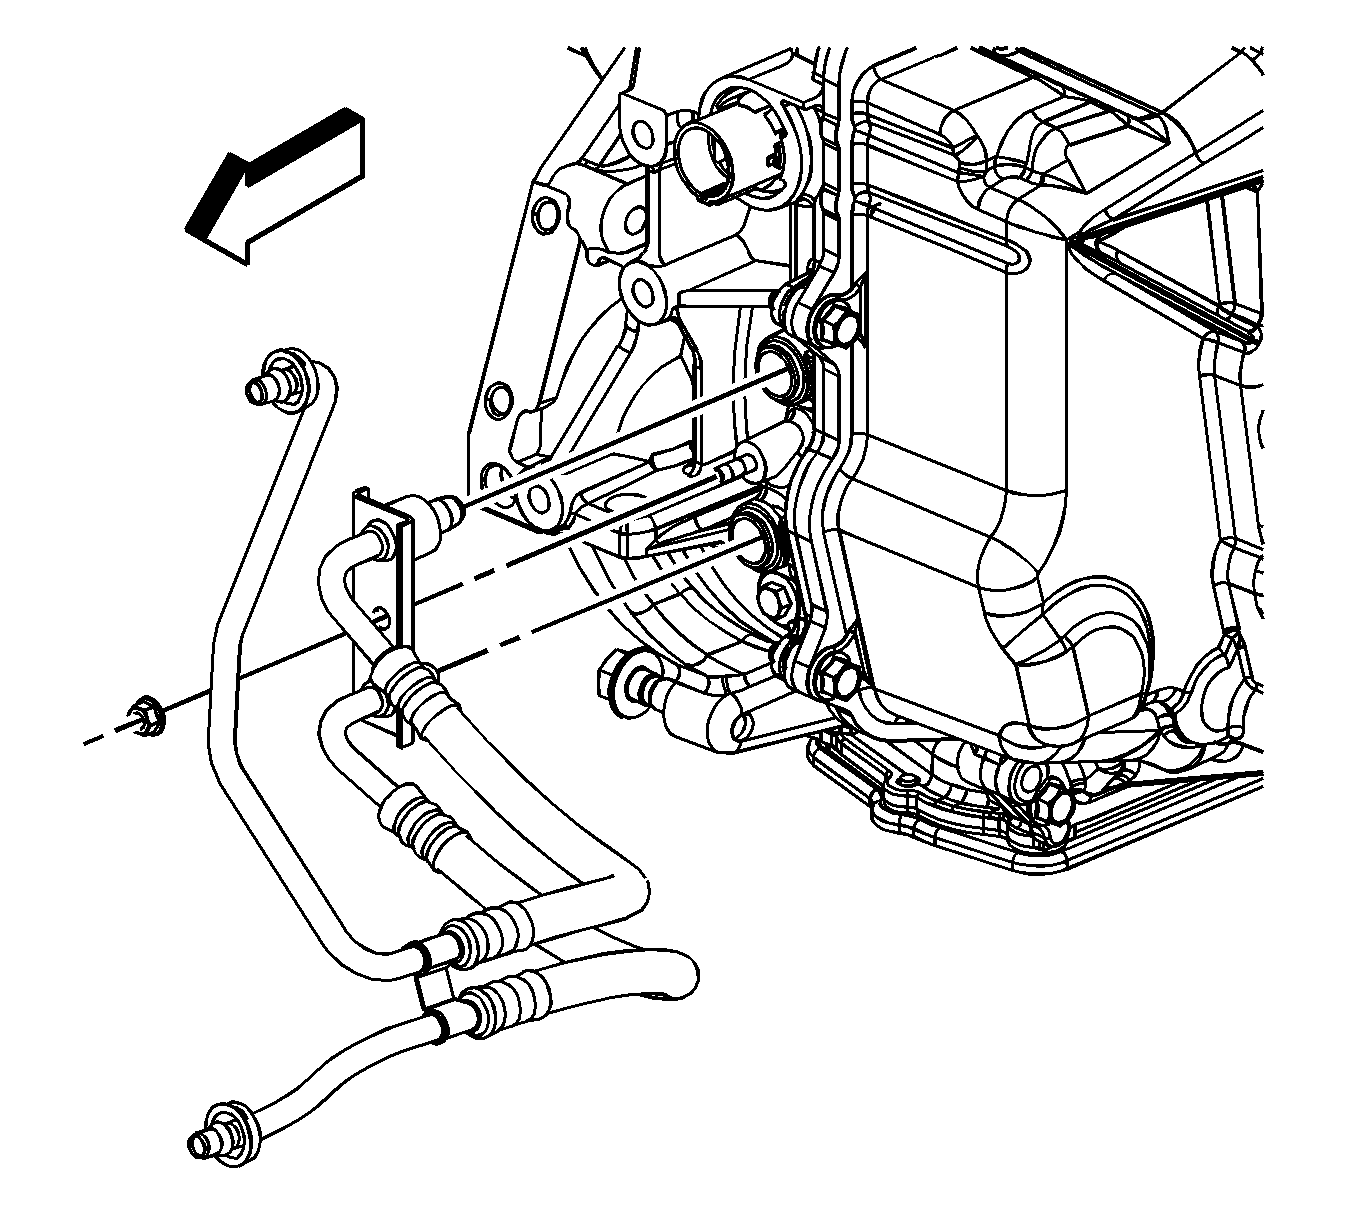
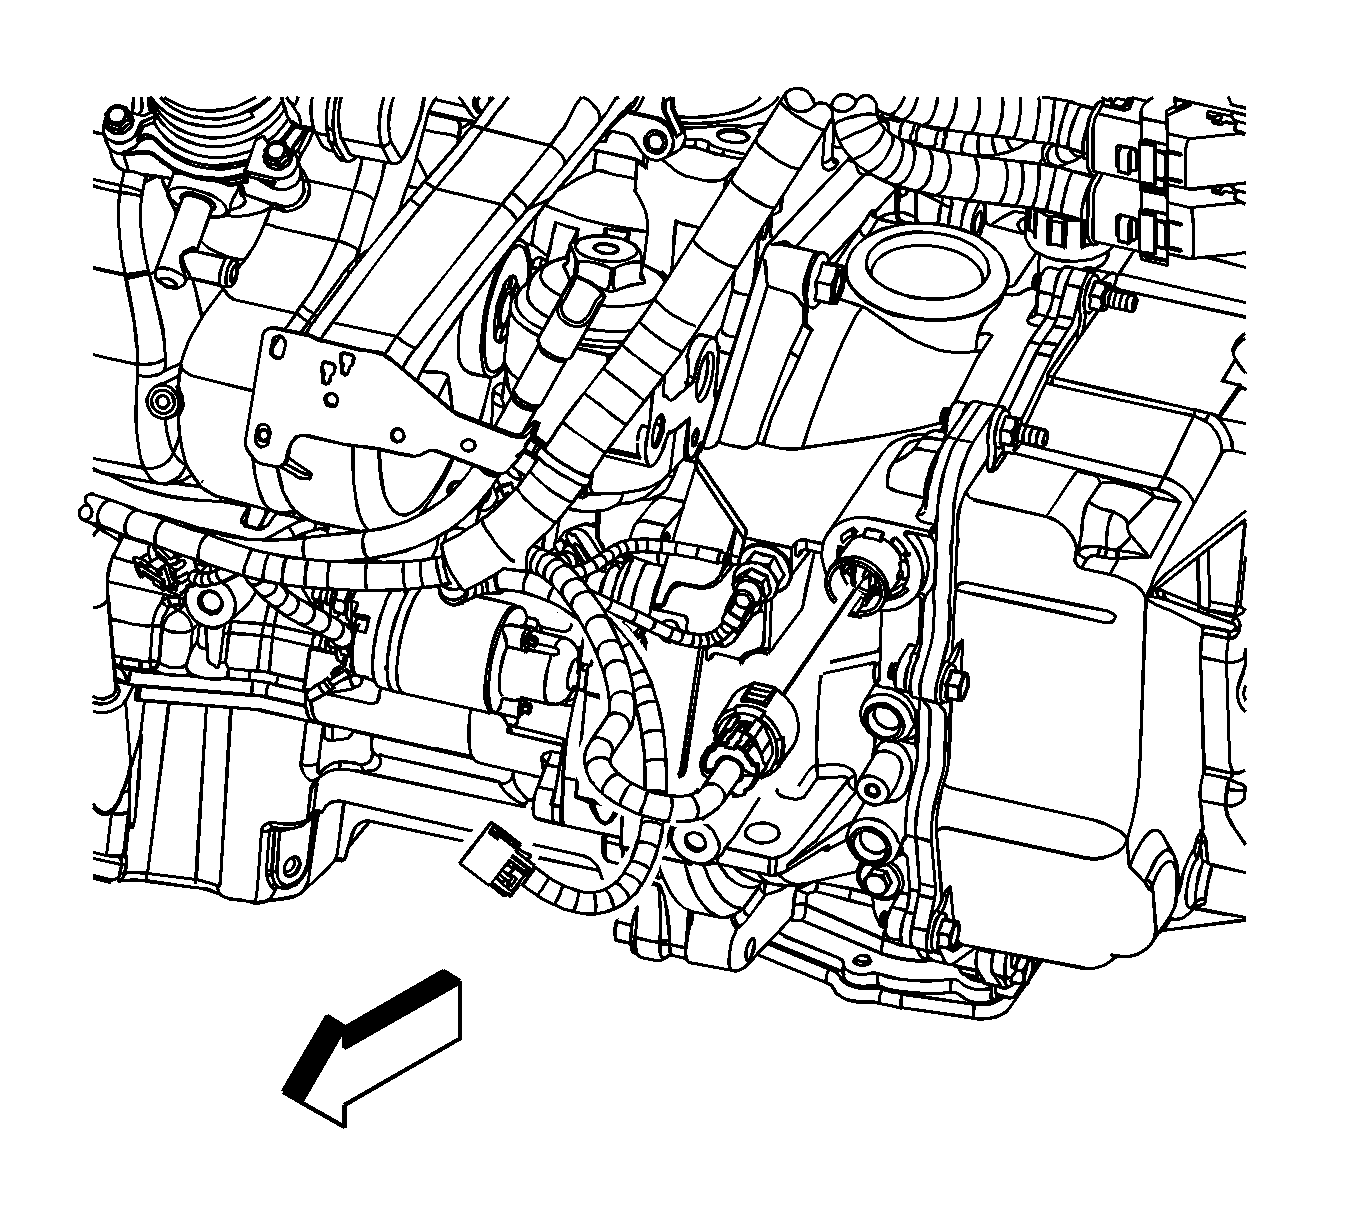
- Remove the transaxle fluid cooler bracket nut.
- Remove the transaxle fluid cooler lines from the transaxle.
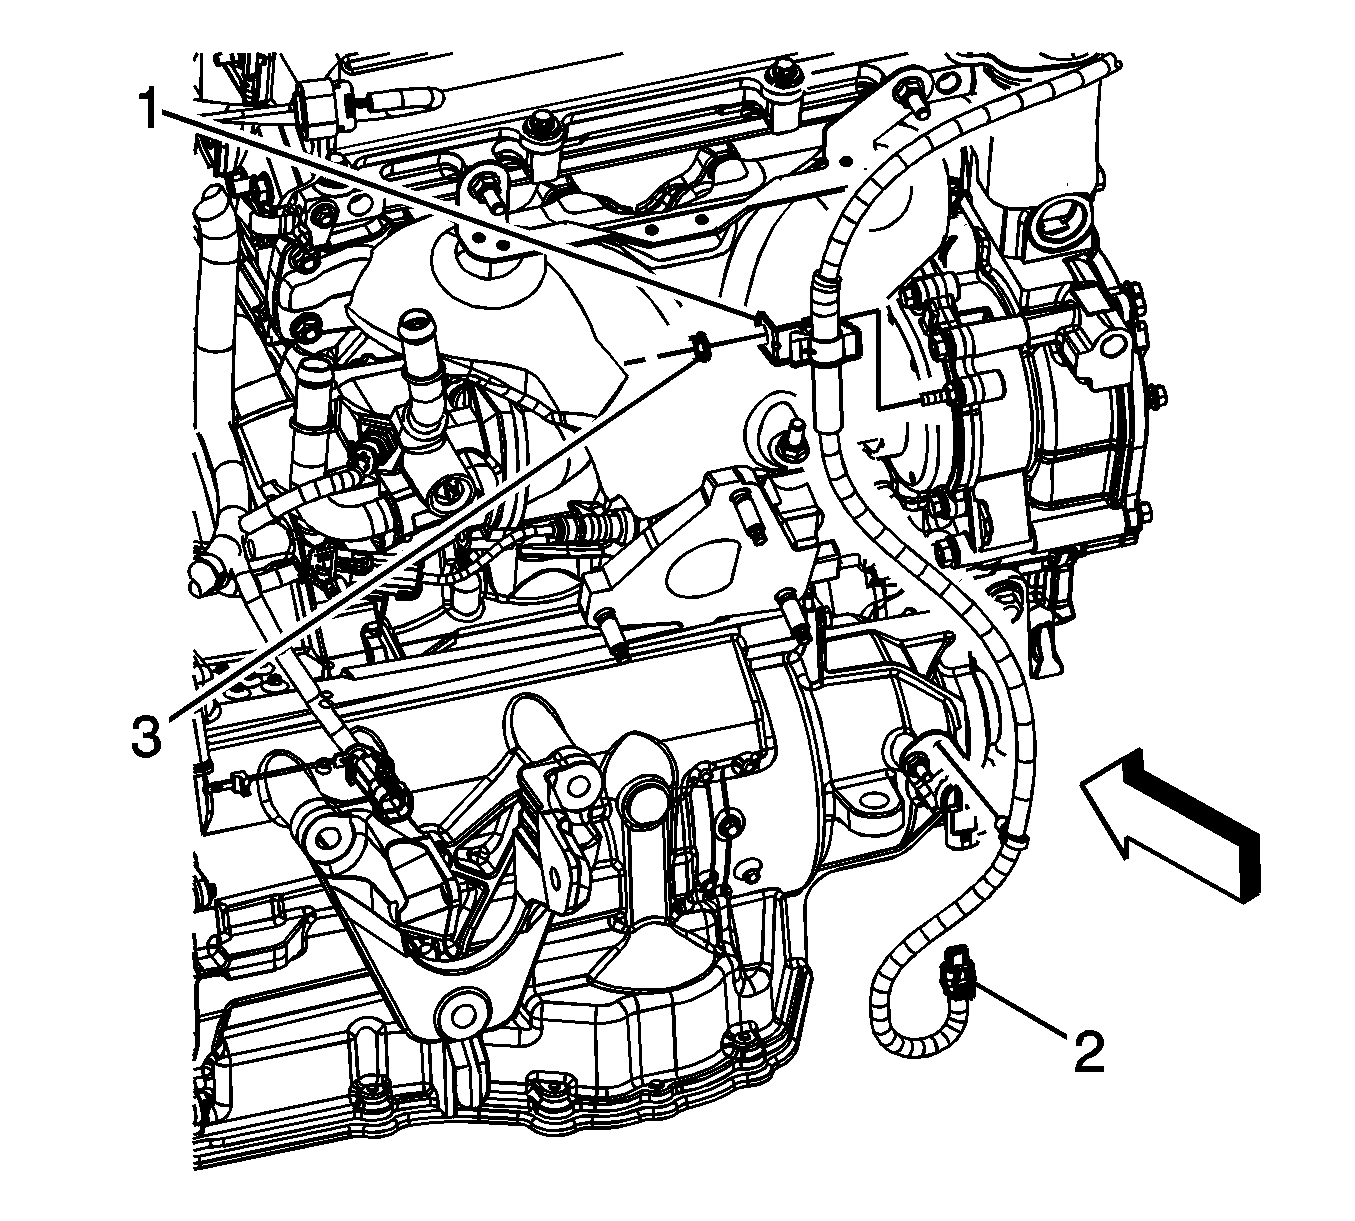
- Remove the engine harness clip nut (3) from the engine stud.
- Remove the engine harness clip (1) from the stud.
- If equipped with a automatic transaxle, disconnect the engine harness electrical connector (2) from the vehicle speed sensor (VSS).
- Remove the engine harness clip (3) from the speed sensor.
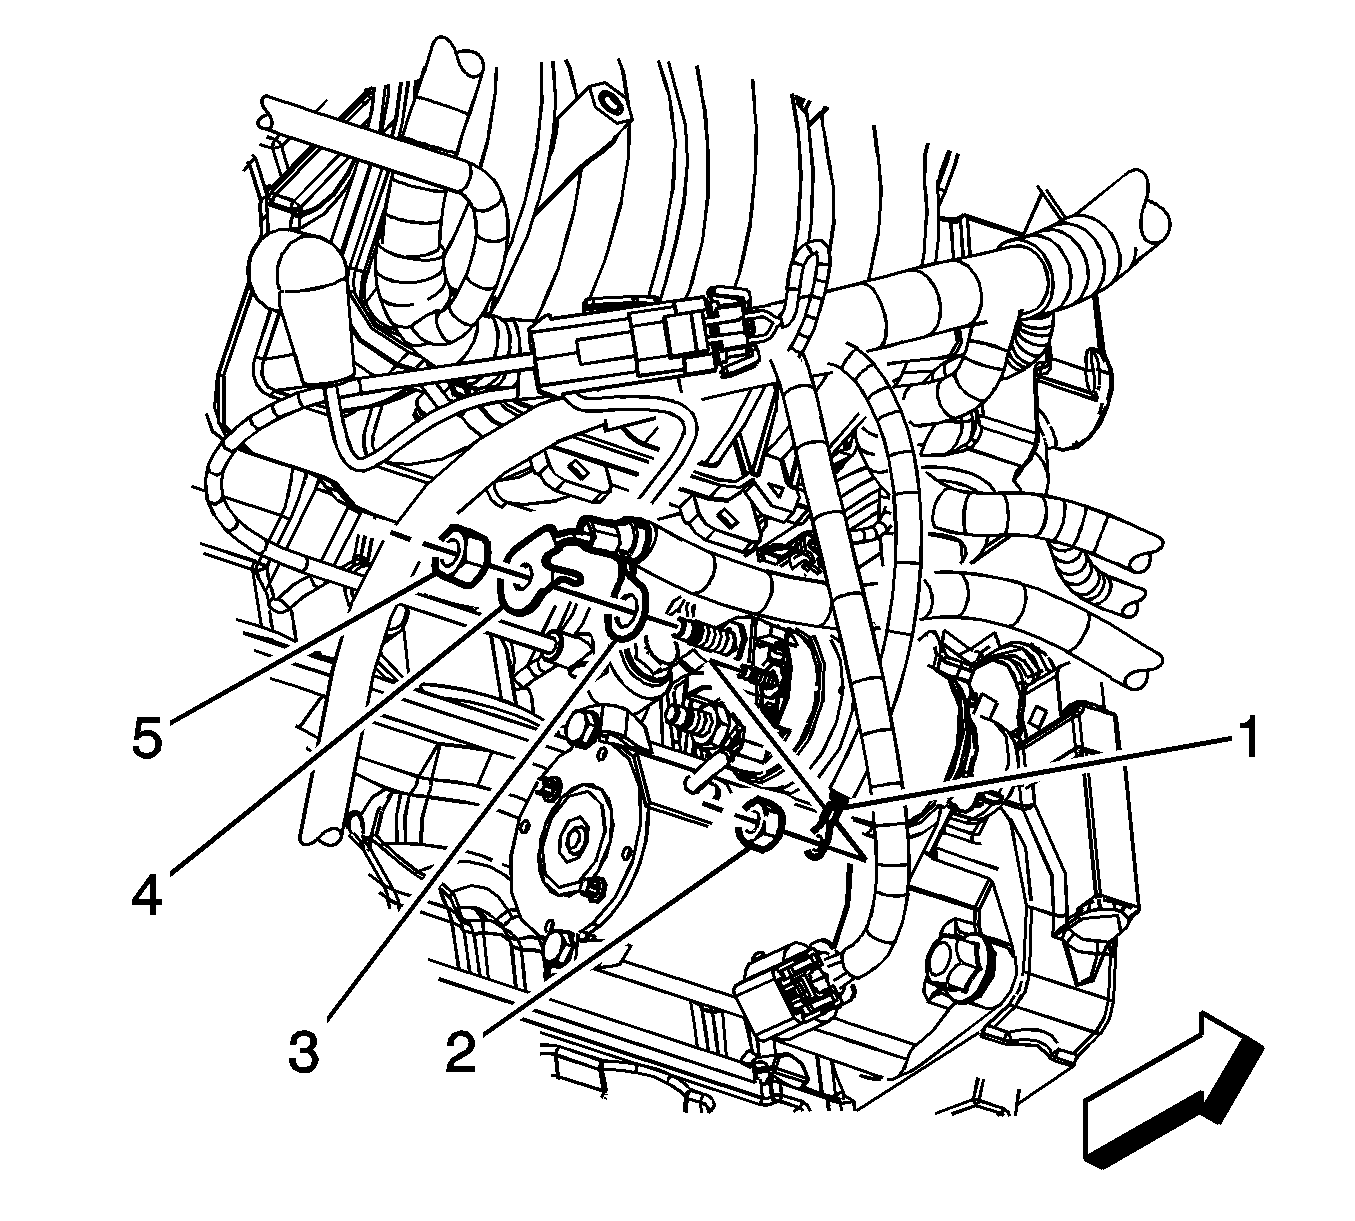
- Remove the positive battery cable lead nut (5) from the starter solenoid.
- Remove the positive battery cable terminal (4) from the starter.
- Remove the engine harness terminal (3) from the starter.
- Remove the engine harness to starter solenoid "S" terminal nut (2).
- Remove the engine harness lead terminals (1) from the starter solenoid.
- Lower the vehicle.
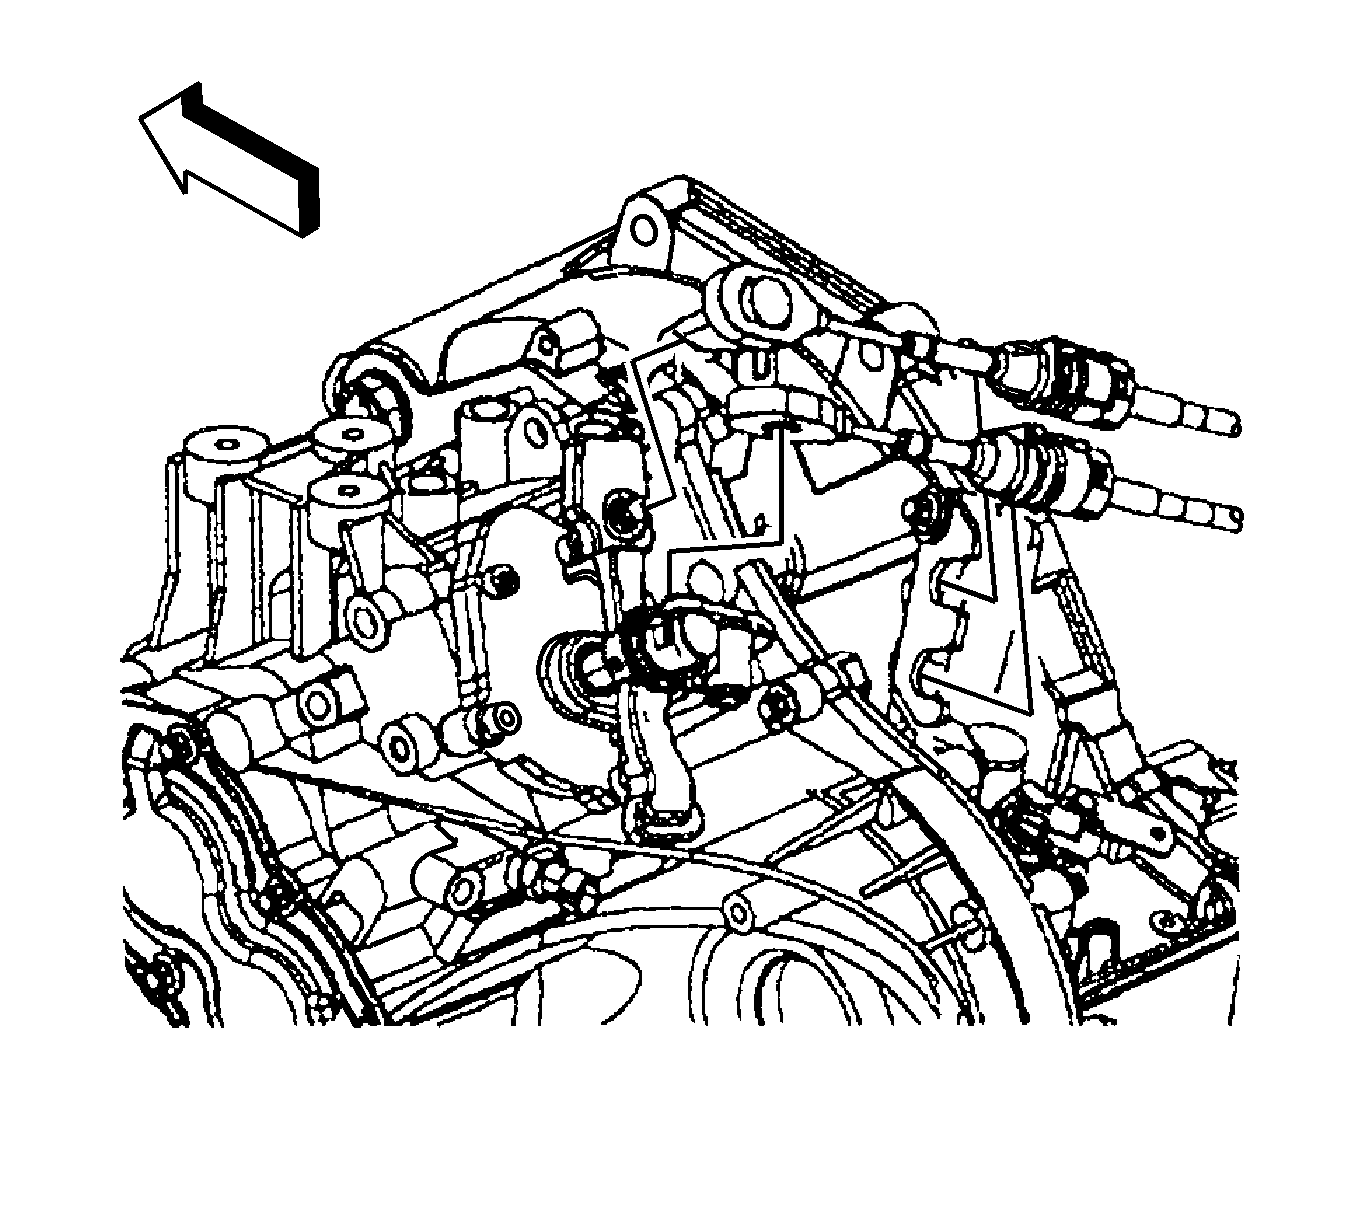
- If equipped with a automatic transaxle, disconnect the engine harness from the transaxle.
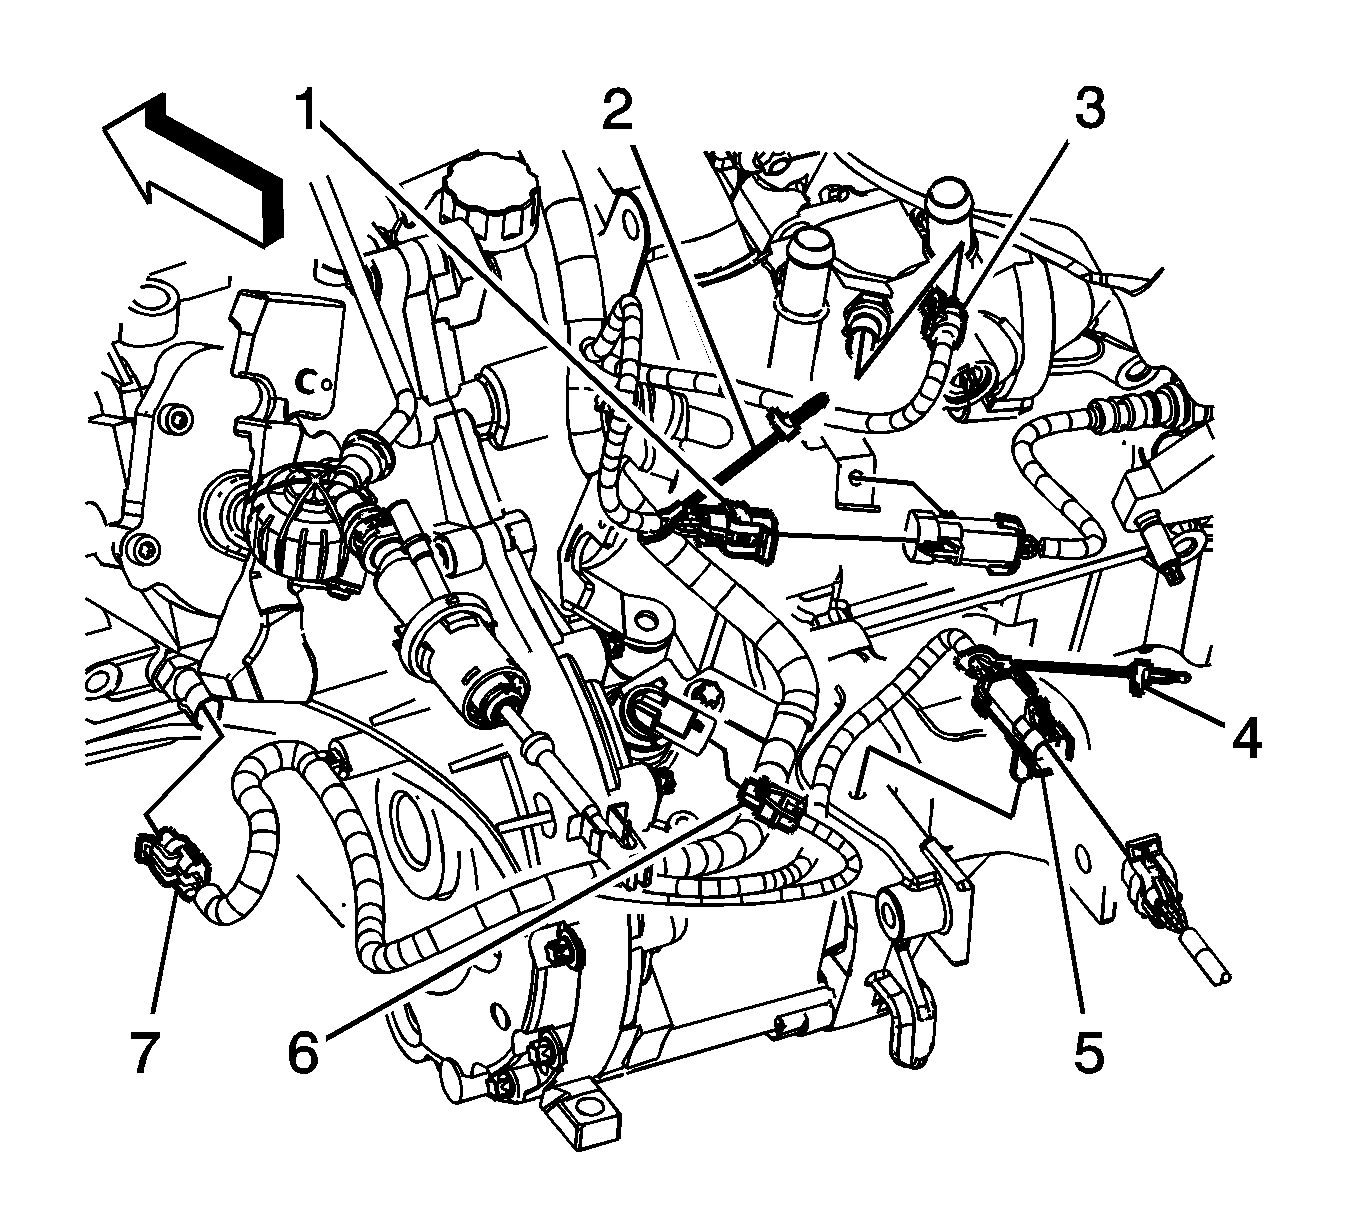
- If equipped with a automatic transaxle, perform the following steps. Disconnect the engine harness electrical connector (2) from the engine coolant temperature (ECT) sensor.
- Remove the heated oxygen sensor (HO2S) connector position assurance (CPA) retainers.
- Disconnect the engine harness electrical connectors (2, 4) from the HO2S.
- Remove the HO2S connector clips from the thermostat housing and engine bracket.
- Disconnect the engine harness electrical connector (1) from the park neutral position switch.
- If equipped with a manual transaxle, disconnect the engine harness electrical connector (6) from the VSS.
- Disconnect the engine harness electrical connector (7) from the back up lamp switch.
- Remove the HO2S CPA retainers (2, 4).
- Disconnect the engine harness electrical connectors (1, 5) from the HO2S.
- Remove the HO2S clips from the engine brackets.
- Gather all engine harness branches are reposition the harness off to the side, out of the way.
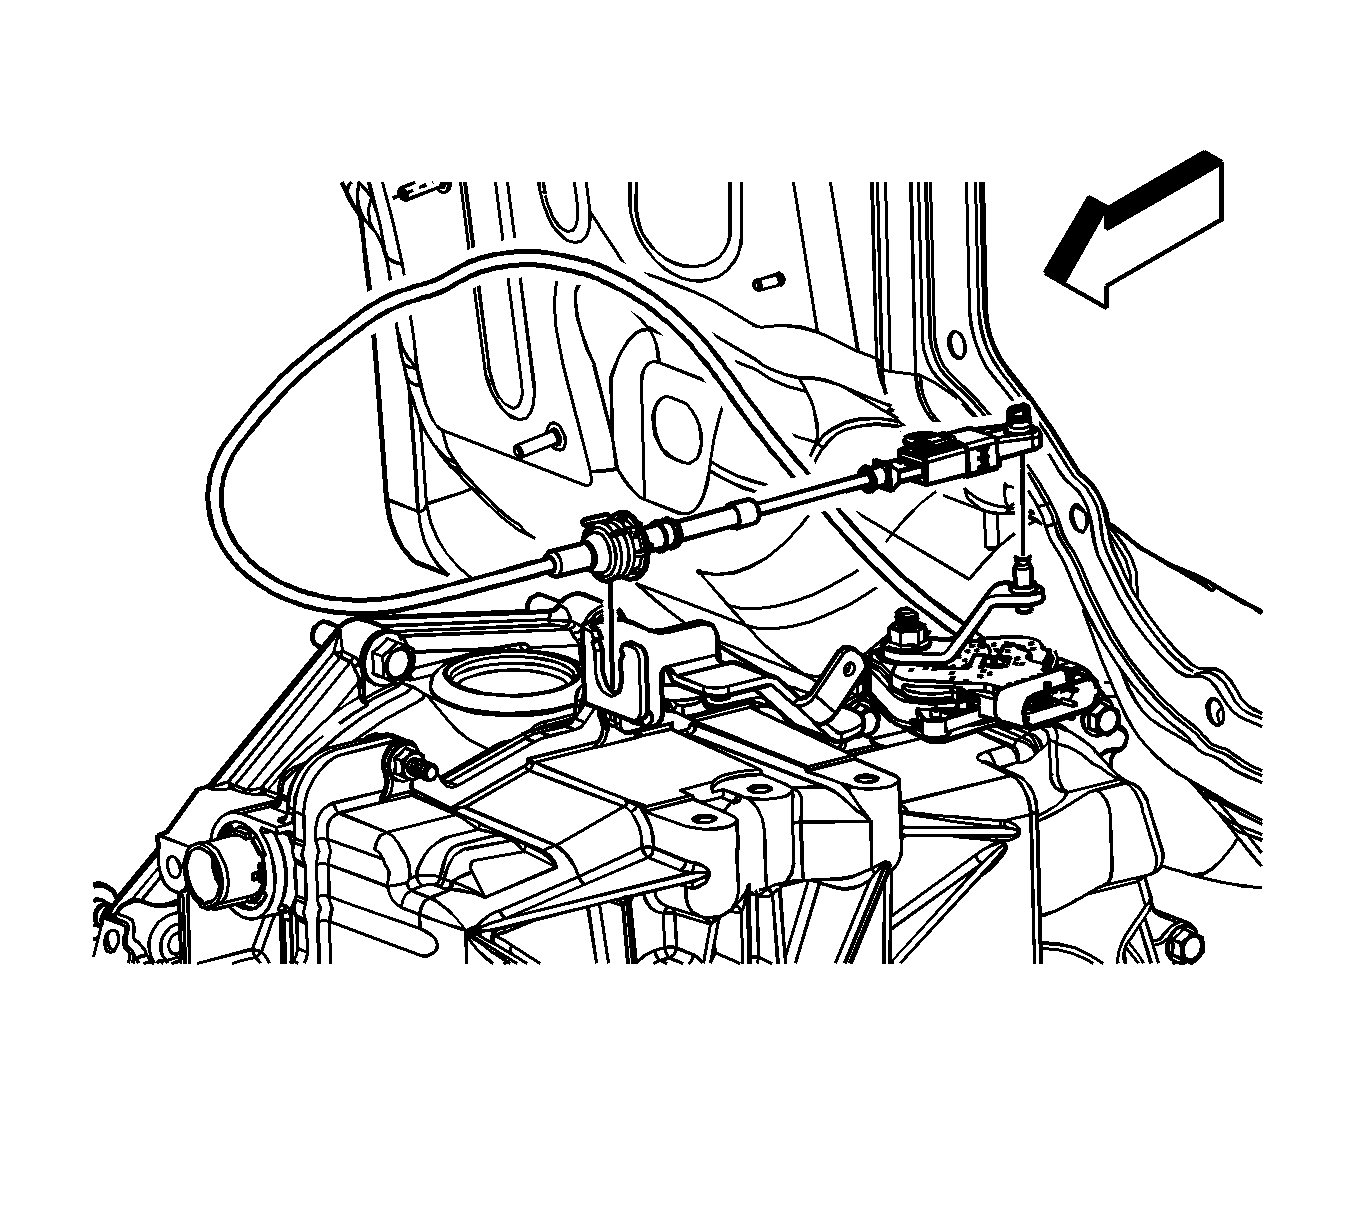
- If equipped with a automatic transaxle, disconnect the range selector lever cable from the transaxle lever.
- Remove the range selector lever cable from the transaxle bracket.
- If equipped with a manual transaxle, disconnect the range selector and shift lever cables from the transaxle levers.
- Remove the range selector and shift lever cables from the transaxle bracket.
- Remove the catalytic converter. Refer to Catalytic Converter Replacement .
- Lower the vehicle.
- Insert blocks of wood between the powertrain and the frame, in order to support the powertrain.
- Remove the engine mount. Refer to Engine Mount Replacement .
- Remove the transaxle mount to transaxle bolts.
- Raise the vehicle.
- Disconnect the stabilizer links from the stabilizer bar. Refer to Stabilizer Shaft Link Replacement .
- Disconnect the outer tie rod ends from the steering knuckles. Refer to Rack and Pinion Outer Tie Rod End Replacement .
- Disconnect the intermediate shaft from the steering gear. Refer to Intermediate Steering Shaft Replacement .
- Disconnect the lower control arms from the steering knuckles. Refer to Lower Control Arm Replacement .
- Using a paint pen or magic marker, mark the frame to body position.
- Lower the vehicle to about 3 feet off the ground.
- Position a engine lift table under the frame.
- Place wood blocks on top of the lift table between the table and the frame.
- Lower the vehicle until the frame is resting on the blocks of wood.
- Slowly loosen/remove the frame bolts using the following sequence:
- Slowly raise the vehicle away from the powertrain assembly.
- Slide the lift table out from under the vehicle.
- Attach the engine lift hoist to the engine lift hooks.
- Remove the starter bolts and starter.
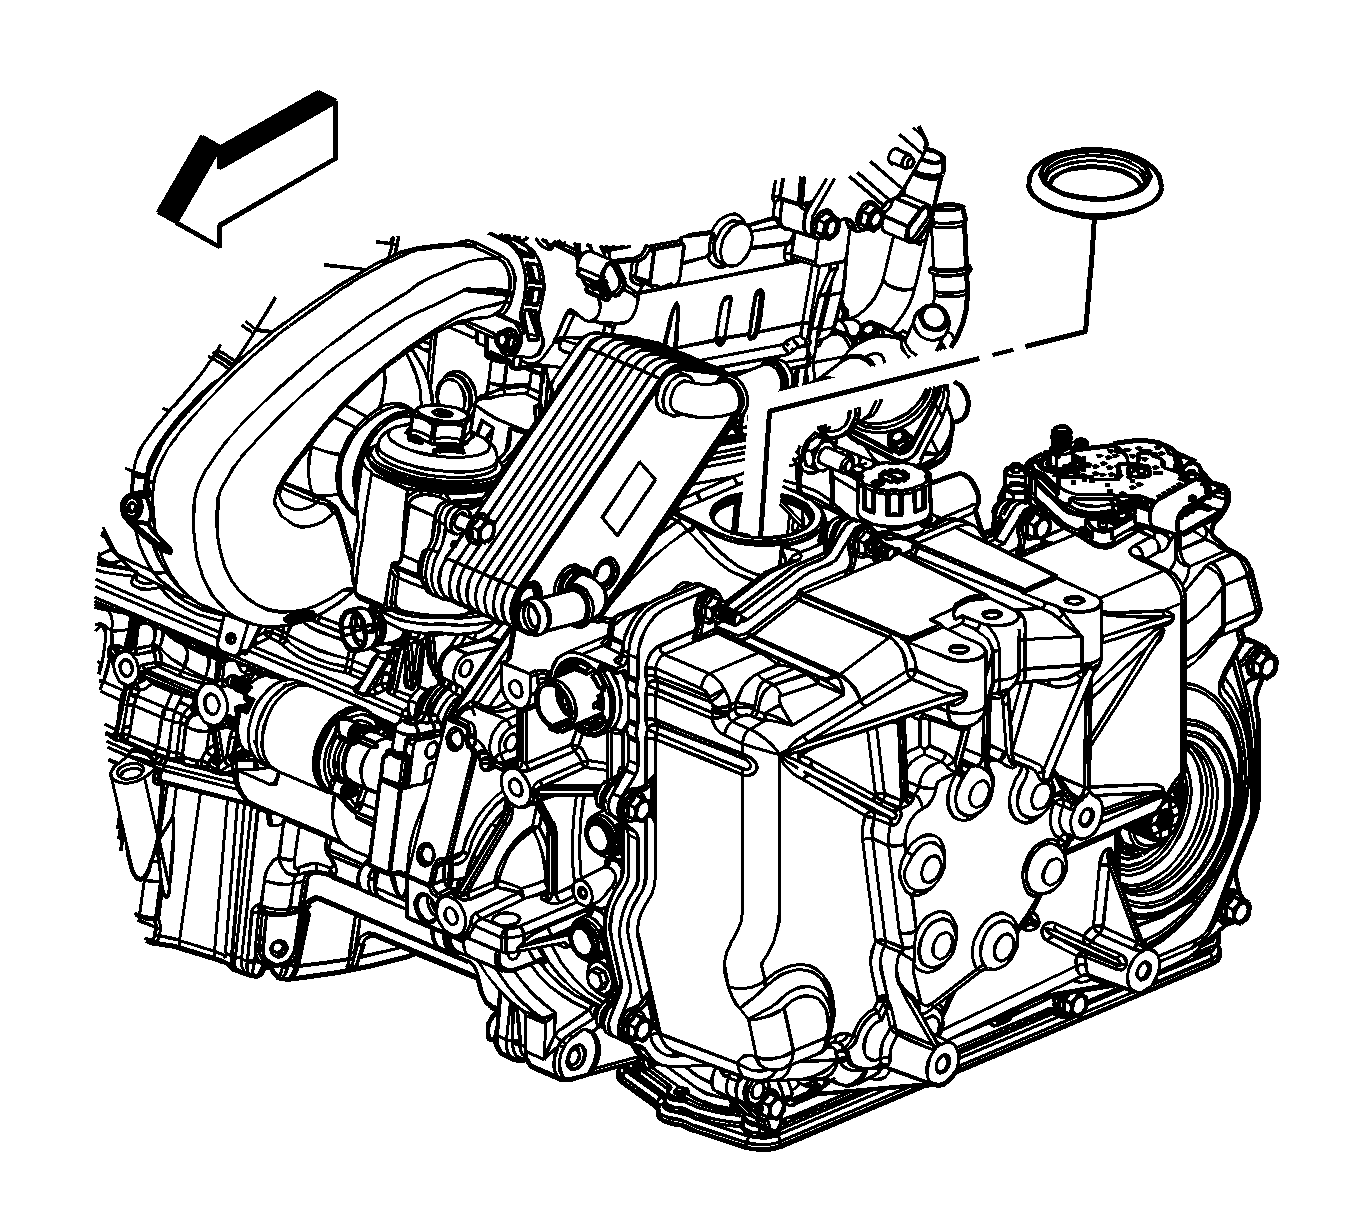
- If equipped with a automatic transaxle, remove the torque converter housing access plug.
- If equipped with a automatic transaxle, remove the torque converter bolts.
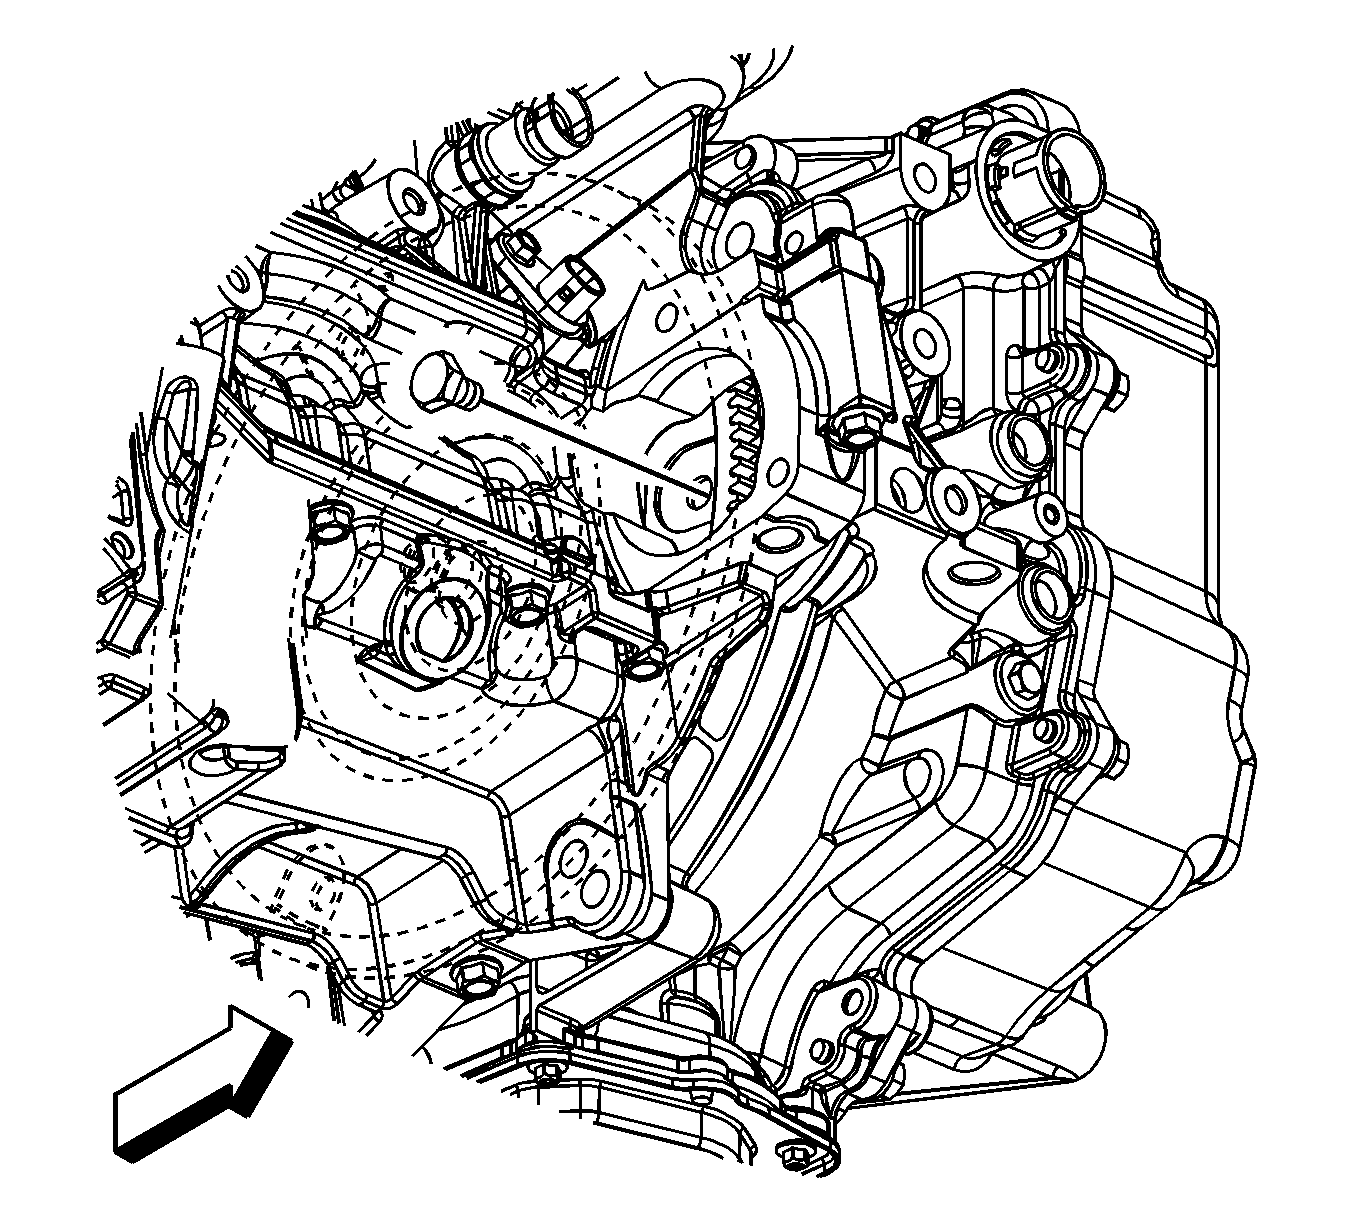
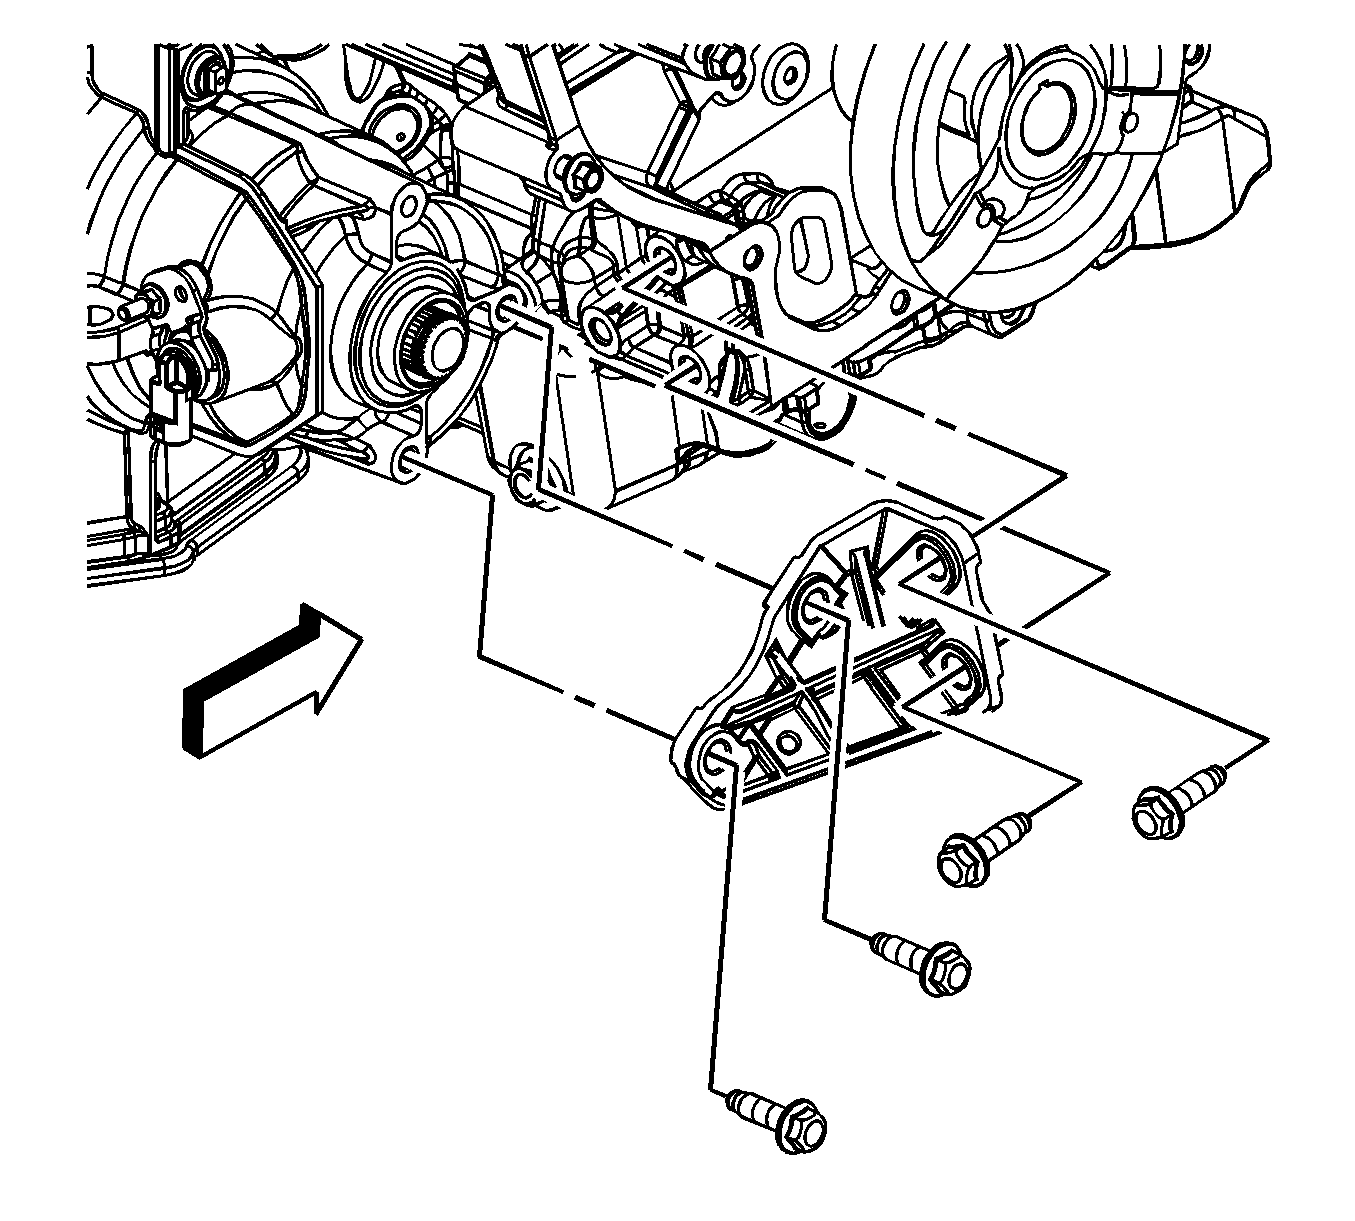
- Remove the transaxle brace bolts and brace.
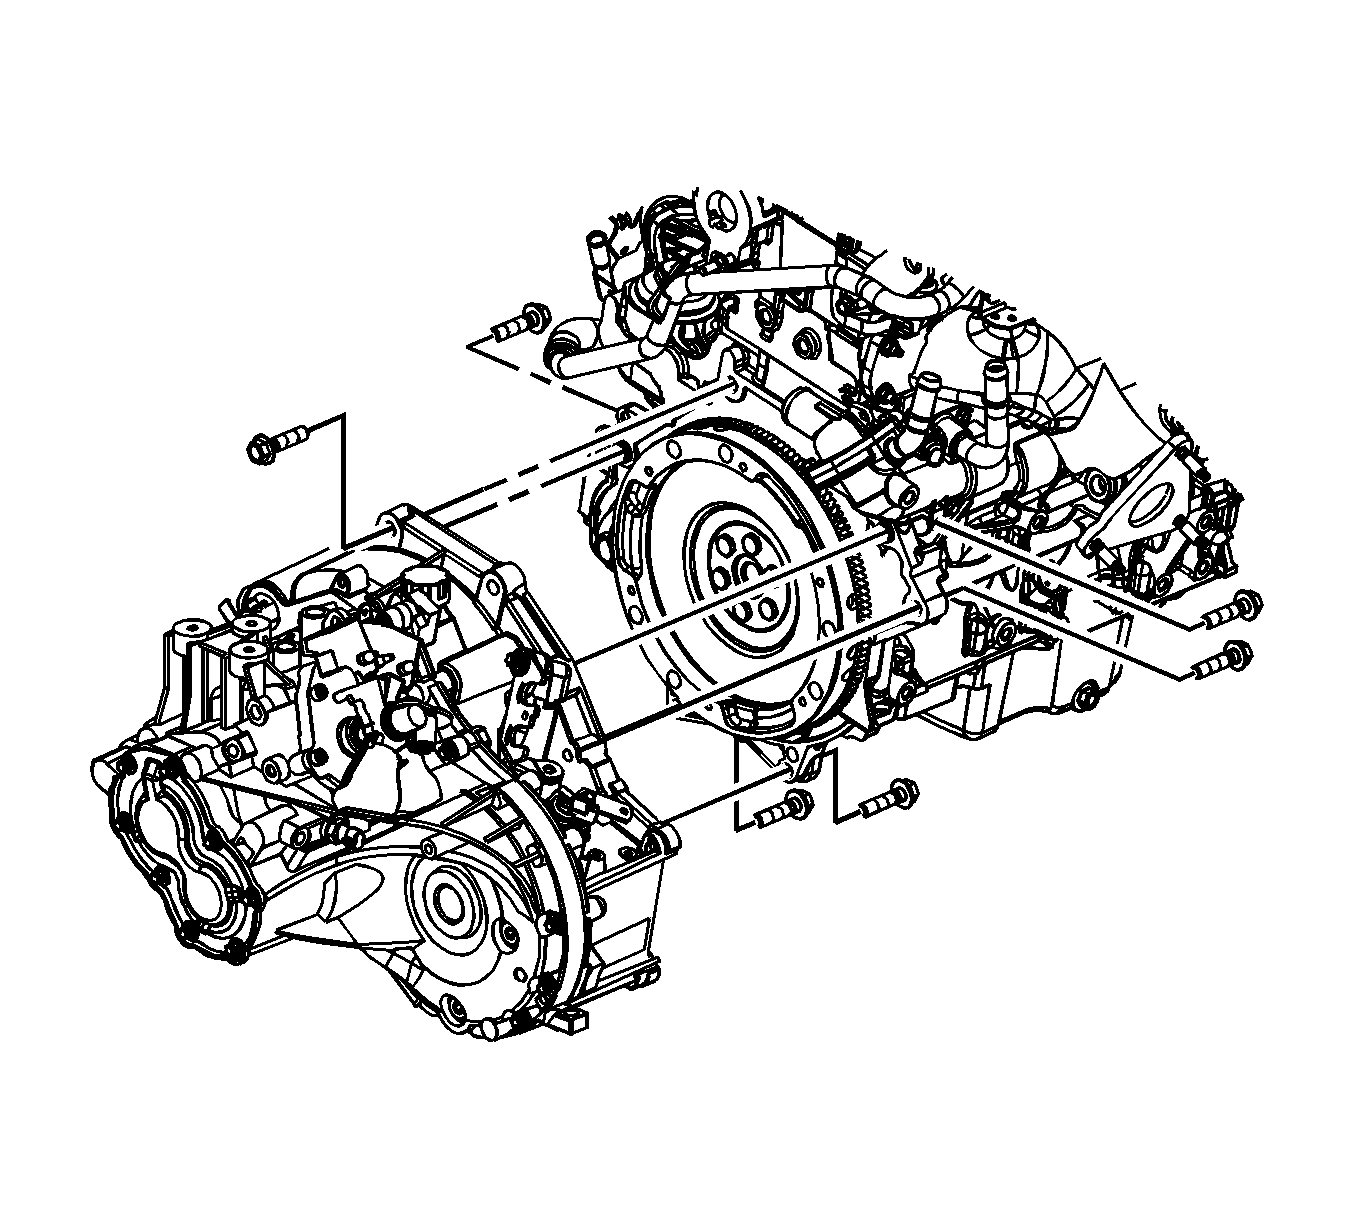
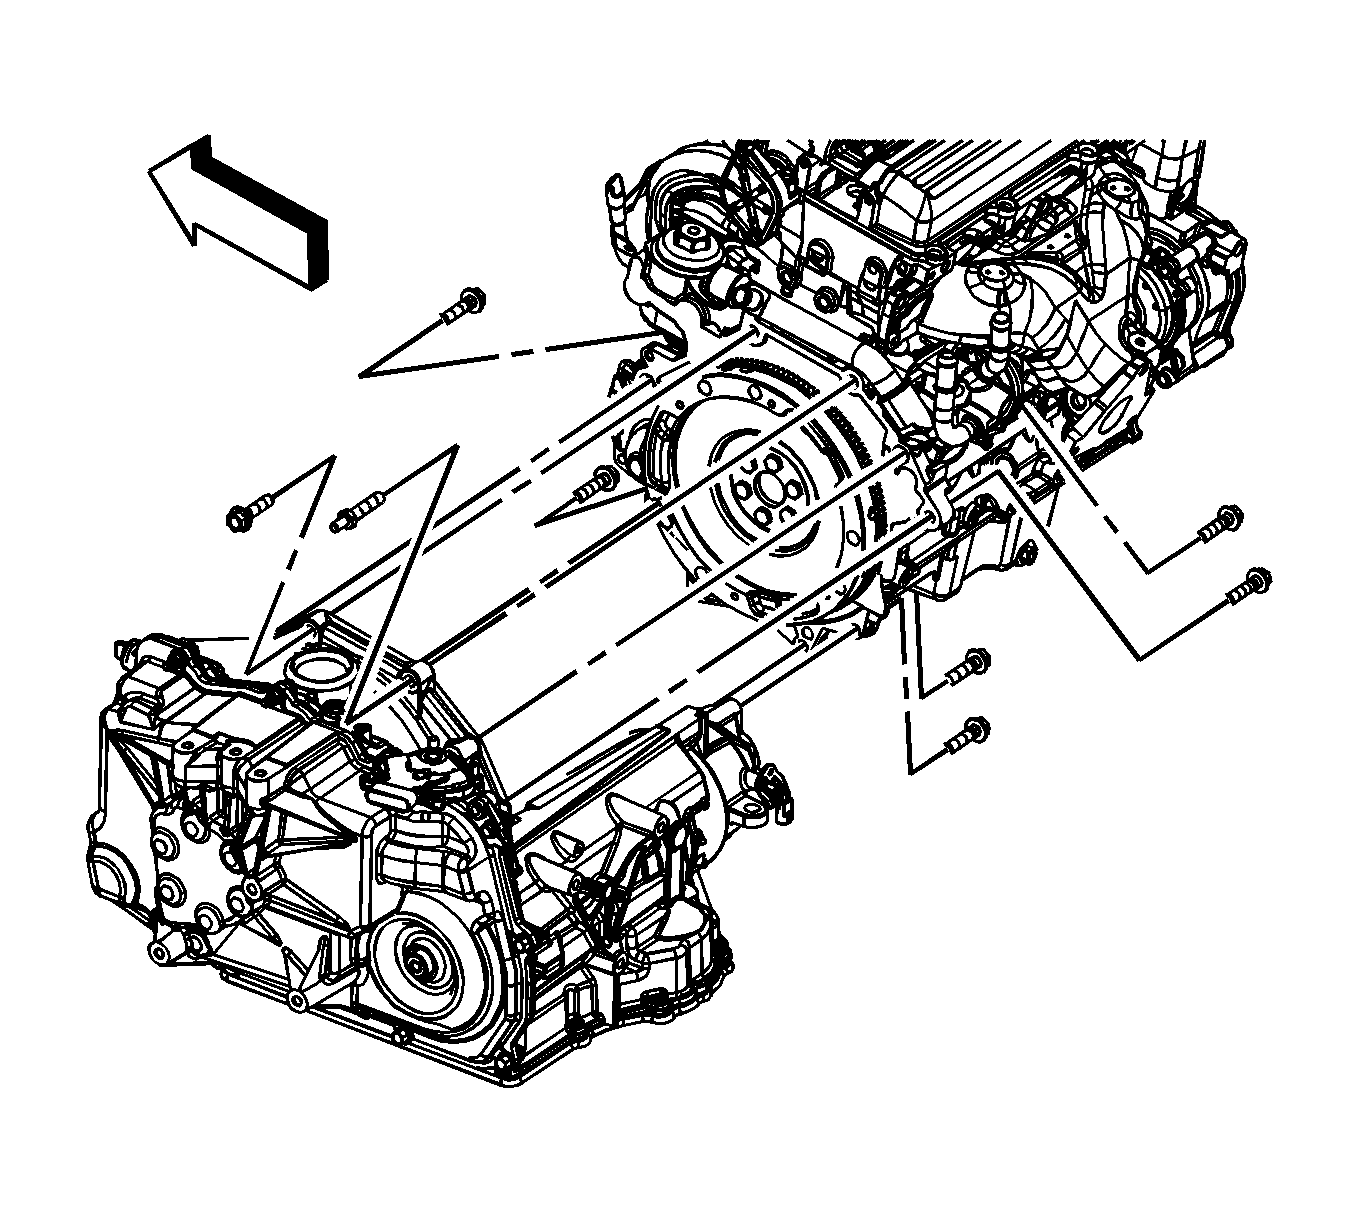
- If equipped with a manual transaxle, remove the transaxle to engine bolts/stud.
- If equipped with a automatic transaxle, remove the transaxle to engine bolts/stud.
- Separate the engine from the transaxle.
- If equipped with a manual transaxle, remove the clutch pressure plate and disc. Refer to Clutch Pressure and Driven Plate Replacement .
- Remove the following components:
- Using a engine hoist, install the engine to a engine stand.
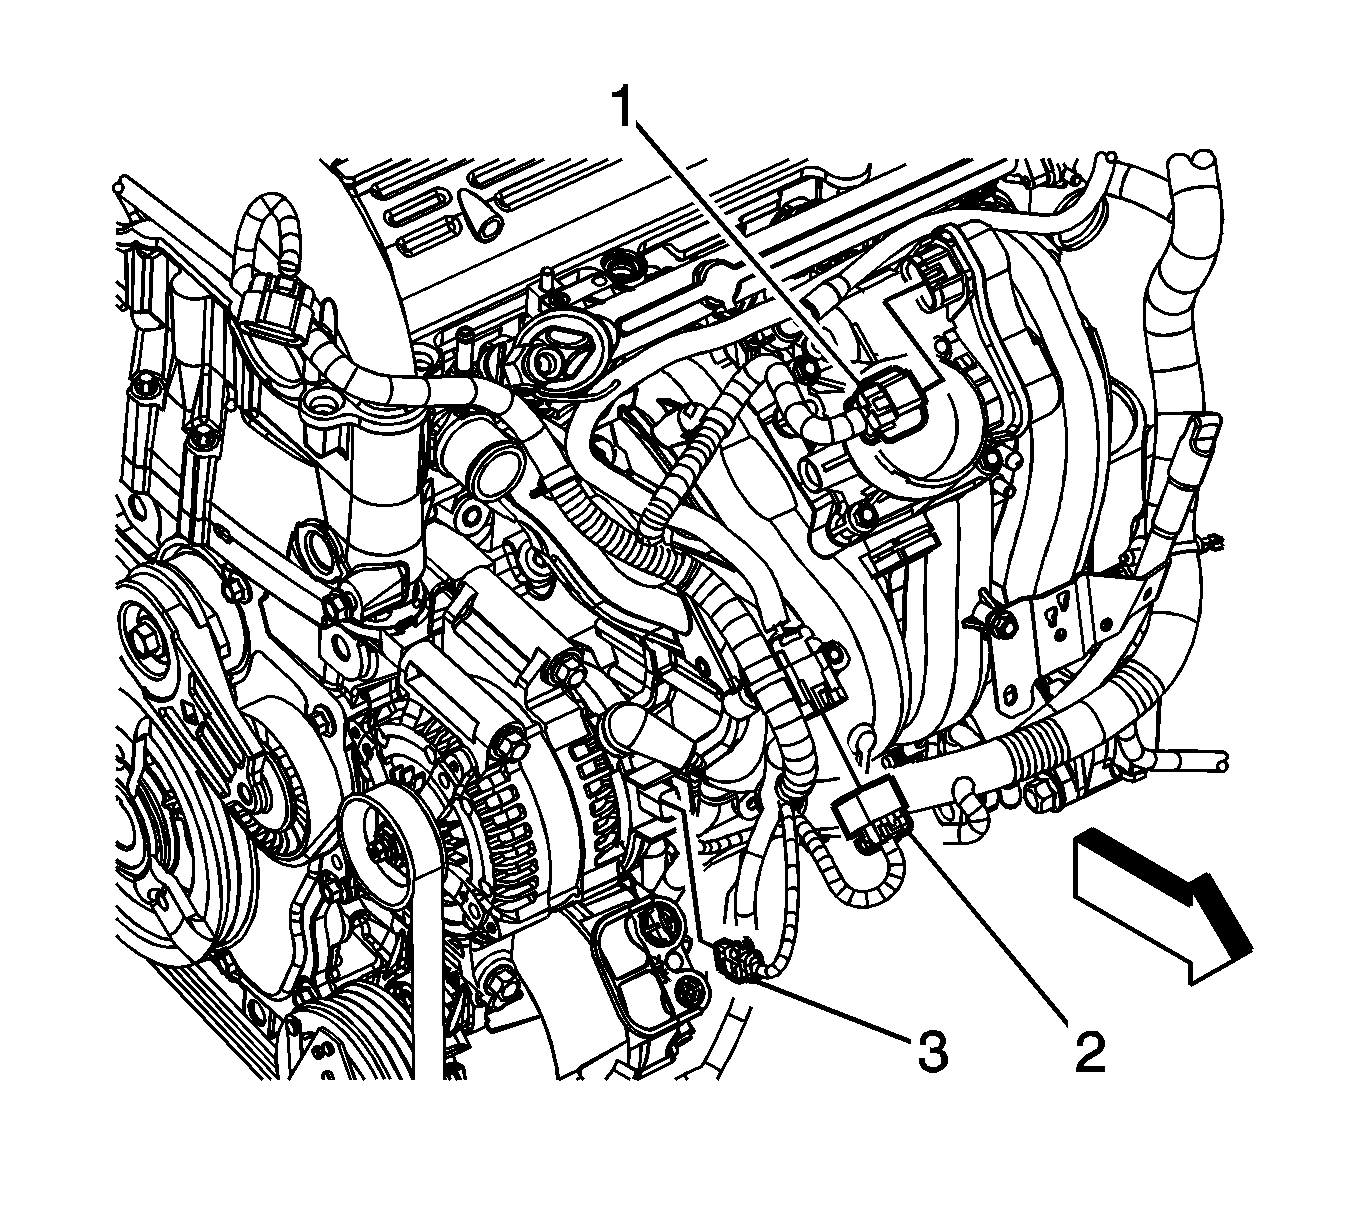
| • | Throttle actuator control (TAC) (1) |
| • | Manifold absolute pressure (MAP) sensor |
| • | Fuel injector harness (2) |
| • | Generator (3) |
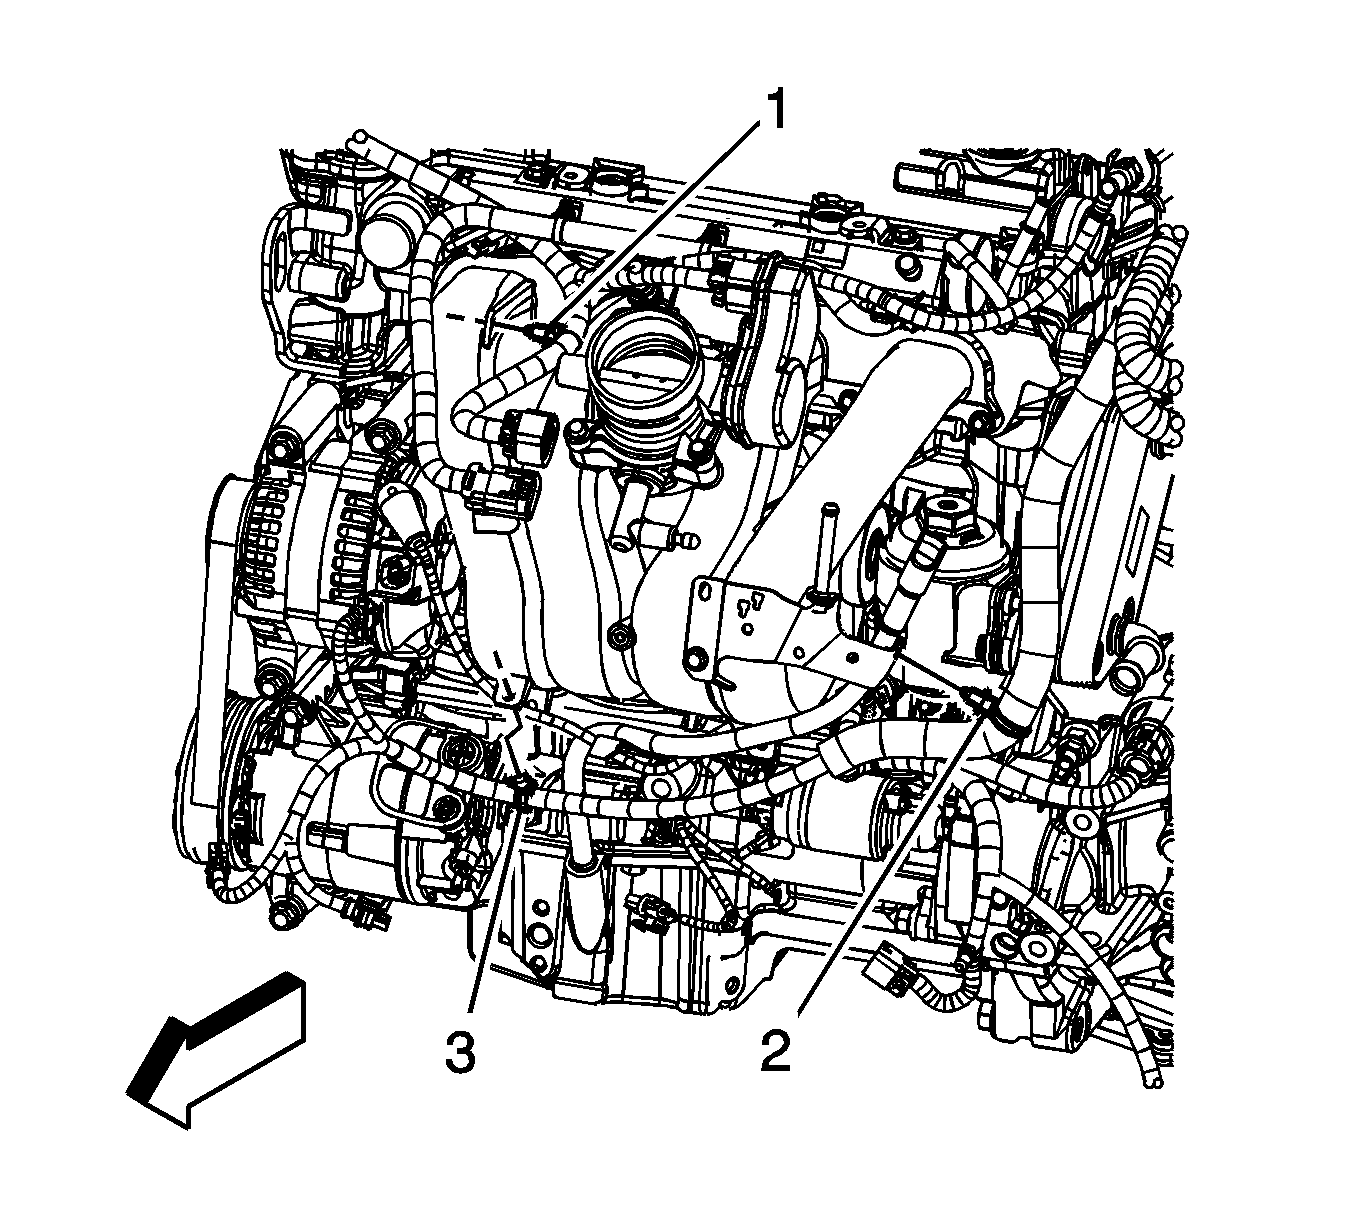

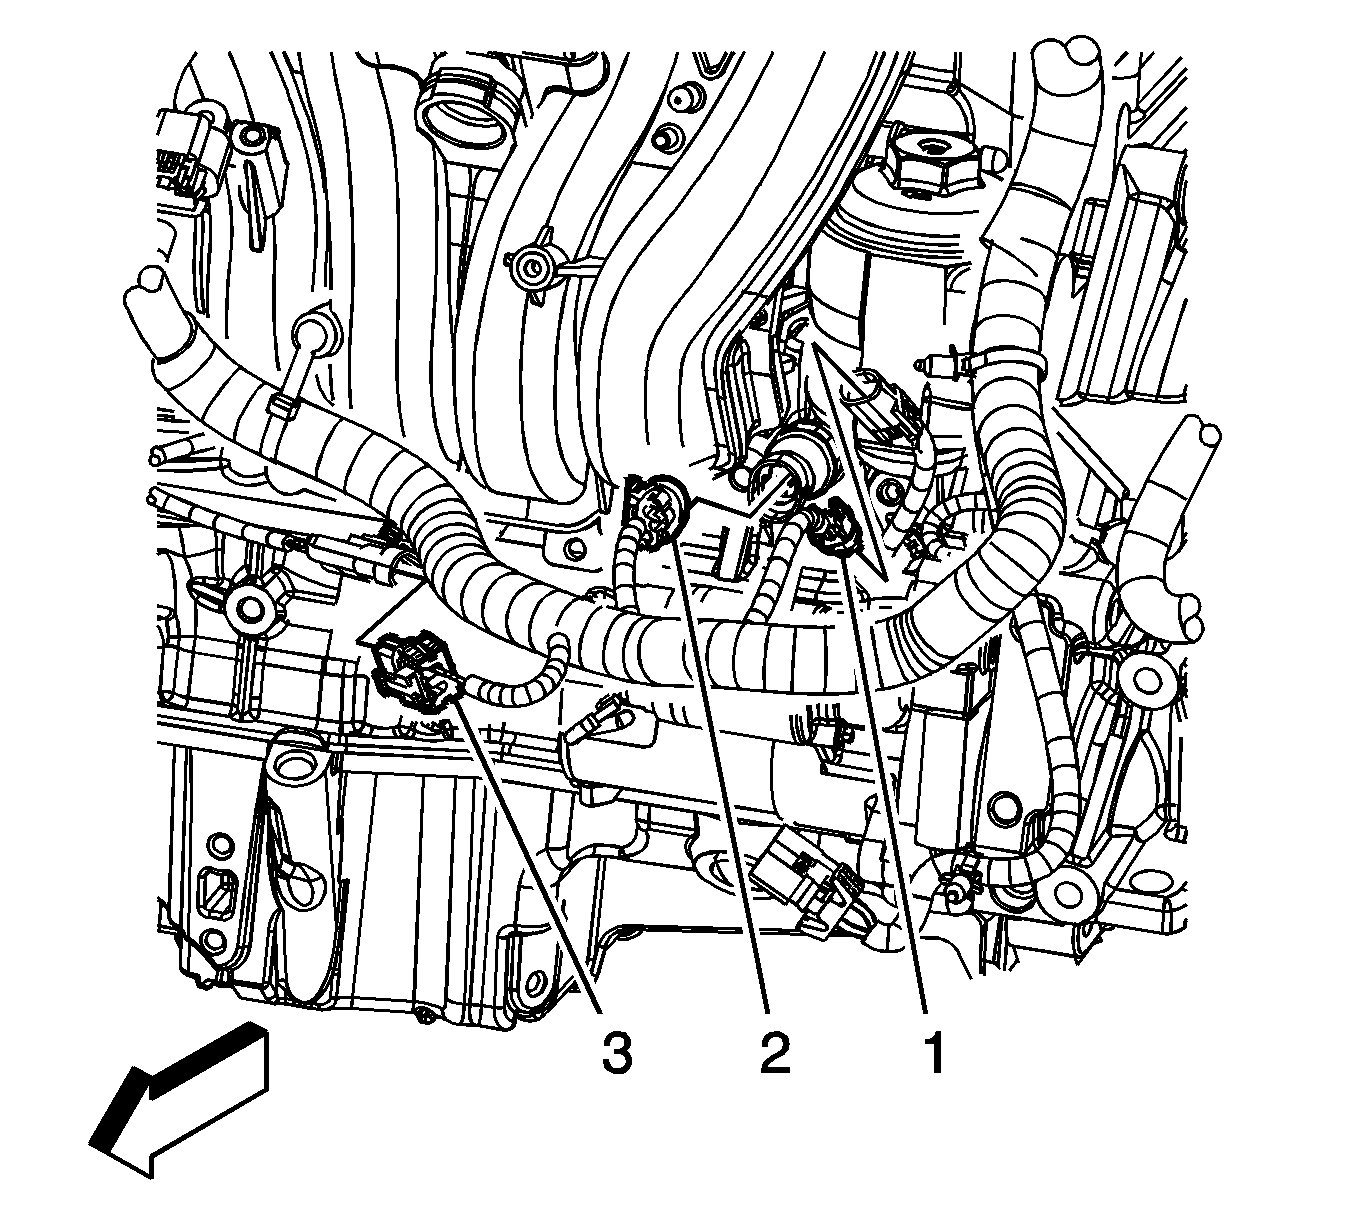
| • | Oil pressure sensor (2) |
| • | Crankshaft position (CKP) sensor (1) |
| • | Knock sensor (3) |
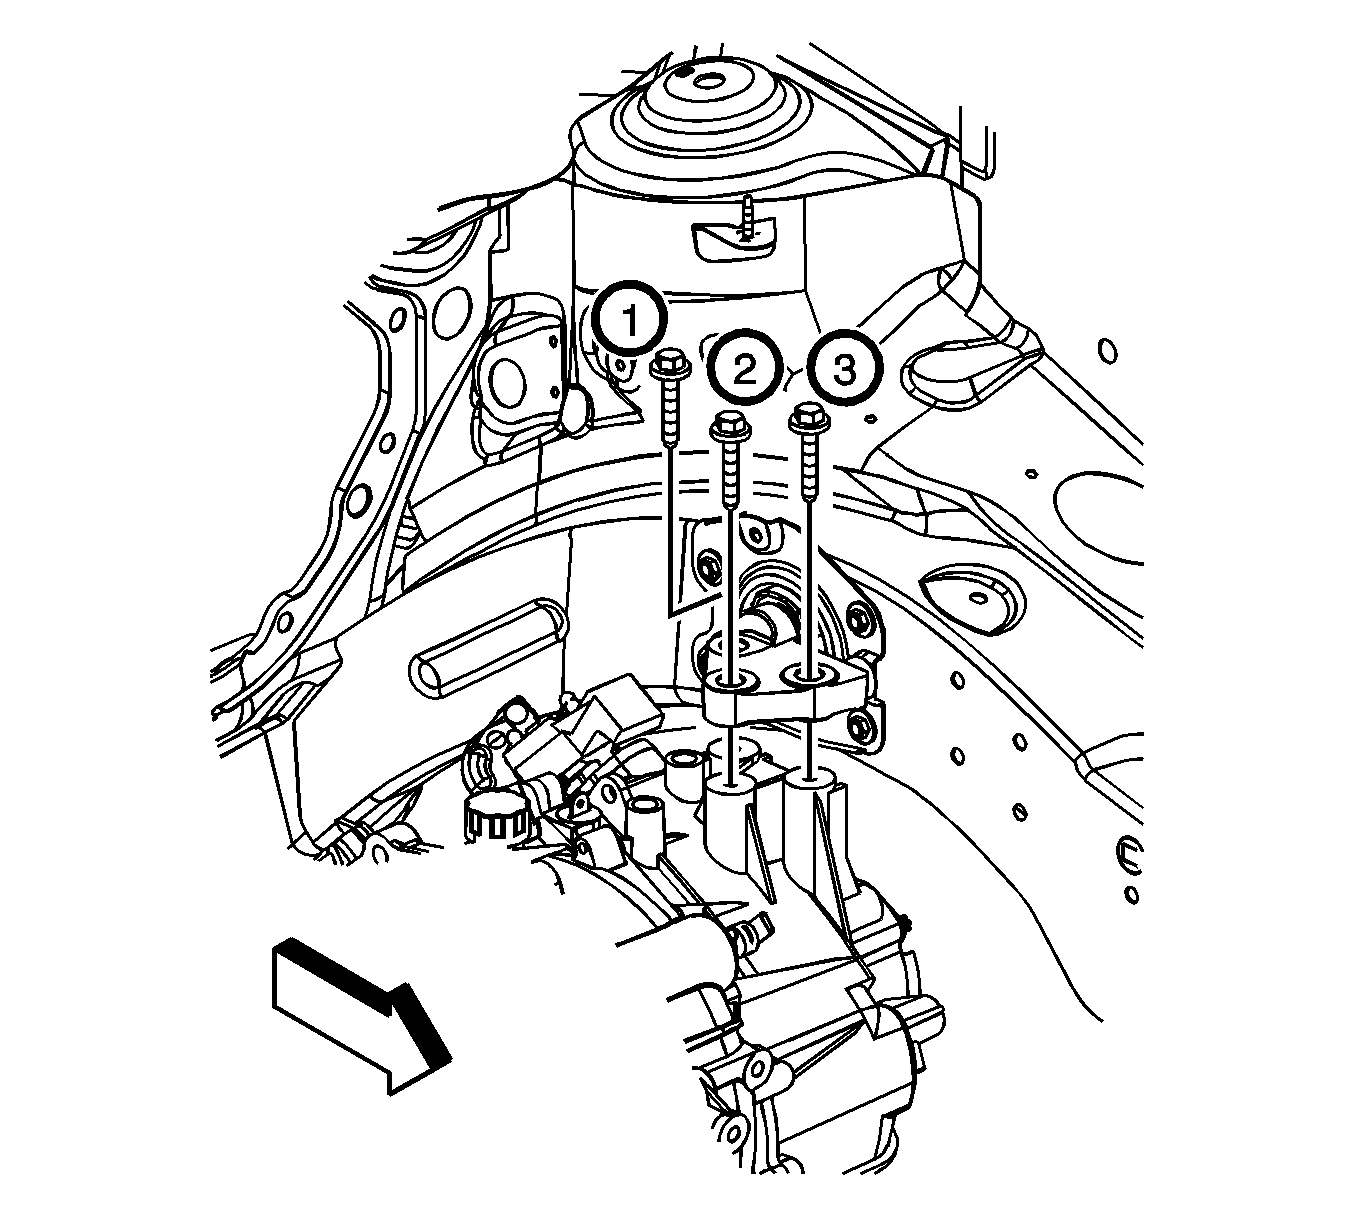
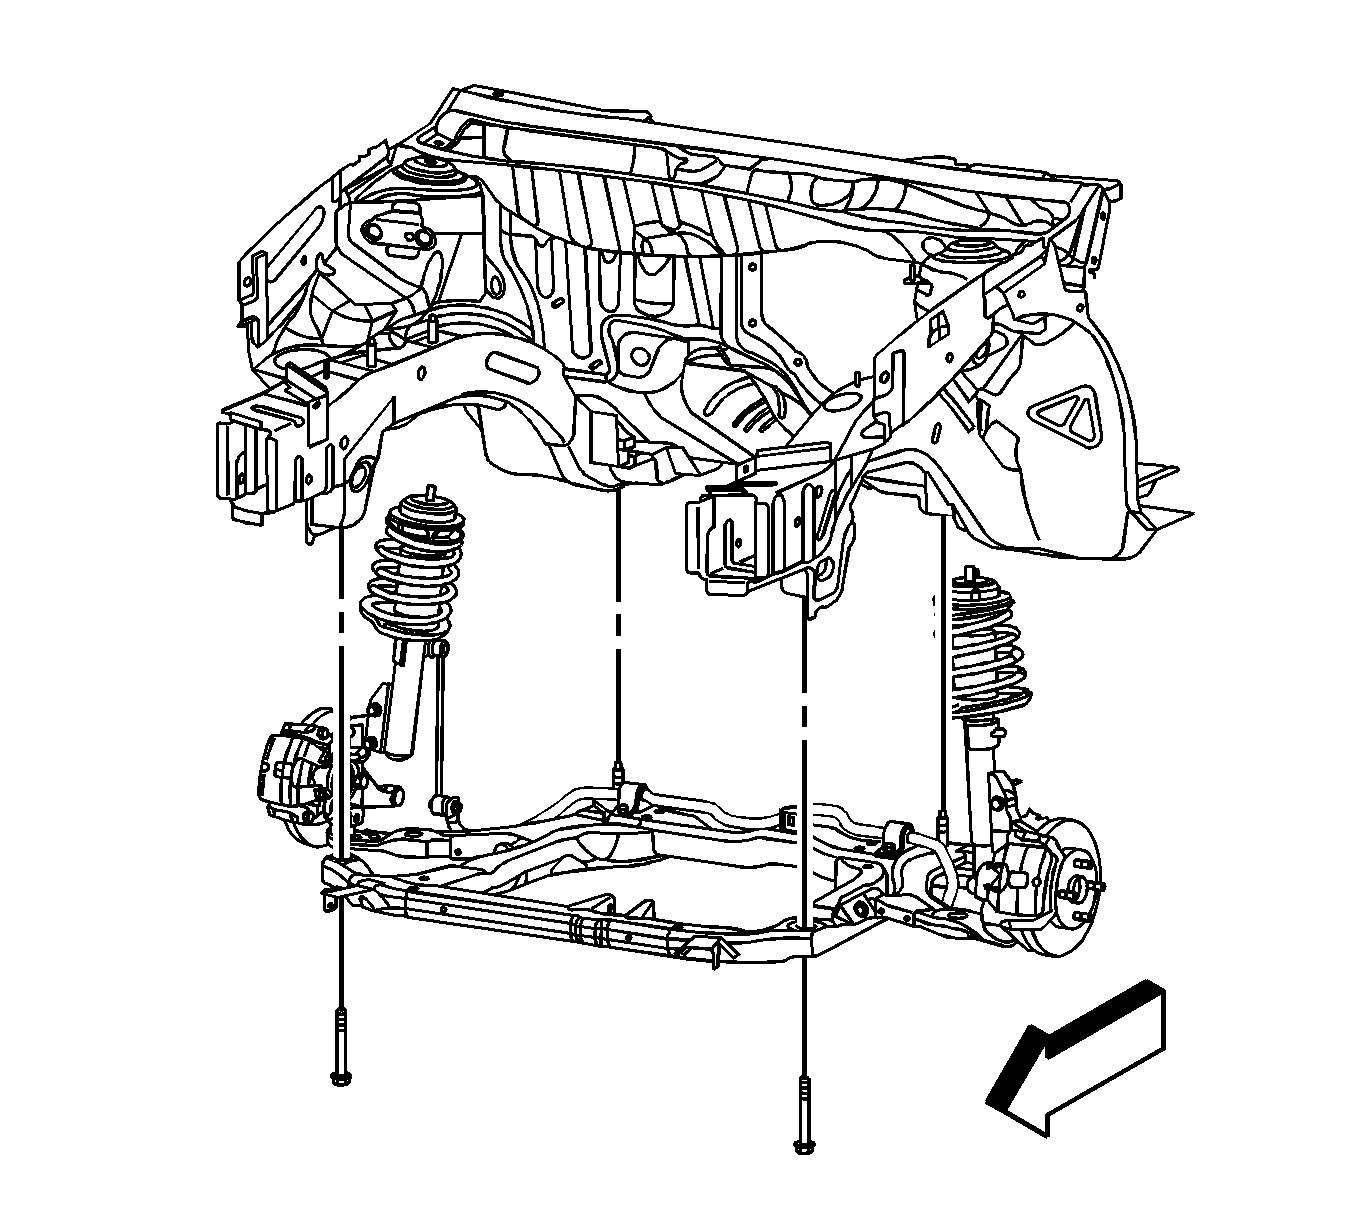
| 89.1. | Loosen/remove the front frame bolts. |
| 89.2. | Loosen/remove the rear frame bolts. |
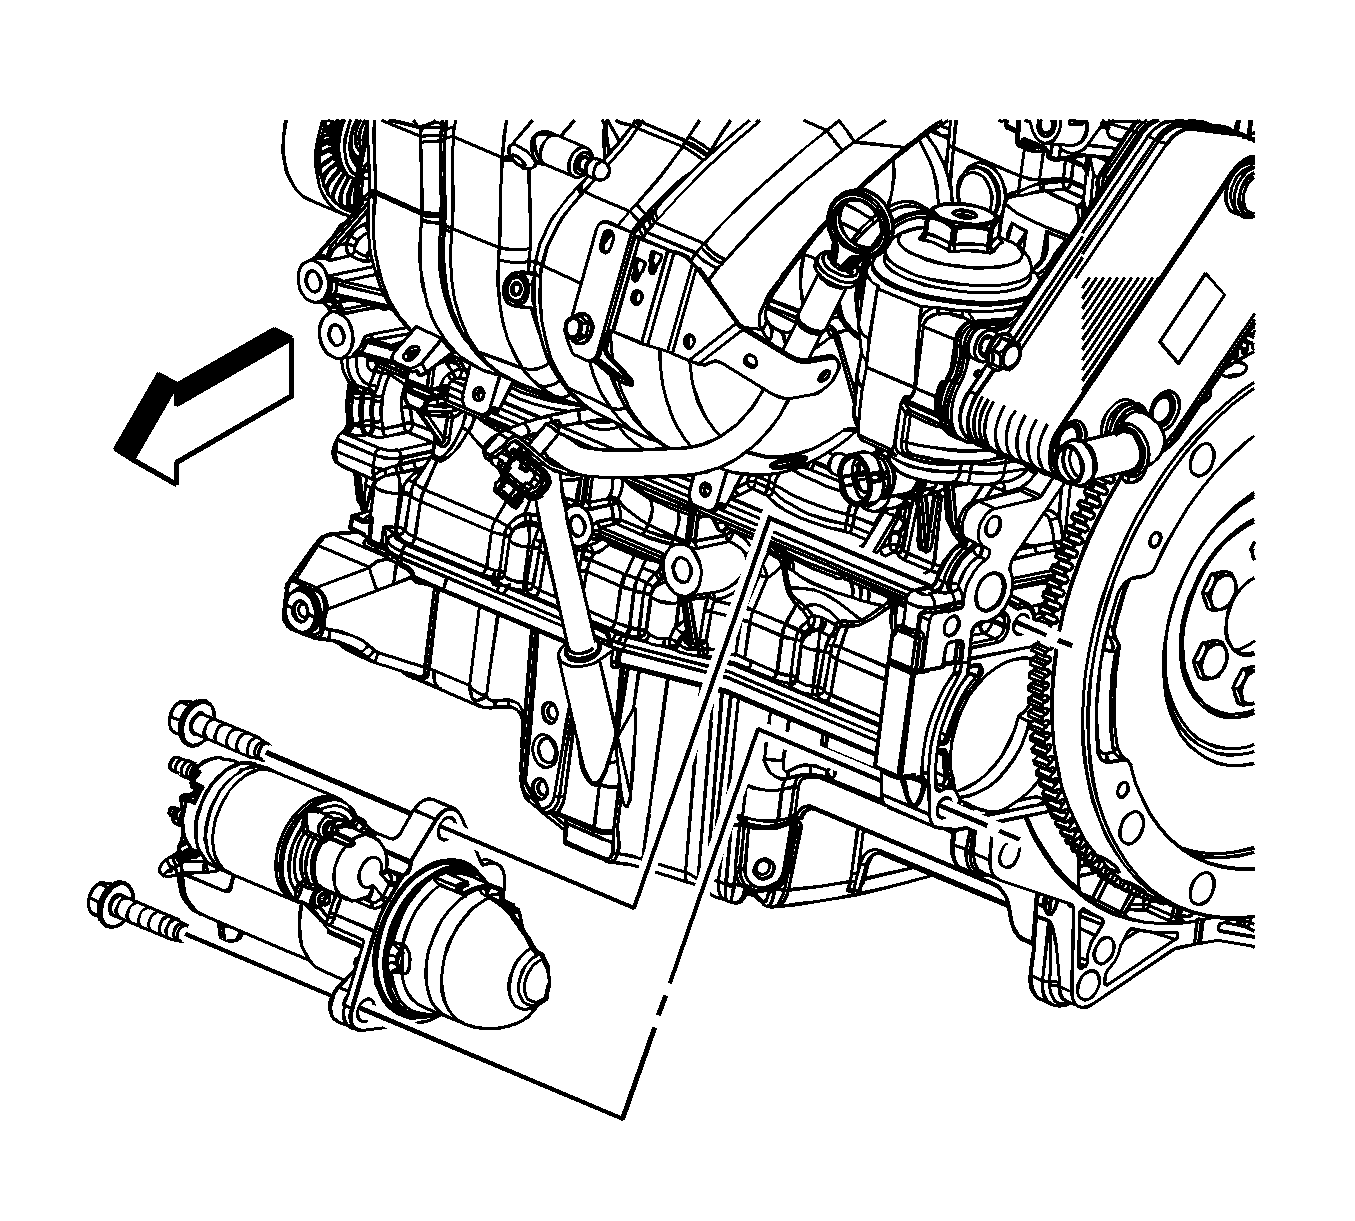
| • | The engine mount bracket |
| • | The engine block heater |
| • | The generator |
Installation Procedure
- Using a engine hoist, remove the engine from the engine stand.
- Install the following components:
- If equipped with a manual transaxle, install the clutch pressure plate and disc. Refer to Clutch Pressure and Driven Plate Replacement .
- Install the engine to the transaxle.
- If equipped with a automatic transaxle, install the transaxle to engine bolts/stud.
- If equipped with a manual transaxle, install the transaxle to engine bolts/stud.
- Install the transaxle brace and bolts.
- If equipped with a automatic transaxle, install the torque converter bolts.
- If equipped with a automatic transaxle, install the torque converter housing access plug.
- Install the starter and bolts.
- Remove the engine lift hoist from the engine lift hooks.
- Slide the lift table under the vehicle.
- Slowly lower the vehicle until it aligns with the alignment marks made during the removal.
- Tighten/install the frame bolts.
- Raise the vehicle until the lift table can be removed from under the vehicle.
- Remove the lift table.
- Install the transaxle fluid cooler lines to the transaxle.
- Install the transaxle fluid cooler bracket nut.
- Connect the lower control arms to the steering knuckles. Refer to Lower Control Arm Replacement .
- Connect the intermediate shaft to the steering gear. Refer to Intermediate Steering Shaft Replacement .
- Connect the outer tie rod ends to the steering knuckles. Refer to Rack and Pinion Outer Tie Rod End Replacement .
- Connect the stabilizer links to the stabilizer bar. Refer to Stabilizer Shaft Link Replacement .
- Lower the vehicle.
- Install the transaxle mount to transaxle bolts.
- Install the engine mount. Refer to Engine Mount Replacement .
- Remove the blocks of wood from between the powertrain and the frame.
- Install the catalytic converter. Refer to Catalytic Converter Replacement .
- Lower the vehicle.
- If equipped with a manual transaxle, install the range selector and shift lever cables to the transaxle bracket.
- Connect the range selector and shift lever cables to the transaxle levers.
- If equipped with a automatic transaxle, install the range selector lever cable to the transaxle bracket.
- Connect the range selector lever cable to the transaxle lever.
- Gather all engine harness branches and position the harness over the engine.
- If equipped with a manual transaxle, perform the following steps. Install the HO2S clips to the engine brackets.
- Connect the engine harness electrical connectors (1, 5) to the HO2S.
- Install the HO2S CPA retainers (2, 4).
- Connect the engine harness electrical connector (7) to the back up lamp switch.
- Connect the engine harness electrical connector (1) to the VSS.
- If equipped with a automatic transaxle, perform the following steps. Connect the engine harness electrical connector (1) to the park neutral position switch.
- Install the engine harness clips to the thermostat housing and engine brackets.
- Connect the engine harness electrical connectors (2, 4) to the HO2S.
- Install the HO2S CPA retainers.
- Connect the ECT sensor electrical connector (1).
- If equipped with a automatic transaxle, connect the engine harness to the transaxle.
- Raise the vehicle.
- Install the engine harness lead terminal (1) to the starter solenoid.
- Install the engine harness to starter solenoid "S" terminal nut (2).
- Install the engine harness terminal (3) to the starter.
- Install the positive battery cable terminal (4) to the starter.
- Install the positive/negative battery cable lead nut (5) to the starter solenoid.
- Install the engine harness clip (3) to the speed sensor.
- Connect the engine harness electrical connector (2) to the VSS.
- Install the engine harness clip (1) to the stud.
- Install the engine harness clip nut (3) to the engine stud.
- Lower the vehicle.
- Reposition and install the AC compressor.
- Connect the engine harness electrical connector (2) to the A/C compressor.
- Connect the engine harness electrical connector (1) to the A/C pressure switch.
- Position the engine harness ground terminal to the engine block.
- Install the engine harness ground bolt.
- Connect the EVAP purge solenoid electrical connector (2).
- Install the engine harness clip (1) to the EVAP purge solenoid bracket.
- Connect the following electrical connectors:
- Install the negative battery cable ground terminal (2) to the stud.
- Install the engine harness ground terminal (3) to the stud.
- Install the negative battery cable ground nut (4).
- Install the engine harness clips (1 and 2) to the camshaft cover.
- Connect the intake (3) and exhaust (2) camshaft position actuator electrical connectors.
- Connect the ignition coils electrical connectors (1).
- Connect the engine harness clips (1, 3 and 4) to the intake manifold.
- Connect the engine harness clip (2) to the oil level indicator tube.
- Connect the following electrical connectors:
- Install the brake booster vacuum hose to the intake manifold.
- Position the brake booster vacuum hose clamp (1) at the intake manifold.
- Install the heater inlet and outlet hoses to the thermostat housing.
- Position the heater inlet (2) and outlet hose (1) clamps at the thermostat housing.
- If the vehicle is not equipped with a engine oil cooler perform the following steps, otherwise proceed to step 82.
- Install the surge tank outlet hose to the surge tank.
- Position the surge tank outlet hose clamp at the surge tank.
- Install the radiator outlet hose to the thermostat cover.
- Position the radiator outlet hose clamp (1) at the thermostat cover. Proceed to step 86.
- If the vehicle is equipped with a engine oil cooler perform the following steps, install the radiator outlet hose to the oil cooler.
- Install the radiator outlet hose to the water outlet.
- Position the radiator outlet hose clamp (2) at the oil cooler.
- Position the radiator outlet hose clamp (1) at the water outlet.
- Install the radiator inlet hose to the engine.
- Position the radiator inlet hose clamp at the engine.
- Connect the cooling fan electrical connector.
- Install the engine drive belt. Refer to Drive Belt Replacement .
- Unsecure the cooling module from the upper body structure.
- Fill the cooling system. Refer to Cooling System Draining and Filling .
- Check and fill the transaxle fluid as needed.
- Connect the EVAP line quick connect fitting (3) to the EVAP purge solenoid. Refer to Plastic Collar Quick Connect Fitting Service .
- Connect the fuel feed line quick connect fitting (4) to the fuel rail. Refer to Metal Collar Quick Connect Fitting Service .
- Install the fuel line clips (1, 2) to the engine brackets.
- Fill the engine with oil. Refer to Engine Oil and Oil Filter Replacement .
- Connect the negative battery cable. Refer to Battery Negative Cable Disconnection and Connection .
- Close the hood.
- Road test the vehicle.

| • | The engine mount bracket |
| • | The engine block heater |
| • | The generator |
Notice: Refer to Fastener Notice in the Preface section.
Tighten
Tighten the bolts/stud to 75 N·m (55 lb ft).

Tighten
Tighten the bolts/stud to 75 N·m (55 lb ft).

Tighten
Tighten the bolts to 50 N·m (37 lb ft).

Tighten
Tighten the bolts to 62 N·m (46 lb ft).


Tighten
Tighten the bolts to 40 N·m (30 lb ft).

Tighten
Tighten the bolts to 100 N·m (74 lb ft)
plus and additional 180 degrees.

Tighten
Tighten the nut to 7 N·m (62 lb in).

Tighten
Tighten the bolts to 45 N·m (33 lb ft).

Important: Ensure that the black cable is installed in the top notch of the transaxle bracket and the white cable in installed in the bottom notch of the transaxle bracket.


Tighten
Tighten the nut to 3 N·m (27 lb in).
Tighten
Tighten the nut to 17 N·m (13 lb ft).

Tighten
Tighten the nut to 50 N·m (37 lb ft).

Tighten
Tighten the bolts to 50 N·m (37 lb ft).

Tighten
Tighten the bolt to 25 N·m (18 lb ft).


| • | Knock sensor (3) |
| • | CKP sensor (1) |
| • | Oil pressure sensor (2) |

Tighten
Tighten the nut to 10 N·m (89 lb in).



| • | TAC (1) |
| • | MAP sensor |
| • | Fuel injector harness (2) |
| • | Generator (3) |


