Exhaust Manifold Replacement - Left Side LZ9
Tools Required
J 39194-B Heated Oxygen Sensor Wrench
Removal Procedure
- Remove the air cleaner outlet duct. Refer to Air Cleaner Outlet Duct Replacement .
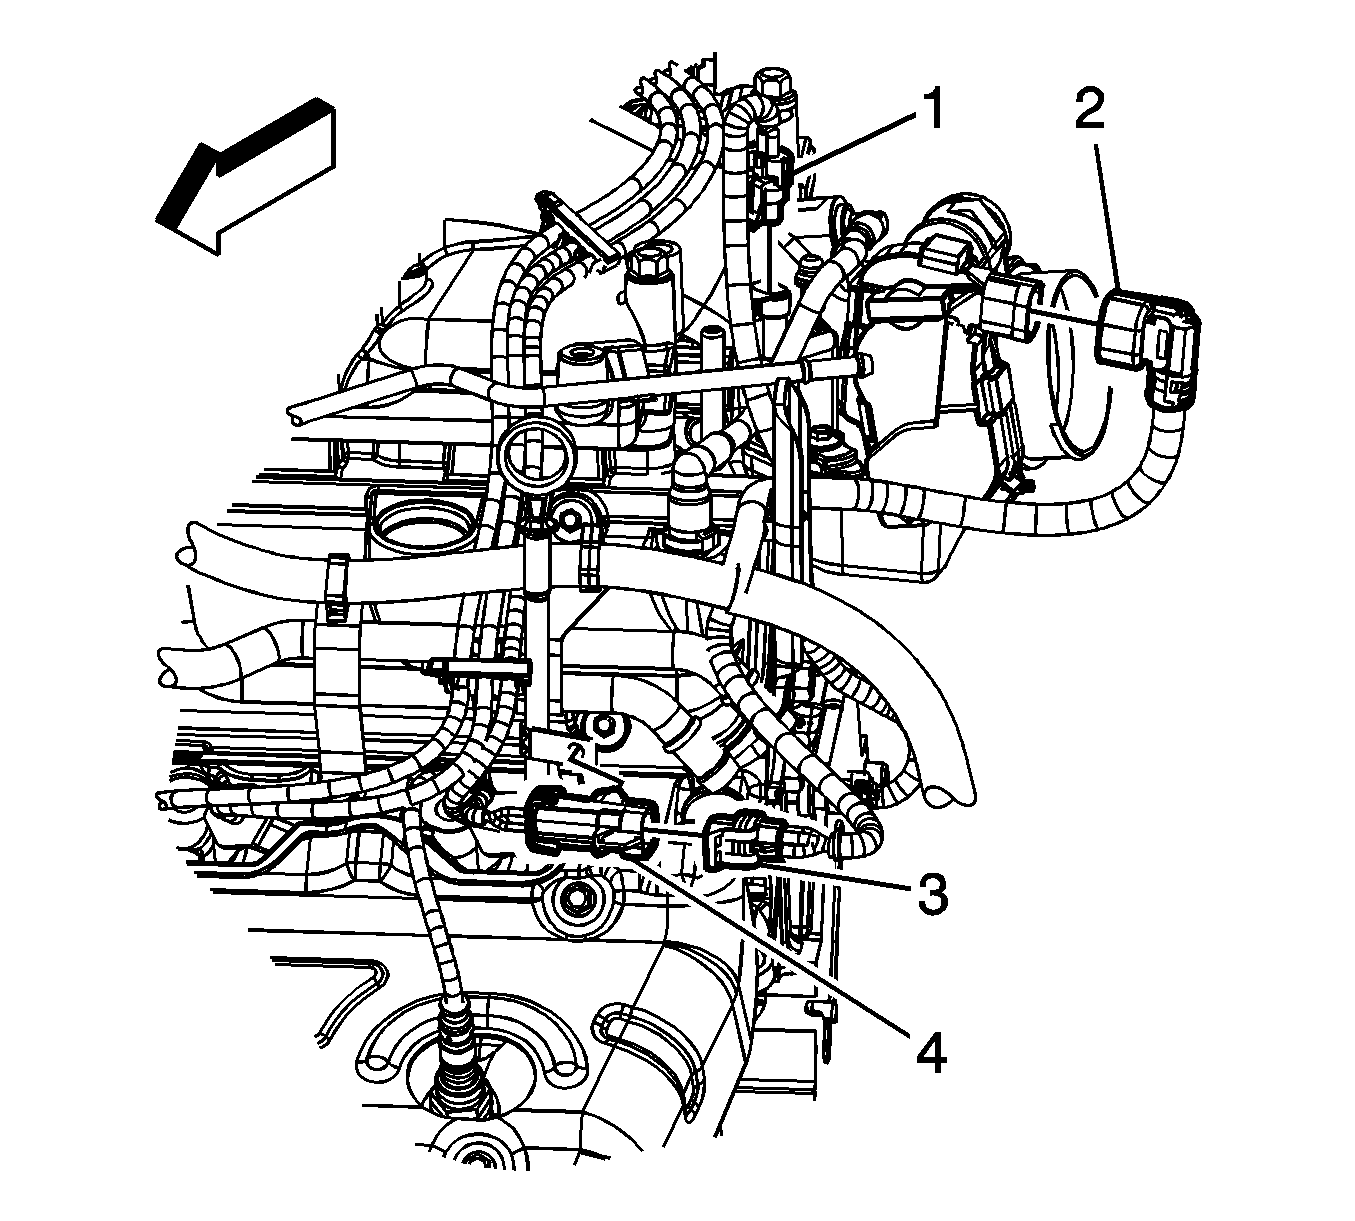
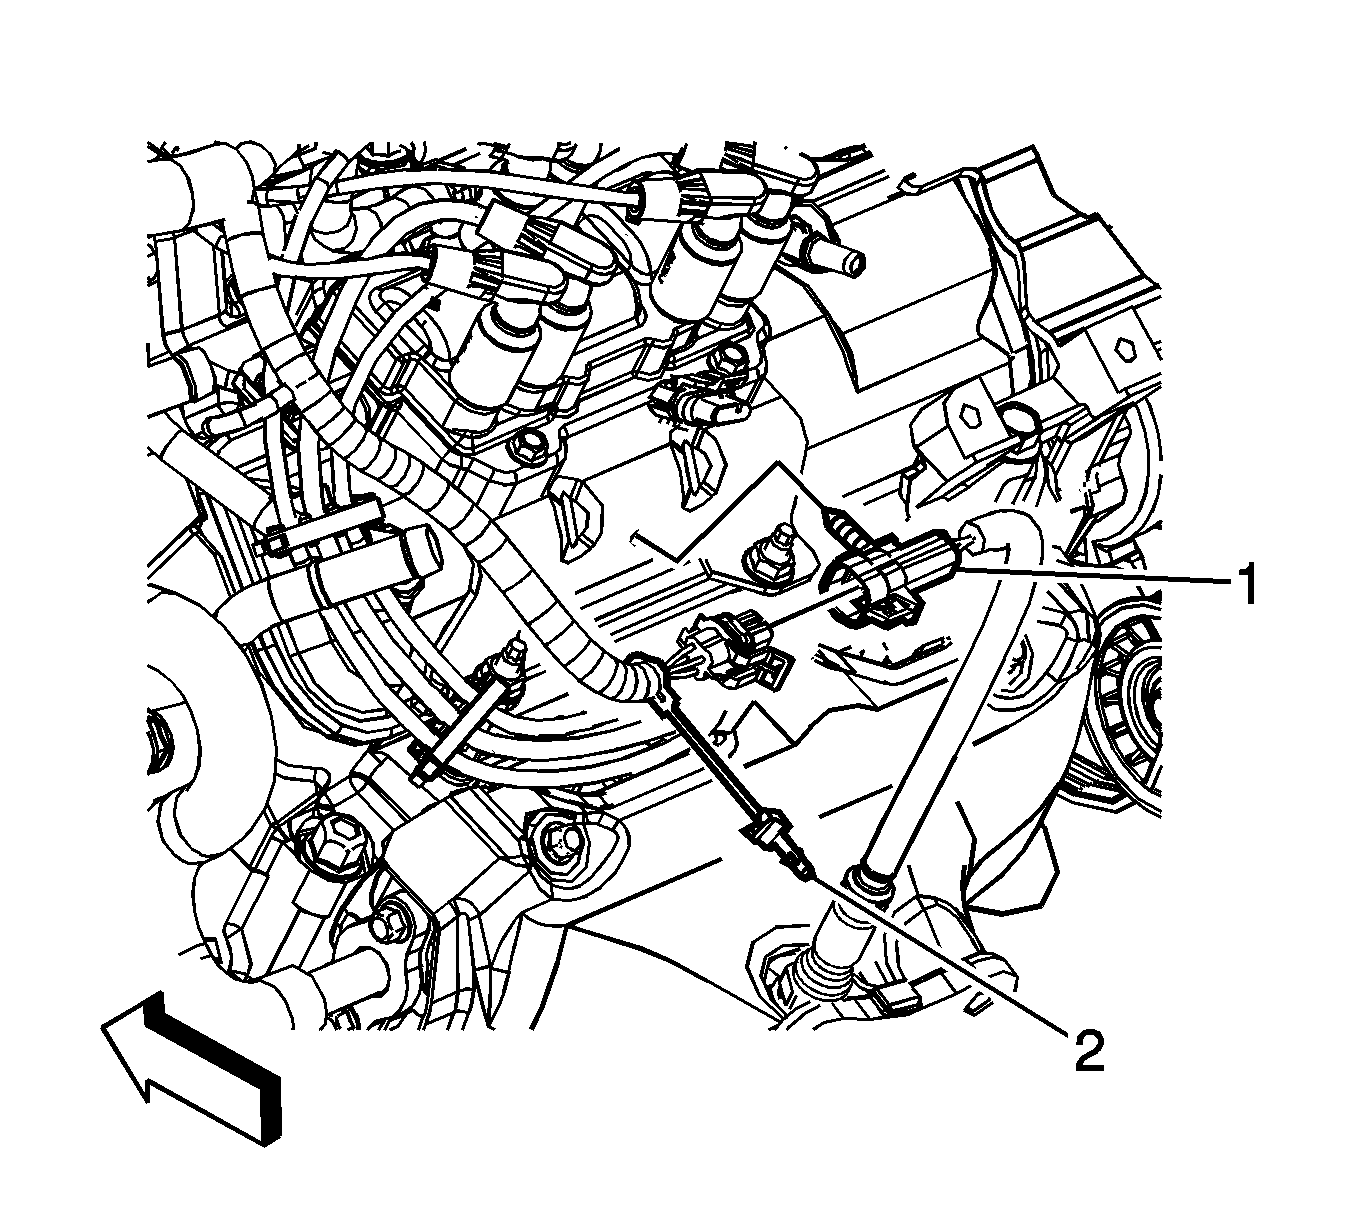
- Remove the connector position assurance (CPA) retainer (5).
- Disconnect the heated oxygen sensor (HO2S) electrical connector (4).
- Remove the HO2S clip (3) from the oil level indicator tube bracket.
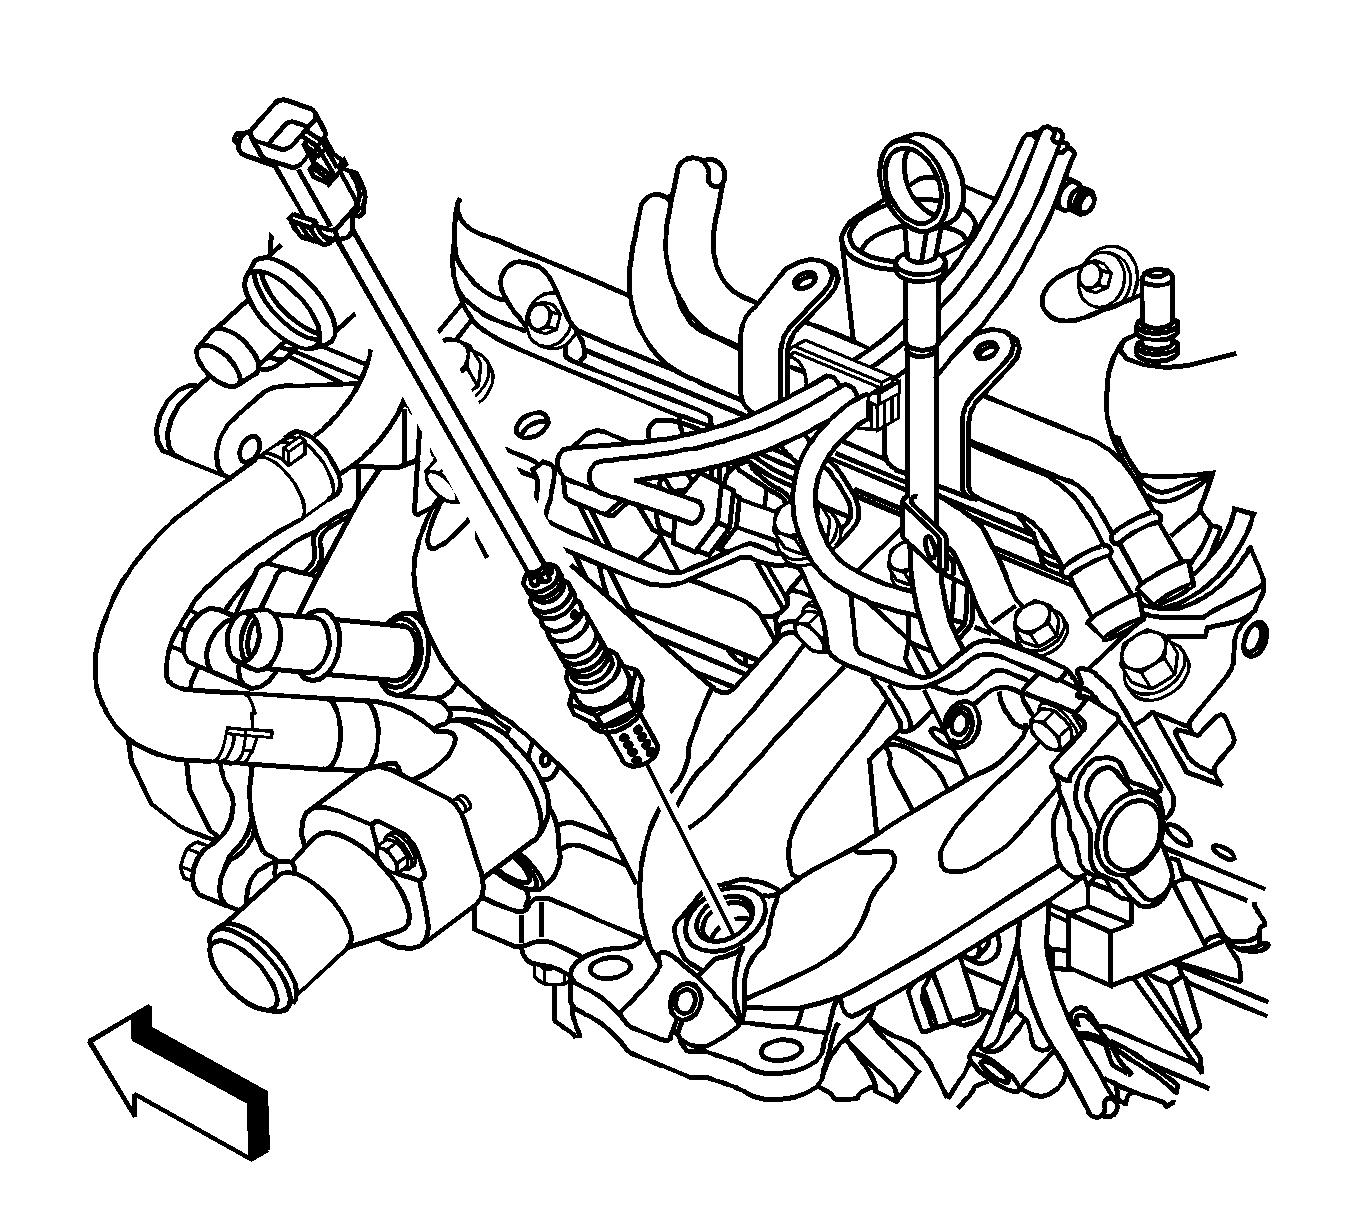
- Remove the HO2S using the J 39194-B .
- Remove the exhaust manifold heat shield bolts.
- Remove the exhaust manifold heat shield.
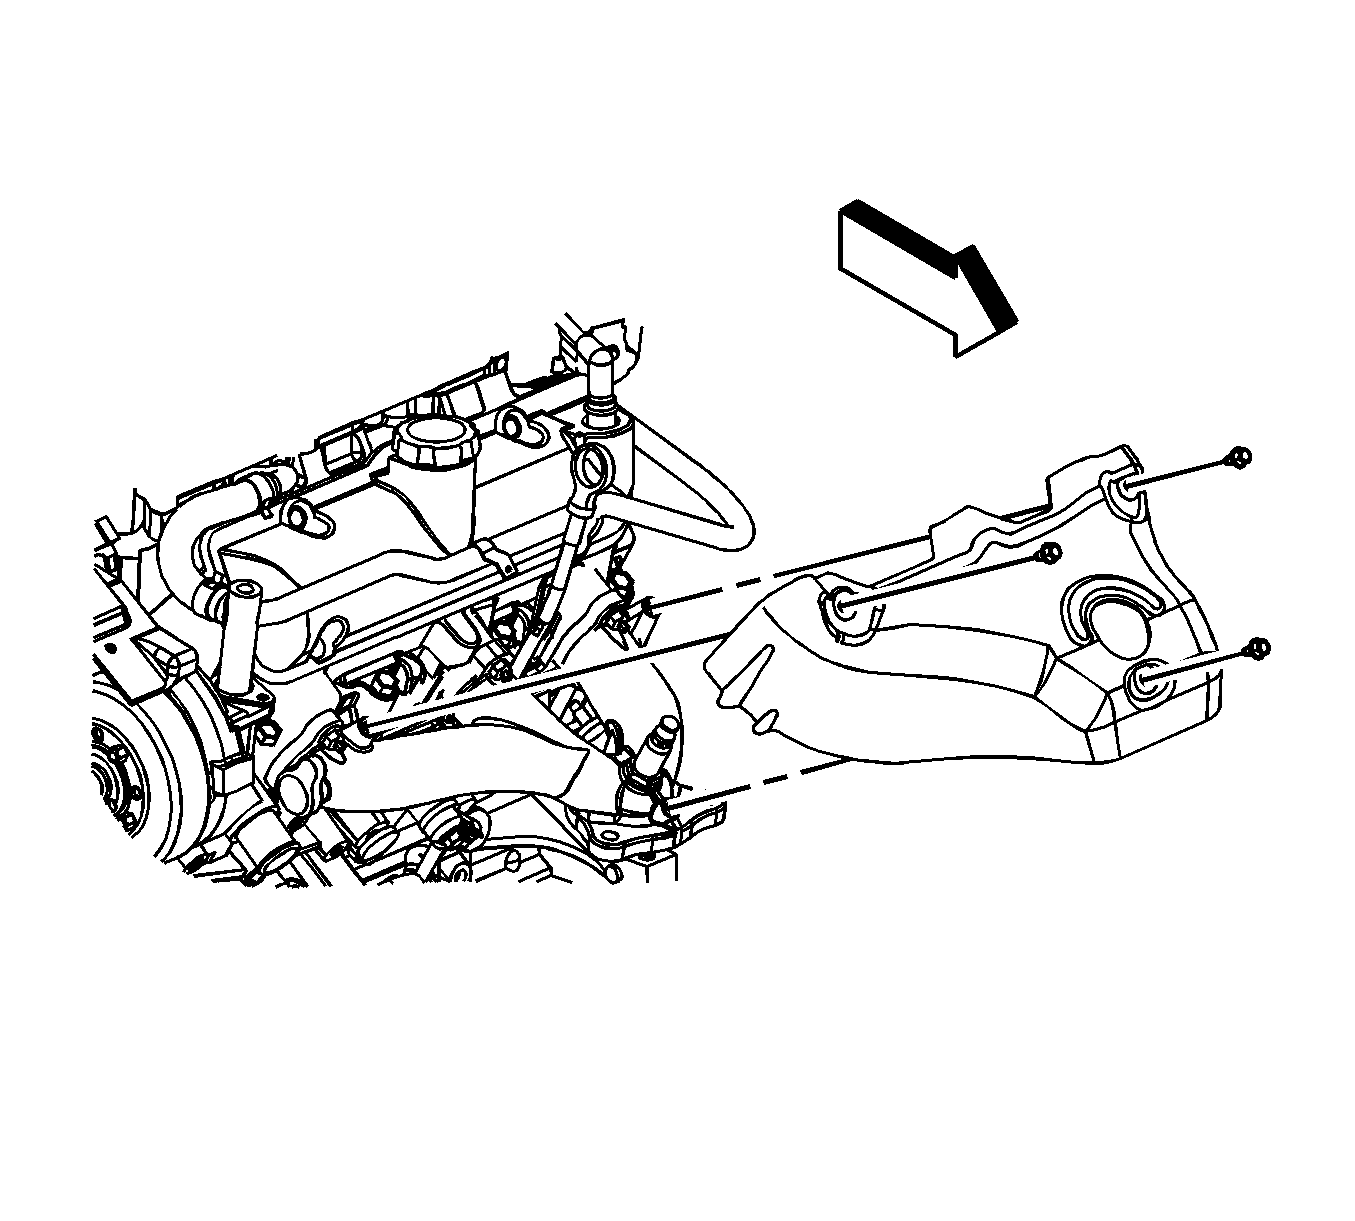
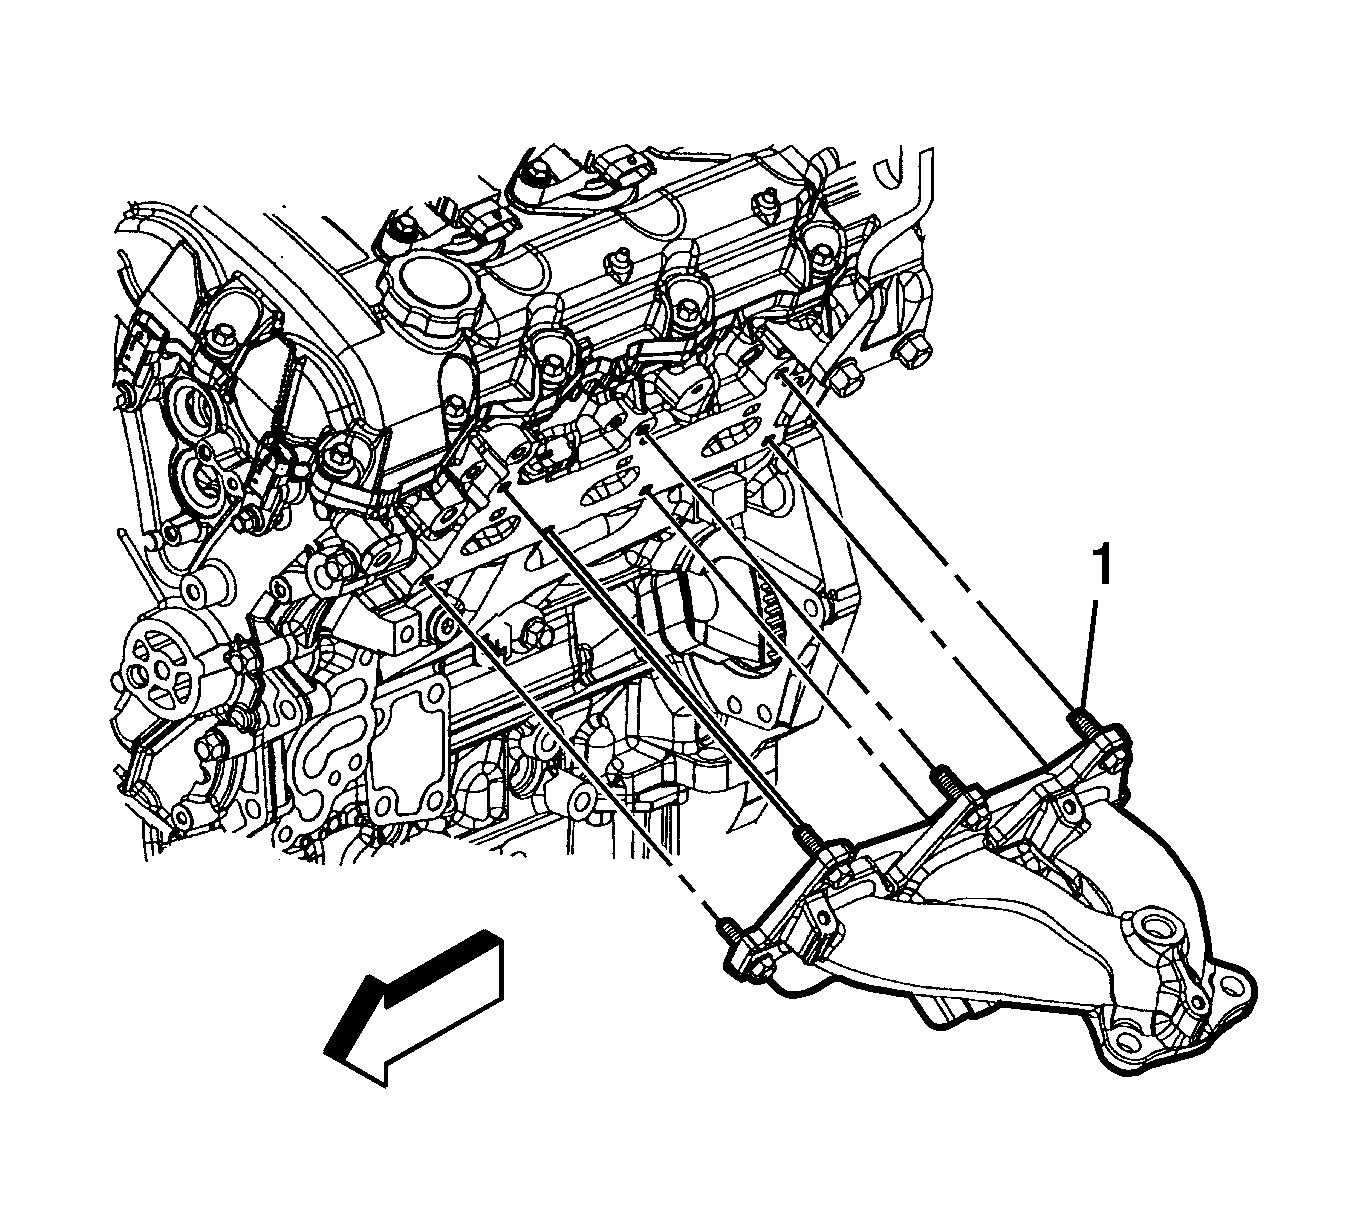
- Remove the upper exhaust manifold bolts.
- Raise and support the vehicle. Refer to Lifting and Jacking the Vehicle .
- Remove the left catalytic converter. Refer to Catalytic Converter Replacement - Left Side .
- Remove the lower exhaust manifold bolts.
- Remove the exhaust manifold.
- Remove and discard the exhaust manifold gasket.
Important: The HO2S uses a permanently attached pigtail and connector. This pigtail should not be removed from the sensor. Damage or removal of the pigtail or connector will affect proper operation of the sensor.
Installation Procedure
- Install a NEW exhaust manifold gasket onto the cylinder head studs.
- Install the exhaust manifold.
- Install the exhaust manifold bolts.
- Install the left catalytic converter. Refer to Catalytic Converter Replacement - Left Side .
- Lower the vehicle.
- Install the exhaust manifold heat shield.
- Install the exhaust manifold heat shield bolts.
- Install the HO2S using J 39194-B .
- Connect the HO2S electrical connector (1).
- Install the CPA retainer (2).
- Install the HO2S clip (3) to the oil level indicator tube bracket.
- Install the air cleaner outlet duct. Refer to Air Cleaner Outlet Duct Replacement .
Notice: Refer to Fastener Notice in the Preface section.
Tighten
Tighten the bolts to 20 N·m (15 lb ft).
Tighten
Tighten the bolts to 10 N·m (89 lb in).
Important: Whenever the oxygen sensor is removed, coat the threads with nickel-based anti-seize compound, such as GM P/N 5613695, or equivalent.
Tighten
Tighten the sensor to 42 N·m (31 lb ft).
Exhaust Manifold Replacement - Left Side LZ4
Tools Required
J 39194-B Heated Oxygen Sensor Wrench
Removal Procedure
- Remove the air cleaner outlet duct. Refer to Air Cleaner Outlet Duct Replacement .
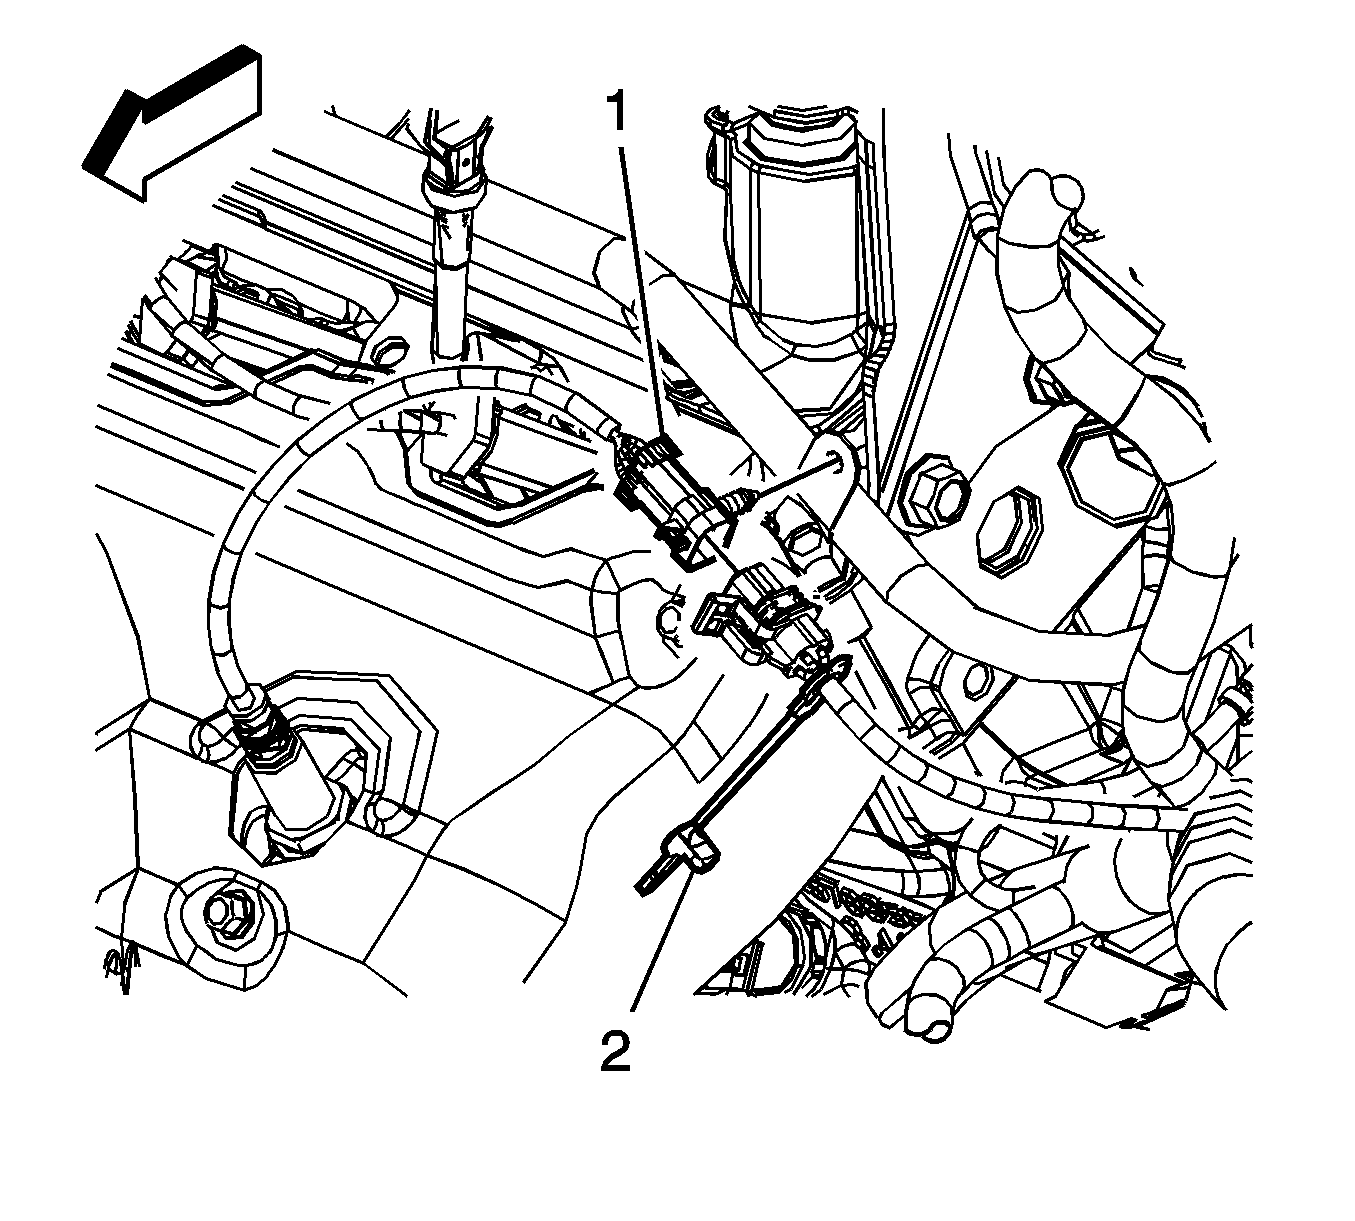
- Remove the connector position assurance (CPA) retainer (2).
- Disconnect the heated oxygen sensor (HO2S) electrical connector (1).
- Remove the HO2S using the J 39194-B .
- Remove the exhaust manifold heat shield bolts and shield.
- Remove the upper exhaust manifold nuts.
- Raise and support the vehicle. Refer to Lifting and Jacking the Vehicle .
- Remove the left catalytic converter. Refer to Catalytic Converter Replacement - Left Side .
- Remove the lower exhaust manifold nuts.
- Remove the exhaust manifold.
- Remove and discard the exhaust manifold gasket.
Important: The HO2S uses a permanently attached pigtail and connector. This pigtail should not be removed from the sensor. Damage or removal of the pigtail or connector will affect proper operation of the sensor.
Installation Procedure
- Install a NEW exhaust manifold gasket onto the cylinder head studs.
- Install the exhaust manifold.
- Install the exhaust manifold nuts.
- Install the left catalytic converter. Refer to Catalytic Converter Replacement - Left Side .
- Install the exhaust manifold heat shield and bolts.
- Install the HO2S using J 39194-B .
- Connect the HO2S electrical connector (1).
- Install the CPA retainer (2).
- Ensure that the connector rosebud is attached to the clip.
- Install the air cleaner outlet duct. Refer to Air Cleaner Outlet Duct Replacement .
Notice: Refer to Fastener Notice in the Preface section.
Tighten
Tighten the nuts to 16 N·m (12 lb ft).
Tighten
Tighten the bolts to 10 N·m (89 lb in).
Important: Whenever the oxygen sensor is removed, coat the threads with nickel-based anti-seize compound, such as GM P/N 5613695, or equivalent.
Tighten
Tighten the sensor to 42 N·m (31 lb ft).
Exhaust Manifold Replacement - Left Side LY7
Removal Procedure
Caution: Refer to Exhaust Service Caution in the Preface section.
Caution: Refer to Protective Goggles and Glove Caution in the Preface section.
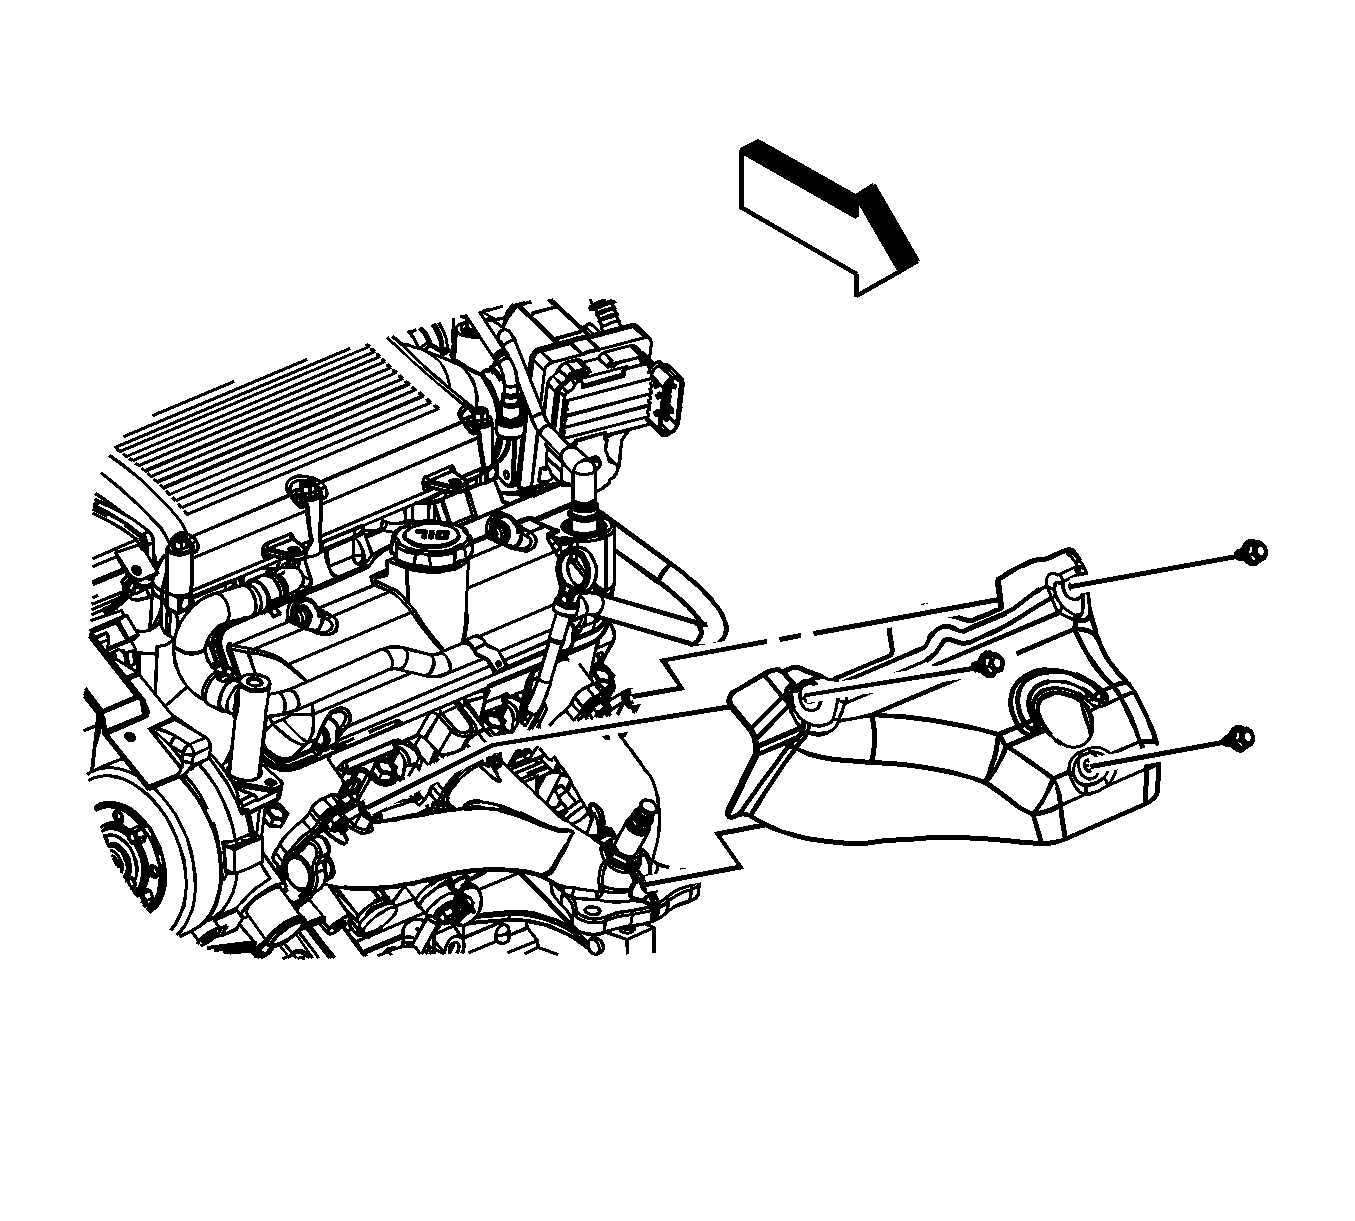
- Remove the exhaust manifold heat shield. Refer to Exhaust Manifold Heat Shield Replacement - Left Side .
- Remove the oil level indicator. Refer to Oil Level Indicator and Tube Replacement .
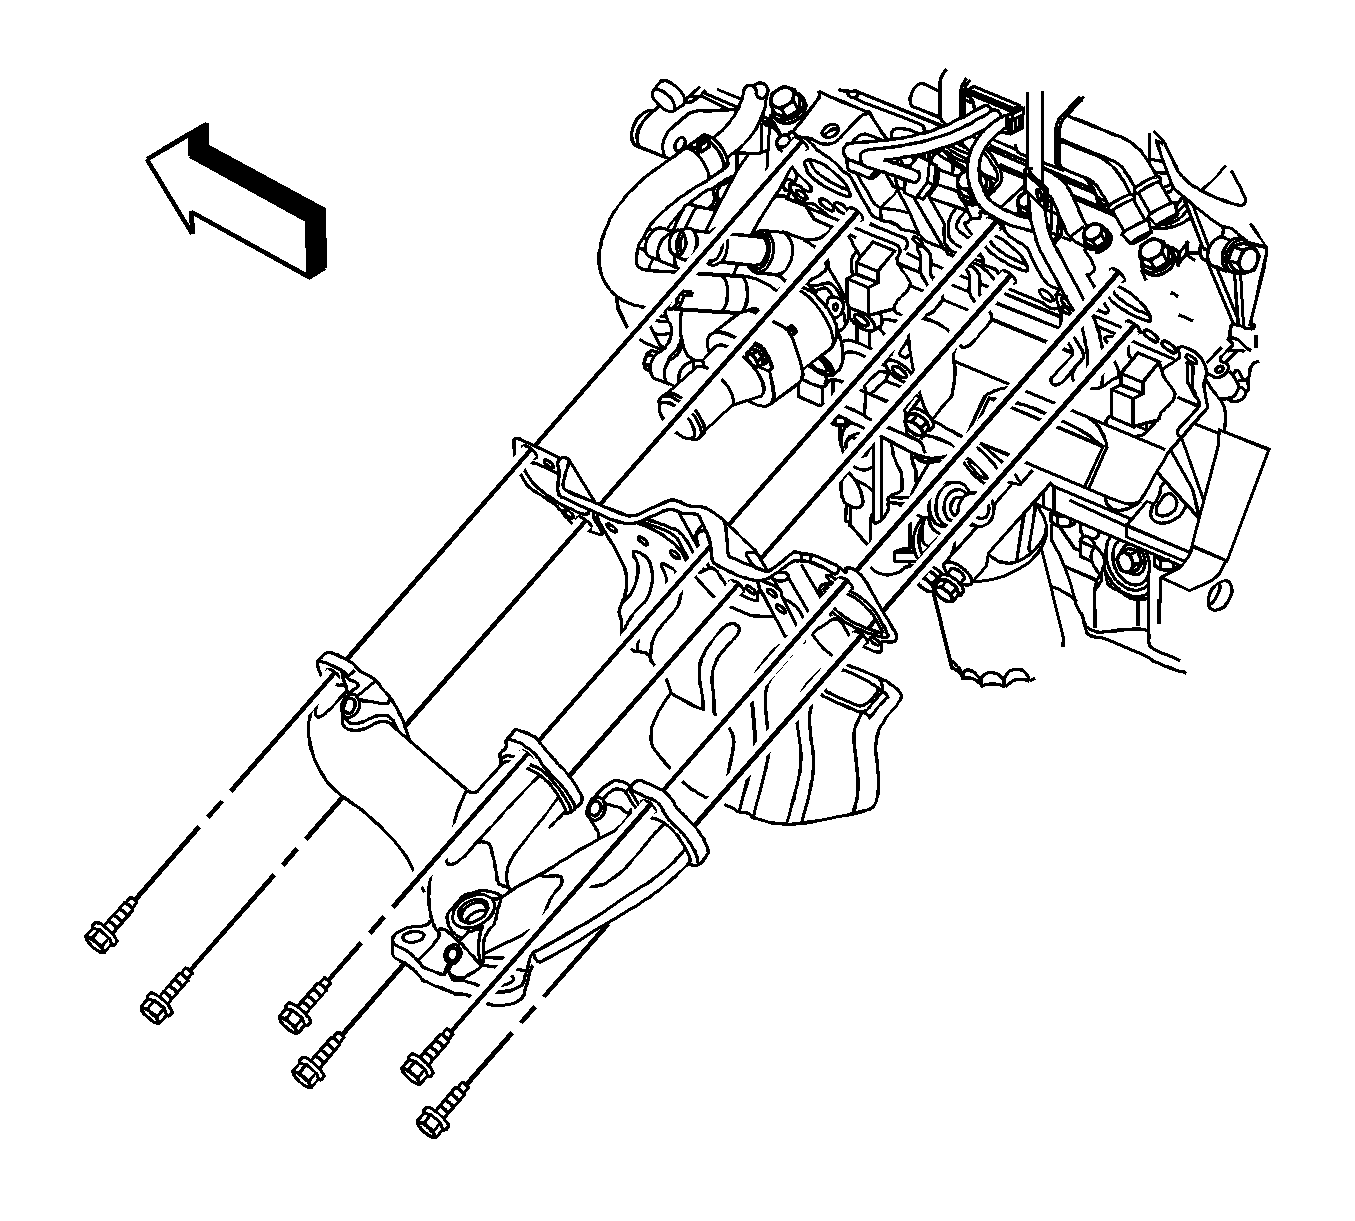
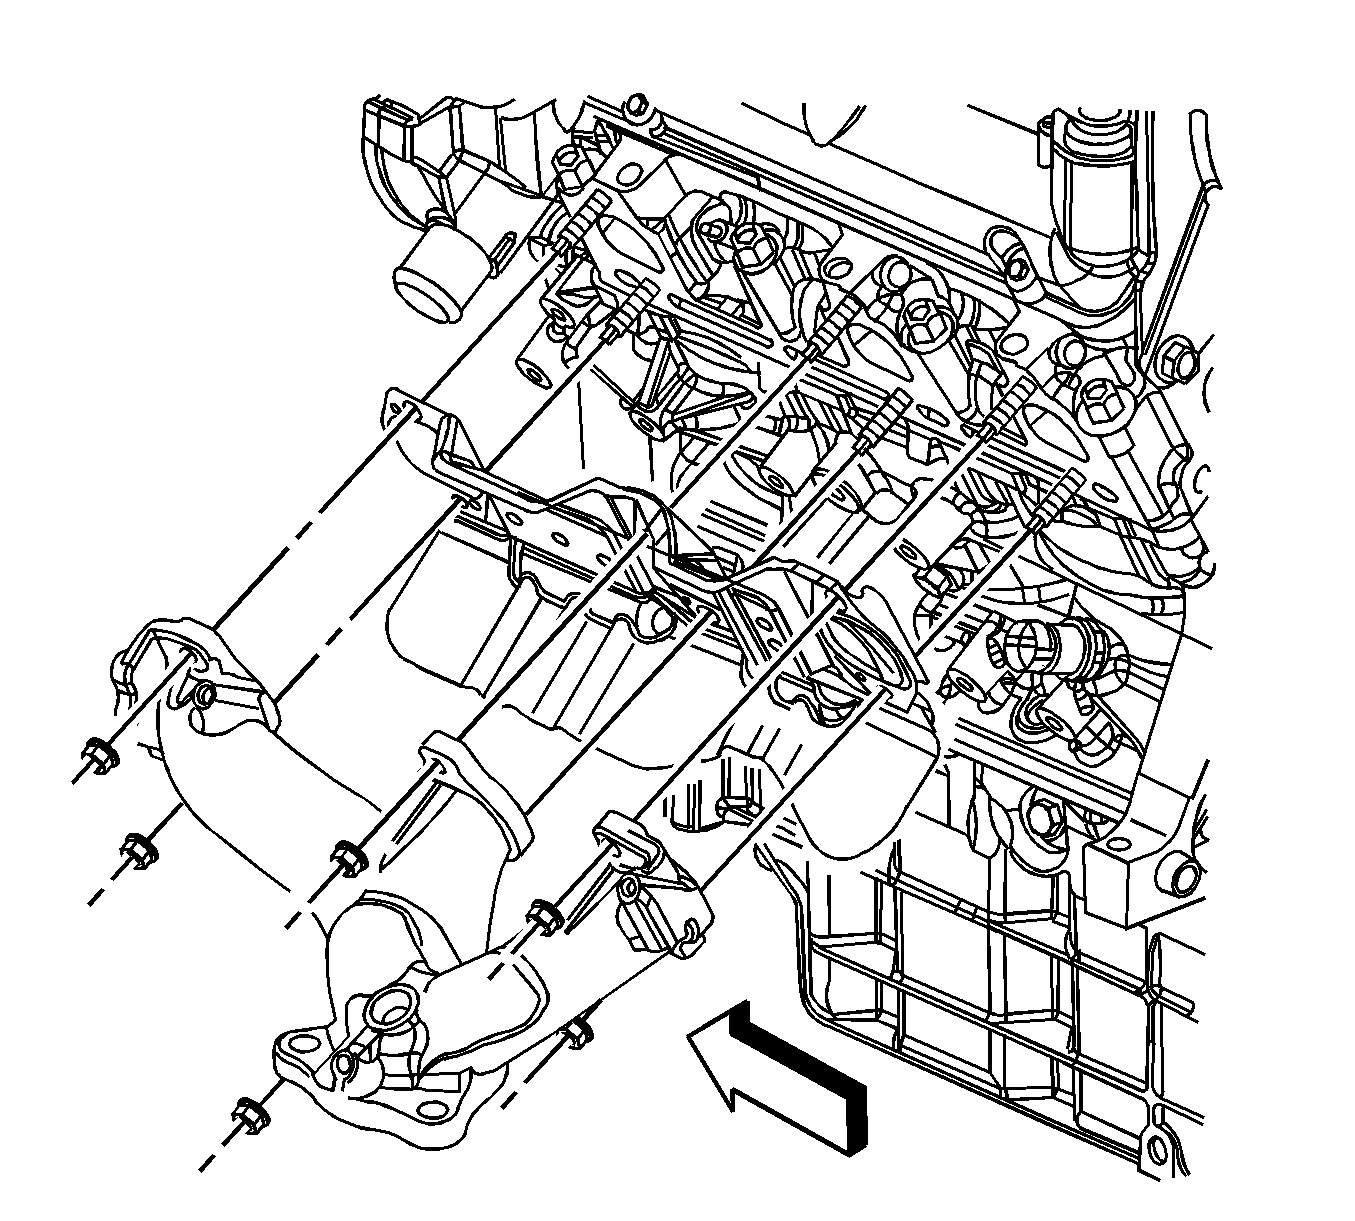
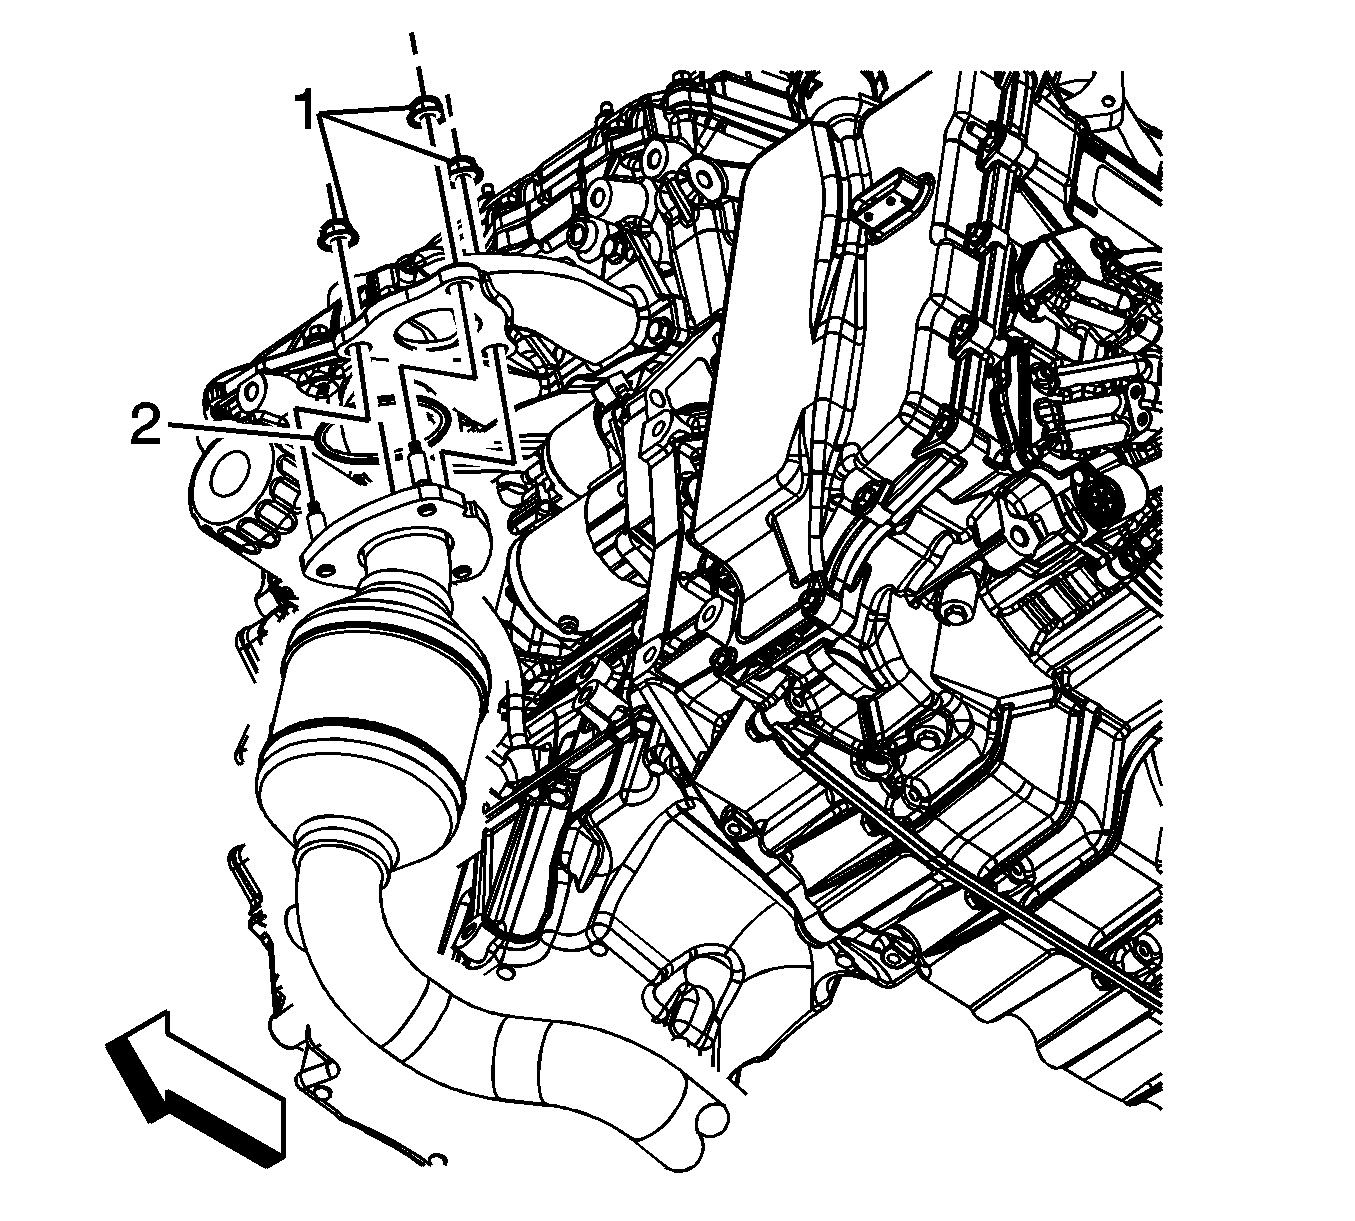
- Remove the catalytic converter to exhaust manifold nuts (1).
- Remove the exhaust manifold bolts (1).
- Remove the exhaust manifold and gasket. Discard the gasket.
Installation Procedure
- Install one exhaust manifold bolt to the exhaust manifold.
- Install the NEW exhaust manifold gasket onto the cylinder head and bolt.
- Install the exhaust manifold (with gasket) to the catalytic converter and the cylinder head.
- Install the remaining exhaust manifold bolts (1).
- Install the catalytic converter to exhaust manifold nuts (1).
- Install the oil level indicator. Refer to Oil Level Indicator and Tube Replacement .
- Install the exhaust manifold heat shield. Refer to Exhaust Manifold Heat Shield Replacement - Left Side .
- Inspect for exhaust leaks.
Notice: Refer to Fastener Notice in the Preface section.
Tighten
Tighten the bolts to 20 N·m (15 lb ft).
Tighten
Tighten the nuts to 45 N·m (33 lb ft).
