Removal Procedure
Tools Required
J 41101
Transaxle Connector Remover
- Remove the transmission side cover. Refer to
Control Valve Body Cover Replacement
.
- Remove the control valve body. Refer to
Control Valve Body Replacement
.

- Push the
J 41101
onto the pass-through connector from the outside of the transmission case in order to compress the pass-through
connector's retaining tabs.
- With the retaining tabs compressed, use a screwdriver in order to remove the pass-through connector through the inside of the transmission case.
- Remove the wiring harness (11).
Installation Procedure
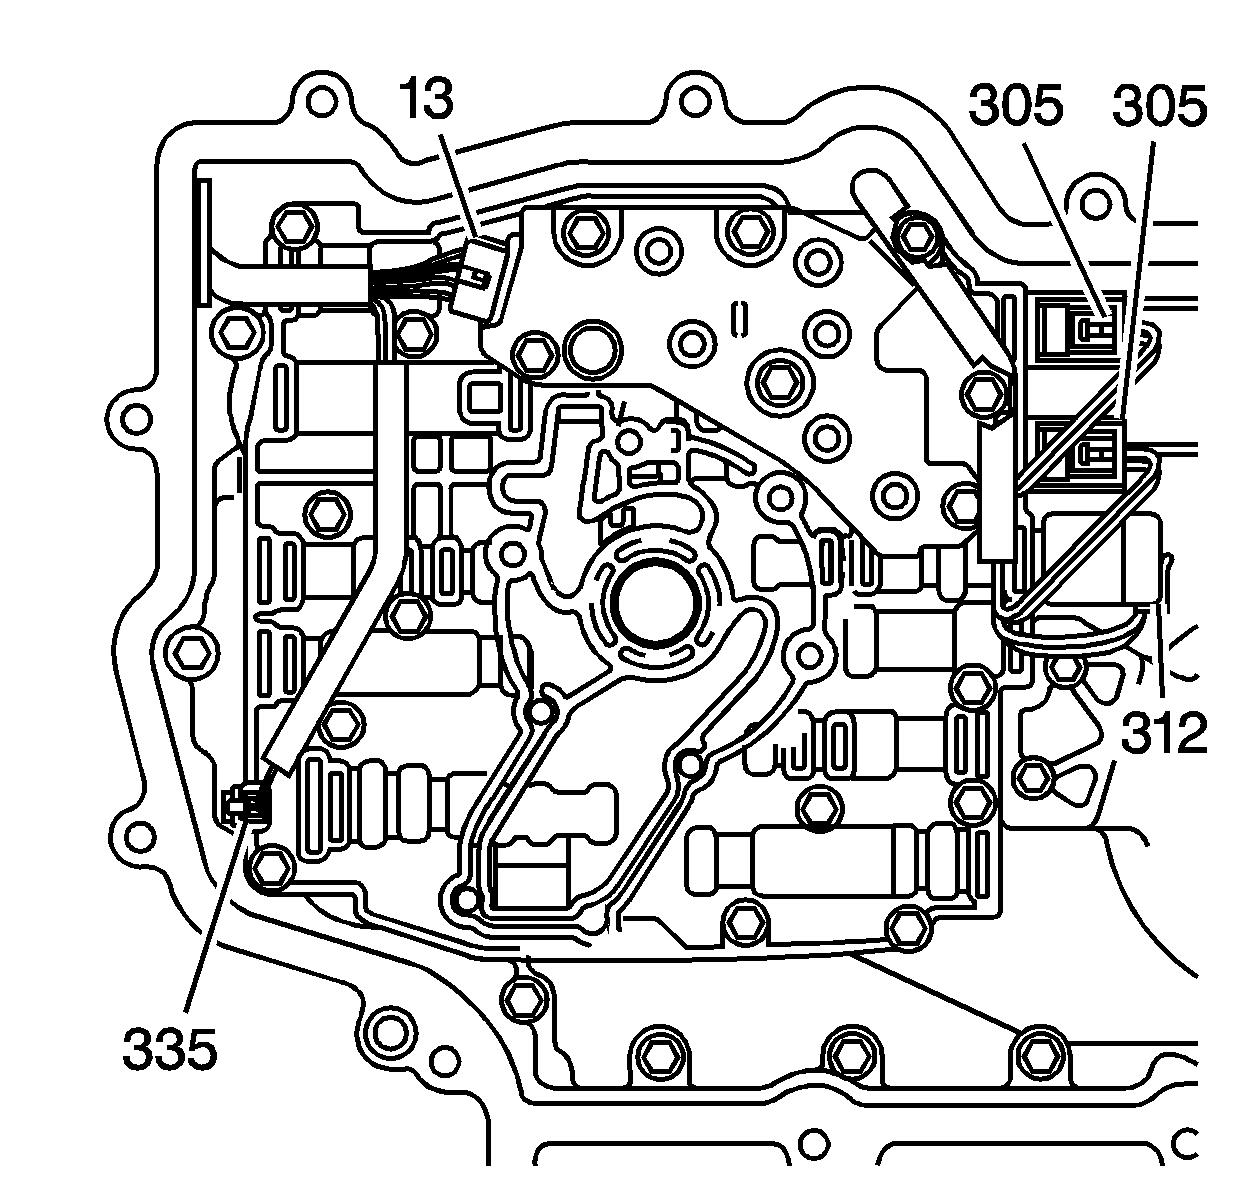
Connect the wiring harness assembly to the following components:
| • | The TFP switch assembly (13) |
| • | The pressure control solenoid (312) (red connector) |
| | Important: The 1-2 shift solenoids wires are red and light green. The 2-3 shift solenoid wires are red and yellow.
|
| • | The 1-2 shift solenoid (305) (white connector) |
| • | The 2-3 shift solenoids (305) (white connectors) |
| | Important: It is recommended that transmission adaptive pressure (TAP) information be reset.
Resetting the TAP values using a scan tool will erase all learned values in all cells. As a result, The ECM, PCM or TCM will
need to relearn TAP values. Transmission performance may be affected as new TAP values are learned.
|
