For 1990-2009 cars only
Instrument Panel Compartment Replacement LHD
Removal Procedure
- Remove the instrument panel insulator panel - right side. Refer to Instrument Panel Insulator Panel Replacement - Left Side.
- Remove the instrument panel outer trim cover. Refer to Instrument Panel Outer Trim Cover Replacement.
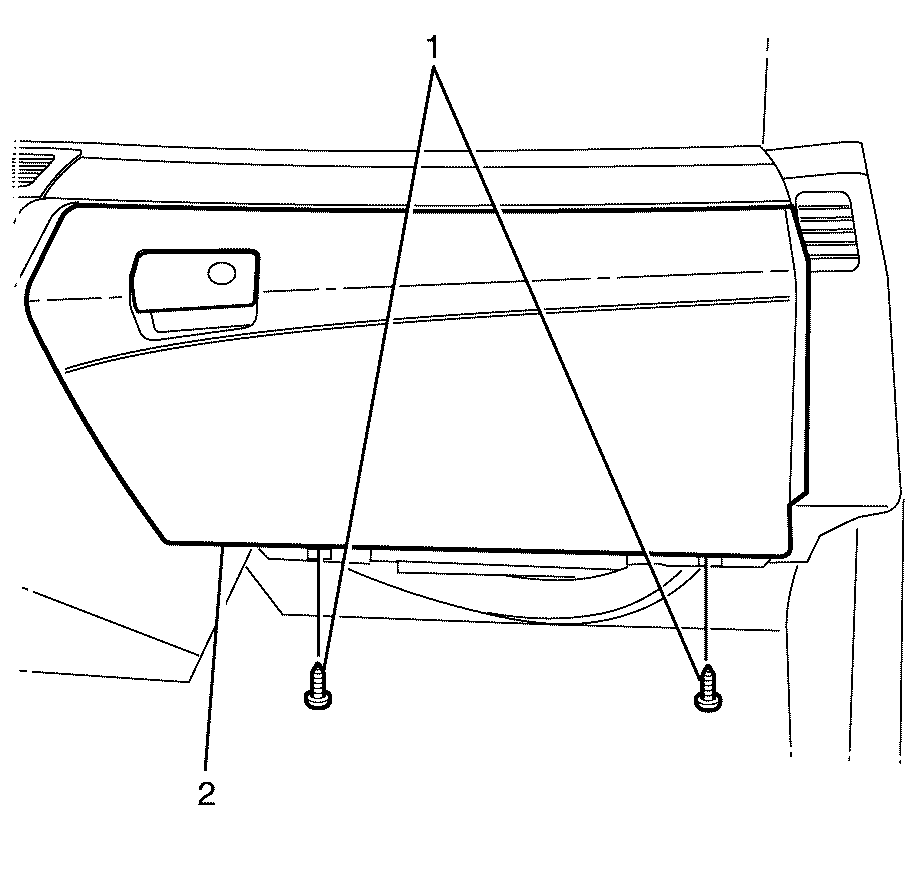
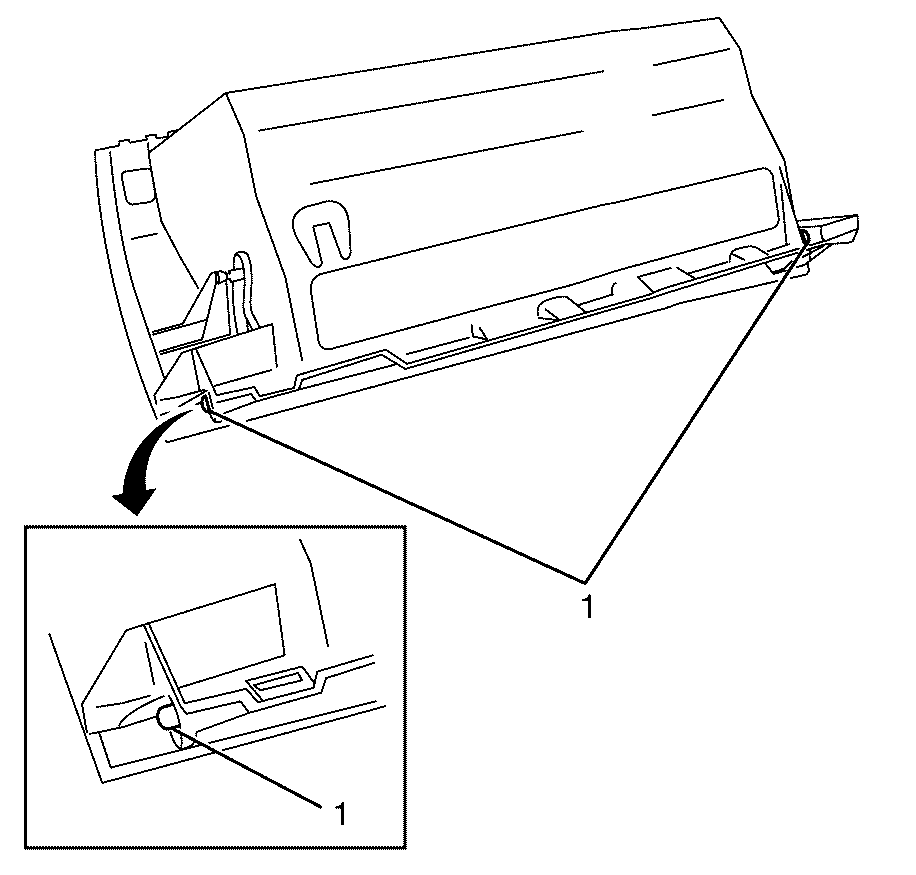
- Remove the I/P compartment assembly lower retaining screws (1).
- Open the I/P compartment assembly door (2).
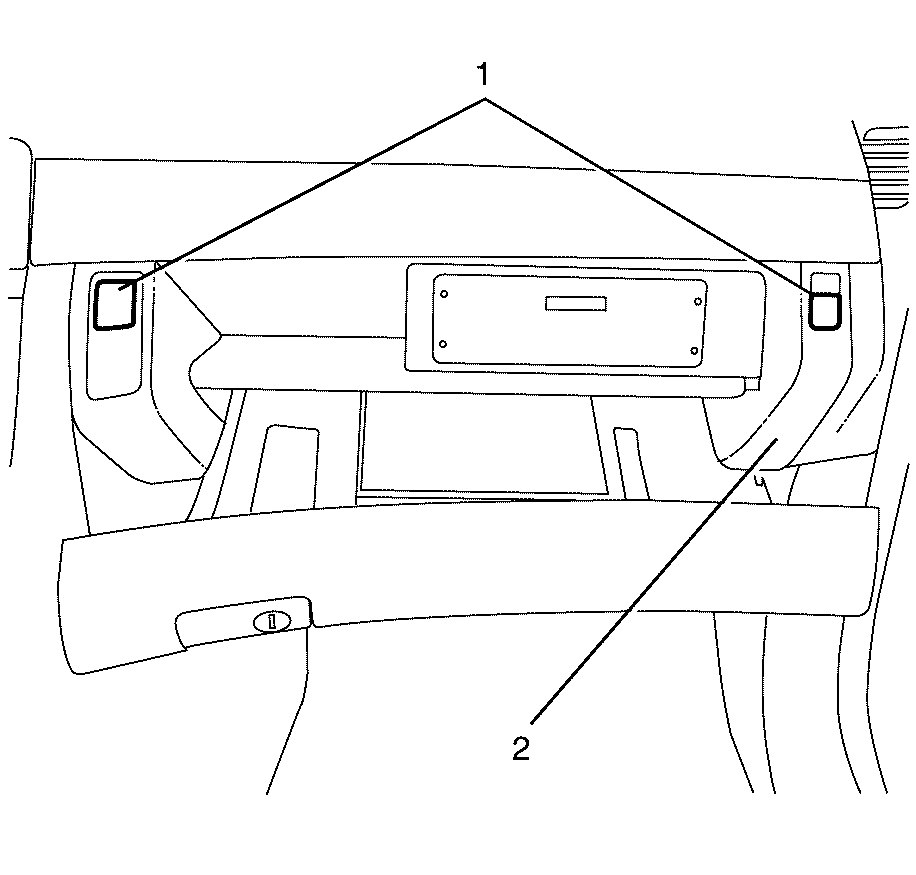
- Remove the I/P compartment retaining screw covers (1) from the I/P compartment (2).
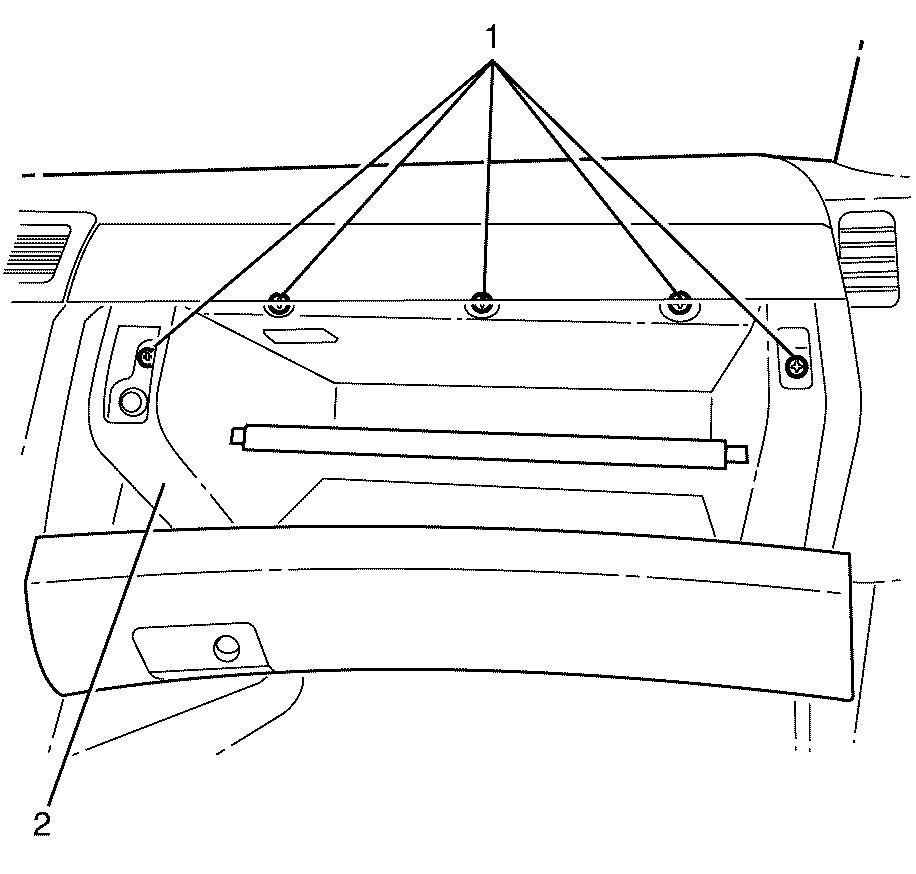
- Remove the I/P compartment upper retaining screws (1).
- Remove the I/P compartment (2).
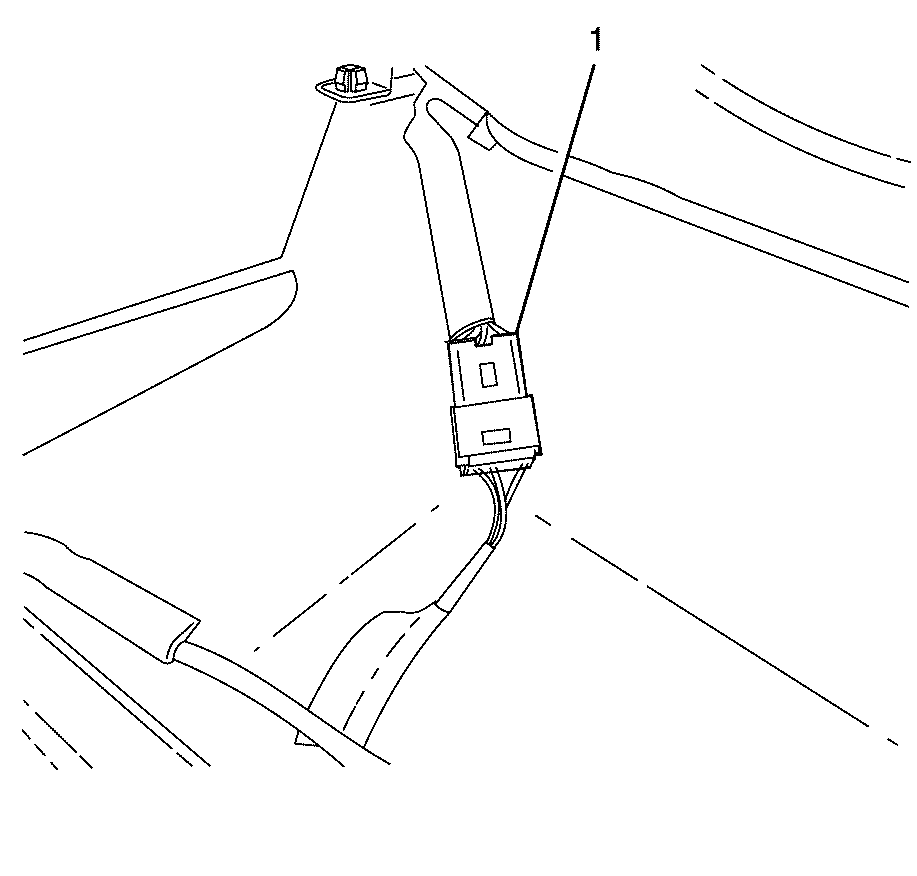
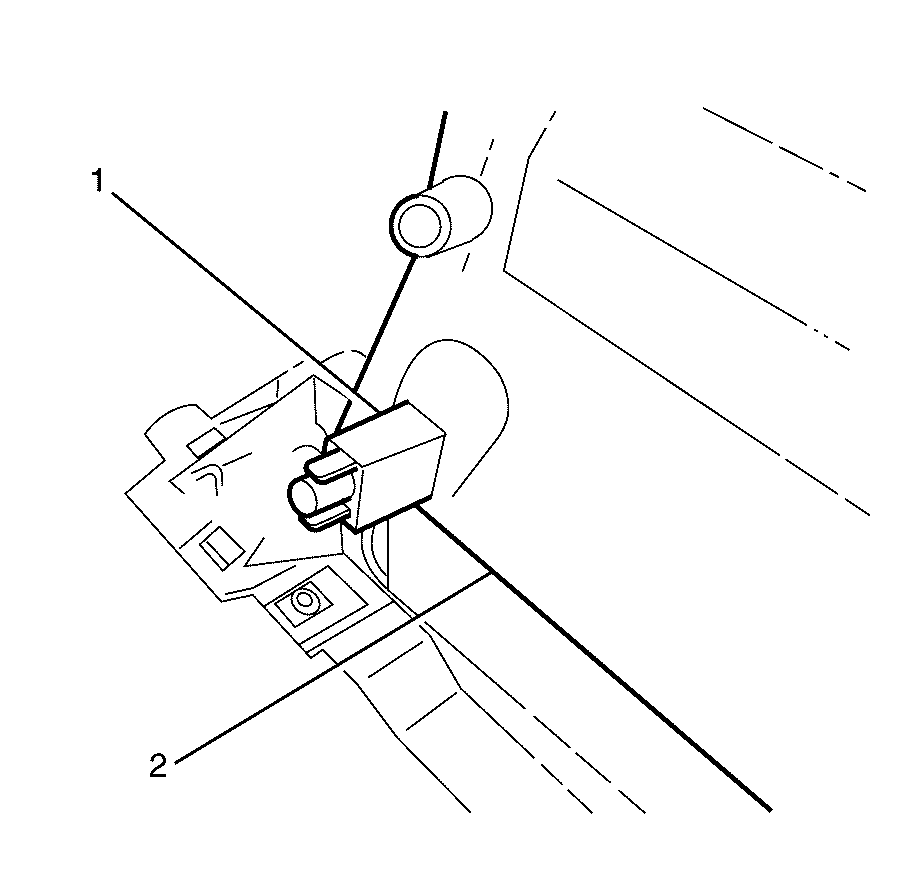
- Disconnect the I/P compartment electrical connector (1) from the I/P compartment wiring harness.
Disassemble Procedure
- Disconnect the I/P compartment lamp electrical connectors (1), where fitted.
- Disconnect the rear compartment release button electrical connector (3), where fitted.
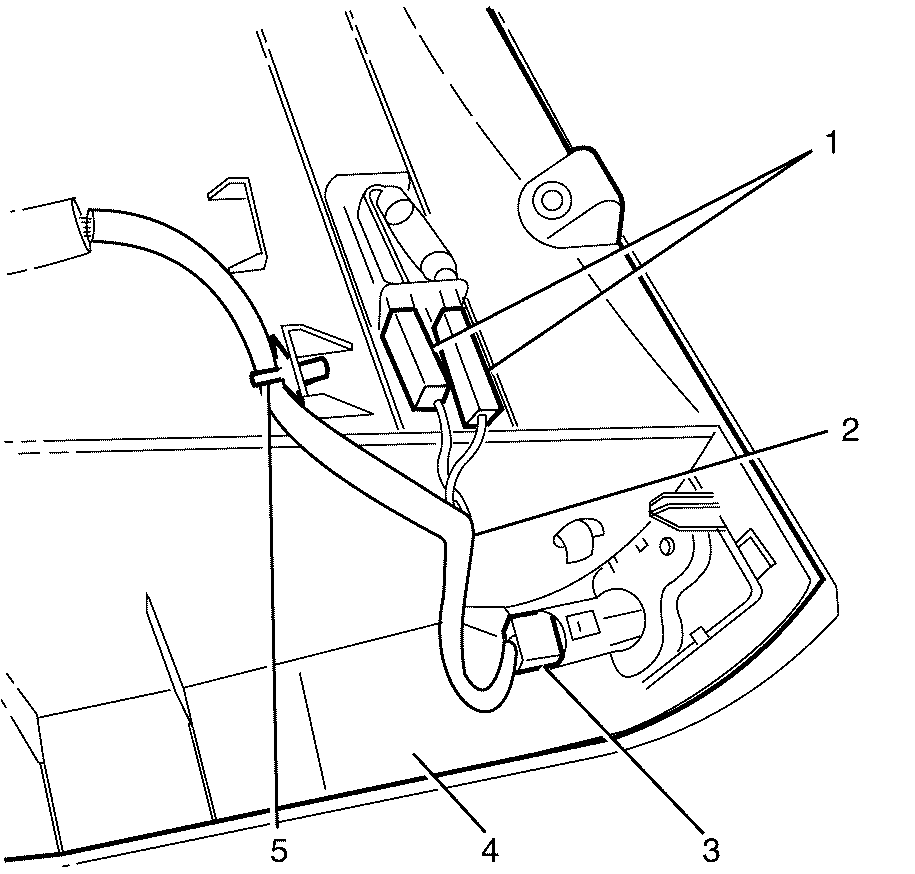
- Detach the I/P compartment electrical harness retaining clip (5) and harness (2) from the I/P compartment (4)
- Disconnect the I/P compartment lamp switch electrical connectors (4), where fitted.
- Detach the wiring harness retaining clips (3) from the I/P compartment (2).
- Remove the I/P compartment wiring harness (1) from the I/P compartment (2).
- Remove the rear compartment release button (1) from the I/P compartment (3).
- Remove the I/P compartment lamp (3), where fitted, by releasing the I/P compartment lamp retaining clip (2) and pushing it through the I/P compartment (1),.
- Remove the I/P compartment lamp switch (1) from the I/P compartment (2), where fitted
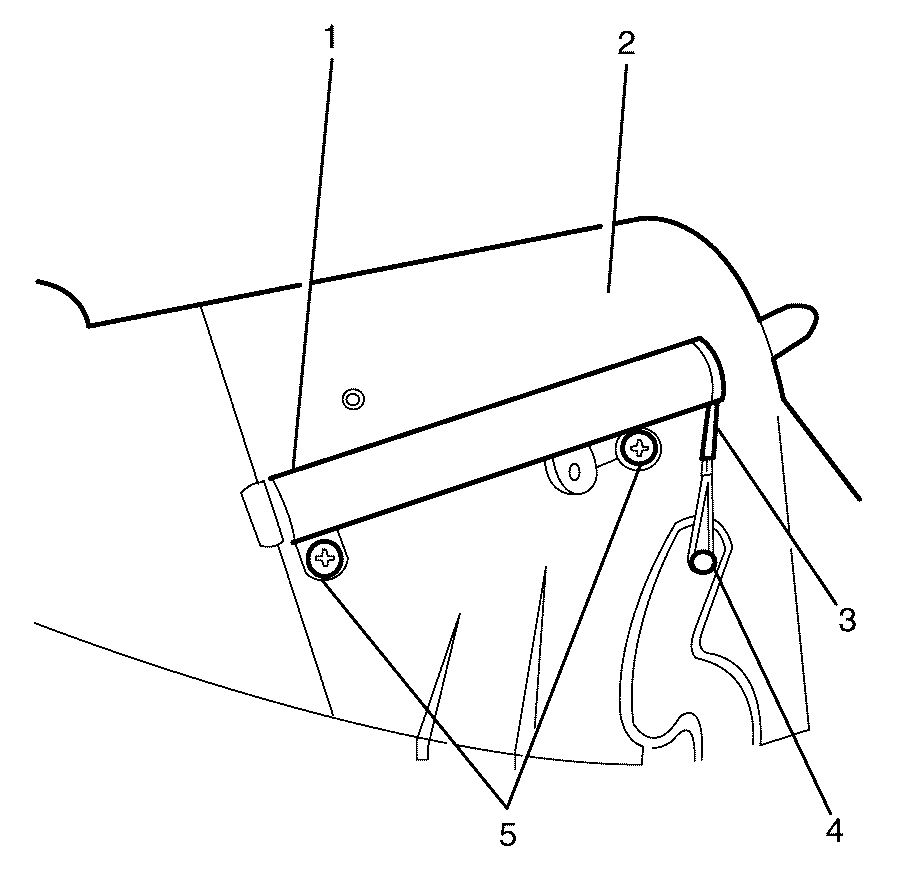
- Remove the I/P compartment damper cord (3) by detaching it from the securing hook (4).
- Remove the I/P compartment damper retaining screws (5).
- Remove the I/P compartment damper (1) from the I/P compartment (2).
- Remove the I/P compartment door hinge retaining pins (1) and remove the I/P compartment door.

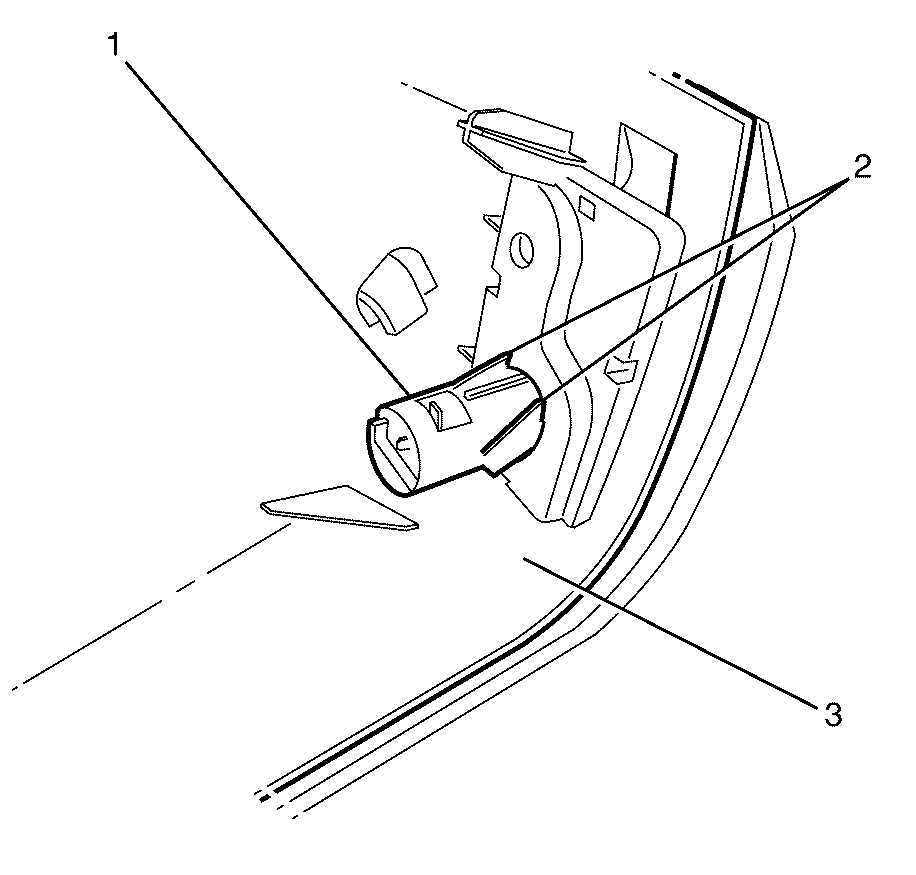
Important: Press the retaining clips (2) and push the rear compartment release button (1) through the I/P compartment (3) to remove.

Assemble Procedure
- Align the I/P compartment door with the I/P compartment.
- Install the I/P compartment door hinge retaining pins (1) to the I/P compartment door.
- Install the I/P compartment damper (1) to the I/P compartment (2).
- Install the I/P compartment damper retaining screws (5).
- Install the I/P compartment damper cord (3) by attaching it to the securing hook (4).
- Install the I/P compartment lamp switch (1), where fitted, to the I/P compartment (2).
- Install the I/P compartment lamp (3), where fitted, by pushing it through the I/P compartment (1).
- Ensure the I/P compartment lamp retaining clip (2) is fully engaged.
- Install the rear compartment release button (1), where fitted, to the I/P compartment (3), listen for an audible click to confirm fitting.
- Position the I/P compartment wiring harness (1) to the I/P compartment (2).
- Attach the I/P compartment wiring harness retaining clips (3).
- Connect the I/P compartment lamp switch electrical connectors (4), where fitted.
- Position the I/P compartment harness (2) and attach the I/P compartment wiring harness retaining clip (5) to the I/P compartment (4).
- Connect the rear compartment release button electrical connector (3), where fitted.
- Connect the I/P compartment lamp electrical connectors (1), where fitted
Tighten
Tighten the screws to 2 N·m (18 lb in).
Important: Listen for audible click to confirm correct fitting
Important: Listen for audible click to confirm correct fitting
Installation Procedure
- Connect the I/P compartment electrical connector (1) to the I/P compartment.
- Install the I/P compartment (2).
- Install the I/P compartment upper retaining screws (1).
- Install the I/P compartment retaining screw covers (1) to the I/P compartment (2)
- Close the I/P compartment assembly door (2).
- Install the I/P compartment lower retaining screws (1).
- Install the instrument panel outer trim cover. Refer to Instrument Panel Outer Trim Cover Replacement.
- Install the instrument panel insulator panel - right side. Refer to Instrument Panel Insulator Panel Replacement - Left Side.
- Test all electrical components for corrected operation.
Notice: Refer to Fastener Notice in the Preface section.
Tighten
Tighten the screws (1) to 2 N·m (18 lb in).
Notice: Refer to Fastener Notice in the Preface section.
Tighten
Tighten the screws (1) to 2 N·m (18 lb in).
