Starter Replacement 3.6L
Removal Procedure
- Raise and support the vehicle. Refer to Lifting and Jacking the Vehicle.
- Ignition OFF.
- Disconnect the battery negative cable. Refer to Battery Negative Cable Disconnection and Connection.
- Remove the right catalytic converter from the vehicle. Refer to Catalytic Converter Replacement - Right Side.
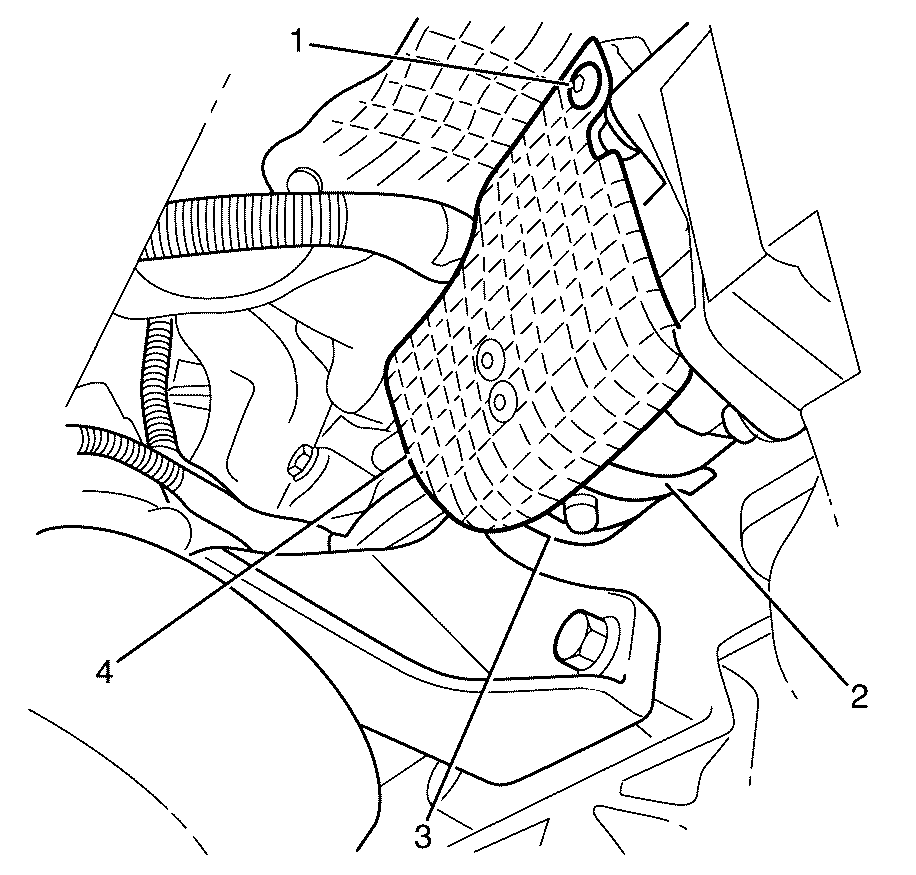
- Remove the starter motor heat shield to starter motor retaining screw (1).
- Detach the starter motor heat shield to starter motor retaining clip (2) from the starter motor (3).
- Remove the starter motor heat shield (4).
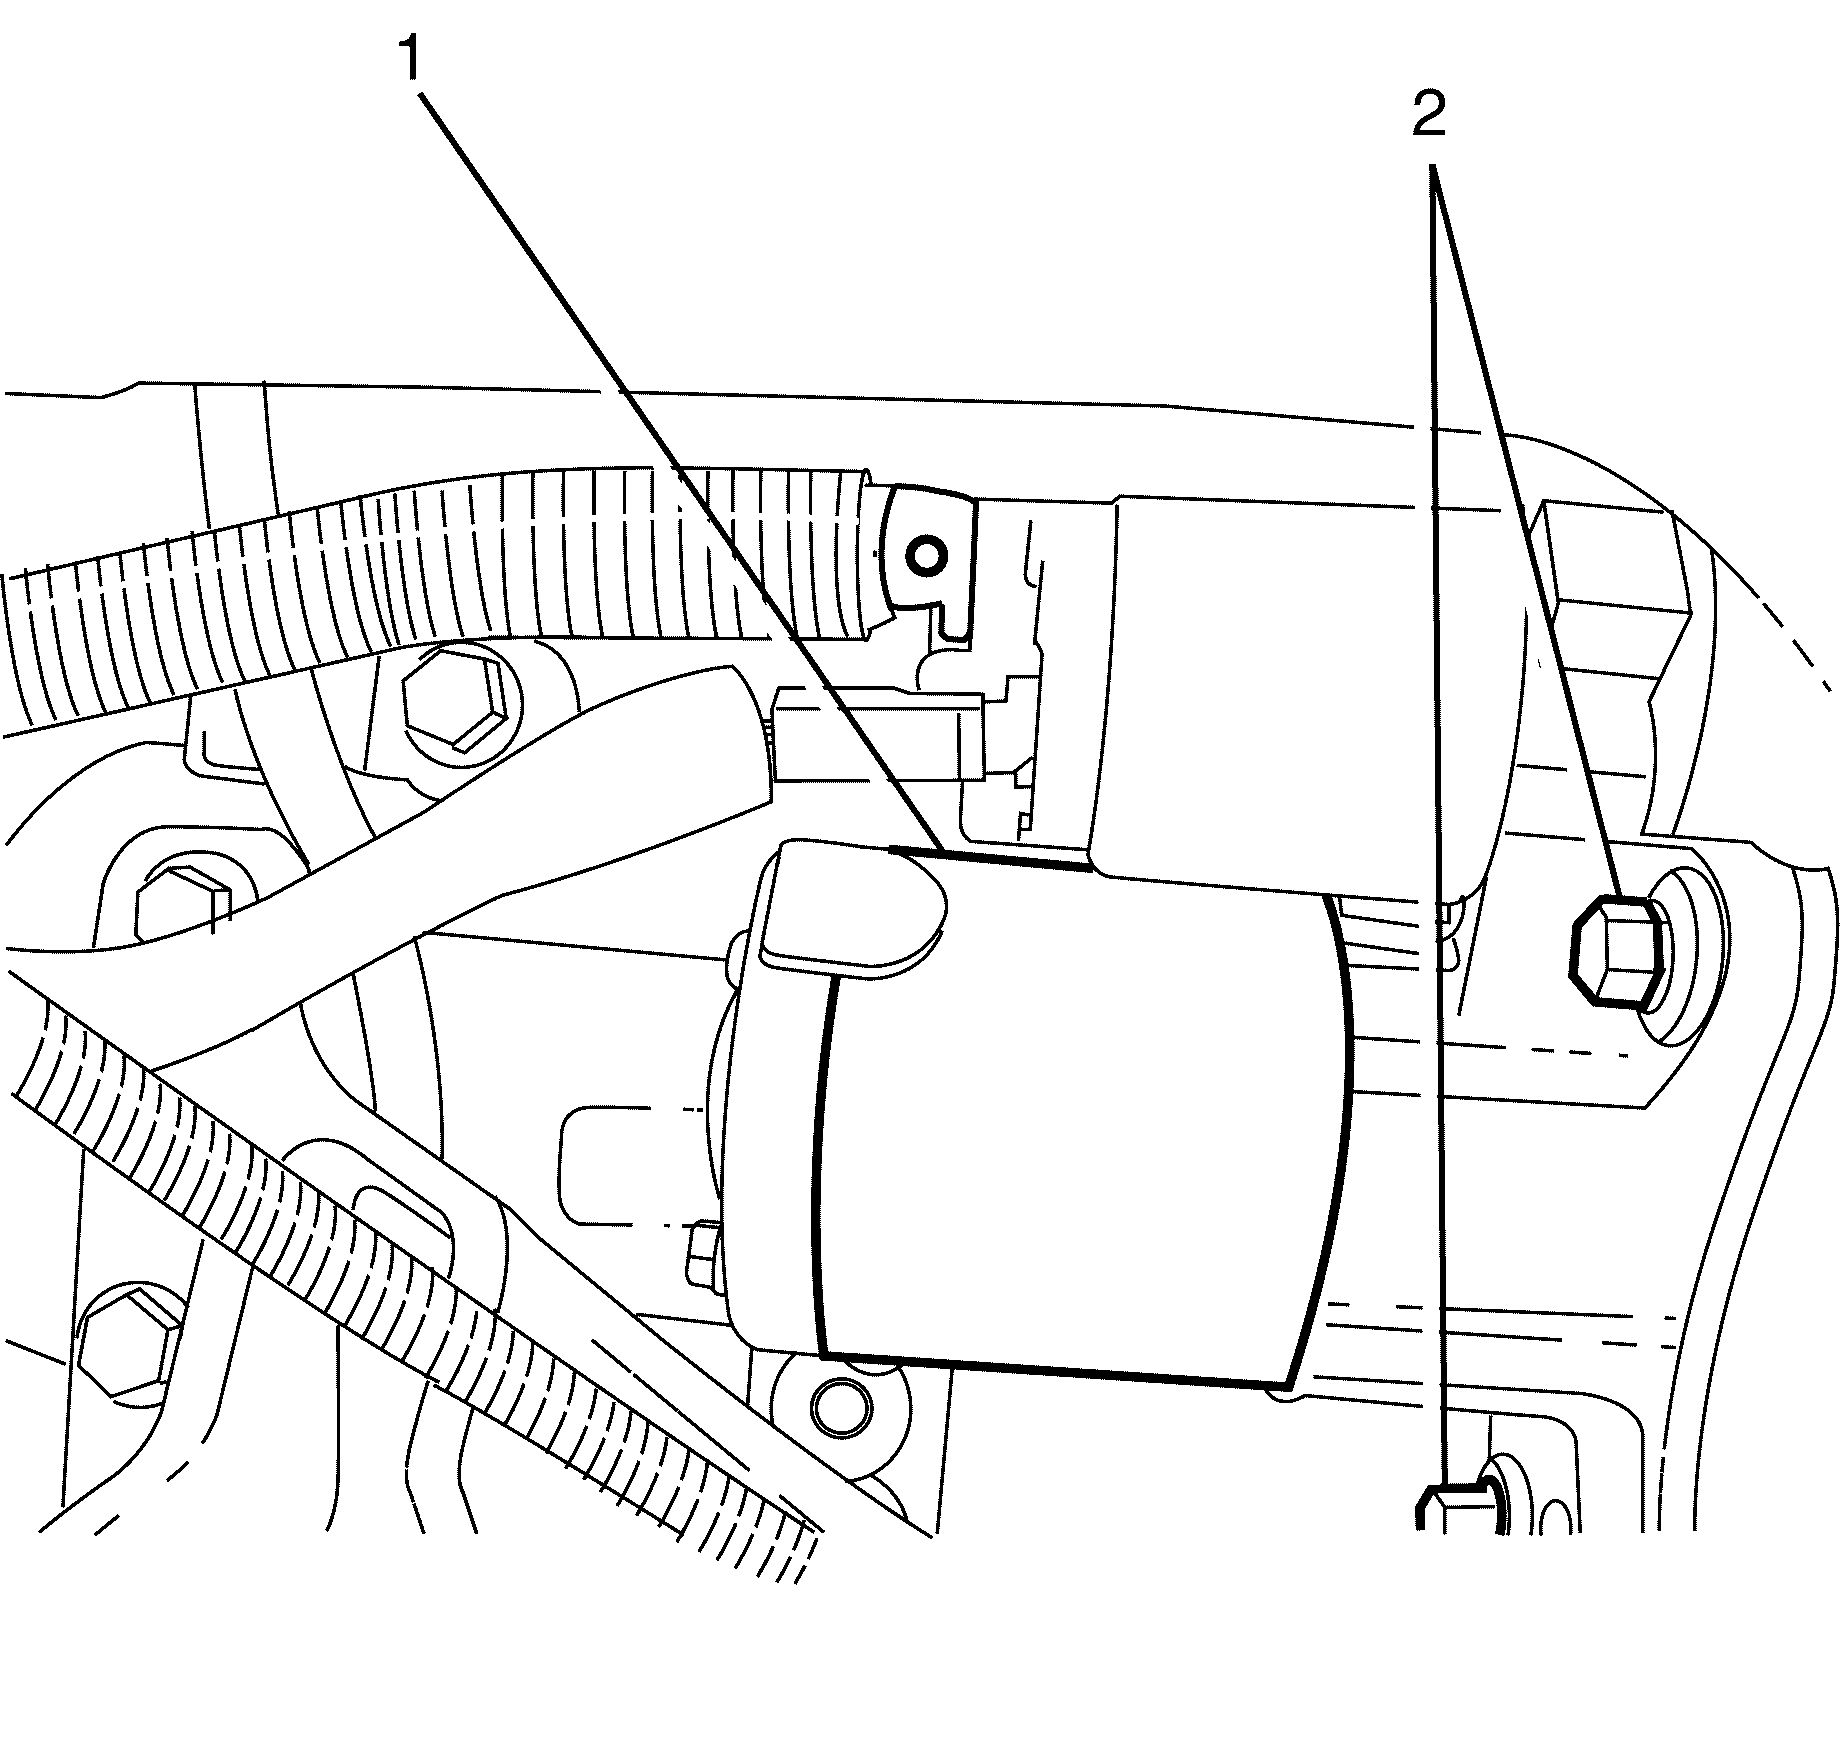
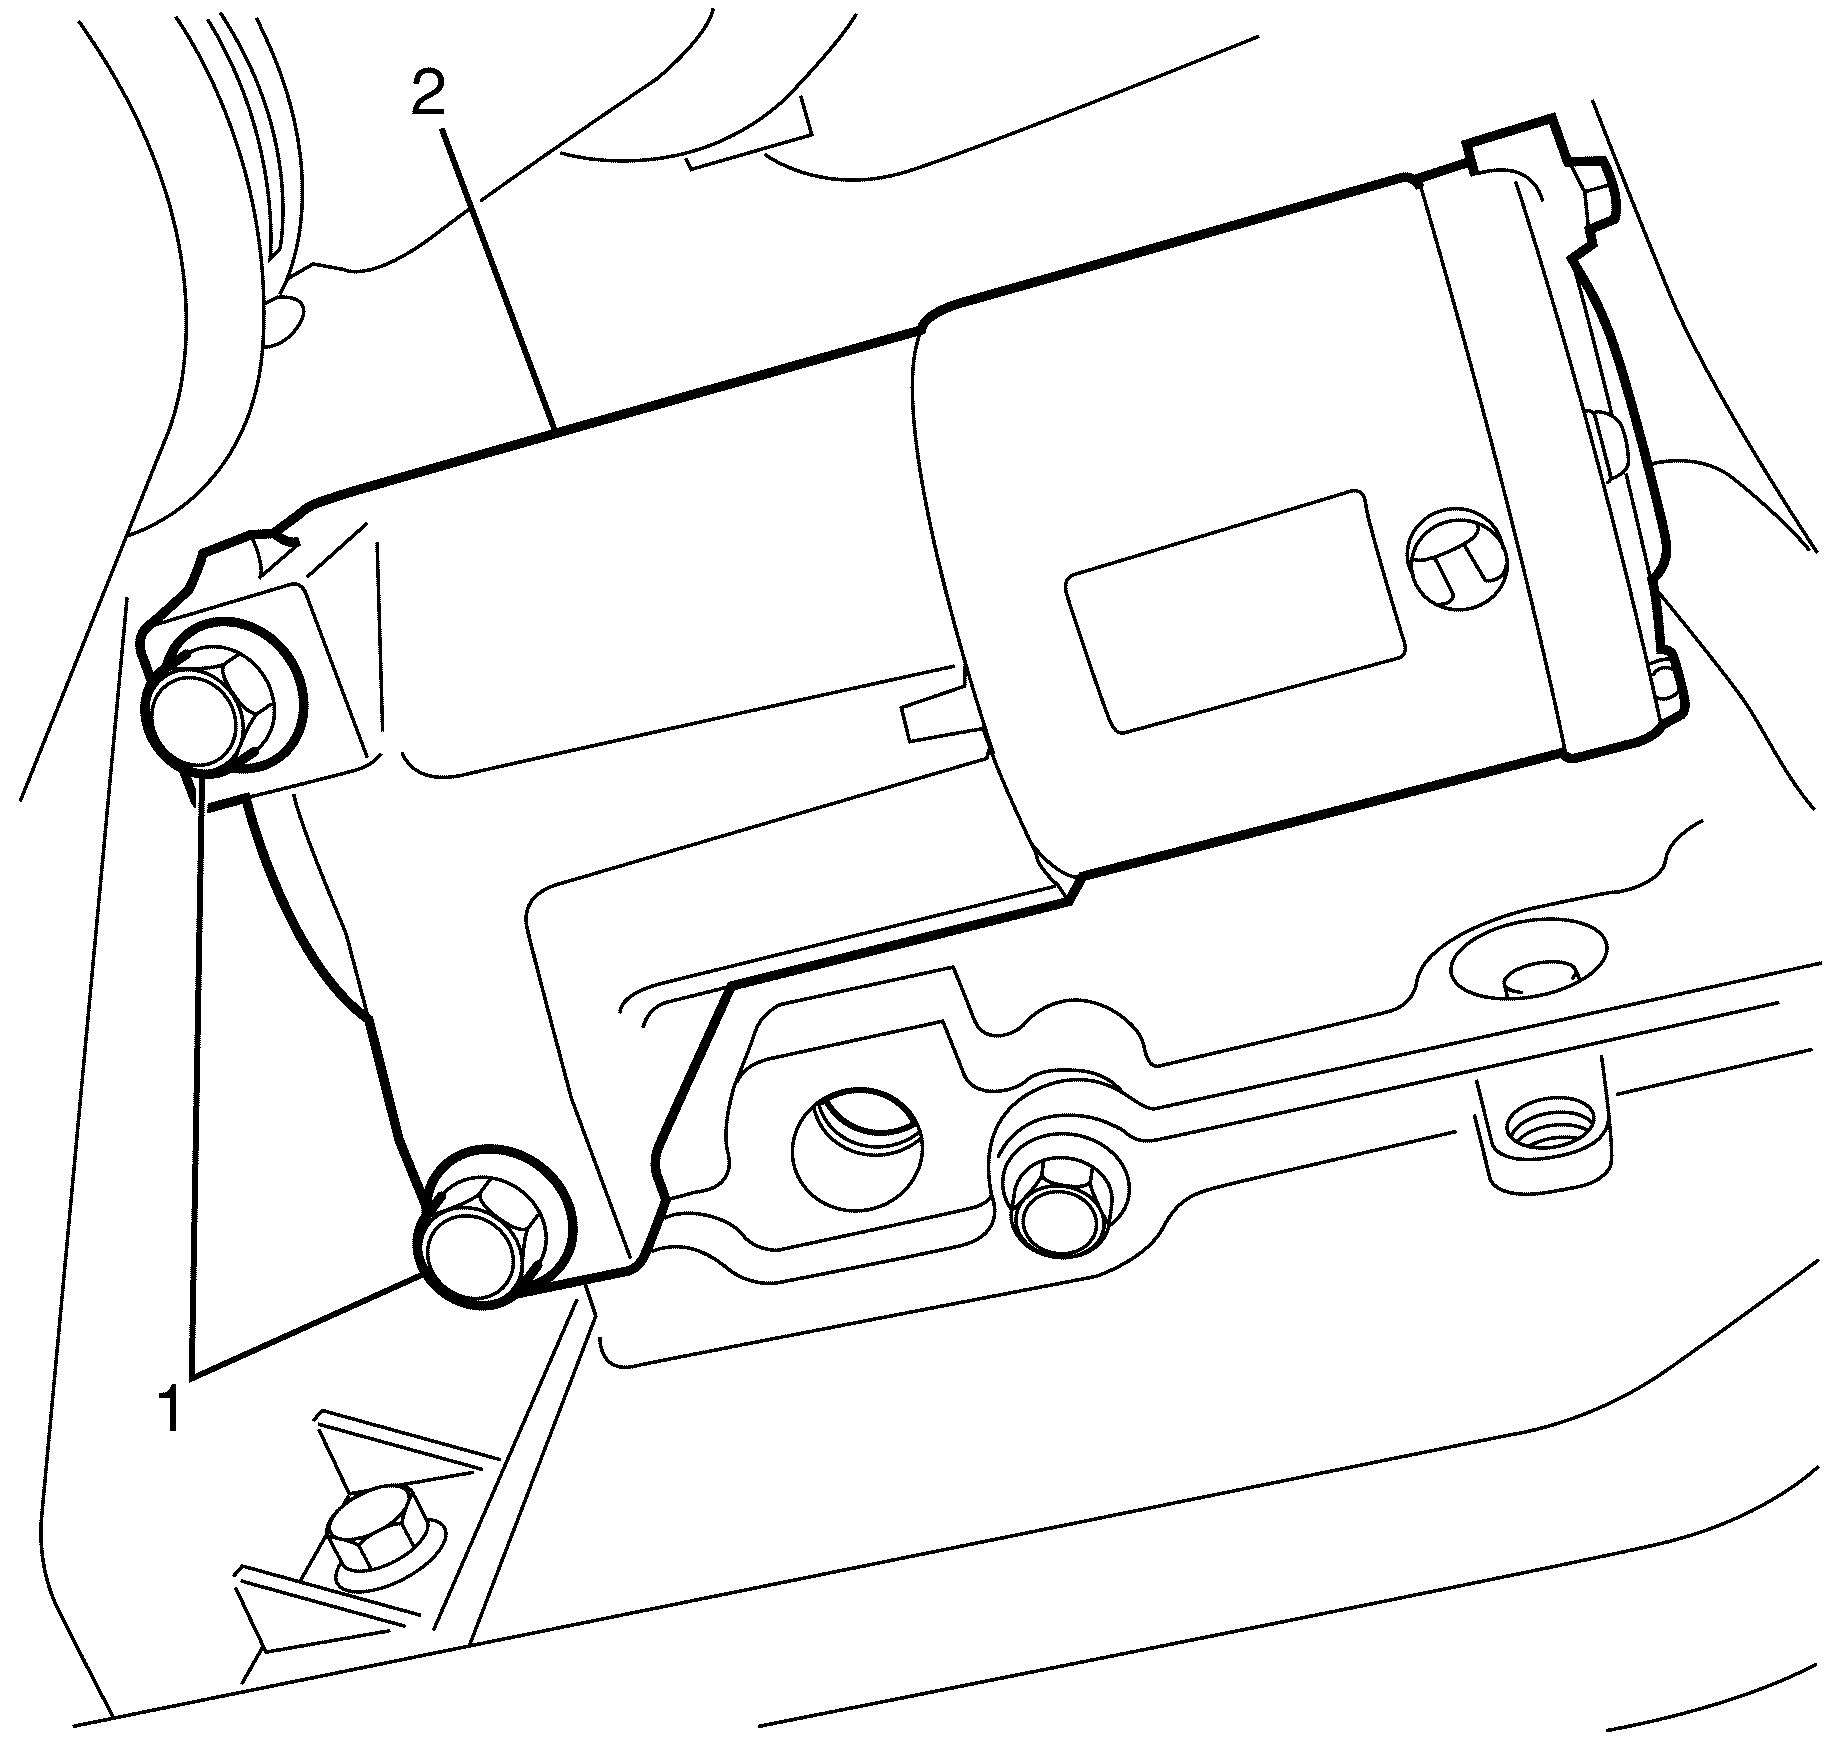
- Remove the starter motor to bell housing retaining bolts (2).
- Remove the starter motor (1) from the bell housing.
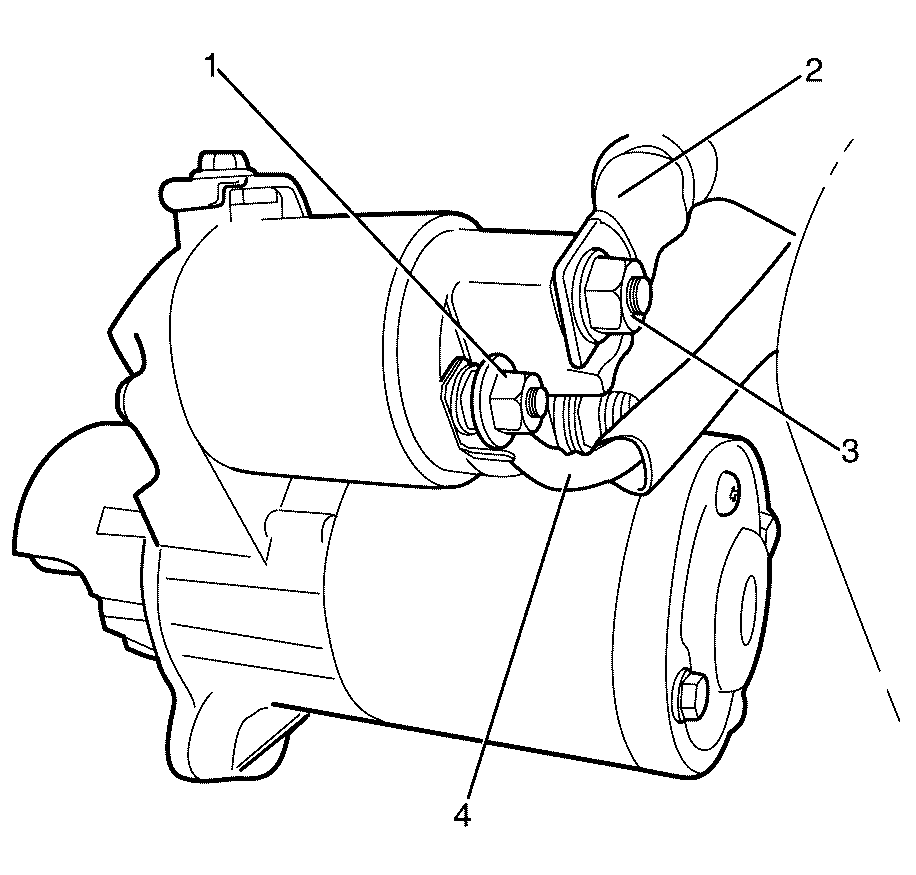
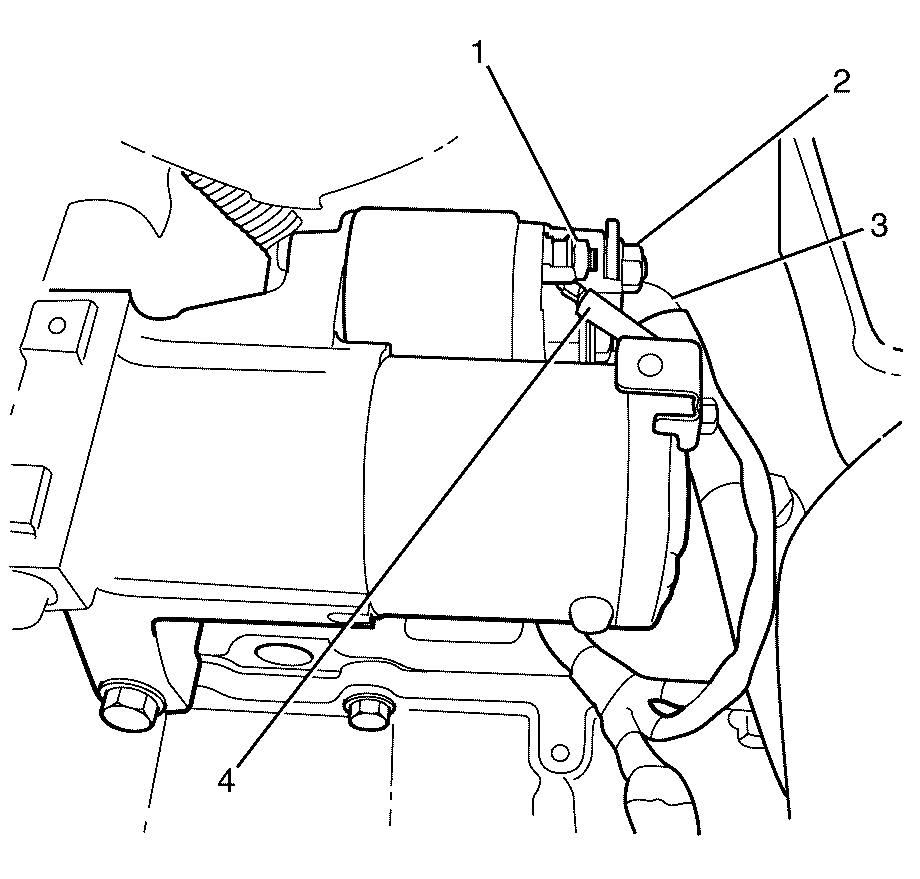
- Remove the engine wiring harness lead nut (1).
- Remove the engine wiring harness lead terminal (4) from the starter motor.
- Remove battery positive cable retaining nut (3) from the starter motor solenoid.
- Remove the battery positive cable (2) from the starter motor.
Warning: Refer to Safety Glasses Warning in the Preface section.
Danger: To avoid any vehicle damage, serious personal injury or death when major components are removed from the vehicle and the vehicle is supported by a hoist, support the vehicle with jack stands at the opposite end from which the components are being removed and strap the vehicle to the hoist.
Warning: Refer to Battery Disconnect Warning in the Preface section.
Installation Procedure
- Install the engine wiring harness lead terminal (4) from the starter motor.
- Install the engine wiring harness lead nut (1) and tighten to 4 N·m (30 lb ft).
- Install the battery positive cable (2) from the starter motor.
- Install battery positive cable retaining nut (3) to the starter motor solenoid and tighten to 10 N·m (7 lb ft).
- Manoeuvre the starter motor into place, locating into the correct position on the bell housing.
- Install the starter motor to bell housing (2) retaining bolts and tighten to 50 N·m (37 lb ft).
- Attach the heat shield (4) to the starter motor (3).
- Install the heat shield to starter motor retaining bolt (1) and tighten to 5 N·m (44 lb in).
- Install the right catalytic converter to the vehicle. Refer to Catalytic Converter Replacement - Right Side.
- Connect the battery negative cable. Refer to Battery Negative Cable Disconnection and Connection.
- Remove the safety stands.
- Lower the vehicle to the ground.
Caution: Refer to Fastener Caution in the Preface section.
Note: Make sure the heat shield to starter motor retaining clip (2) is correctly attached to the starter motor (3).
Warning: Refer to Battery Disconnect Warning in the Preface section.
Starter Replacement 6.0L
Removal Procedure
- Disconnect the battery negative cable. Refer to Battery Negative Cable Disconnection and Connection.
- Raise and support the vehicle. Refer to Lifting and Jacking the Vehicle.
- Remove the right catalytic converter from the vehicle. Refer to Catalytic Converter Replacement - Right Side.
- Remove the starter motor heat shield to starter motor retaining bolts (1).
- Remove the heat shield from the vehicle (2).
- Remove the engine wiring harness lead nut (1).
- Remove the engine wiring harness lead terminal (4) from the starter motor.
- Remove battery positive cable retaining nut (2) from the starter motor solenoid.
- Remove the battery positive cable (3) from the starter motor.
- Remove starter motor to engine block retaining bolts (1).
- Manoeuvre the starter motor (2) out and down between the transmission bell housing and body sub frame.
Warning: Refer to Battery Disconnect Warning in the Preface section.
Warning: Refer to Safety Glasses Warning in the Preface section.
Danger: To avoid any vehicle damage, serious personal injury or death when major components are removed from the vehicle and the vehicle is supported by a hoist, support the vehicle with jack stands at the opposite end from which the components are being removed and strap the vehicle to the hoist.
Installation Procedure
- Raise and support the vehicle. Refer to Lifting and Jacking the Vehicle.
- Manoeuvre the starter motor (2) into position between the transmission bell housing and body sub frame.
- Install starter motor to bell housing retaining bolts (1) and tighten to 50 N·m (37 lb ft).
- Install the engine wiring harness lead terminal (4) from the starter motor.
- Install the engine wiring harness lead nut (1) and tighten to 4 N·m (30 lb ft).
- Install the battery positive cable (3) from the starter motor.
- Install battery positive cable retaining nut (2) from the starter motor solenoid.
- Install battery positive cable retaining nut (1) to the starter motor battery positive terminal and tighten to 10 N·m (7 lb ft).
- Install the heat shield to the vehicle (2).
- Install the heat shield to starter motor retaining bolts (1) and tighten to 5 N·m (44 lb in).
- Install the right catalytic converter to the vehicle. Refer to Catalytic Converter Replacement - Right Side.
- Connect the battery negative cable. Refer to Battery Negative Cable Disconnection and Connection.
- Remove the safety stands.
- Lower the vehicle to the ground.
Warning: Refer to Safety Glasses Warning in the Preface section.
Danger: To avoid any vehicle damage, serious personal injury or death when major components are removed from the vehicle and the vehicle is supported by a hoist, support the vehicle with jack stands at the opposite end from which the components are being removed and strap the vehicle to the hoist.
Caution: Refer to Fastener Caution in the Preface section.
Warning: Refer to Battery Disconnect Warning in the Preface section.
