For 1990-2009 cars only
Starter Replacement 2.4L
Removal Procedure
- Disconnect the cable from negative battery terminal. Refer to Battery Negative Cable Disconnection and Connection.
- Remove the engine cover. Refer to Engine Cover Replacement
- Remove the air cleaner cap assembly.
- Remove the battery. Refer to Battery Replacement.
- Remove the battery carrier. Refer to Battery Tray Replacement.
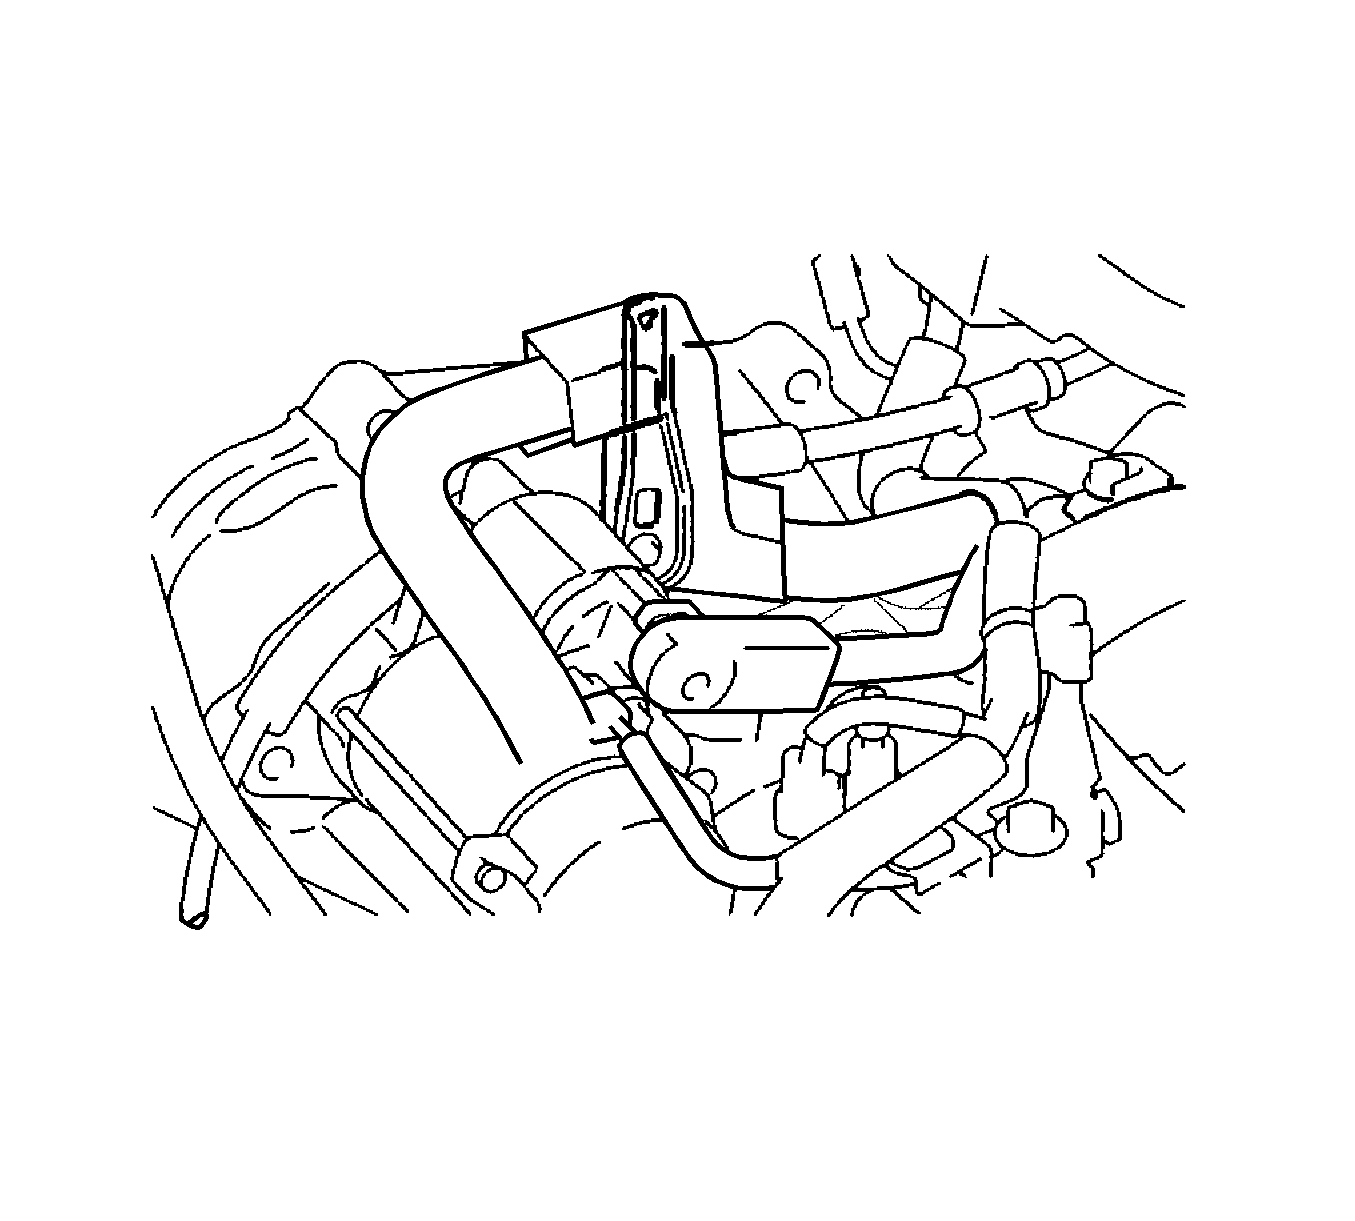
- Disconnect the wire harness.
- Release the claw, and disconnect the wire harness.
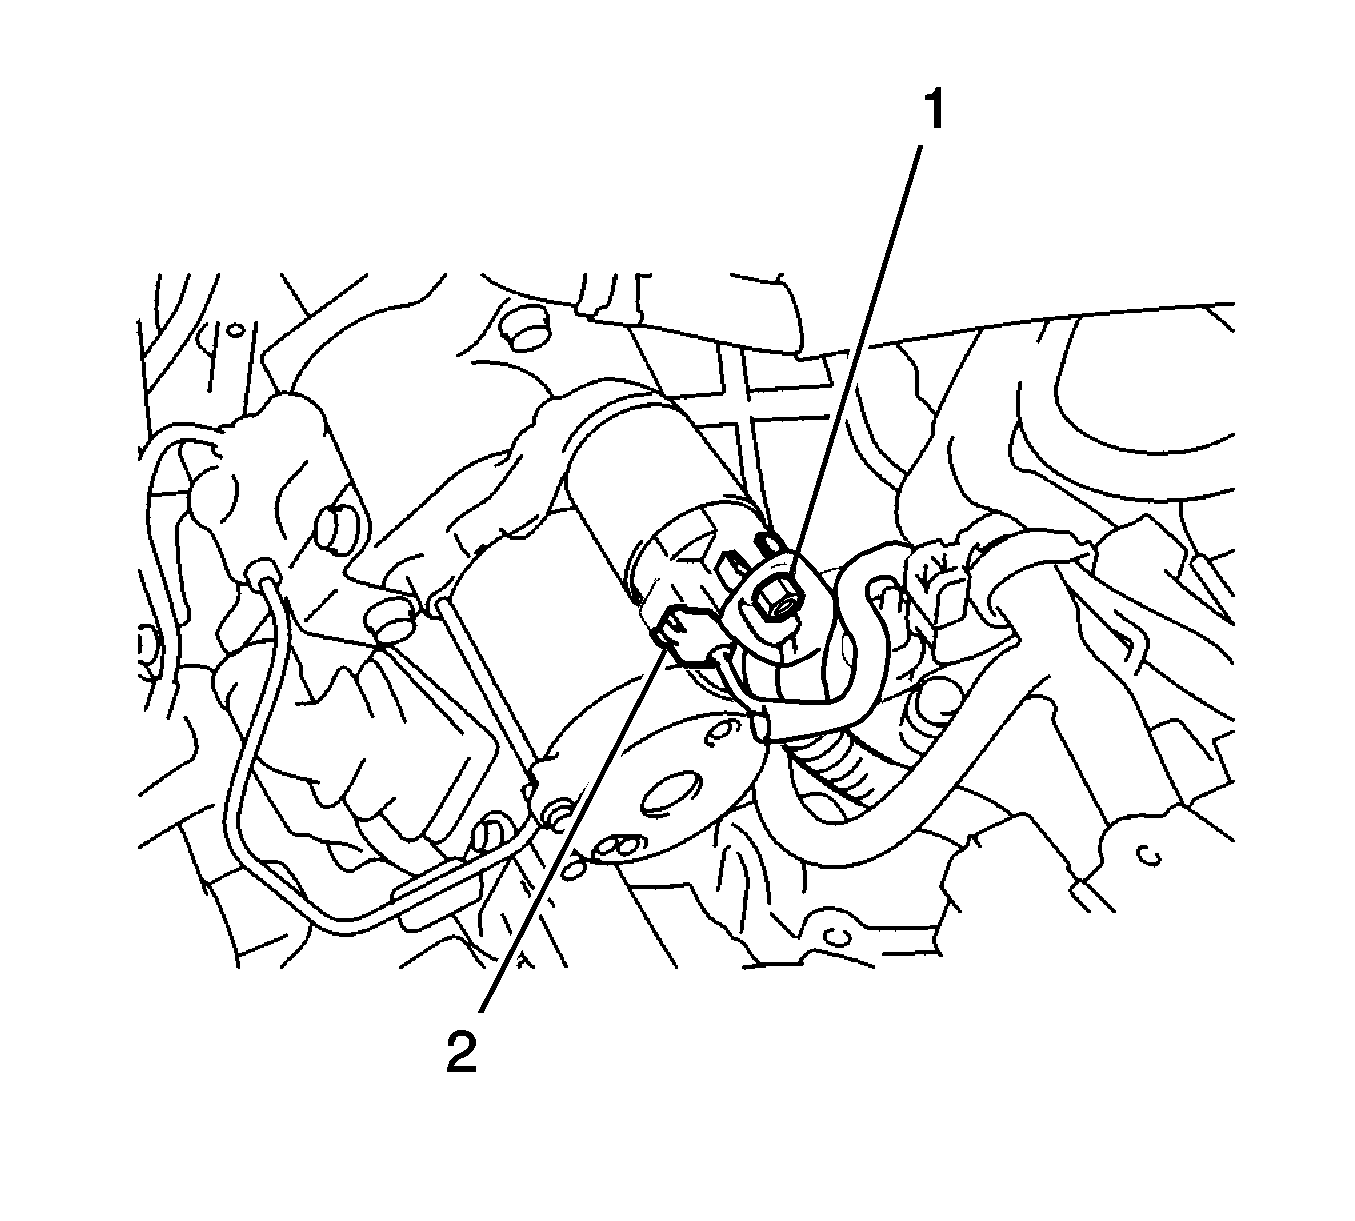
- Disconnect the terminal 50 connector (2) from the starter assembly.
- Remove the nut and disconnect the wire harness from terminal 30 (1).
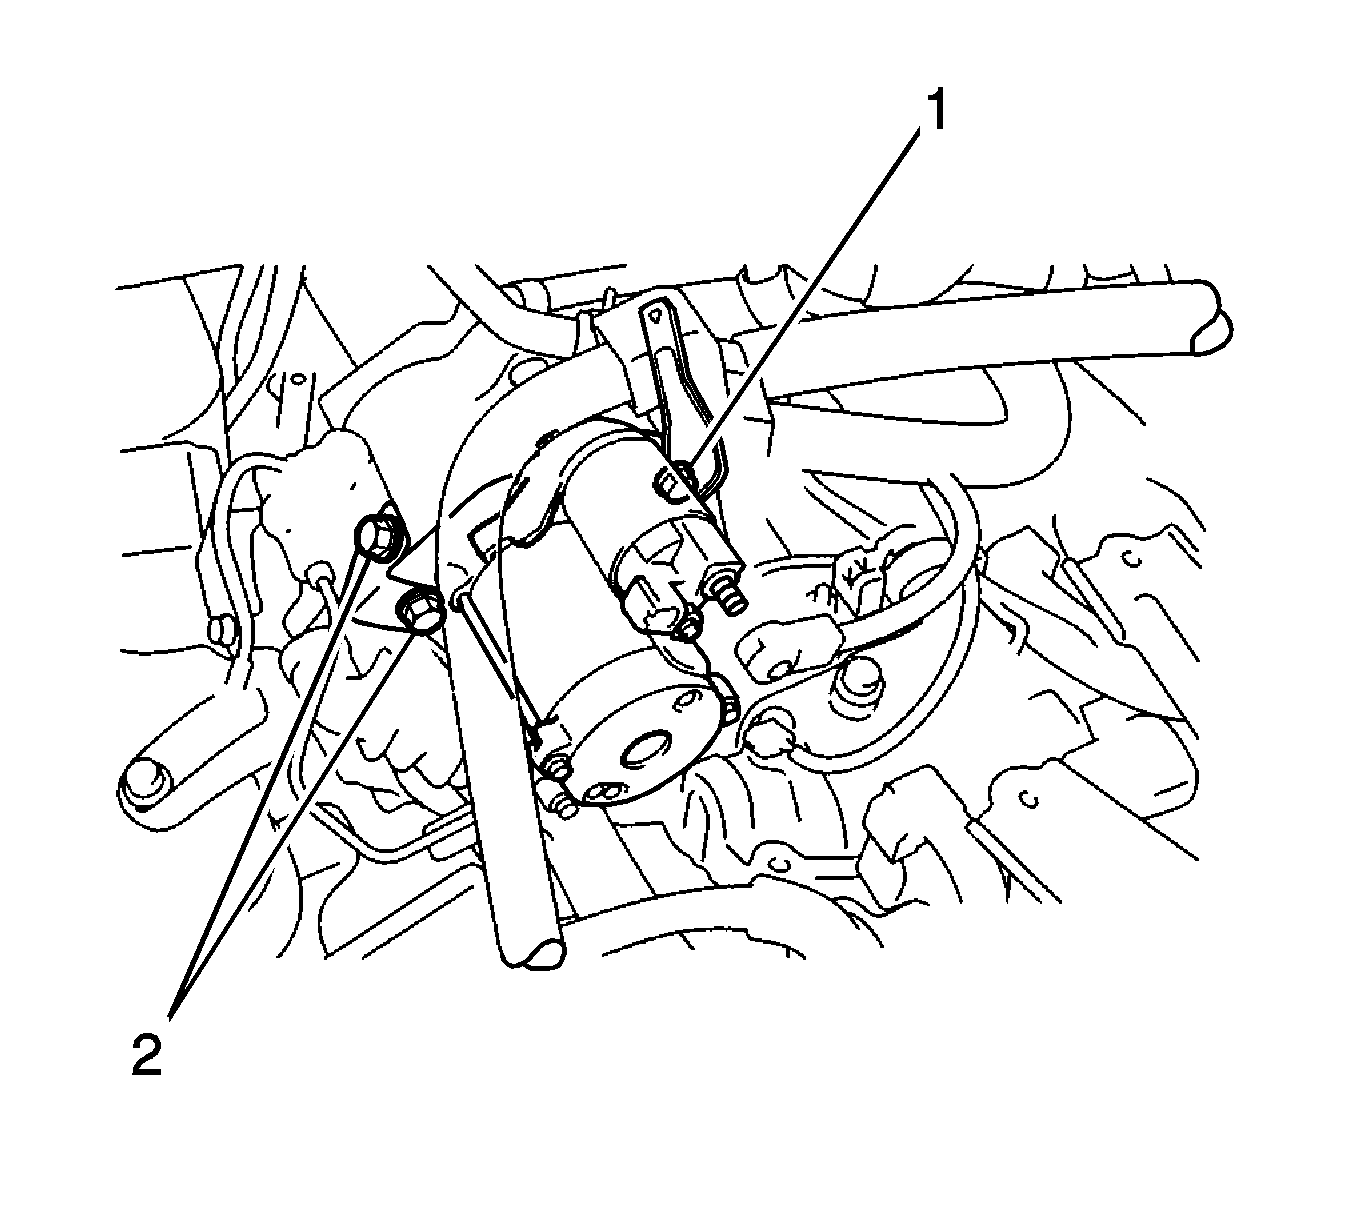
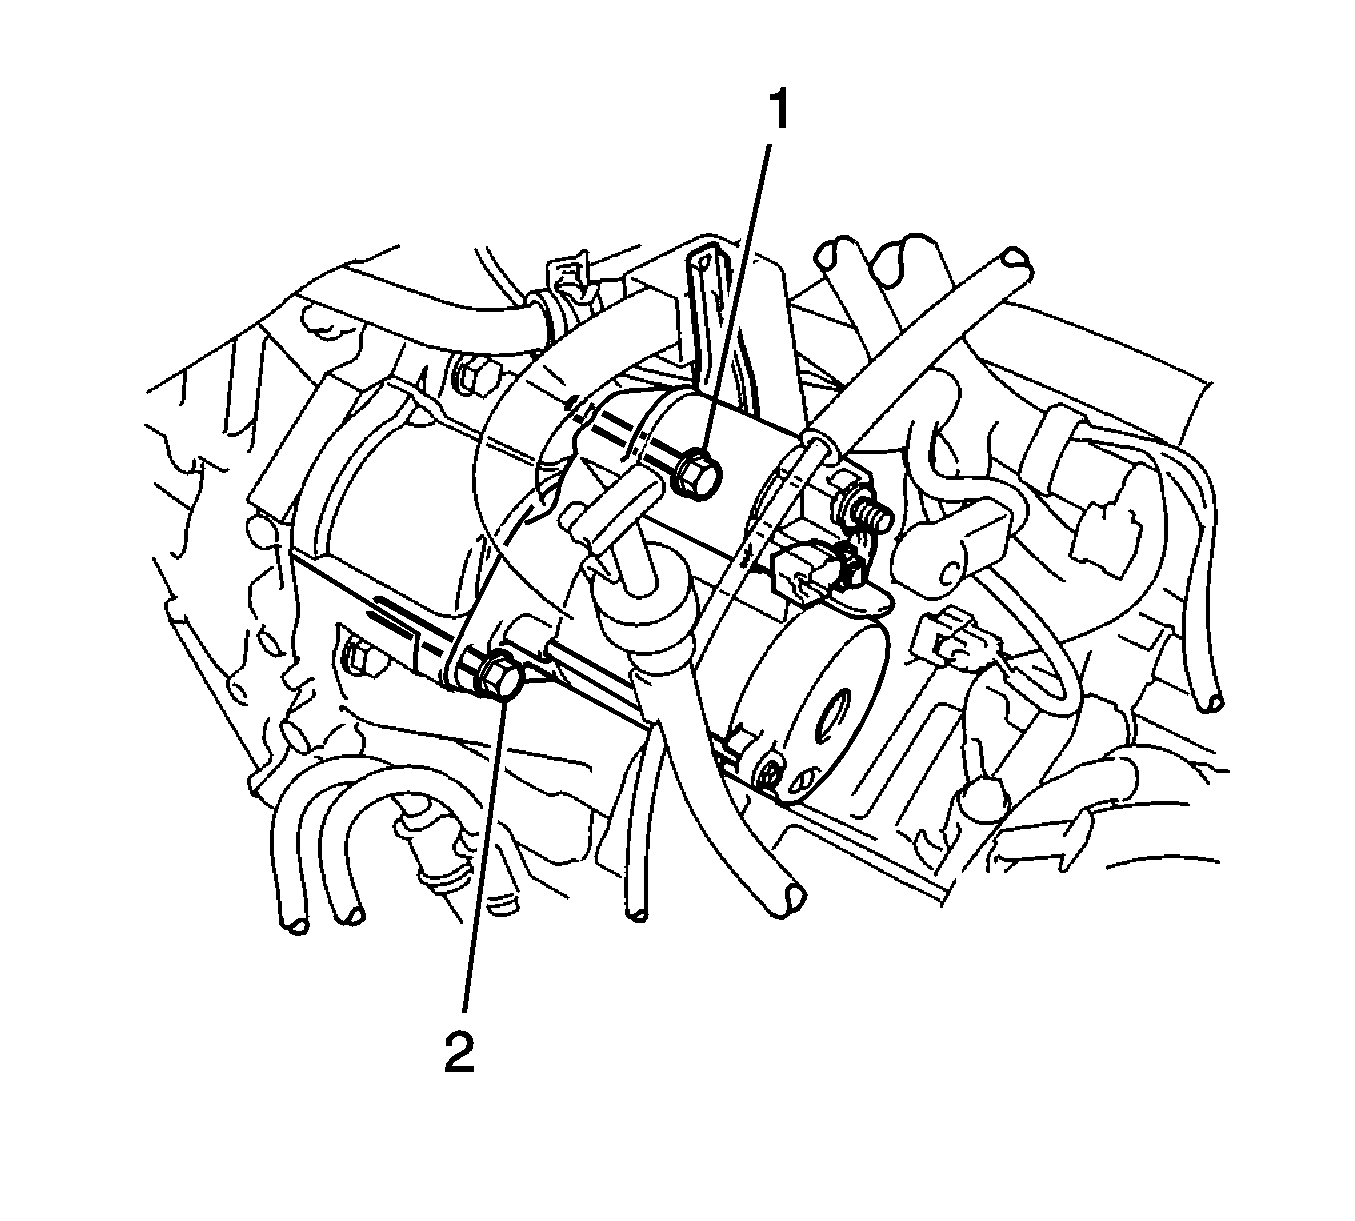
- Remove the 3 bolts (1, 2), clutch accumulator bracket, wire harness clamp bracket and starter assembly.
- Disconnect the terminal 50 connector (2) from the starter assembly.
- Remove the nut and disconnect the wire harness from terminal 30 (1).
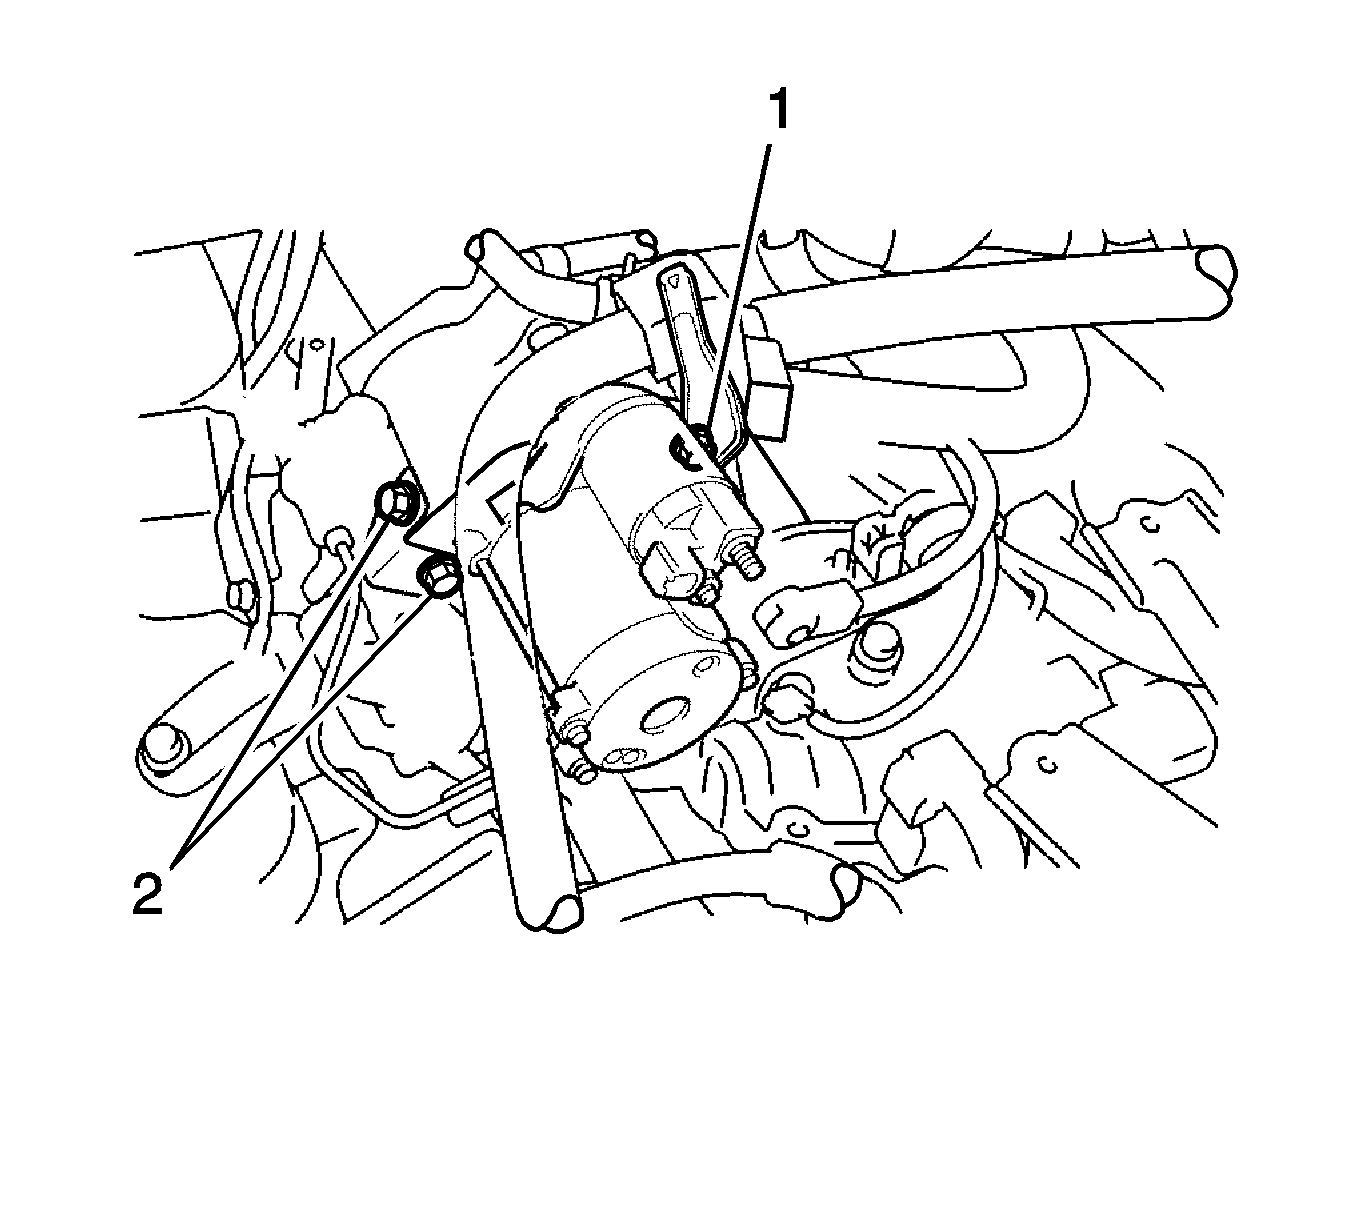
- Remove the 2 bolts (1, 2), wire harness clamp bracket and starter assembly.
Warning: Refer to Battery Disconnect Warning in the Preface section.
Installation Procedure
- Install the starter assembly, clutch accumulator bracket and wire harness clamp bracket with the 3 bolts (1, 2).
- Connect the wire harness to terminal 30 and install the nut (1). Then, attach the terminal cap.
- Connect the terminal 50 connector (2) to the starter assembly.
- Install the starter assembly and wire harness clamp bracket with the 2 bolts (1, 2).
- Connect the wire harness to terminal 30 and install the nut (1). Then, attach the terminal cap.
- Connect the terminal 50 connector (2) to the starter assembly.
- Install the battery carrier. Refer to Battery Tray Replacement.
- Install the battery. Refer to Battery Replacement.
- Install wire harness.
- Install the claw and wire harness.
- Install the air cleaner assembly.
- Install the engine cover. Refer to Engine Cover Replacement.
- Connect the cable to negative battery terminal. Refer to Battery Negative Cable Disconnection and Connection.
Caution: Refer to Fastener Caution in the Preface section.
Tighten
| • | Bolt 1 to 37 N·m (27 lb ft) |
| • | Bolt 2 to 12 N·m (9 lb ft) |

Tighten
Tighten the nut to 9.8 N·m (87 lb in).

Tighten
Tighten the bolts to 37 N·m (27 lb ft).

Tighten
Tighten the nut to 9.8 N·m (87 lb in).

Starter Replacement 1.8L
Removal Procedure
- Disconnect the cable from negative battery terminal. Refer to Battery Negative Cable Disconnection and Connection.
- Remove the transmission oil filler tube sub-assembly.
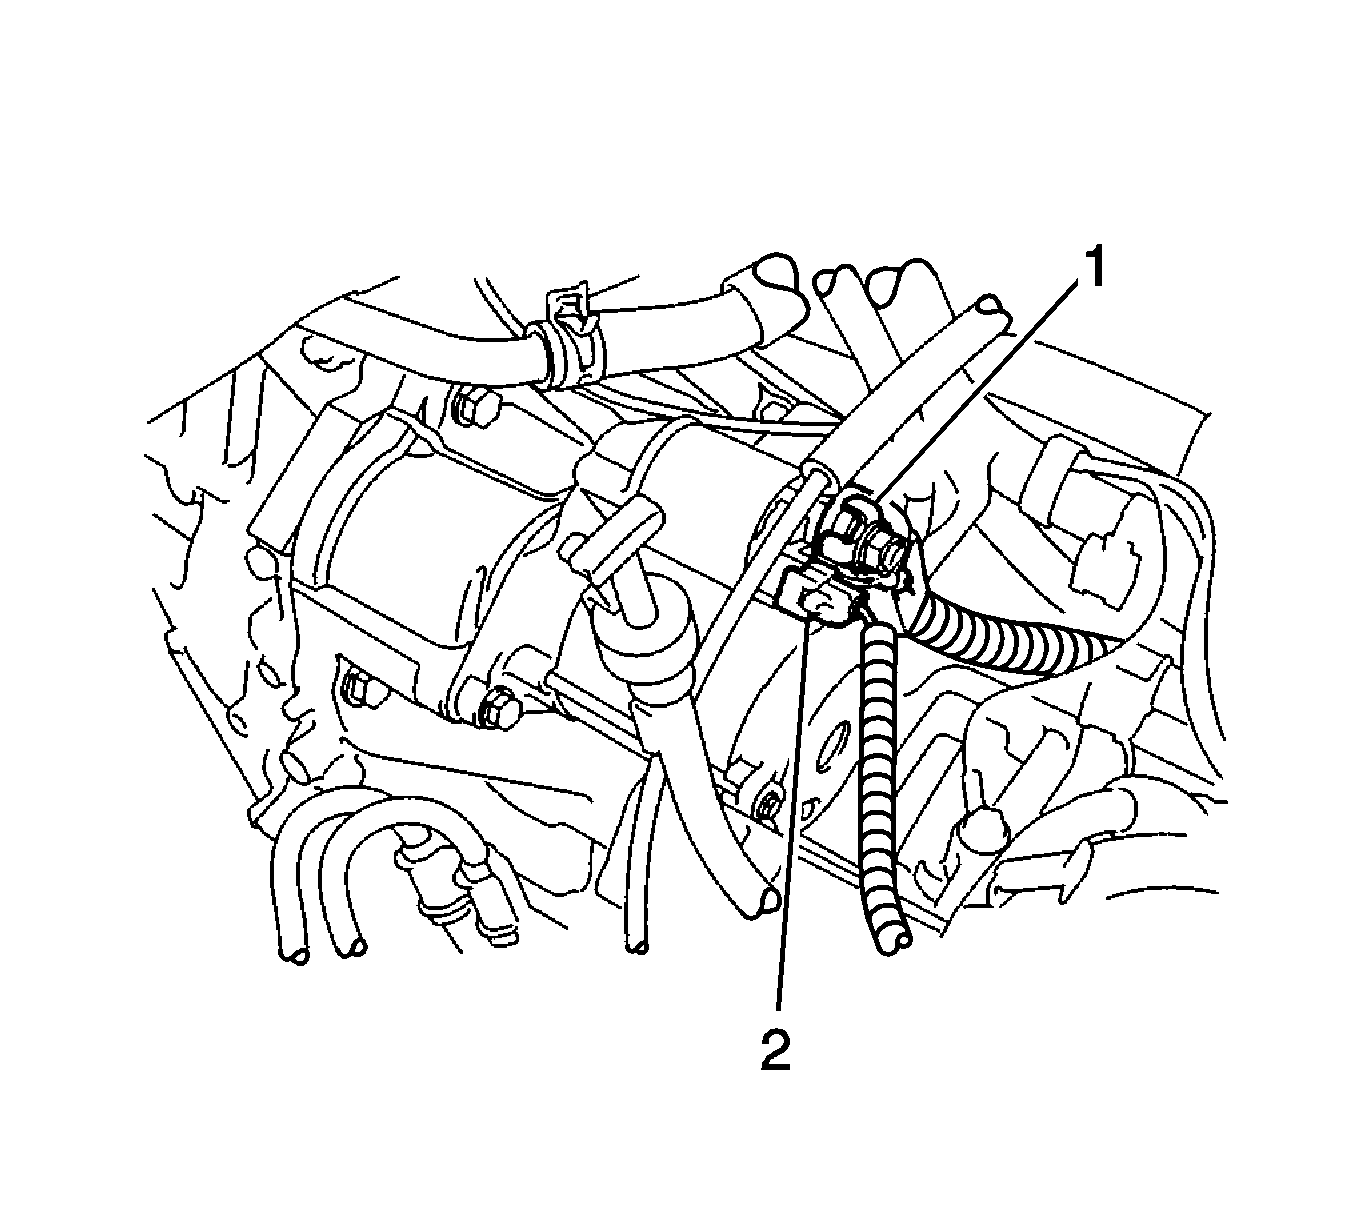
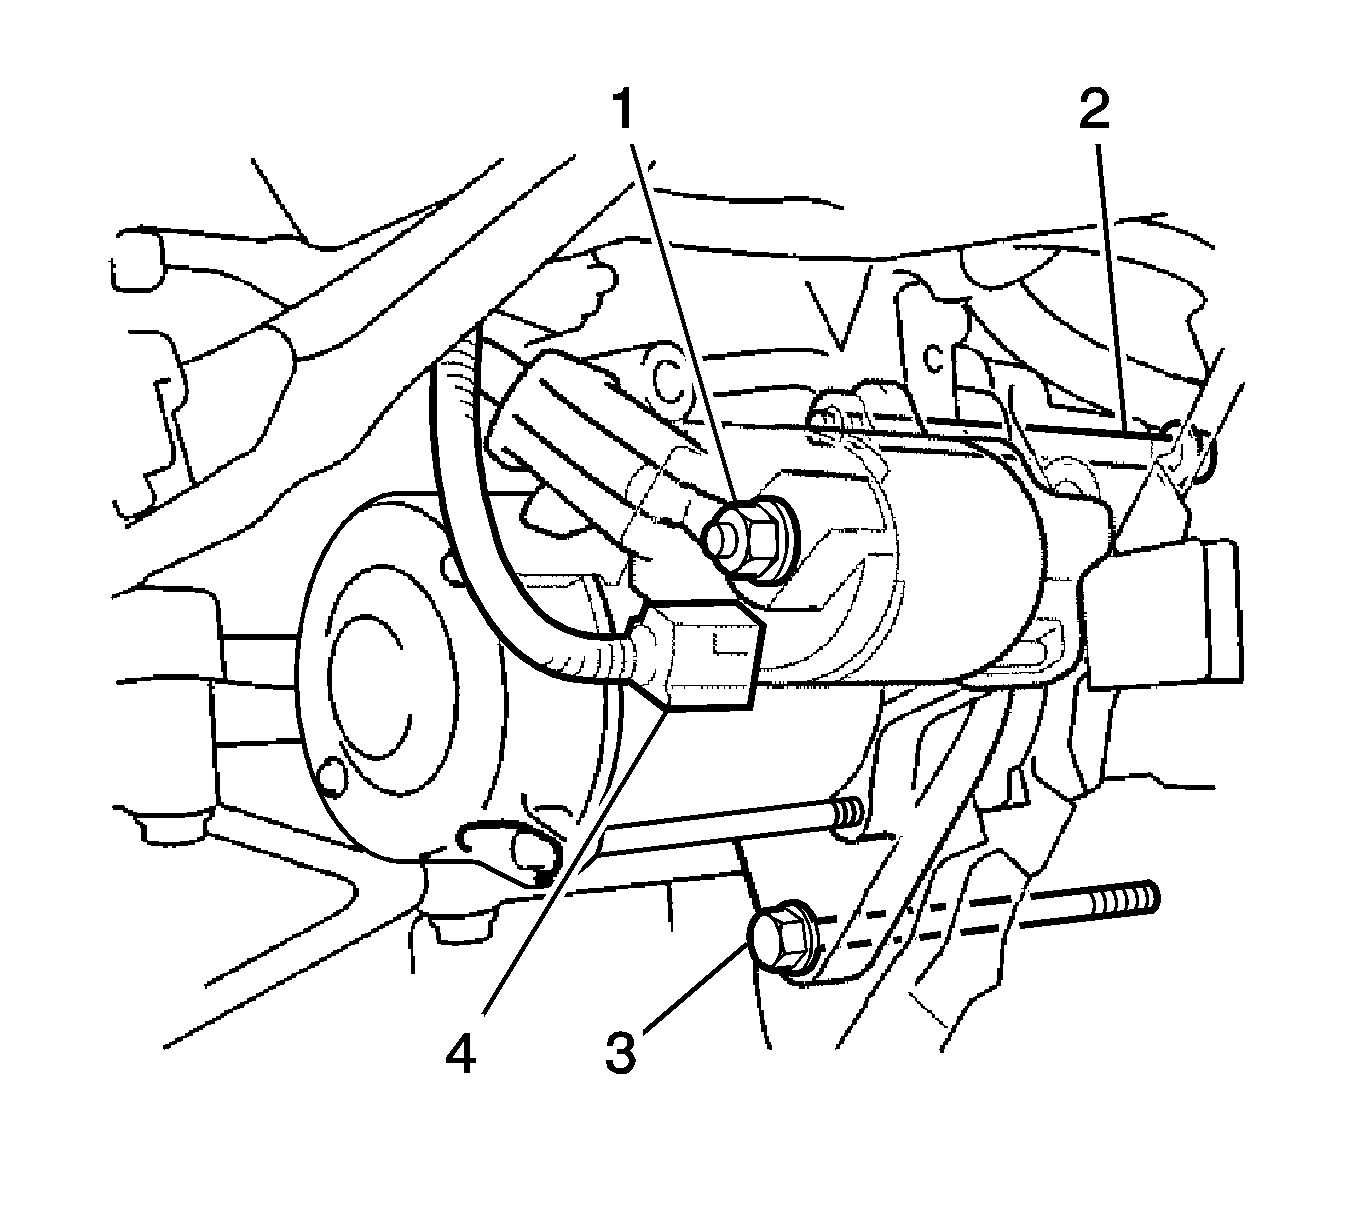
- Disconnect the terminal 50 connector (4) from the starter assembly.
- Remove the nut (1) and disconnect the wire harness from terminal 30.
- Remove the 2 bolts (2, 3) and starter assembly.
Warning: Refer to Battery Disconnect Warning in the Preface section.
Installation Procedure
- Install the starter assembly.
- Install the starter assembly with the 2 bolts (2, 3).
- Connect the wire harness to terminal 30 and install the nut (1). Then, attach the terminal cap.
- Connect the terminal 50 connector (4) to the starter assembly.
- Install the transmission oil filler tube subassembly.
- Connect the cable to negative battery terminal.

Caution: Refer to Fastener Caution in the Preface section.
Tighten
Tighten the bolts to 37 N·m (27 lb ft).
Tighten
Tighten the nut to 9.8 N·m (87 lb in).
