For 1990-2009 cars only
- Install the connecting rod bearing to the connecting rod and bearing cap.
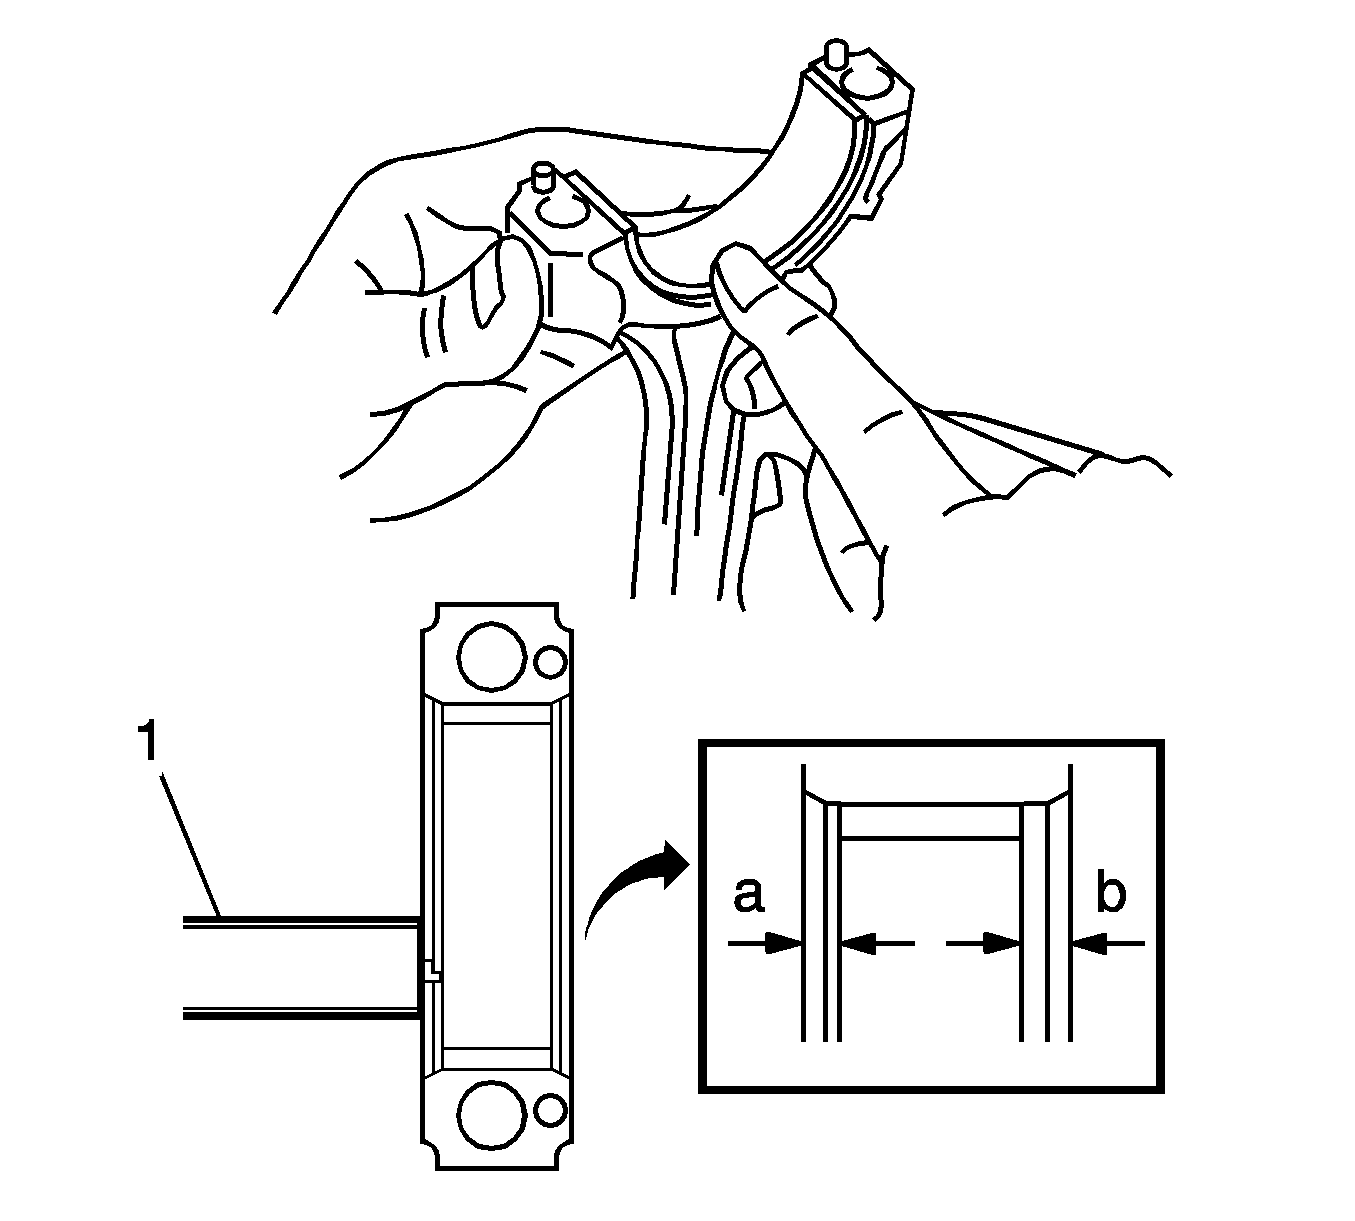
- Using vernier calipers, measure the distance between the connecting rod and bearing cap edges and the connecting rod bearing edge.
- Apply engine oil to the cylinder walls, the pistons, and the surfaces of the connecting rod bearings.
- Position the piston rings so that the ring ends (1,2) are as shown in the illustration.
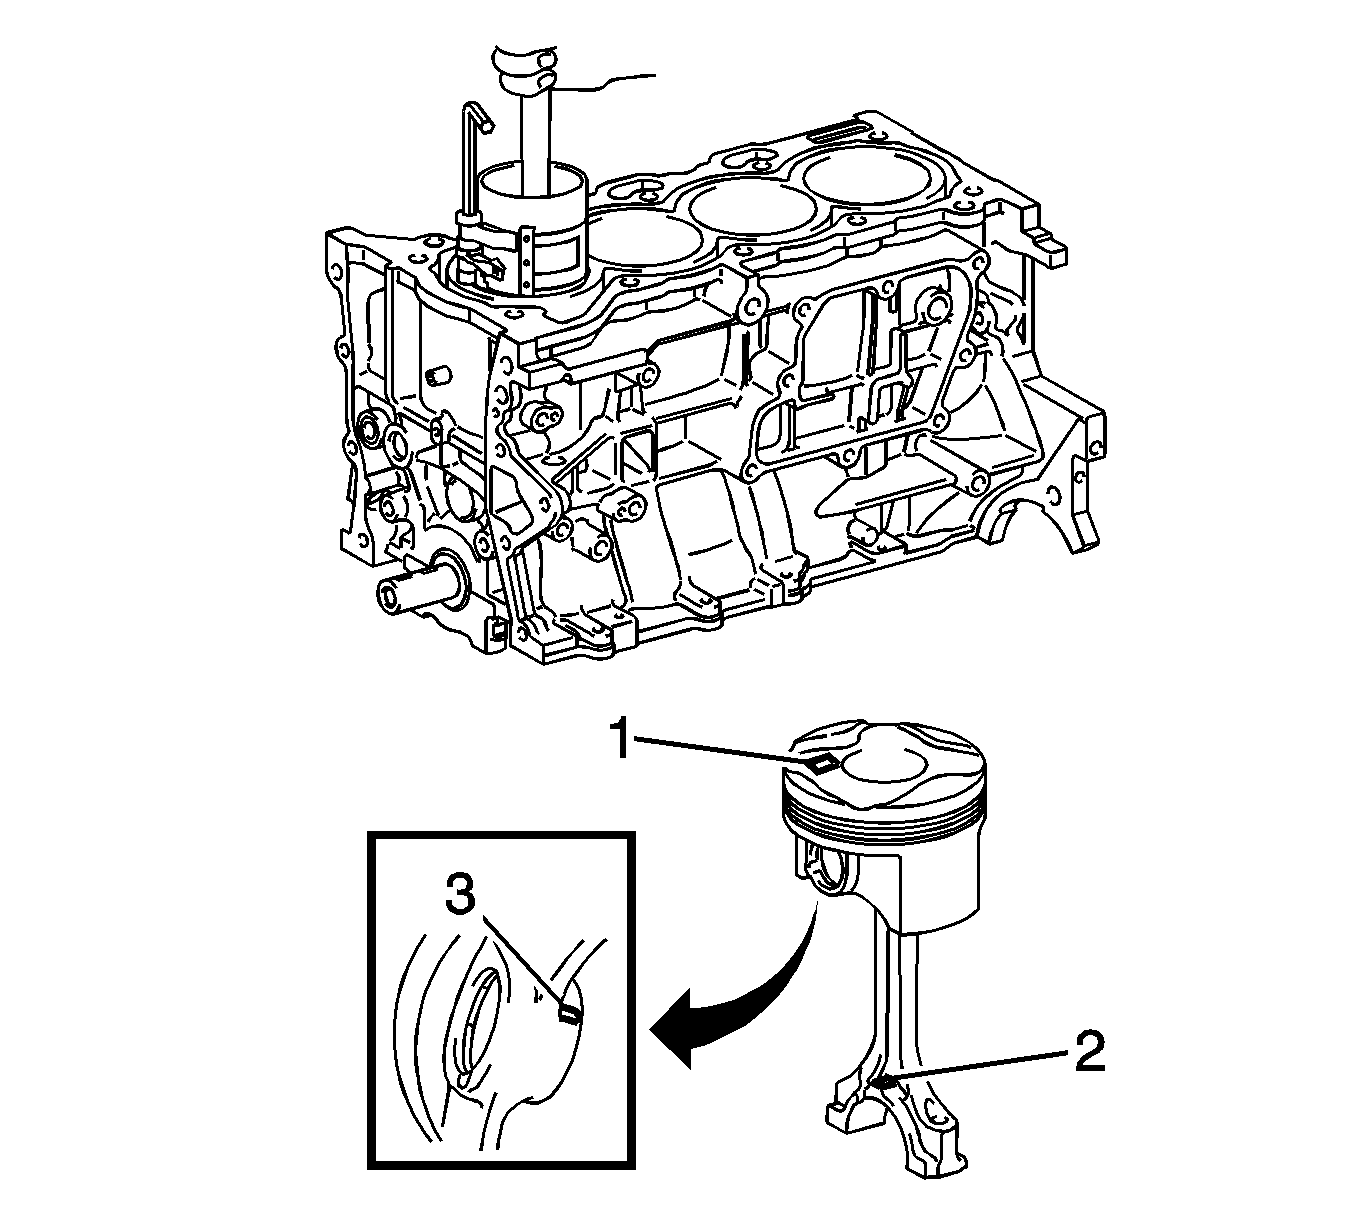
- Using a piston ring compressor, push the correctly numbered piston (1) and connecting rod assembly into the cylinder with the front mark of the piston facing forward.
- Check that the protrusion of the connecting rod cap (1) is facing in the correct direction.
- Apply a light coat of engine oil to the threads and under the heads of the connecting rod cap bolts.
- Install the connecting rod cap bolts.
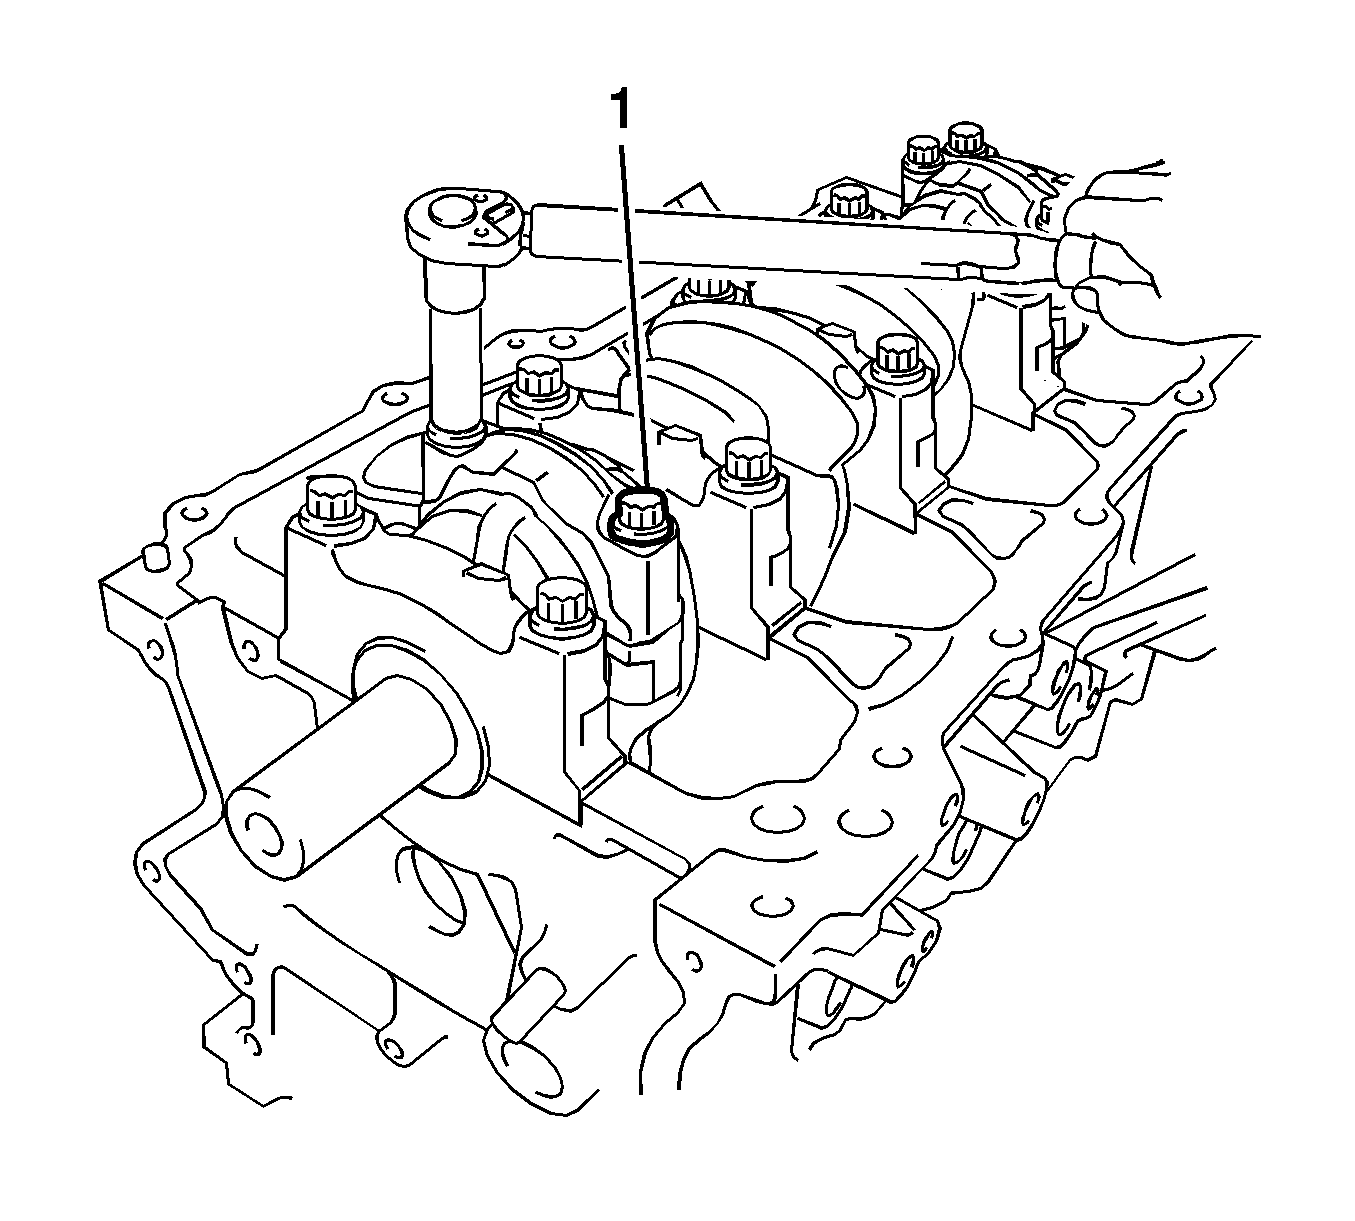
- Using a suitable socket, install and alternately tighten the bolts (1) of the connecting rod cap in several steps to 20 N·m(15 lb ft).
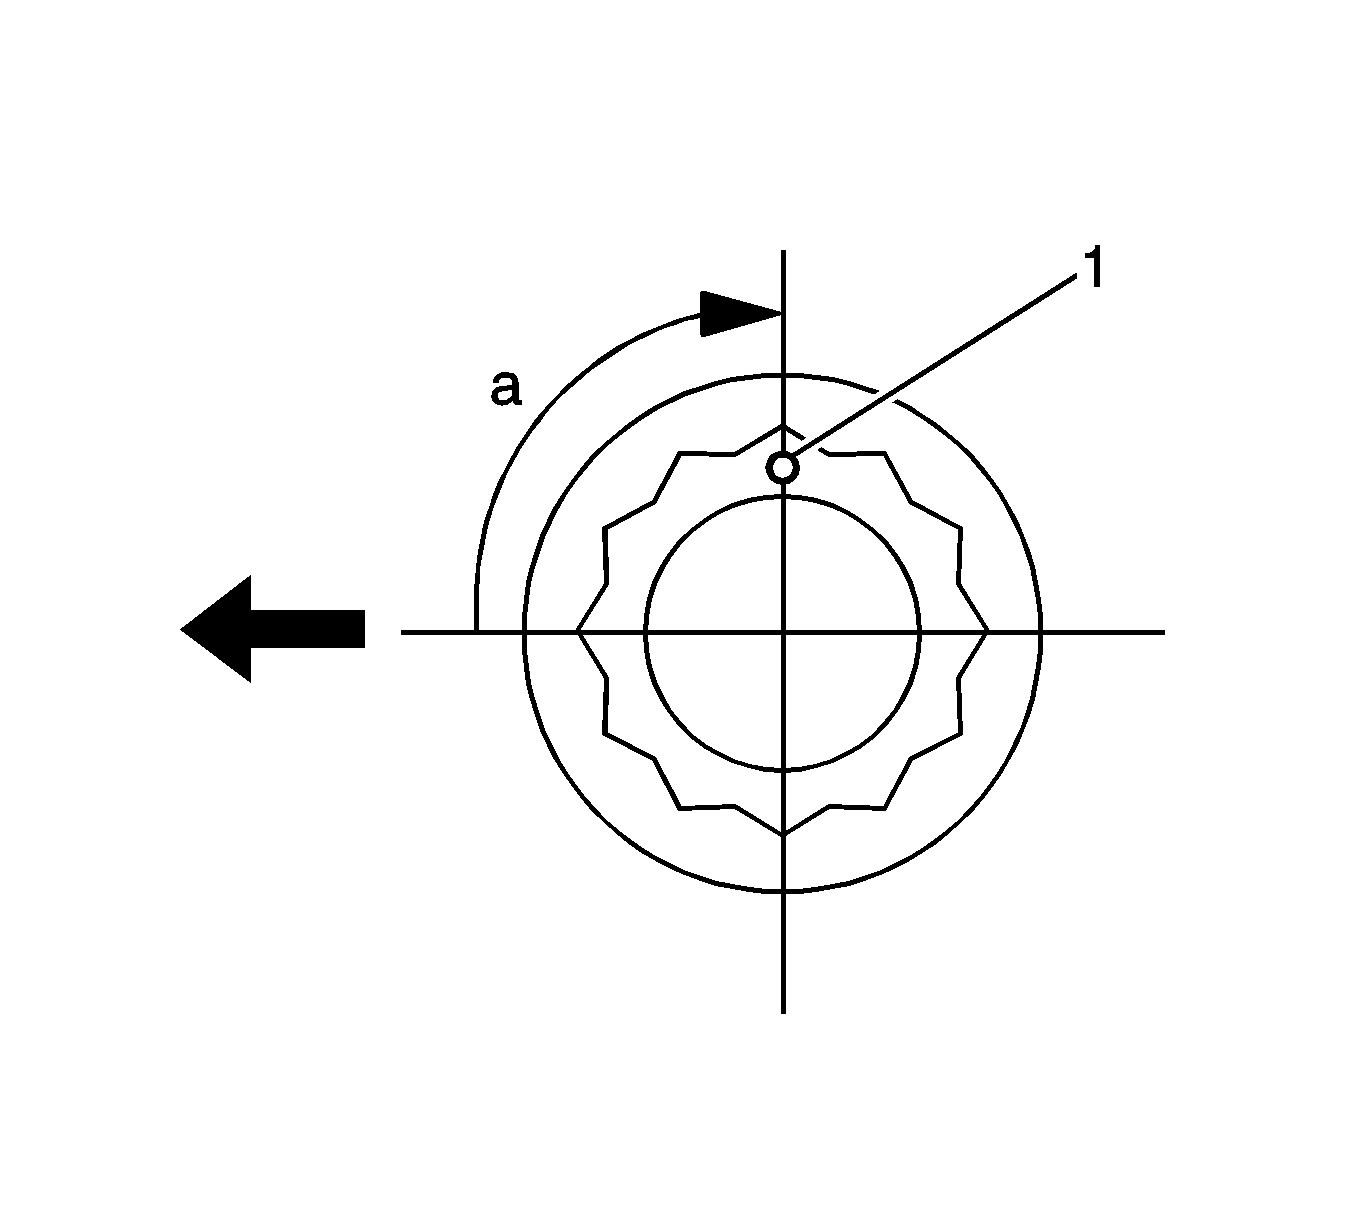
- Mark the front of the connecting rod cap bolts with paint (1).
- Further tighten the cap bolts an additional 90 degrees as shown.
- Check that the crankshaft turns smoothly.
- Check the connecting rod thrust clearance.
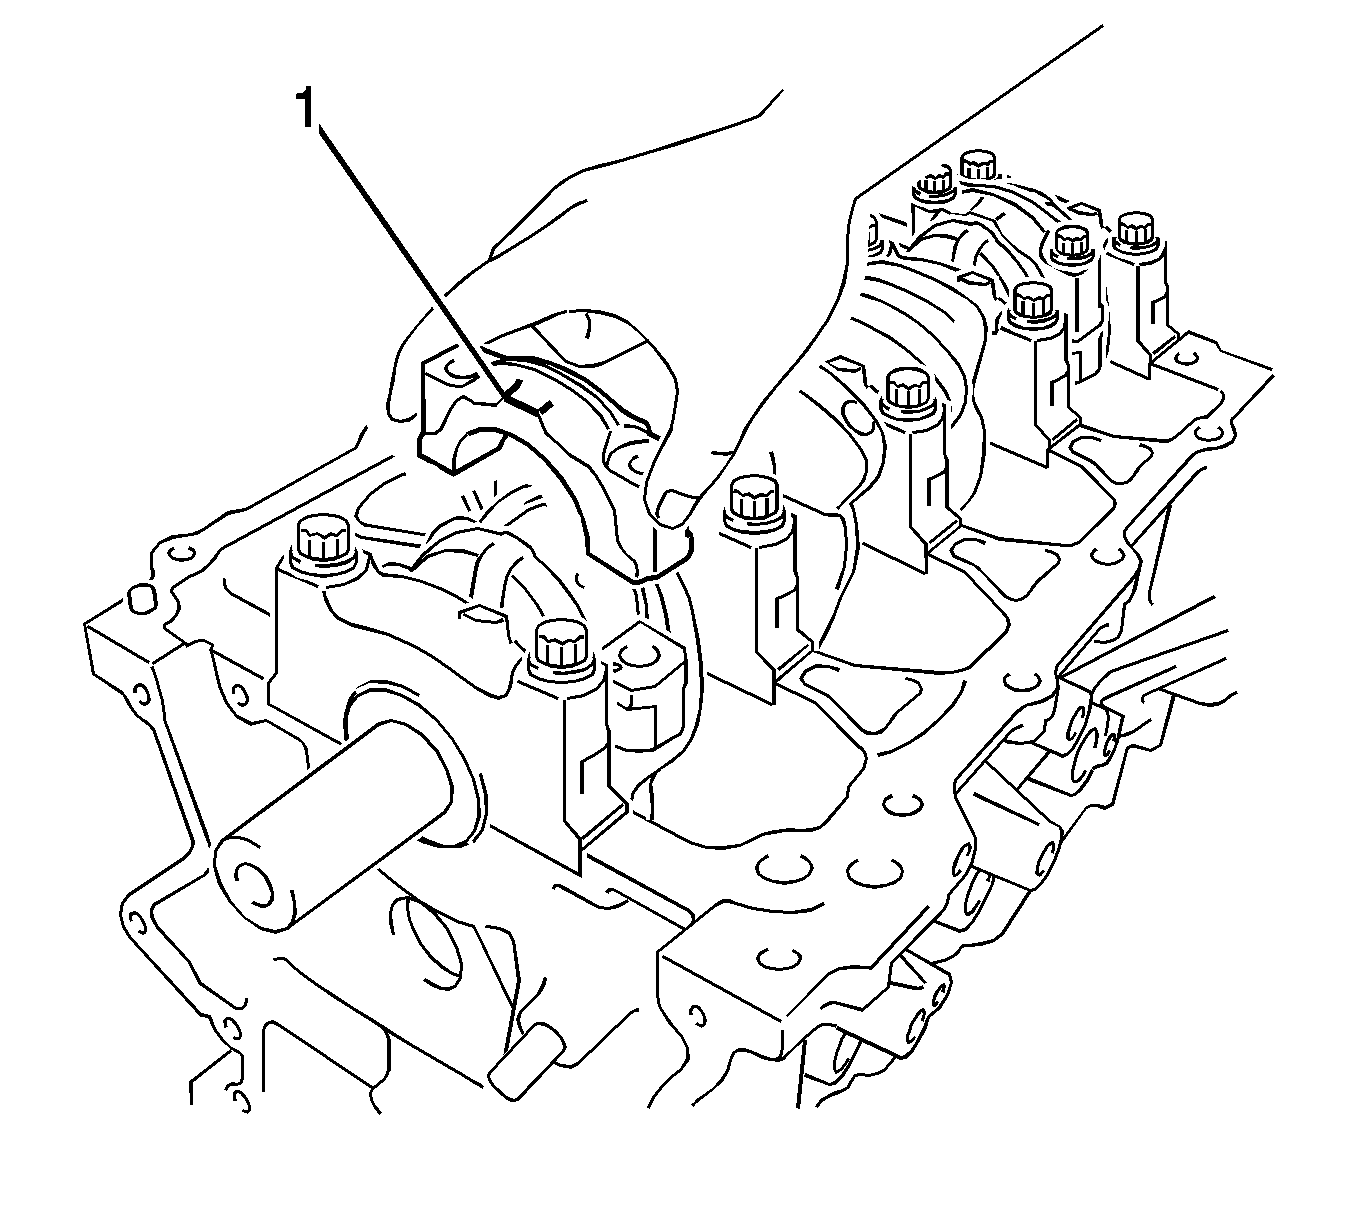
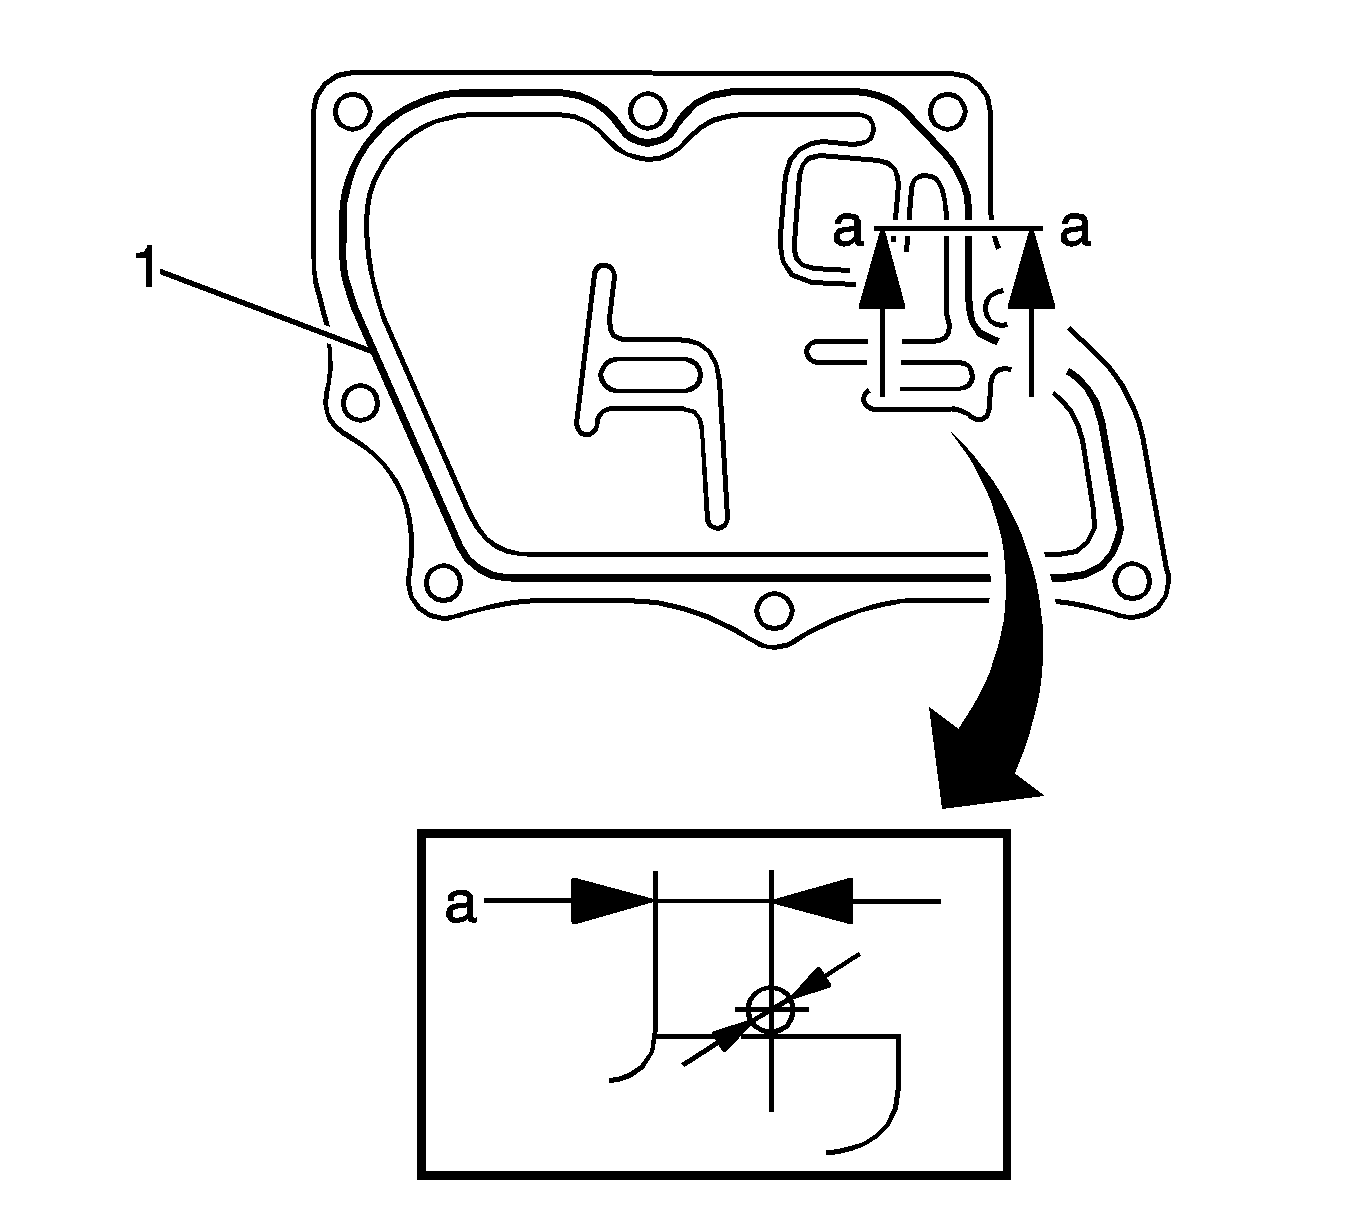
- Apply Three Bond 1207B or equivalent Bead diameter: 2.0 mm (0.0787 in) sealant (1) in a continuous bead as shown in the illustration.
- Install the ventilation case with the 6 bolts (1) and 2 nuts (2) and tighten to 10 N·m (7 lb ft).
Note: Do not apply engine oil to the bearings or the contact surfaces.
Specification
Dimension (A - B): 0.7 mm (0.0276 in) or less
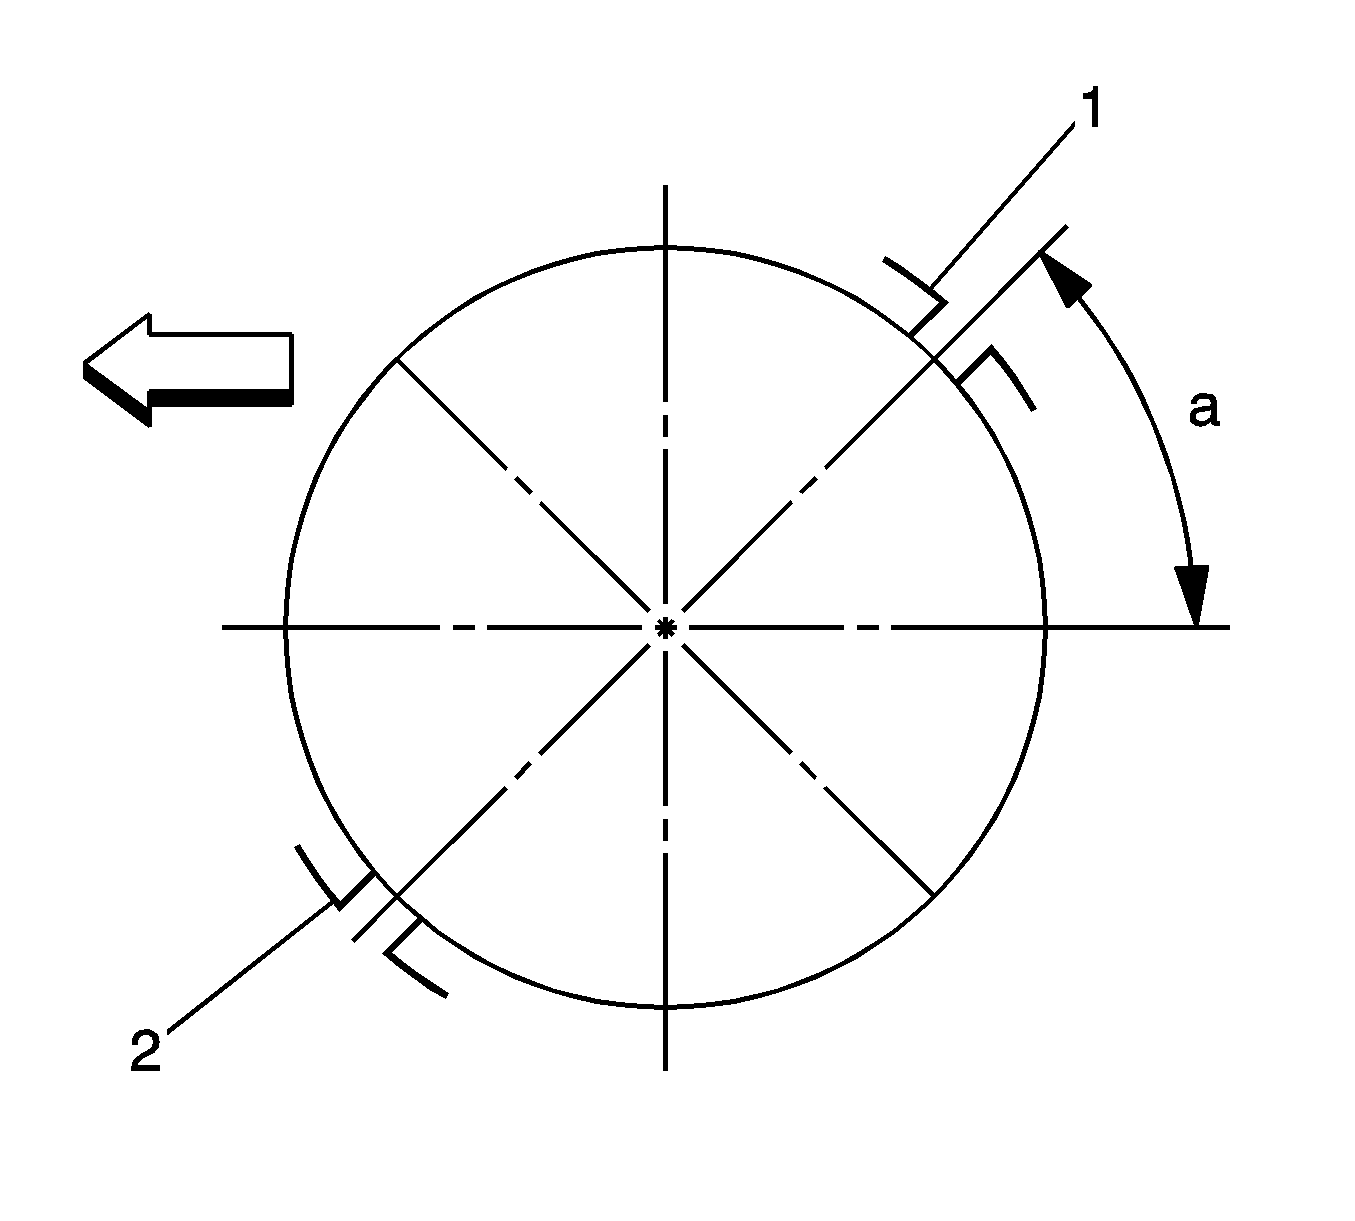
Note: Do not align the ring ends.
Note:
• When inserting the piston with connecting rod, do not allow it to make contact with the oil nozzle. • Match the numbered connecting rod cap with the connecting rod (2).
Note: The connecting rod cap bolts should be tightened in 2 progressive steps.
Caution: Refer to Fastener Caution in the Preface section.
Note:
• Remove any oil from the contact surface. • Install the No. 1 ventilation case within 3 minutes and tighten the bolts and nuts within 15 minutes after applying seal packing. • Do not start the engine for at least 2 hours after installing.

