For 1990-2009 cars only
Lower Control Arm Replacement All Wheel Drive and GT
Special Tools
EN-49191 Torque Wrench Adapter
Removal Procedure
- Raise and support the vehicle. Refer to Lifting and Jacking the Vehicle.
- Remove the rear tire and wheel assembly. Refer to Tire and Wheel Removal and Installation.
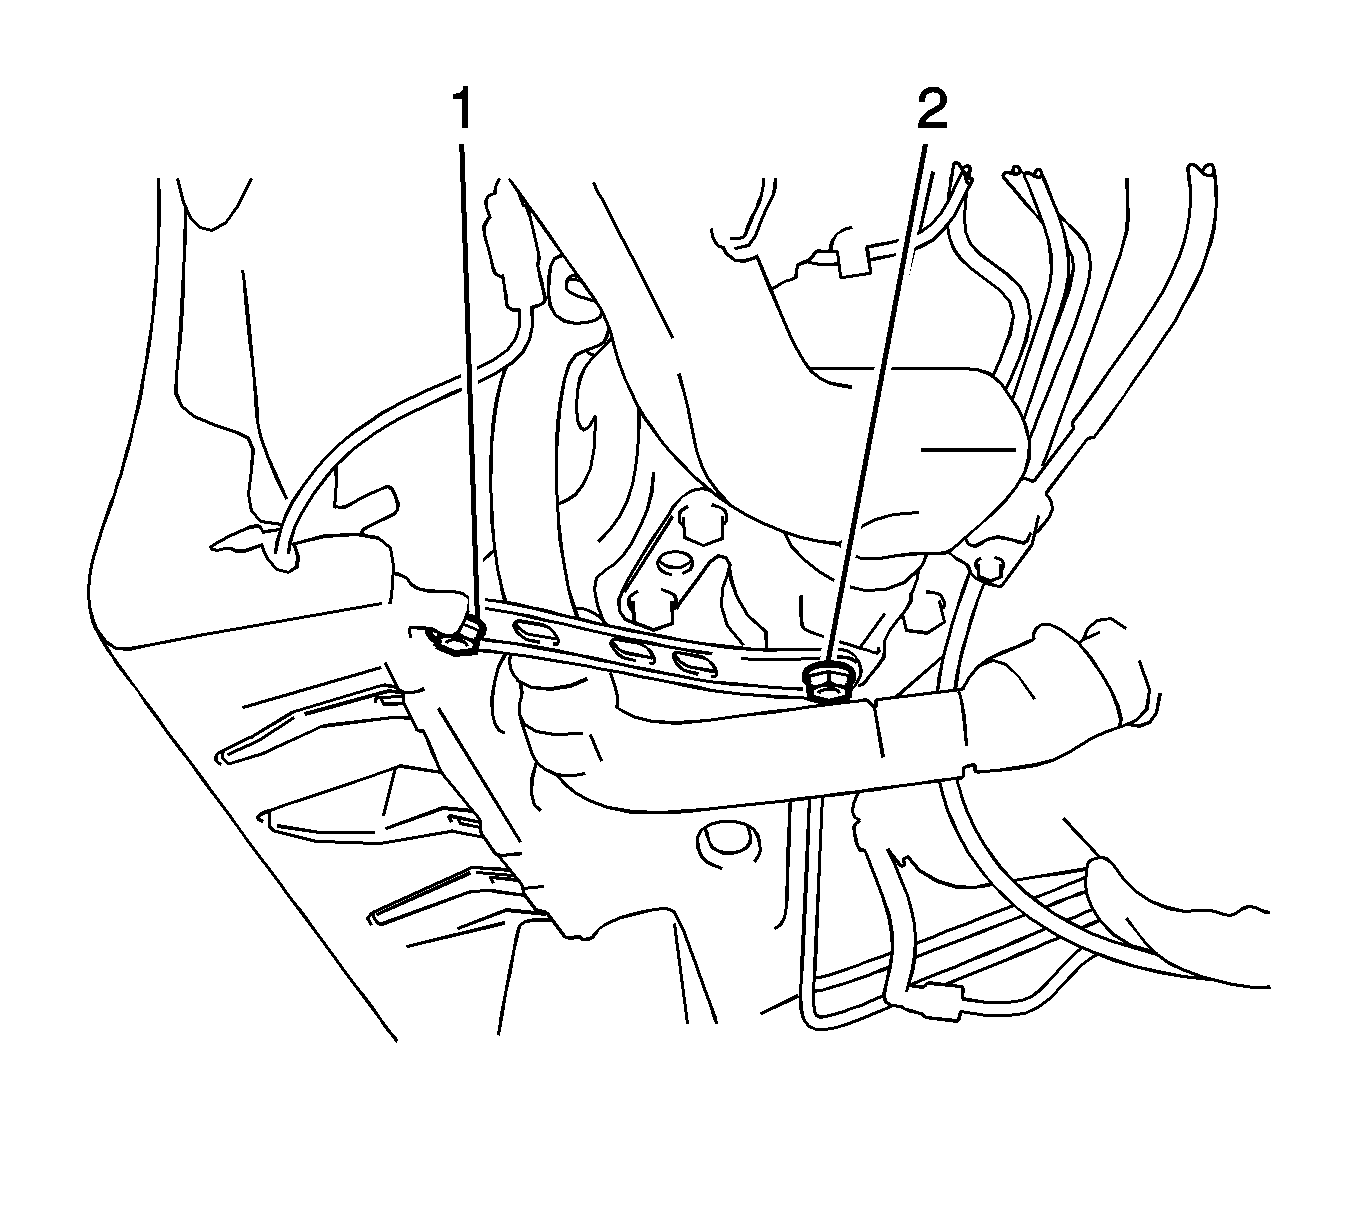
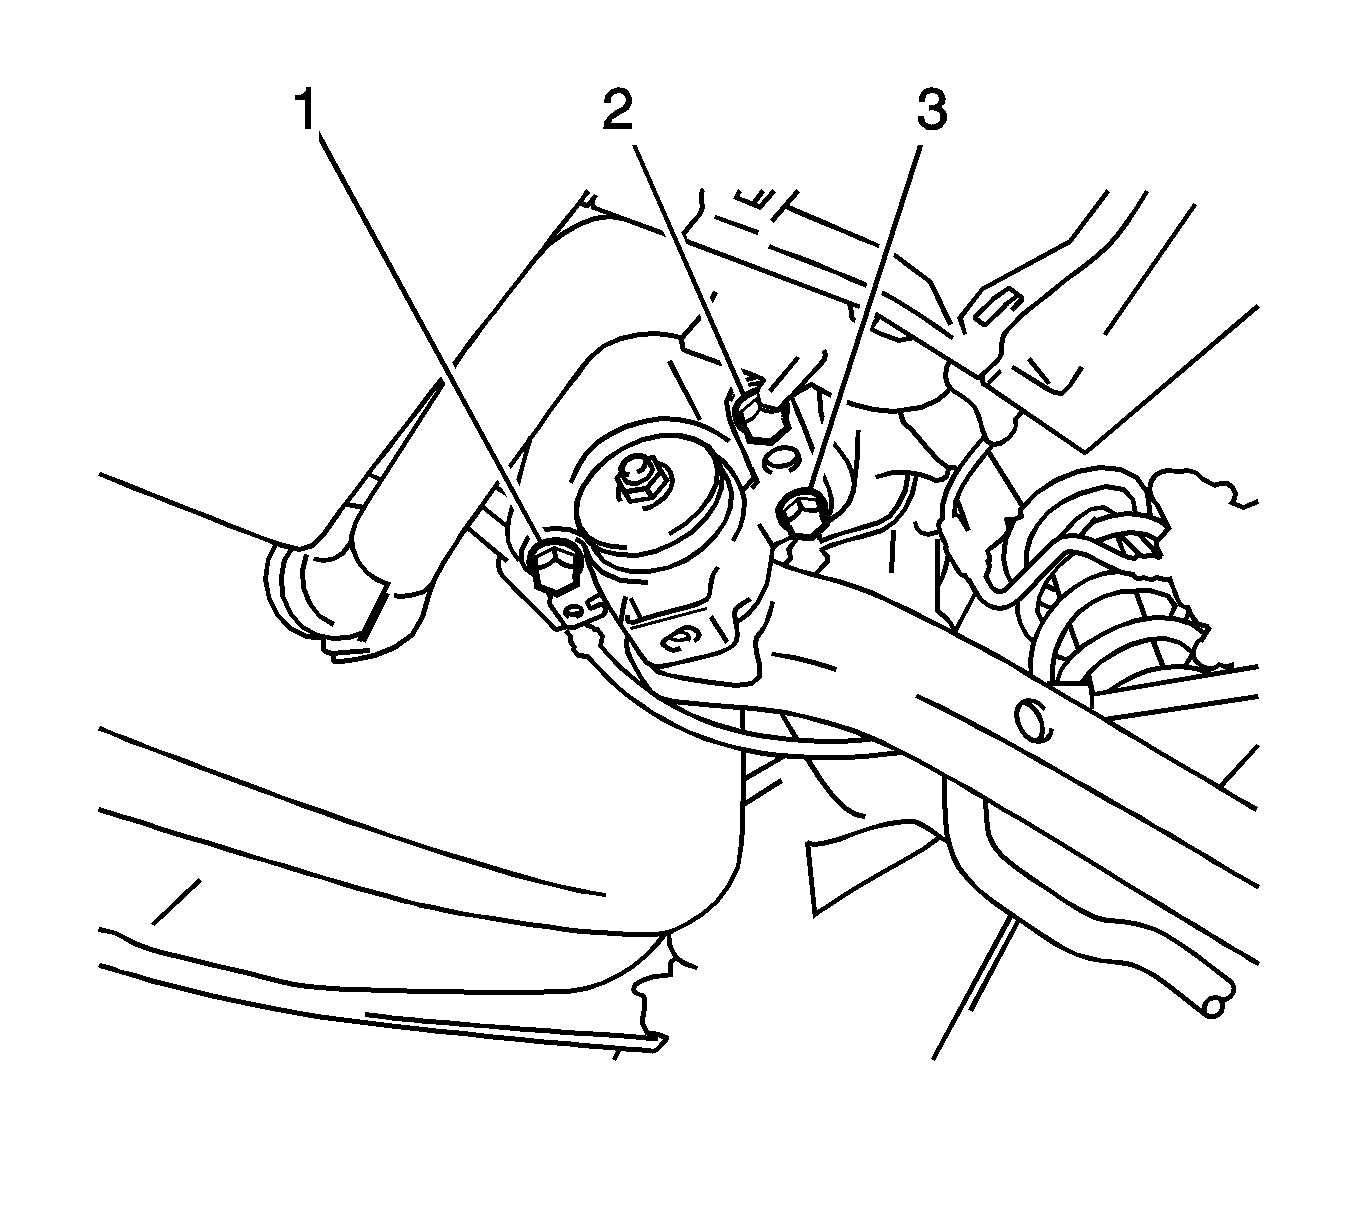
- If you are removing the left rear lower control arm, remove the 2 bolts (1, 2) and the rear floor side member brace.
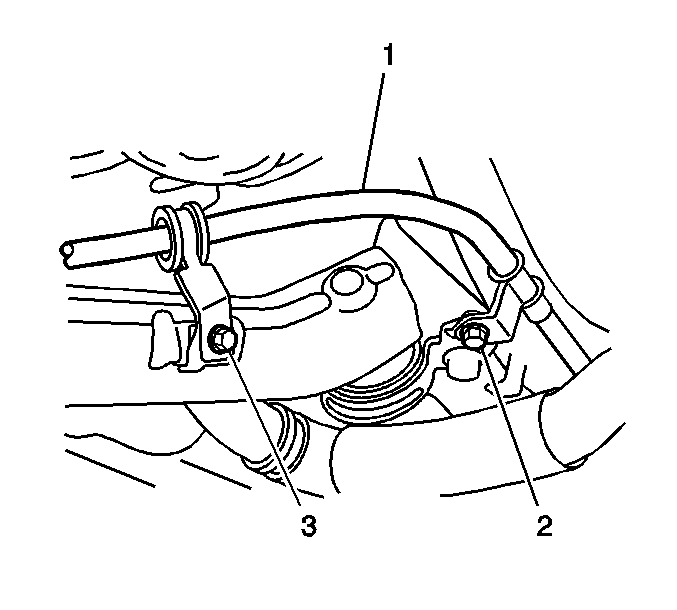
- Remove the 2 bolts (2, 3) in order to separate the park brake cable (1) from the lower control arm.
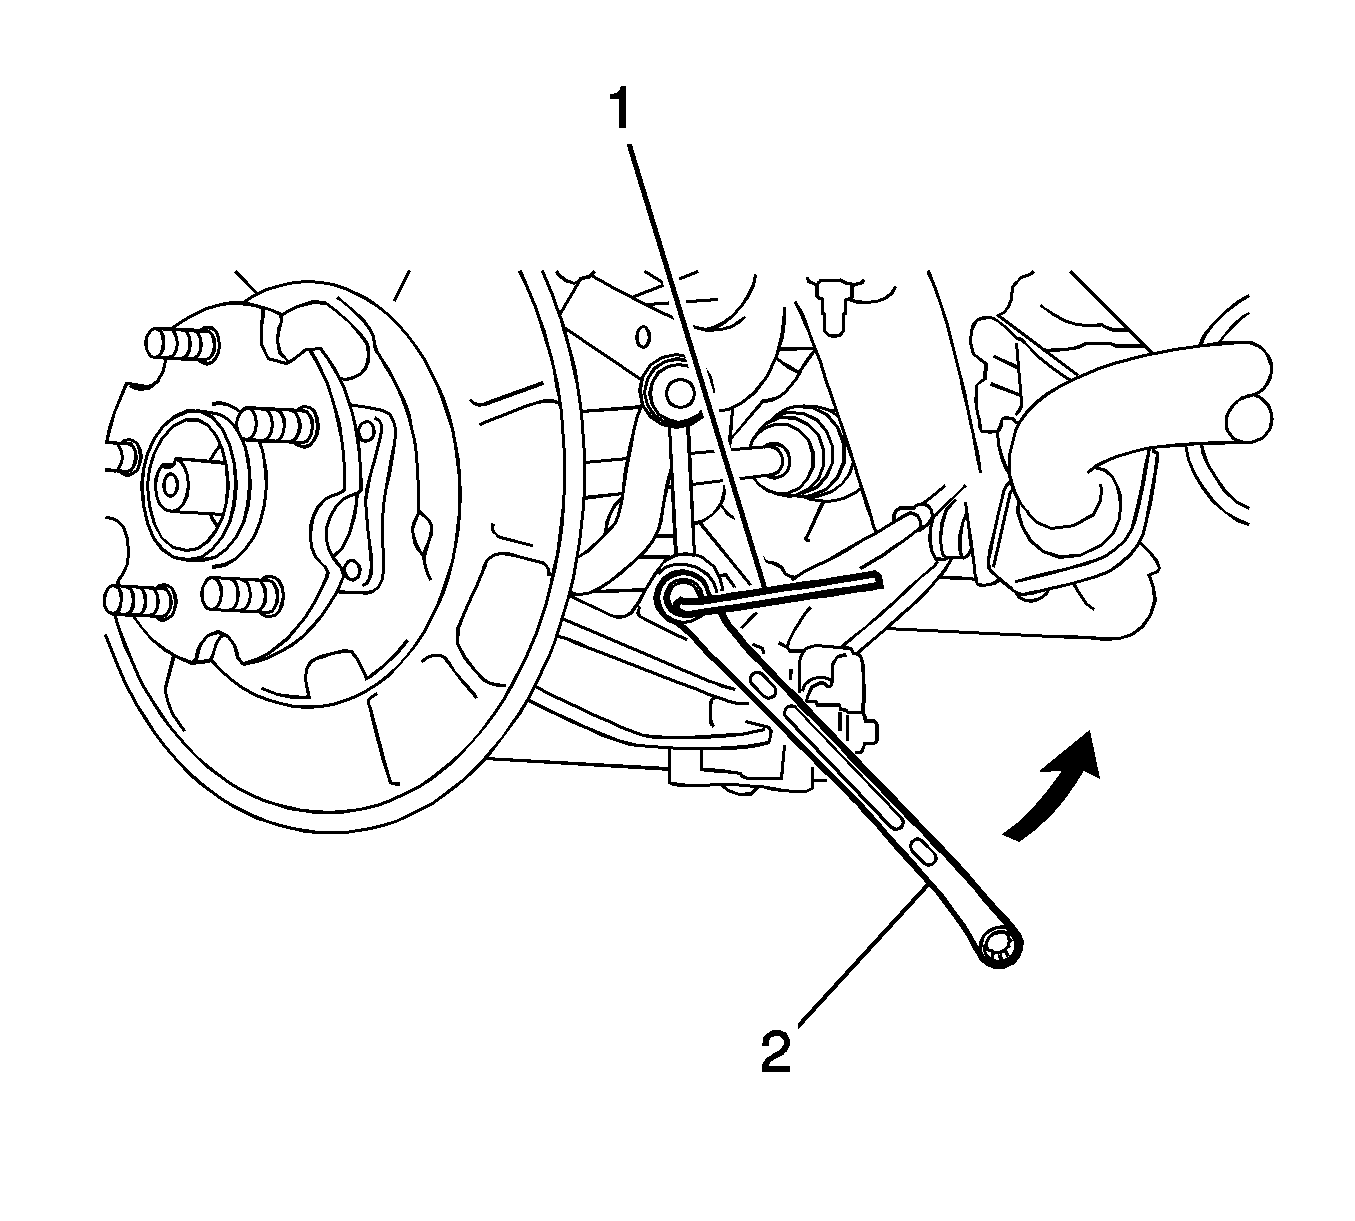
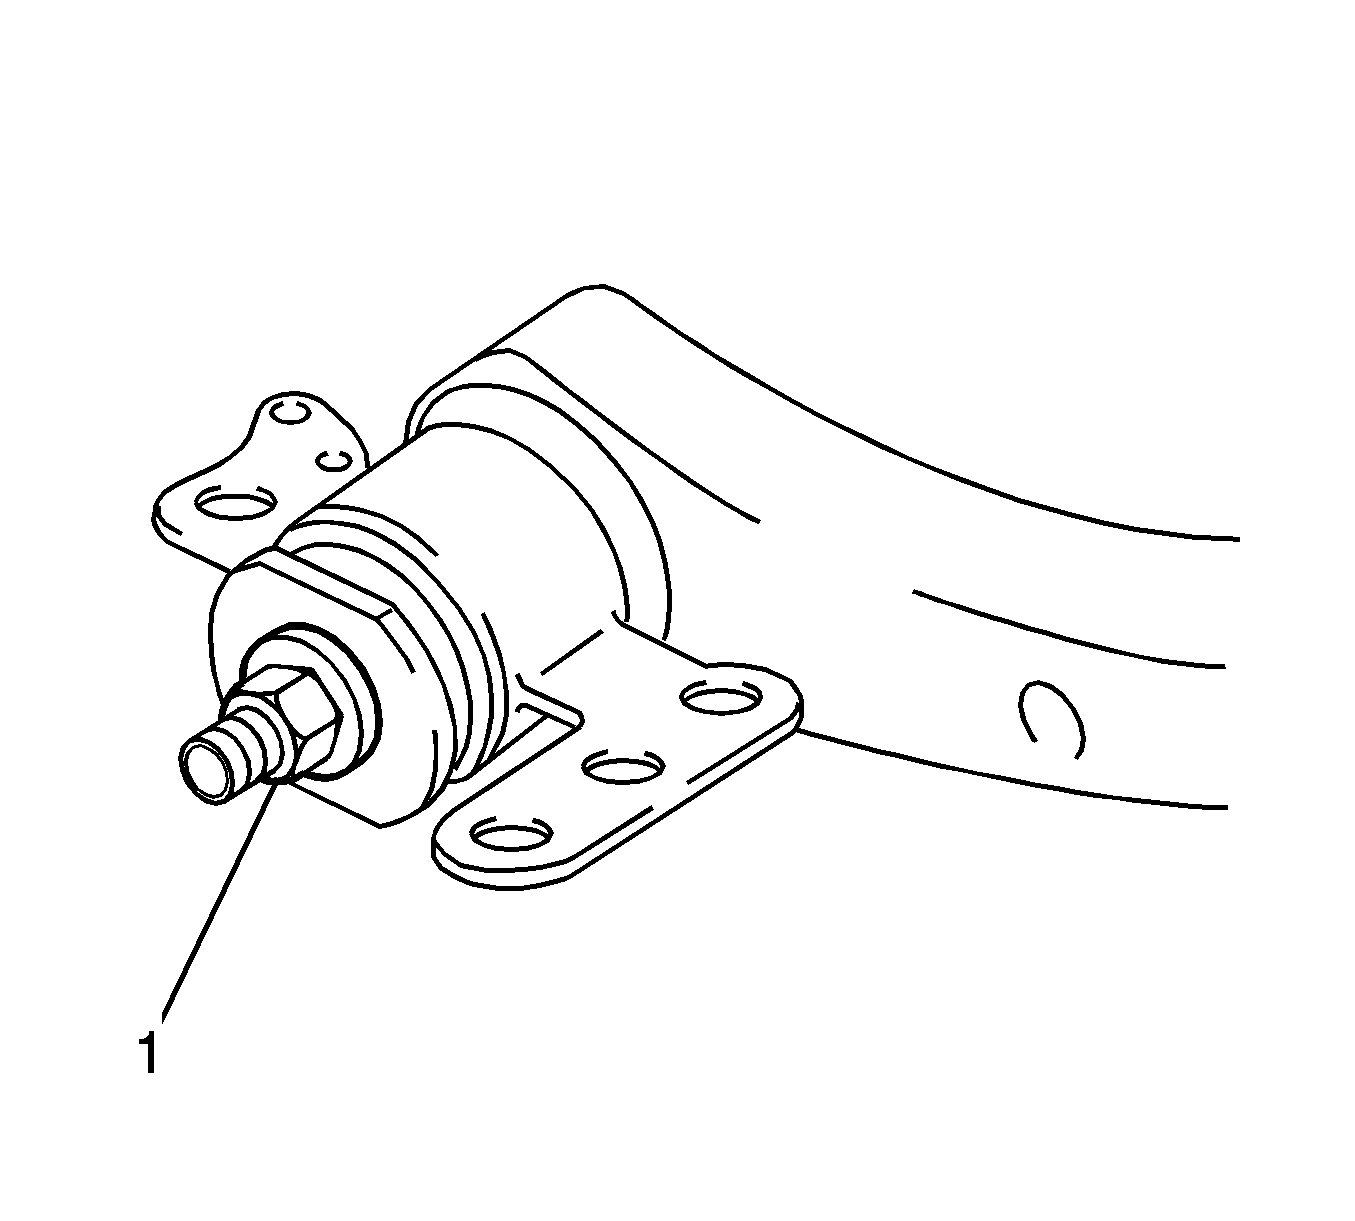
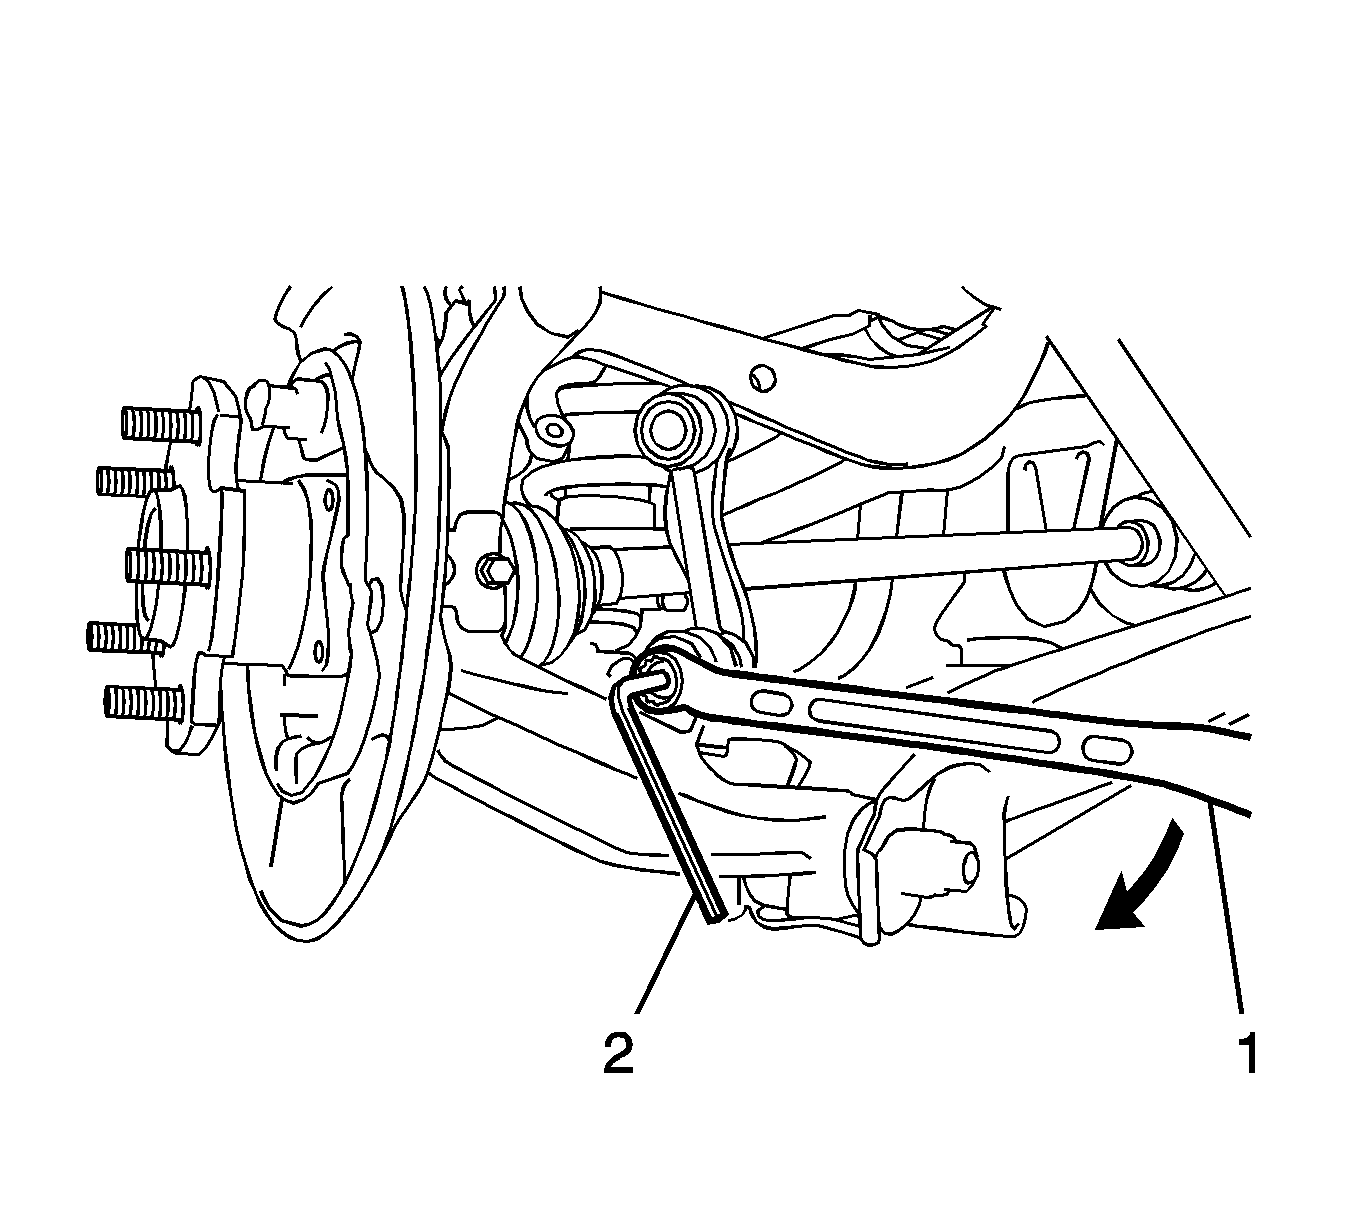
- Use a wrench (1) in order to hold the lower stud on the stabilizer shaft link. Remove the nut in order to separate the lower stabilizer shaft link stud from the knuckle.
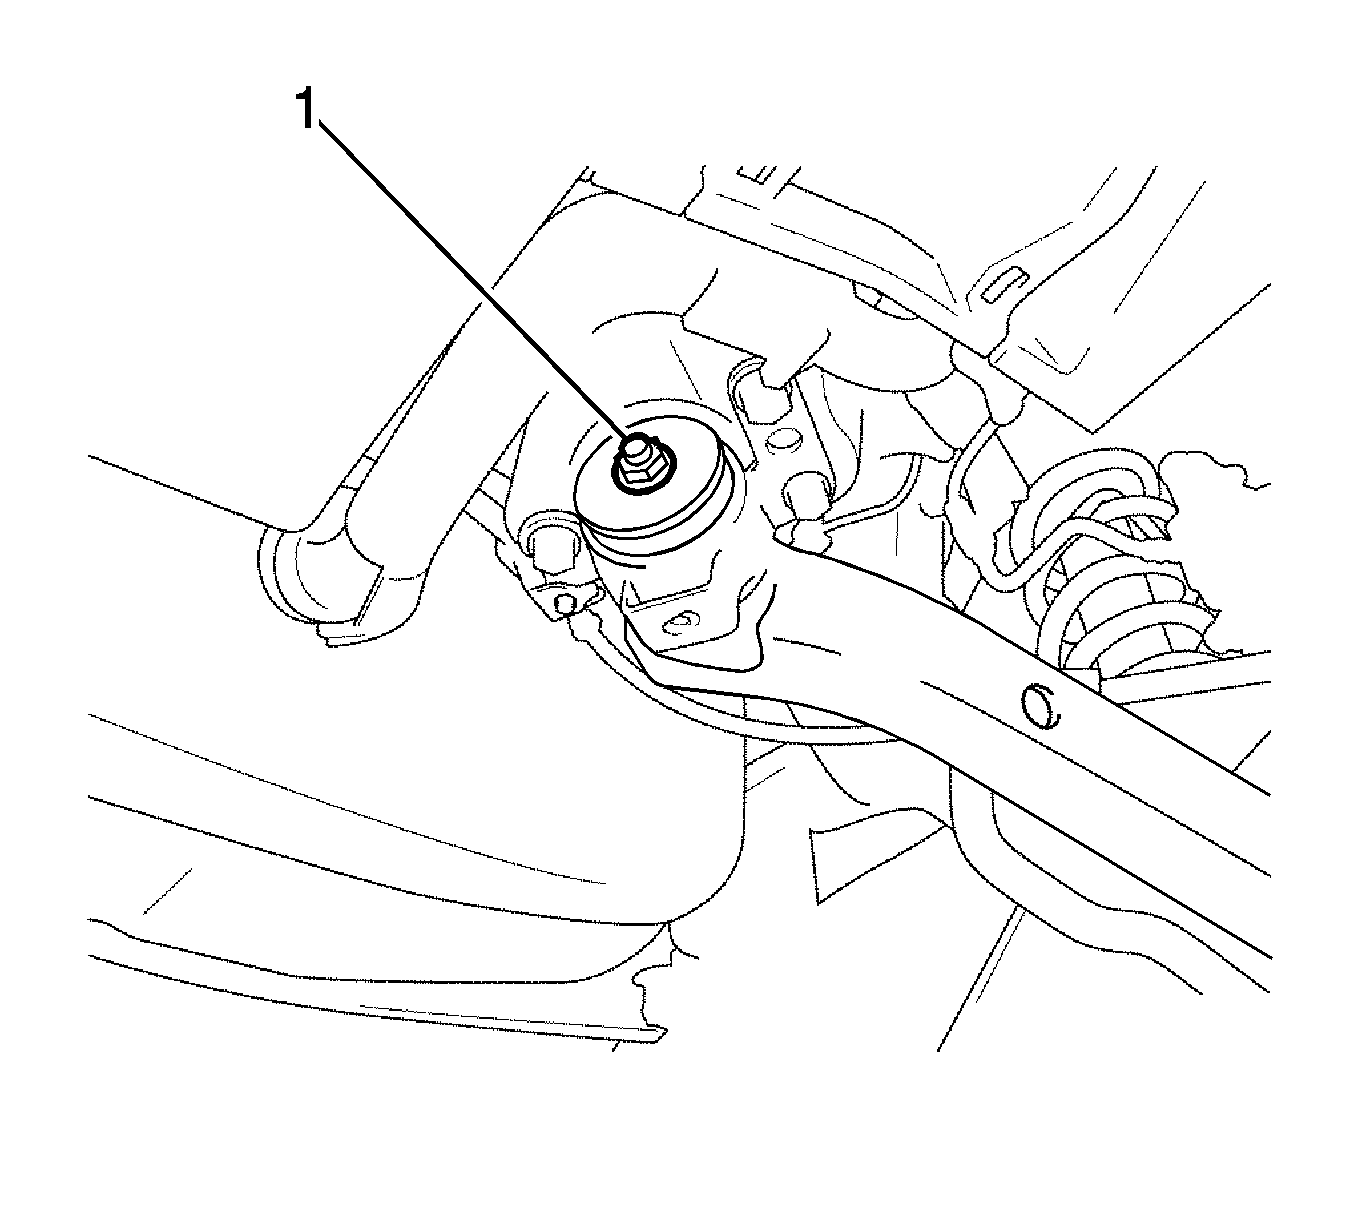
- Loosen, but do not remove, the nut and the bolt (1) at the bottom of the shock absorber.
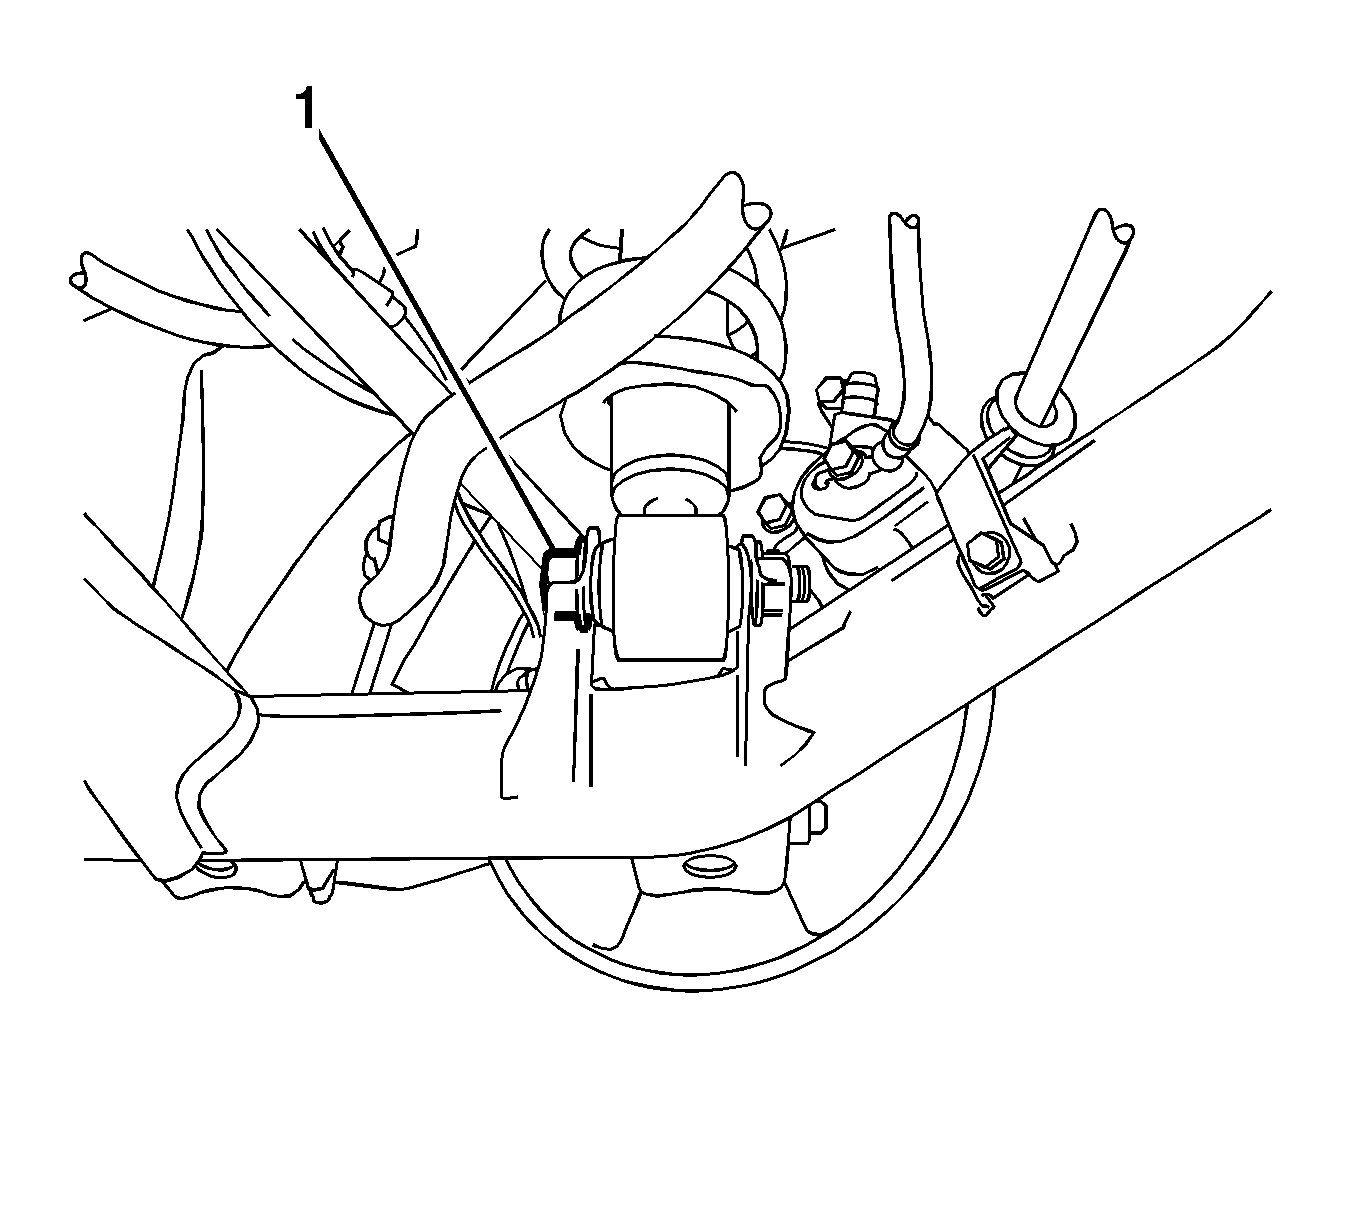
- Loosen, but do not remove, the nut (1) on the lower control arm bracket.
- Support the lower control arm with a jack.
- Remove the nut (1) and the bolt from the front of the lower control arm.
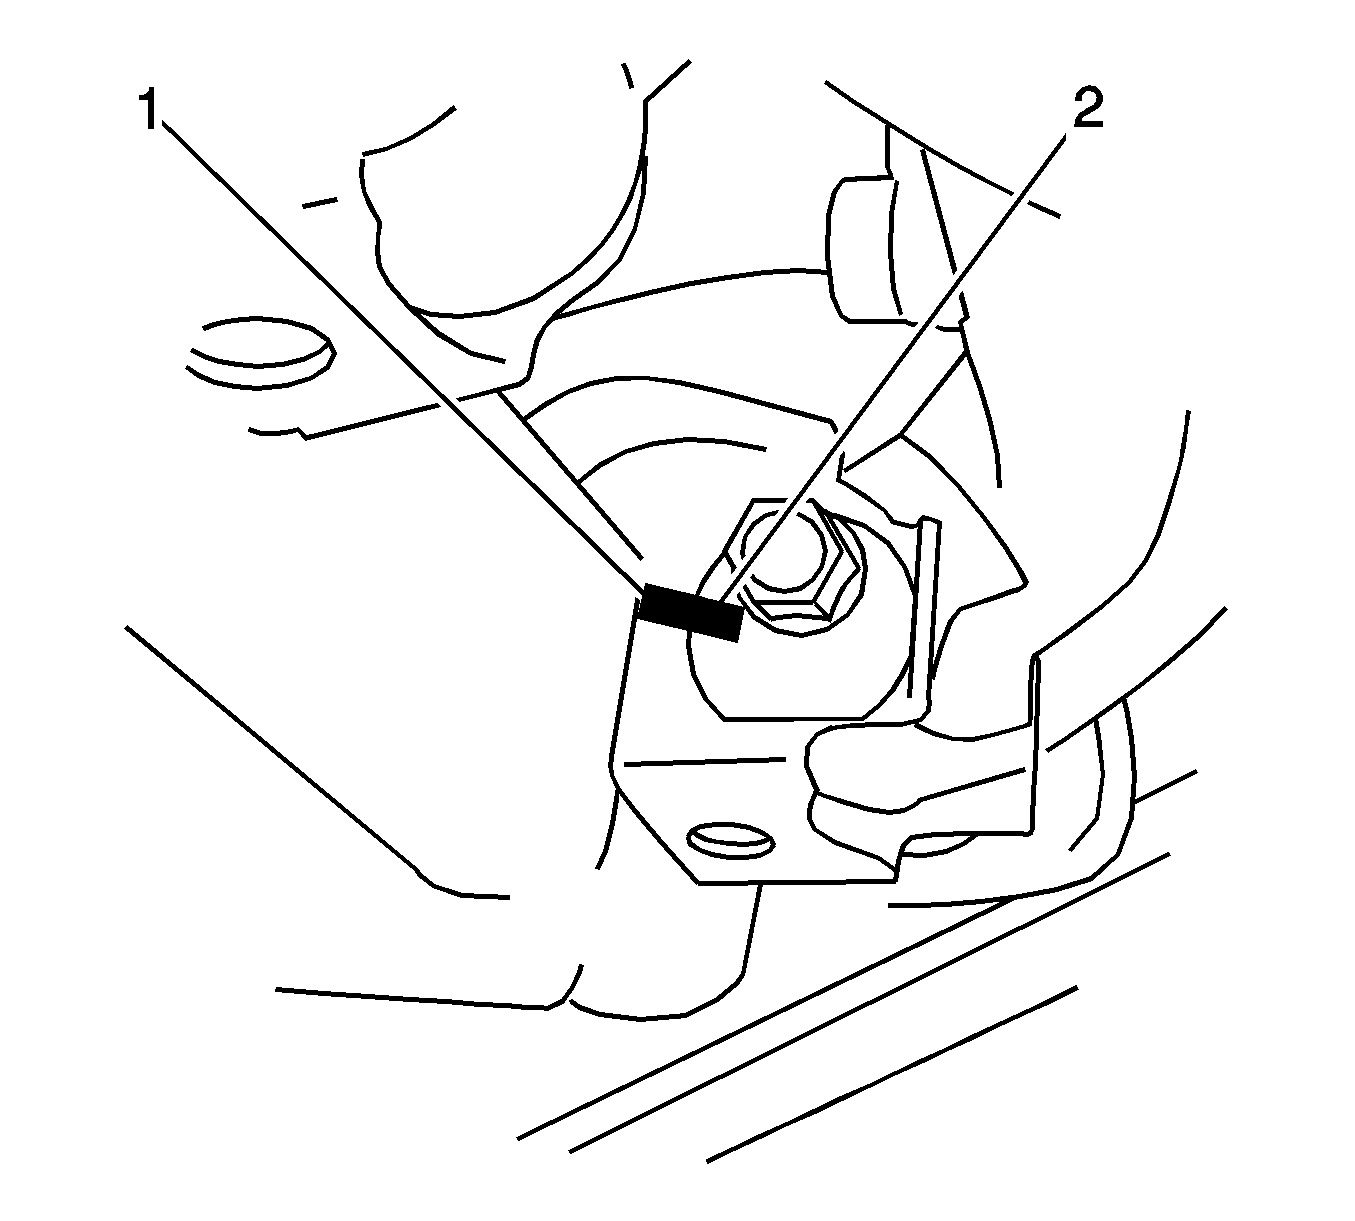
- Use paint in order to place match marks on the cam bolt (2) and on the lower control arm (1).
- Use paint in order to place match marks on the adjust cam (1) and on the lower control arm (2).
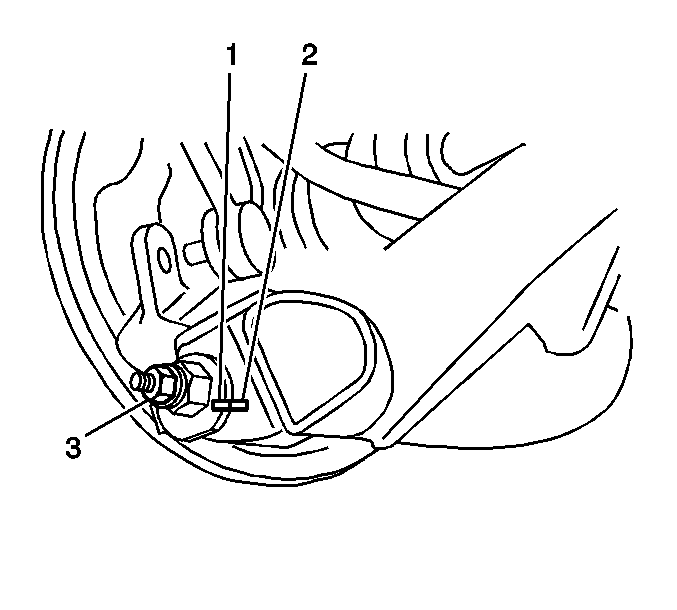
- Remove the nut (3) from the adjust cam and from the cam bolt.
- Remove the adjust cam.
- Remove the cam bolt.
- Separate the control arm from the knuckle.
- Remove the nut and the bolt (1) from the shock absorber.
- Separate the lower control arm from the shock absorber.
- Hold the nut and remove the bolt (1) from the control arm.
- Separate the control arm from the rear suspension support crossmember.
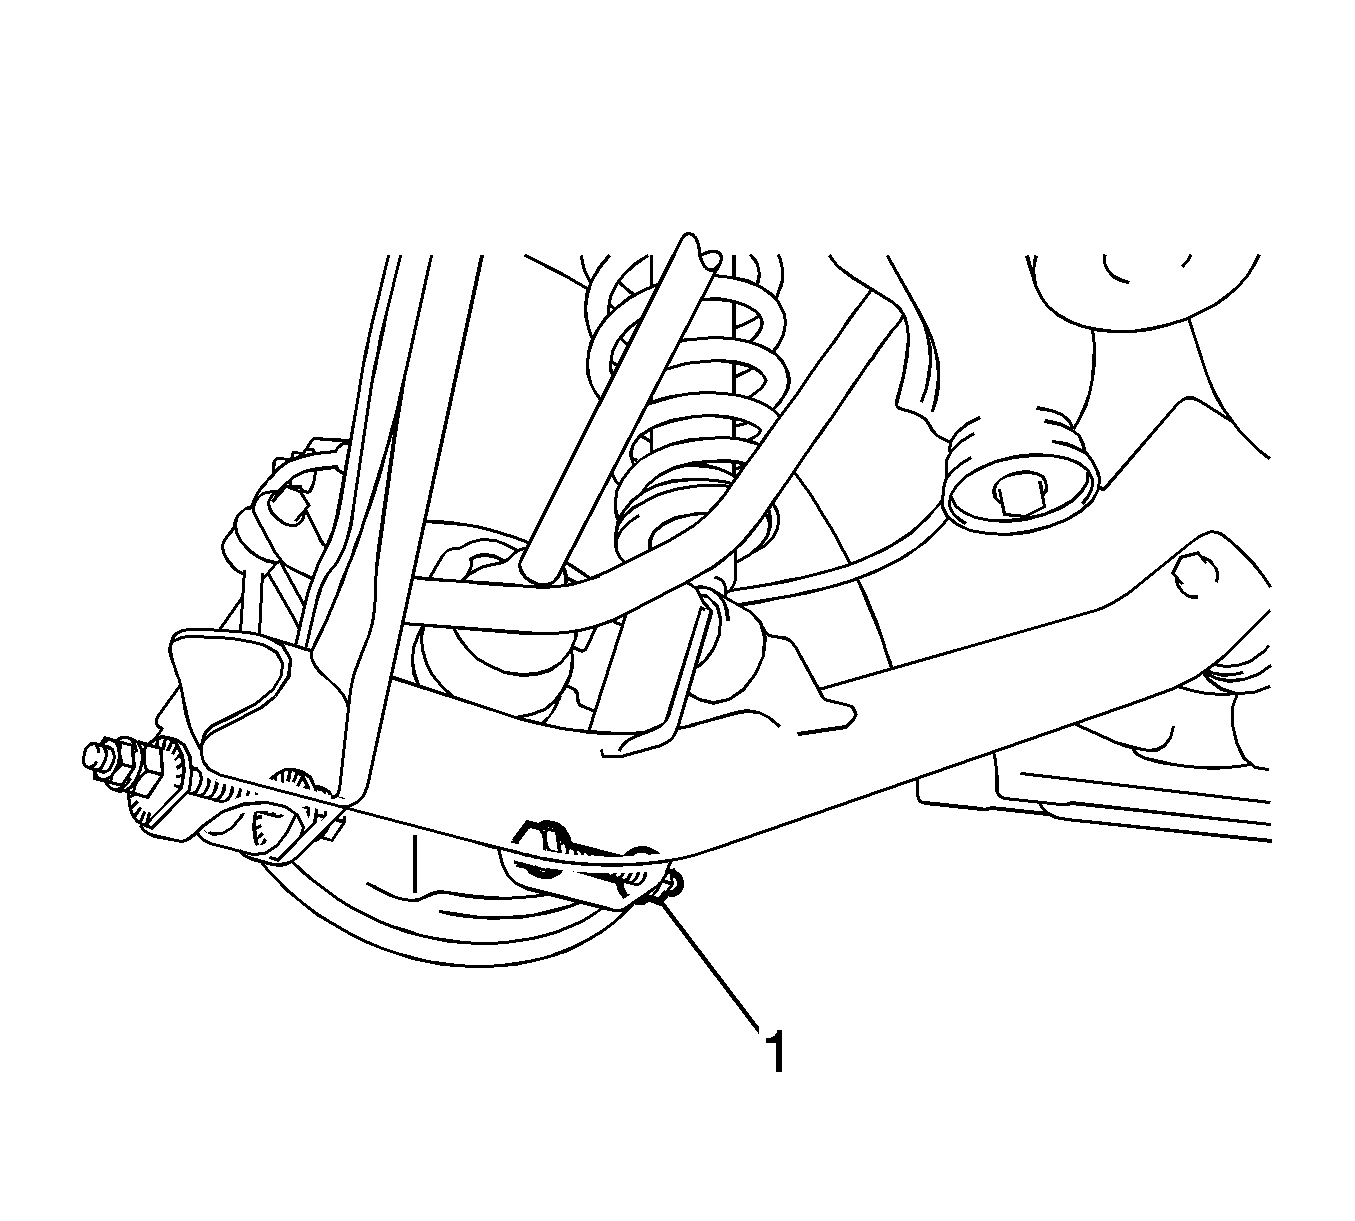
- Remove the 3 bolts (1, 2, 3) from the lower control arm bracket.
- Remove the control arm from the vehicle.
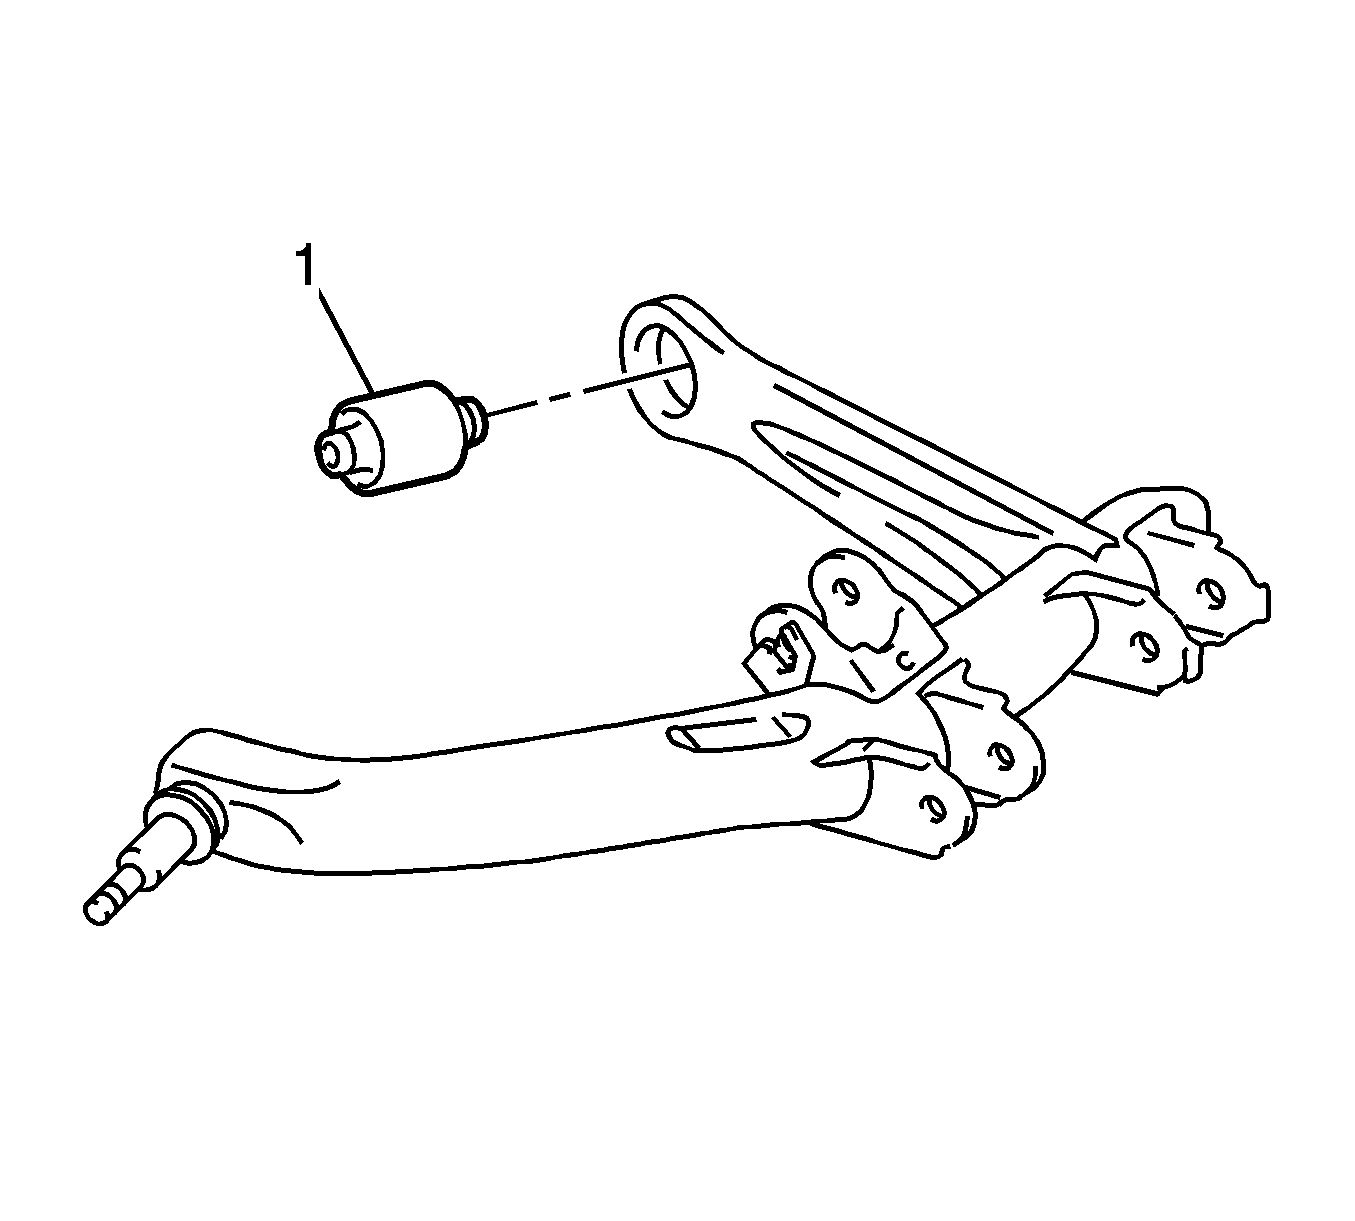
- Remove the nut (1) and the bracket from the control arm.
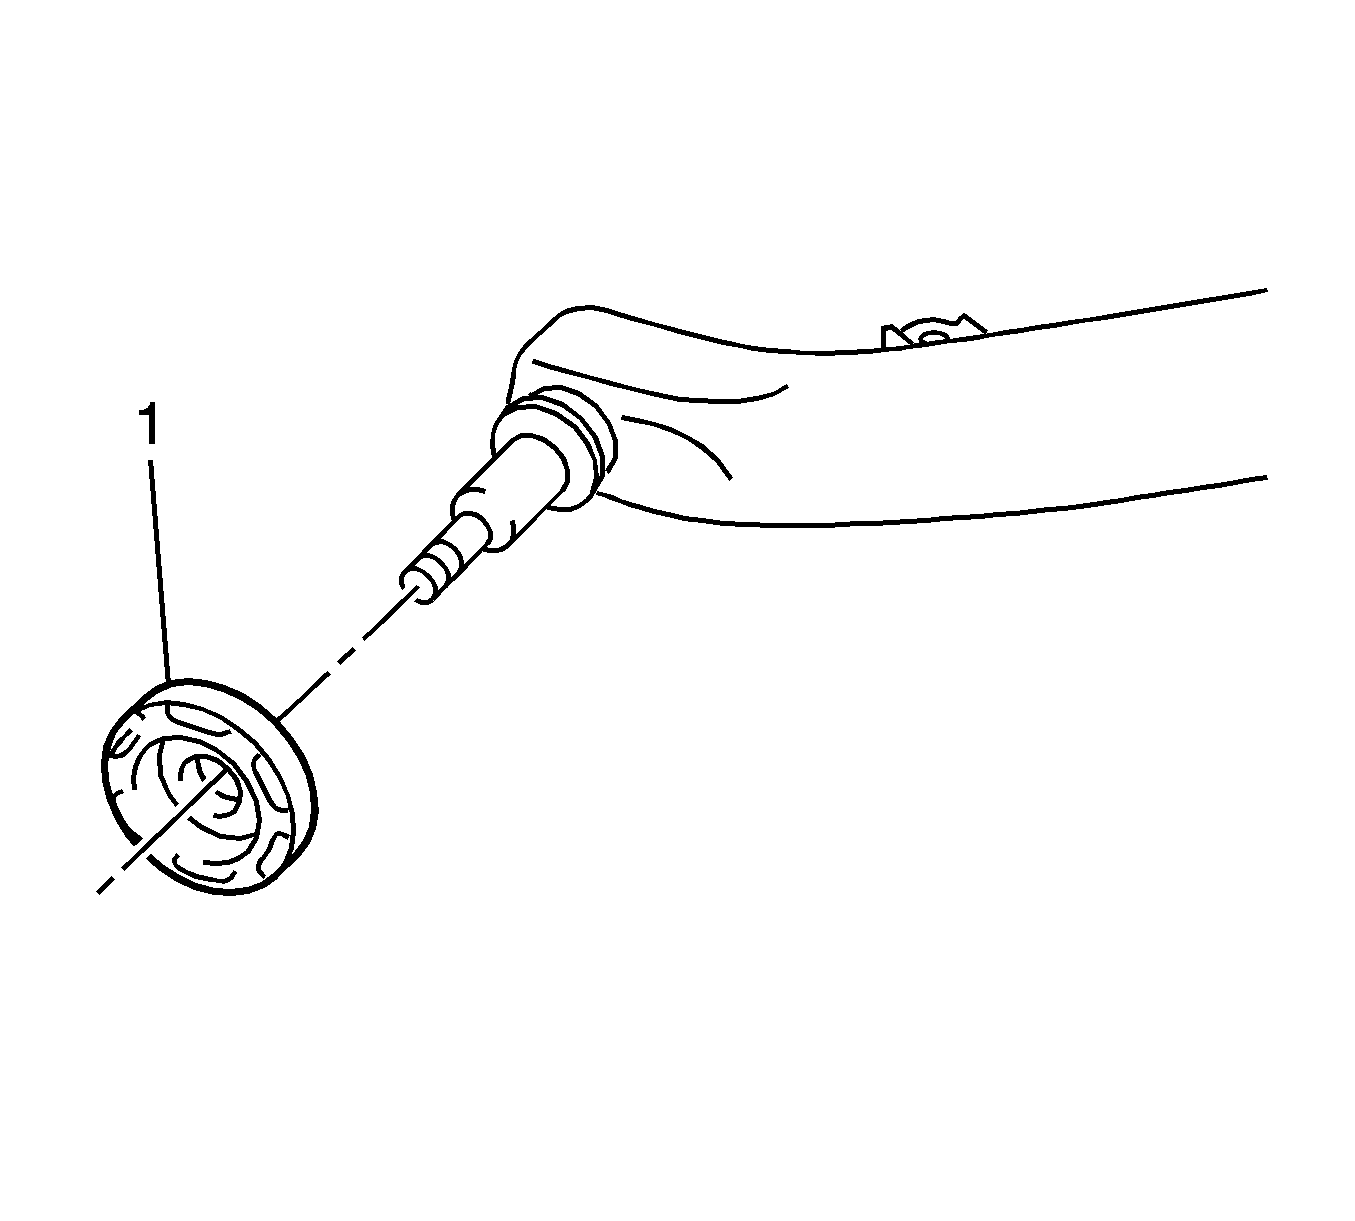
- Remove the insulator (1) from the control arm.
- If necessary, use a press in order to remove the bushing (1) from the lower control arm.

Installation Procedure
- If you are replacing the rear lower control arm, copy the match marks from the old components to the new components.
- If you removed the bushing from the control arm, use a press in order to install the bushing.
- Install the insulator (1) to the control arm.
- Install the bracket to the control arm.
- Install, but do not tighten, the nut (1) to the control arm.
- Raise and support the lower control arm with a jack.
- Install the control arm to the shock absorber.
- Install, but do not tighten, the nut and the bolt (1) to the shock absorber.
- Install the control arm to the rear suspension support crossmember.
- Install, but do not tighten, the nut and the bolt (1).
- Install the 3 bolts (1, 2, 3) and the lower control arm bracket to the body. Tighten the bolts to 65 N·m (48 lb ft).
- Install the control arm to the knuckle.
- Install, but do not tighten, the bolt and the nut (1) to the front of the lower control arm.
- Align the match marks and install the cam bolt (2) to the rear of the lower control arm (1).
- Align the match marks and install the adjust cam (1) to the cam bolt.
- Install, but do not tighten, the nut (3).
- Install the nut in order to retain the stabilizer shaft link stud to the knuckle. Use a wrench (2) in order to hold the stud. Tighten the nut to 44 N·m (32 lb ft).
- Install the 2 bolts (2, 3) in order to retain the park brake cable (1) to the lower control arm. Tighten the bolts to 6 N·m (53 lb in).
- If you installed the left rear lower control arm, install the rear floor side member brace with the 2 bolts (1, 2). Tighten the bolts to 30 N·m (22 lb ft).
- Lower the vehicle.
- Raise and support the vehicle on a wheel alignment rack. Refer to Lifting and Jacking the Vehicle.
- With the weight of the vehicle on the tires, push down on the rear bumper 3 times in order to stabilize the suspension.
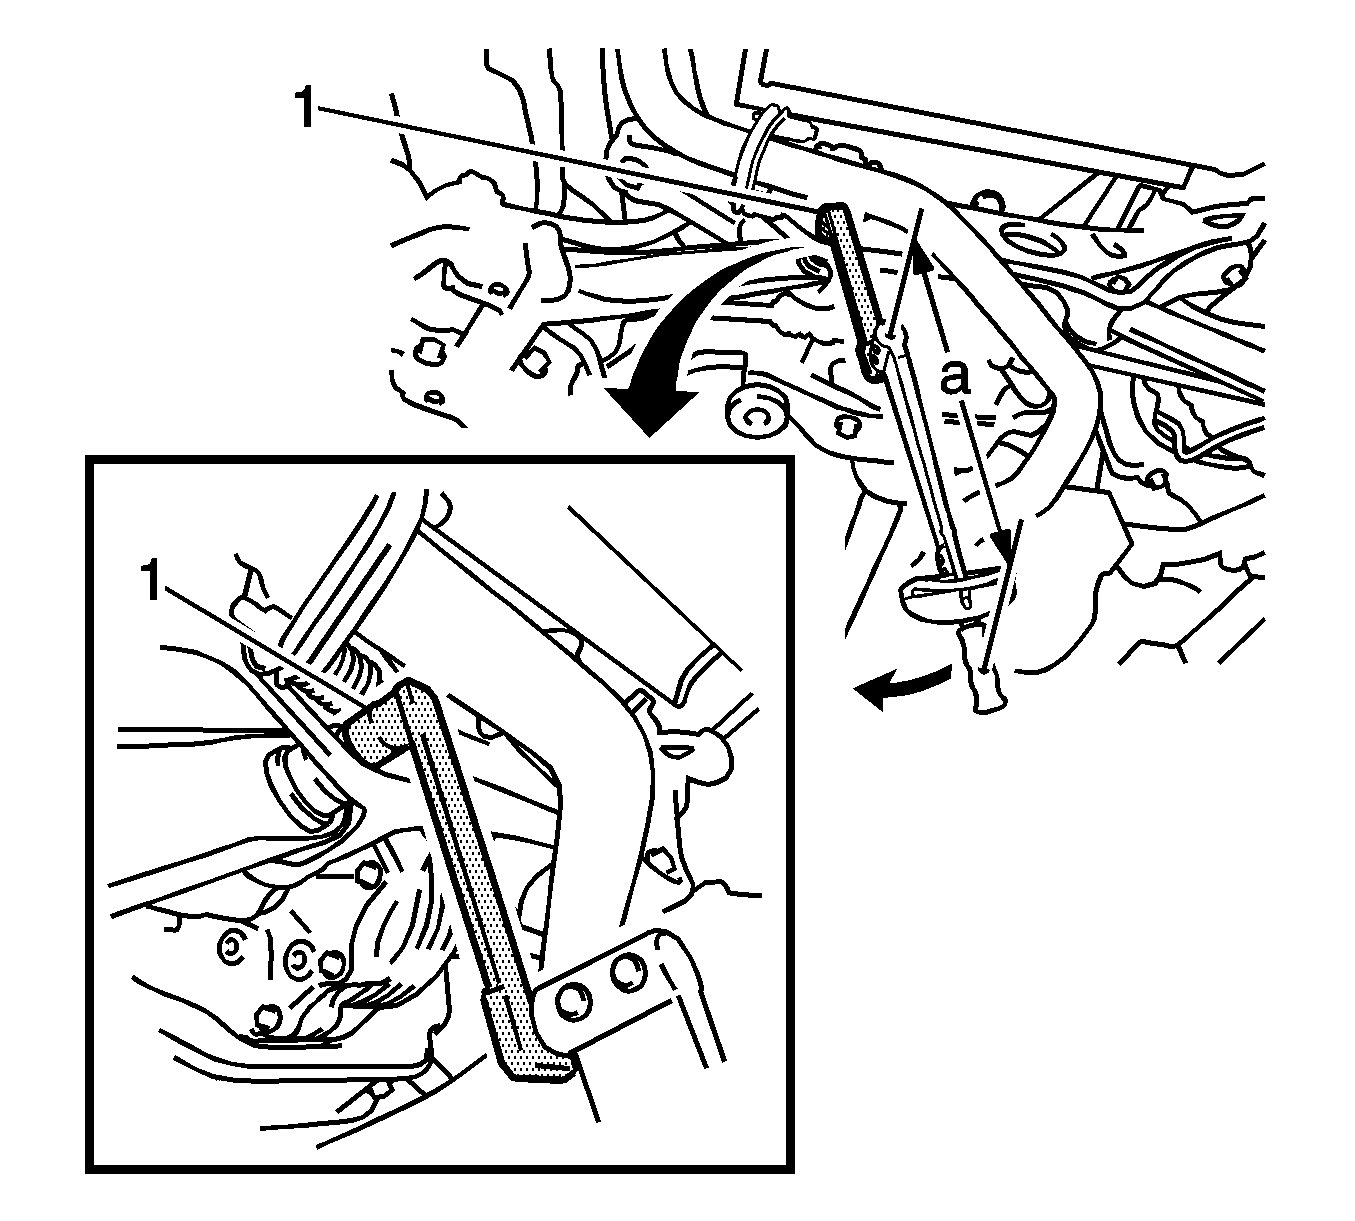
- Select a torque wrench with the correct fulcrum length (a).
- Use a wrench in order to hold the nut that retains the lower control arm to the rear suspension support crossmember. Use the EN-49191 adapter (1) and the torque wrench in order to tighten the bolt to 64 N·m (47 lb ft).
- Use a wrench in order to hold the nut (1) that retains the front of the lower control arm to the knuckle. Tighten the bolt to 140 N·m (103 lb ft).
- Align the match marks on the cam bolt (2) and on the control arm (1).
- Align the match marks on the adjust cam (1) and on the control arm (2).
- Tighten the nut (3) that retains the rear of the lower control arm to the knuckle to 74 N·m (55 lb ft).
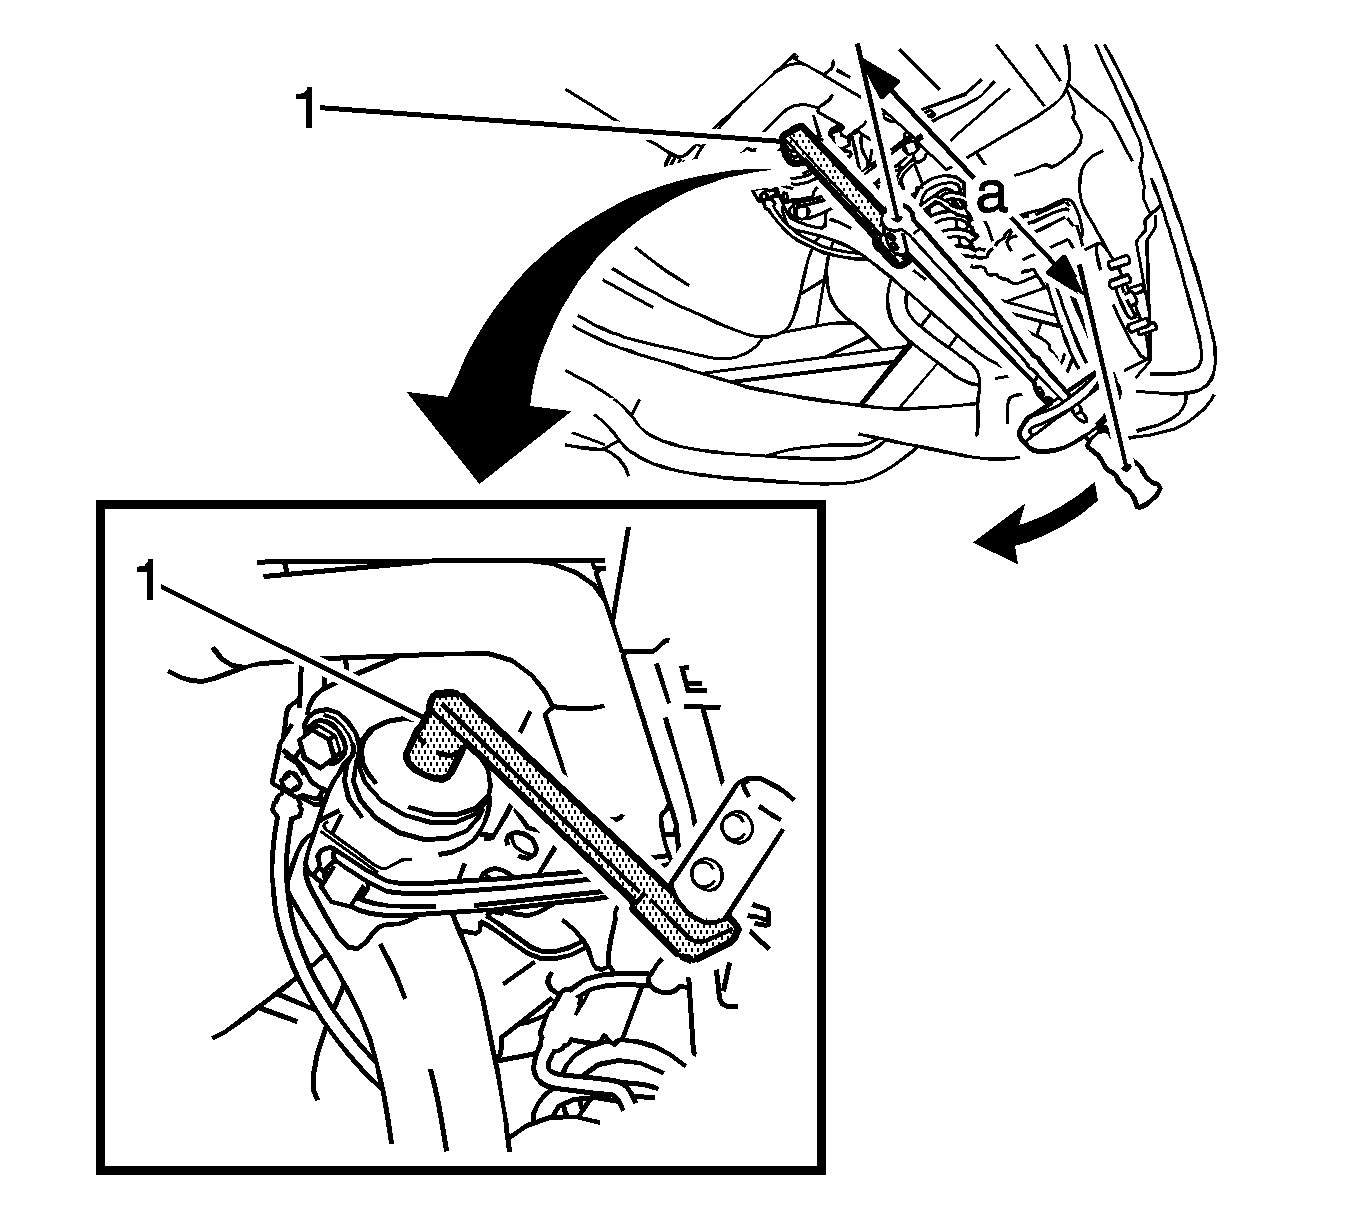
- Select a torque wrench with the correct fulcrum length (a).
- Use the EN-49191 adapter (1) and the torque wrench in order to tighten the nut on the control arm bracket to 81 N·m (60 lb ft).
- Tighten the nut and the bolt (1) on the shock absorber to 210 N·m (155 lb ft).
- Measure the wheel alignment. Adjust the wheel alignment if necessary. Refer to Wheel Alignment Measurement.
- Remove the jacks.
- Lower the vehicle.

Note: Install the bushing in the correct position.
Specification
The distance (a) is 15 ± 0.5 mm (0.59 ± 0.02 in).
Note: Install the insulator in the correct position.
Note: Do not tighten the nuts or the bolts. The weight of the vehicle must be on the tire and wheel assemblies before tightening the nuts and the bolts.
Caution: Refer to Fastener Caution in the Preface section.
Specification
The torque wrench fulcrum length is 425 mm (16.73 in).
Note: Ensure the torque wrench is parallel to the EN-49191 adapter .
Specification
The torque wrench fulcrum length is 425 mm (16.73 in).
Note: Ensure the torque wrench is parallel to the EN-49191 adapter .
