For 1990-2009 cars only
Removal Procedure
- Remove the door window regulator handle, if equipped. Refer to Door Window Regulator Handle Replacement .
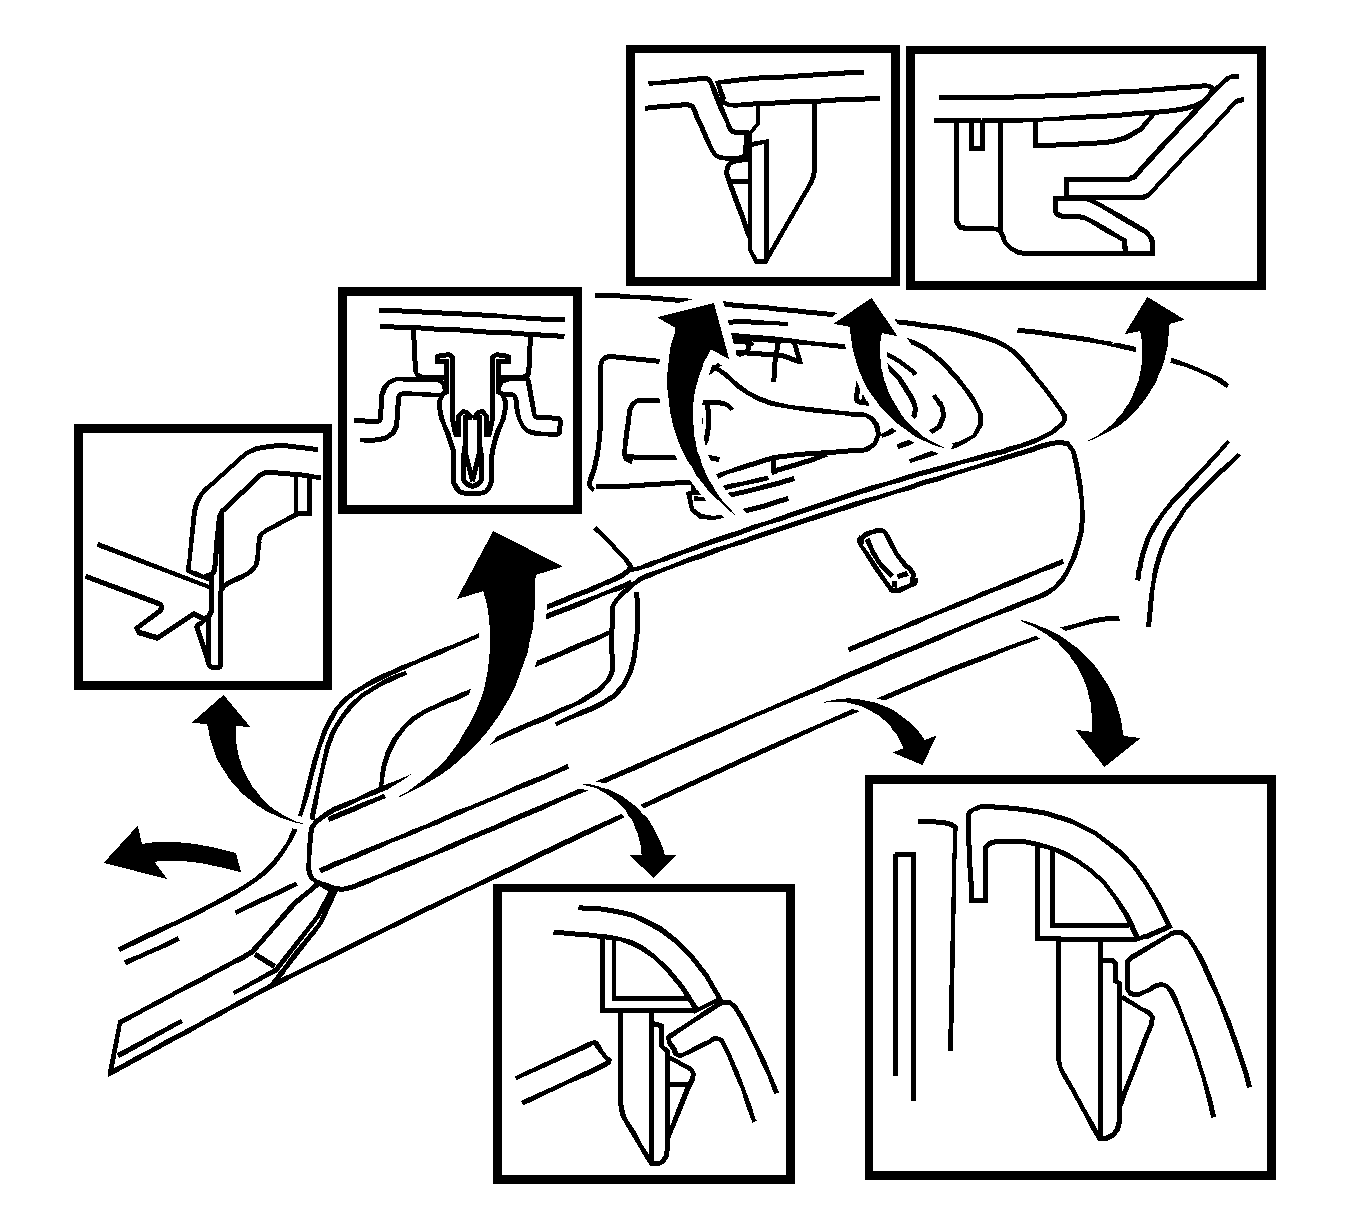
- Using a taped flat-bladed tool, disengage the three clips, and remove the front door inside handle bezel.
- Using a taped flat-bladed tool, disengage the clip and the seven retainers.
- Disconnect the electrical connector, if equipped.
- Remove the front door trim armrest.
- Remove the power accessory switch panel, if equipped. Refer to Power Accessory Switch Panel Replacement .
- Remove the right front door power switch, if equipped. Refer to Front Side Door Window Switch Replacement - Right Side .
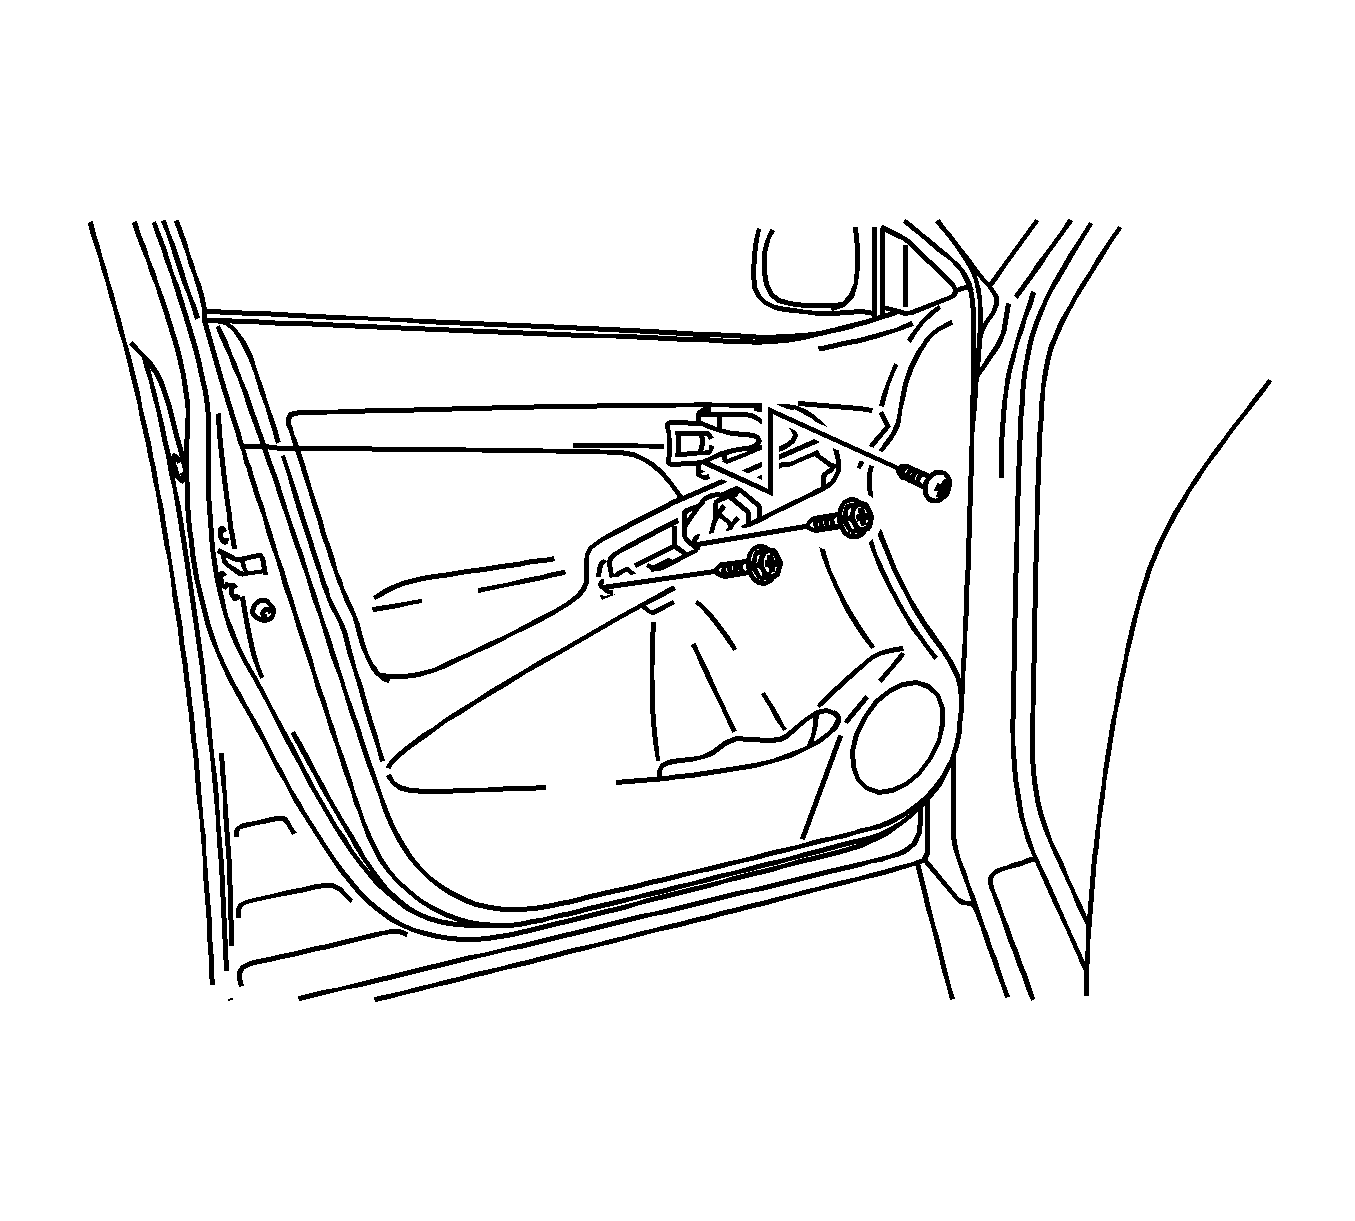
- Remove the three screws.
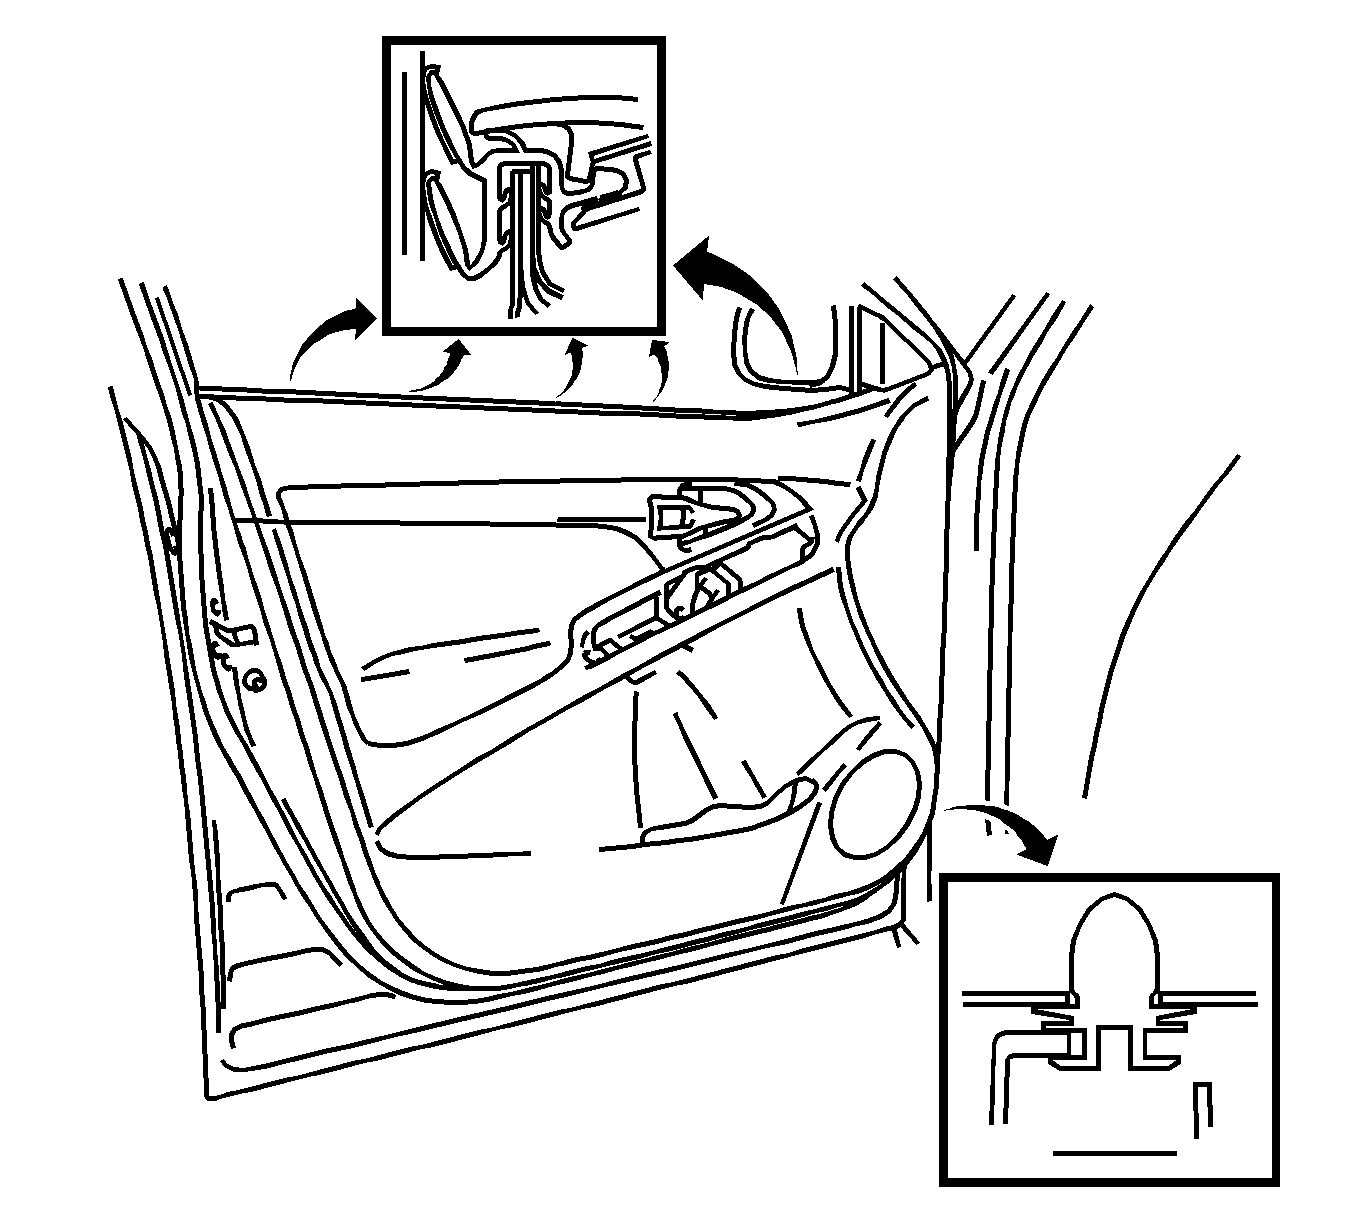
- Using a trim removal tool, disengage the ten retainers.
- Disengage the five clips and separate the front door trim panel front the front door inner belt sealing strip.
- Remove the front door trim panel from the vehicle.


Installation Procedure
- Install the front door trim panel to the vehicle.
- Engage the five clips and install the front door trim panel to the front door inner belt sealing strip.
- Engage the ten retainers.
- Install the three screws.
- Install the right front door power switch, if equipped. Refer to Front Side Door Window Switch Replacement - Right Side .
- Install the power accessory switch panel, if equipped. Refer to Power Accessory Switch Panel Replacement .
- Install the front door trim armrest to the front door trim panel.
- Connect the electrical connector, if equipped.
- Engage the clip and the seven retainers.
- Engage the three clips, and install the front door inside handle bezel.
- Remove the door window regulator handle, if equipped. Refer to Door Window Regulator Handle Replacement .


