For 1990-2009 cars only
Removal Procedures
- Remove the engine cover.
- Disconnect the negative battery cable.
- Remove the throttle body bolts and position throttle body aside. Refer to Throttle Body Assembly Replacement in Engine Controls.
- Remove the intake manifold insulator.
- Disconnect the evaporative emission (EVAP) hose for the ORVR.
- Disconnect the brake booster vacuum hose.
- Disconnect the positive crankcase ventilation (PCV) hose.
- Remove the one bolt and one nut from the accelerator cable bracket.
- Disconnect the engine coolant temperature (ECT) sensor connector.
- Remove the secondary air injection (AIR) solenoid valve. Refer to Secondary Air Injection Solenoid Valve Replacement In Engine Controls.
- Disconnect the camshaft position sensor connector.
- Disconnect the camshaft position (CMP) actuator solenoid valve connector.
- Disconnect the rocker arm (CMP) control solenoid valve connector.
- Disconnect the oil pressure switch and 2 ground connectors.
- Unclip the engine wire harness from the top of the generator.
- Remove one bolt from the engine wire harness bracket.
- Remove the oil dipstick guide bolt.
- Remove 2 bolts and one nut from the intake manifold bracket.
- Remove 2 bolts from the alternator bracket.
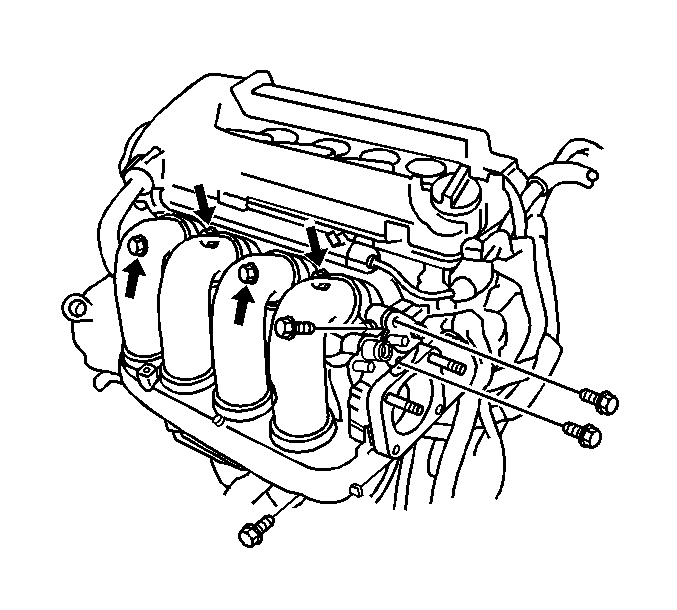
- Remove the intake manifold bolts and nuts.
- Remove the intake manifold and gasket.
- Remove the intake manifold insulator.
Caution: Refer to Battery Disconnect Caution in the Preface section.
Installation Procedure
- Install the intake manifold and new gasket.
- Install the intake manifold bolts and nuts.
- Install the alternator bracket and 2 bolts.
- Install the intake manifold bracket with 2 bolts and one nut.
- Install the oil dipstick guide tube and bolt.
- Install one bolt to the engine wire harness bracket.
- Clip the engine wire harness to the top of the generator.
- Connect the oil pressure switch and 2 ground connectors.
- Connect the rocker arm (CMP) control solenoid valve connector.
- Connect the CMP actuator solenoid valve connector.
- Connect the camshaft position sensor connector.
- Connect the ECT sensor connector.
- Install the AIR solenoid valve. Refer to Secondary Air Injection Solenoid Valve Replacement In Engine Controls.
- Install the one bolt and one nut to the accelerator cable bracket.
- Connect the PCV hose.
- Connect the brake booster vacuum hose.
- Connect the EVAP hose for the ORVR.
- Install the intake manifold insulator.
- Install the throttle body bolts. Refer to Throttle Body Assembly Replacement in Engine Controls.
- Install the engine cover.
- Connect the negative battery cable.
Notice: Refer to Fastener Notice in the Preface section.
Tighten
| • | Tighten the upper intake manifold nuts and bolts to 34 N·m (25 lb ft). |
| • | Tighten the lower intake manifold bolt to 46 N·m (34 lb ft). |
Tighten
Tighten the alternator bracket bolts to 29 N·m
(21 lb ft).
Tighten
Tighten the intake manifold bracket bolts and nut
to 24 N·m (18 lb ft).
Tighten
Tighten the oil dipstick guide tube bolt to 24 N·m
(18 lb ft).
Tighten
Tighten the engine wire harness bracket bolts to
10 N·m (7 lb ft).
Tighten
Tighten the accelerator cable bracket bolts to 13 N·m
(10 lb ft).
