For 1990-2009 cars only
Removal Procedure
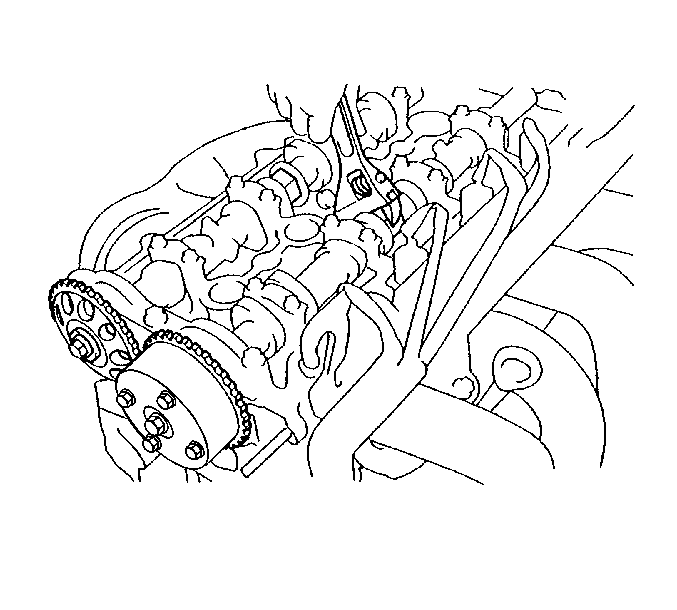
- Remove the timing chain from the engine. Refer to Timing Chain and Sprocket Replacement .
- Remove the exhaust camshaft sprocket bolt.
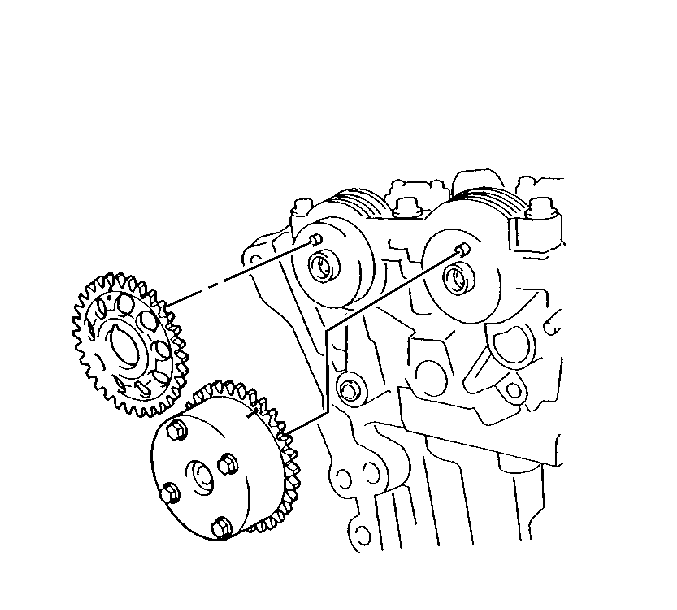
- Remove the cam sprocket.
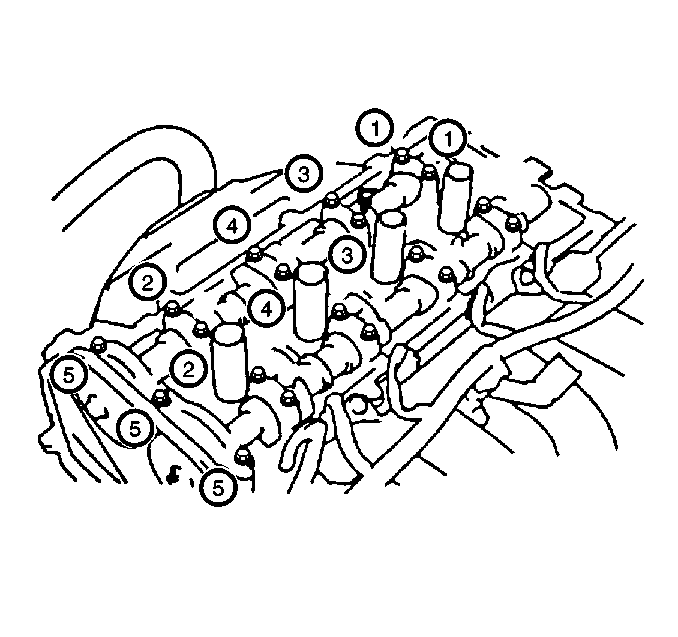
- Remove the exhaust camshaft bearing cap bolts in sequence. Starting at the ends and working toward the center of the camshaft.
- Remove the front camshaft bearing cap (5).
- Remove the exhaust camshaft from the cylinder head.
- Remove and inspect the lifters for wear, replace as necessary.
Important: When performing any service procedure that pertains to the camshaft or the camshaft actuator, unlock the camshaft actuator locking pin. Refer to Camshaft Position Actuator Locking Pin Adjustment .


Installation Procedure
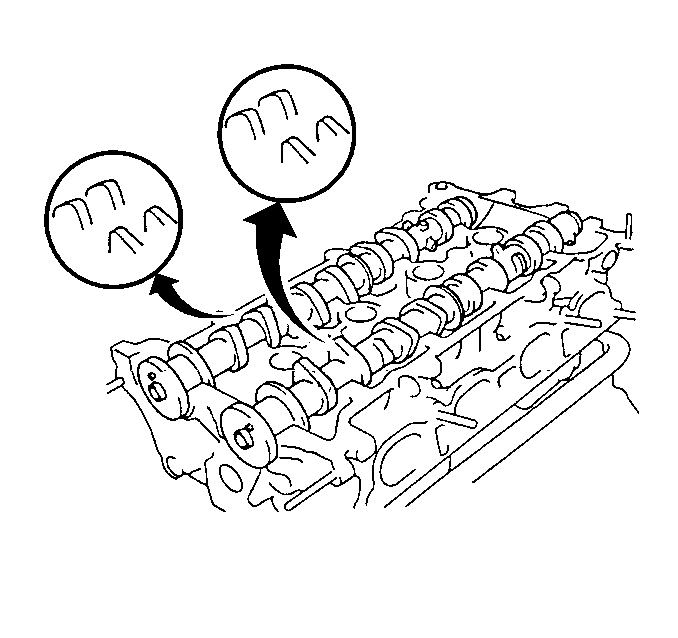
- Install the exhaust camshaft onto the cylinder head with the number 1 cam lobes facing as shown.
- Install the camshaft bearing caps in their proper locations and direction.
- Install the camshaft bearing cap bolts.
- Install the exhaust camshaft sprocket to the camshaft.
- Install the camshaft sprocket bolt in order to secure the cam sprocket.
- Install the timing chain onto the engine. Refer to Timing Chain and Sprocket Replacement .
- Unlock the intake camshaft actuator locking pin. Refer to Camshaft Position Actuator Locking Pin Adjustment .
- Check and adjust valve clearance. Refer to Valve Clearance Adjustment .

Important: Each bearing cap has a number and a directional arrow marked on the bearing cap.
Notice: Refer to Fastener Notice in the Preface section.

Tighten
| • | Tighten the camshaft bearing cap bolts in the sequence shown to 13 N·m (10 lb ft). |
| • | Tighten the front bearing cap bolts to 23 N·m (17 lb ft). |


Tighten
Tighten the bolt to 55 N·m (40 lb ft).
