Tools Required
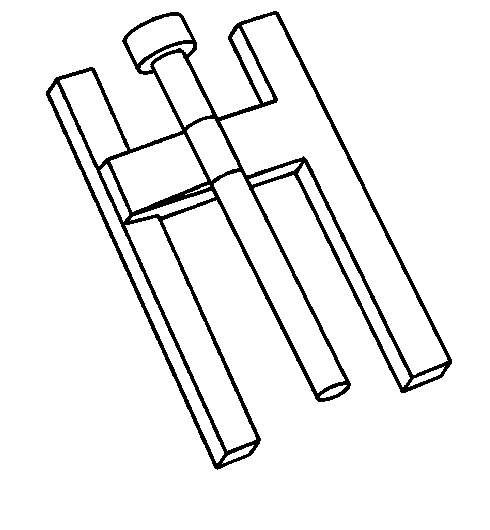
| • | J 39567 Brake Booster Piston Rod Height Gage |
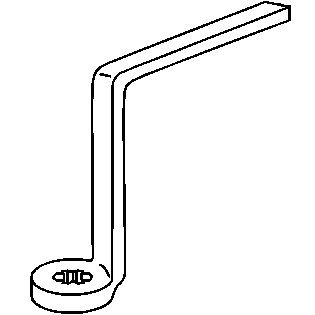
| • | J 37767 Brake Booster Piston Rod Adjuster |
Removal Procedure
- Remove the brake master cylinder. Refer to Master Cylinder Replacement .
- Remove the left front brake pipe.
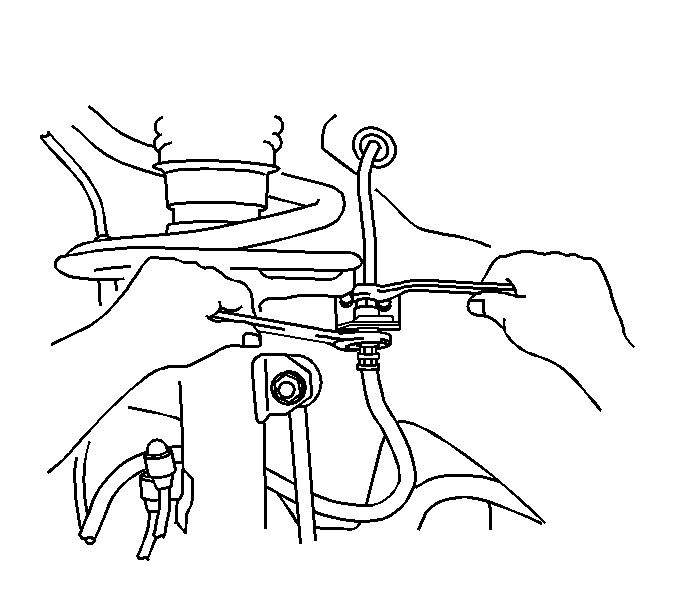
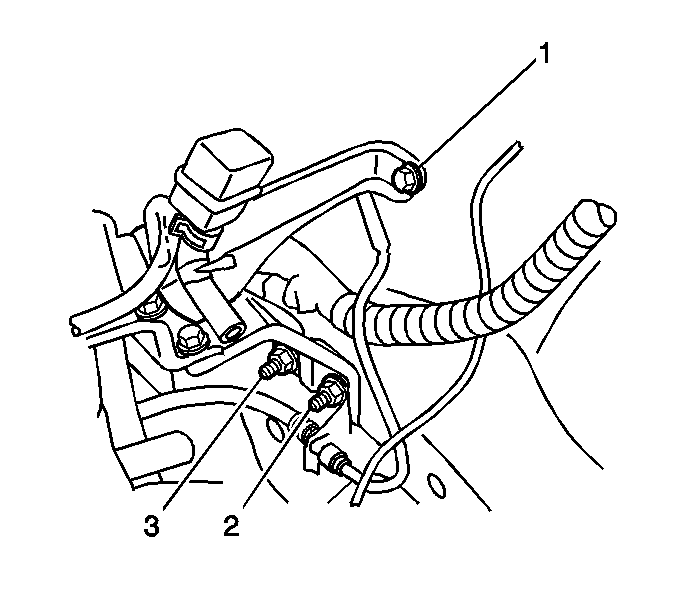
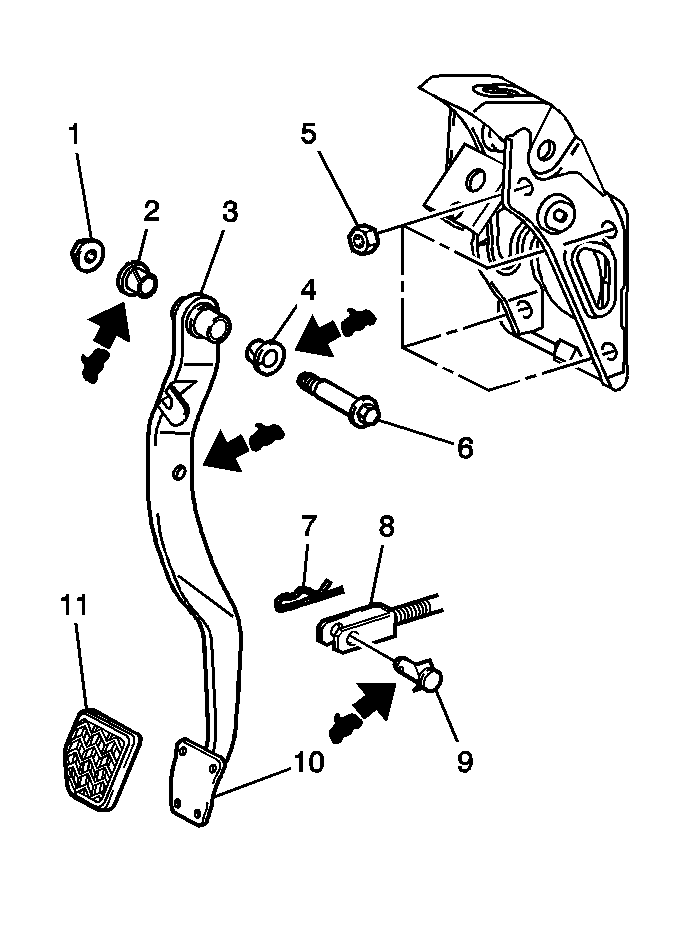
- If the vehicle has cruise control, remove the 2 nuts (2, 3) and the bolt (1) from the bracket in order to move the cruise control actuator to the side.
- Loosen the hose clamp and remove the vacuum hose from the check valve.
- Remove the check valve from the booster.
- Remove the check valve grommet from the booster.
- Remove the clip (7) from the push rod clevis pin (9).
- Remove the push rod clevis pin and the washer from the push rod clevis (8).
- Use paint in order to mark the location of the clevis and the nut on the booster push rod.
- Remove the clevis from the push rod.
- Remove the clevis nut from the push rod.
- Remove the 4 nuts.
- Pull 2 or 3 brake pipes out of the bulkhead clamp, as necessary.
- Remove the booster and the gasket from the bulkhead.
Caution: Refer to Brake Fluid Irritant Caution in the Preface section.
Notice: Refer to Brake Fluid Effects on Paint and Electrical Components Notice in the Preface section.
Notice: Internal components of this booster are not serviceable. The housing must not be unstaked and separated. Separating the housing will cause permanent deformation, preventing the booster from holding proper volume.

Adjustment Procedure
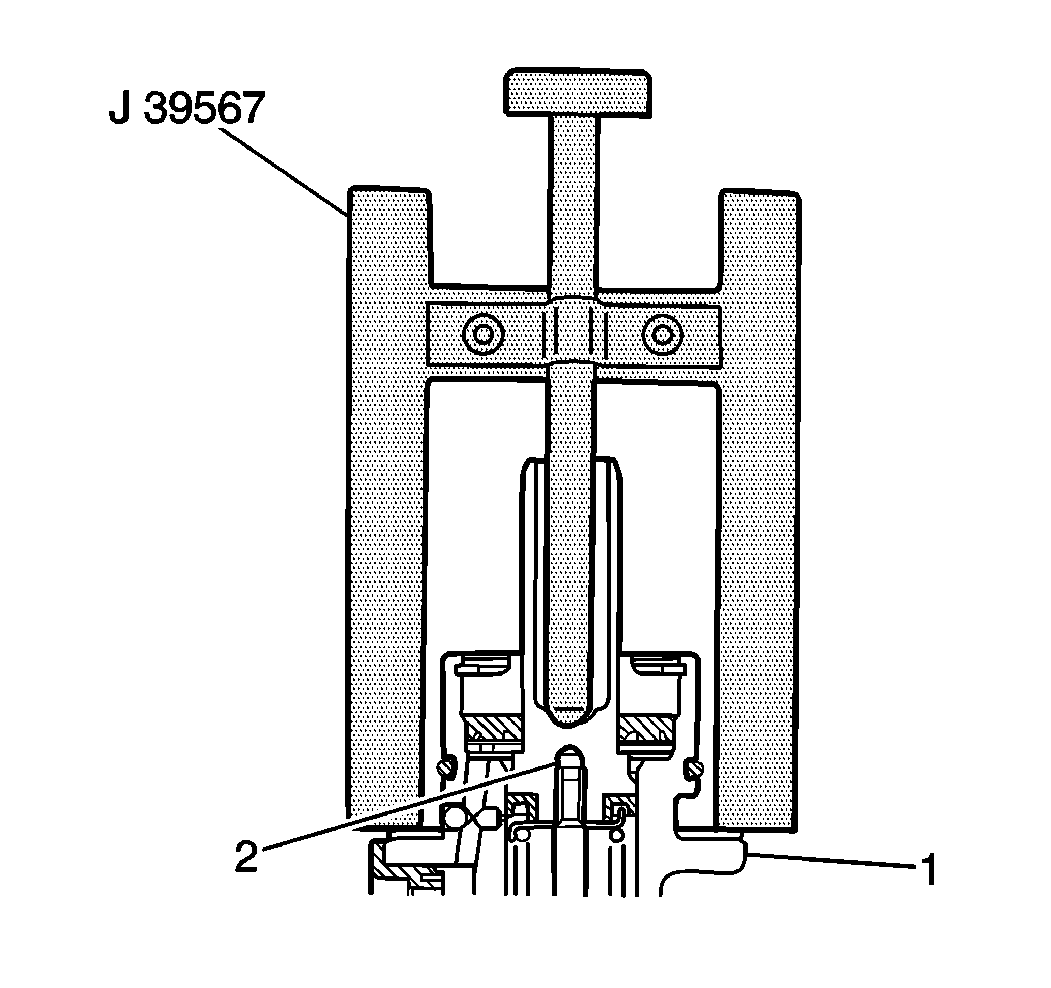
- Place the J 39567 on the master cylinder (1).
- Push the J 39567 pin down until it touches the master cylinder piston (2).
- Remove the J 39567 from the master cylinder.
- Turn the J 39567 upside down.
- Set the J 39567 on the booster (1).
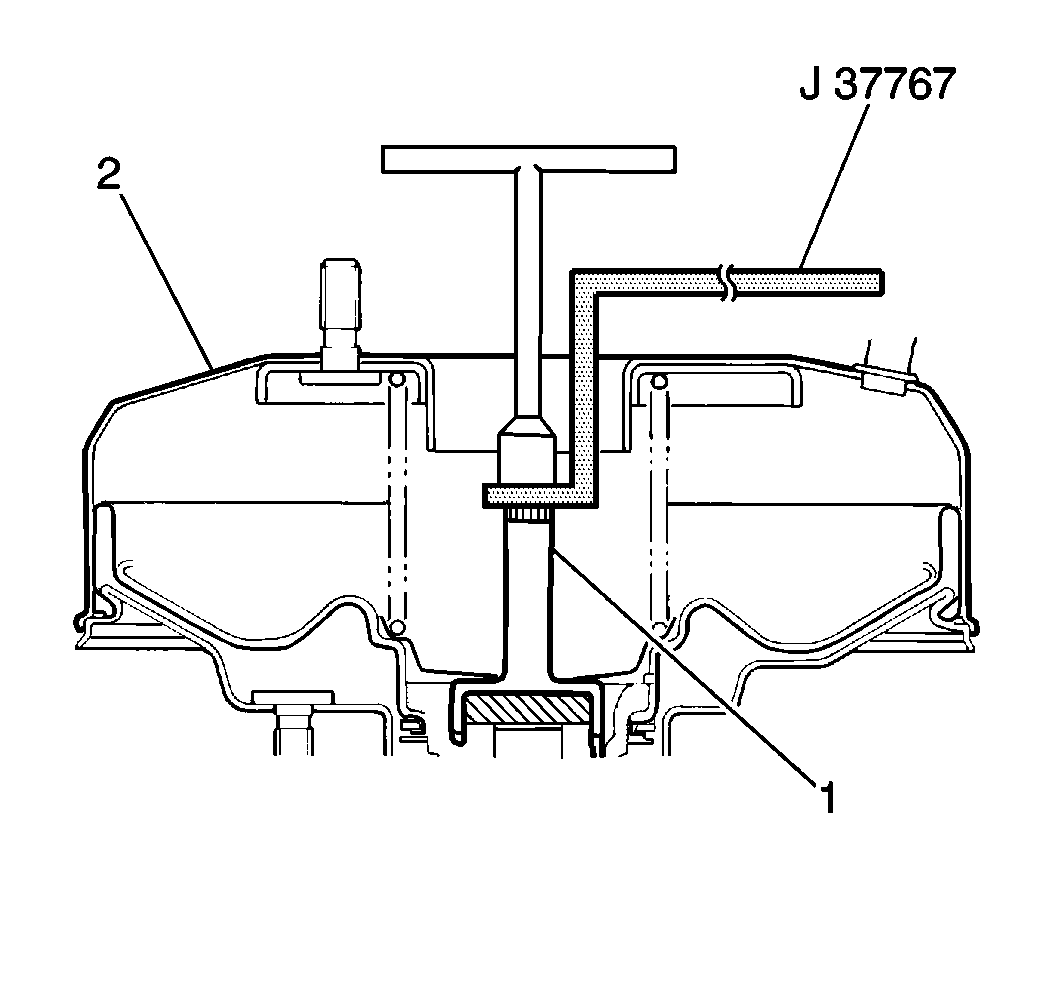
- If the measurement does not equal the specification, use the J 37767 in order to hold the booster piston rod (1).
- Turn the adjusting screw of the piston rod in order to adjust the clearance.
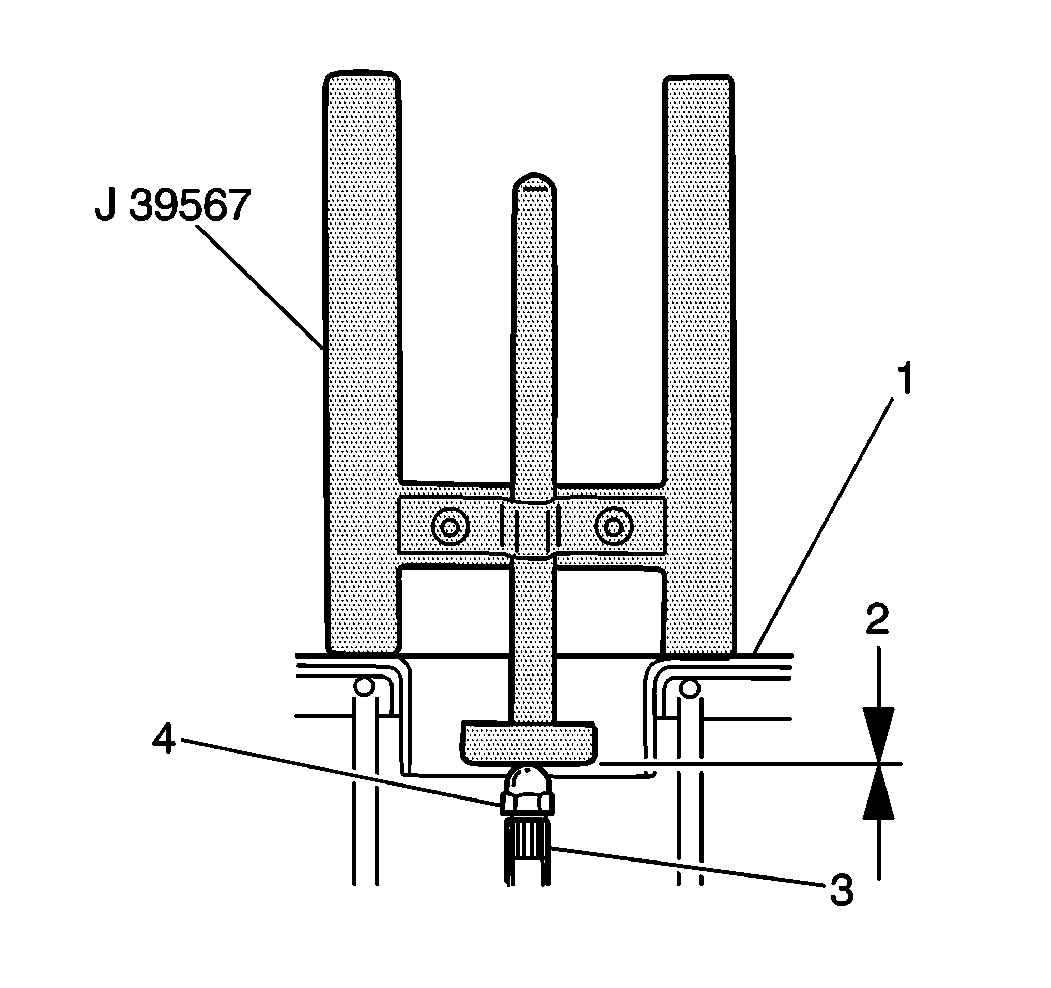
Specification
The clearance (2) between the booster piston rod (3) and the
J 39567
should be 0 mm (0 in).
Installation Procedure
- If you are installing a new booster, use paint on the new booster push rod in order to copy the location of the paint mark on the old booster push rod.
- Install the check valve grommet to the booster.
- Install the check valve to the booster.
- Install the cowl gasket to the booster.
- Install the booster to the bulkhead.
- Install the 4 nuts in order to retain the booster to the bulkhead.
- Push the brake pipes into the bulkhead bracket.
- Install the clevis nut to the paint mark on the booster push rod.
- Install the clevis (8) to the push rod.
- Apply Lubriplate lubricant, GM P/N 1052196 (Canadian P/N 5264008), or the equivalent, to the push rod clevis pin (9) and to the clevis pin hole in the brake pedal.
- Install the push rod clevis pin and the washer in order to retain the clevis to the brake pedal.
- Install the clip (7) in order to retain the pin to the brake pedal.
- Install the vacuum hose to the check valve.
- Install the hose clamp in order to retain the hose to the check valve.
- If the vehicle has cruise control, install the bolt (1) to the cruise control actuator bracket.
- If the vehicle has cruise control, install the 2 nuts (2, 3) to the cruise control actuator bracket.
- Install the left front brake pipe.
- Install the brake master cylinder and bleed the brake system. Refer to Master Cylinder Replacement .
Notice: Refer to Fastener Notice in the Preface section.
Tighten
Tighten the nuts to 12.7 N·m (112.4 lb in).
Tighten
Tighten the clevis and the nut to 26 N·m (19.2 lb ft).
Tighten
Tighten the bolt to 43 N·m (32 lb ft).
Tighten
Tighten the nuts to 43 N·m (32 lb ft).
Caution: Refer to Brake Fluid Caution in the Preface section.
Notice: Refer to Filling the Master Cylinder Notice in the Preface section.
Tighten
Tighten the brake pipe flare nut to 15.2 N·m (11.2 lb ft).
