Tools Required
J 35405 Differential Preload Wrench
- Remove the breather plug, O-ring and hose from the transaxle case.
- Remove the breather plug.
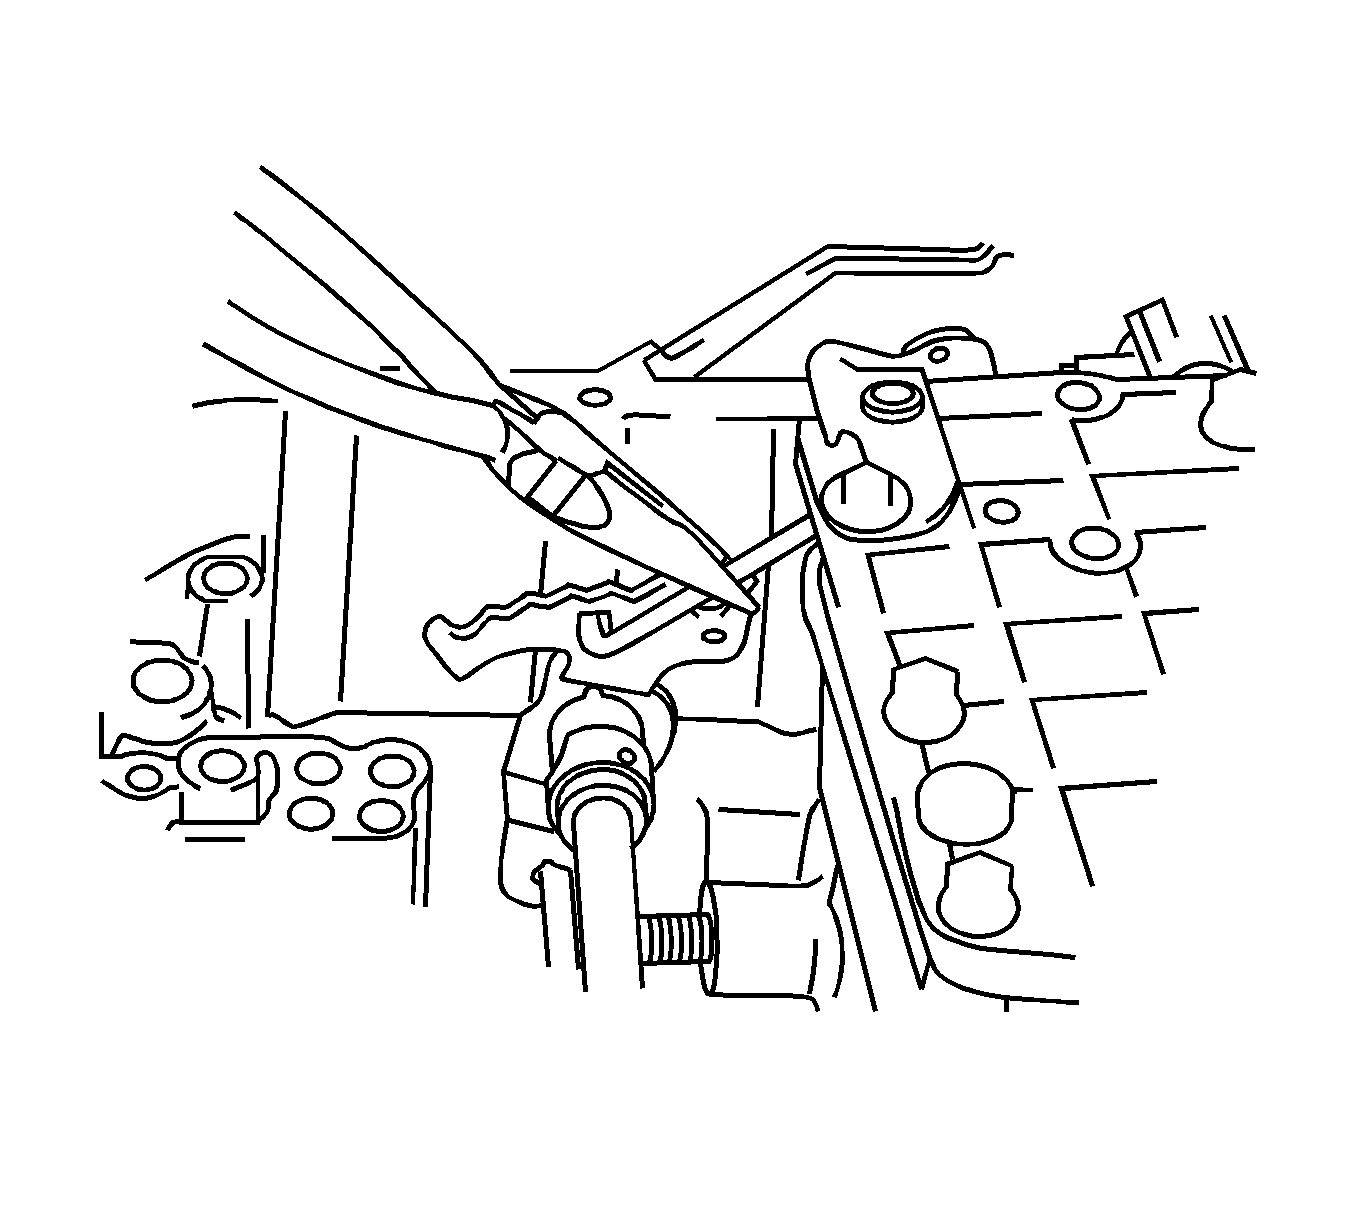
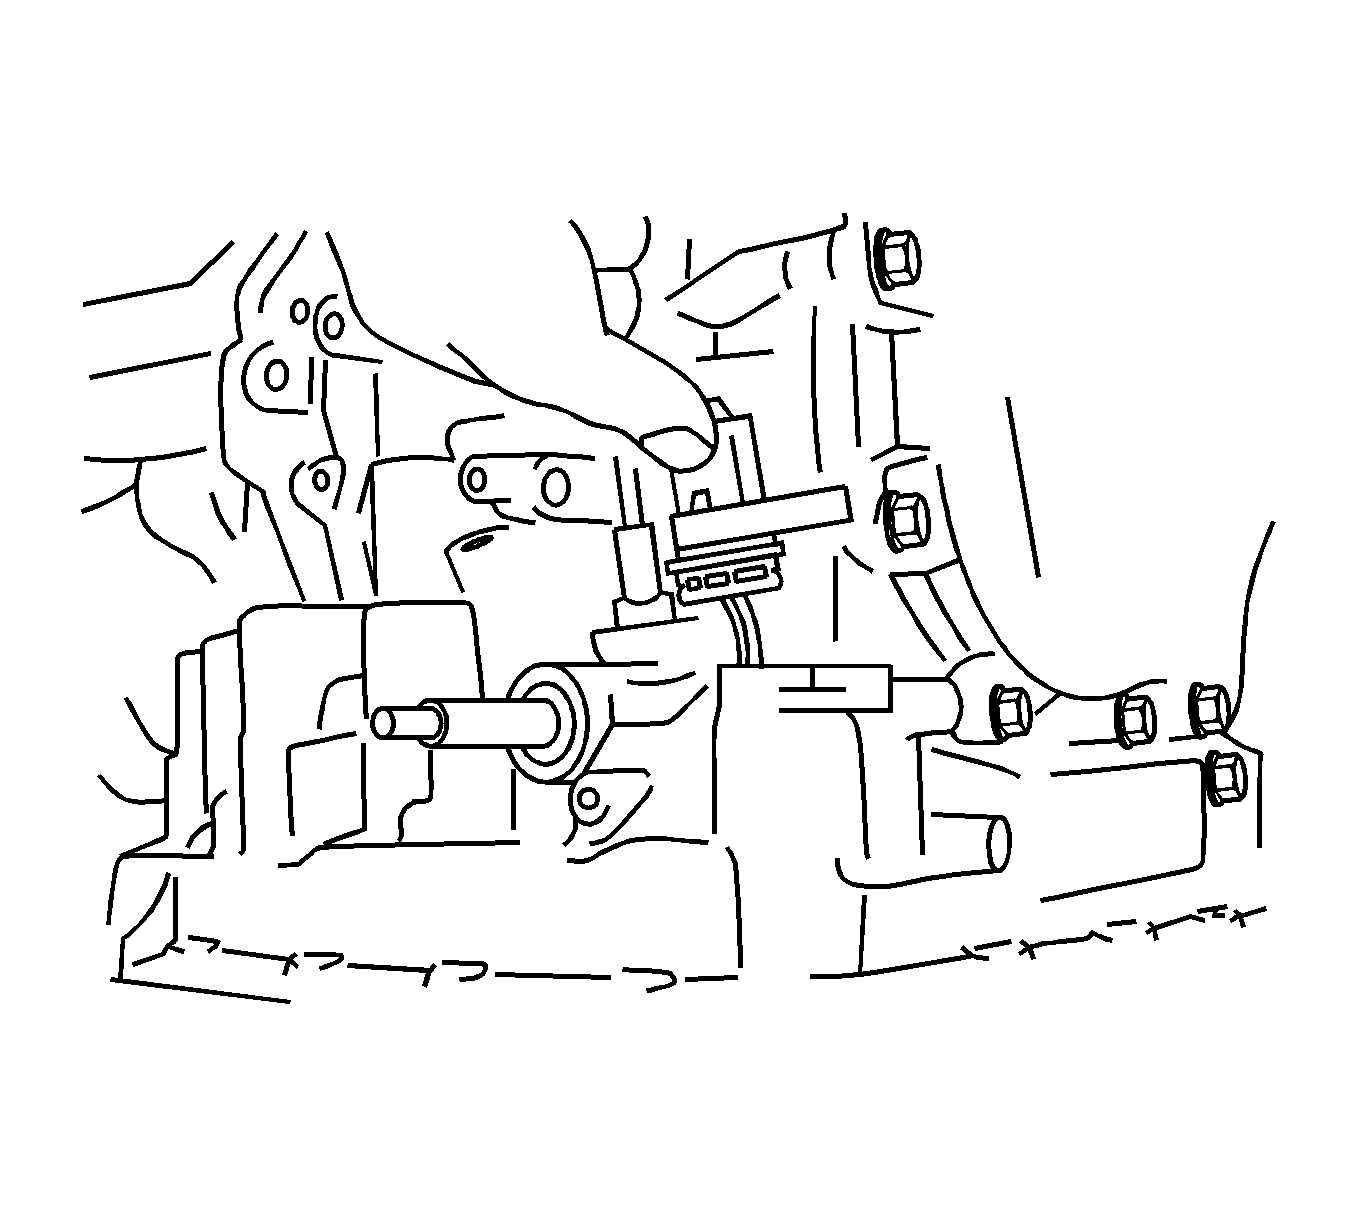
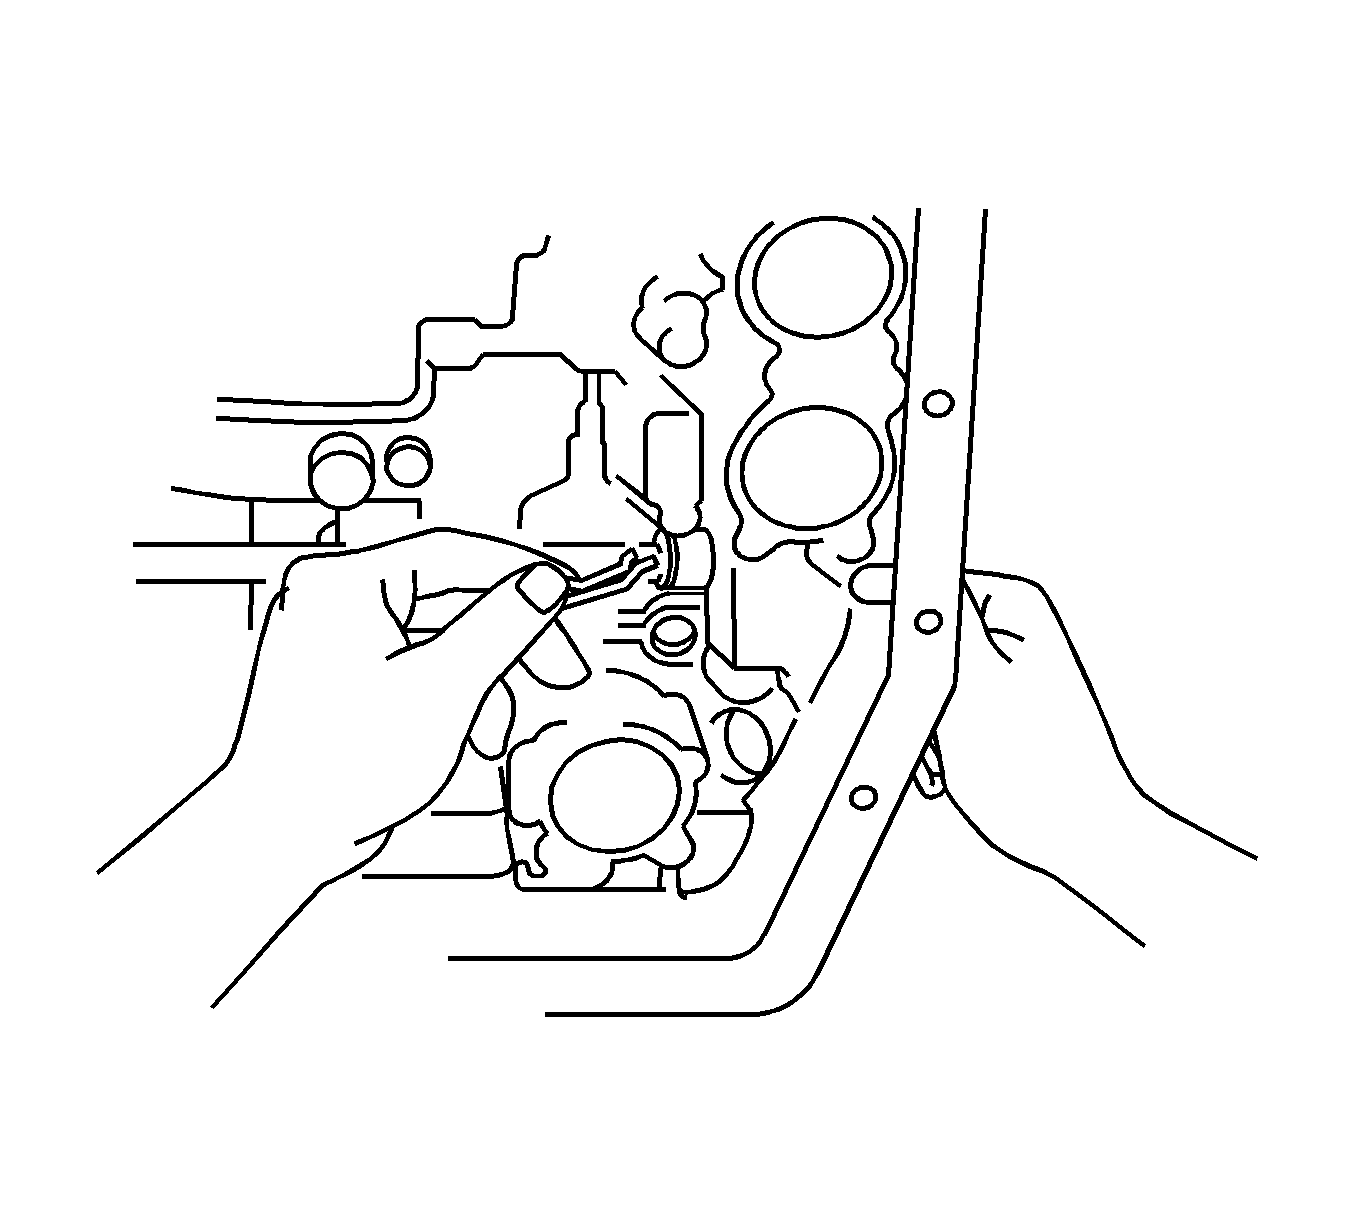
- Remove the nut, washer and control shift lever from the transaxle.
- Pry up the lock tab on the washer, then remove the retaining nut.
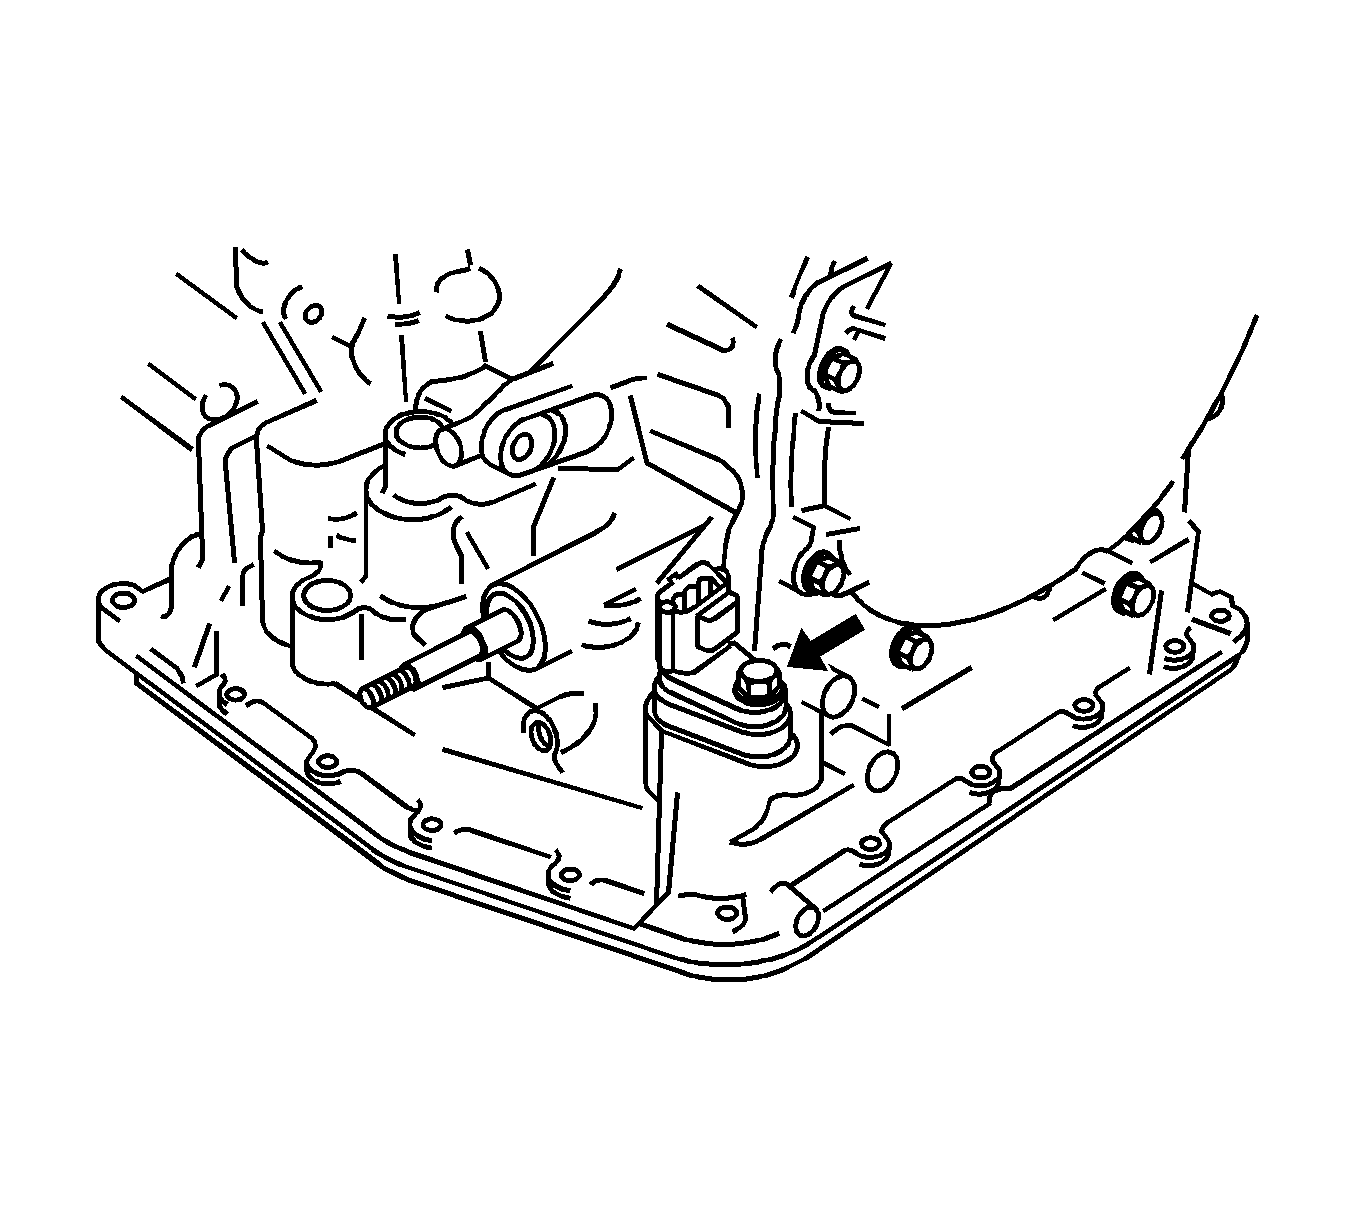
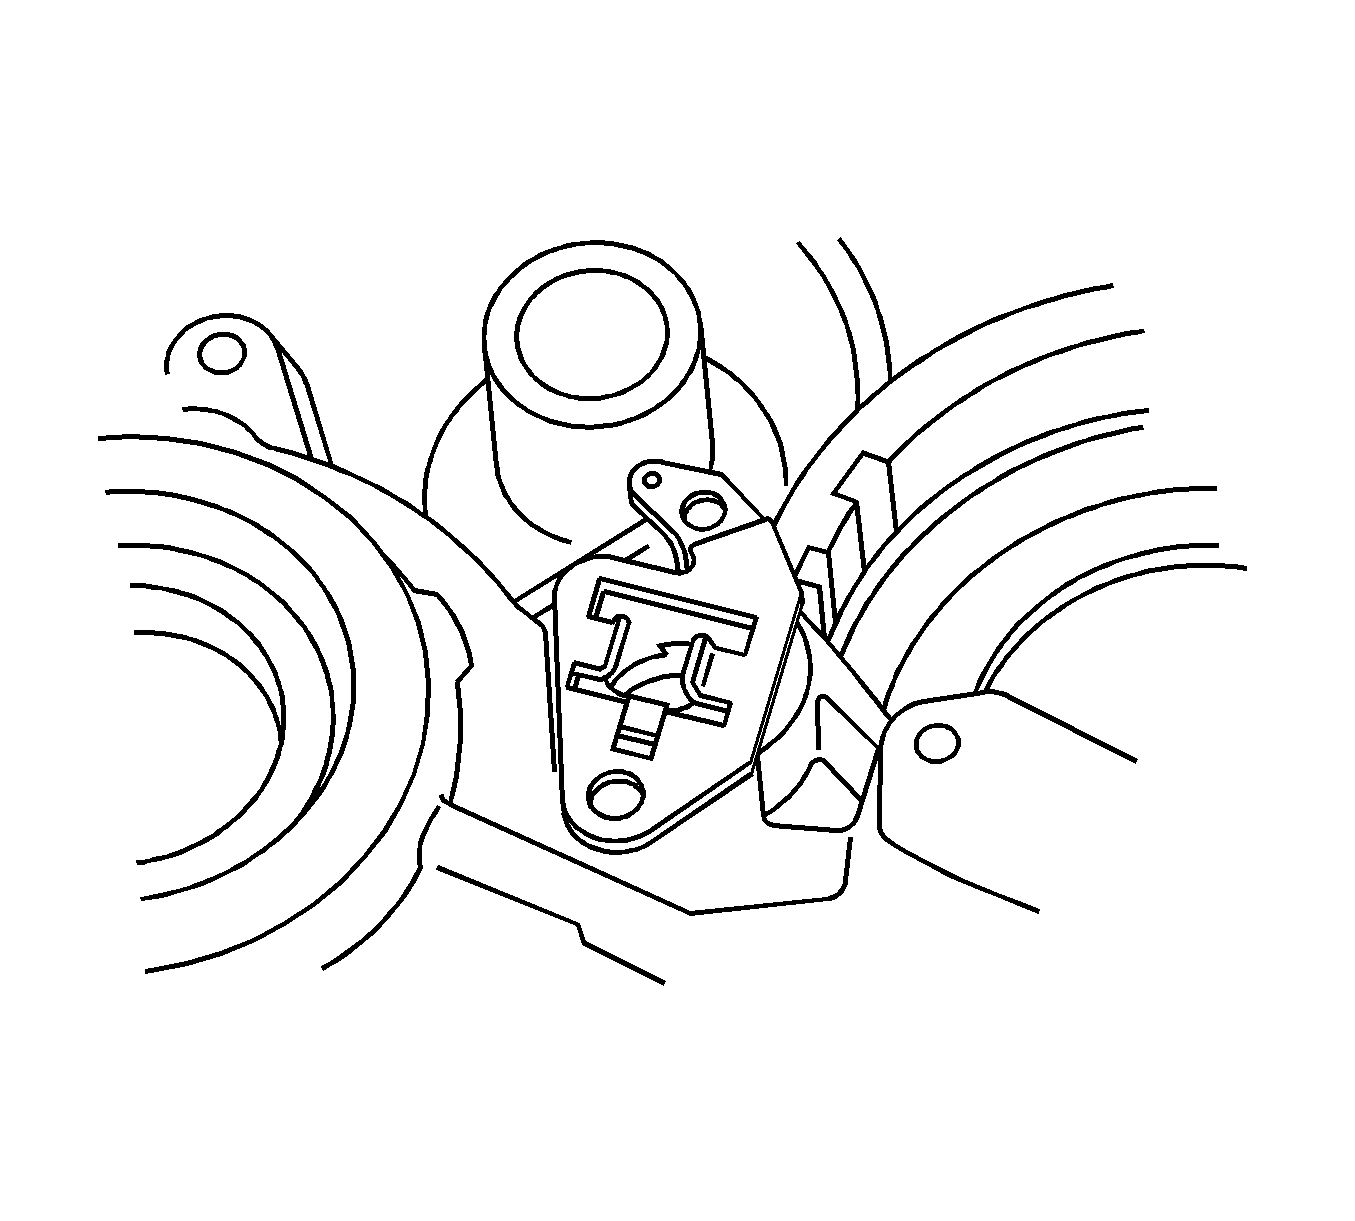
- Remove the 2 PNP switch retaining bolts, then remove the switch from the transaxle.
- Remove the 2 oil cooler unions from the transaxle.
- Remove the O-rings from the unions.
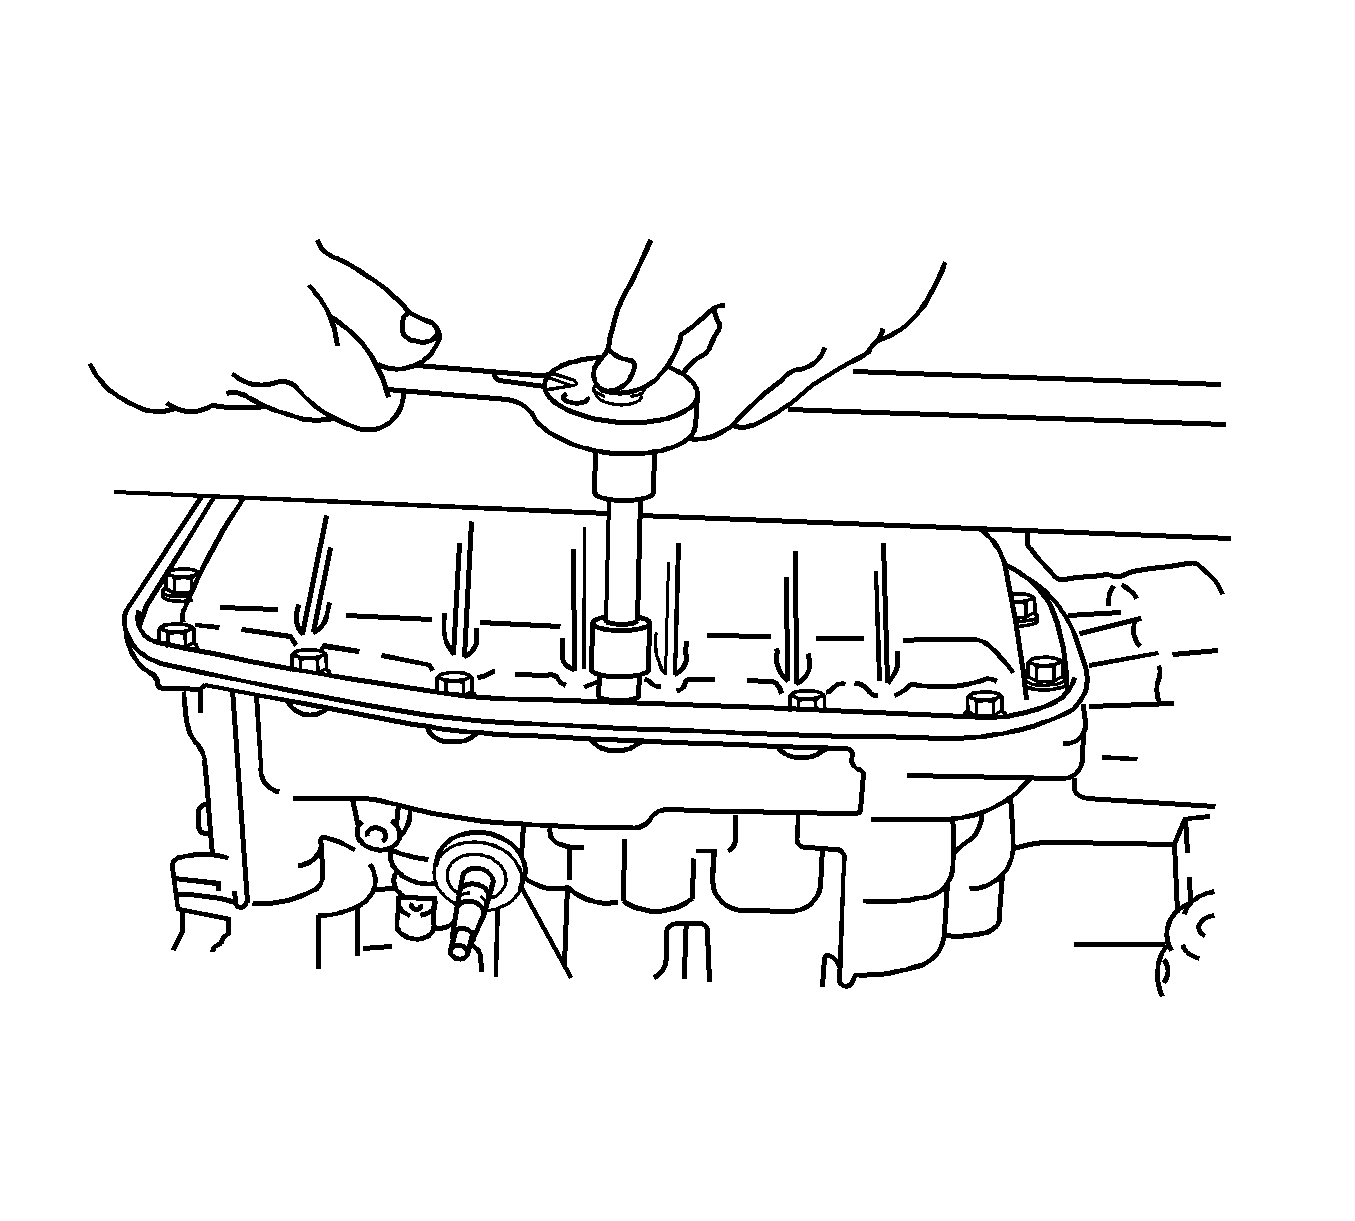
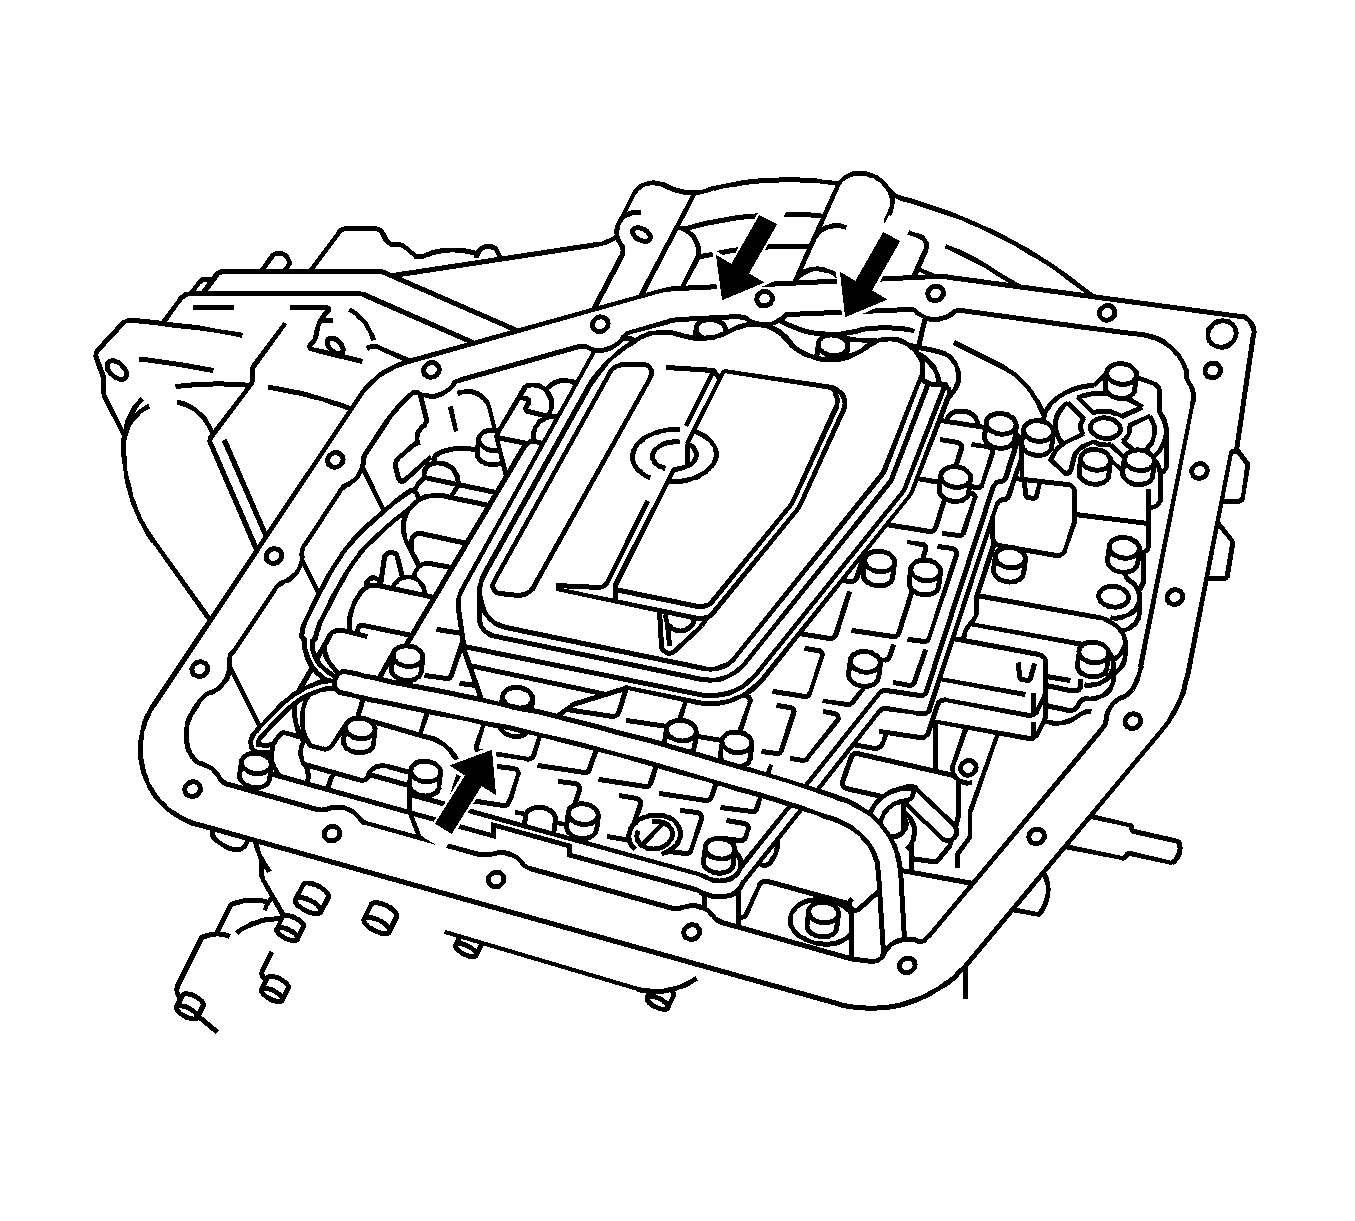
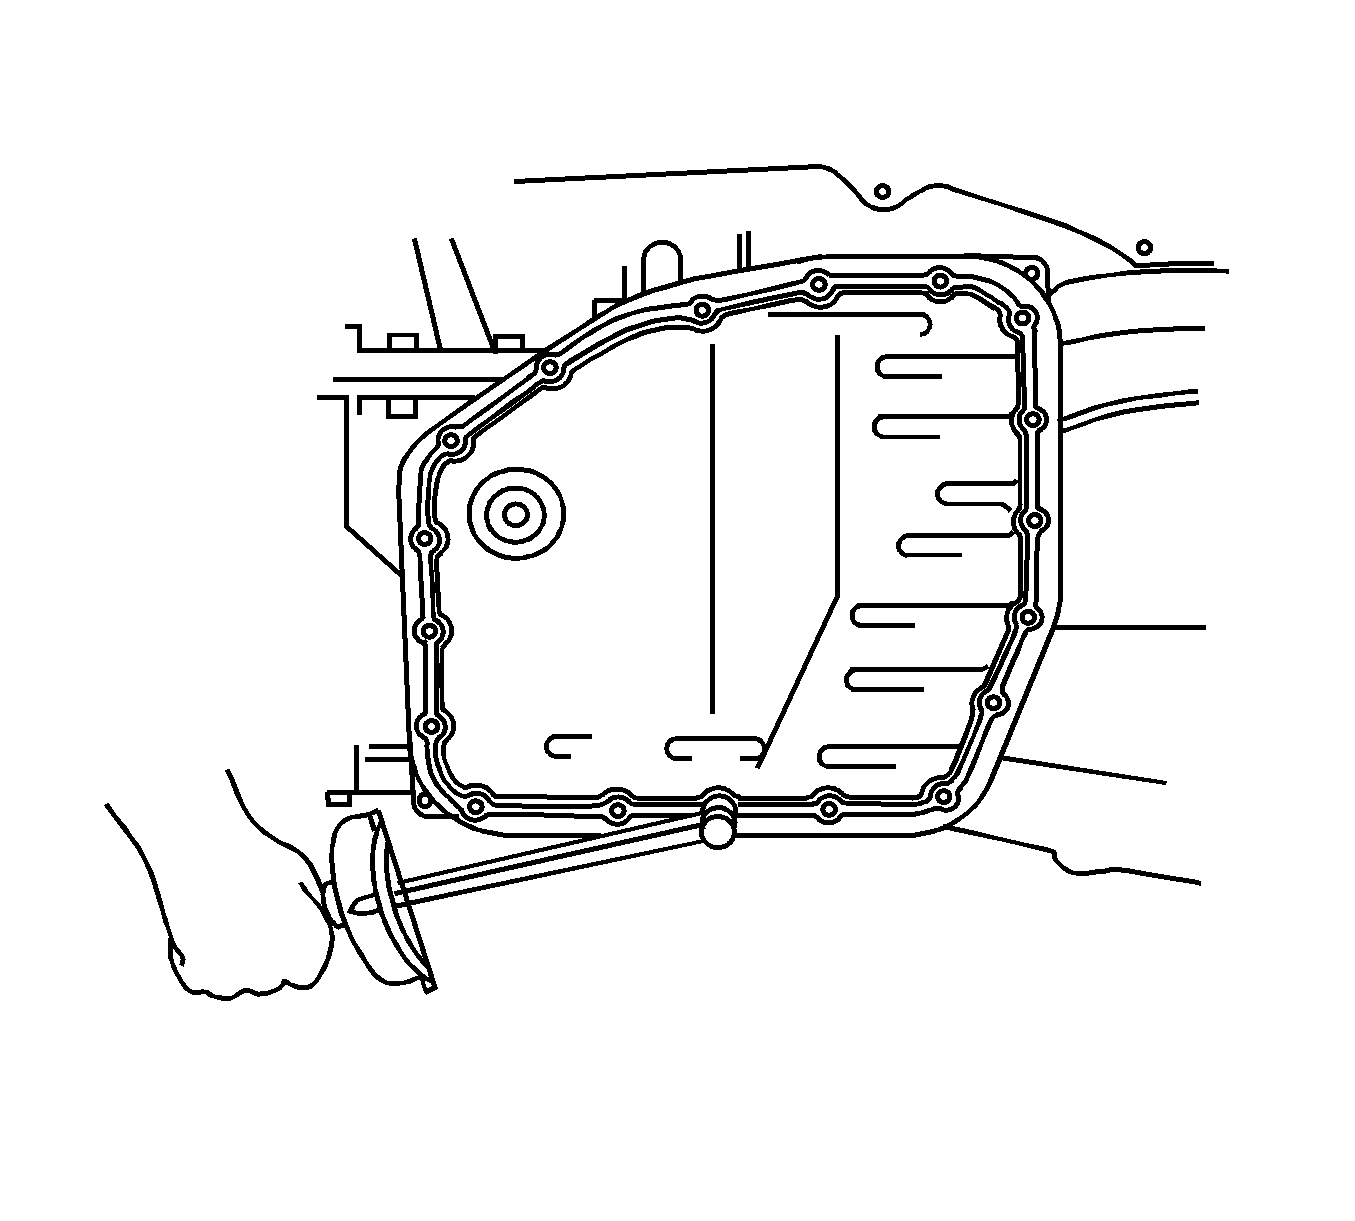
- Remove the oil pan retaining bolts, then the oil pan.
- Place the transaxle on wooden blocks to prevent damage to the pipes.
- Remove the 3 oil filter retaining bolts, then the oil filter and gasket.
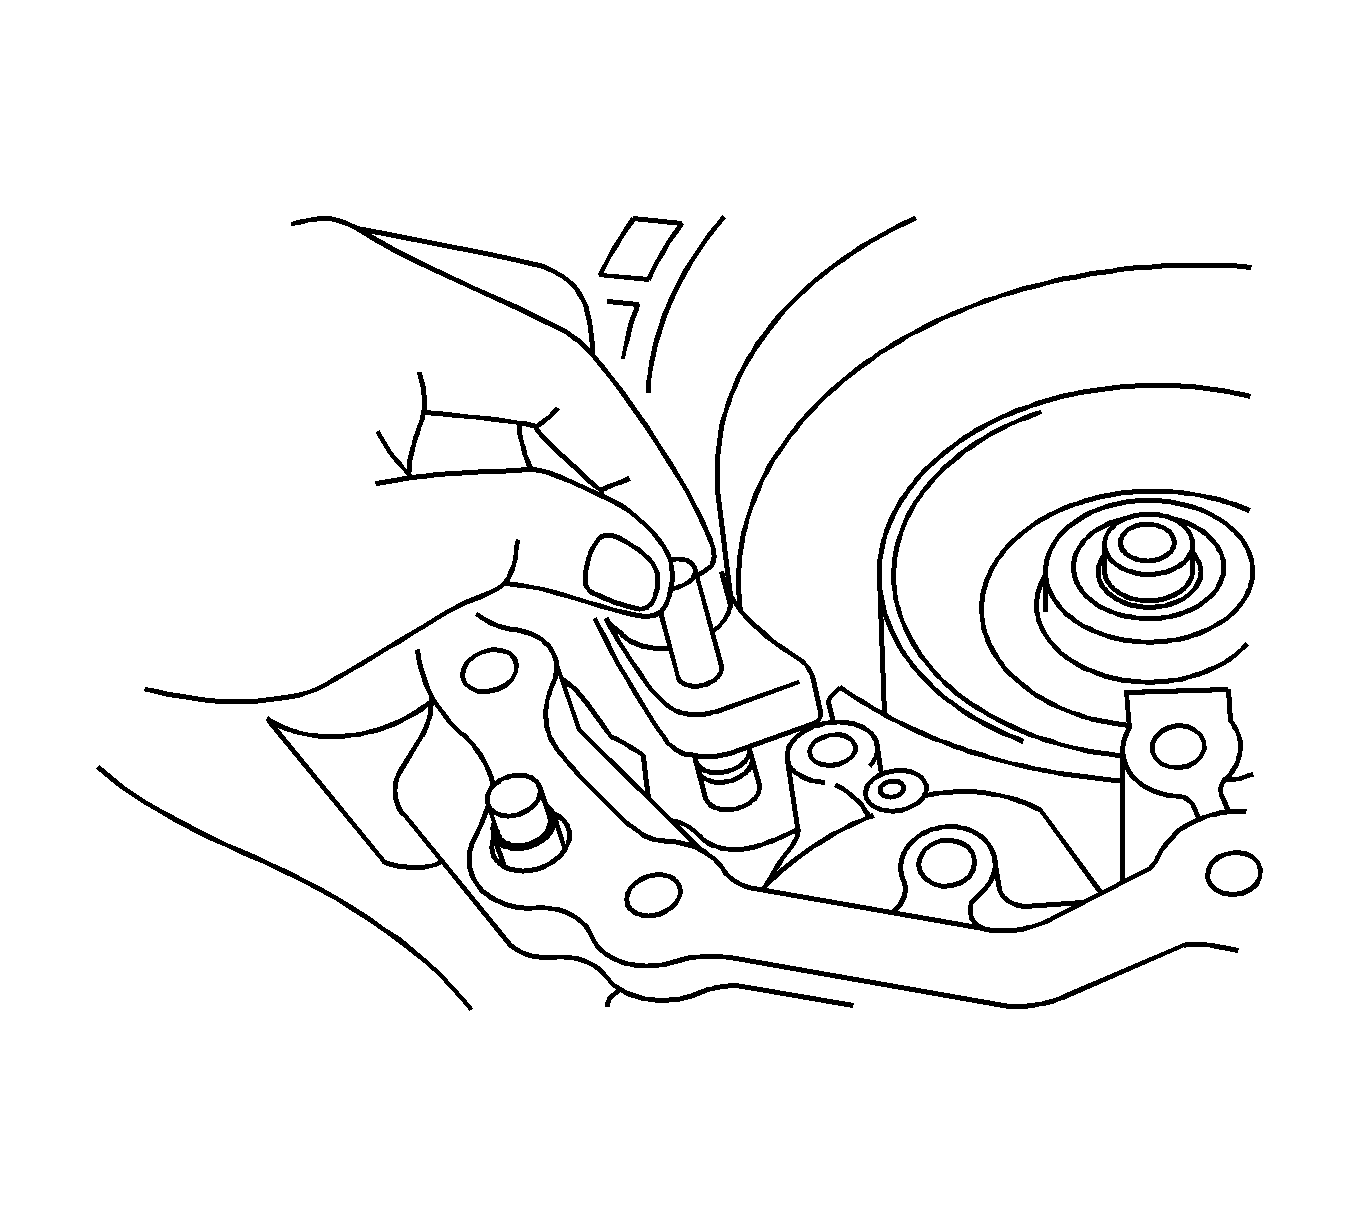
- Remove the bolt, manual detent spring and spring cover.
- Disconnect the solenoid connectors.
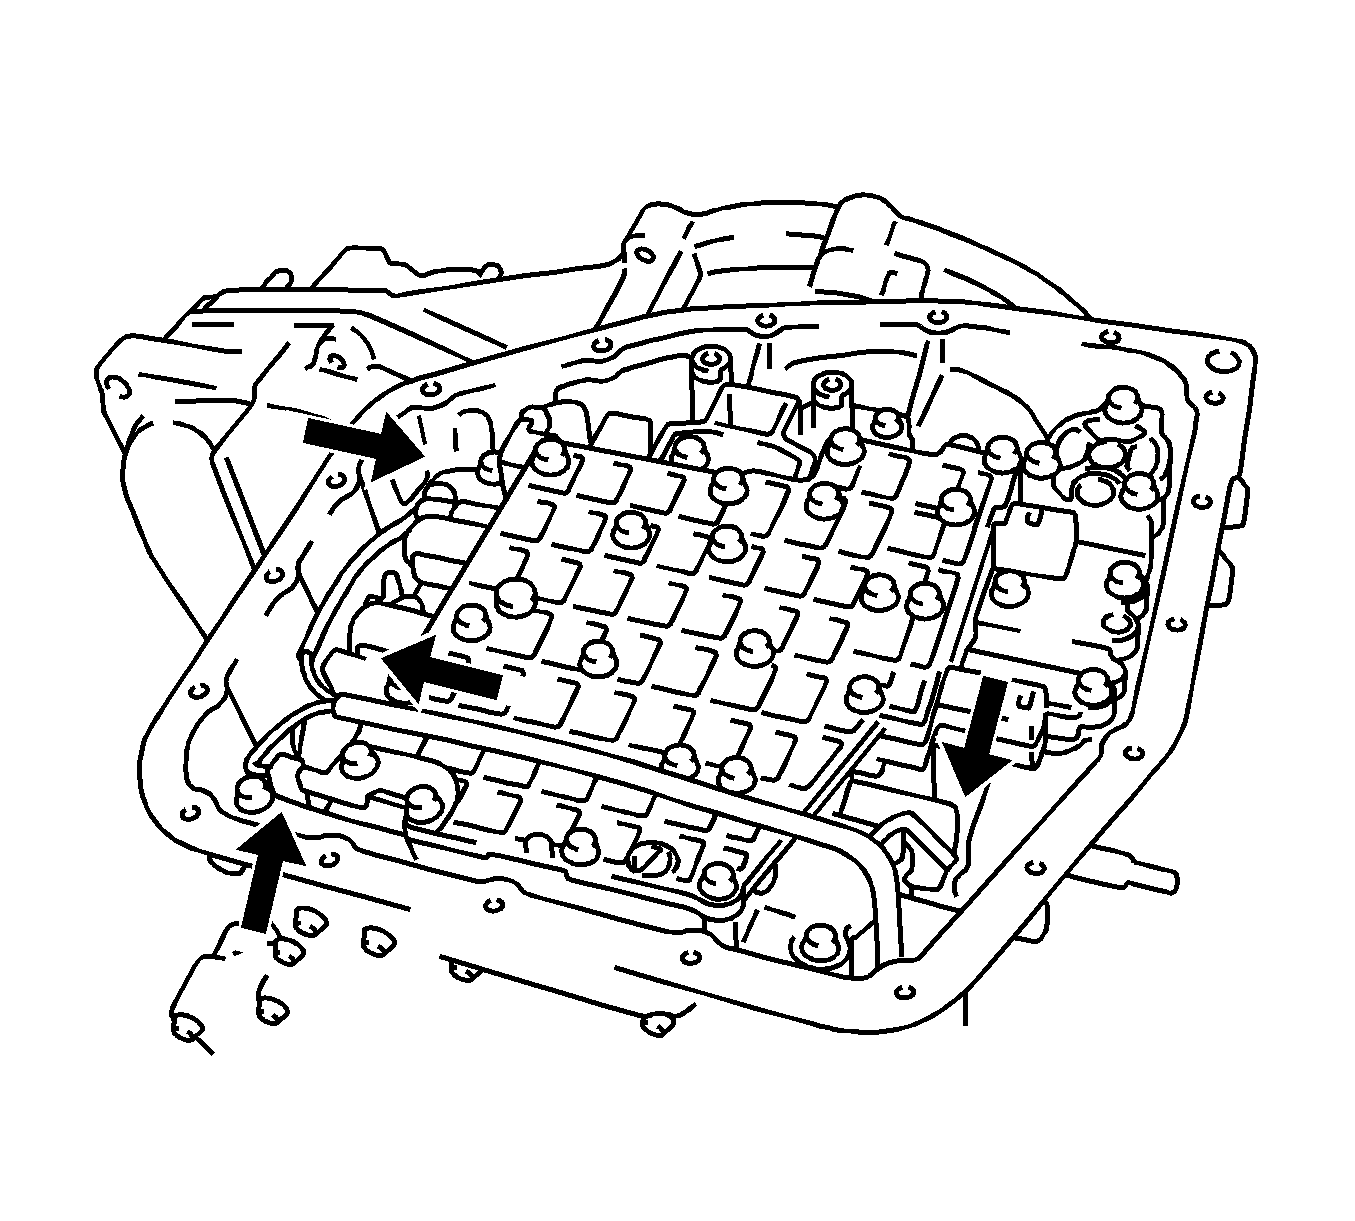
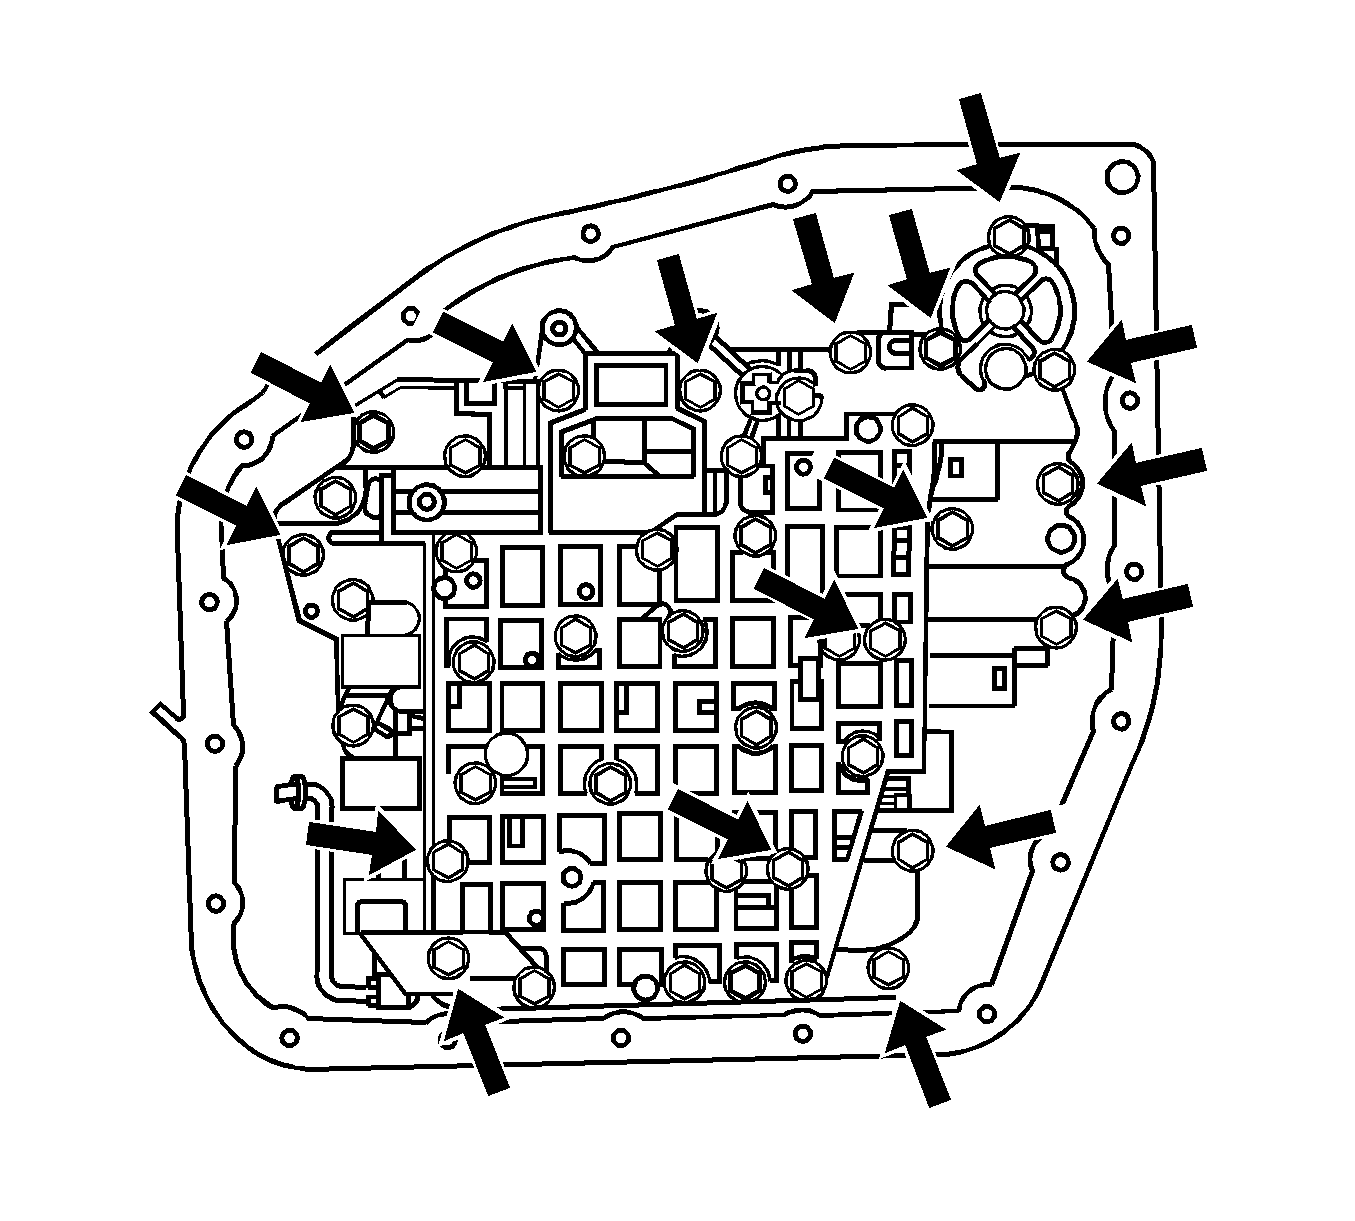
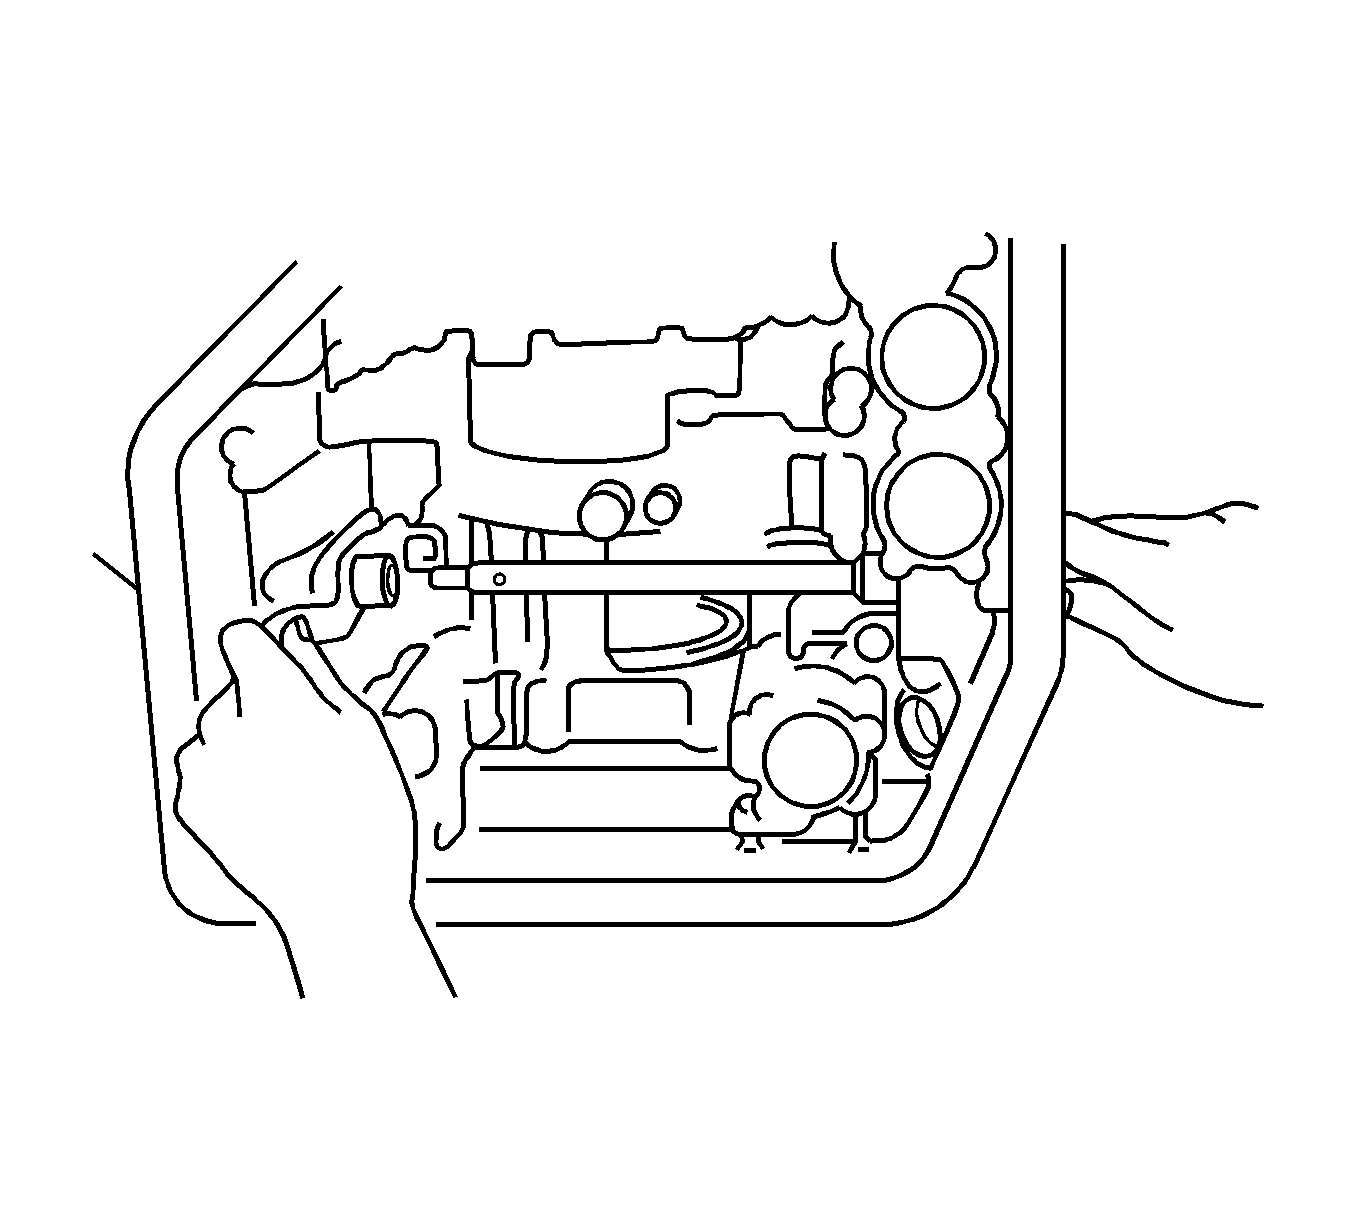
- Remove the 17 valve body retaining bolts.
- Disconnect the connecting rod from the manual valve.
- Remove the valve body from the transaxle case.
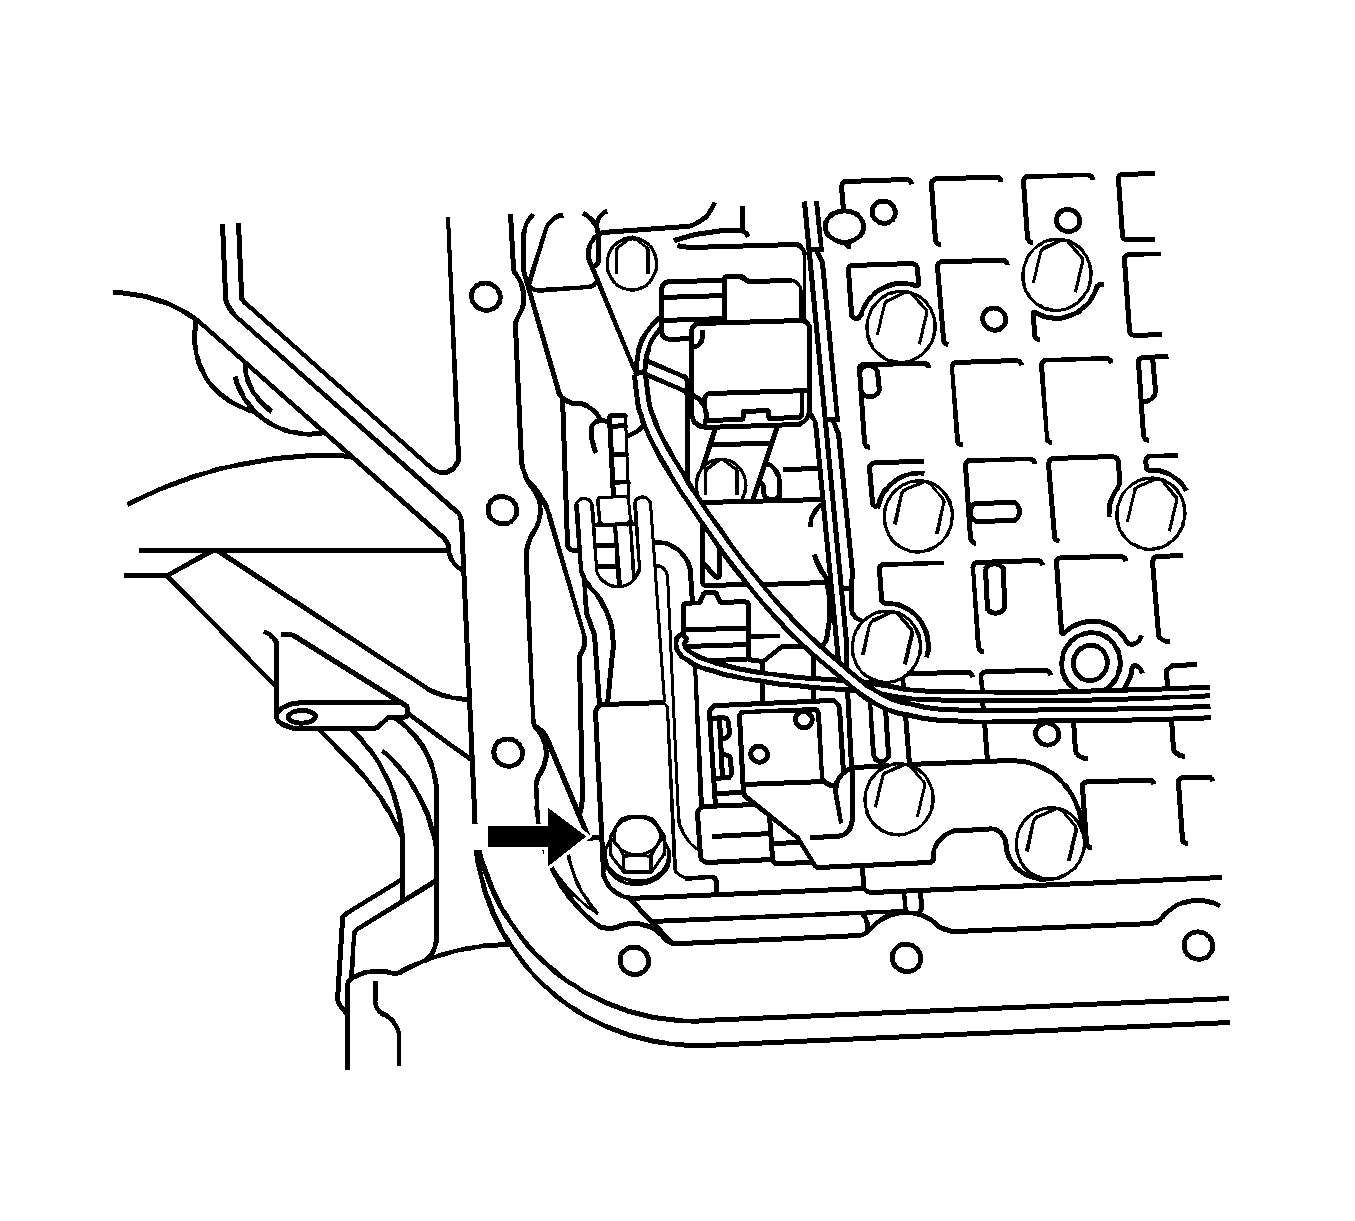
- Remove the transaxle wiring harness retaining bolt.
- Remove the wiring harness from the transaxle case.
- Remove the O-ring from the harness connector.
- Remove the check ball body and spring from the transaxle case.
- Remove the governor apply gasket from the transaxle case.
- Remove the brake drum gasket from the transaxle case.
- Cover the B-2 accumulator piston with a shop towel.
- Using compressed air at low pressure 98 kPa (14 psi) push out the B-2 accumulator piston from the transaxle case.
- Remove the 2 O-rings from the accumulator piston.
- Cover the C-2 accumulator piston with a shop towel.
- Using compressed air at low pressure 98 kPa (14 psi) push out the C-2 accumulator piston from the transaxle case.
- Remove the 2 O-rings from the accumulator piston.
- Cover the C-1 accumulator piston with a shop towel.
- Using compressed air at low pressure 98 kPa (14 psi) push out the C-1 accumulator piston from the transaxle case.
- Remove the 2 O-rings from the accumulator piston.
- Cover the C-3 accumulator piston with a shop towel.
- Using compressed air at low pressure 98 kPa (14 psi) push out the C-3 accumulator piston from the transaxle case.
- Remove the 2 O-rings from the accumulator piston.
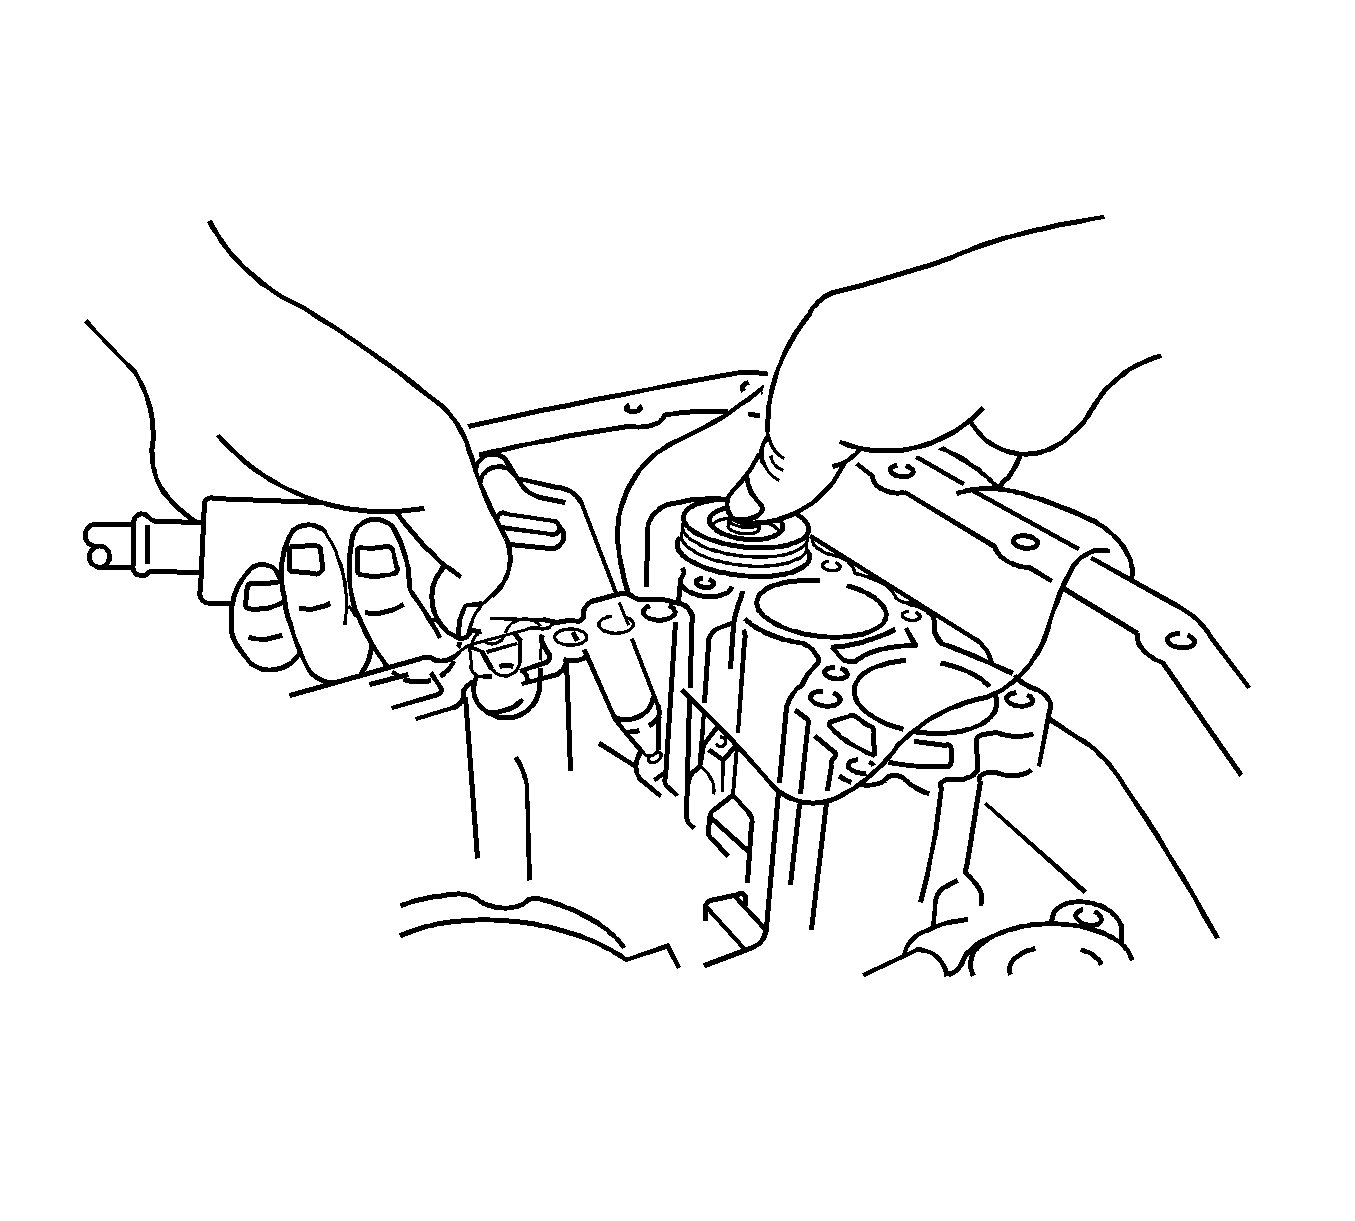
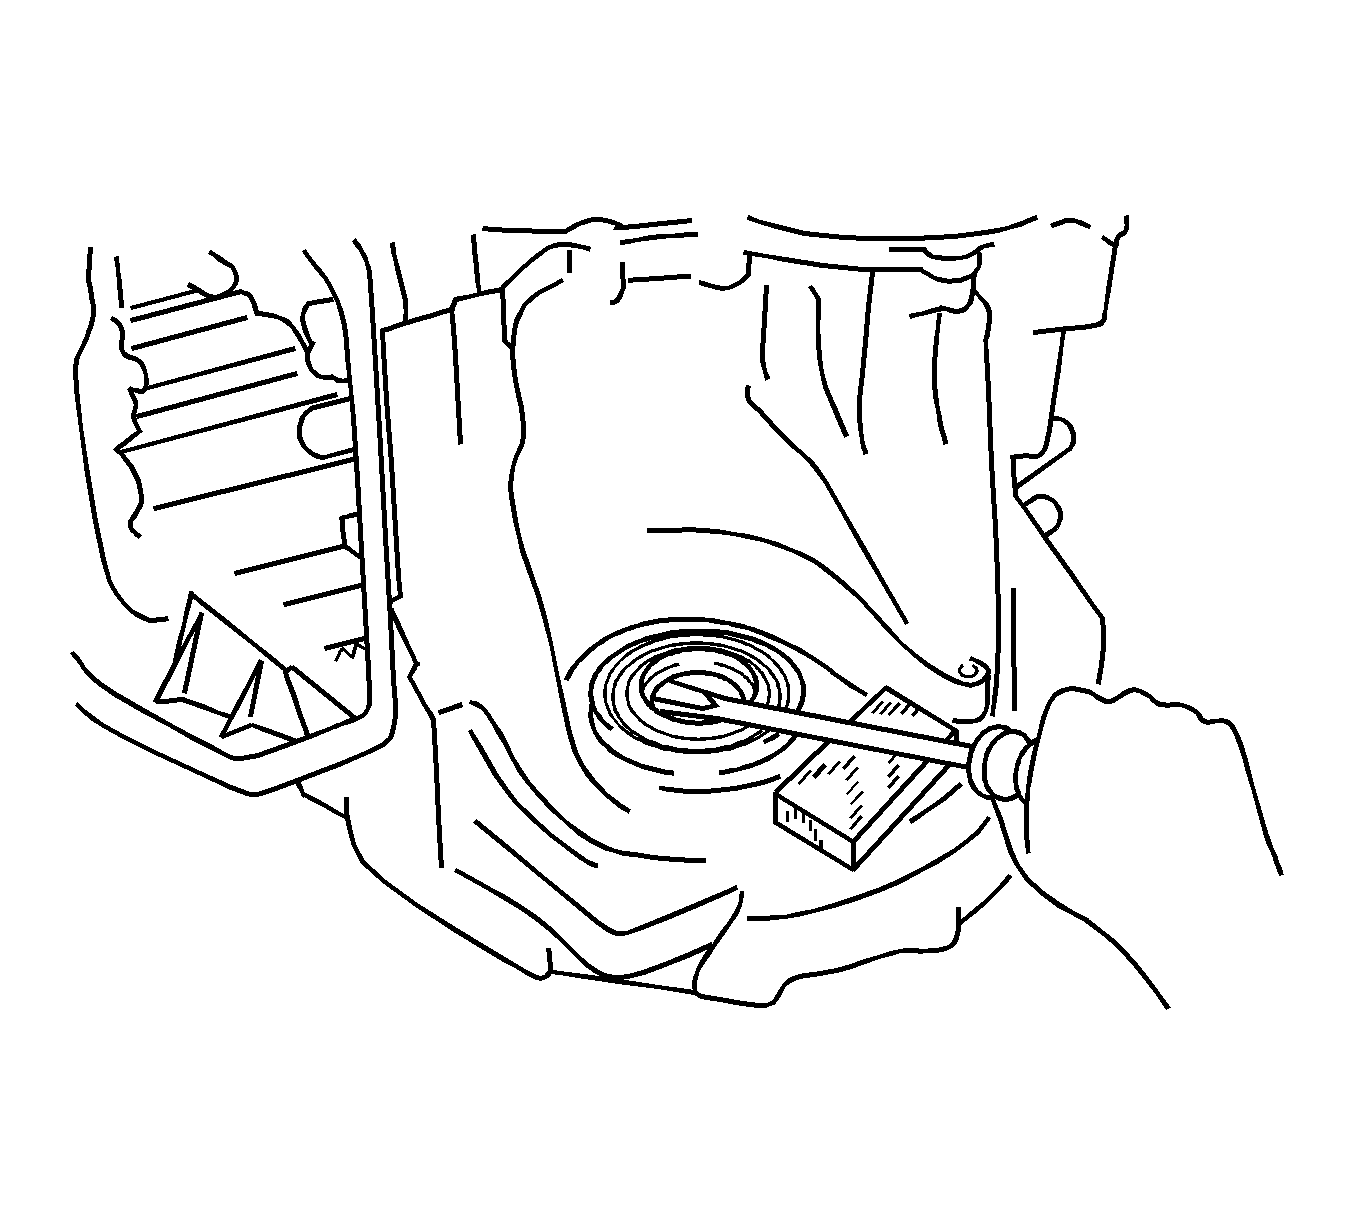
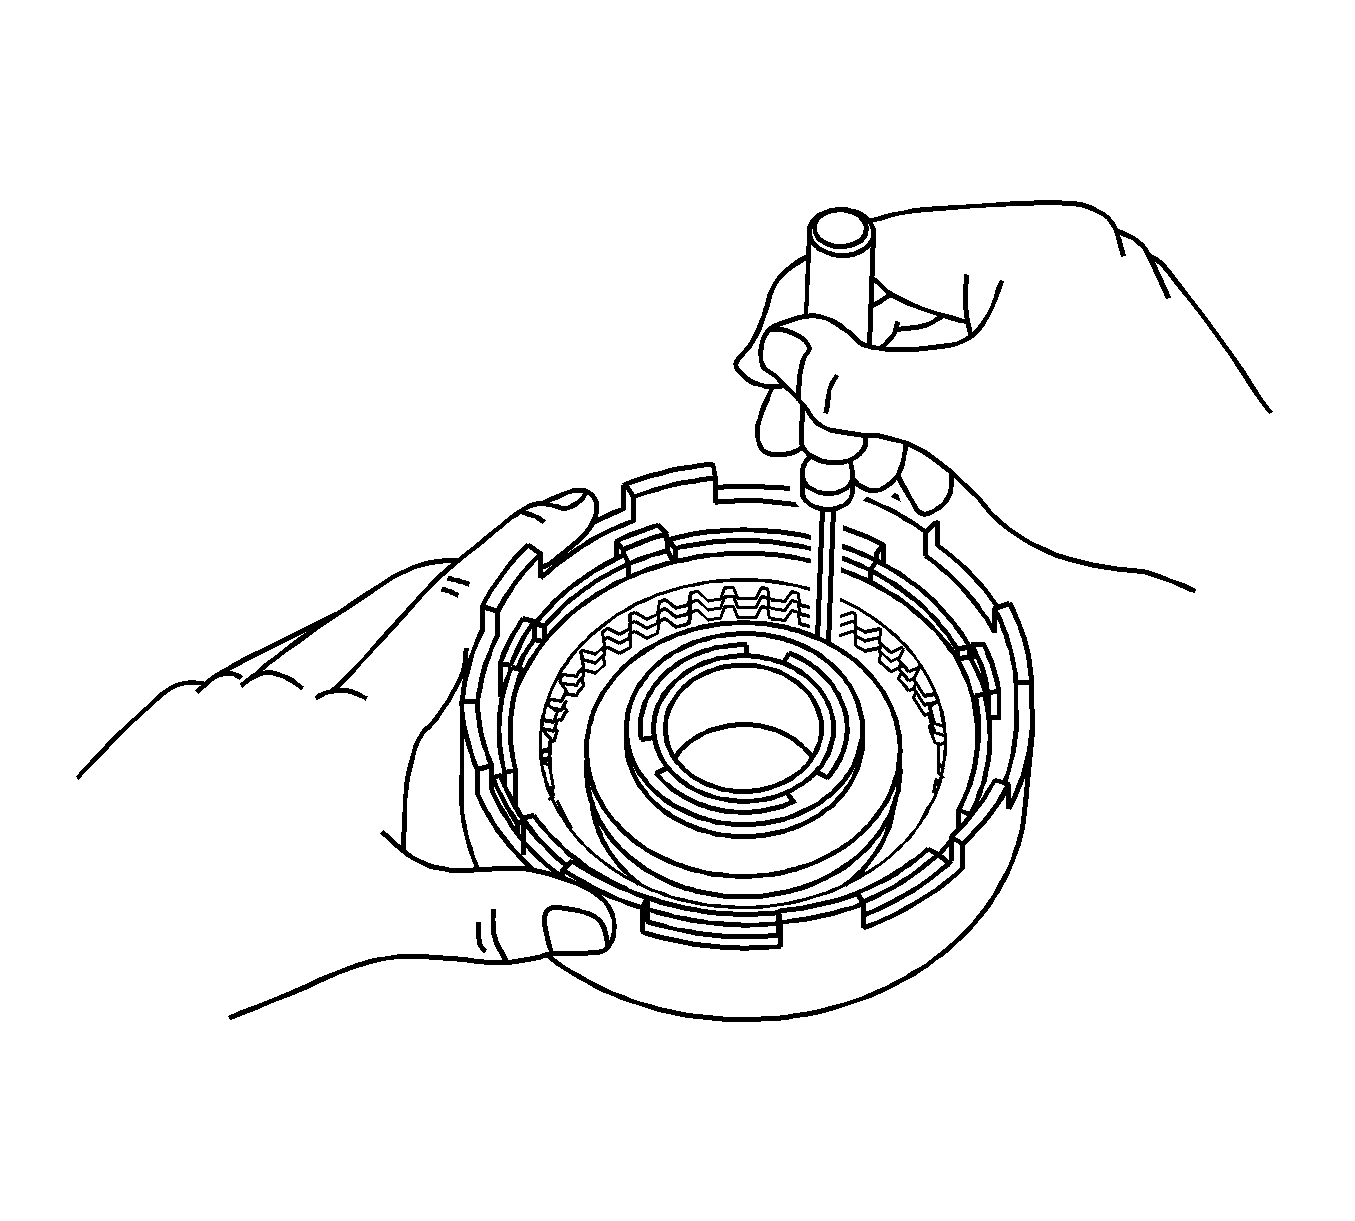
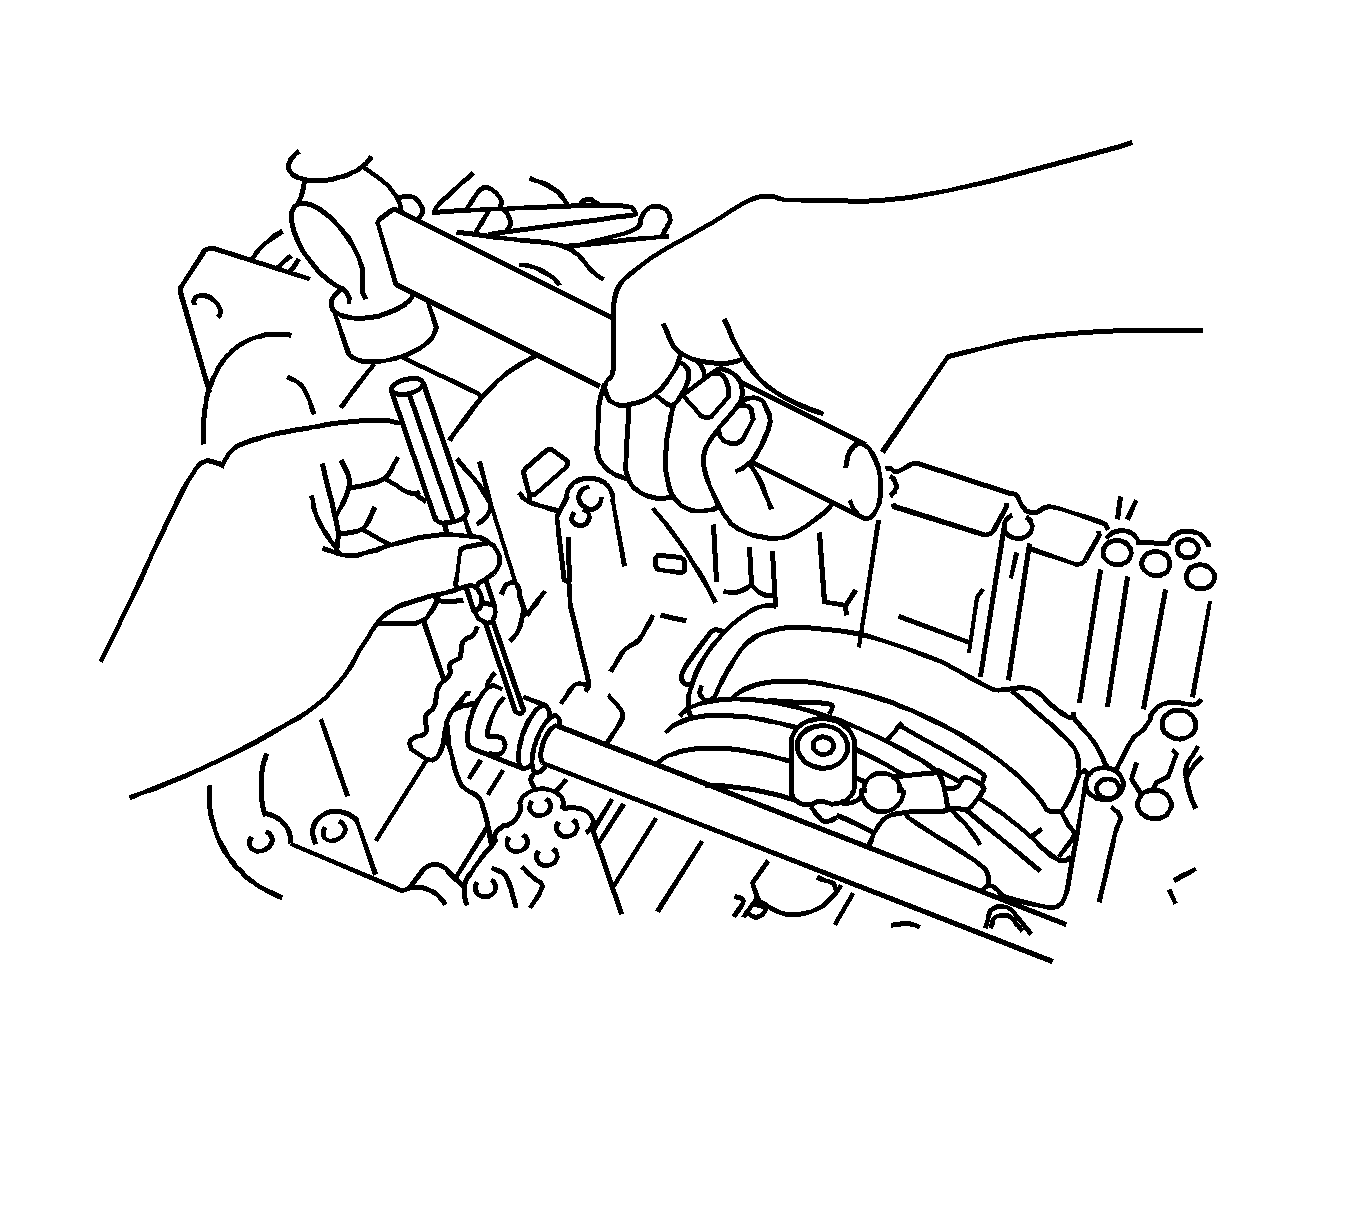
- Using a screwdriver and a hammer, unstake the spacer then remove the spacer from the transaxle case.
- Using a punch and hammer, remove the spring pin.
- Remove the retainer spring.
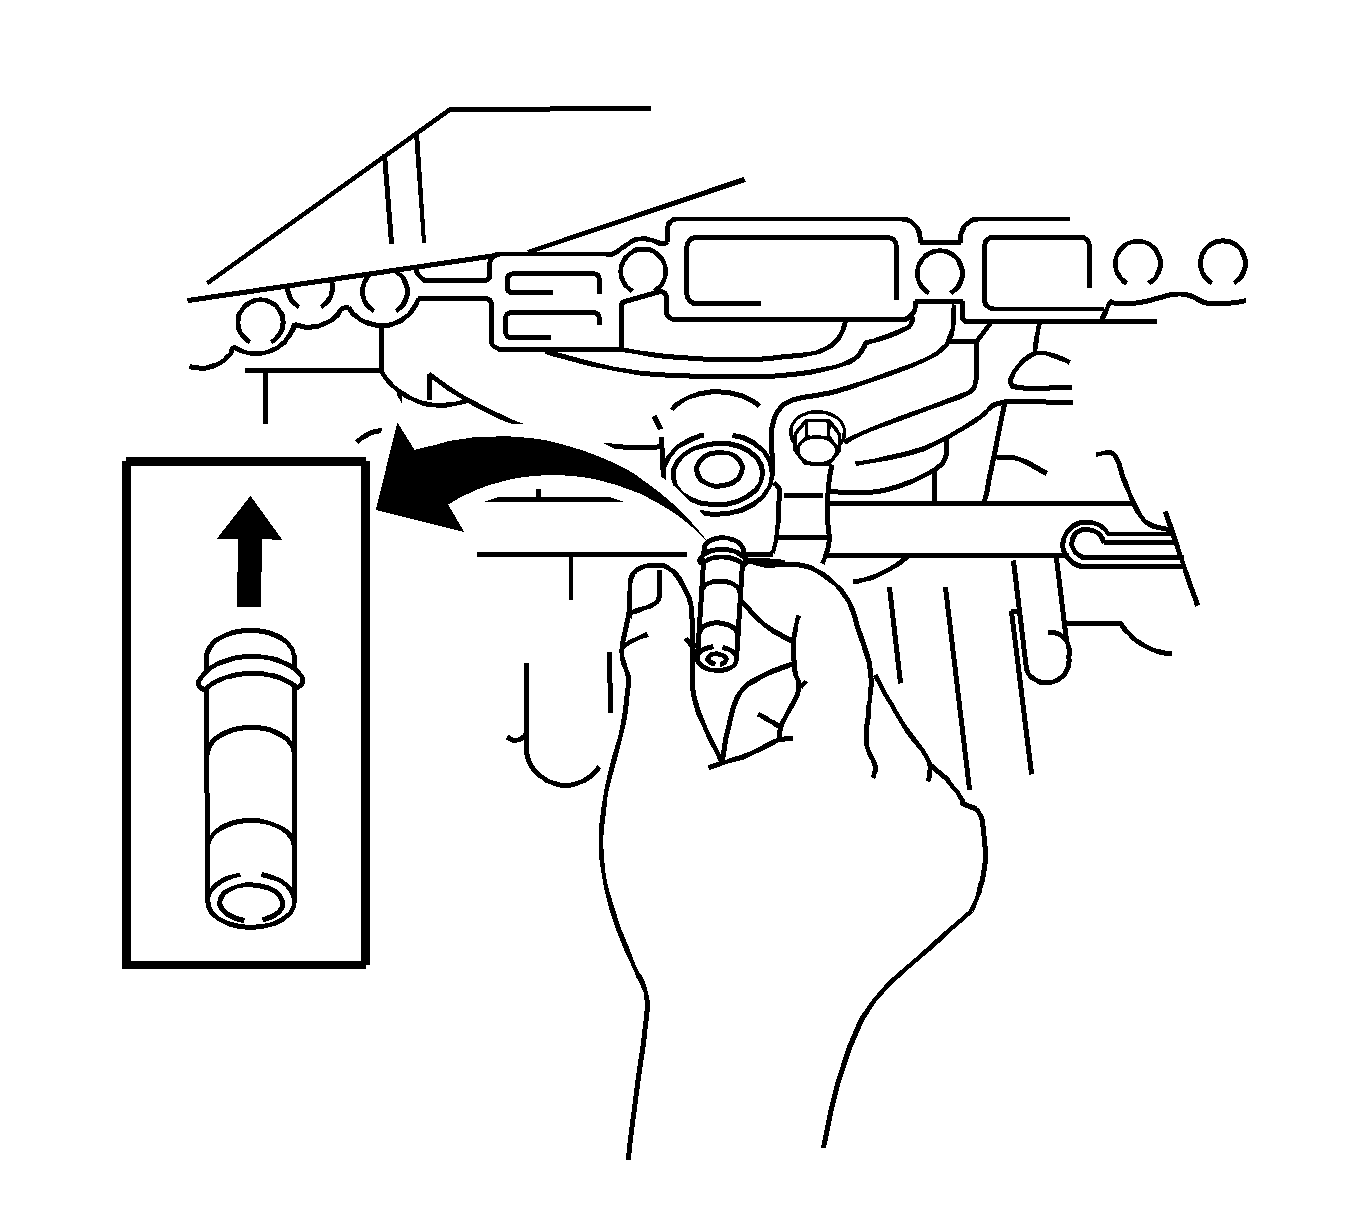
- Slide out the manual valve lever shaft, then remove the manual valve lever assembly and washer plate.
- Using a screwdriver, remove the manual valve lever shaft oil seal.
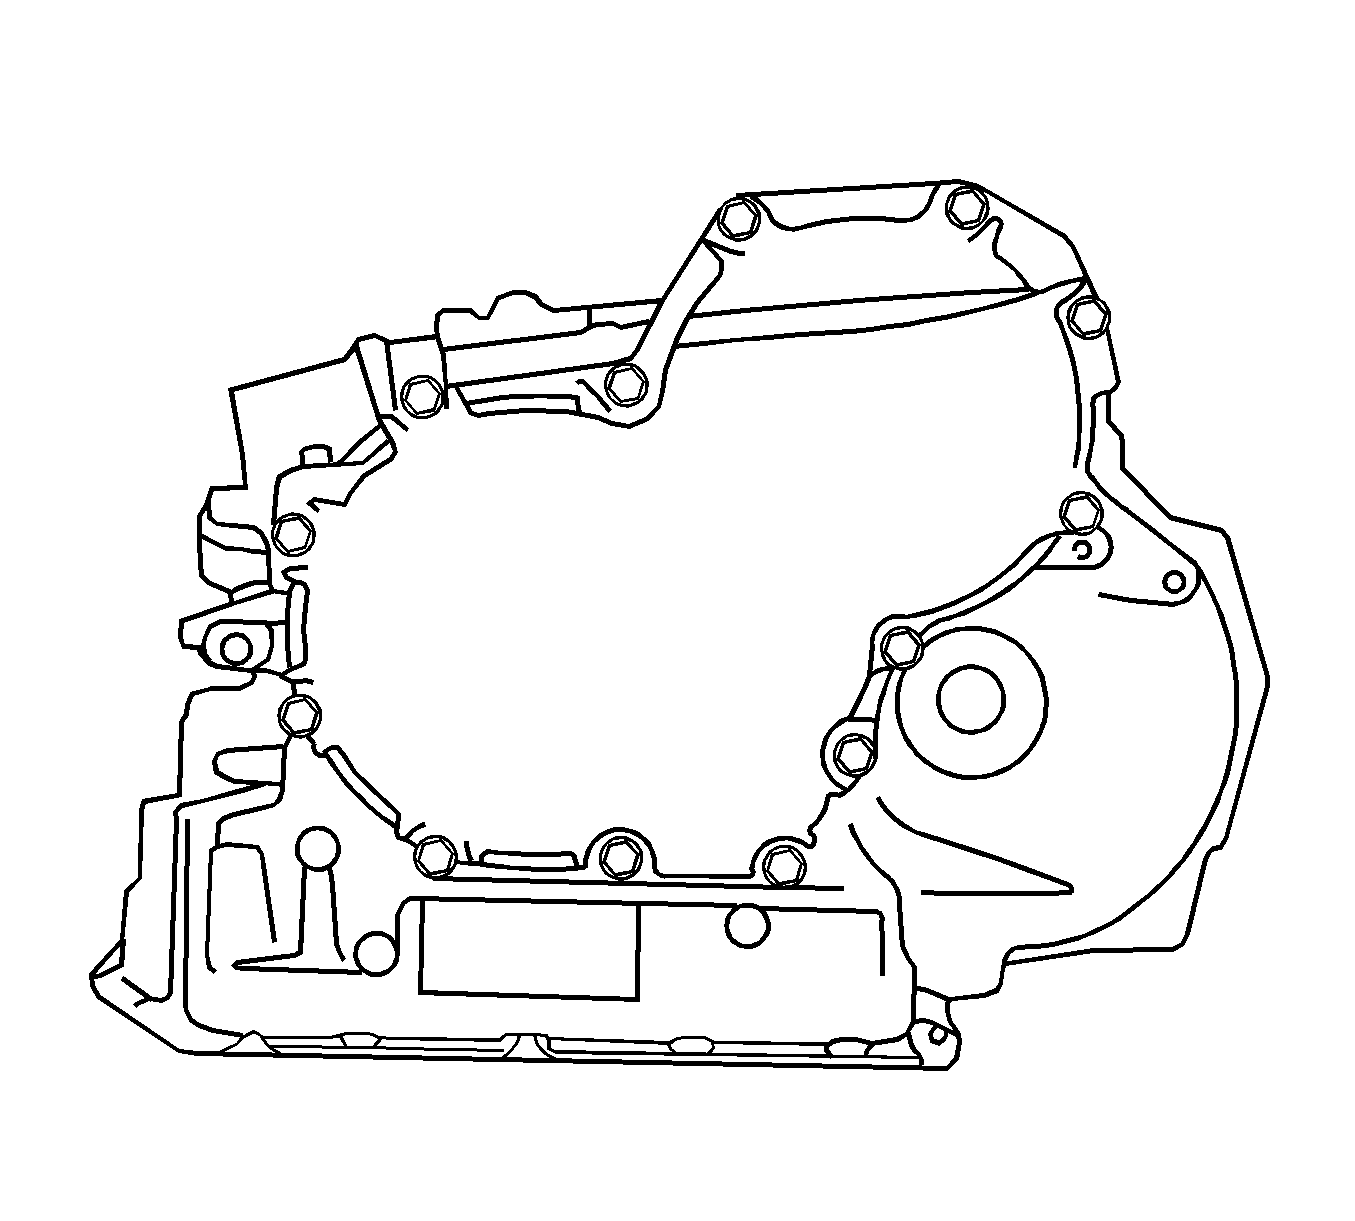
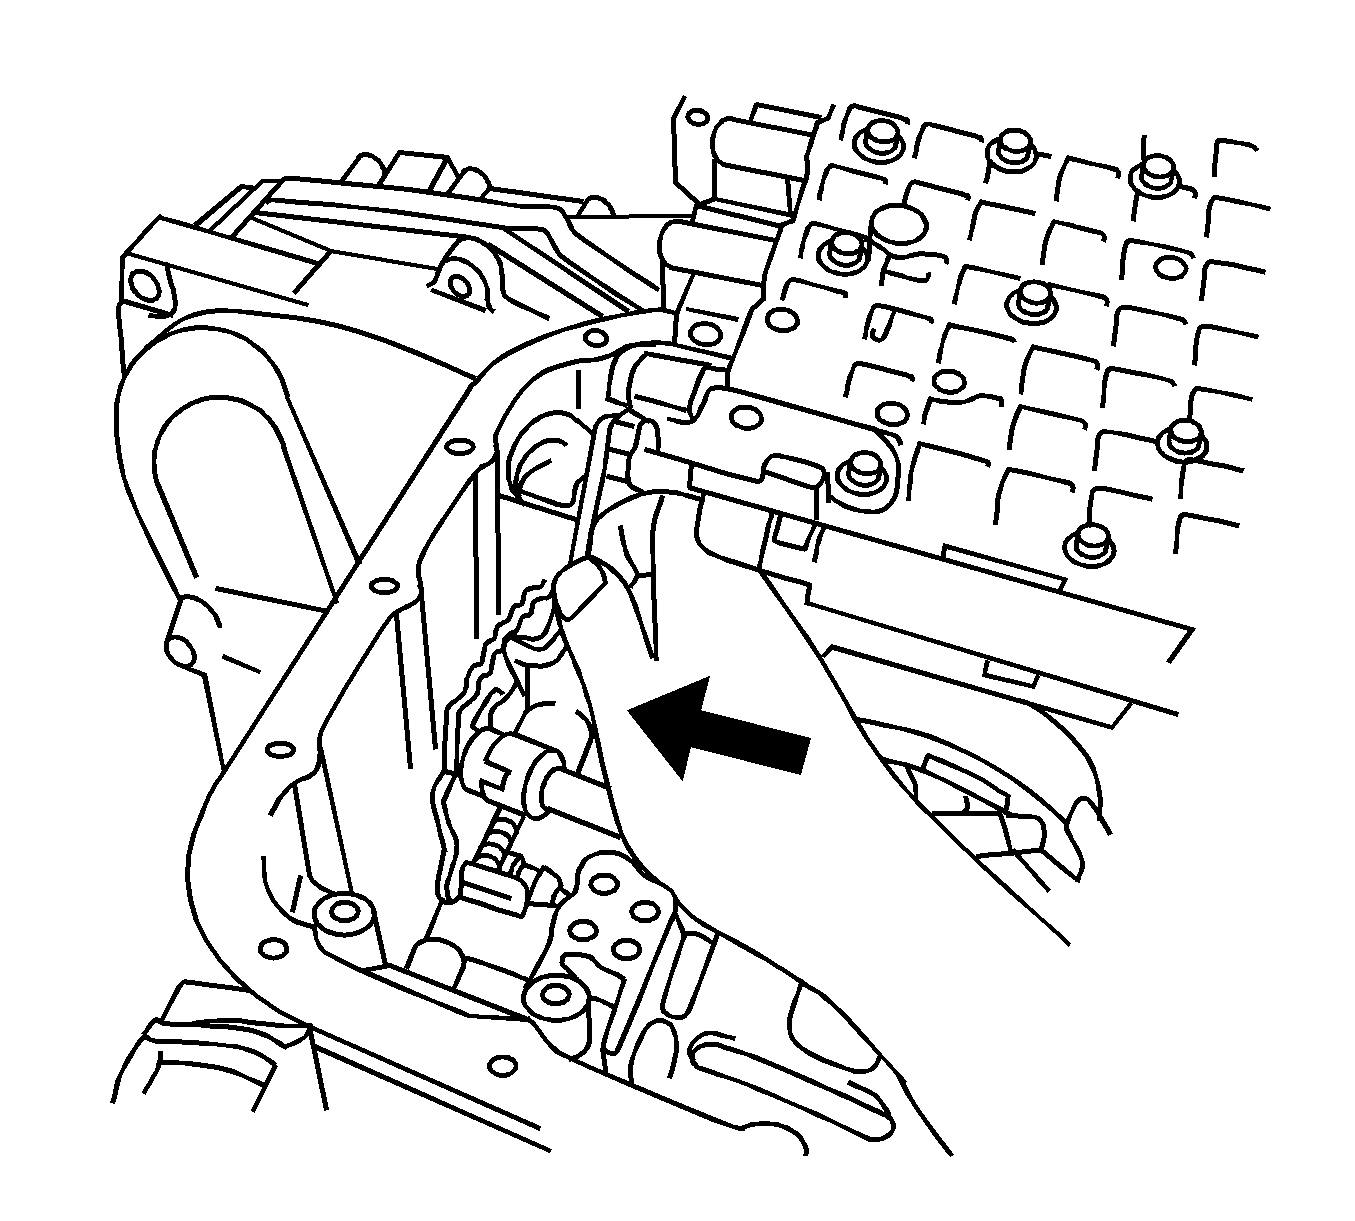
- Remove the 17 transaxle case bolts.
- Separate the transaxle housings.
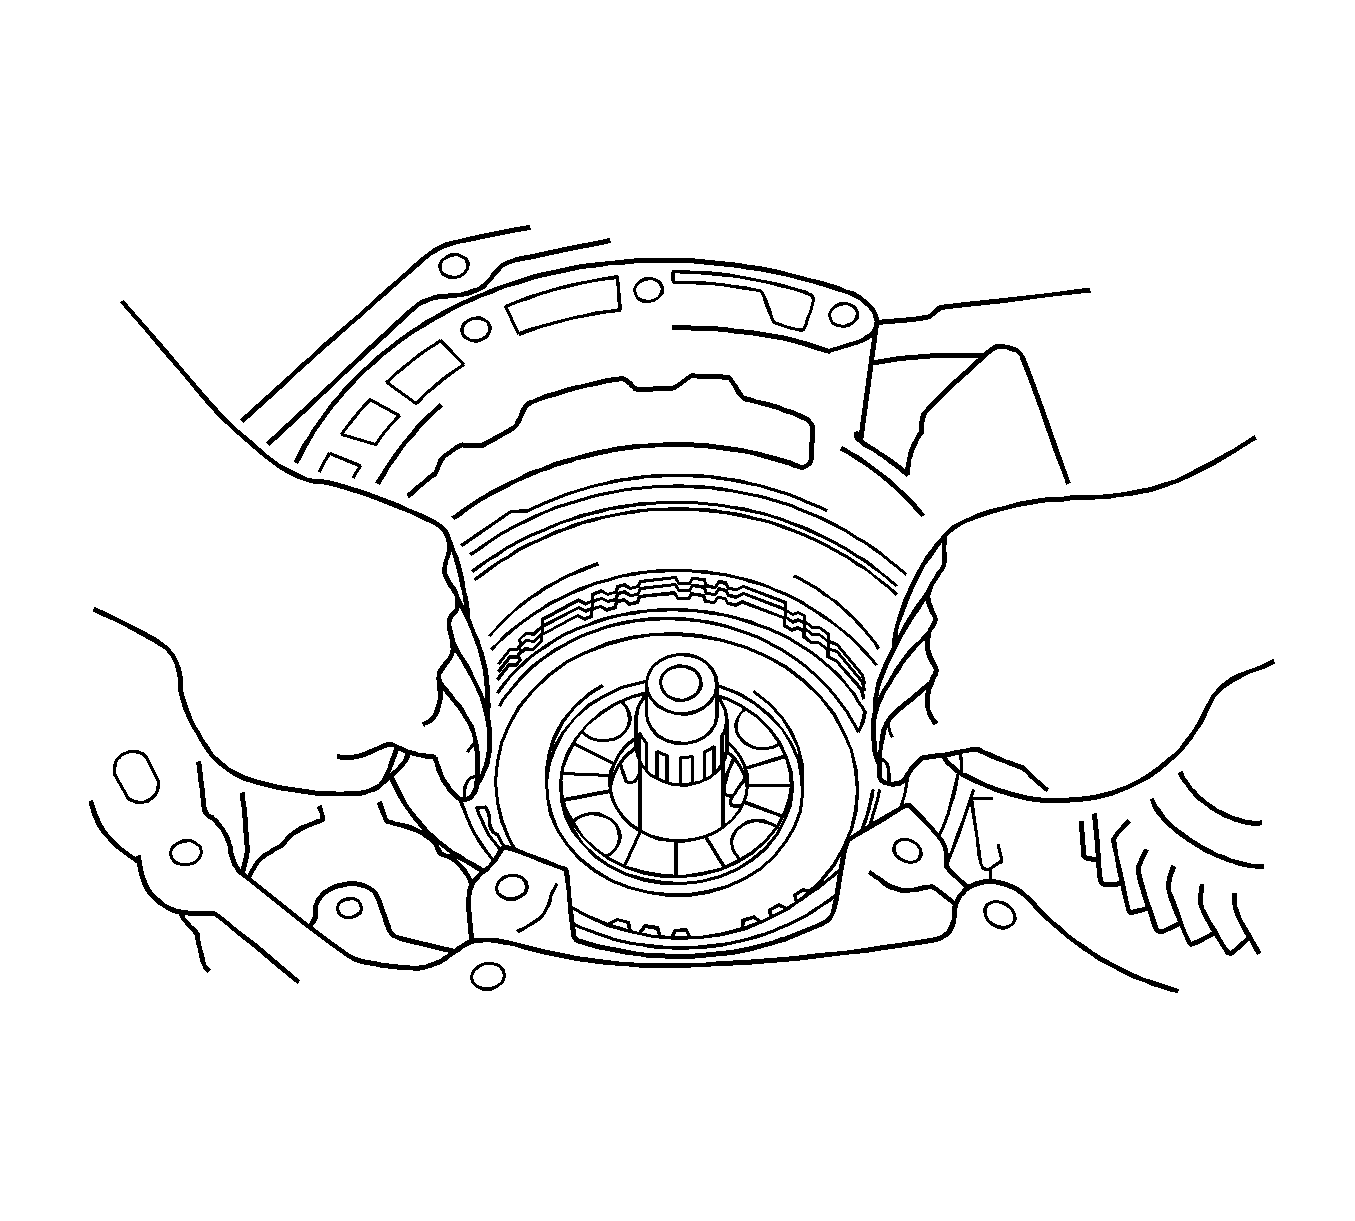
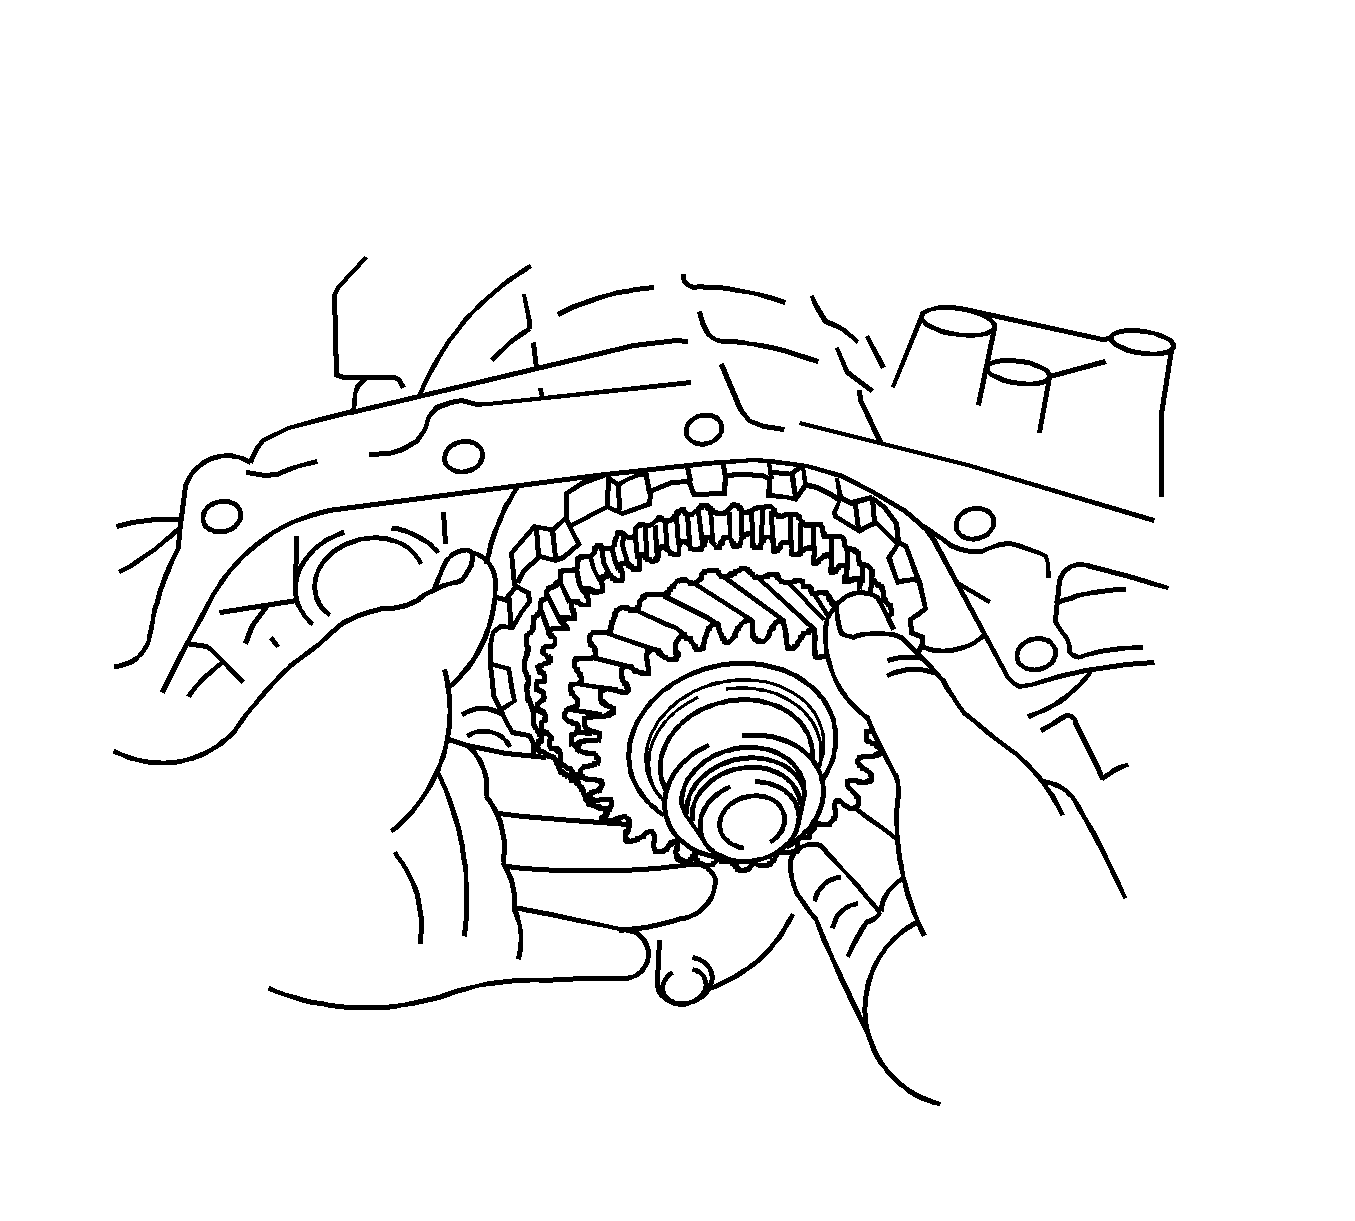
- Remove the differential assembly from the transaxle case.
- Remove the transaxle case plate bolt and transaxle case plate from the transaxle housing.
- Remove the governor apply gasket from the transaxle case.
- Remove the 6 oil pump assembly retaining bolts.
- Lift out the oil pump assembly from the transaxle case.
- Using a screwdriver, remove the O-ring from the oil pump.
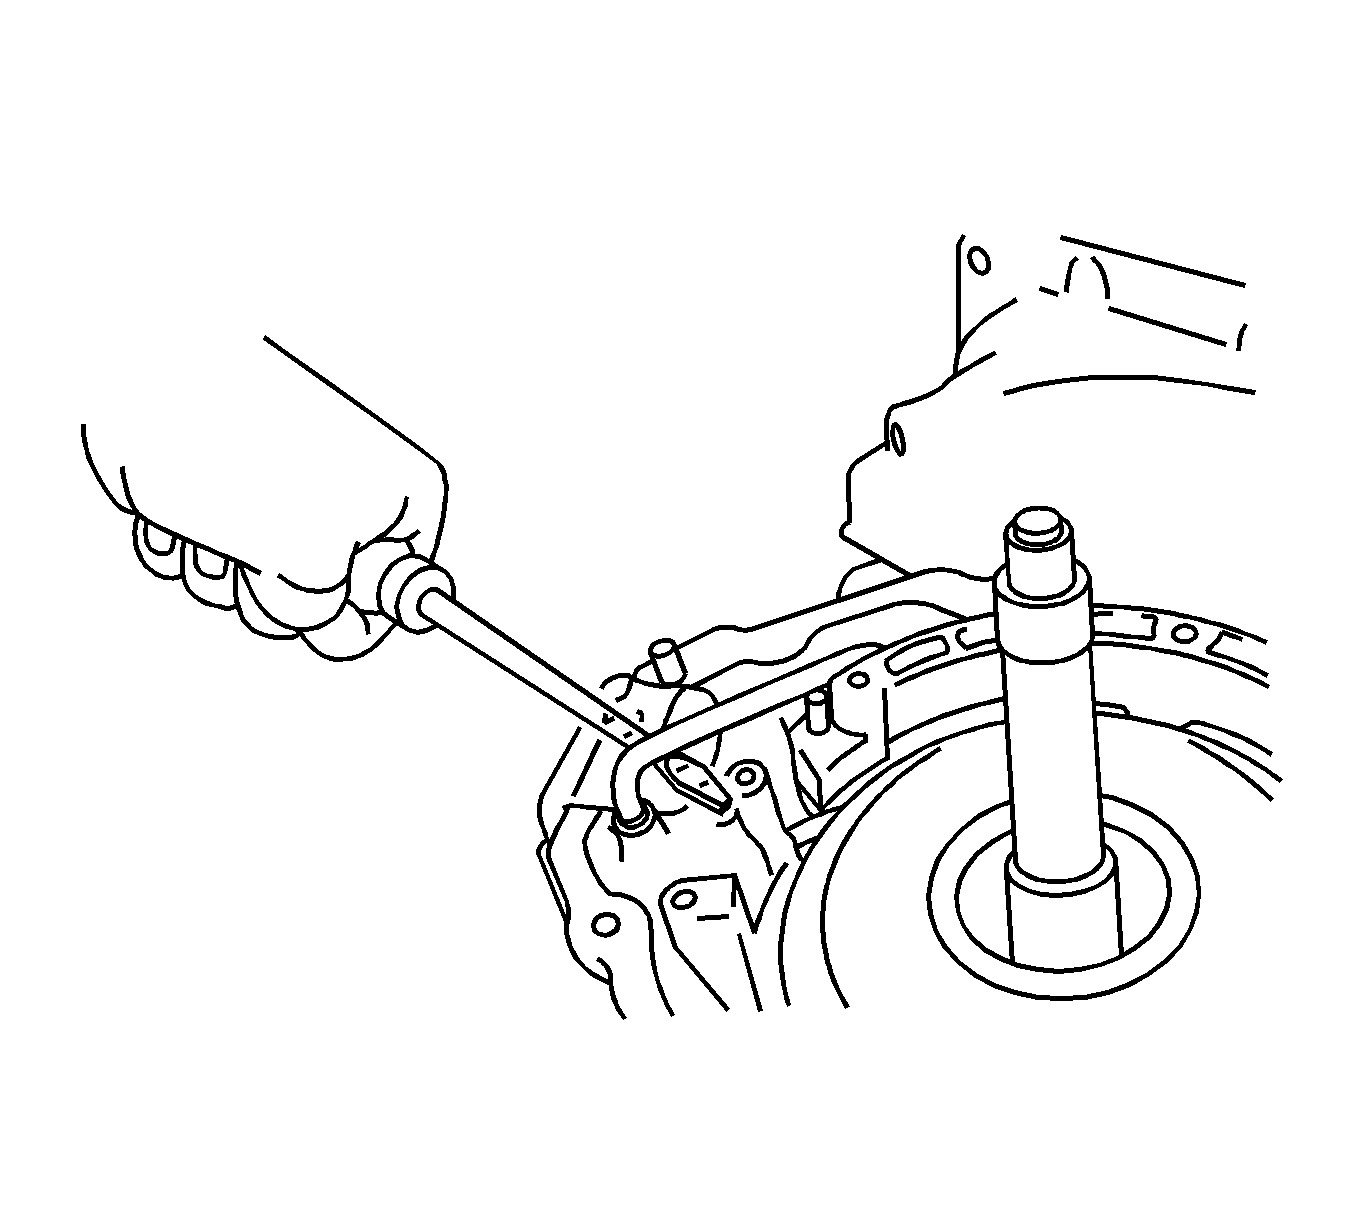
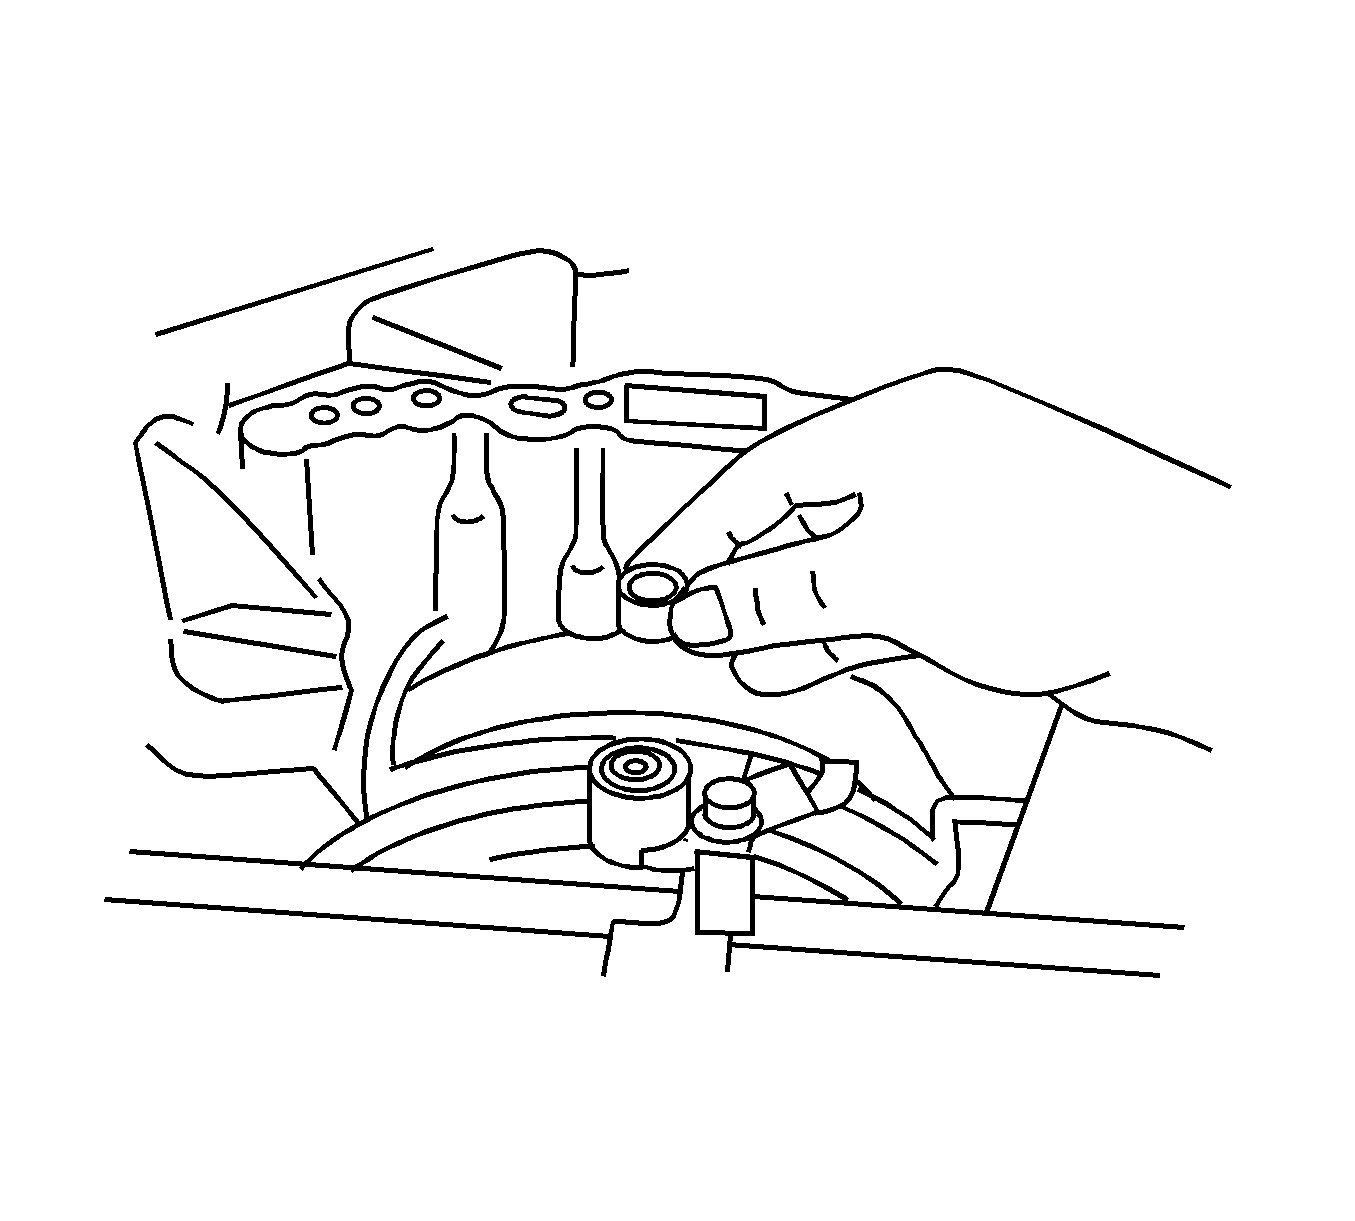
- Remove the bolt and the apply tube clamp from the transaxle case.
- Remove the governor pressure tube from the transaxle case.
- Apply a index mark to the piston at the point where it meets the transaxle case.
- While applying and releasing compressed air at a pressure of 392-785 kPa (57-114 psi) measure the piston stroke.
- Remove the 2nd coast brake piston snap ring.
- Using compressed air at low pressure 98 kPa (14 psi) push out the cover into a shop towel.
- Remove the cover, 2nd coast brake piston assembly and spring.
- Remove the 2 O-rings from the coast brake cover.
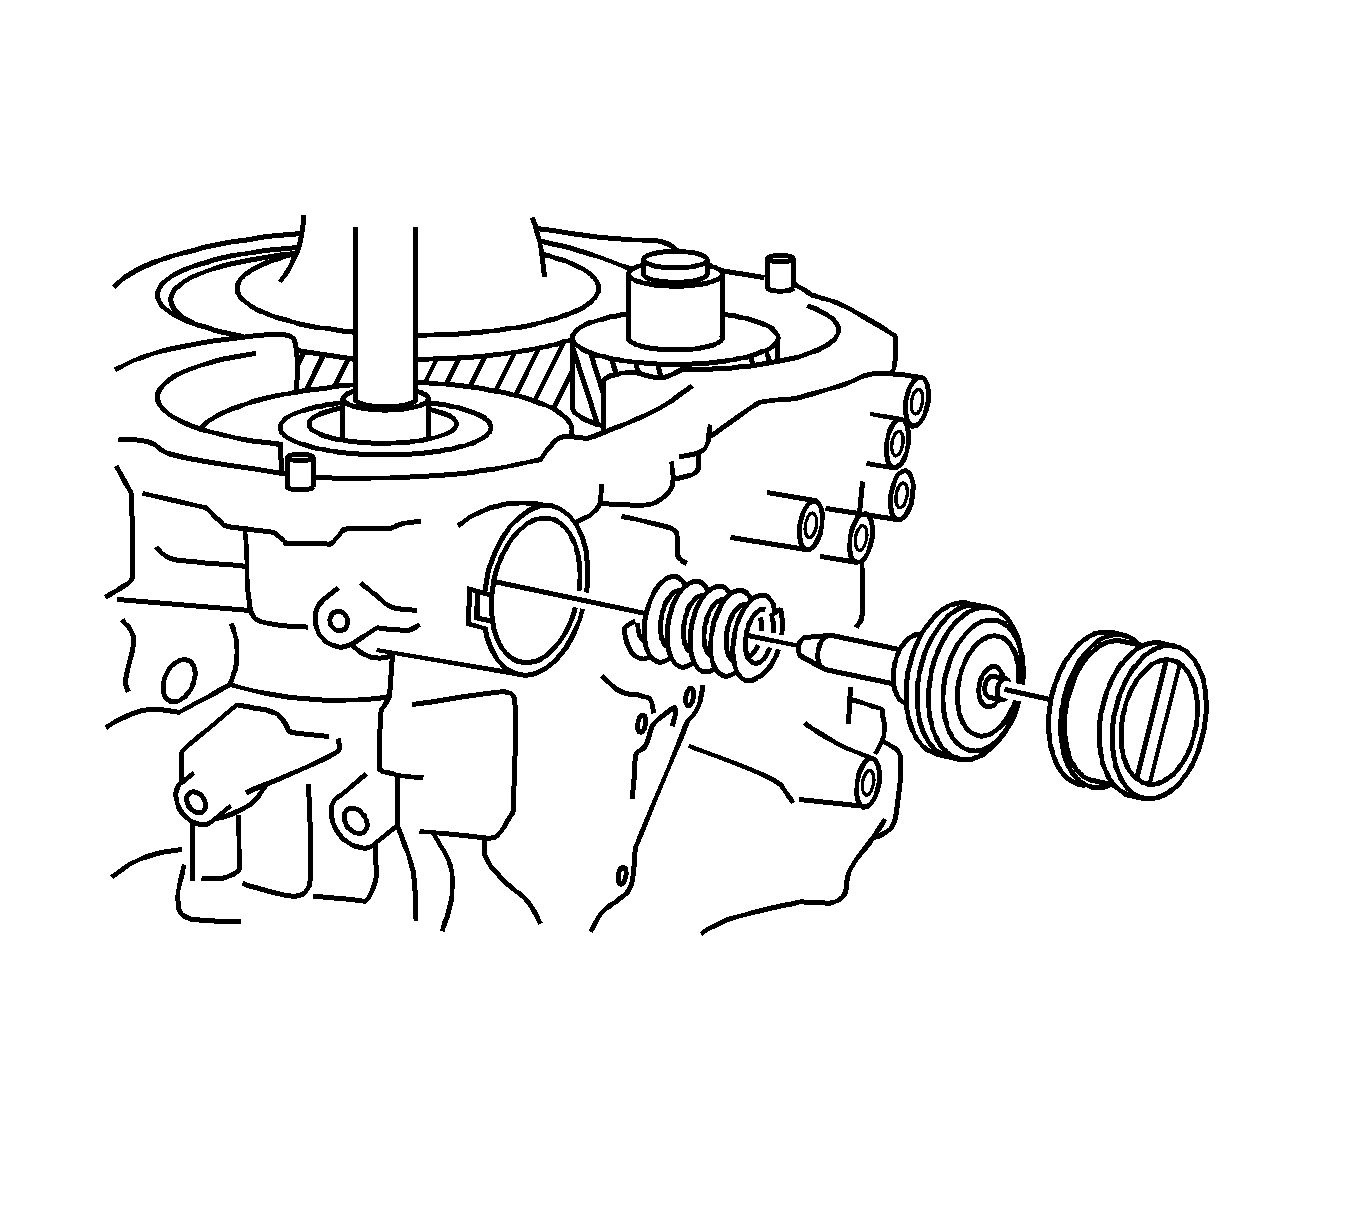
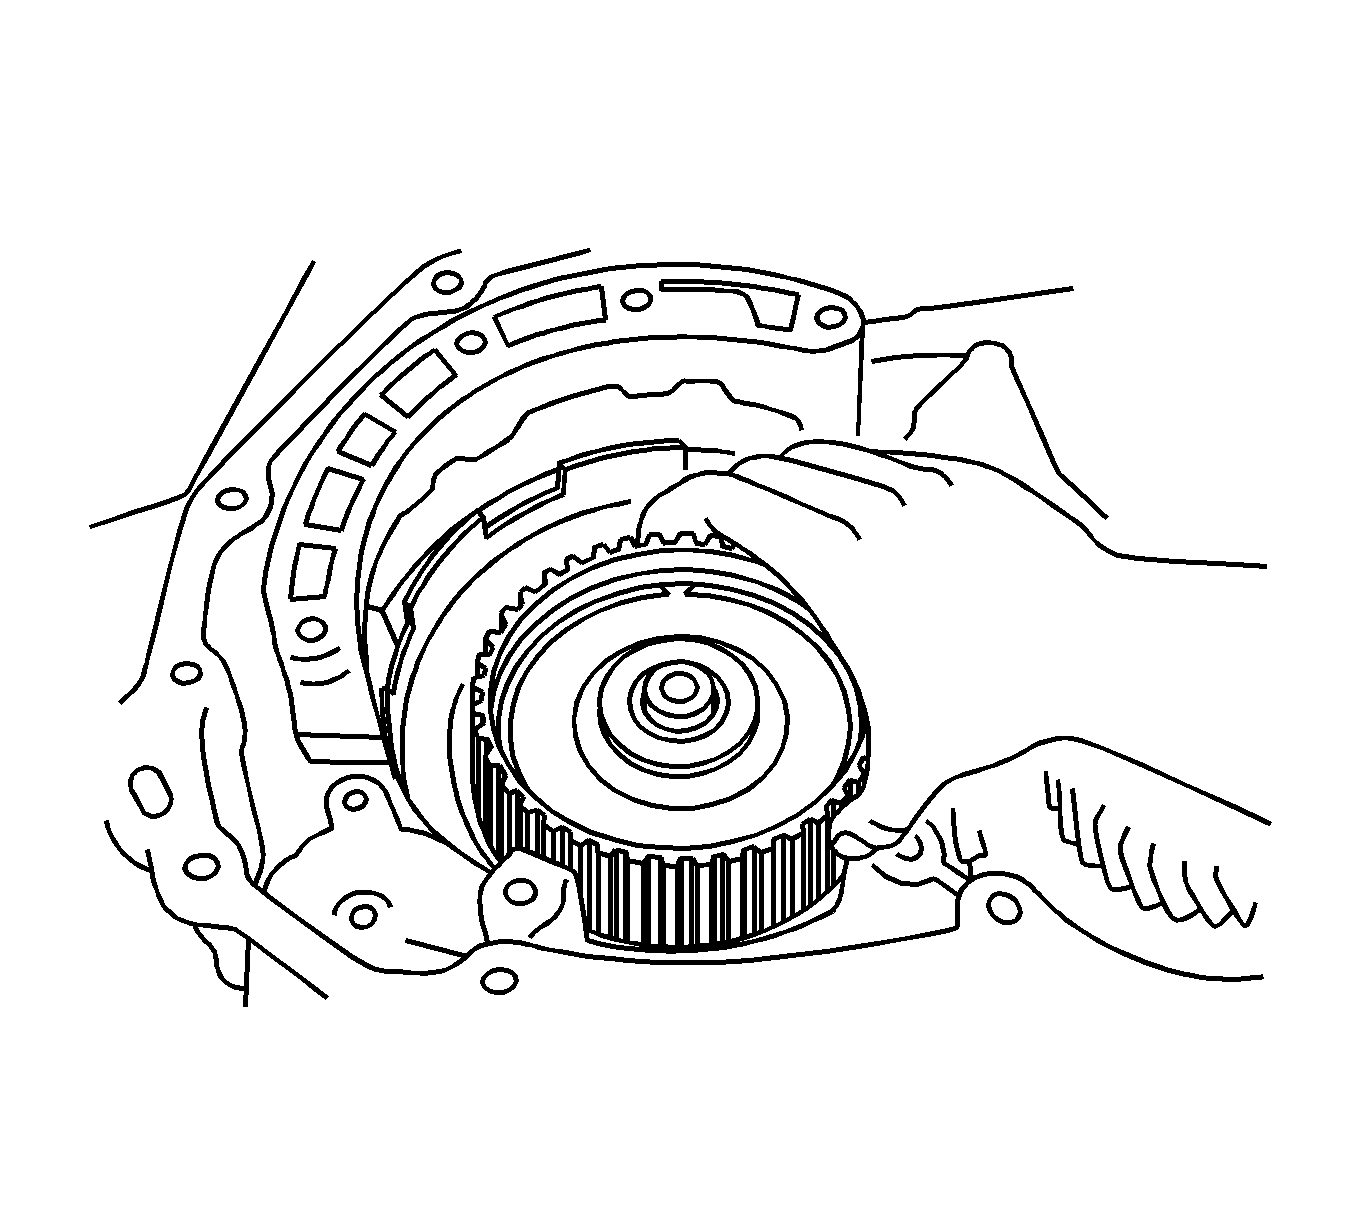
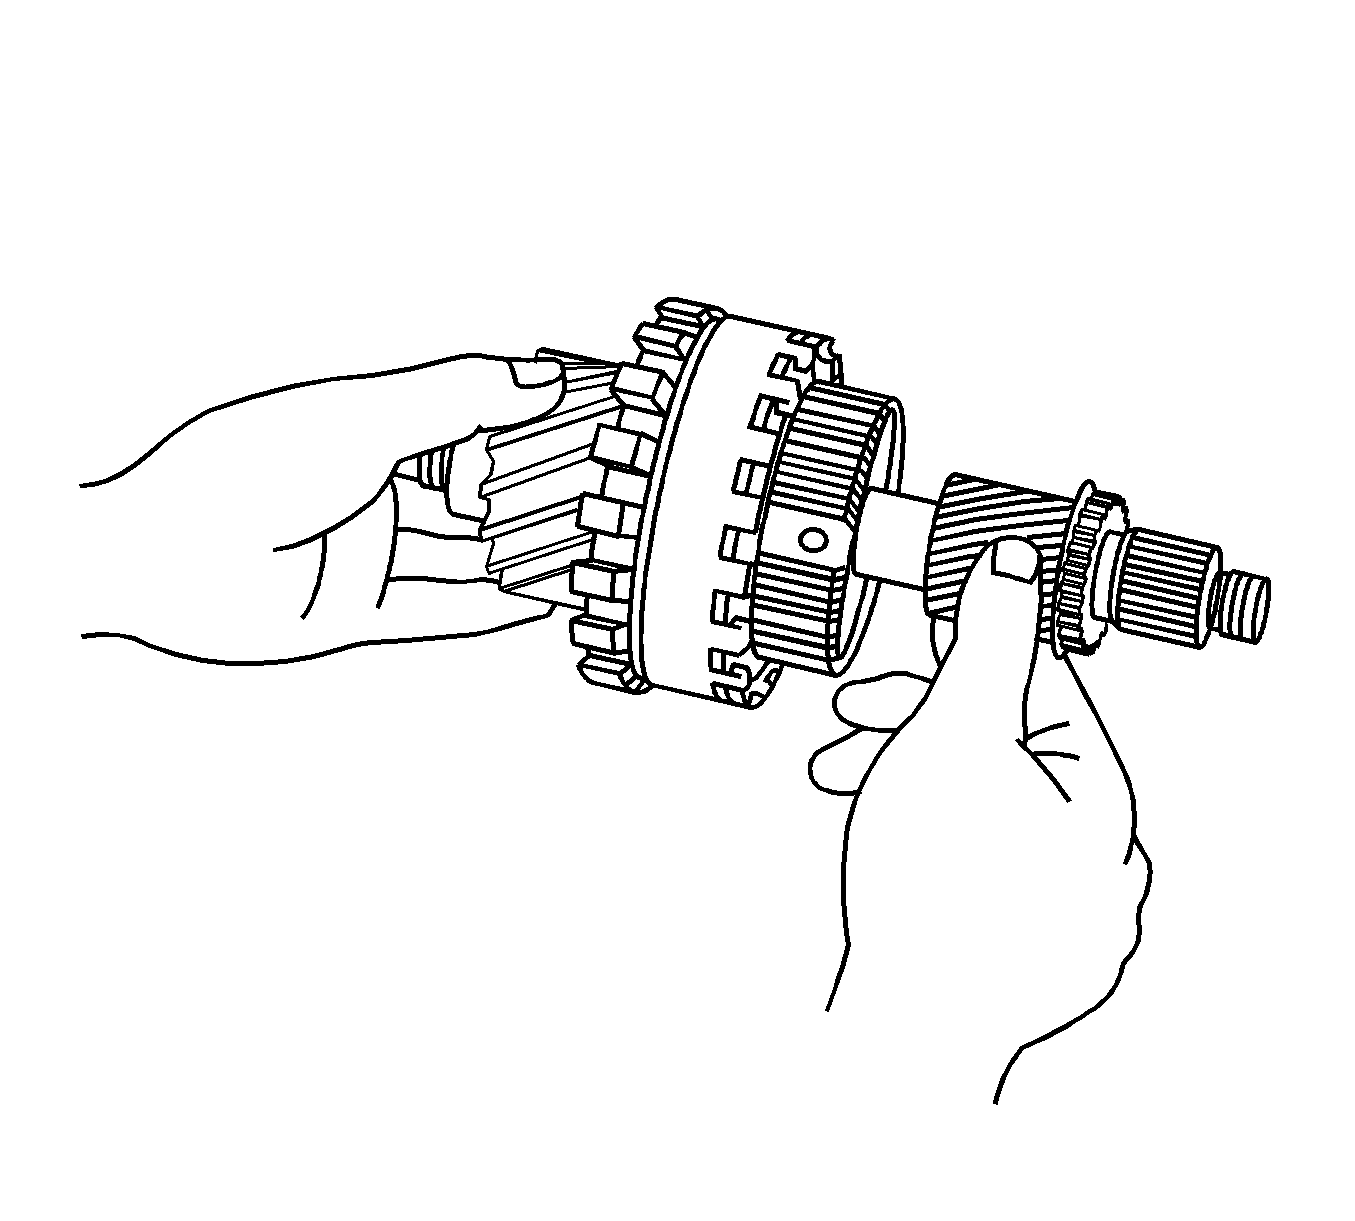
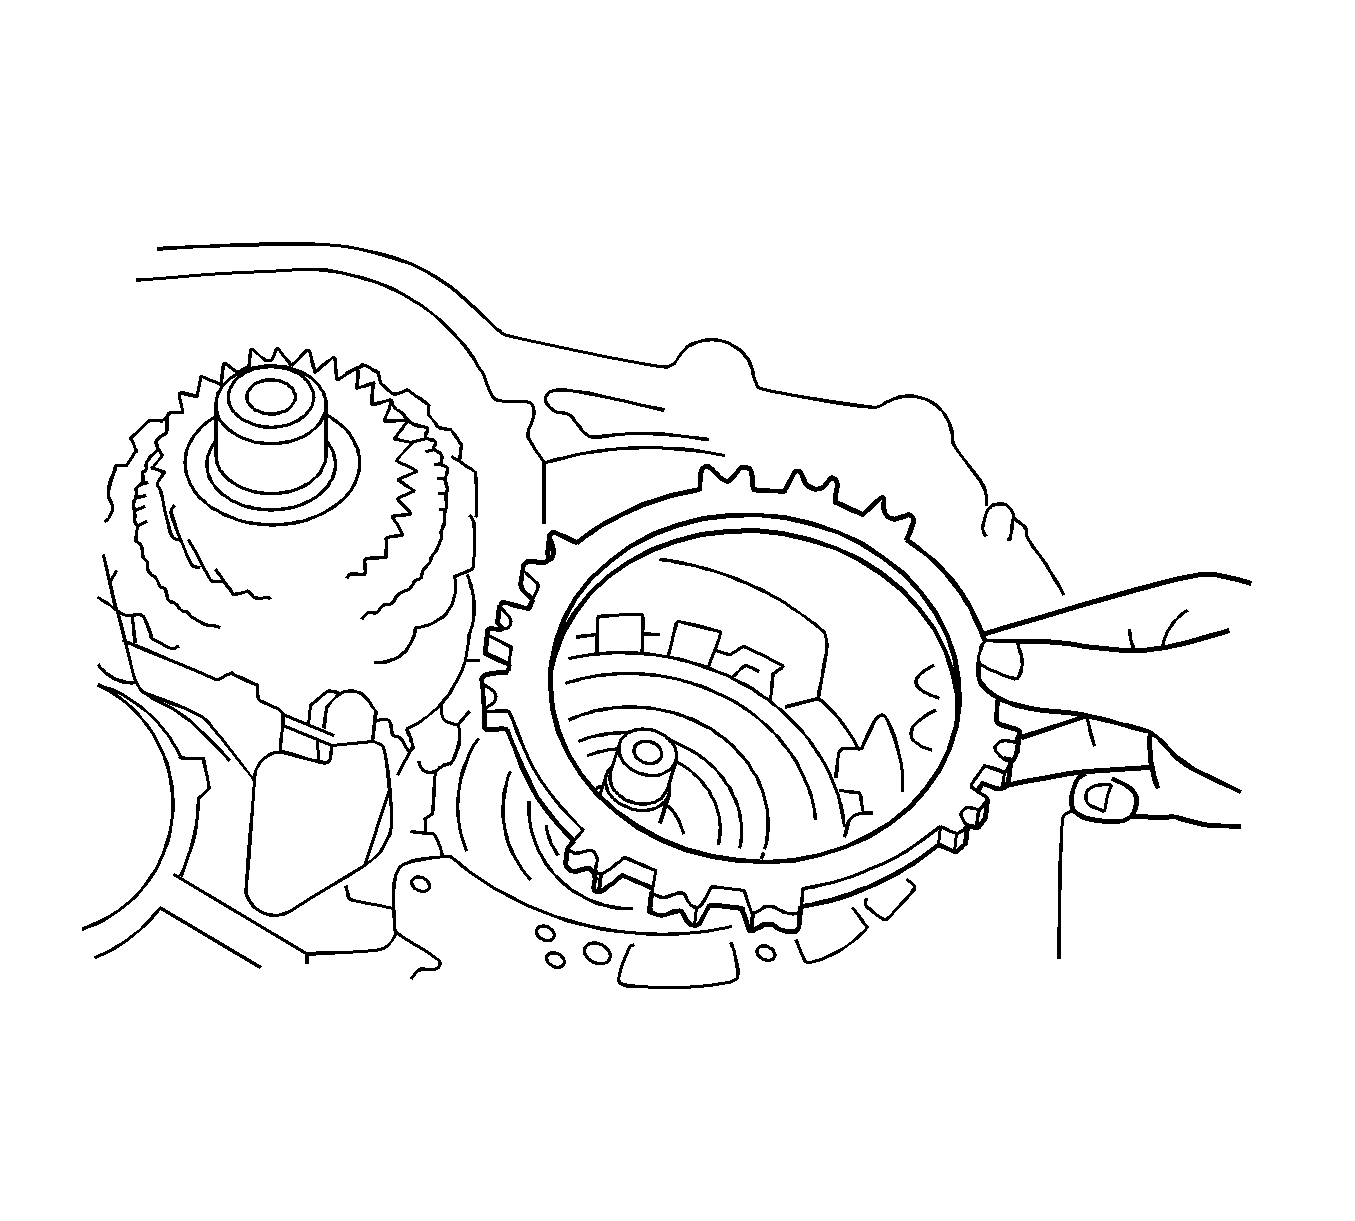
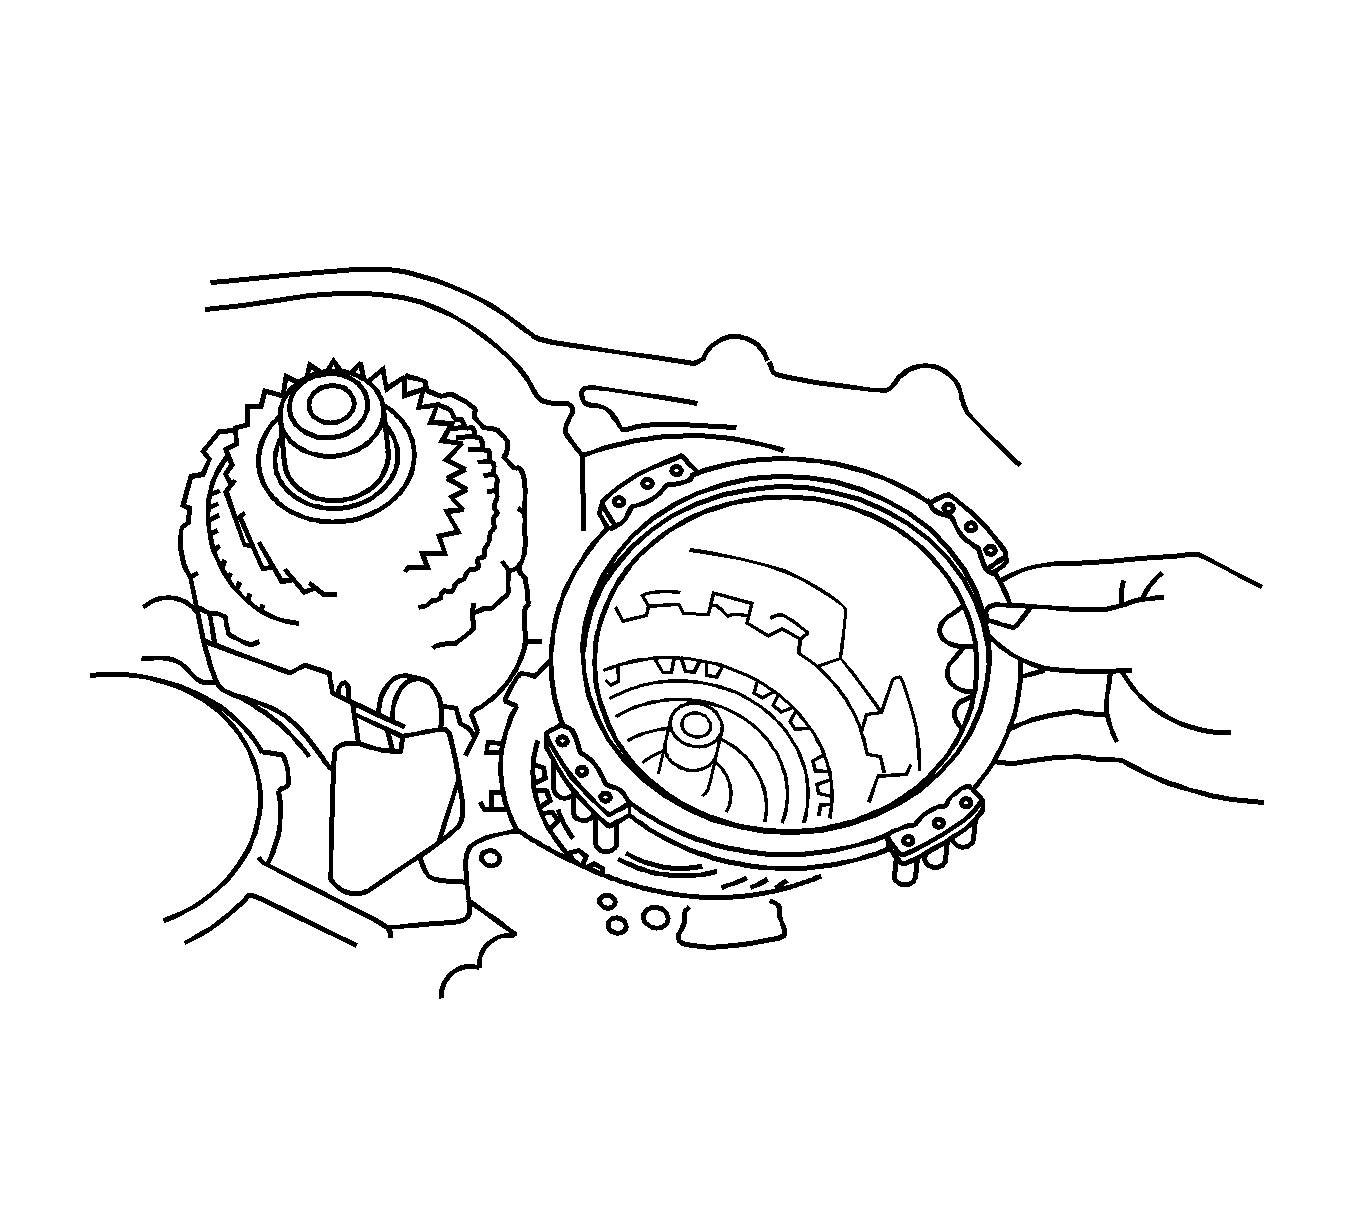
- Remove the direct clutch with the forward clutch from the transaxle case.
- Remove the direct clutch from the forward clutch.
- Remove the clutch drum thrust washer and the 2 thrust needle roller bearings from the forward clutch.
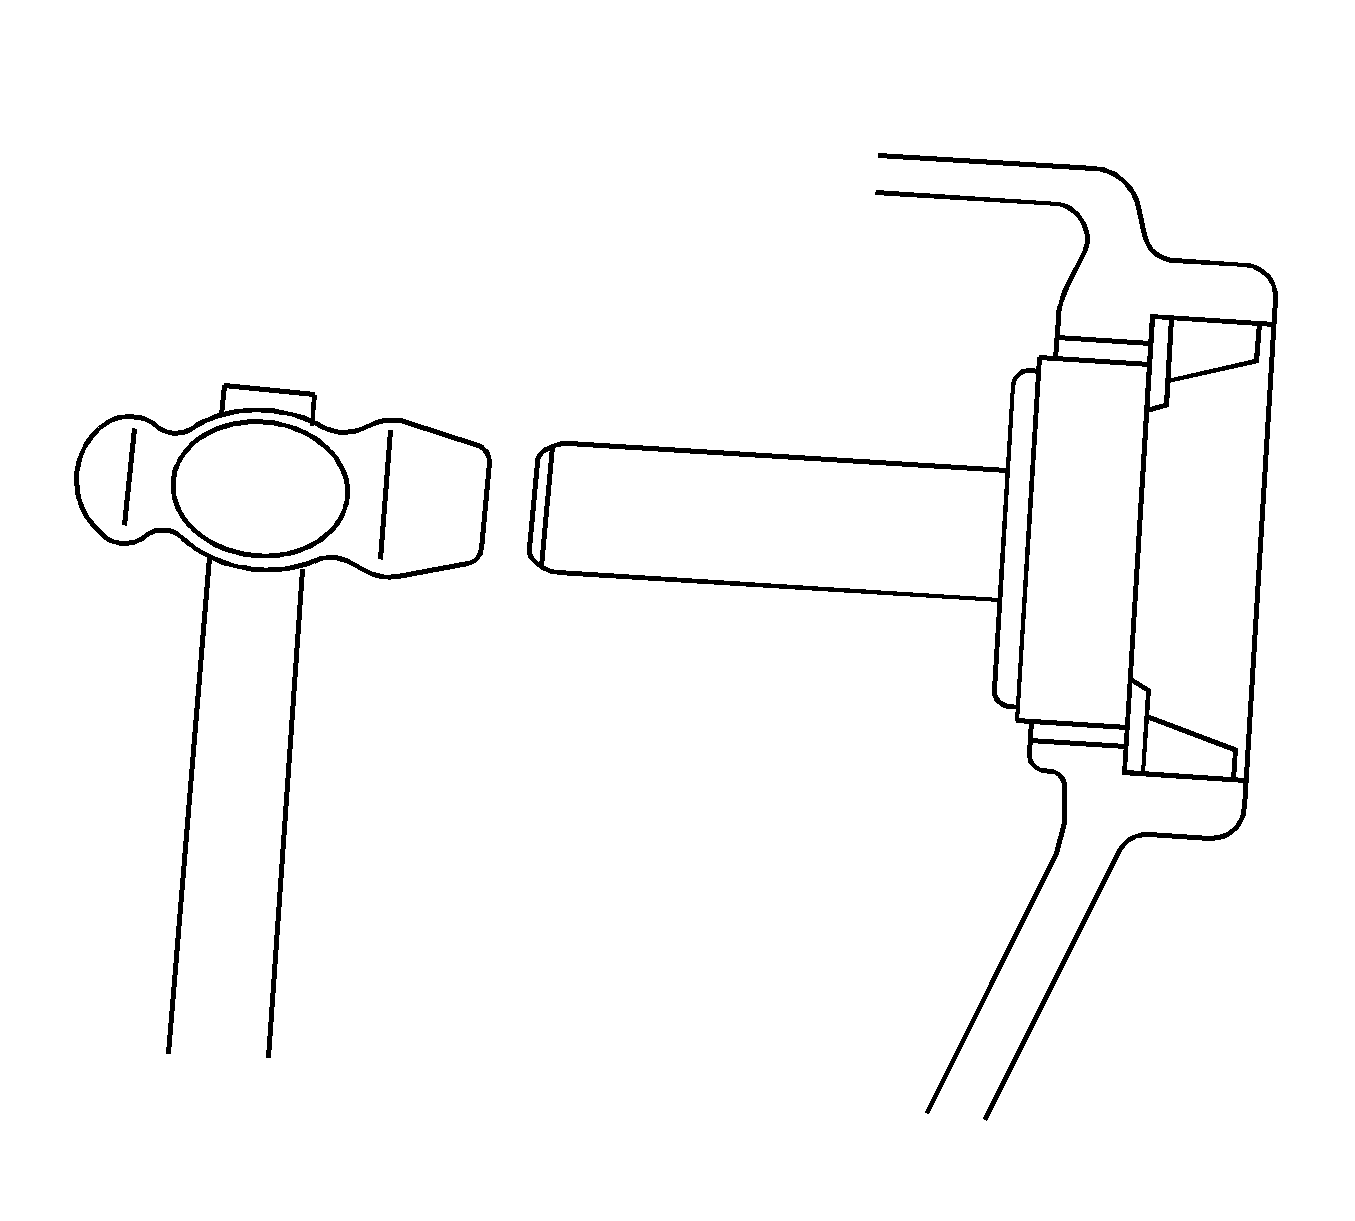
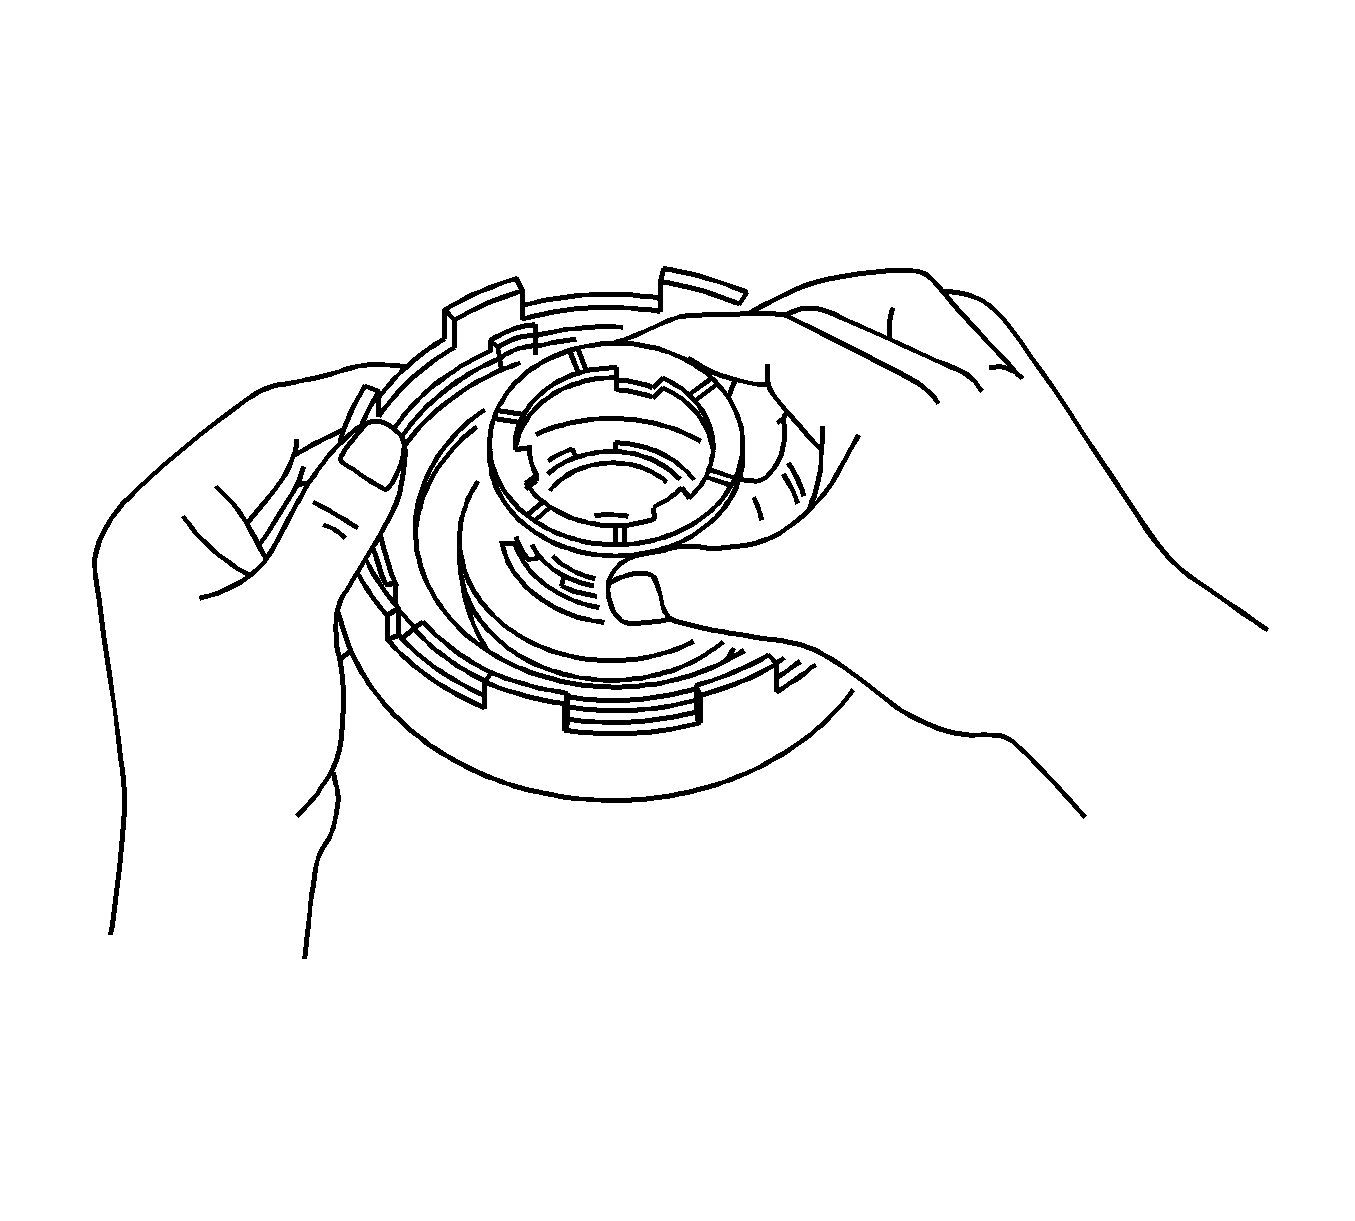
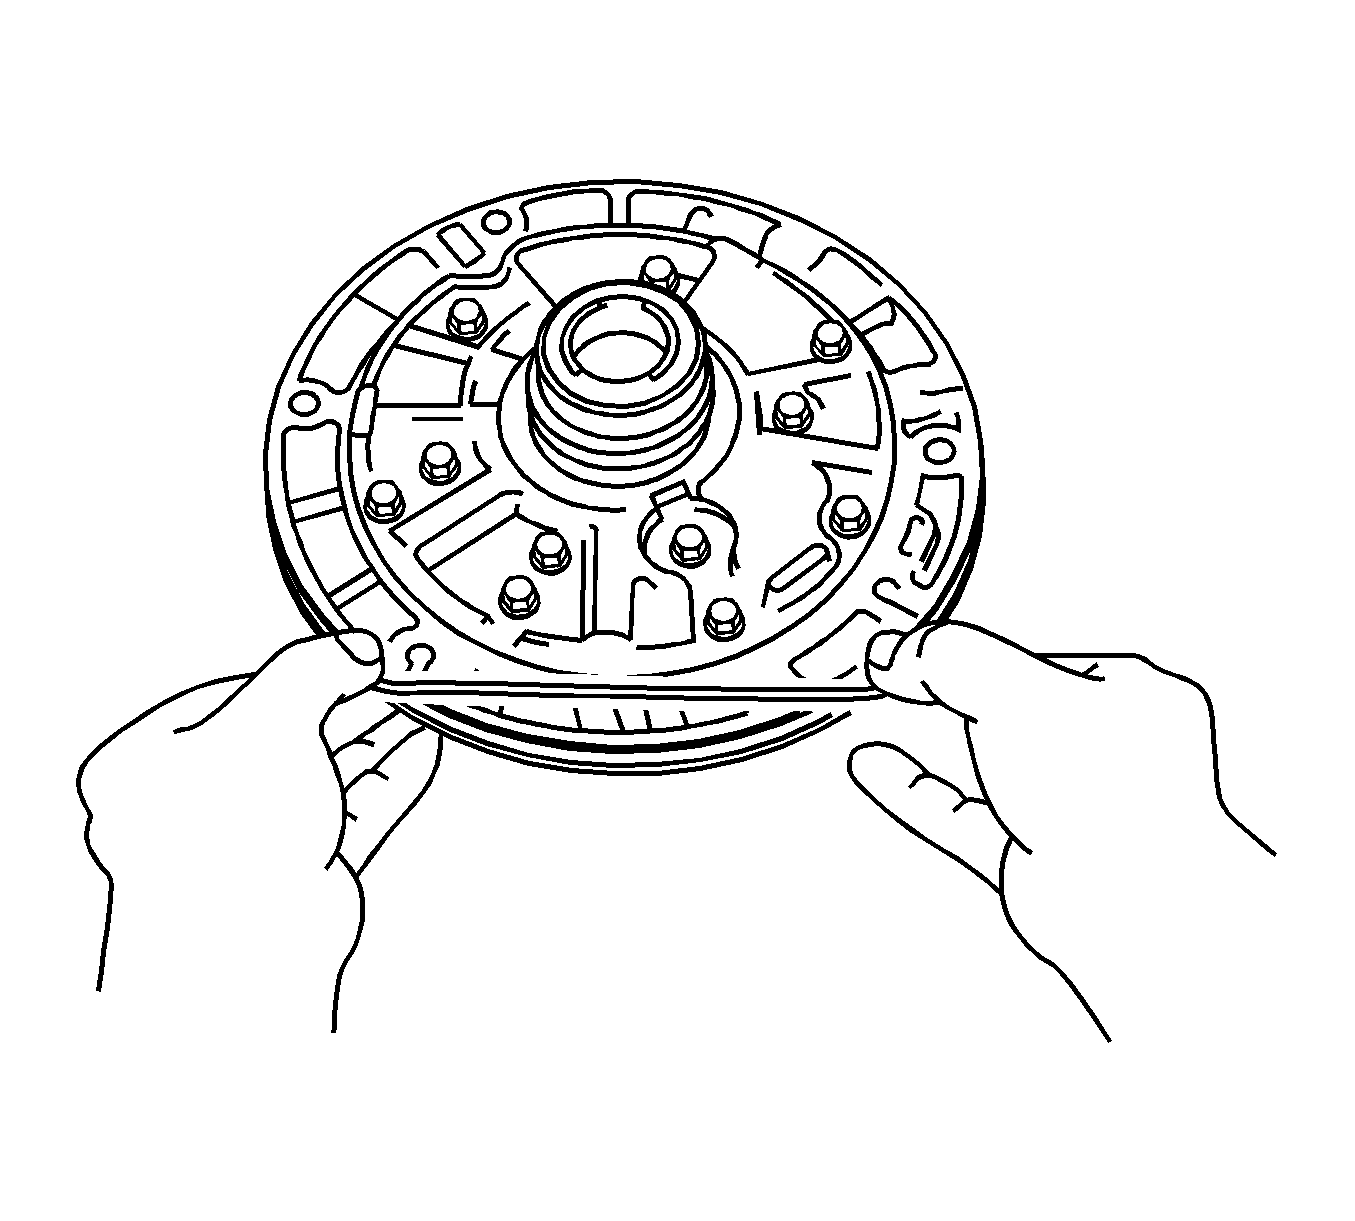
- Pull out the 2nd coast brake band pin.
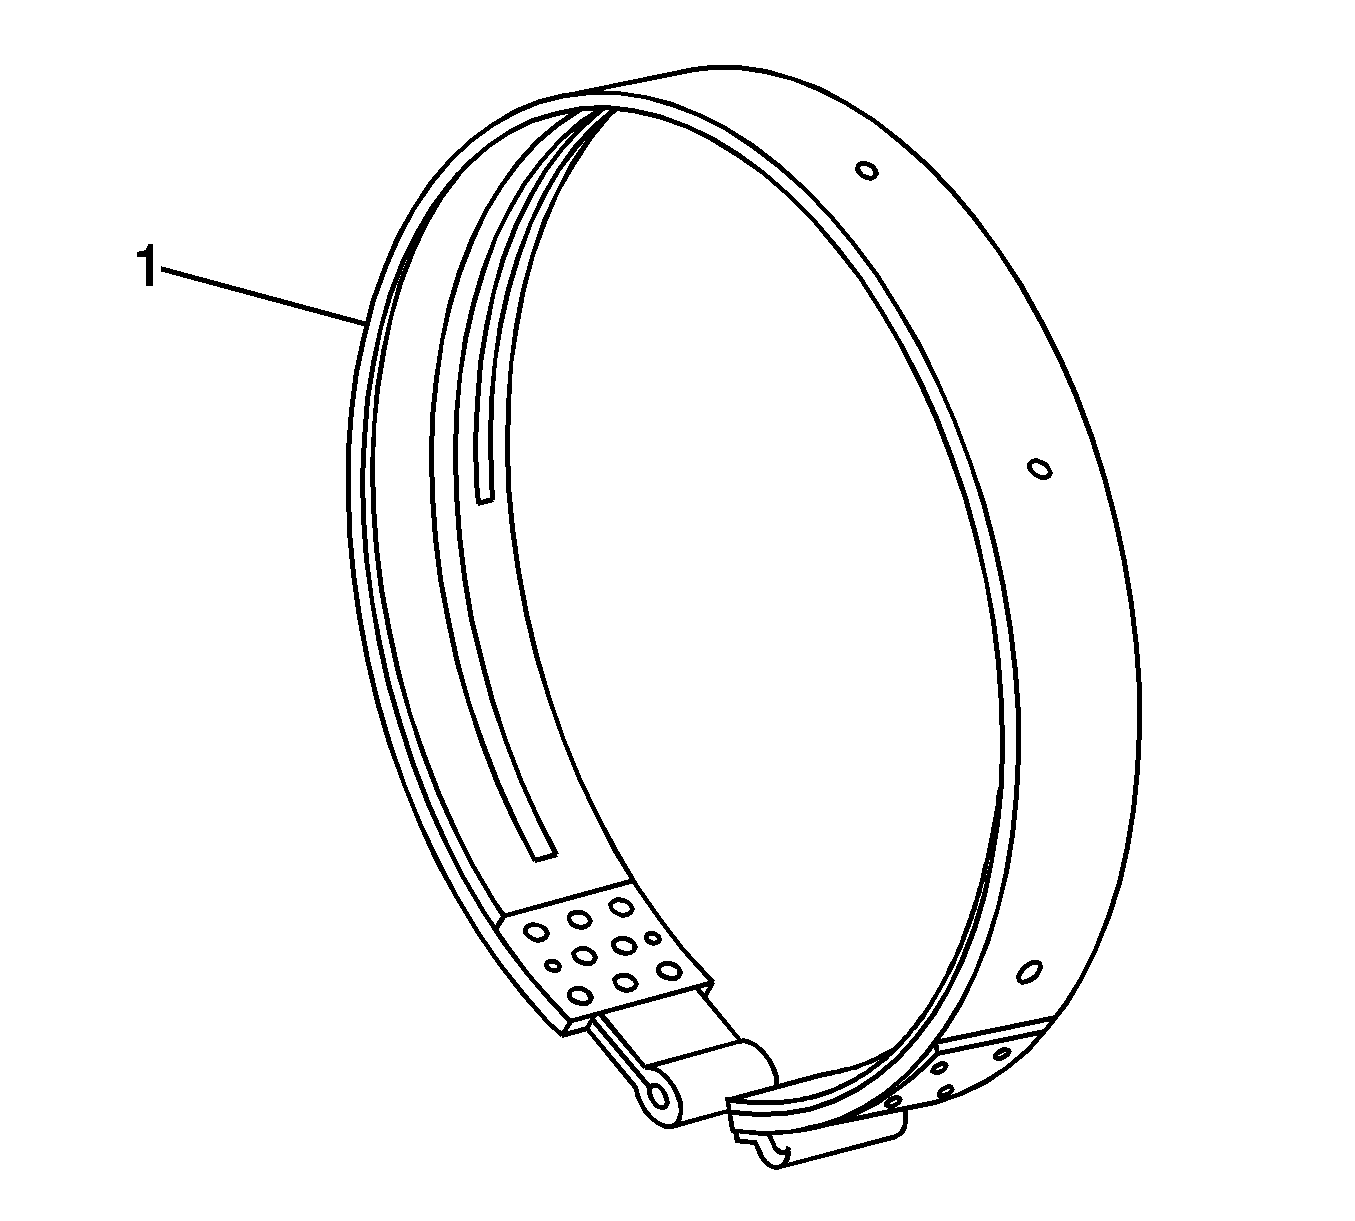
- Remove the 2nd coast brake band assembly from the transaxle case.
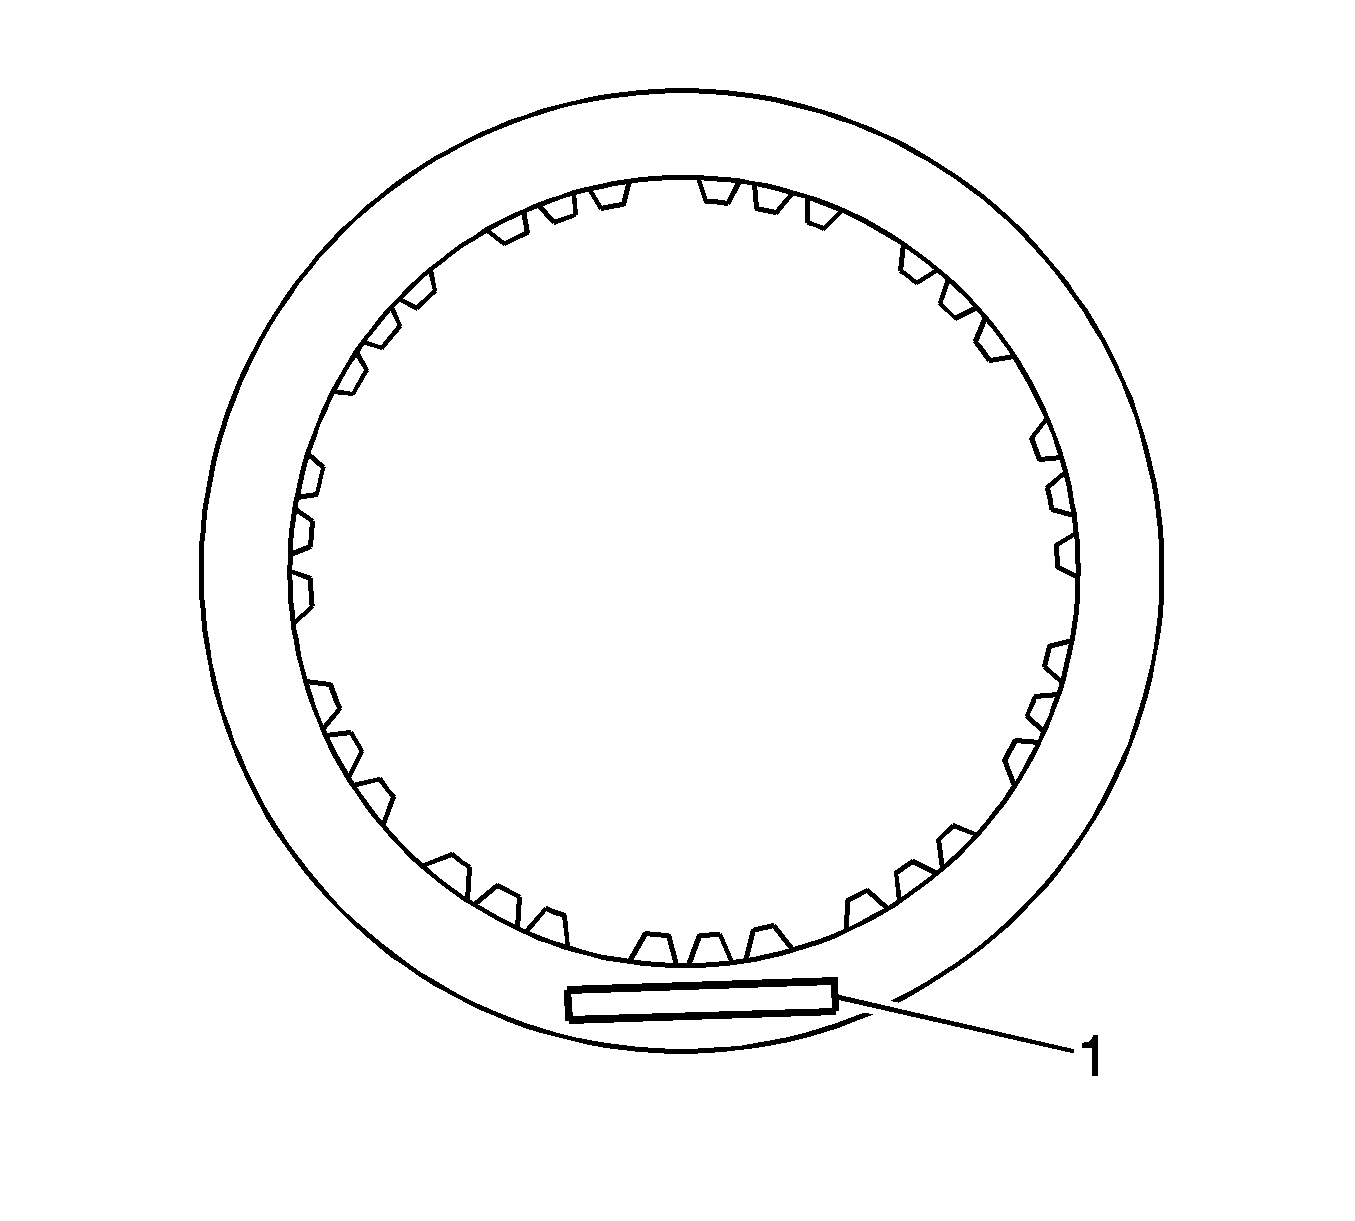
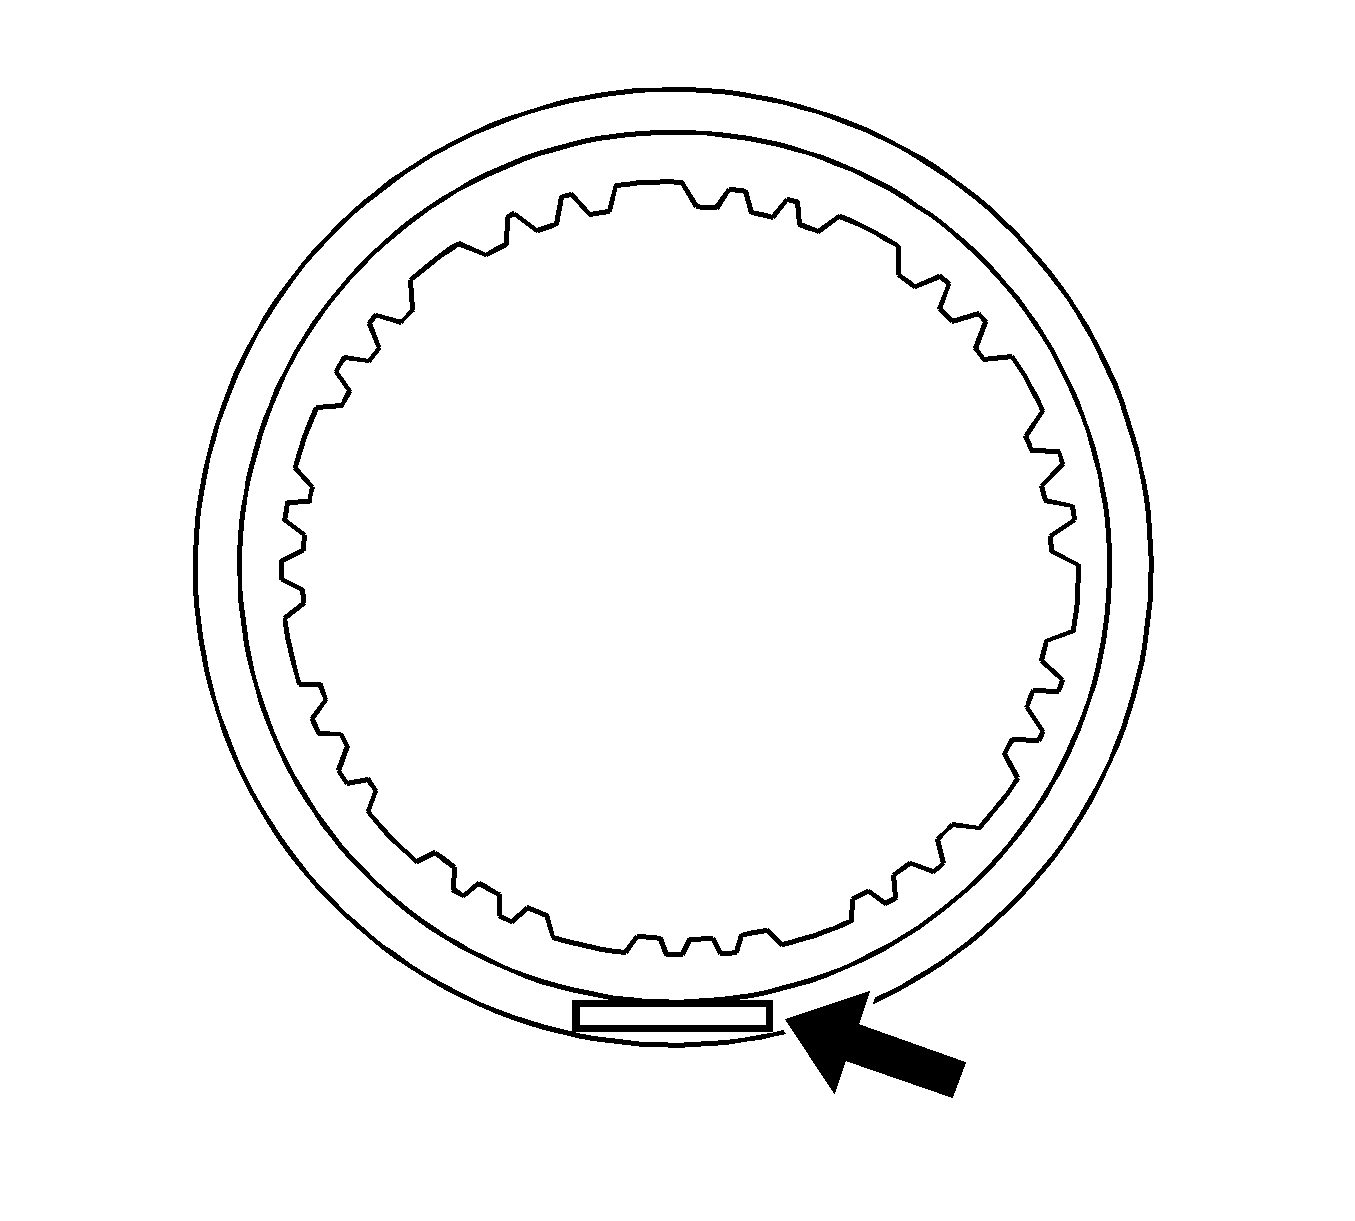
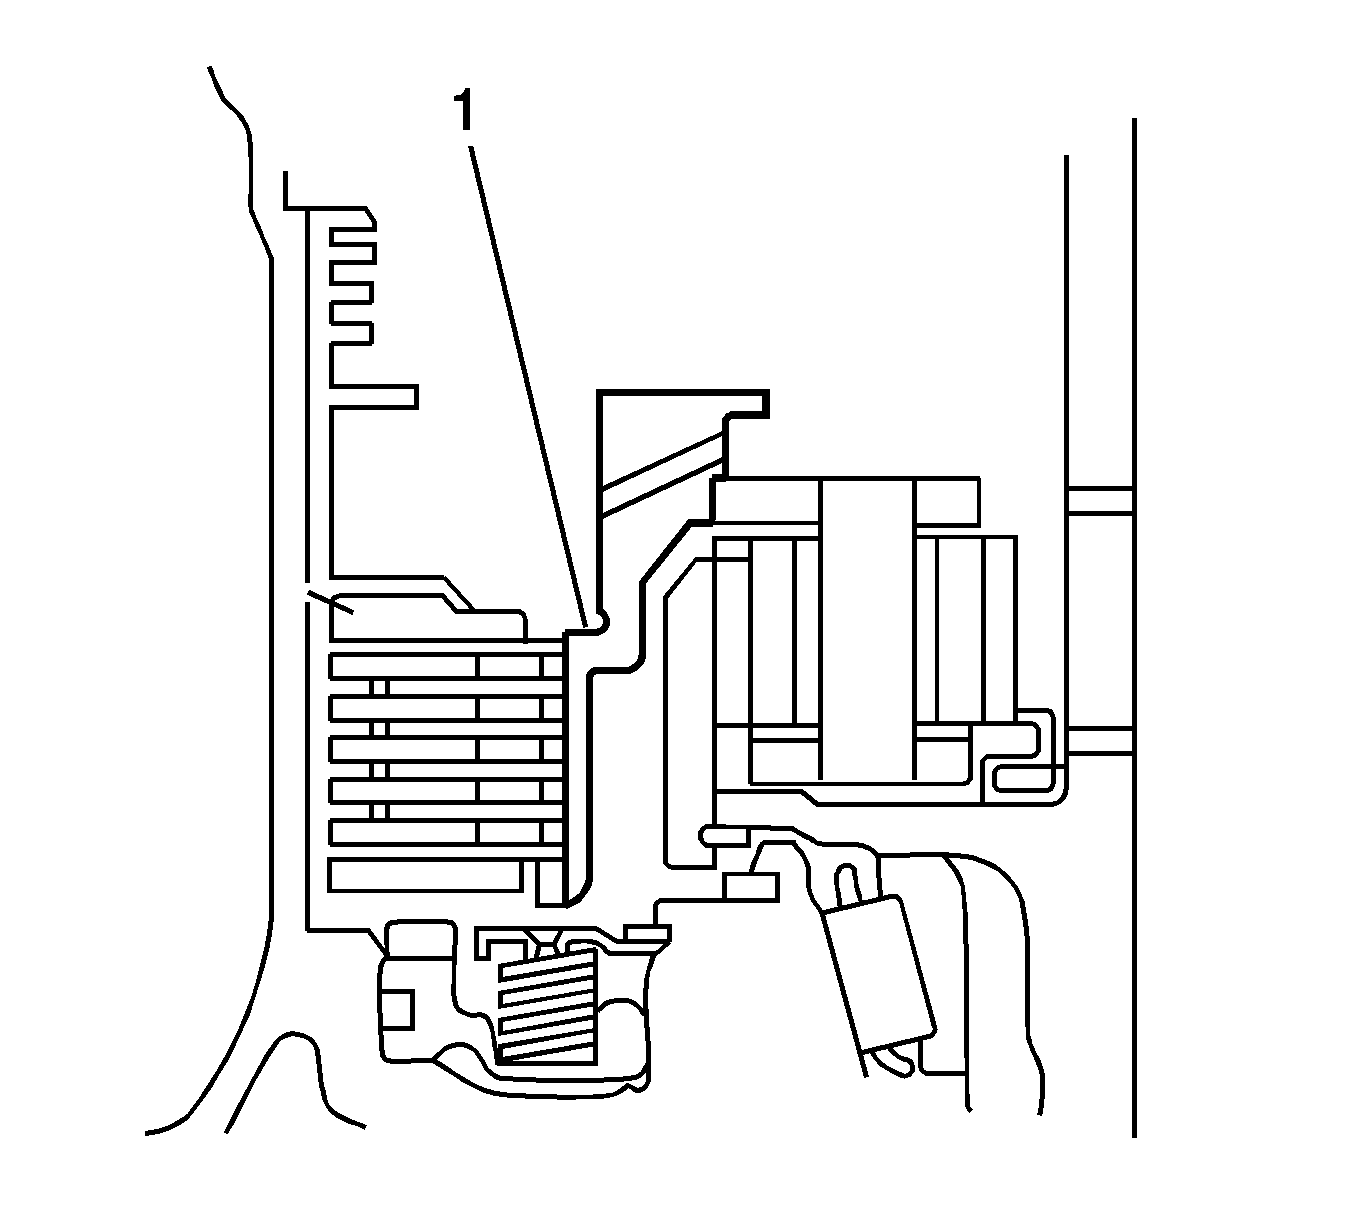
- Inspect the 2nd coast brake band assembly. If peeled, discolored, or if a part of the printed numbers (1) are defaced, replace the 2nd coast brake band assembly.
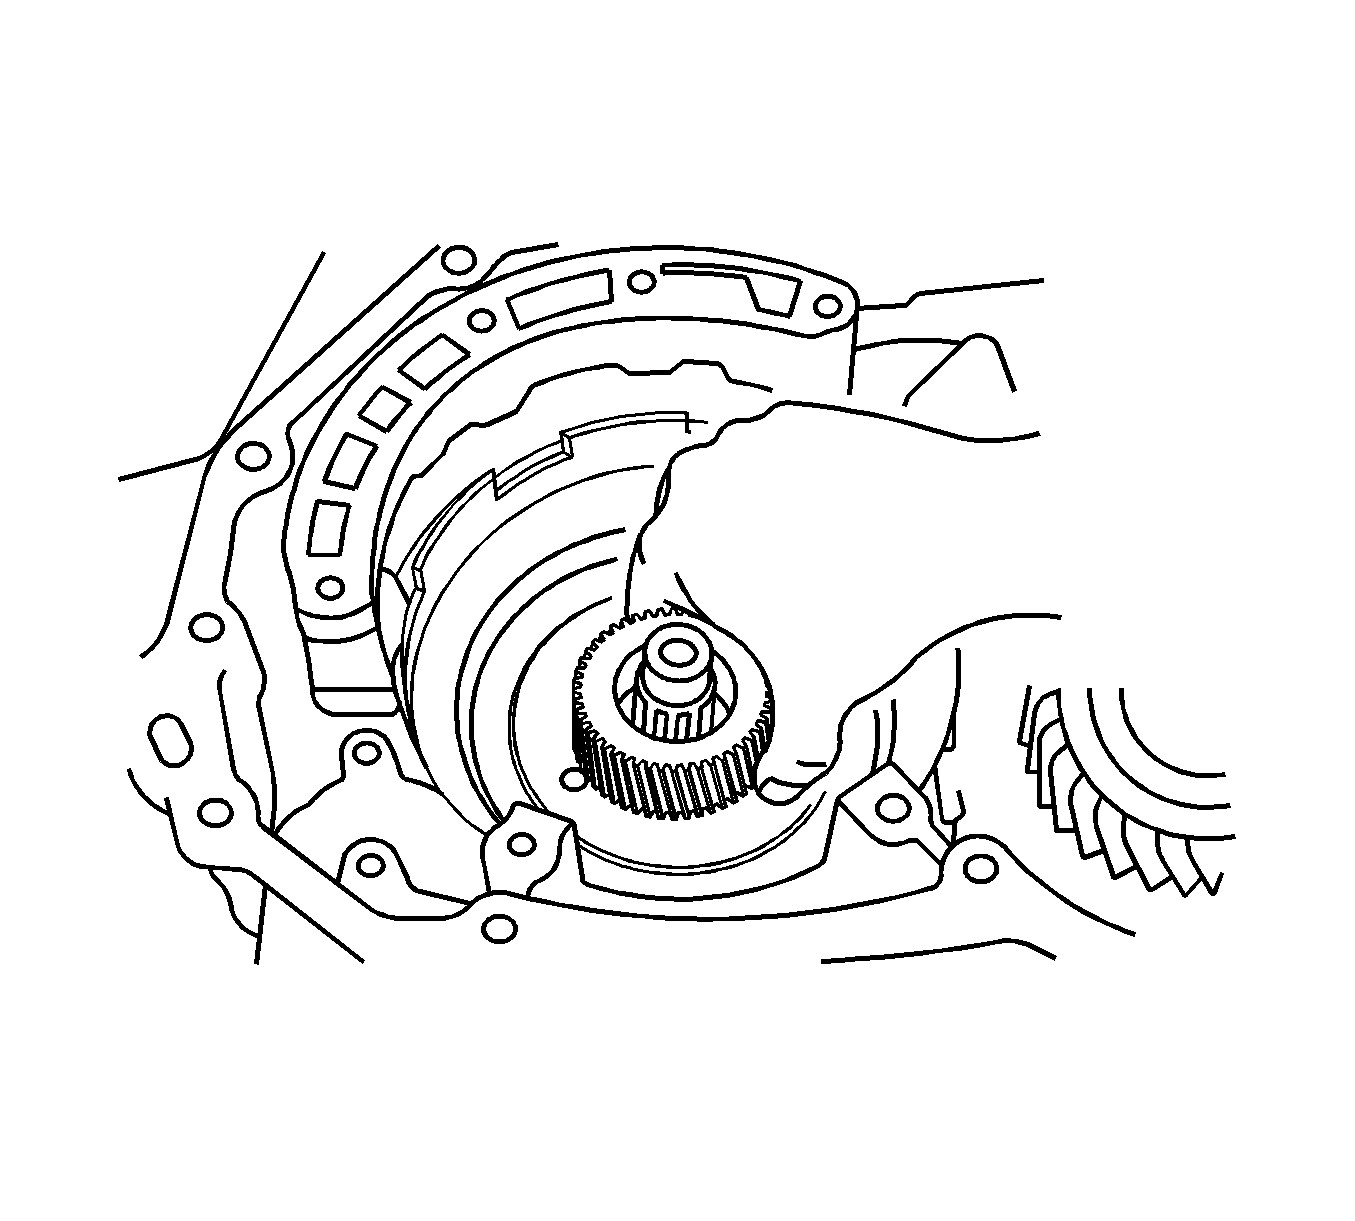
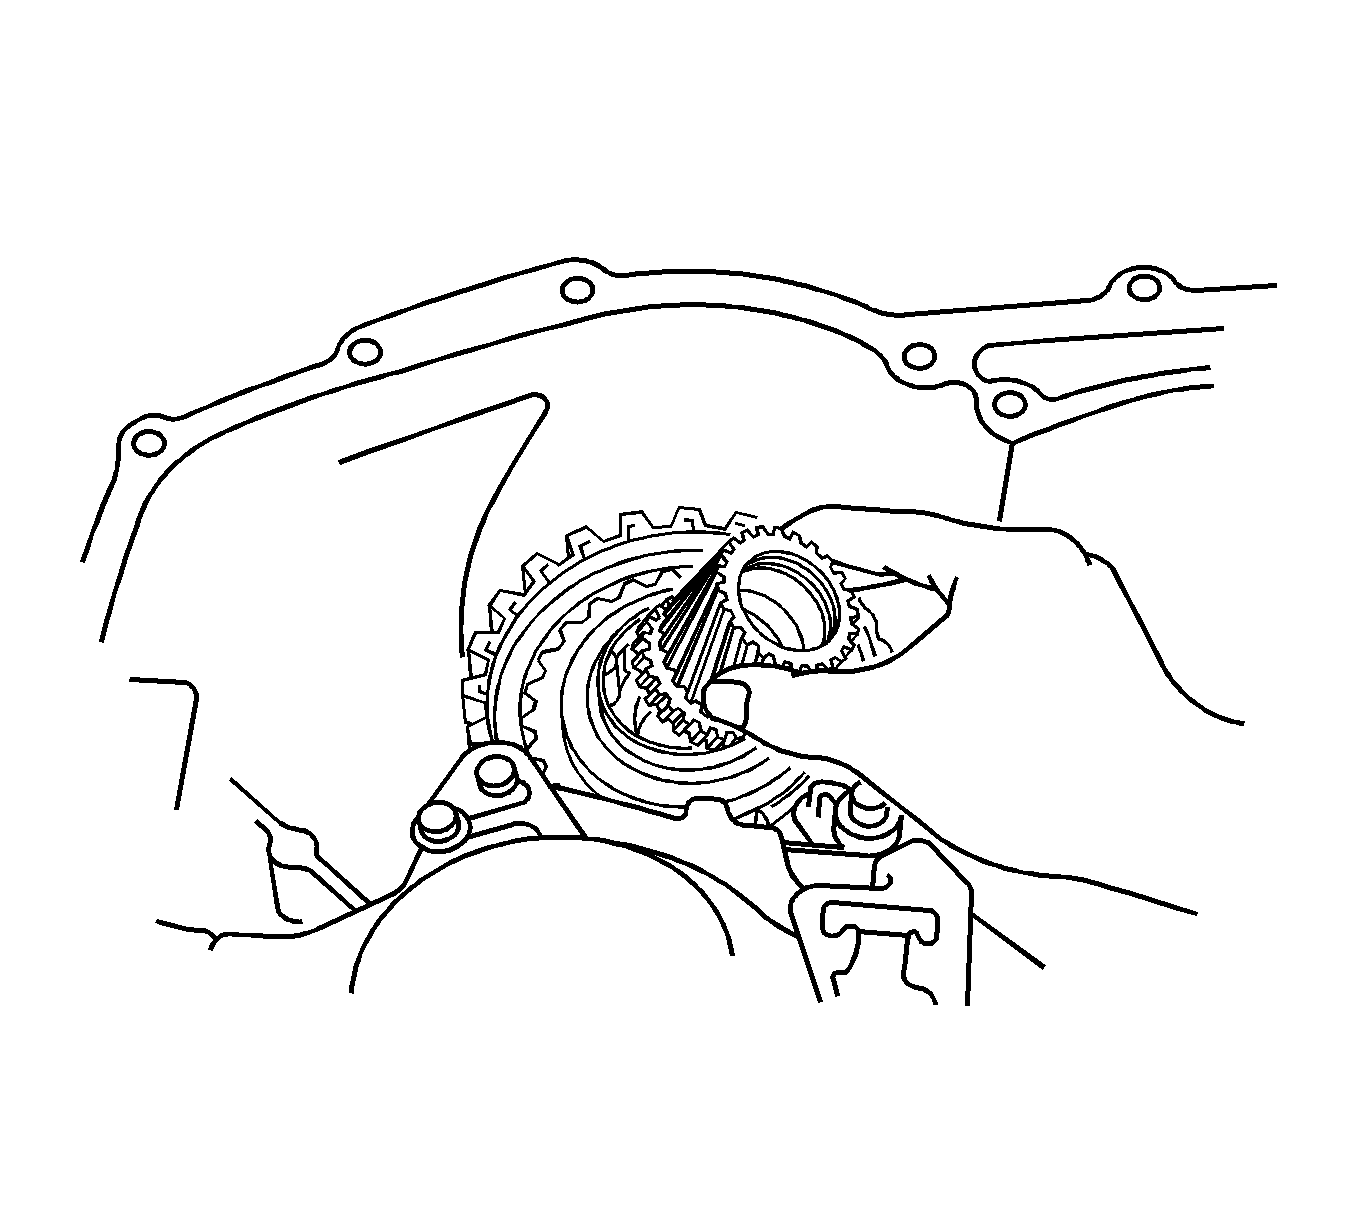
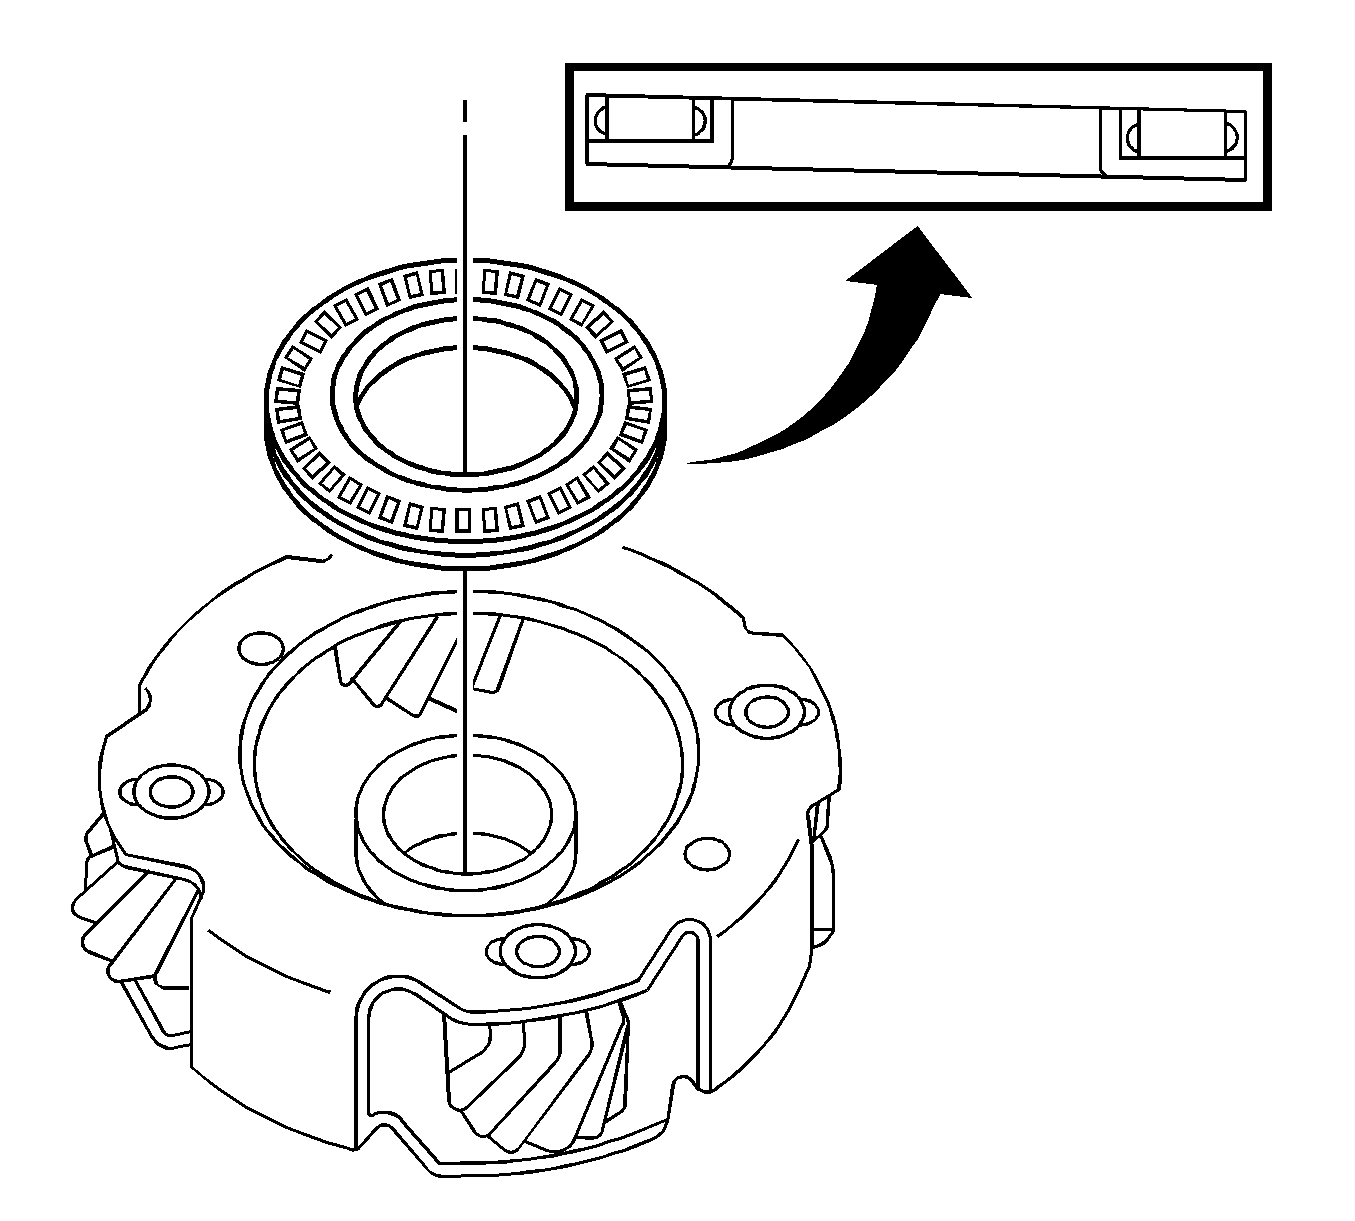
- Remove the front planetary ring gear assembly from the transaxle case.
- Remove the thrust bearing and thrust bearing race from the front planetary ring gear assembly.
- Remove the front planetary gear assembly and the thrust bearing race from the transaxle case.
- Remove the thrust bearing and the thrust bearing race from the front planetary gear assembly.
- Using a feeler gage, measure the planetary pinion gear thrust clearance. If clearance exceeds 0.5 mm (0.020 in), replace the front planetary gear assembly.
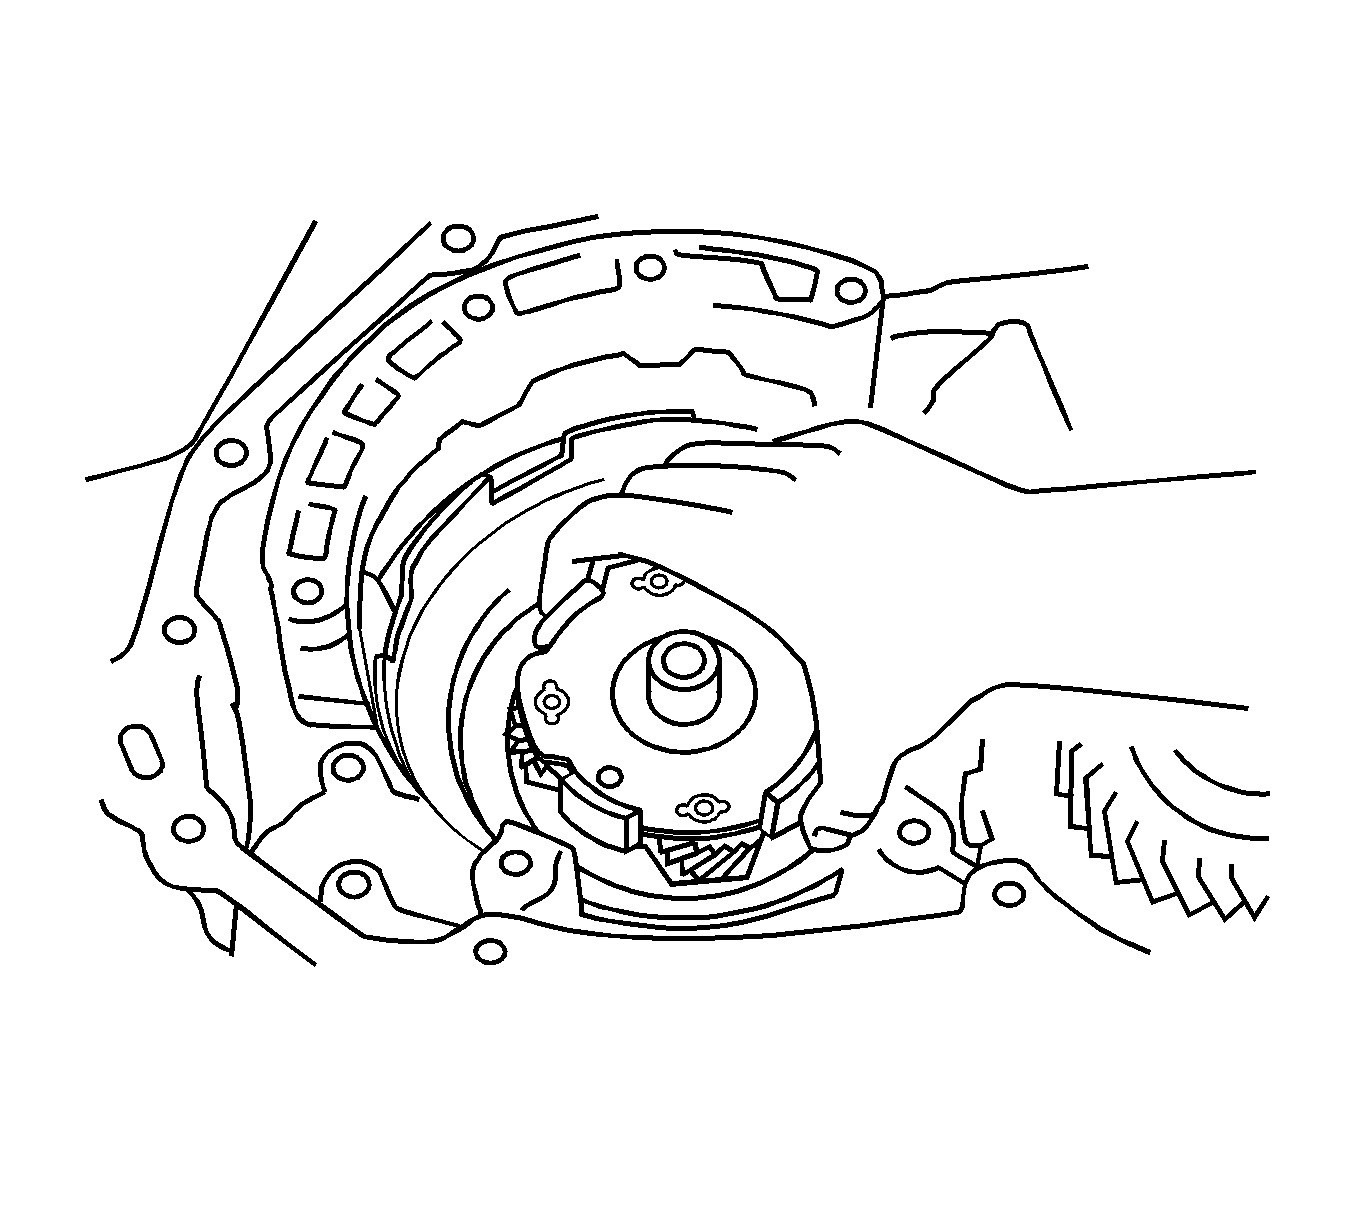
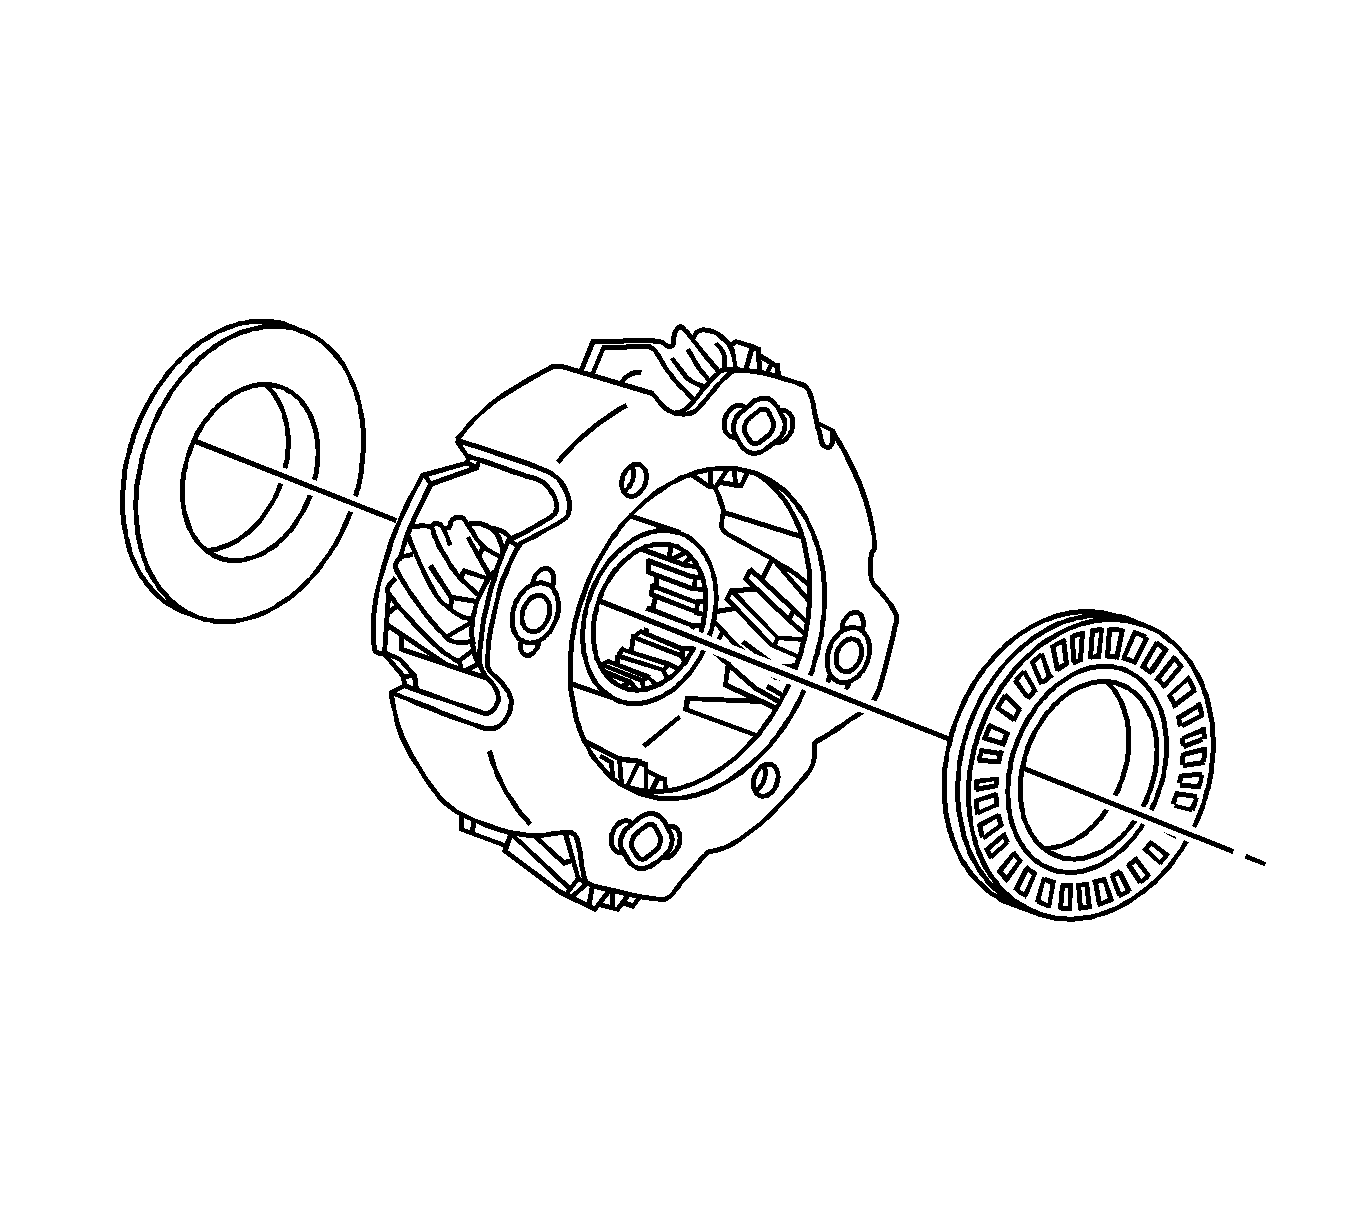
- Remove the planetary sun gear sub-assembly with the sun gear input drum and planetary thrust washer from the transaxle case.
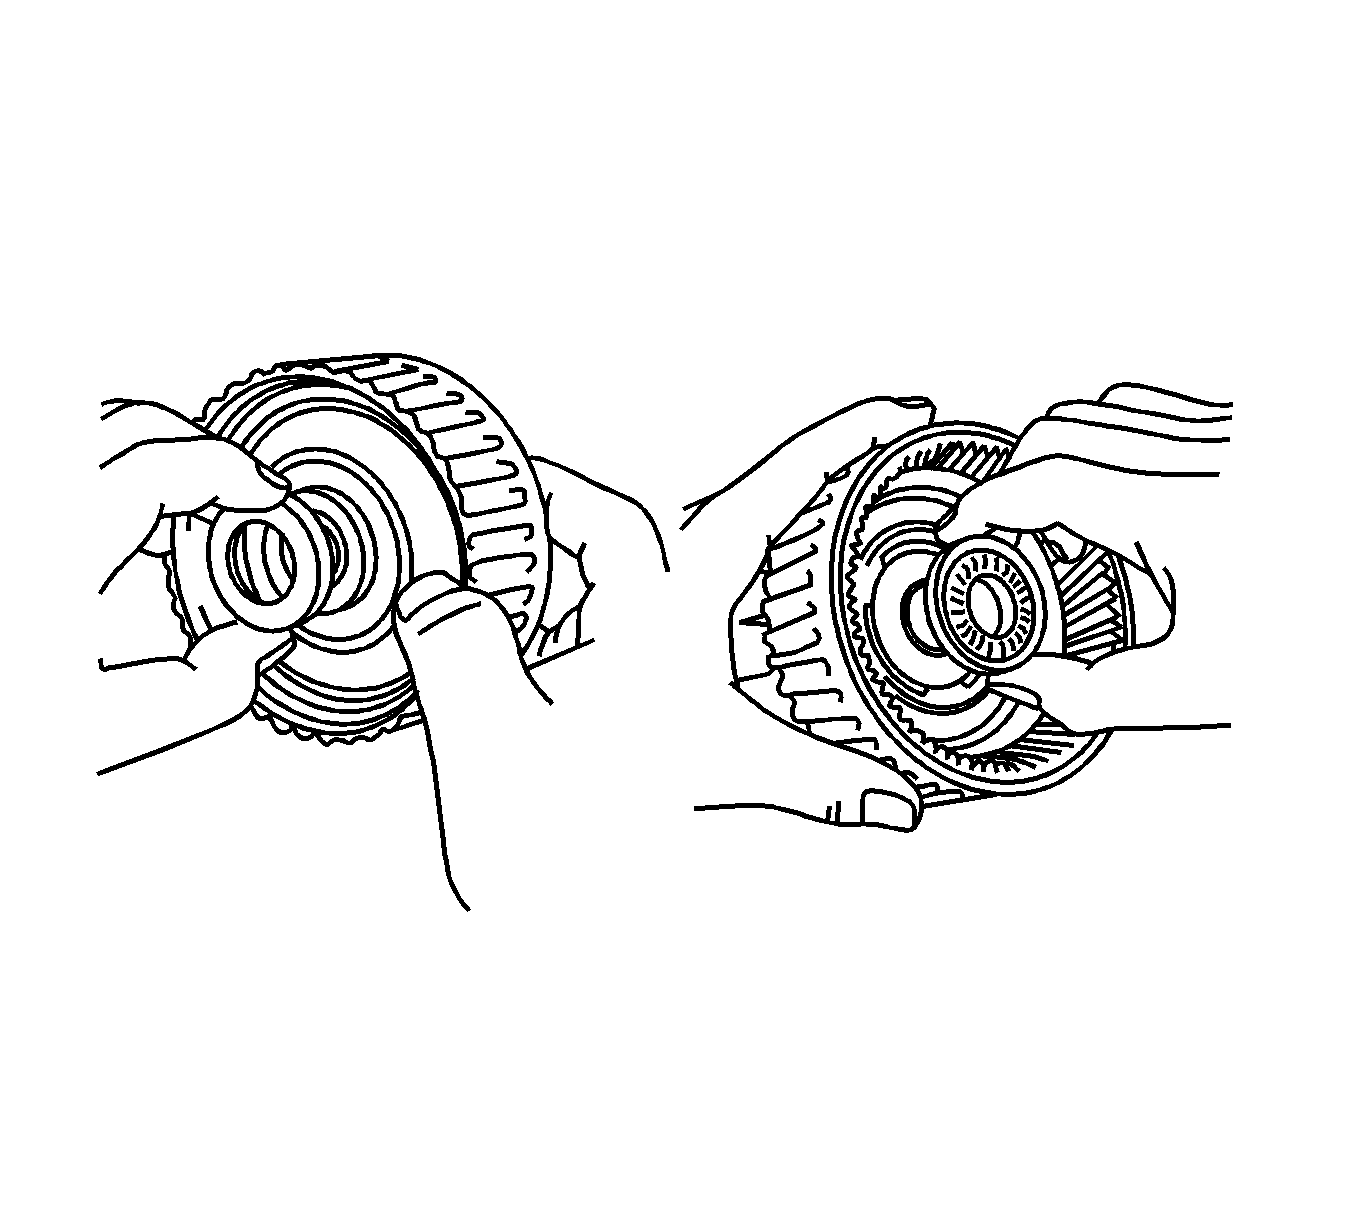
- Remove the 1 way clutch assembly from the transaxle case.
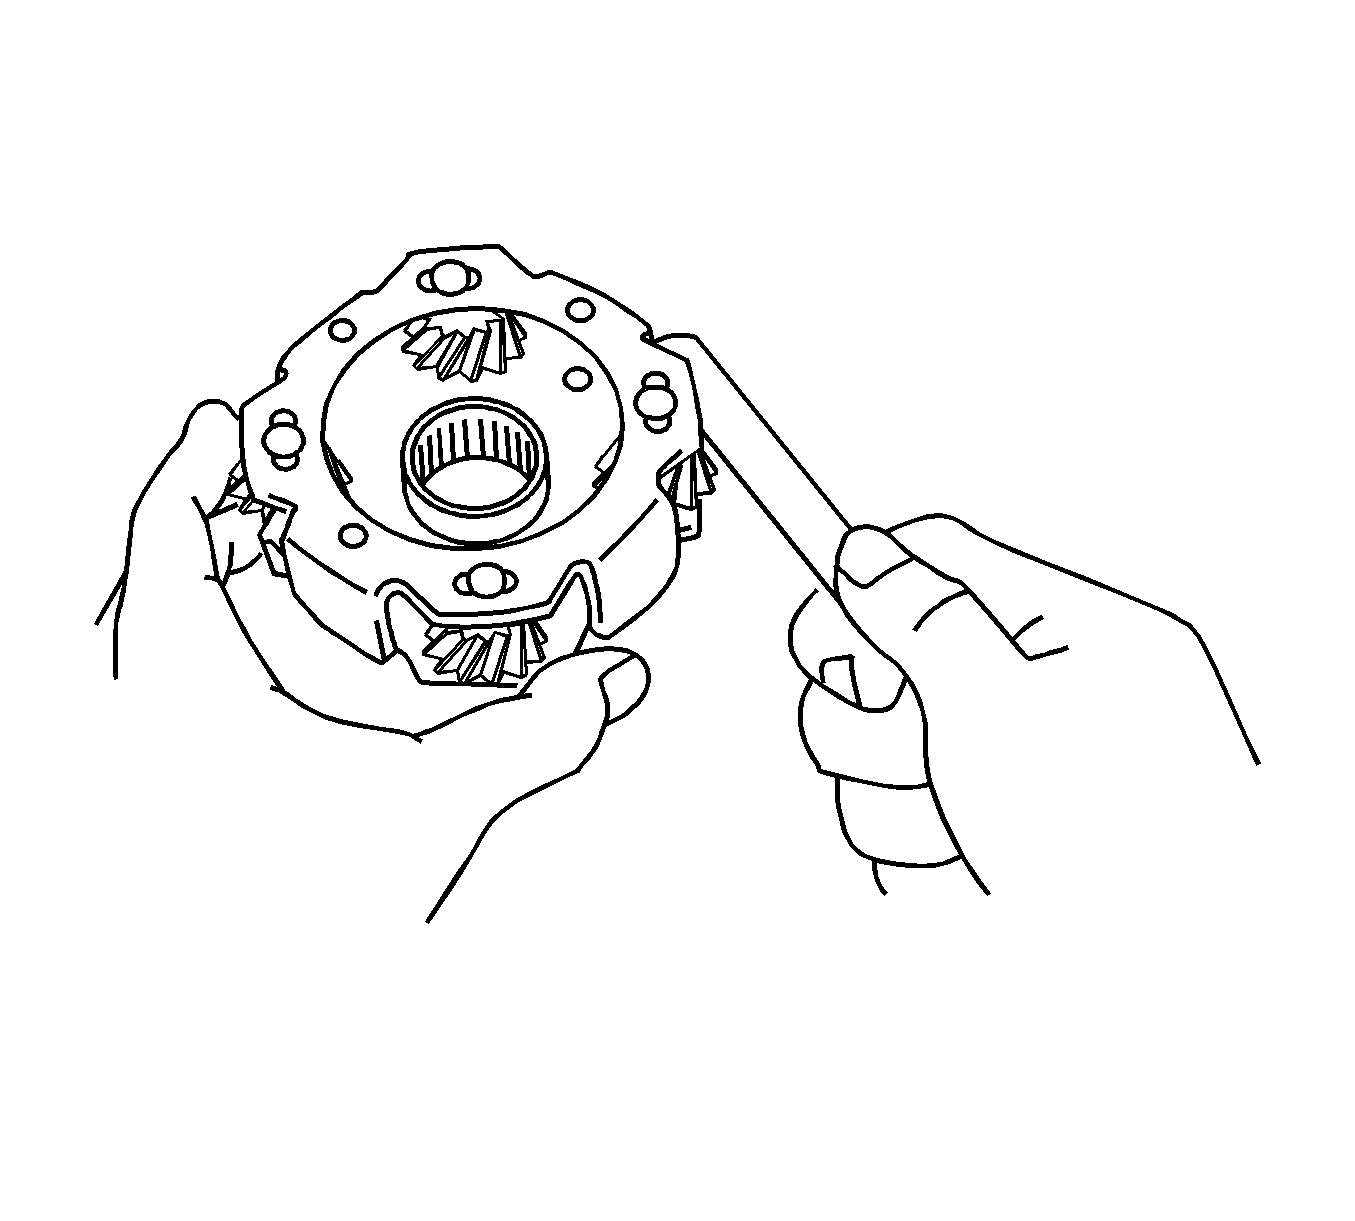
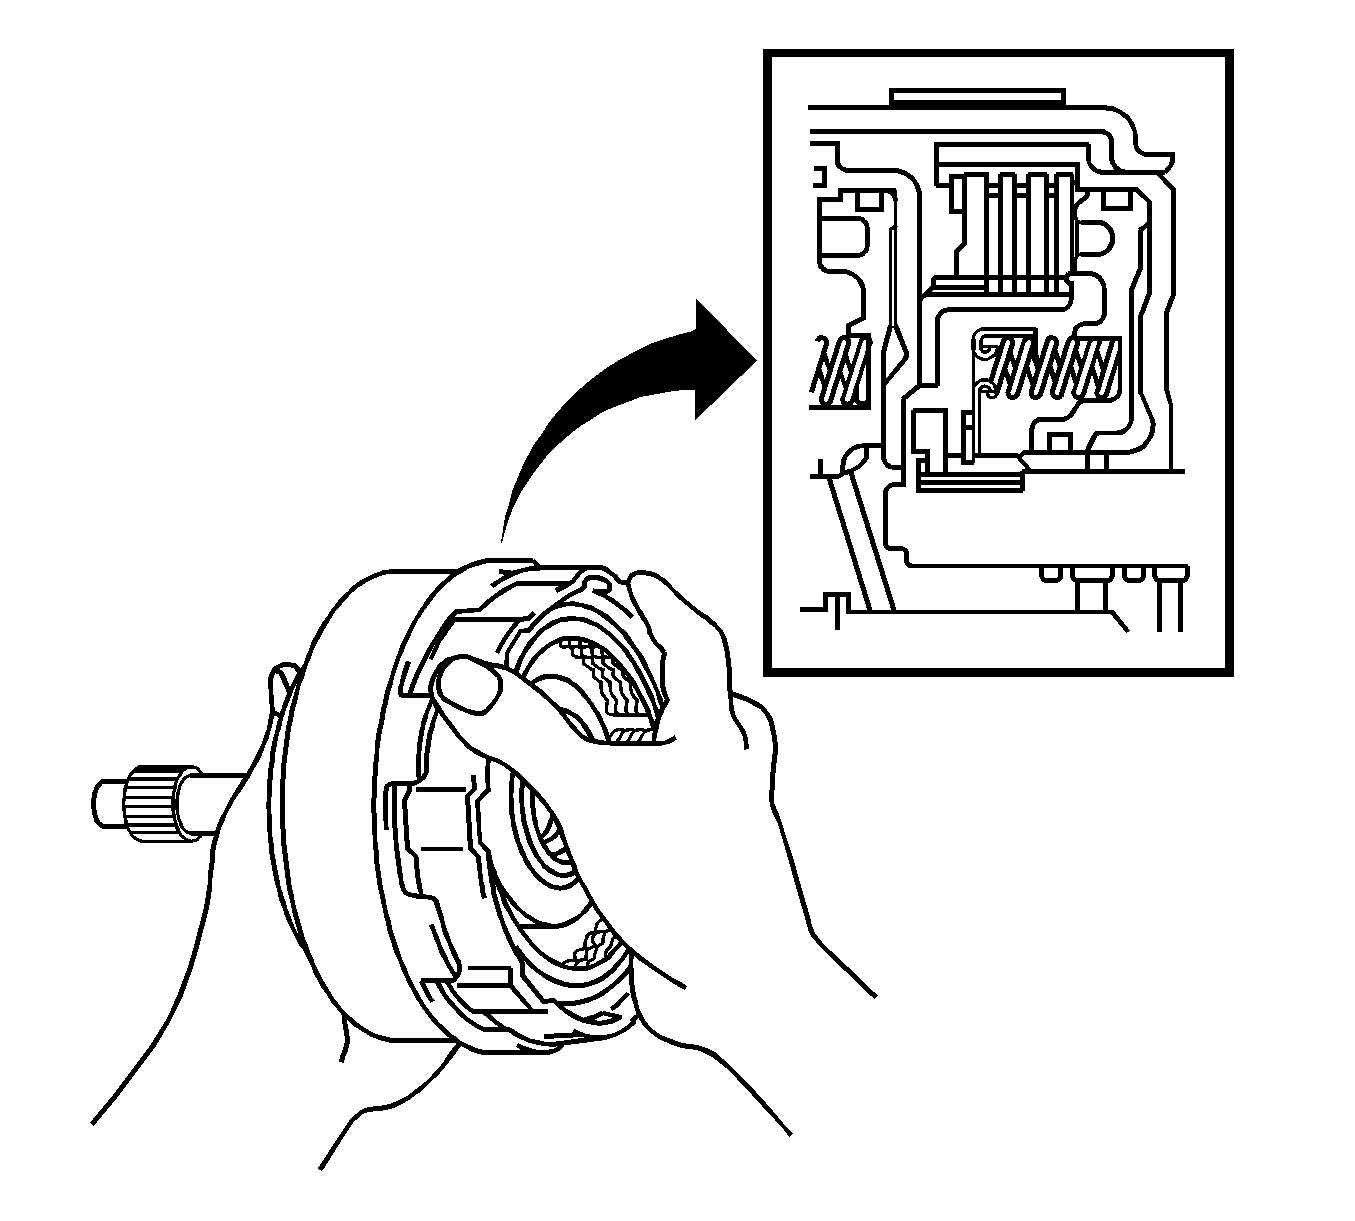
- Hold the sun gear (1) and turn the hub (4). The hub should turn freely clockwise (3) and should lock if turned counterclockwise (2).
- Using compressed air, check that the 2nd brake piston moves smoothly.
- Remove the bolt and brake band guide plate retainer and the 2nd coast brake band guide plate from the transaxle case.
- Using a screwdriver, remove the snap ring from the transaxle case.
- Remove the 2nd brake piston return spring assembly from the transaxle case.
- Remove the 2nd brake piston return spring assembly from the transaxle.
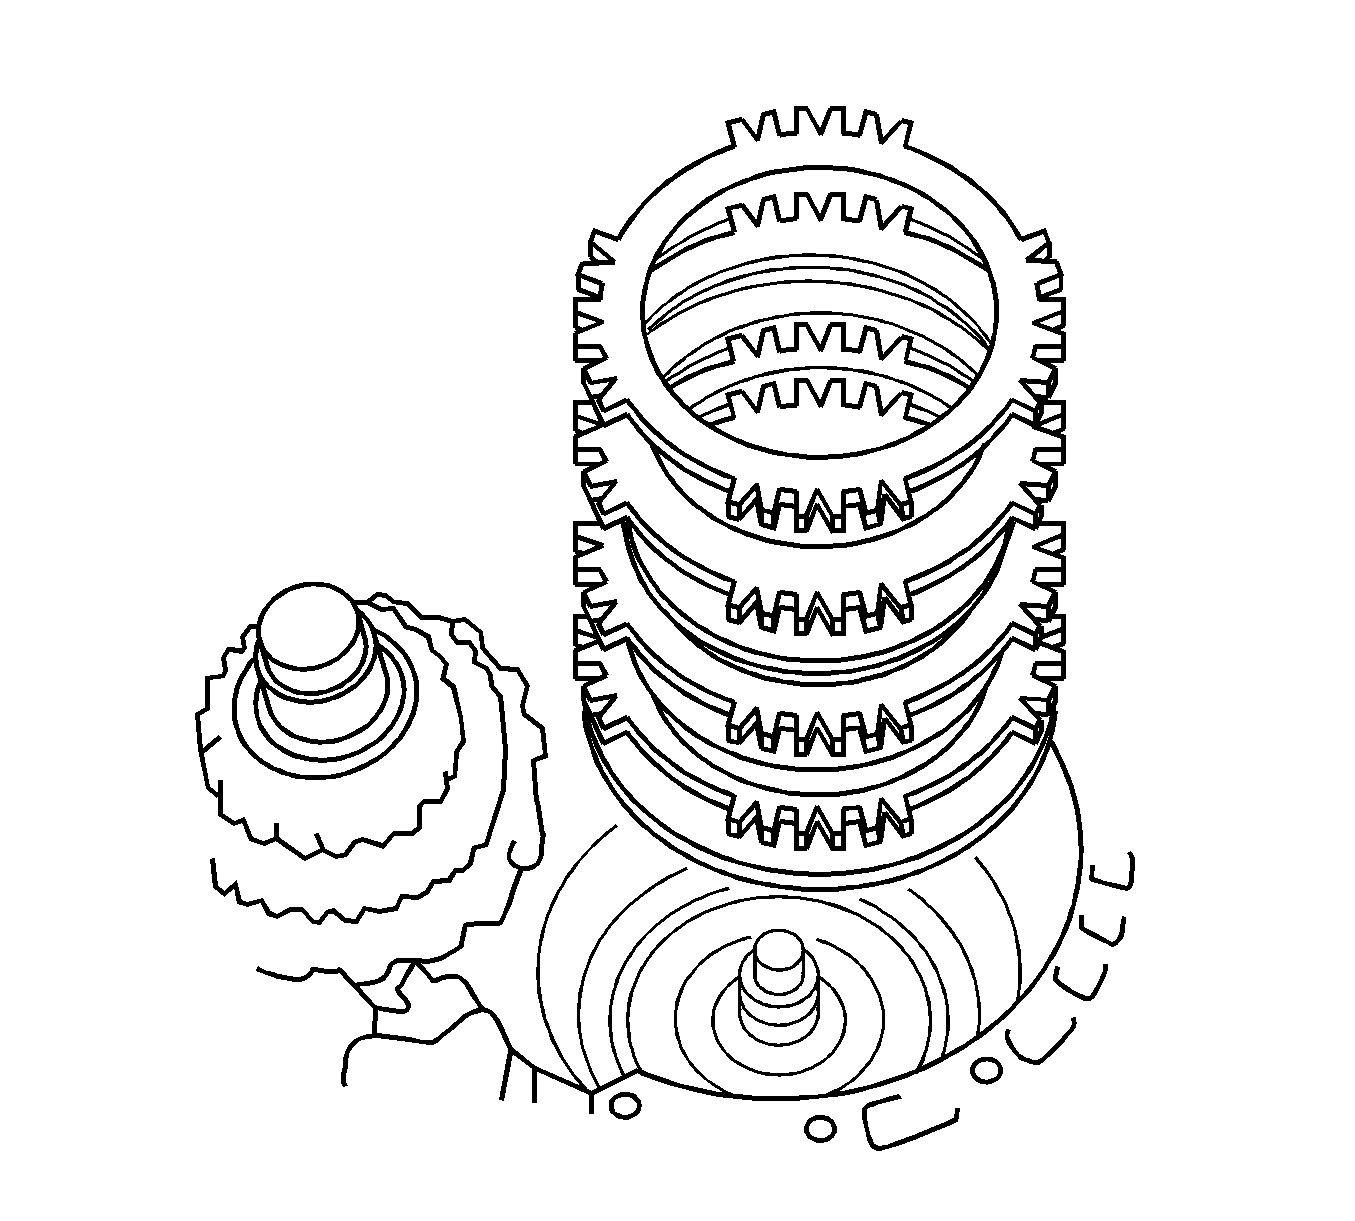
- Remove the plates, 2nd brake clutch disc and flange from the transaxle case.
- Check the 2nd brake clutch discs. If the sliding surfaces of the discs, plates and flanges are worn, discolored, or if a part of the printed numbers (1) are defaced, replace all the discs and plates.
- Using 2 screwdrivers, remove the snap ring from the transaxle case.
- Remove the 1 way clutch assembly and the rear planetary gear assembly with the 2 planetary carrier thrust washers from the transaxle case.
- Remove the 2 planetary carrier thrust washers from the rear planetary gear assembly.
- Remove the thrust bearing and thrust bearing race from the transaxle case.
- Using a feeler gage, measure the rear planetary pinion gear thrust clearance. If clearance exceeds 0.5 mm (0.020 in), replace the rear planetary gear assembly.
- Using a feeler gage, measure the first and reverse brake pack clearance. If clearance exceeds 2.25 mm (0.0886 in), check the disc.
- Using a screwdriver, remove the snap ring from the transaxle case.
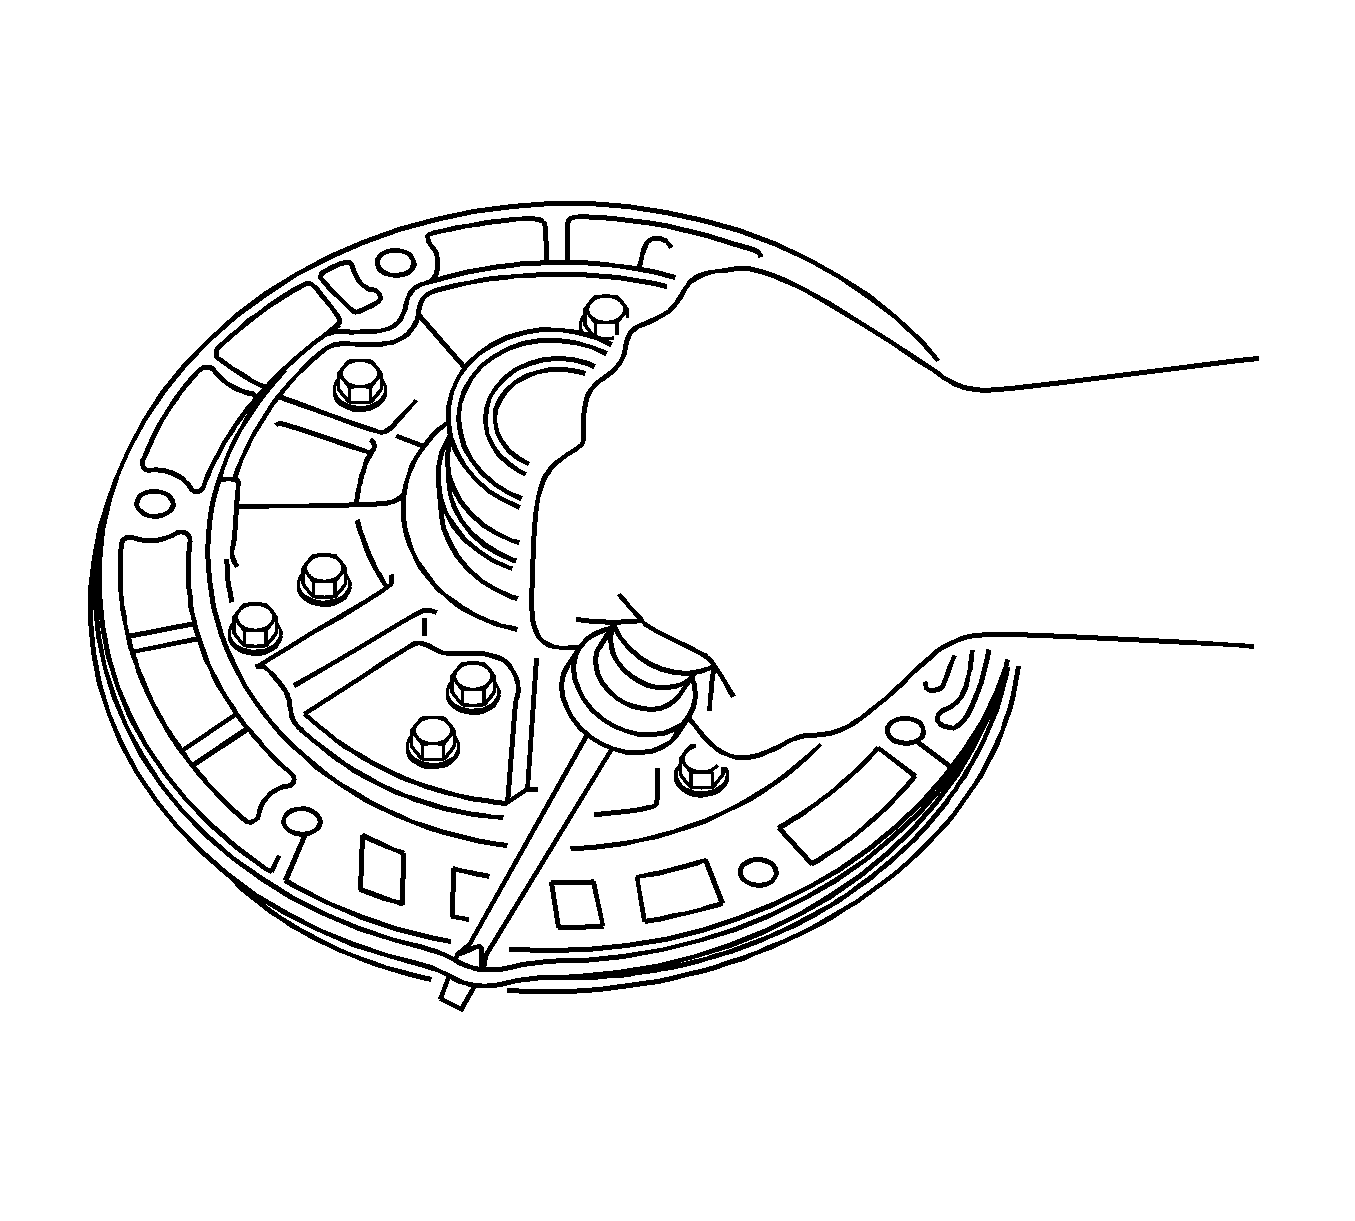
- Remove the flange, plates and 1st and reverse brake clutch discs from the transaxle case.
- Check the 1st and reverse clutch discs. If the sliding surfaces of the discs, plates and flanges are worn, discolored, or if a part of the printed numbers are defaced, replace all the discs and plates.
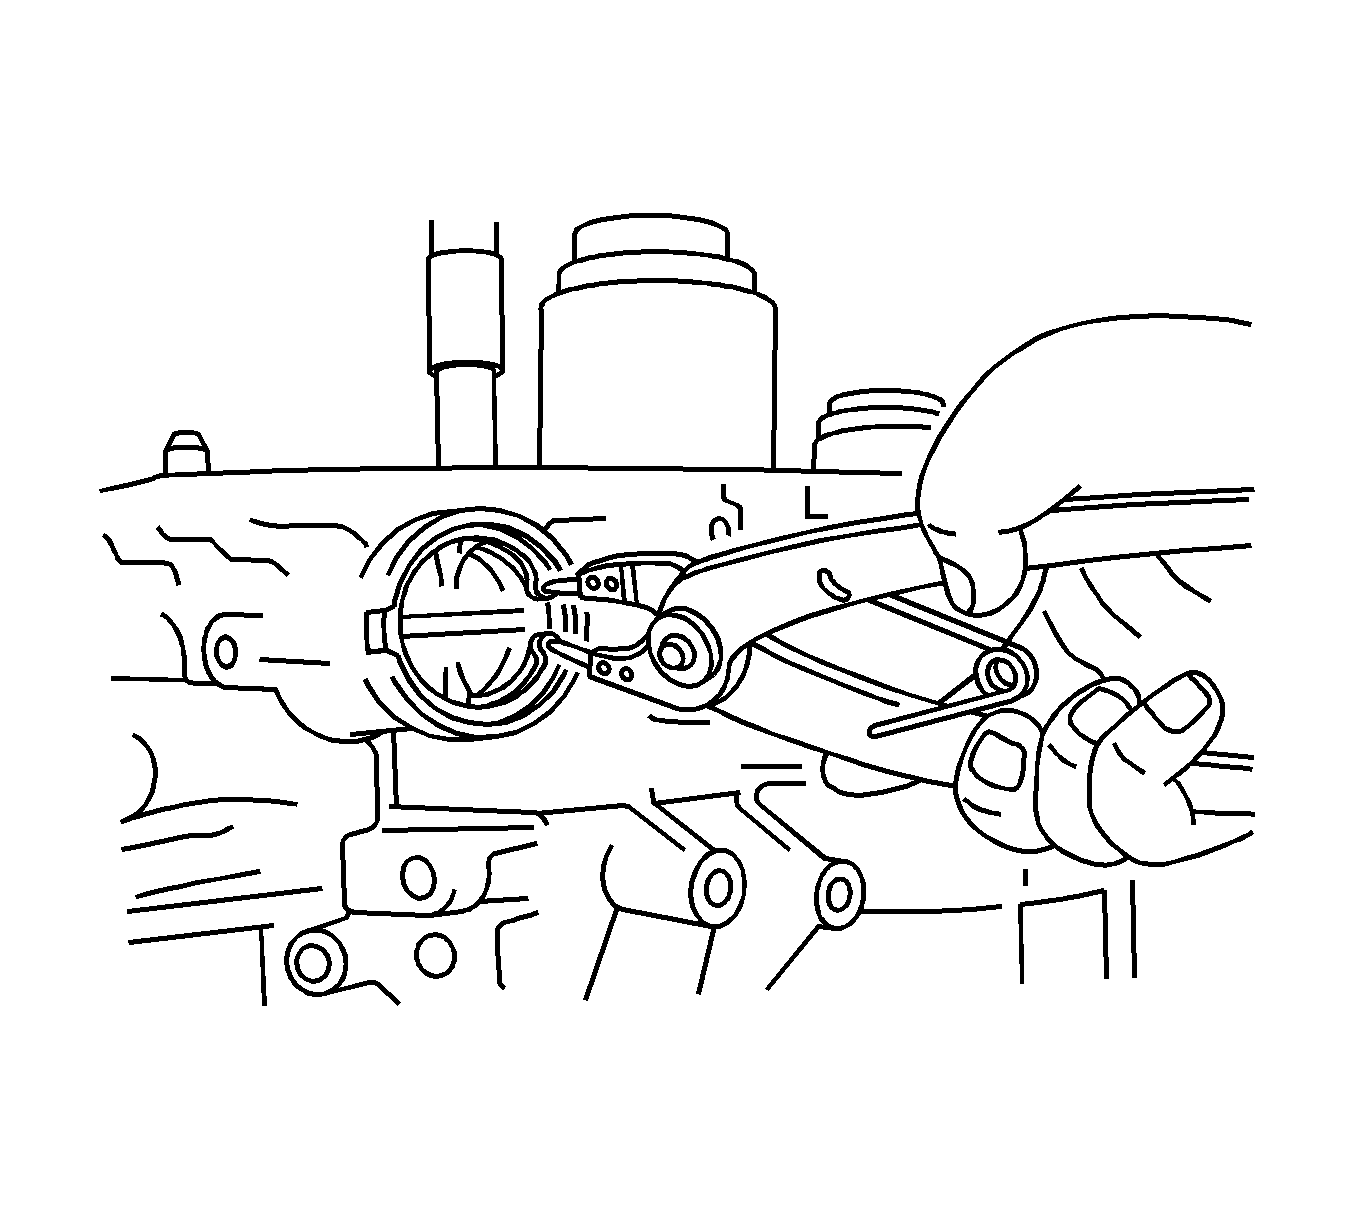
- Using a press, slightly compress the return spring until the snap ring is free from the return spring.
- Using snap ring pliers, remove the snap ring.
- Using compressed air at low pressure 98 kPa (14 psi) push out the 1st and reverse brake piston from the transaxle case.
- Using a screwdriver, remove the 2 O-rings from the 1st and reverse brake piston.
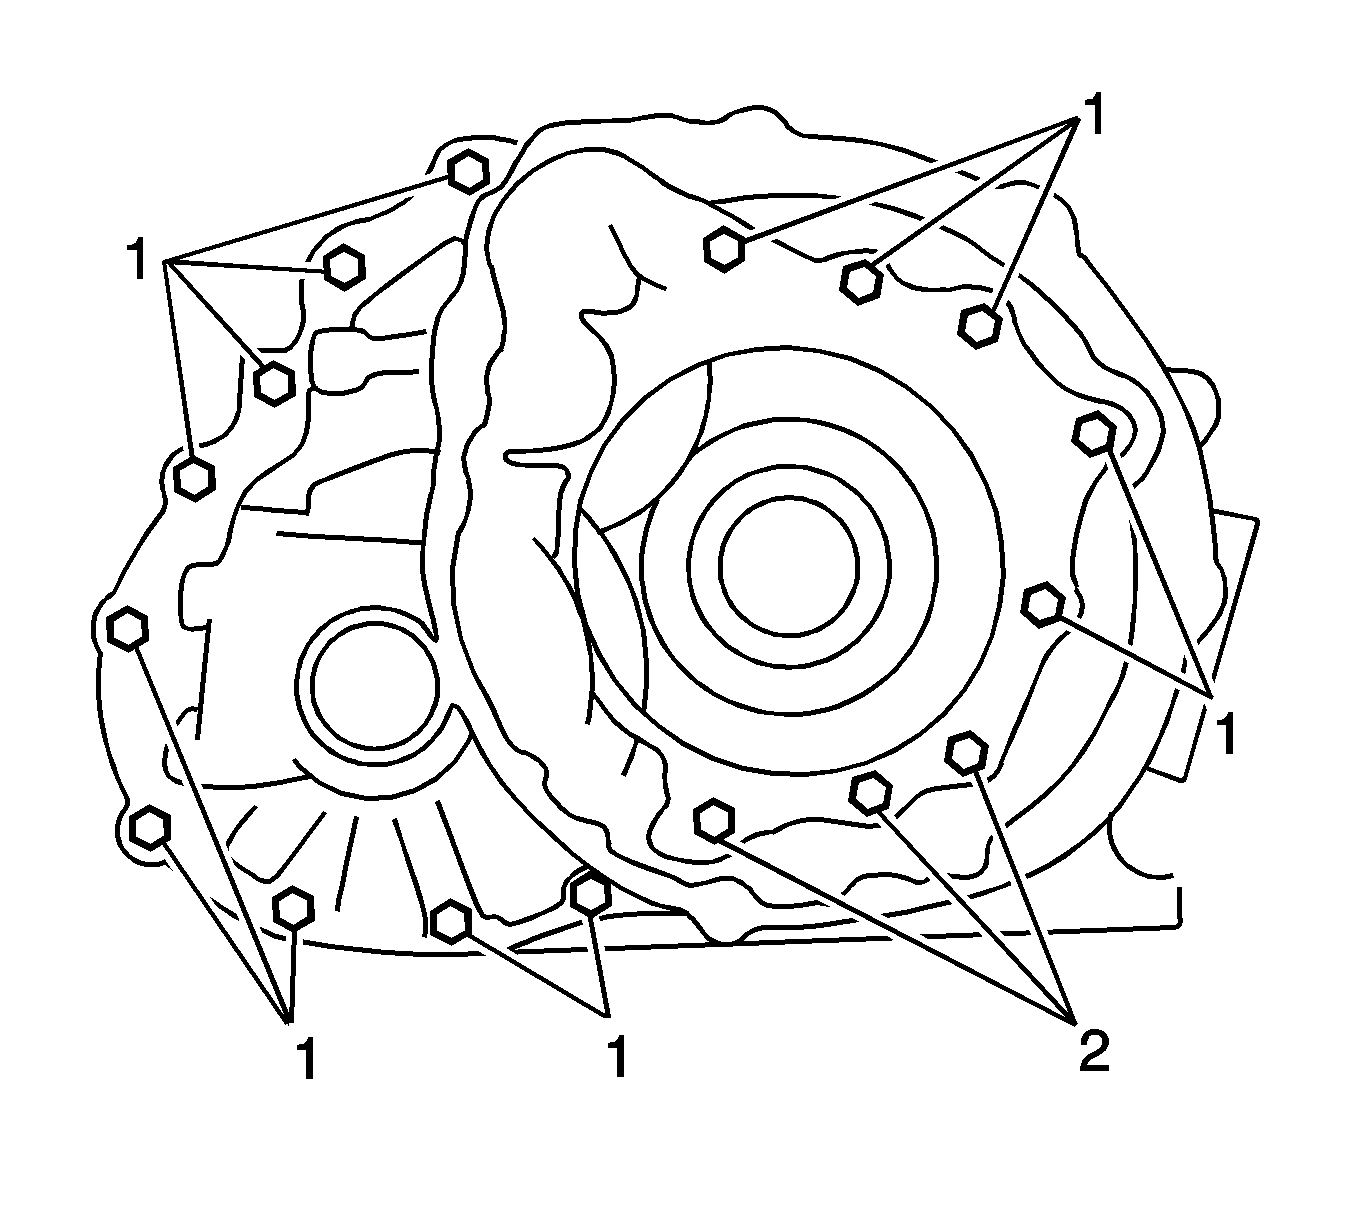
- Remove the 13 bolts from the transaxle case.
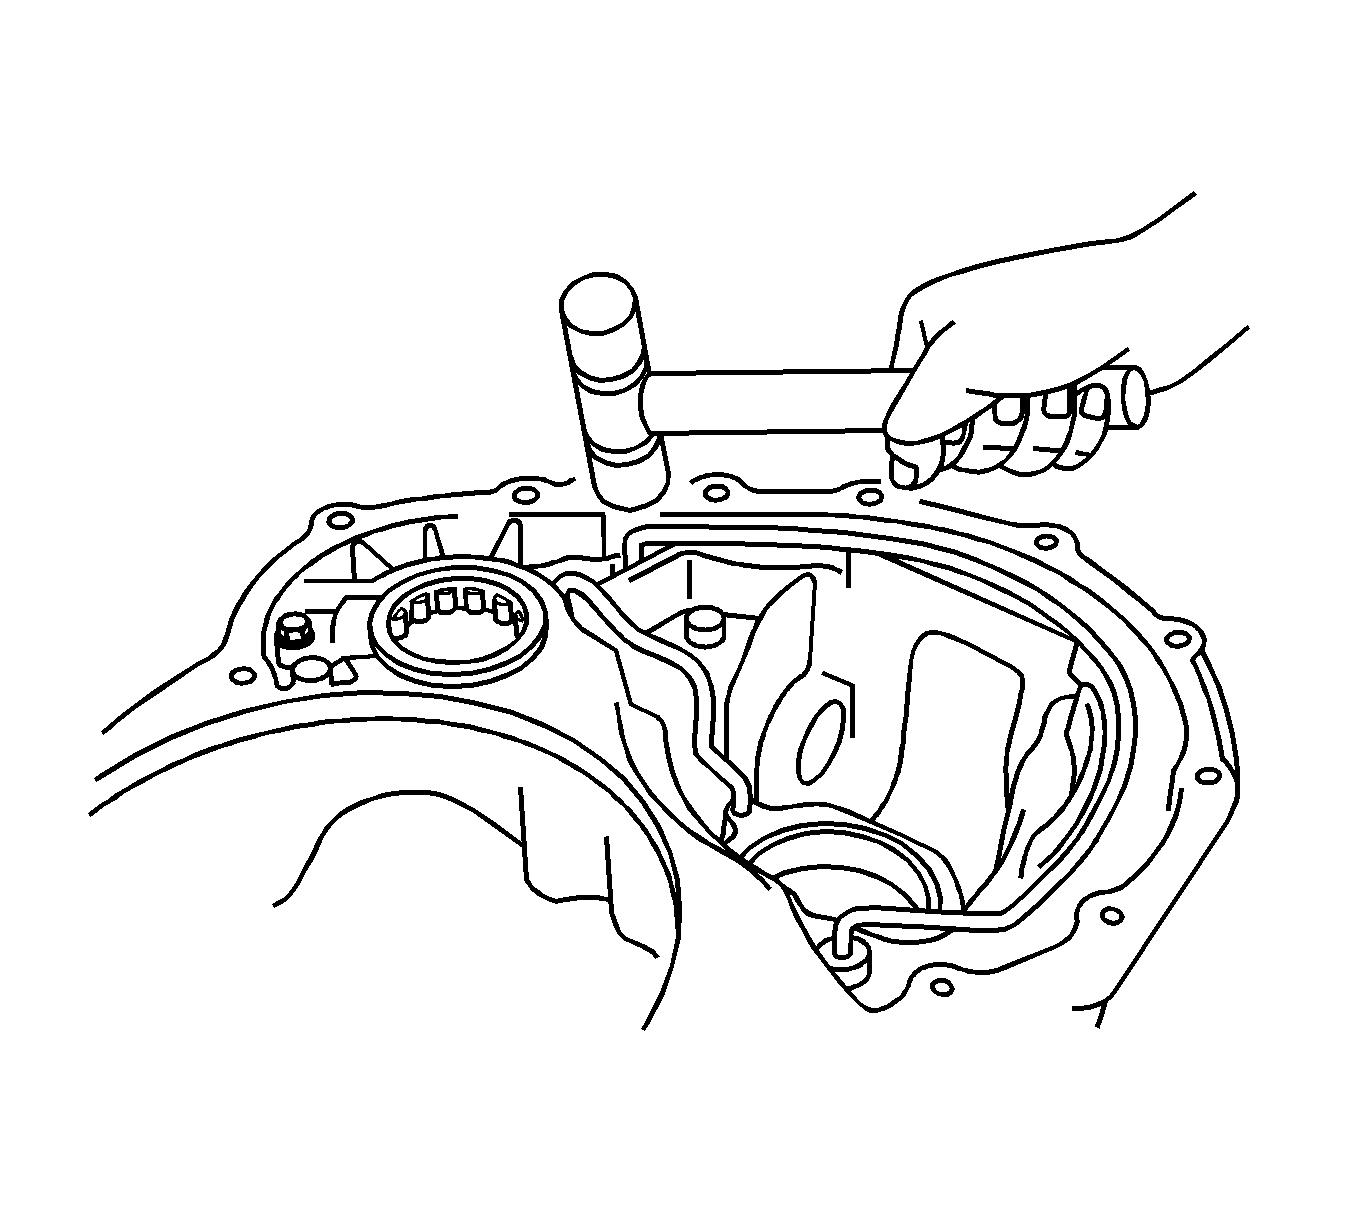
- Using a soft faced hammer, tap the rear transaxle case cover to remove the rear case from the transaxle case.
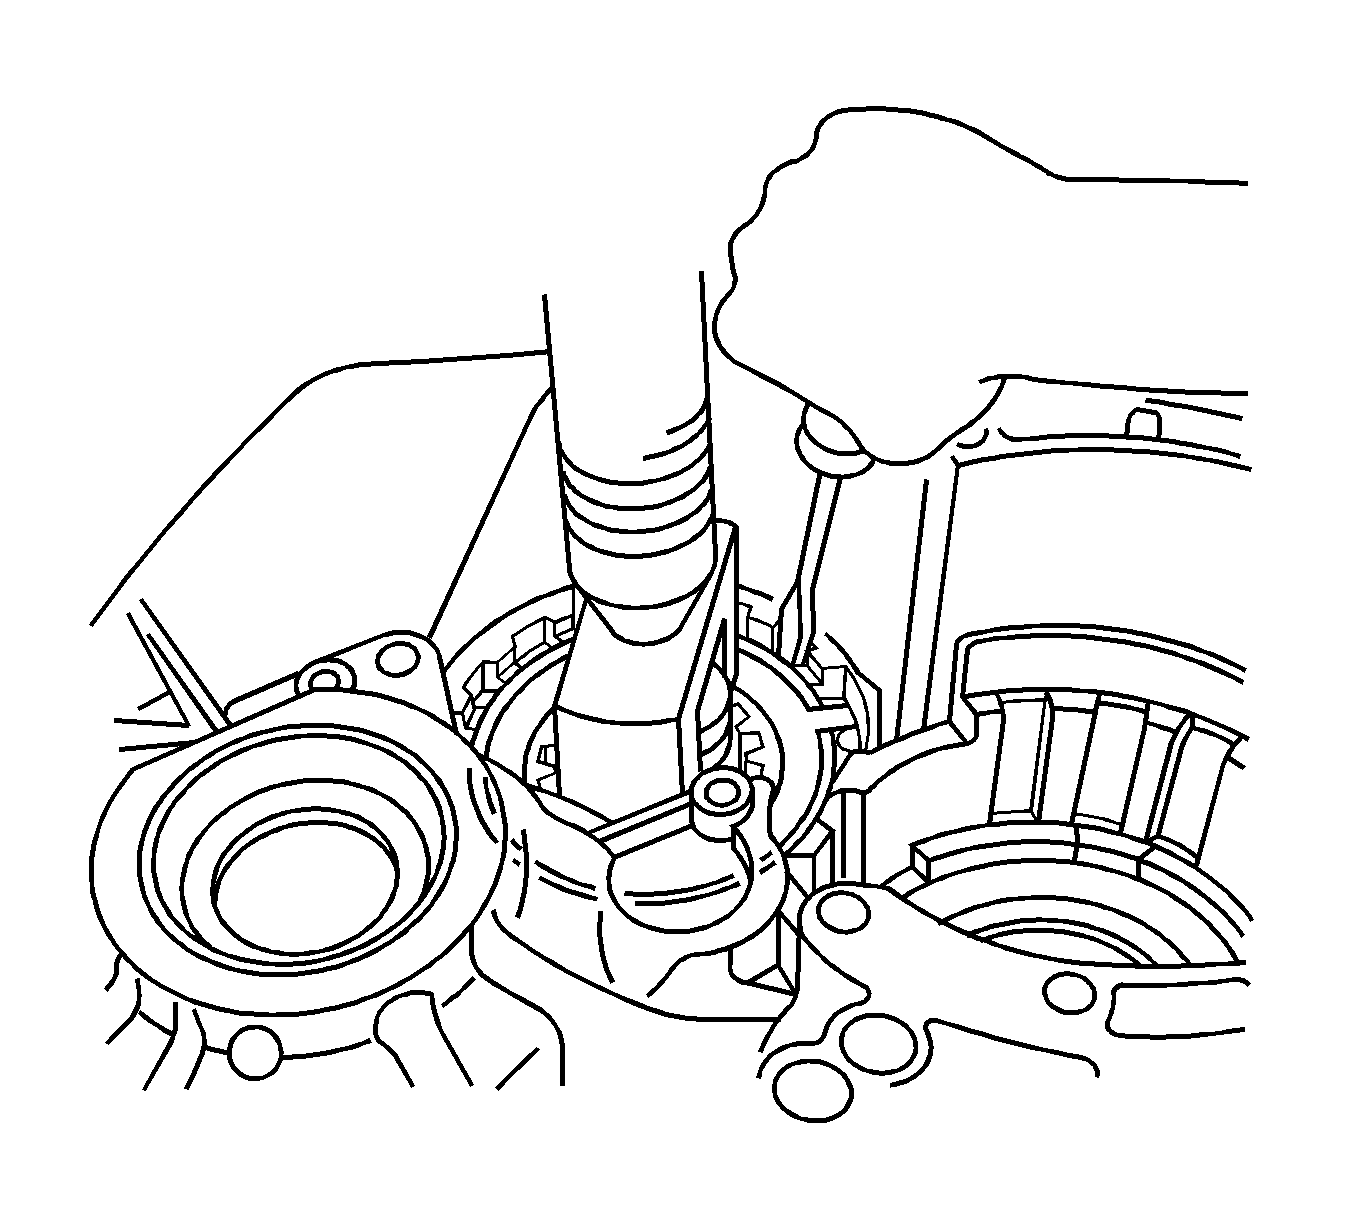
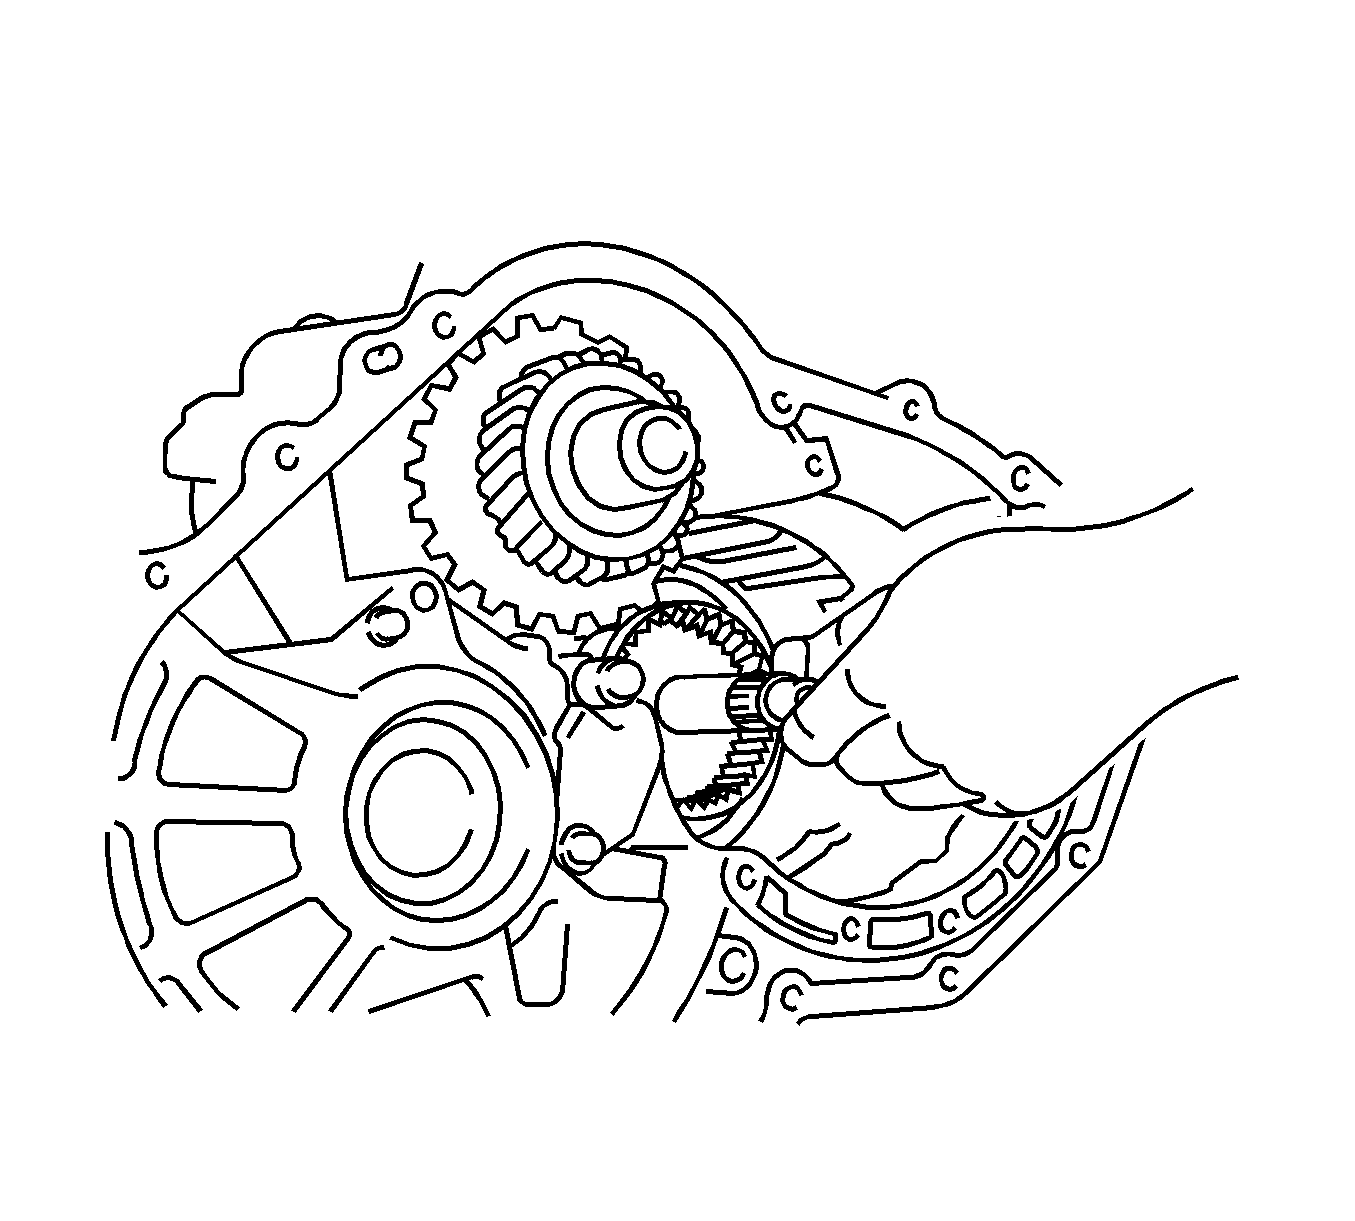
- Using a punch and hammer, unstake the counterdrive gear nut.
- Remove the counterdrive gear nut.
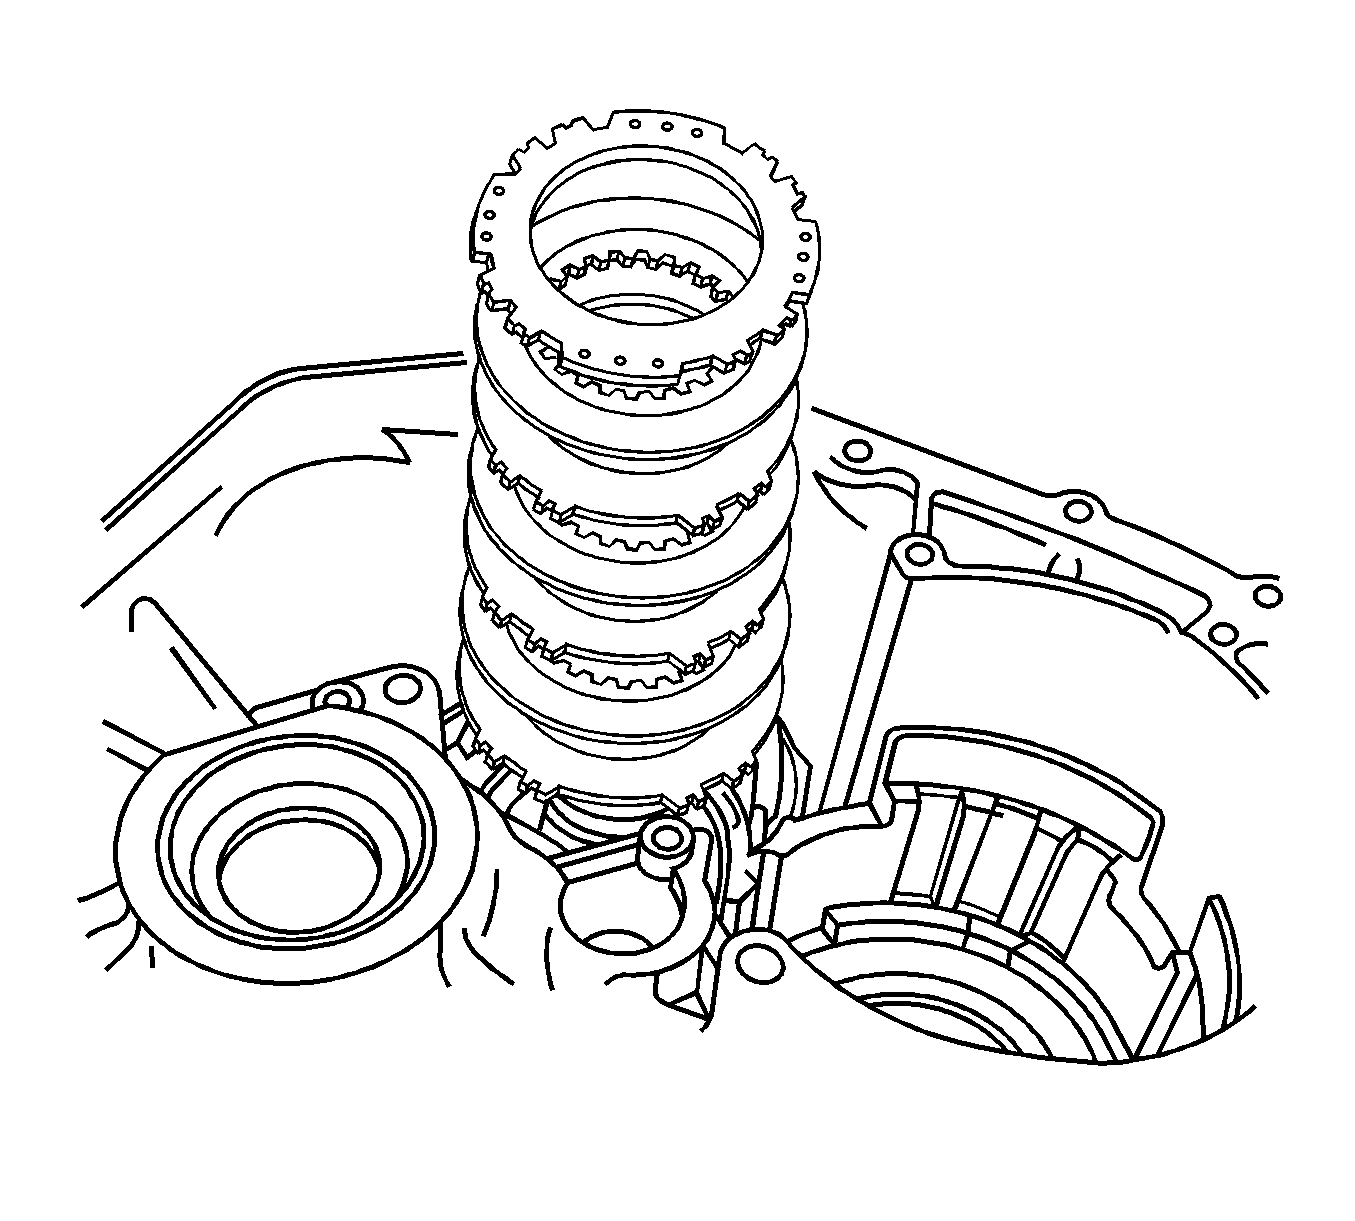
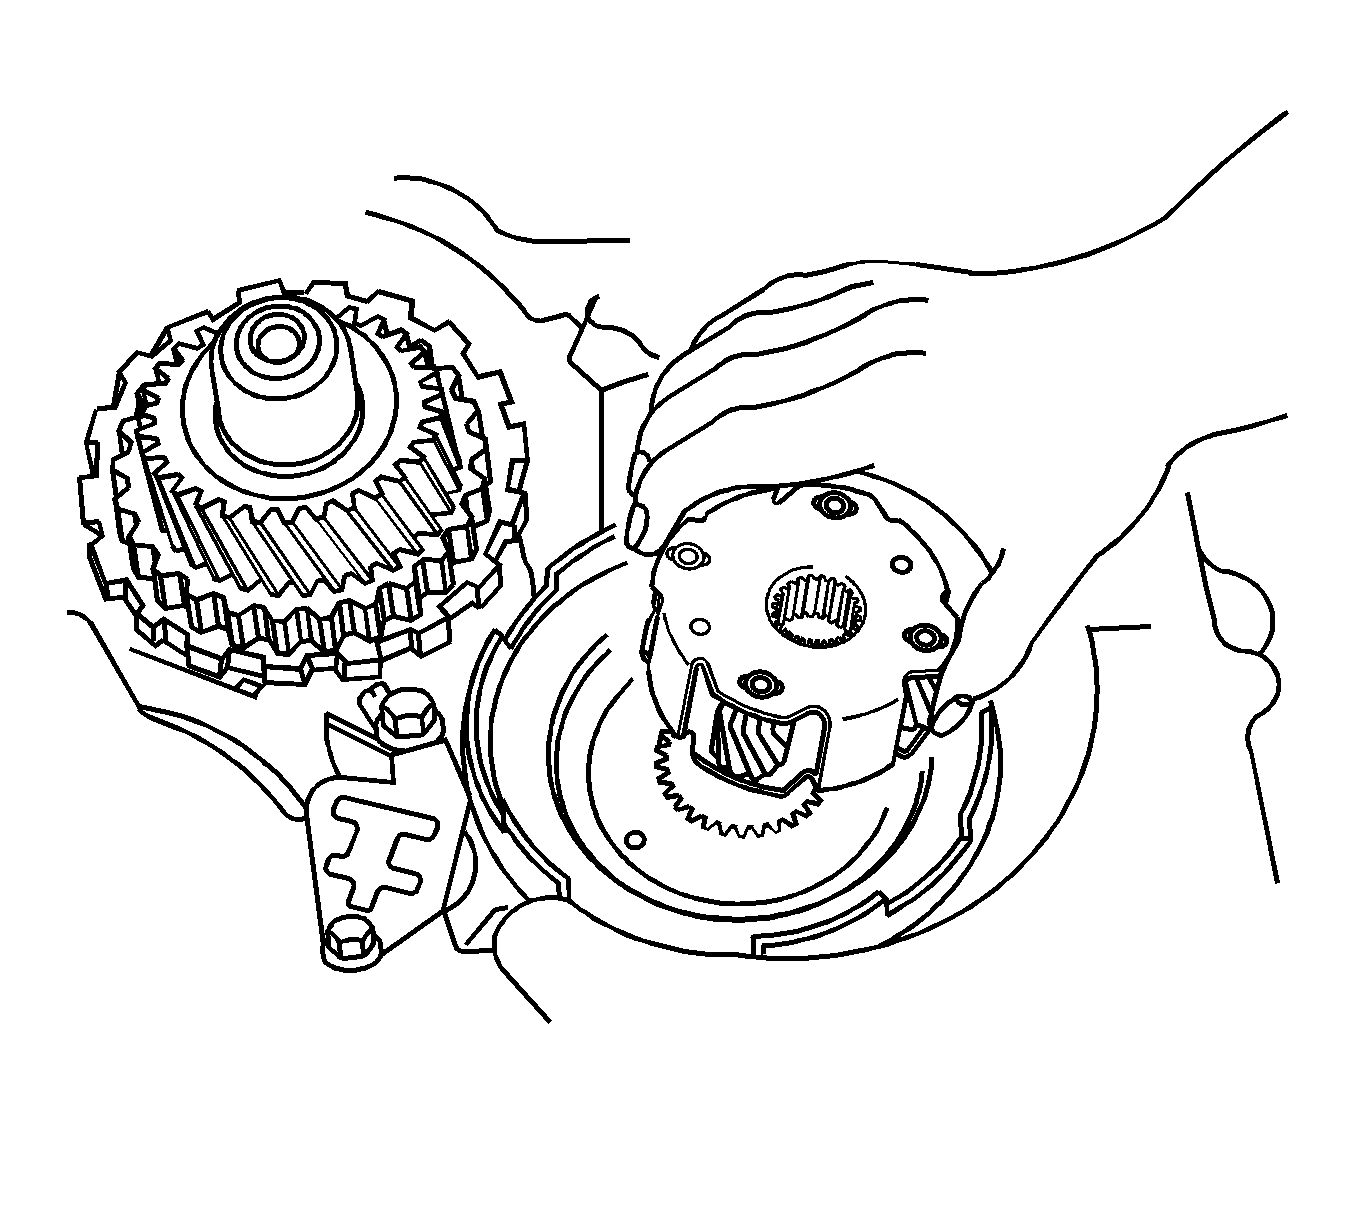
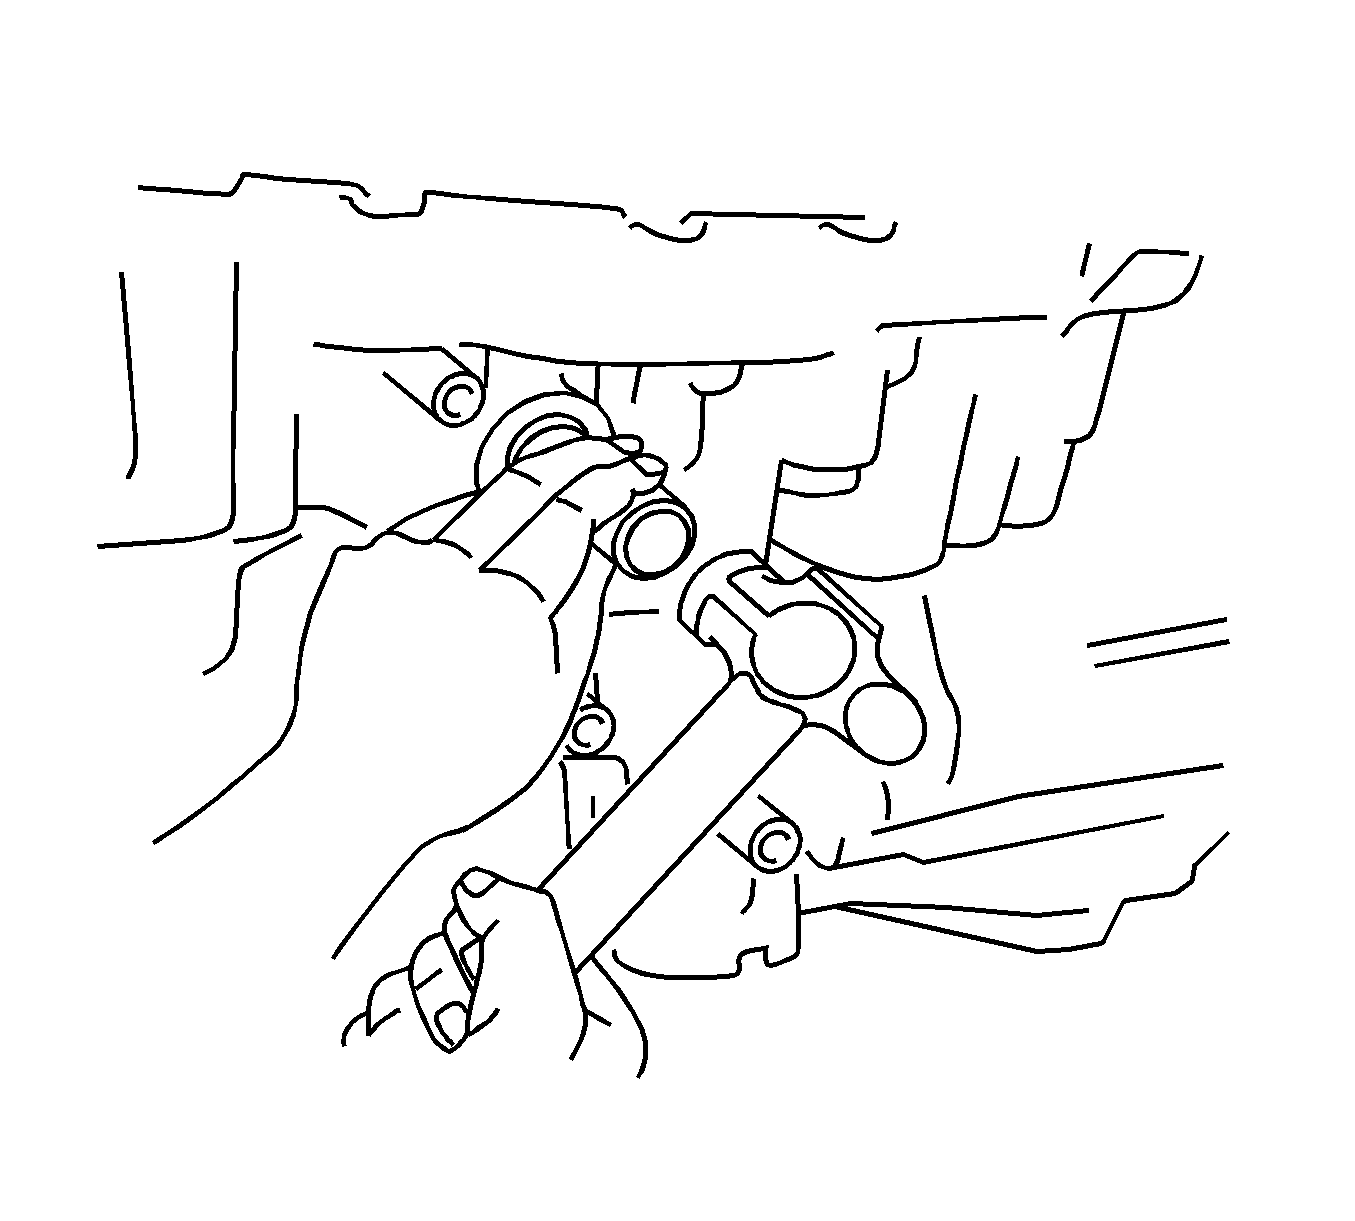
- Remove the intermediate shaft sub-assembly from the transaxle case.
- Using a press, remove the counterdrive gear (1) from the transaxle case.
- Remove the snap ring from the counterdrive gear bearing.
- Remove the counterdrive gear bearing from the counterdrive gear.
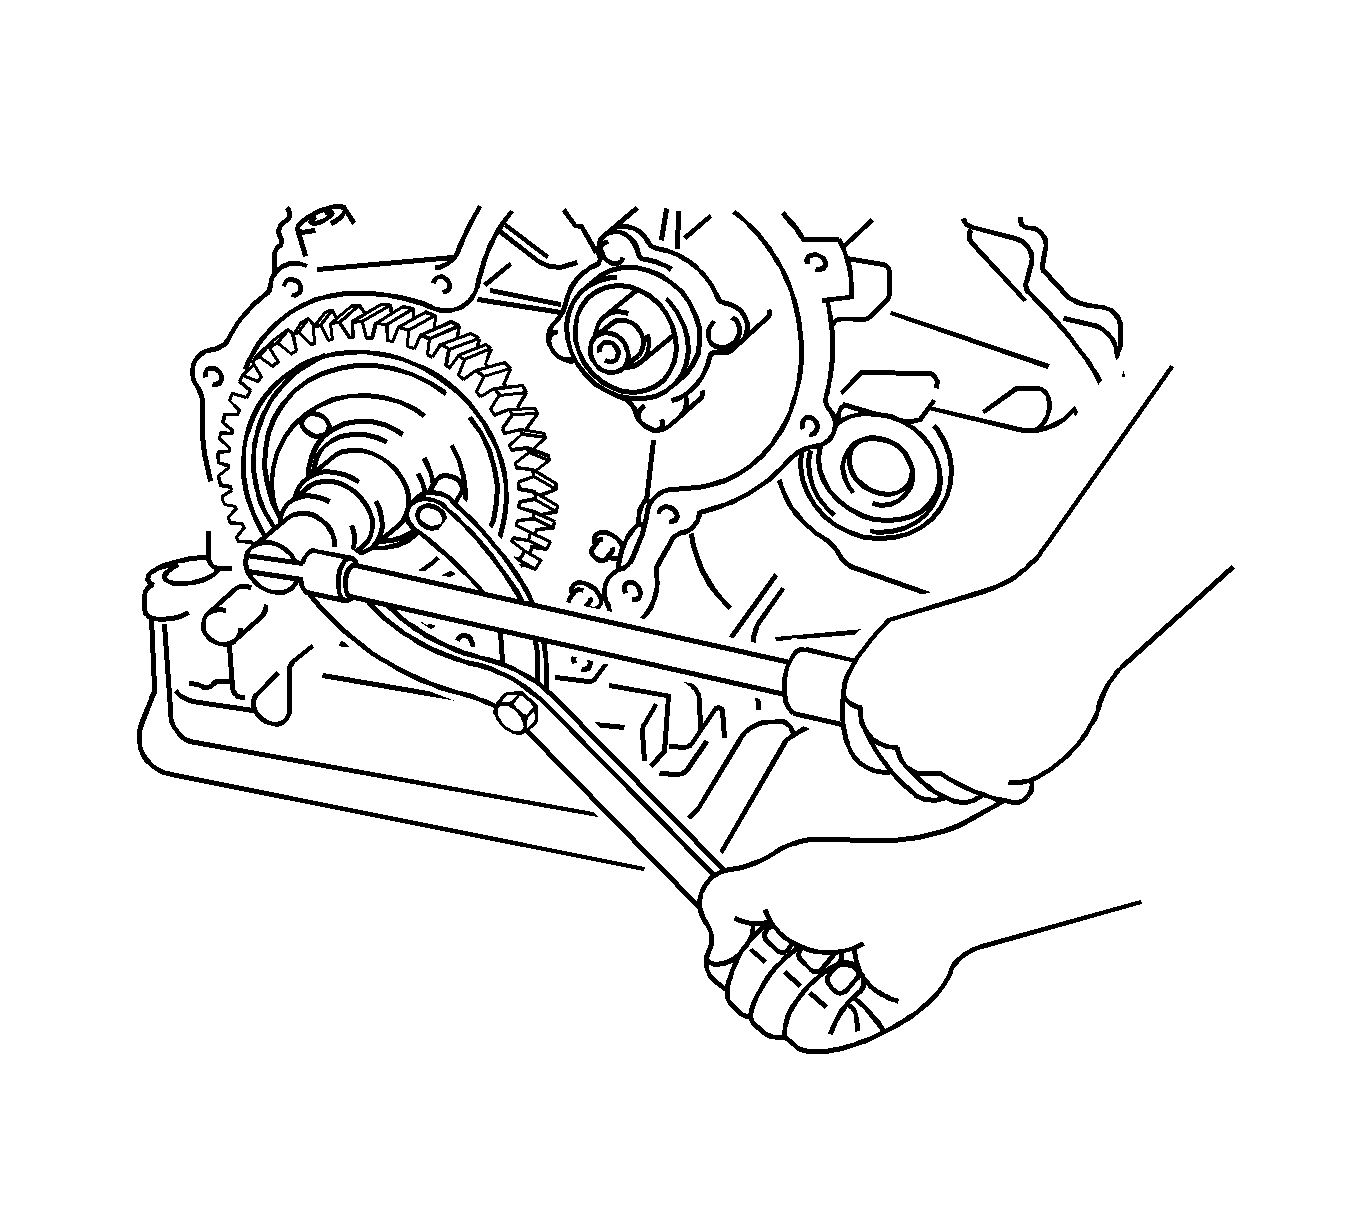
- Using a punch and hammer, unstake the counterdriven gear nut.
- While holding the counter shaft assembly (1), remove the counterdriven gear nut.
- Using a suitable puller, remove the counterdriven gear.
- Remove the thrust bearing from the transaxle case.
- Pull out the counter shaft from the transaxle case.
- Remove the needle bearing from the counter shaft assembly.
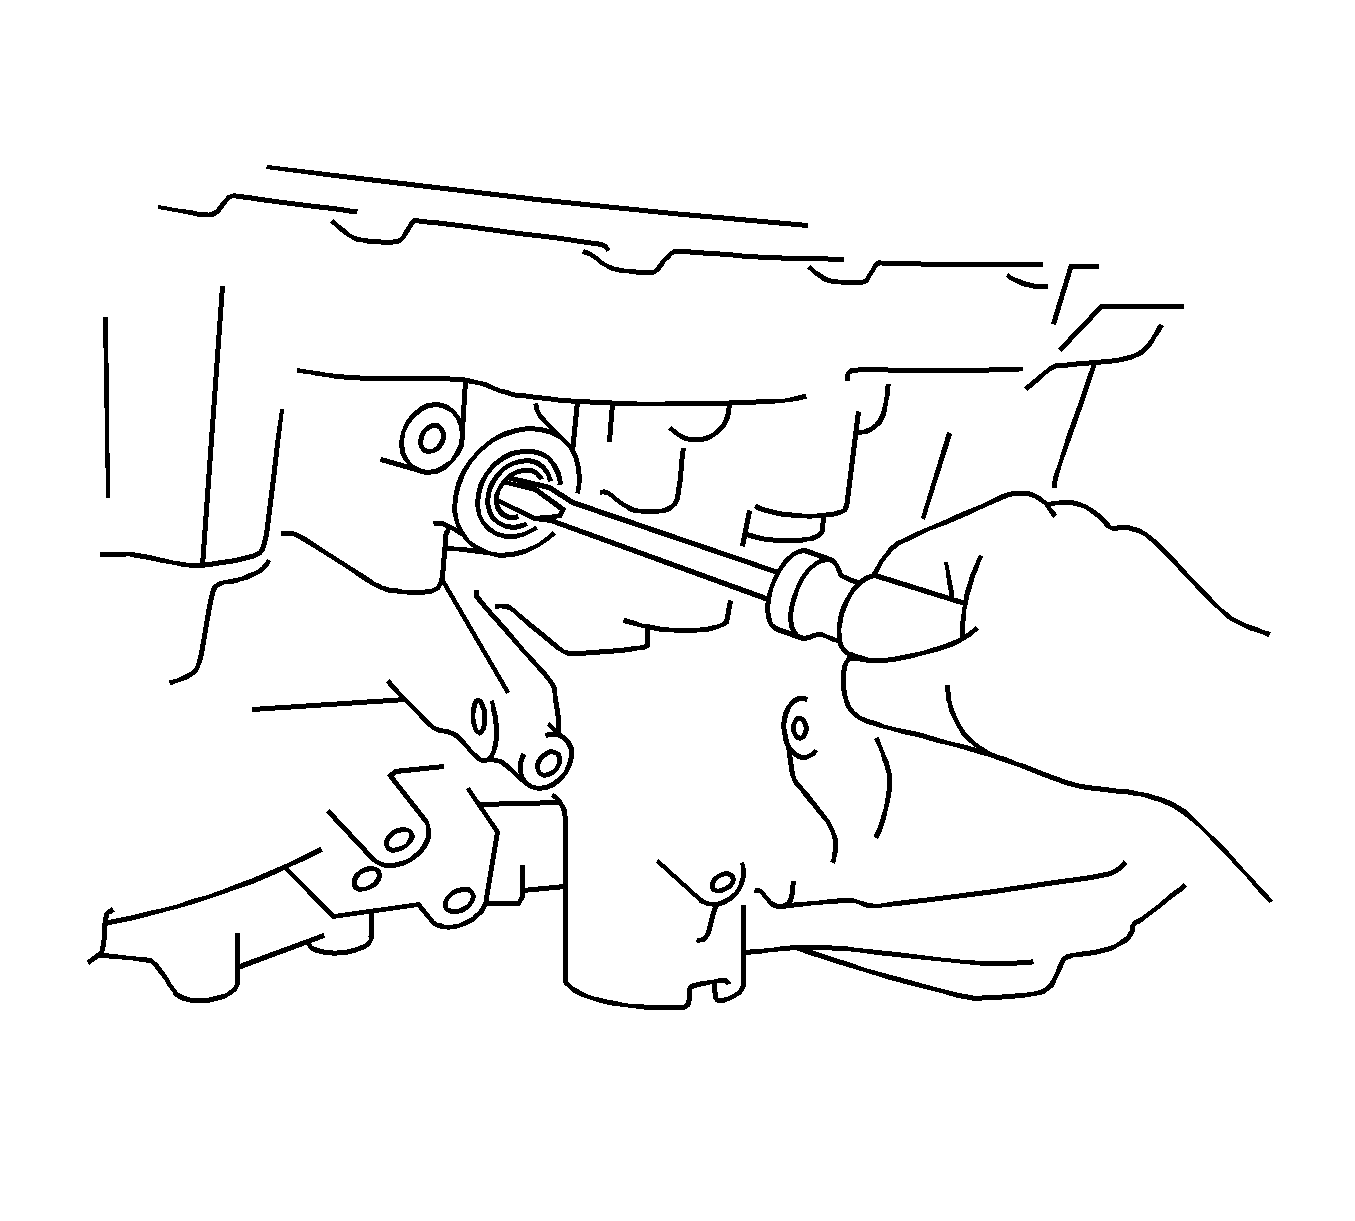
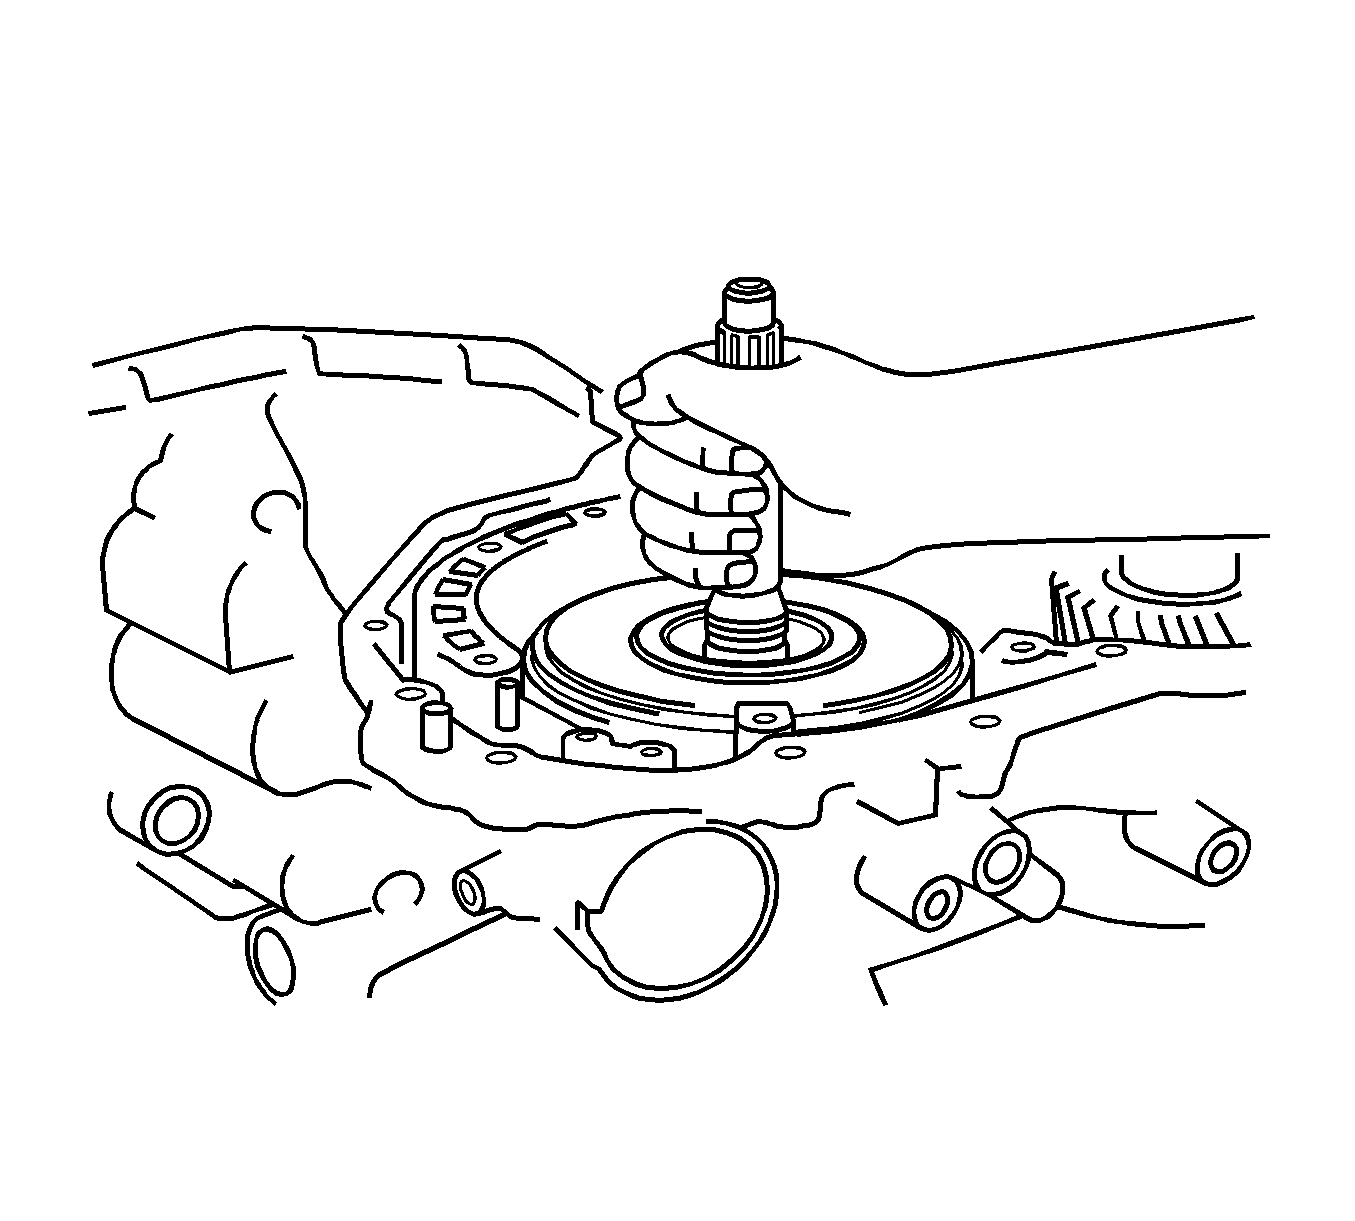
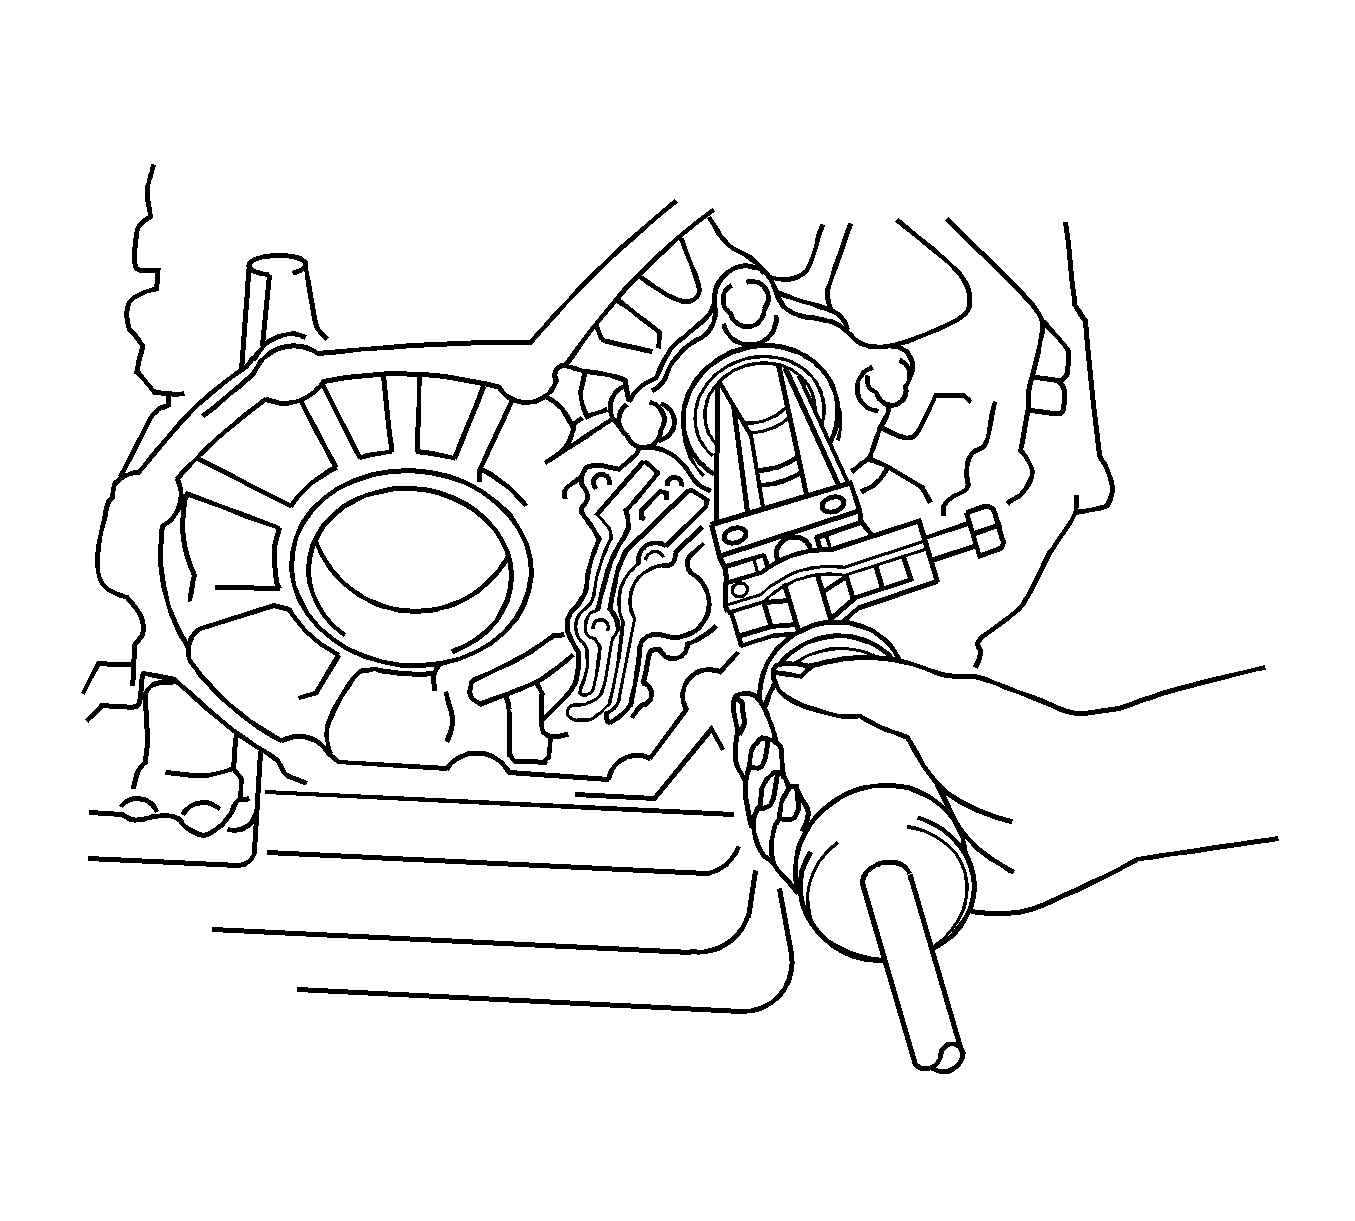
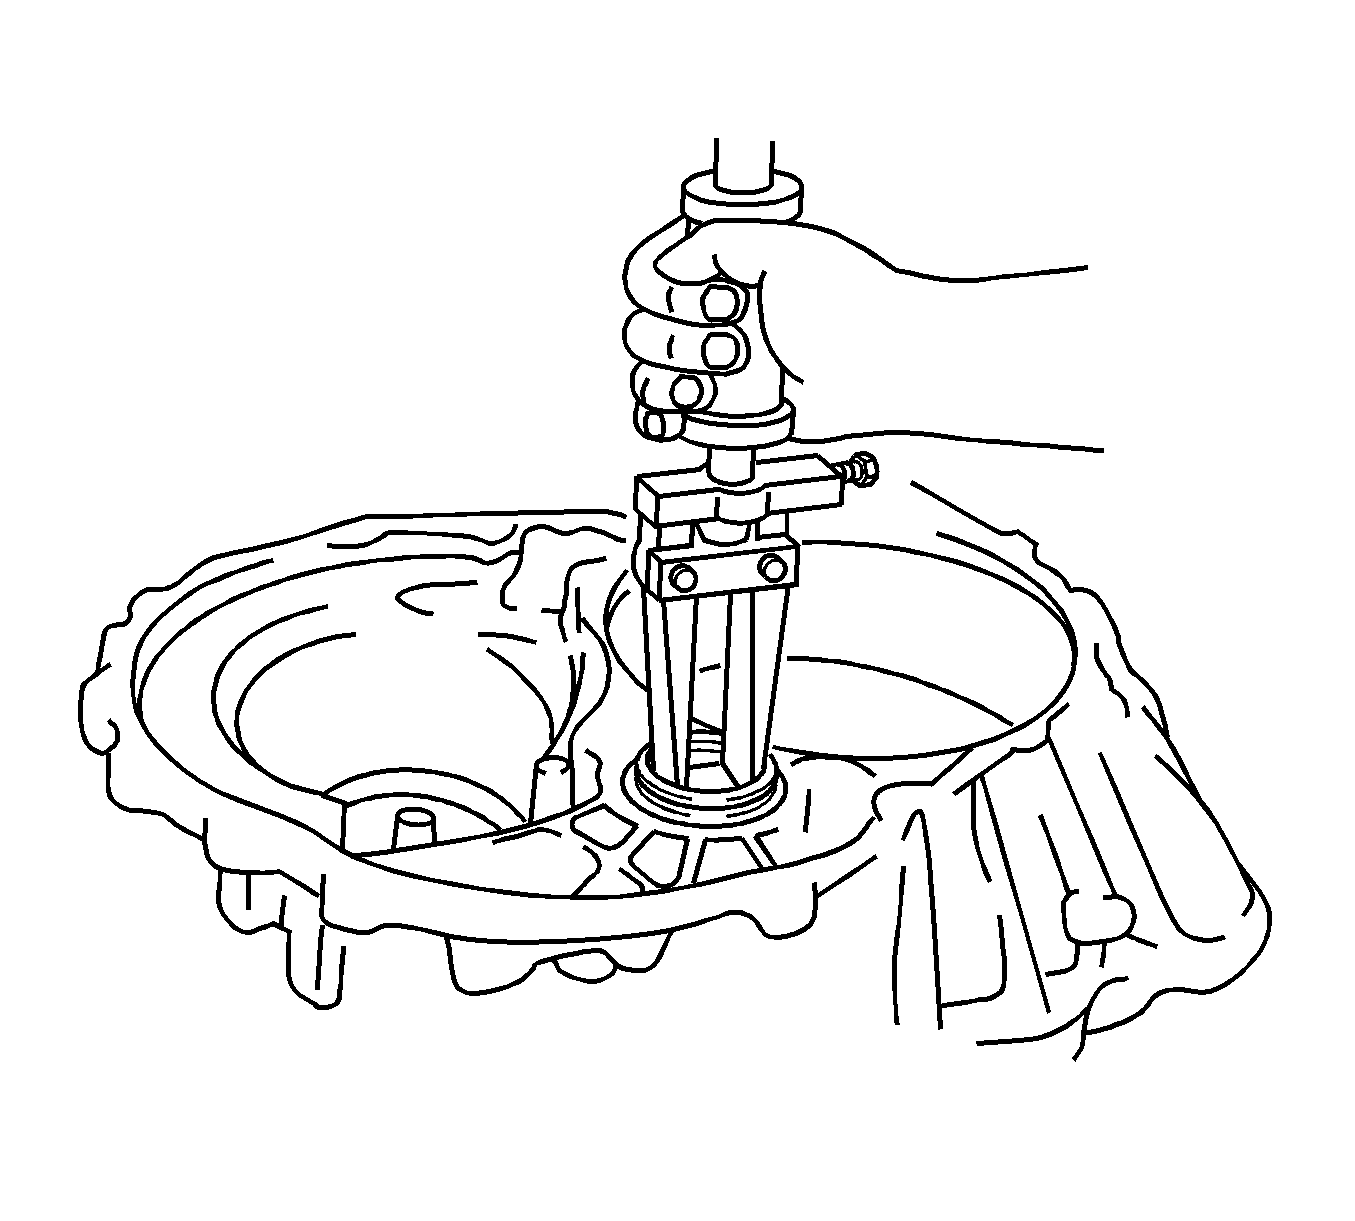
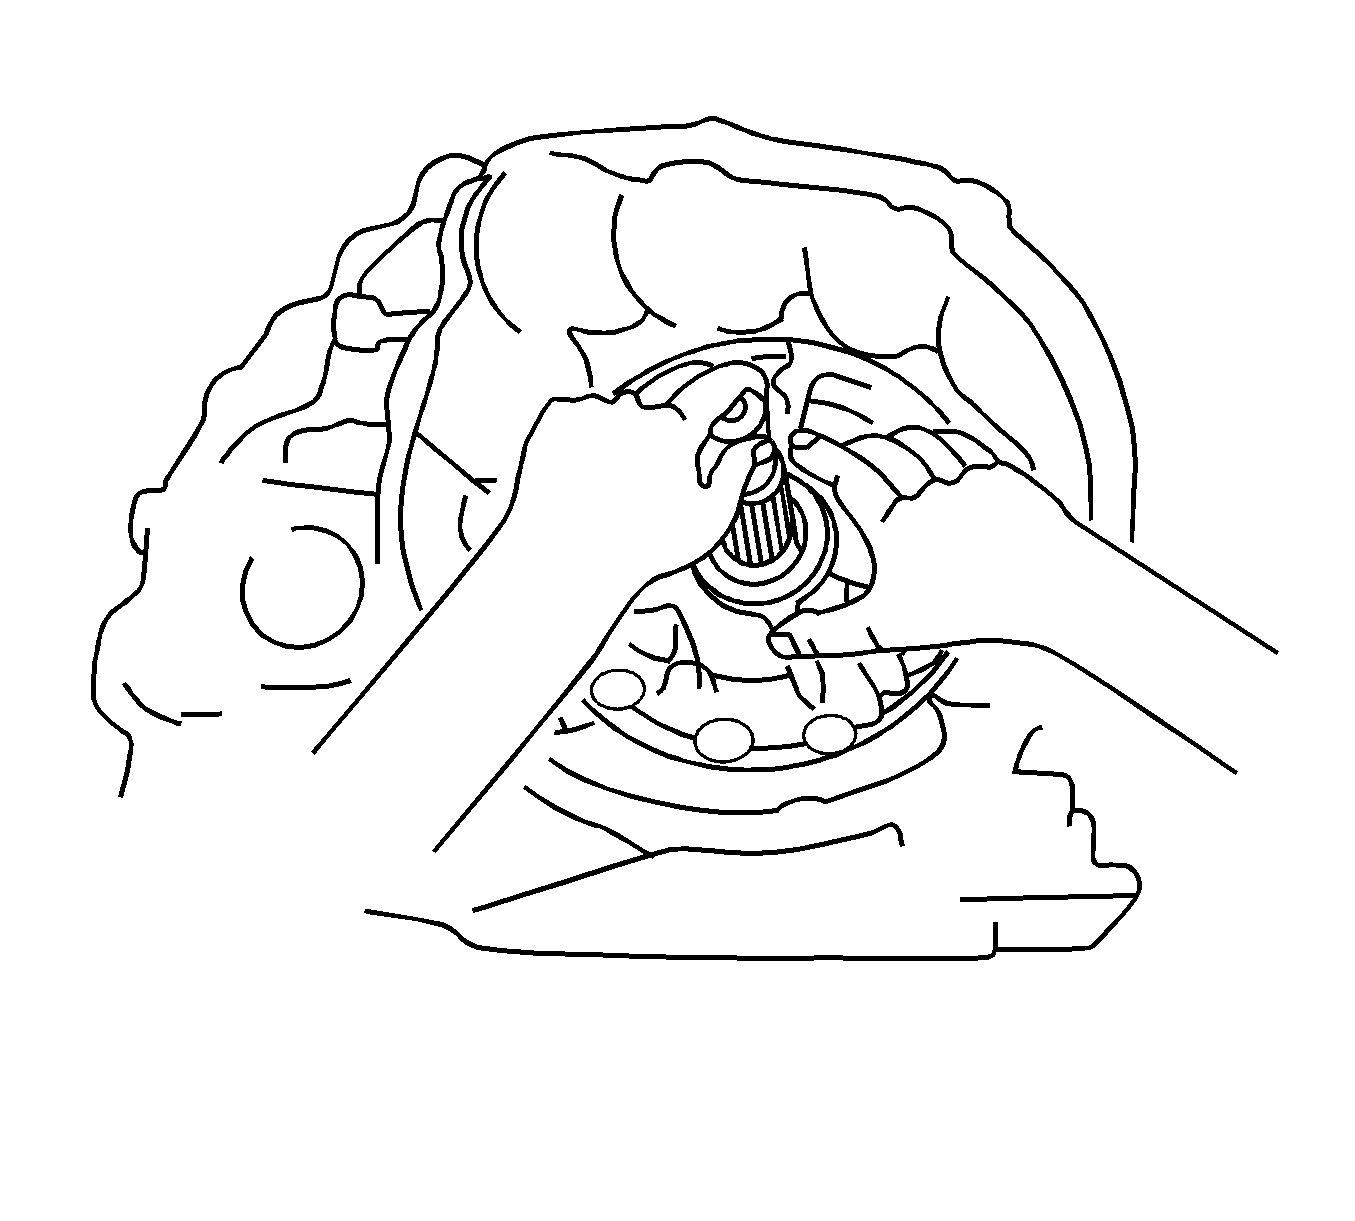
- Install a dial indicator (1) on the underdrive clutch piston.
- While applying and releasing compressed air at a pressure of 392-785 kPa (57-114 psi) measure the piston stroke.
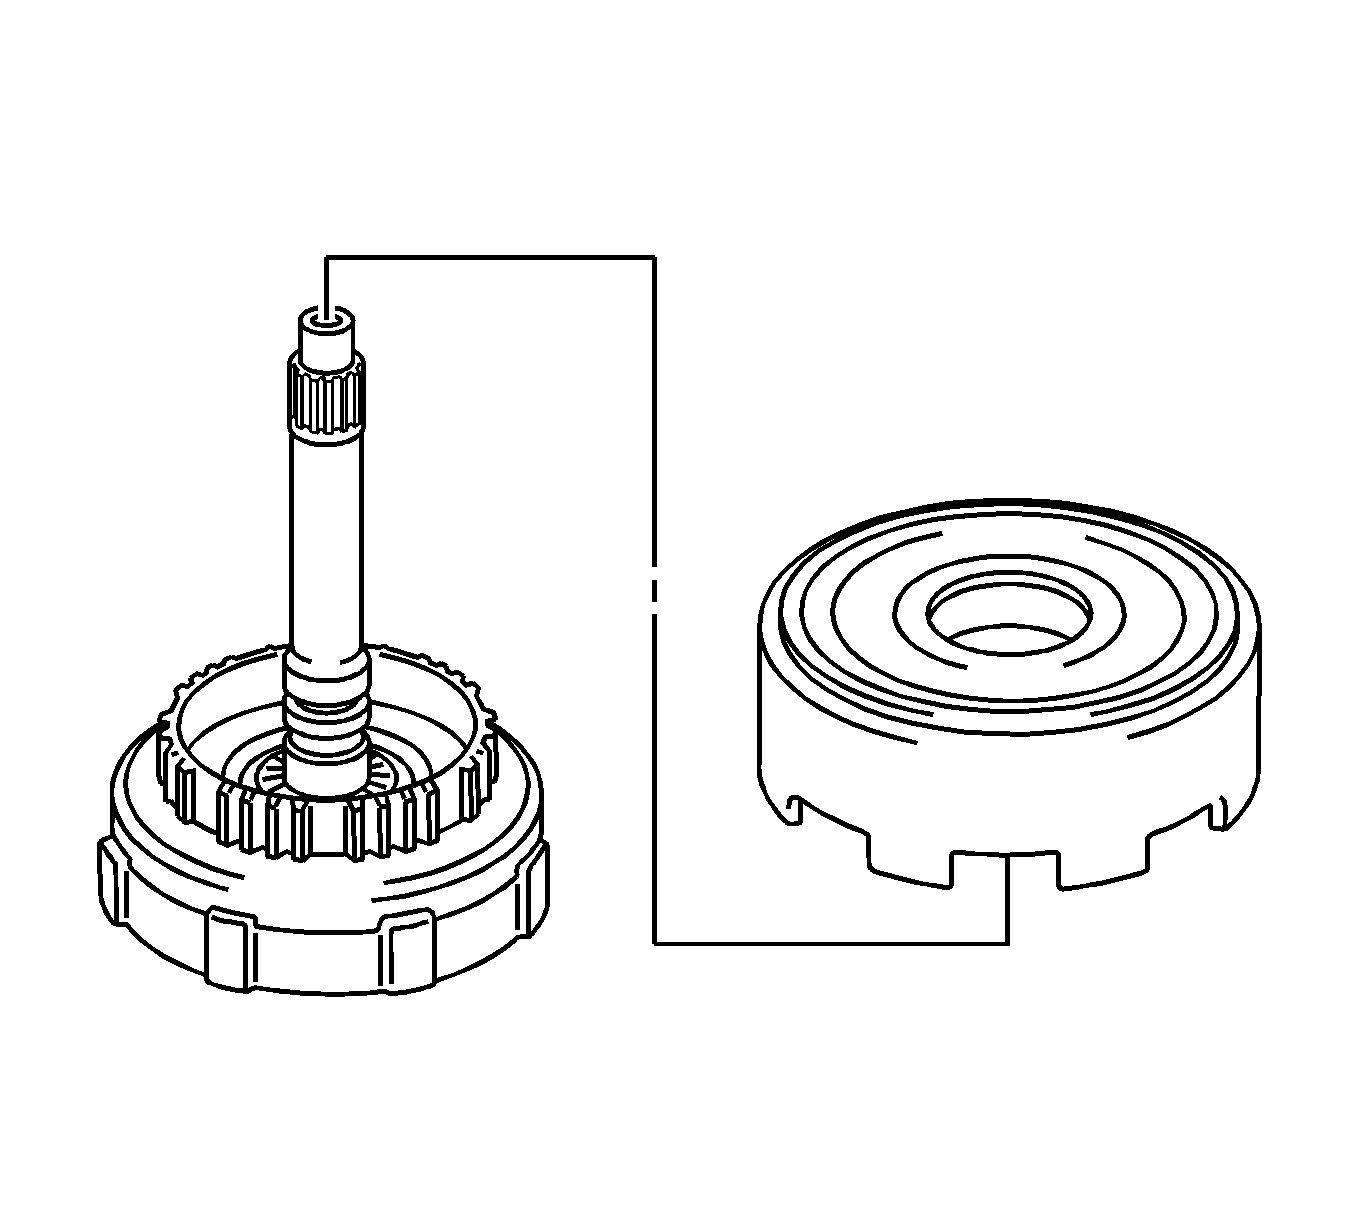
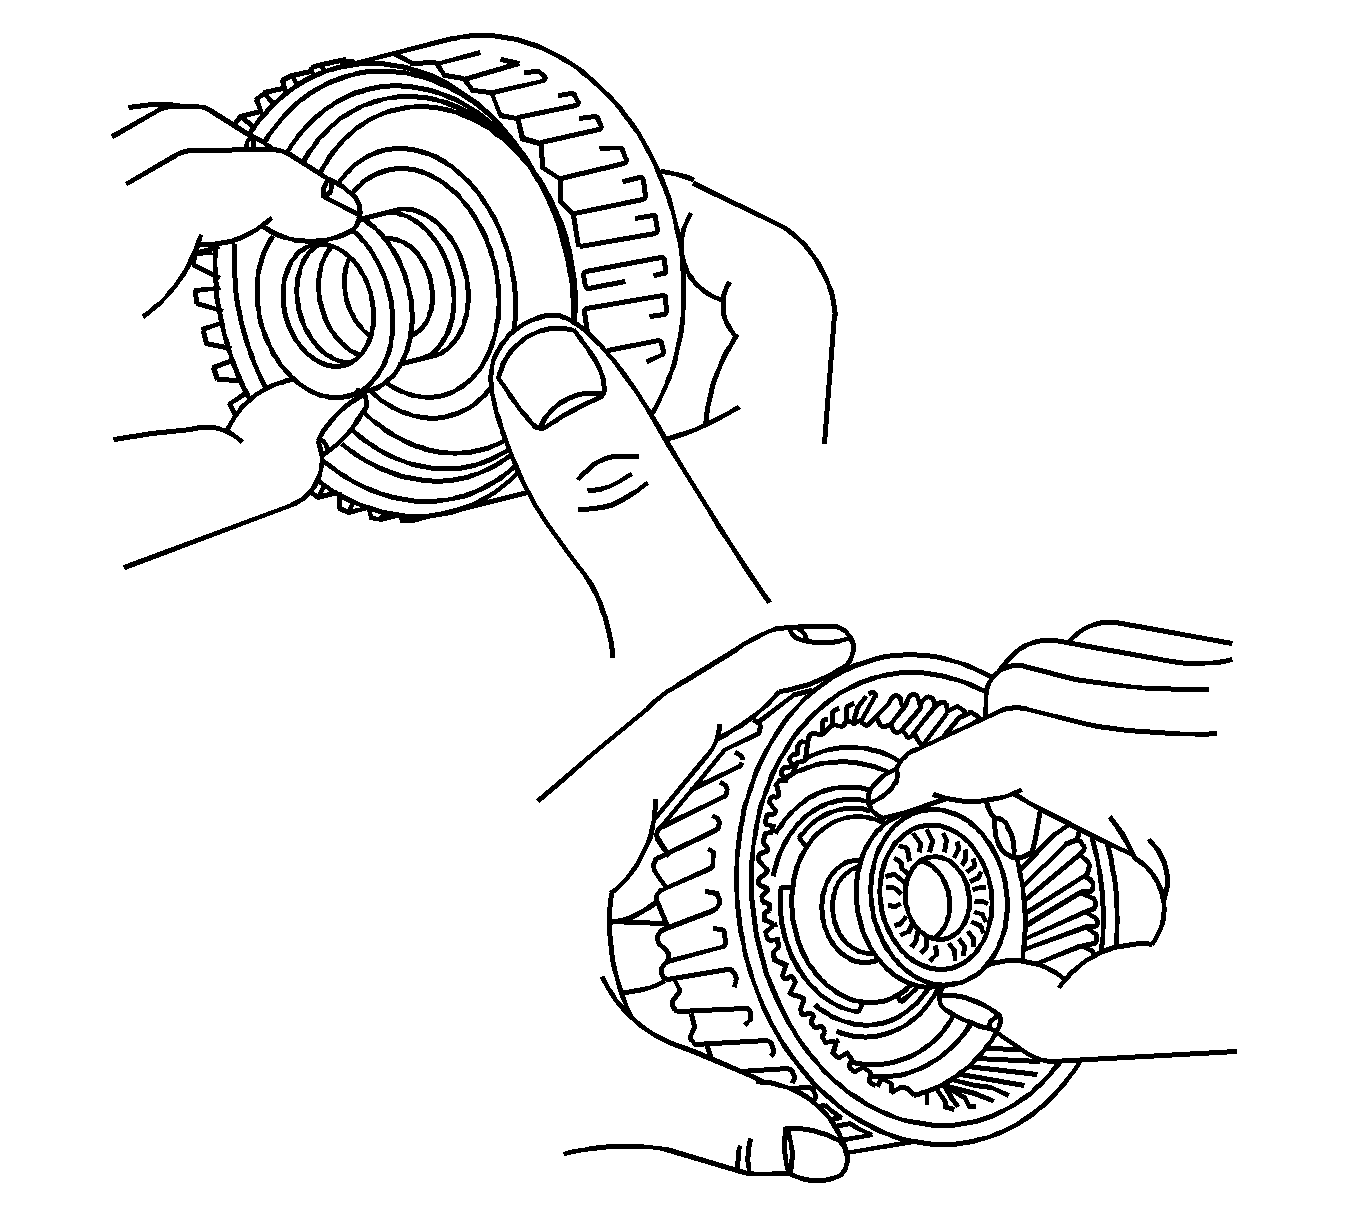
- Remove the underdrive clutch assembly from the transaxle case.
- Remove the underdrive 1 way clutch retainer from the transaxle case.
- Hold the 1 way clutch drum (1) and turn the 1 way clutch (2). The 1 way clutch should turn freely counterclockwise (3) and should lock if turned clockwise (4).
- Remove the 1 way clutch assembly and the underdrive clutch drum thrust washer (1) from the underdrive clutch drum.
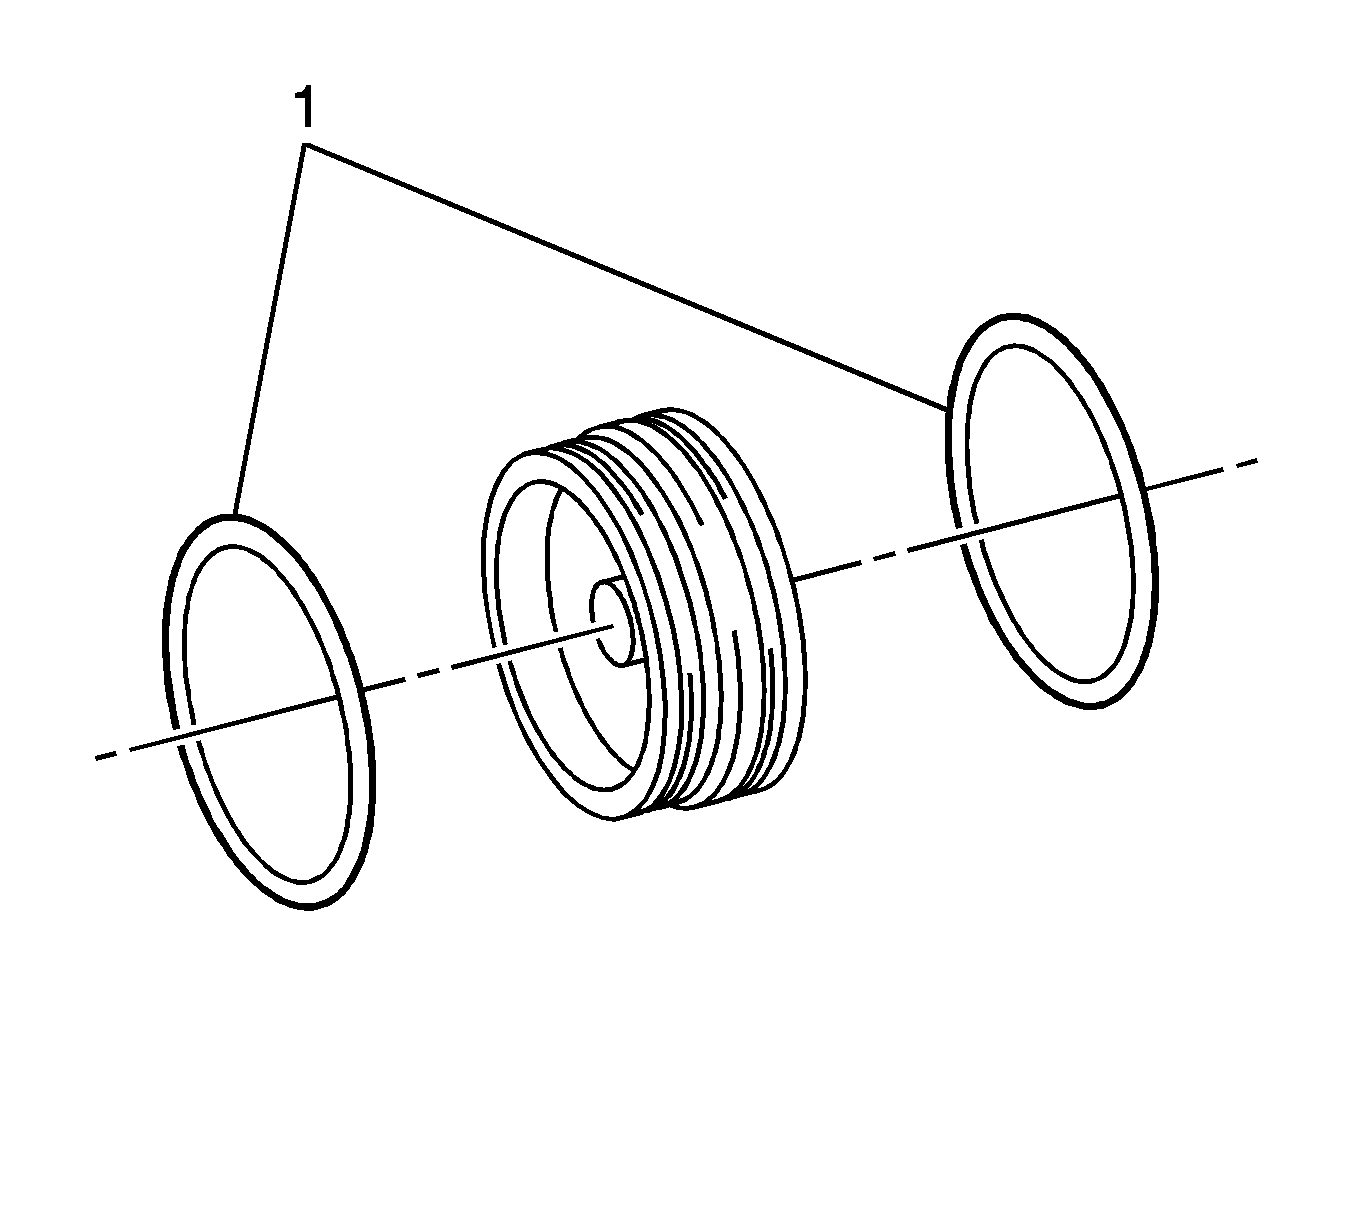
- Remove the 2 overdrive clutch drum oil seal rings from the transaxle case.
- Install a dial indicator on the underdrive brake pack.
- While applying compressed air, measure the pack clearance.
- Using a press, compress the flange until the snap ring is accessible.
- Using a screwdriver, remove the underdrive clutch flange snap ring from the transaxle case.
- Remove the flange, plates and underdrive clutch discs.
- Check the sliding surfaces of the plates and clutch discs. If the sliding surfaces of the discs, plates and flanges are worn, discolored, or if a part of the printed numbers are defaced, replace all the discs and plates.
- Remove the underdrive brake return spring sub-assembly from the transaxle case.
- Using compressed air at low pressure 98 kPa (14 psi) push out the underdrive brake piston from the transaxle case into a shop towel.
- Using a screwdriver, remove the 2 O-rings from the underdrive brake piston.
- Remove the 2 bolts, pawl stopper plate, torsion spring and spring guide sleeve from the transaxle case.
- Remove the bolt and pawl shaft clamp from the transaxle case.
- Remove the parking lock pawl shaft and parking lock pawl from the transaxle case.
- Remove the spring guide sleeve from the transaxle case.
- Remove the cam guide sleeve from the transaxle case.
- Using a TORX® bit, remove the 7 screws.
- Remove the 2 bolts.
- Remove the transmission case plate No. 2 and the case plate gasket from the transaxle case.
- Remove the B-4 accumulator piston and spring from the transaxle case.
- Remove the 2 O-rings from the piston.
- Remove the bolt and the transmission case plate No.3 from the transaxle case.
- Using a suitable puller, remove the counterdriven gear roller bearing from the transaxle case.
- Remove the bolts and transaxle apply tube clamps from the transaxle case.
- Using a screwdriver, remove the lube apply tube from the transaxle case.
- Using a screwdriver, remove the differential gear apply tube from the transaxle case.
- Remove the bolt and the underdrive roller bearing retainer from the transaxle case.
- Using a puller, remove the roller bearing from the transaxle housing.
- Using a screwdriver, remove the housing oil seal from the transaxle case.
- Using a screwdriver, remove the transaxle case oil seal from the transaxle case.
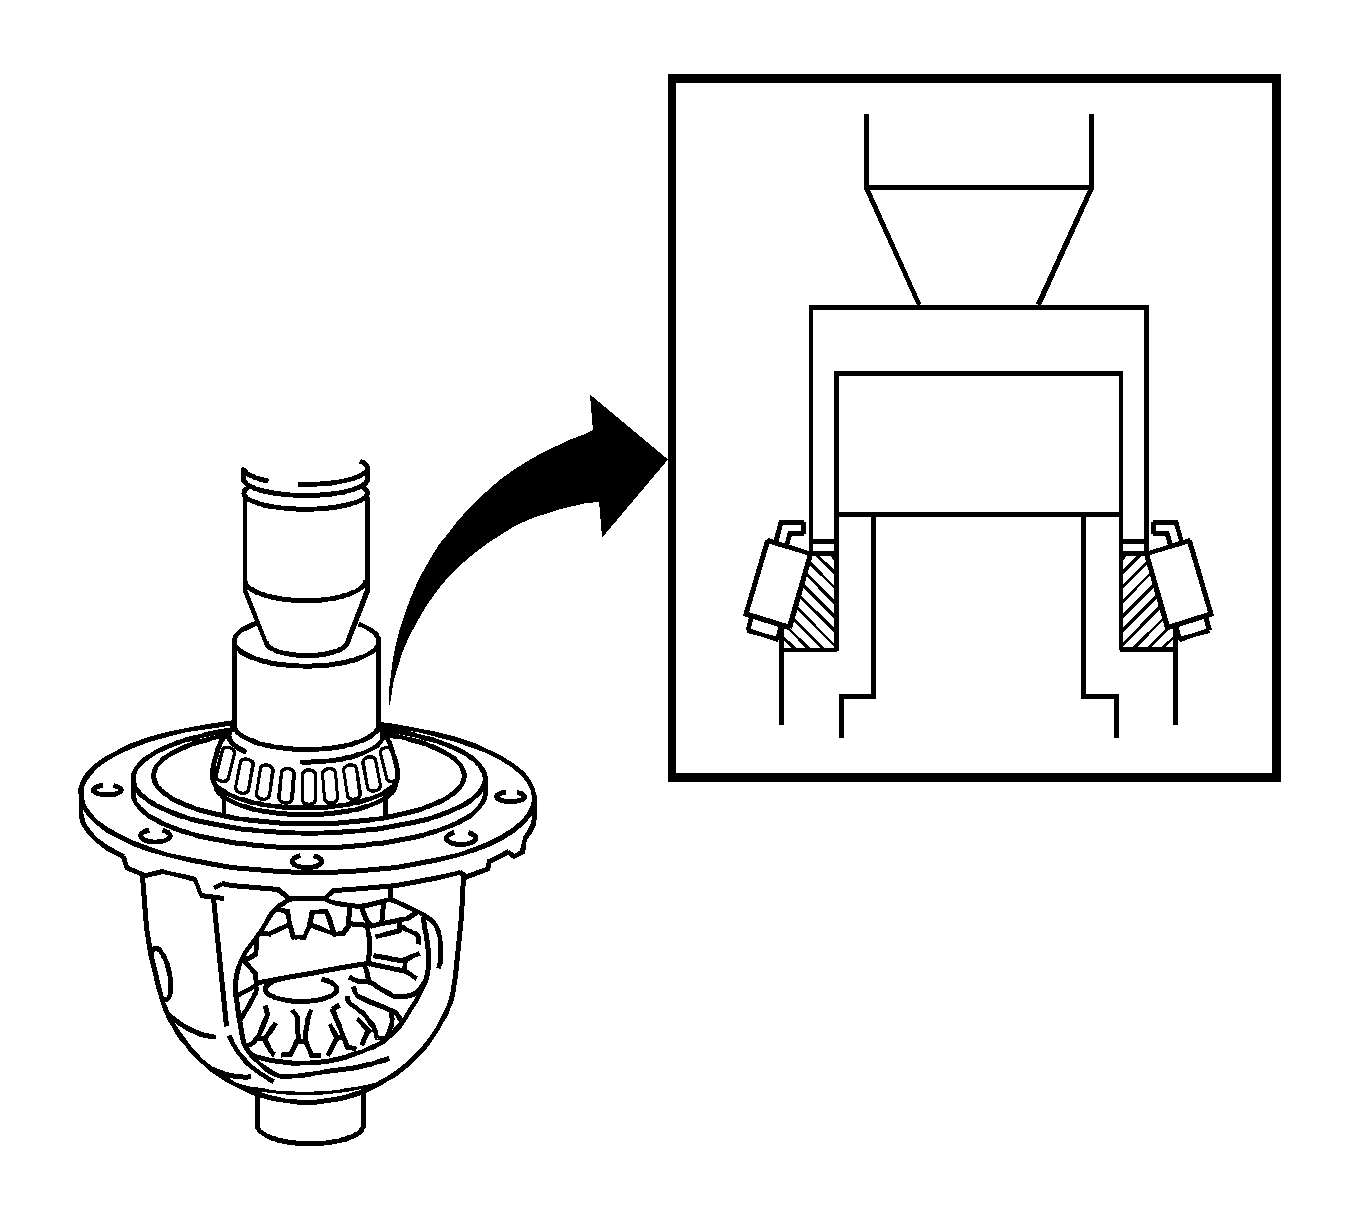
- Using a bearing puller, remove the front drive pinion roller bearing from the differential case.
- Using a bearing puller, remove the rear drive pinion roller bearing from the differential case.
- Using a press, drive out the front pinion front roller bearing outer race.
- Drive out the front drive pinion rear roller bearing outer race and adjusting shim from the transaxle case.
- Using a press, install a new front drive pinion rear roller bearing on the differential case.
- Place the adjusting shim in the transaxle case.
- Using a press, install a new front drive pinion rear roller bearing outer race in the transaxle case.
- Install the speedometer drive gear on the differential case.
- Using a press, install a new front drive pinion front roller bearing in the transaxle case.
- Using a press, install a new front drive pinion front roller bearing outer race in the transaxle case.
- Install a new transaxle case oil seal.
- Coat the lip of the seal with Multi-Purpose grease or equivalent.
- Install a new transaxle oil seal in the transaxle case.
- Coat the lip of the seal with Multi-Purpose grease or equivalent.
- Using a press, install the underdrive roller bearing in the transaxle housing.
- Install the roller bearing retainer with the bolt to the transaxle housing.
- Using a soft faced hammer, install the differential gear lube apply tube.
- Using a soft faced hammer, install the transaxle apply tube in the transaxle housing.
- Install the transaxle apply tube clamps and bolts in the transaxle housing.
- Using a press, install the counterdriven gear roller bearing in the transaxle case.
- Coat the new B-4 accumulator O-rings with T-IV automatic transmission fluid.
- Install the O-rings on the accumulator piston.
- Install accumulator piston and spring in the transaxle case.
- Install the transmission case plate and gasket on the transaxle case.
- Install the 2 bolts.
- Apply Threadlocker 242 GM P/N 12345382 (Canadian P/N 10953459) or the equivalent to the 7 retaining screws.
- Using a TORX® bit, install the screws.
- Install the cam guide sleeve in the transaxle case.
- Install the spring guide sleeve with the protruding portion facing up.
- Place the pawl stopper plate on the protruding portion of the lock sleeve in the transaxle case.
- Install the spring guide sleeve and torsion spring with the 2 bolts.
- Install the parking lock pawl in the transaxle case.
- Install the parking lock pawl shaft with the clamp groove (1) upward, then install the pawl shaft clamp and the 2 bolts.
- Coat the new O-rings with T-IV automatic transmission fluid.
- Install the O-rings on the underdrive brake piston.
- Place the underdrive brake piston into the case with the cup side up, being careful not to damage the O-rings.
- Install the underdrive brake return spring sub-assembly in the transaxle case.
- Install the Plates, underdrive clutch Discs and Flange in the following order: P - D - P - D - P - D - F.
- Using a press, compress the flange and install the underdrive clutch flange snap ring in the transaxle case.
- Using a dial indicator, measure the underdrive brake pack clearance.
- Coat the 2 new overdrive clutch drum oil seal rings with T-IV automatic transmission fluid.
- Install the seal rings in the transaxle case.
- Install the underdrive 1 way clutch assembly and the underdrive clutch drum thrust washer in the transaxle case.
- Push the underdrive 1 way clutch retainer in until it clicks into place.
- Coat the underdrive clutch drum thrust washer with petroleum jelly, then install the thrust washer on the underdrive 1 way clutch assembly.
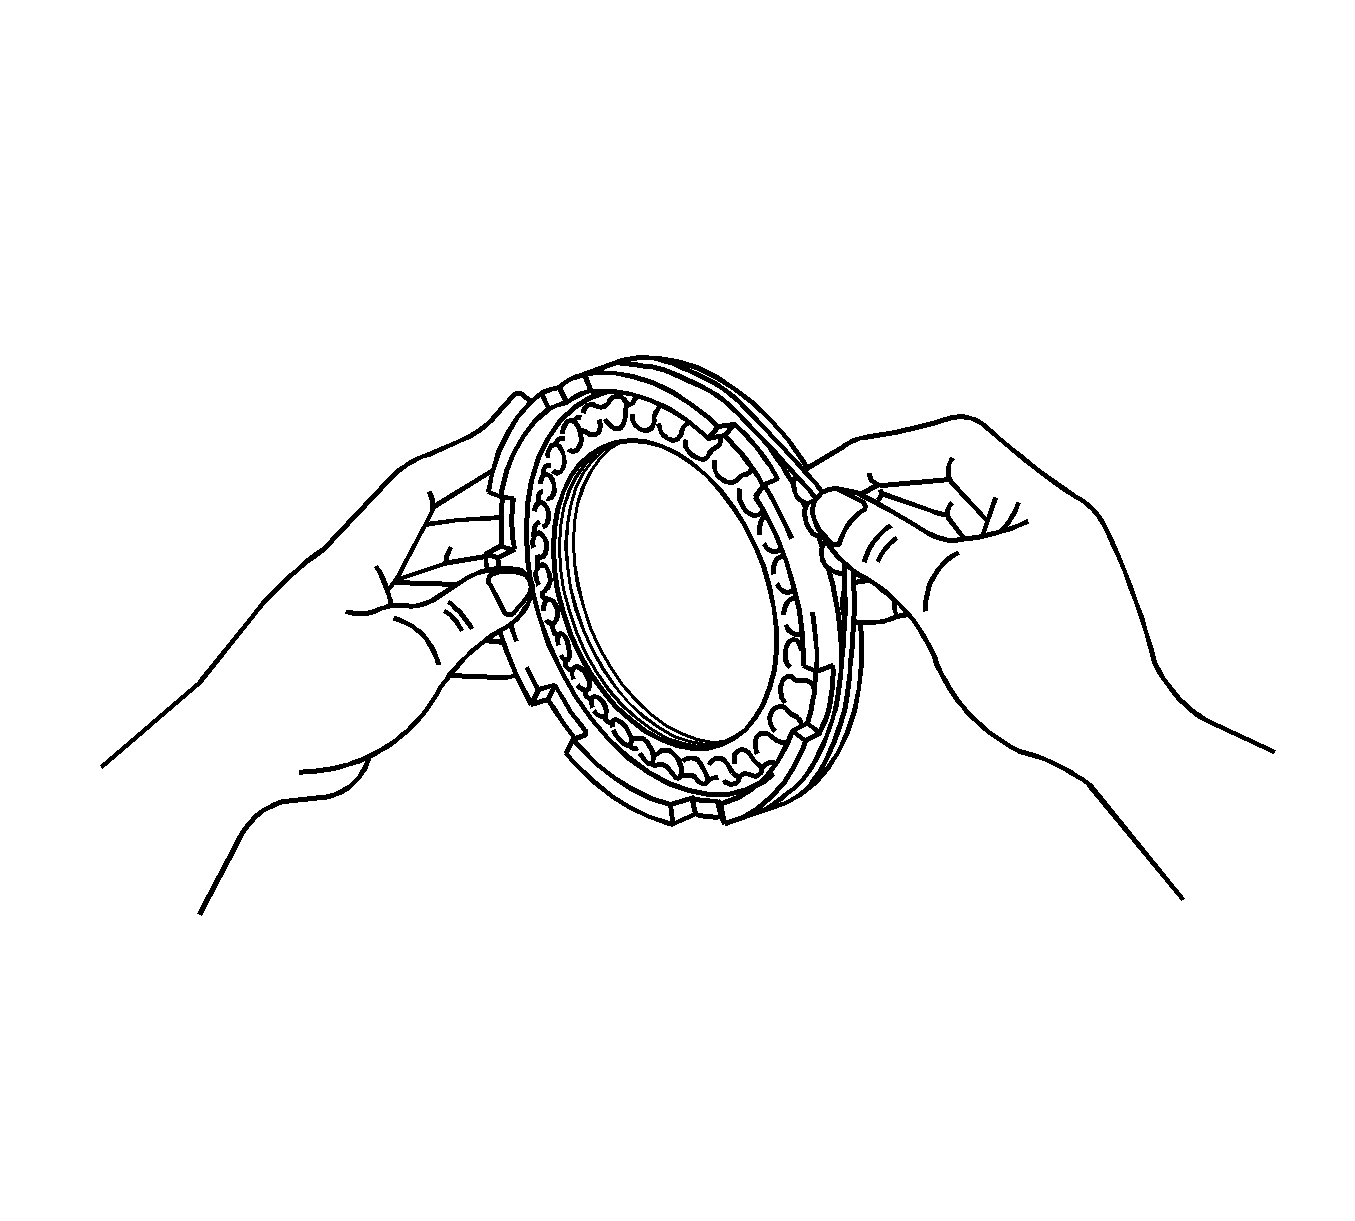
- Align the flukes of the discs in the underdrive brake.
- Install the underdrive clutch drum assembly in the transaxle case.
- Turn the underdrive clutch assembly. The clutch assembly should turn freely counterclockwise (1) and should lock clockwise (2).
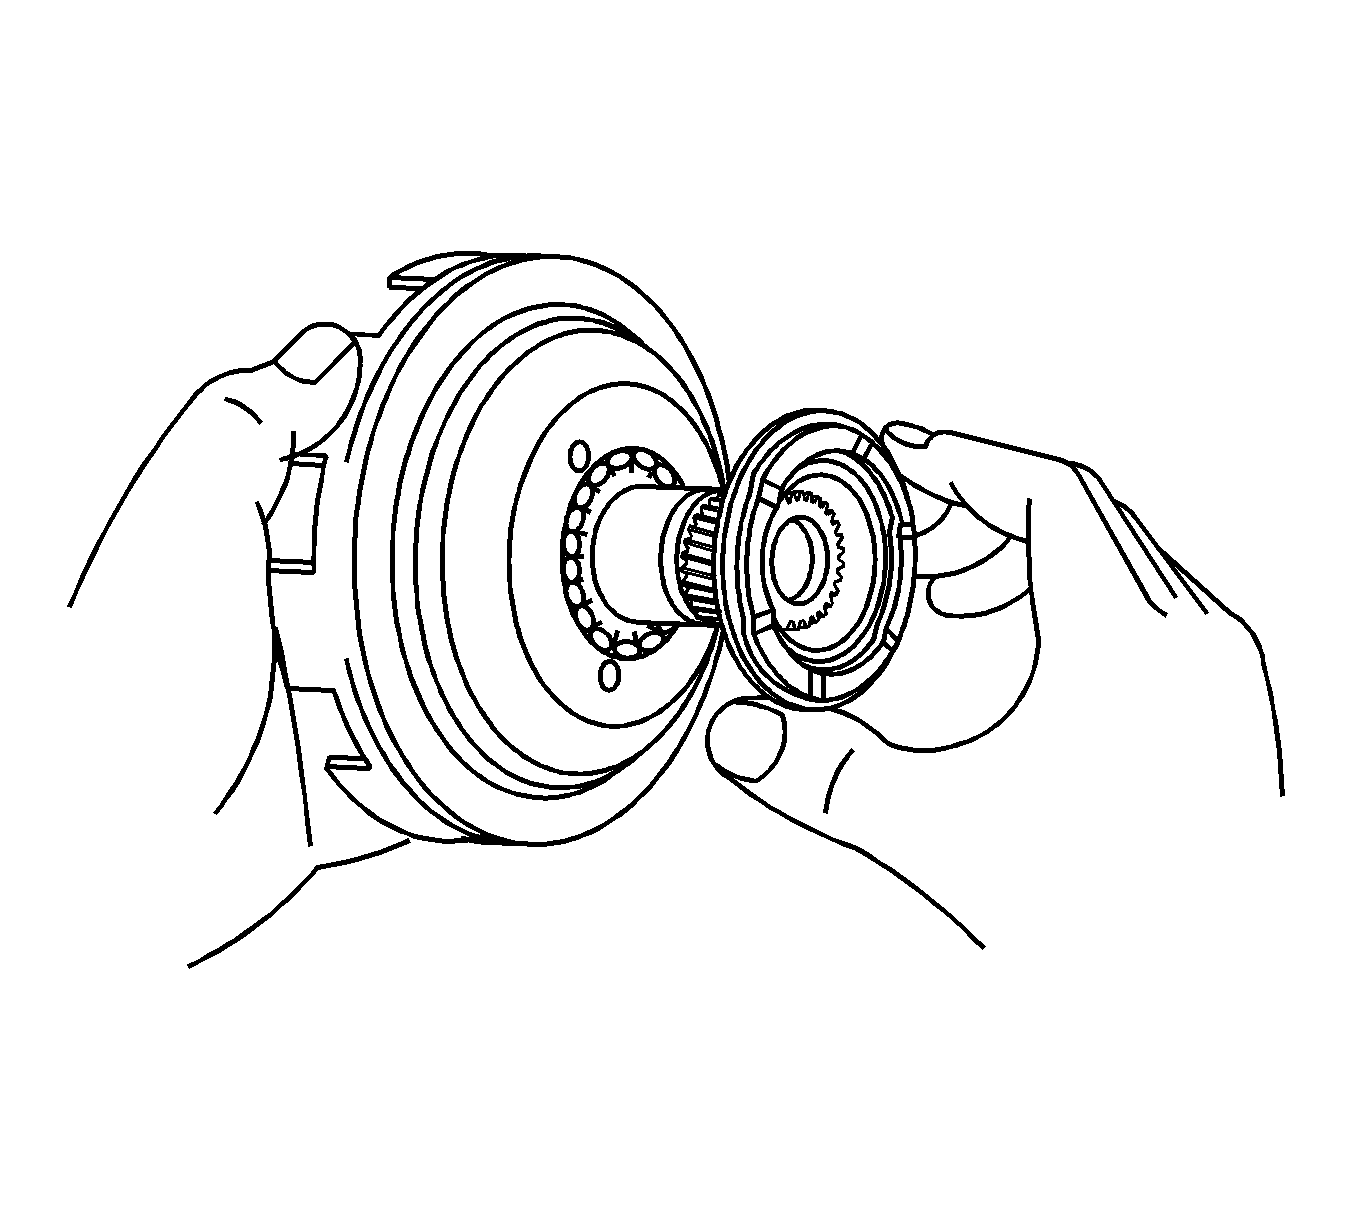
- Install the assembled bearing and race with the thrust needle roller bearing facing upward
- Using Vernier Calipers, check the height from the sleeve to the inner race. The correct installation height should be 17.3-18.2 mm (0.681-0.717 in).
- Install a dial indicator on the underdrive clutch piston.
- While applying and releasing compressed air at a pressure of 392-785 kPa (57-114 psi) measure the underdrive clutch piston stroke.
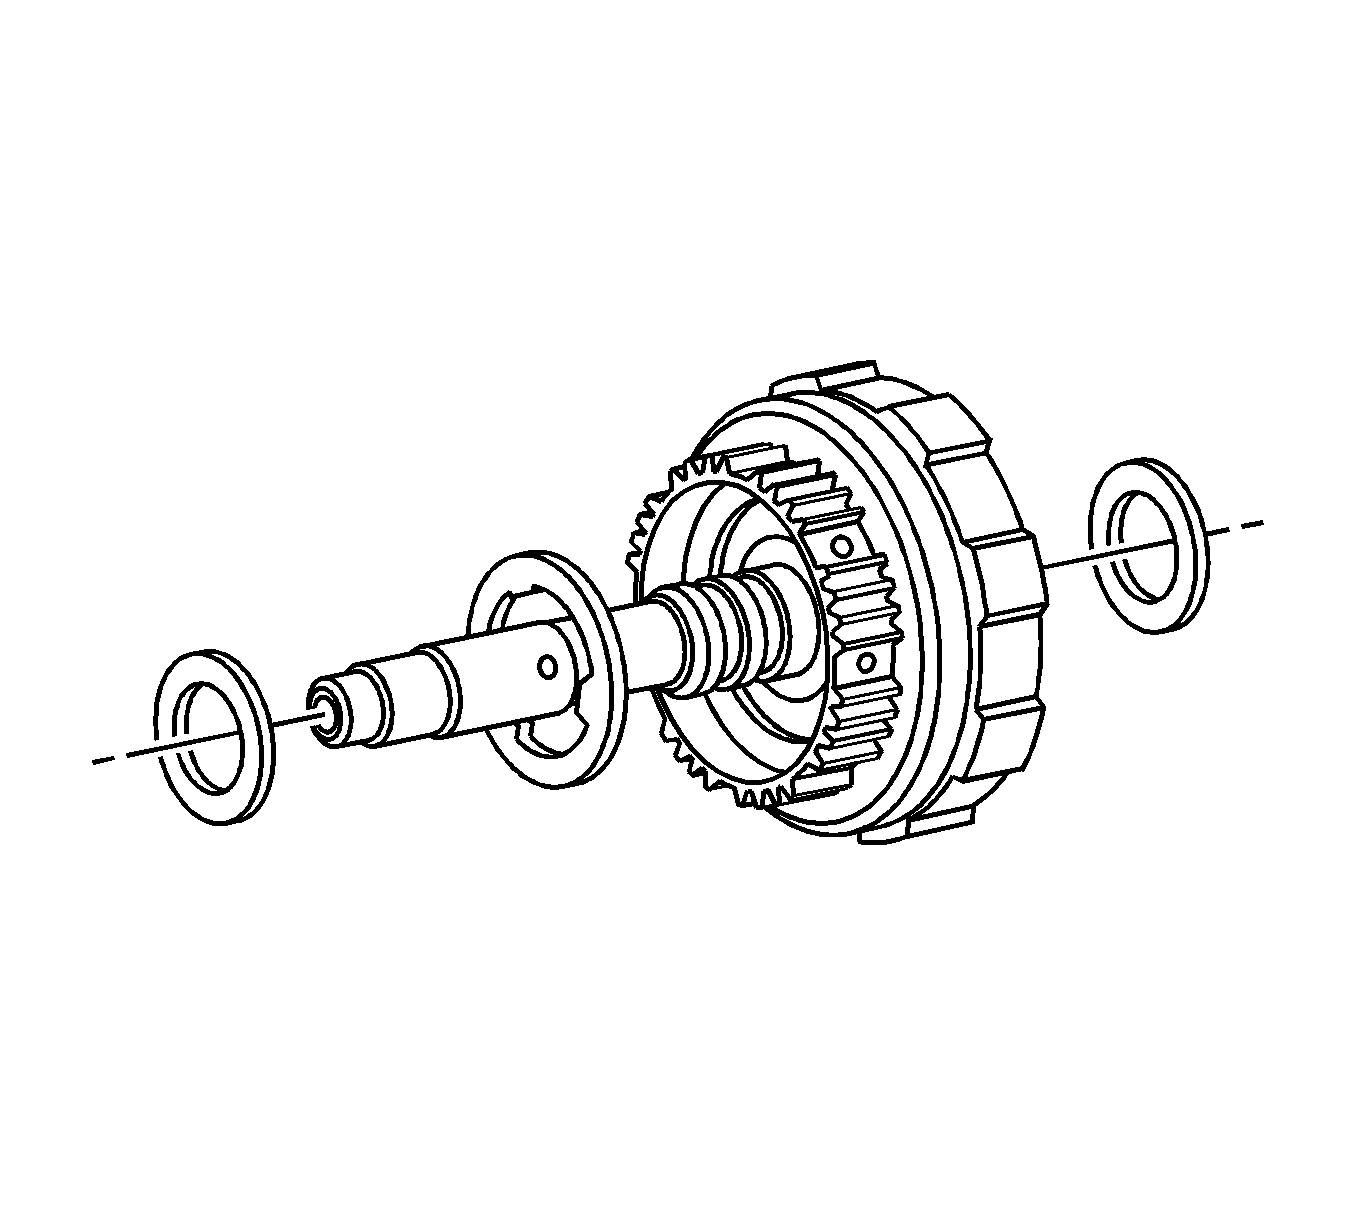
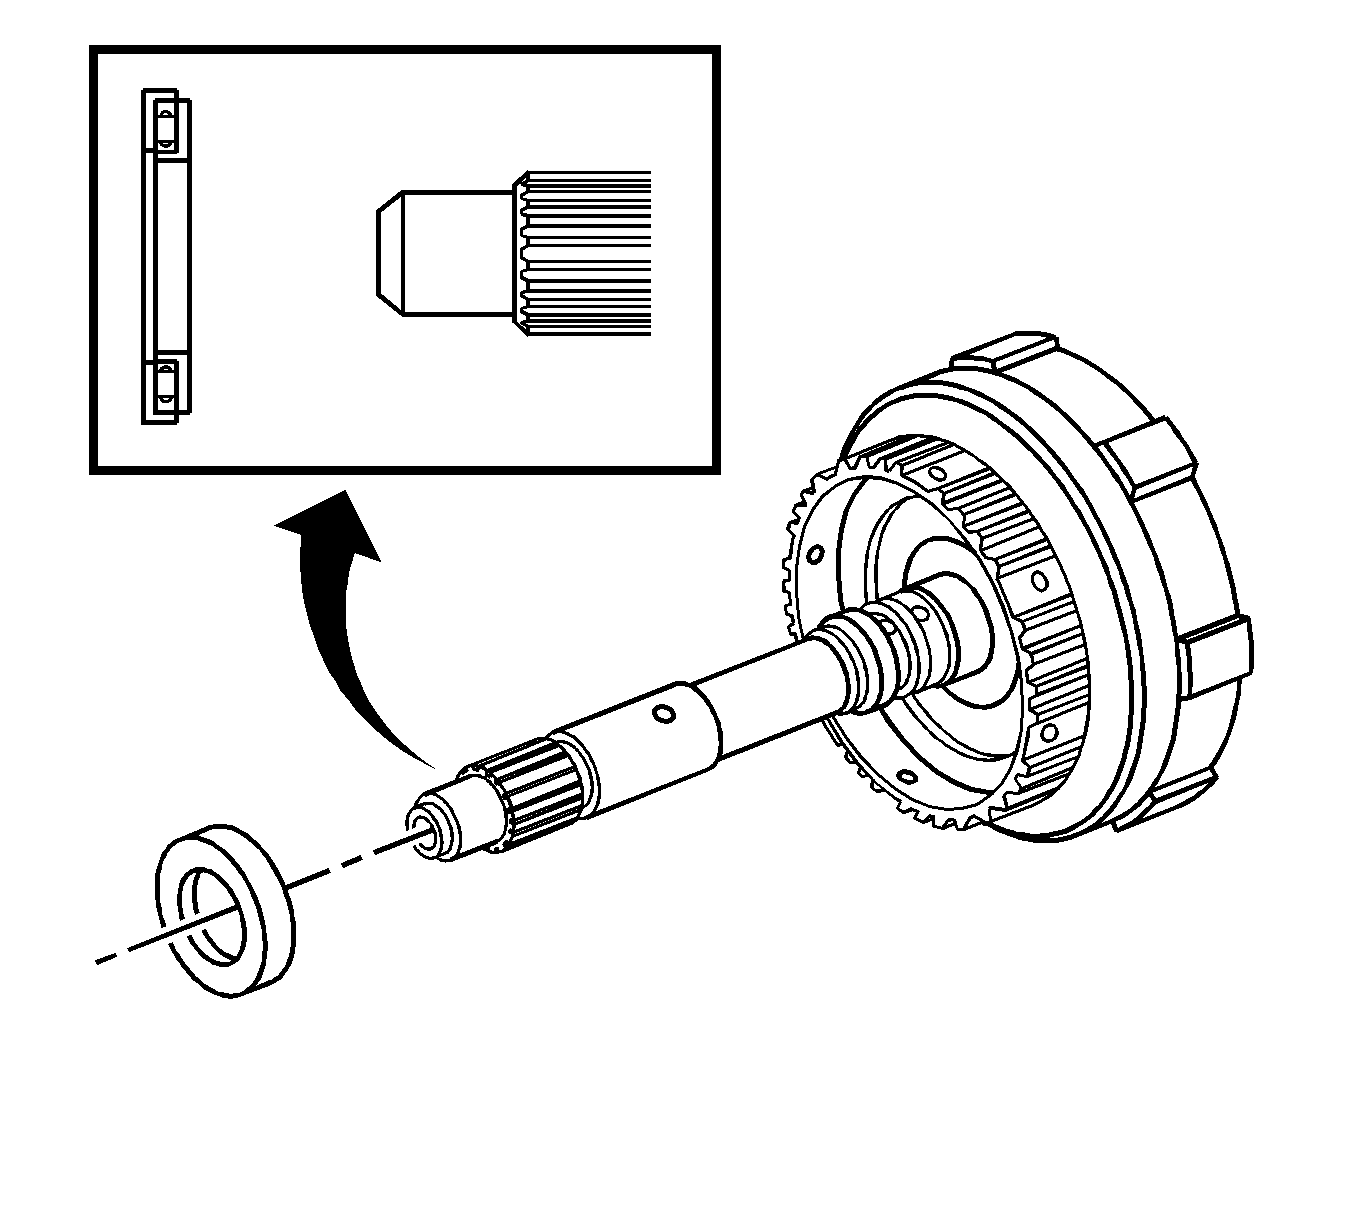
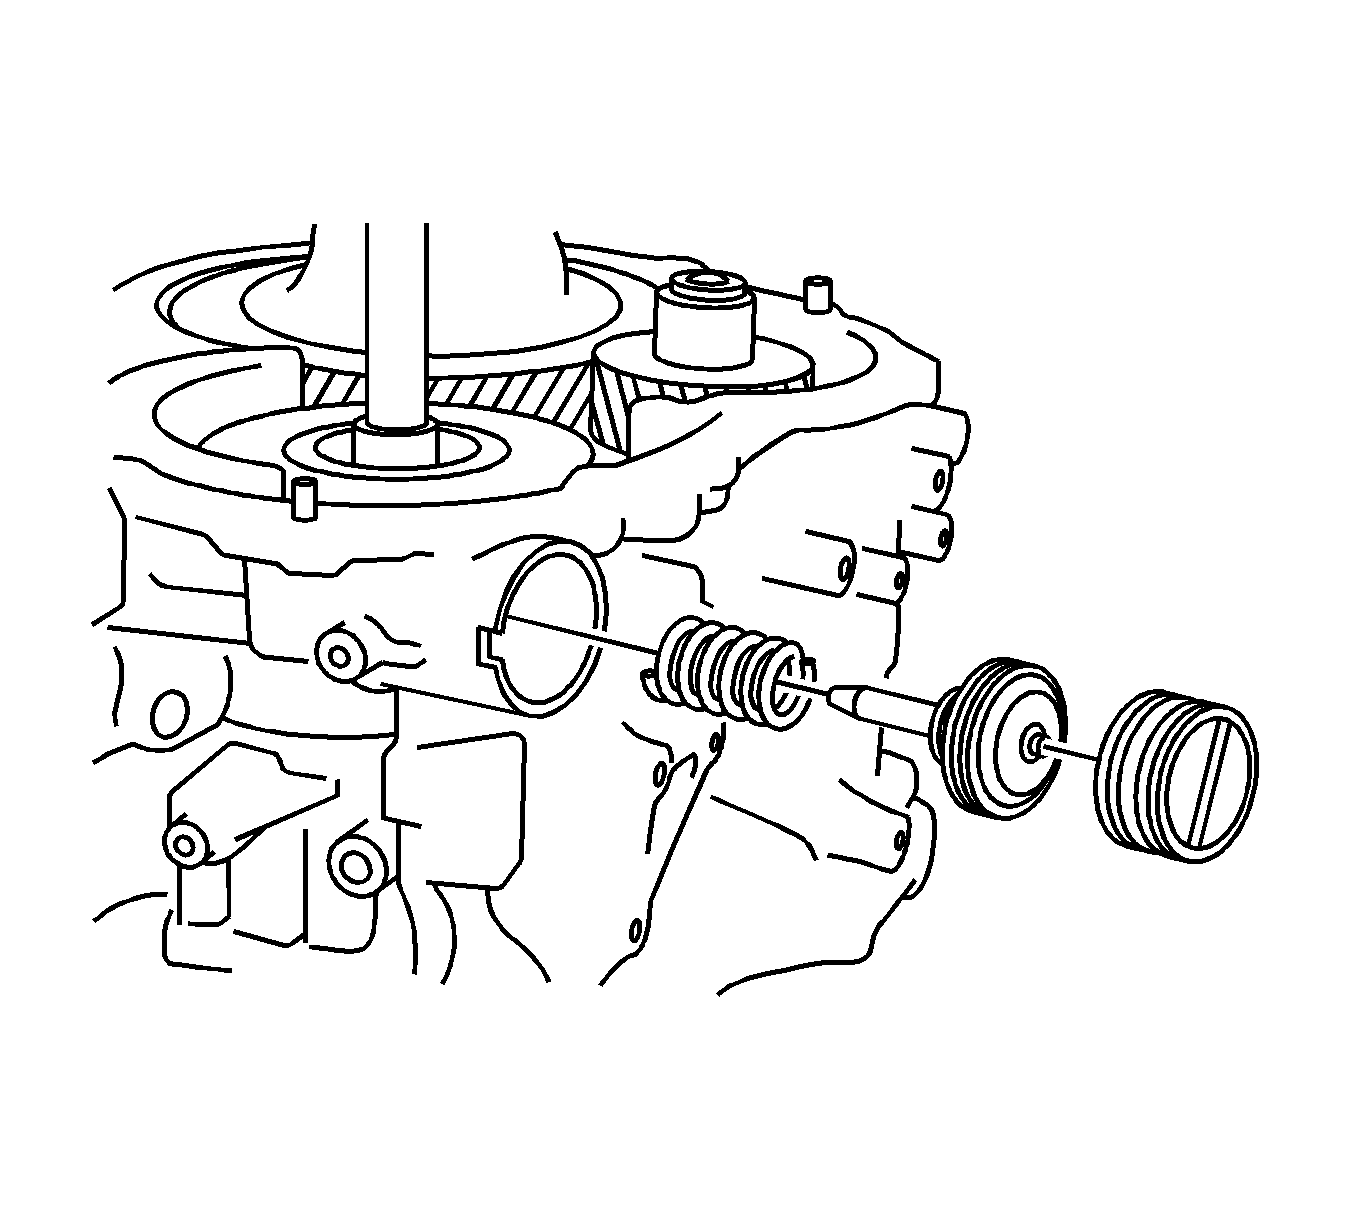
- Remove the underdrive planetary sun gear from the countershaft assembly.
- Remove the underdrive input shaft needle roller bearing and underdrive input shaft thrust bearing race.
- Install the underdrive planetary sun gear sub - assembly in the transaxle case.
- Coat the underdrive input shaft needle roller bearing and underdrive input shaft thrust bearing race with petroleum jelly or equivalent.
- Install the bearing and race in the transaxle case.
- Align the flukes of the discs in the underdrive clutch.
- Install the needle roller bearing with the bearings facing upward.
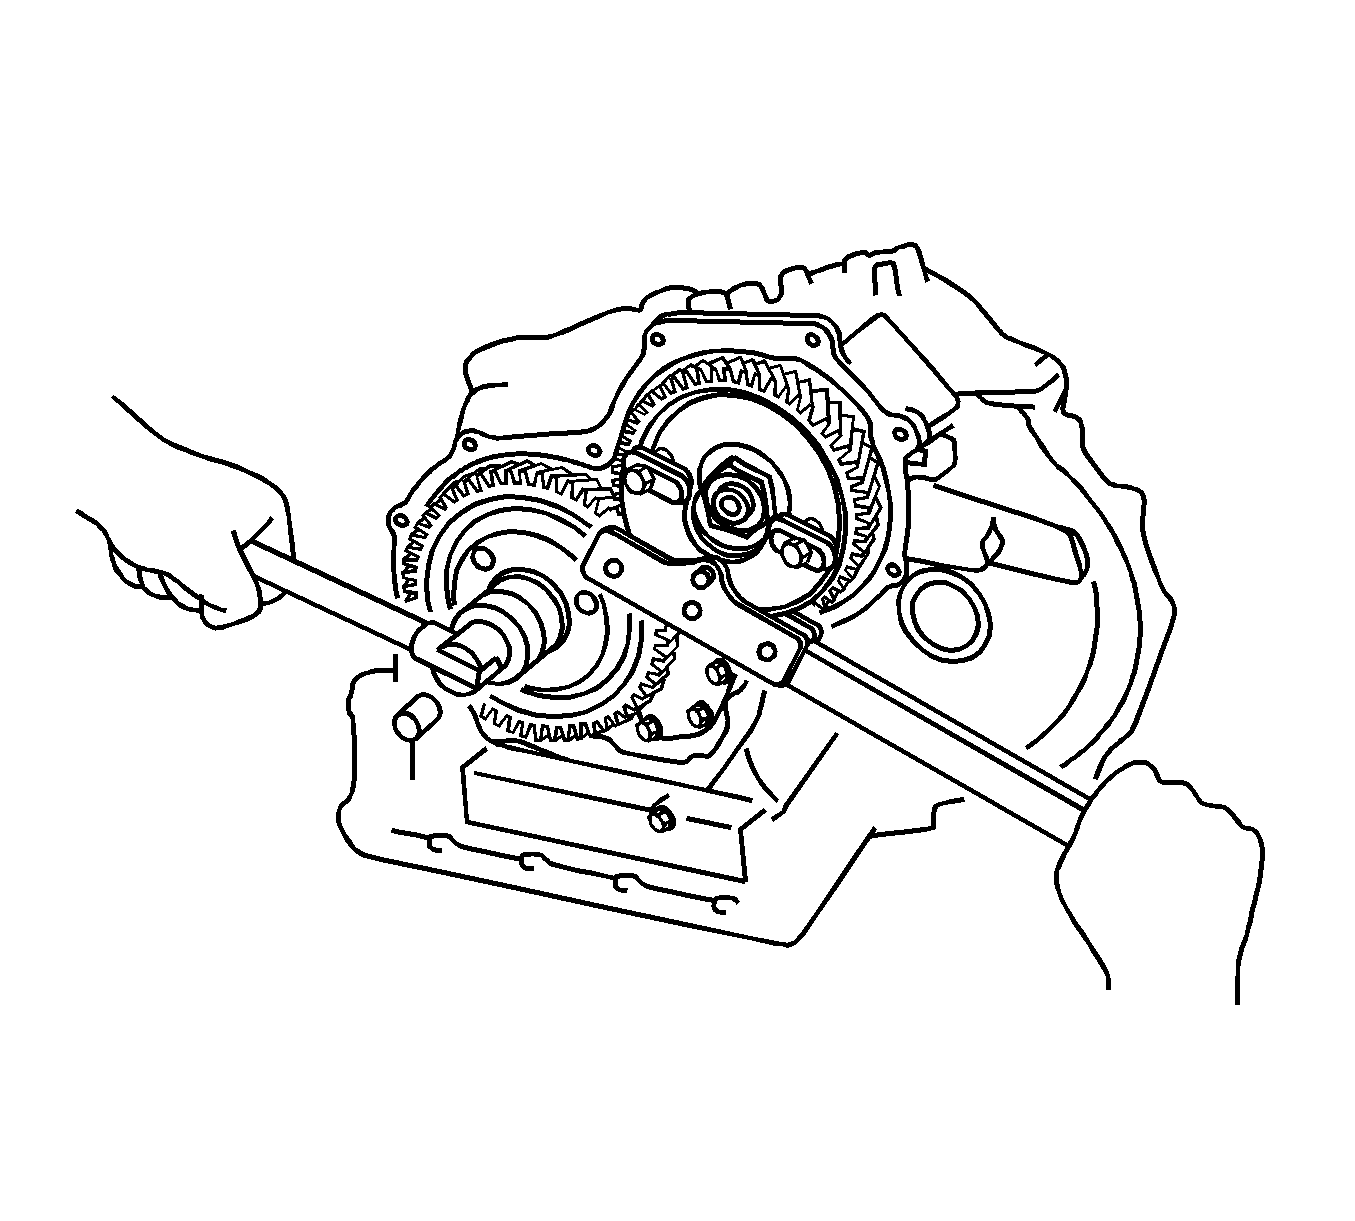
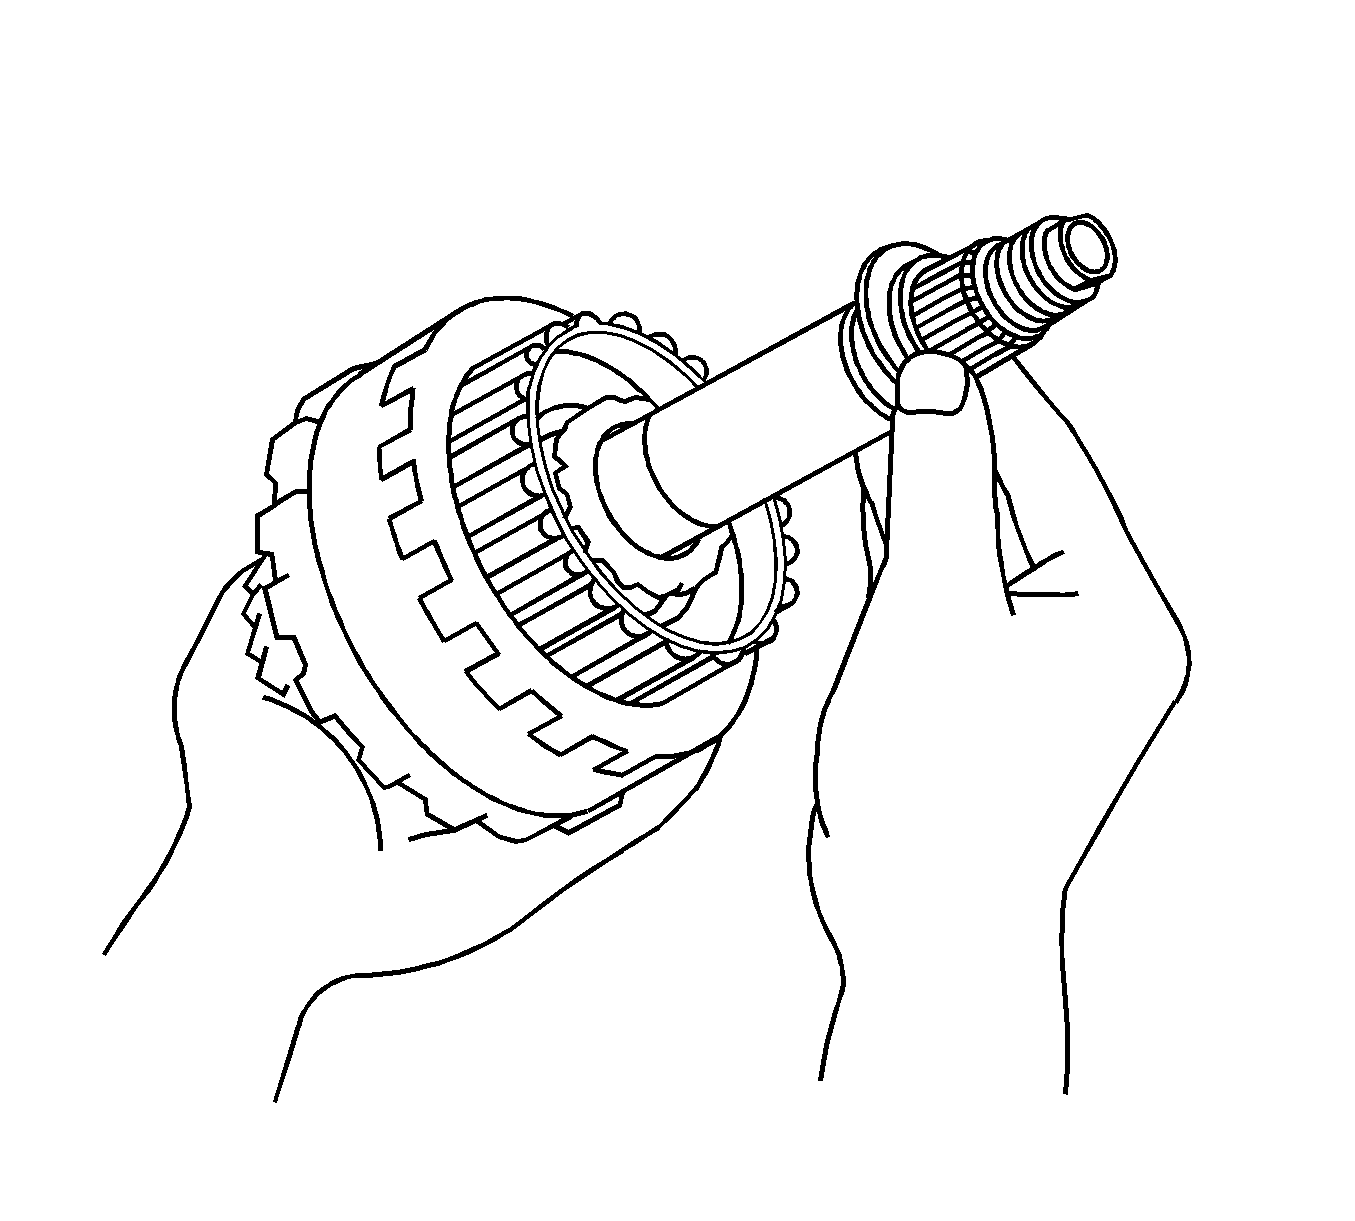
- Install the countershaft assembly in the transaxle case.
- Using Vernier Calipers, measure the distance between the tip of the countershaft and the bolt seat of the clutch support. The installation height should be 33.3-35.5 mm (1.311-1.398 in).
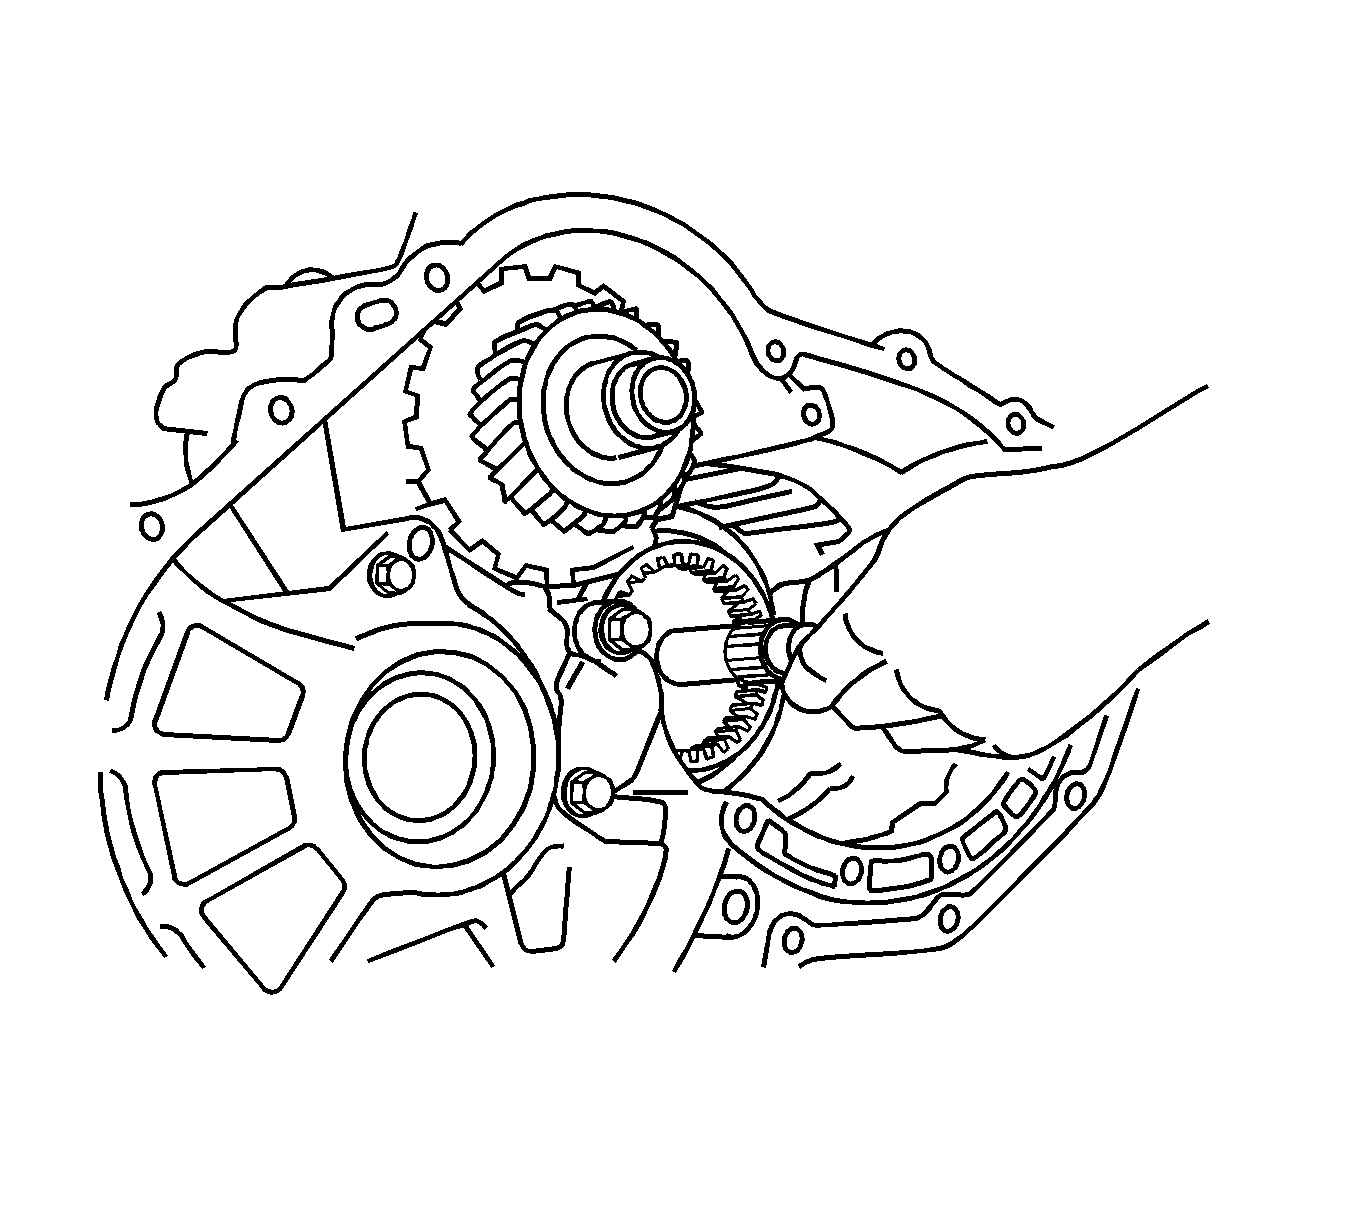
- Install the new counterdrive gear bearing on the counterdrive gear.
- Install a new snap ring to retain the bearing.
- Using a press, install the counter drive gear.
- Install the intermediate shaft sub-assembly in the transaxle case.
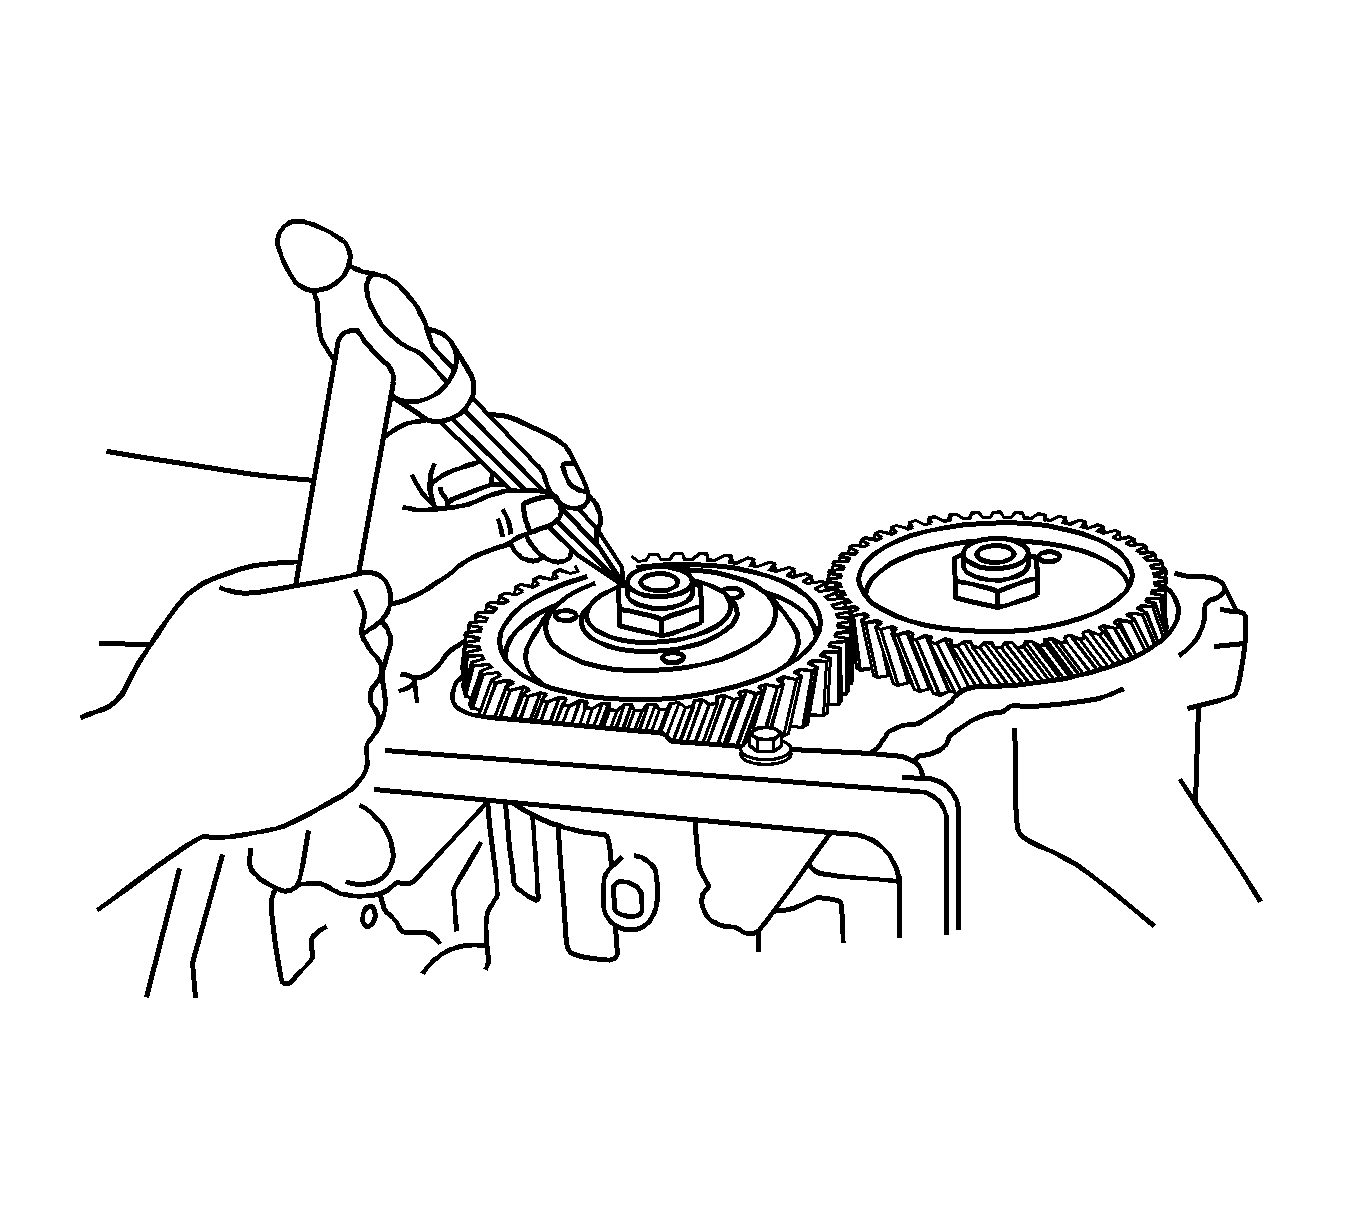
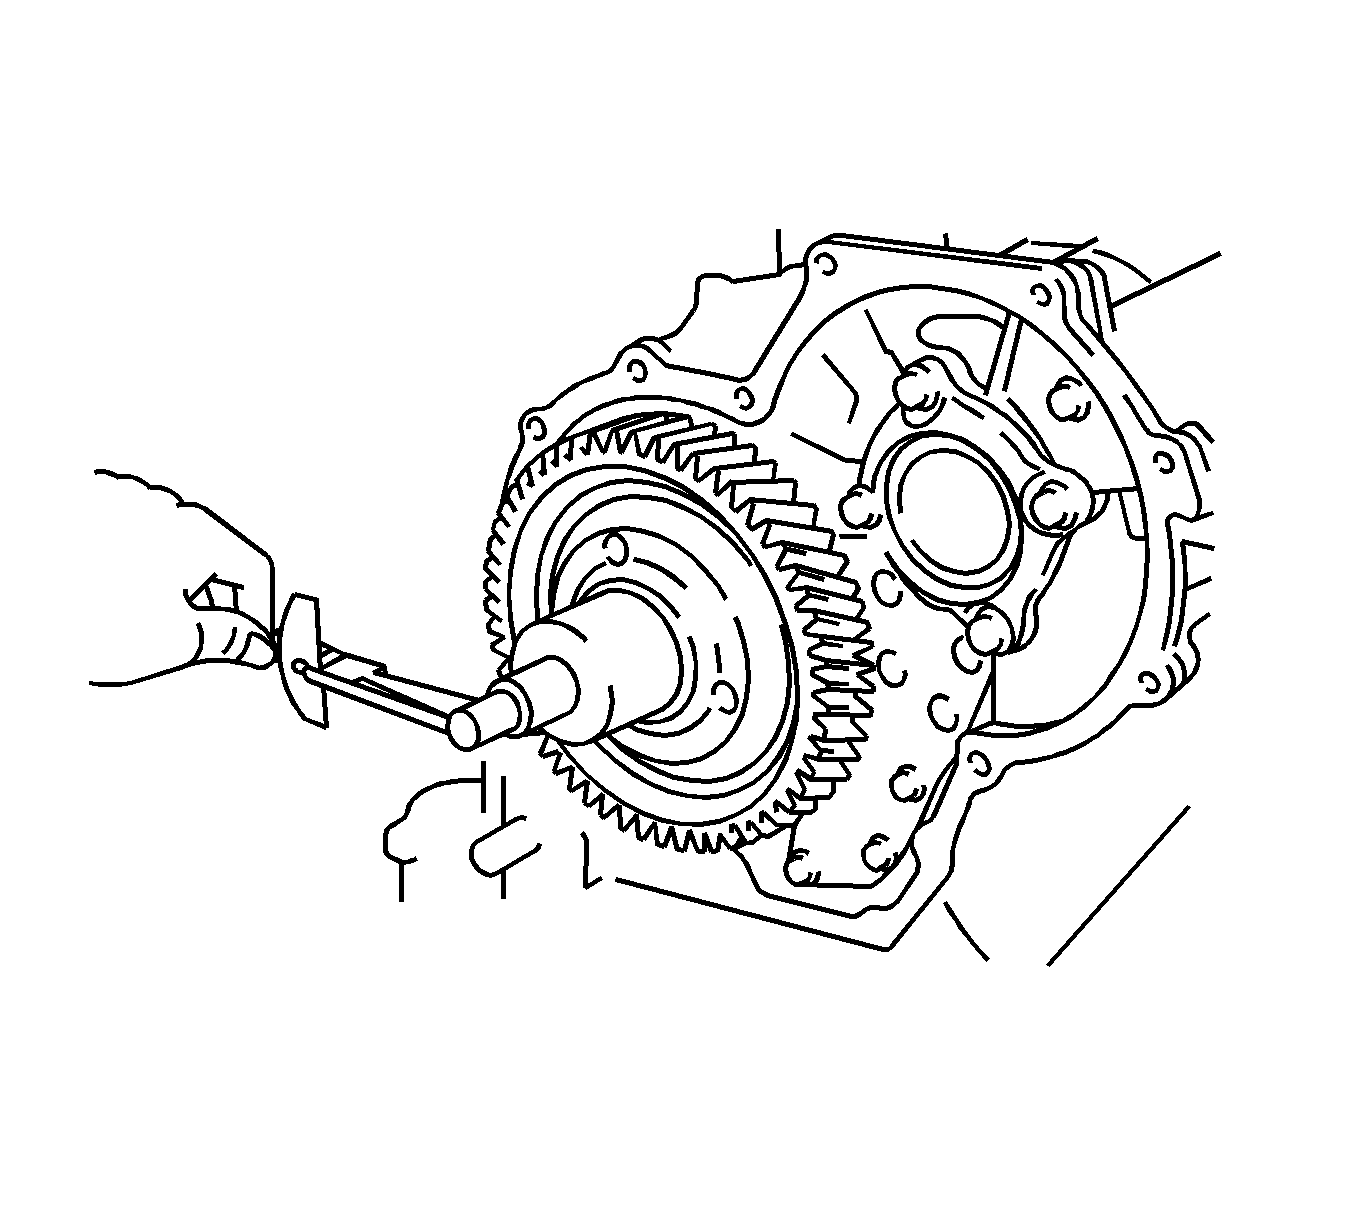
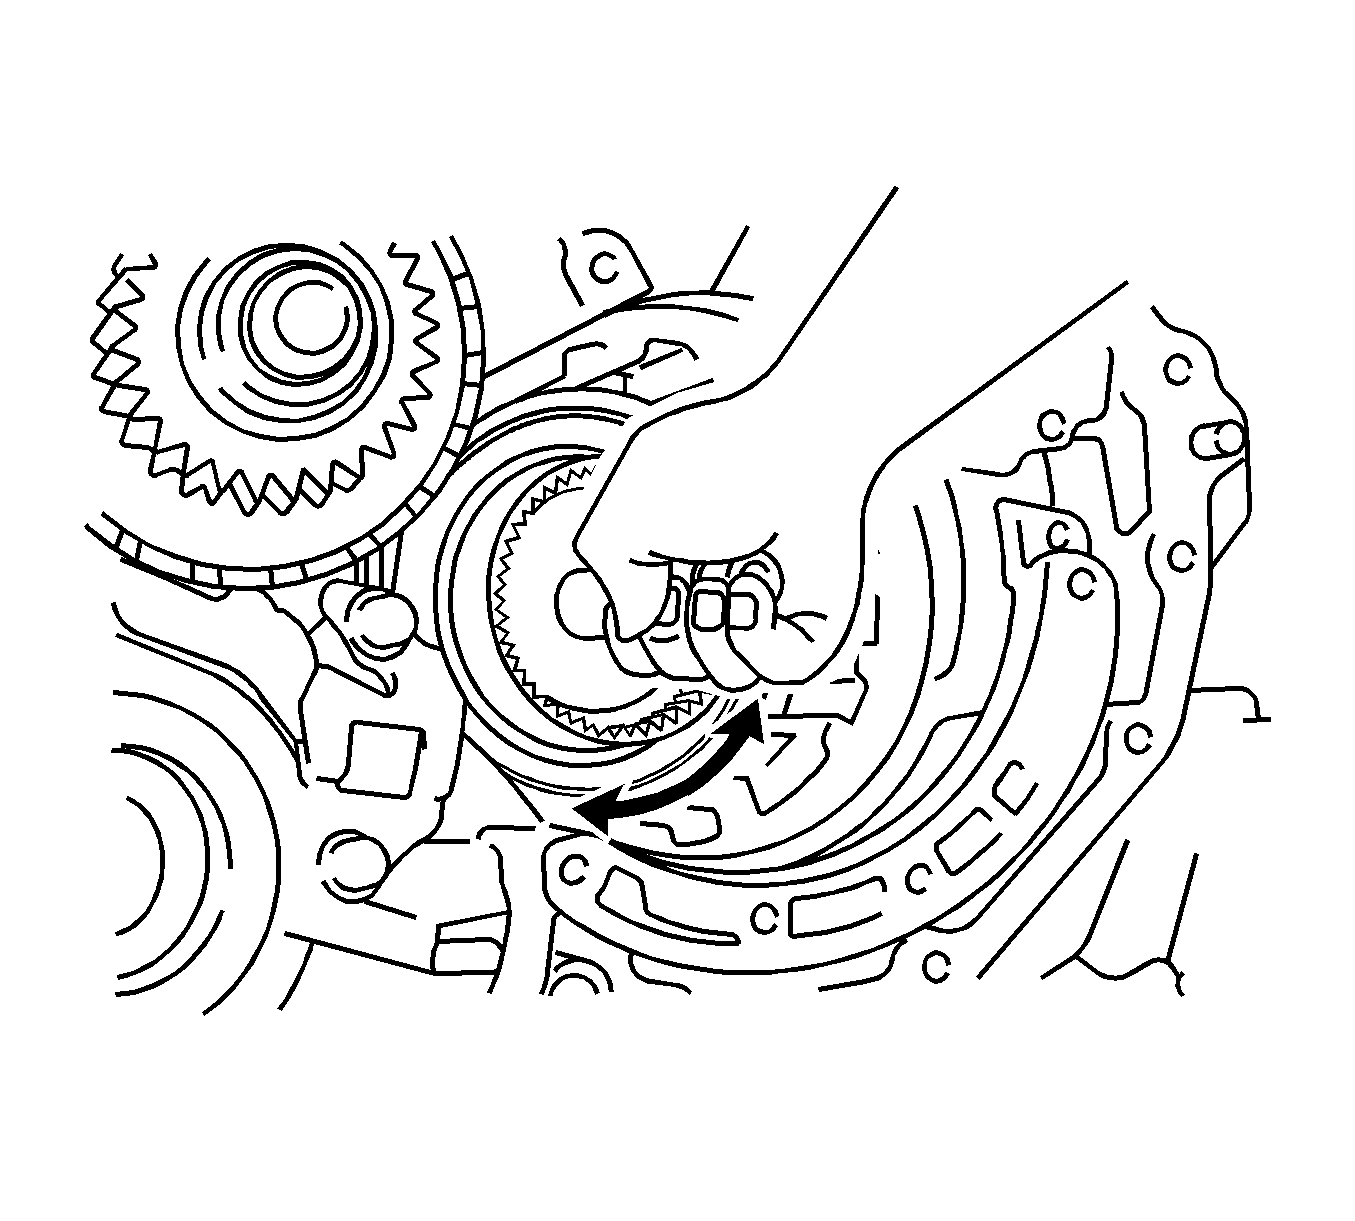
- While holding the counter drive gear, install a new counter drive gear nut.
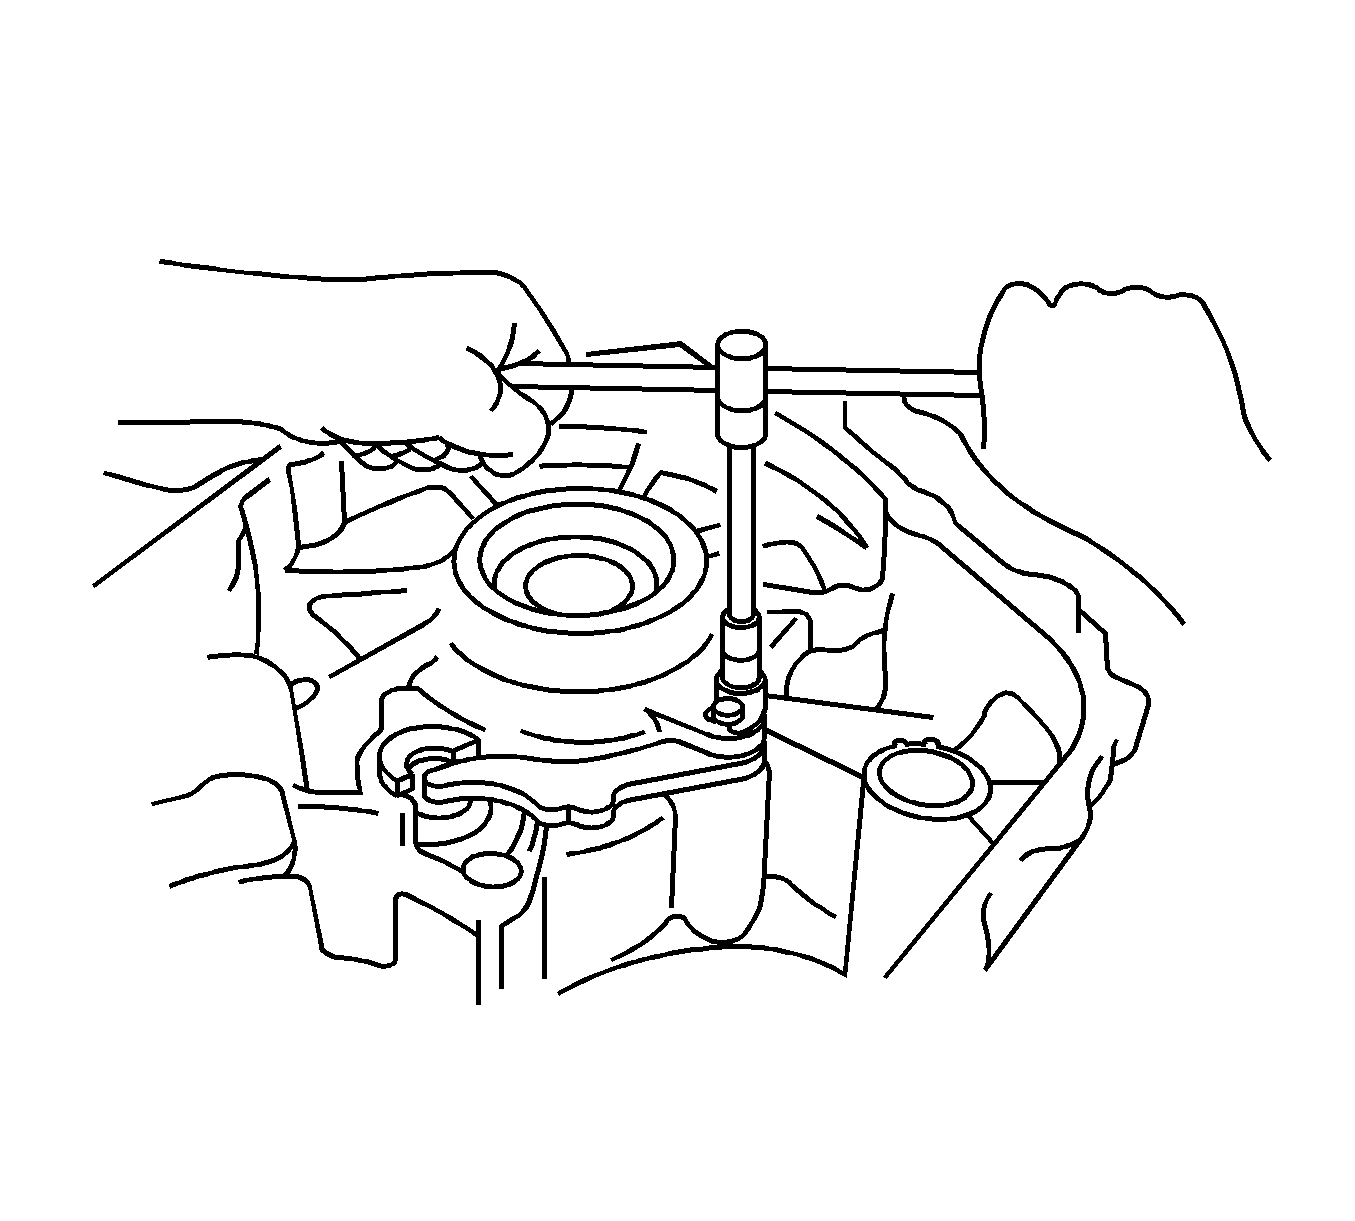
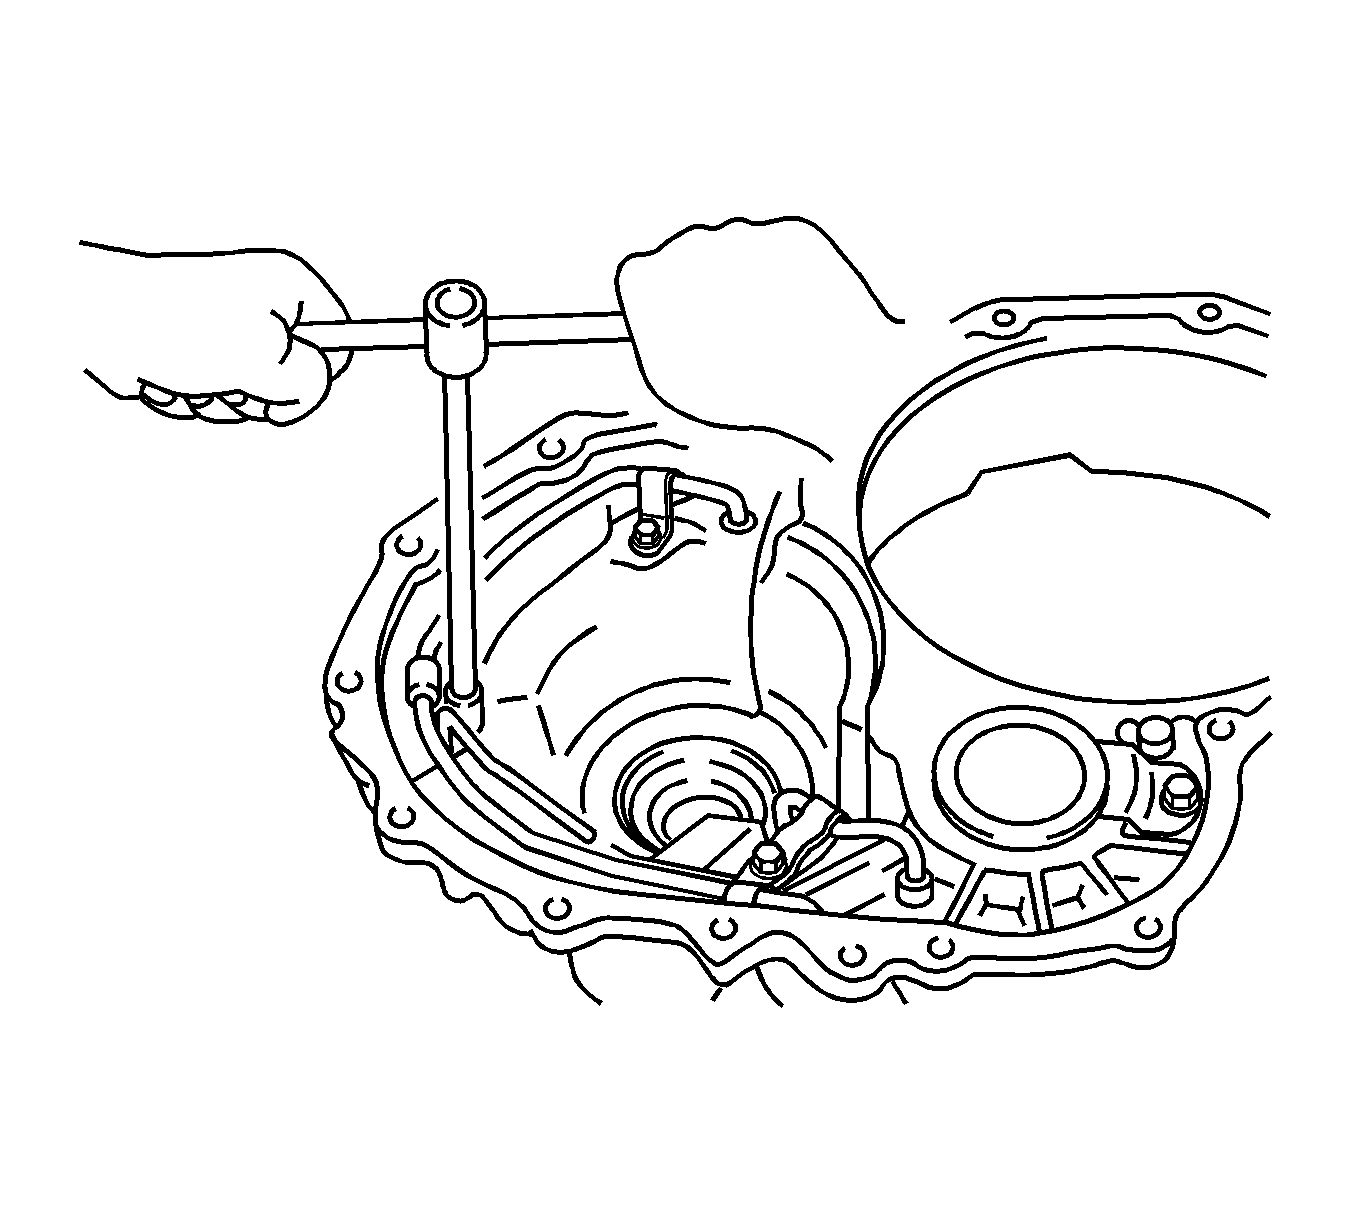
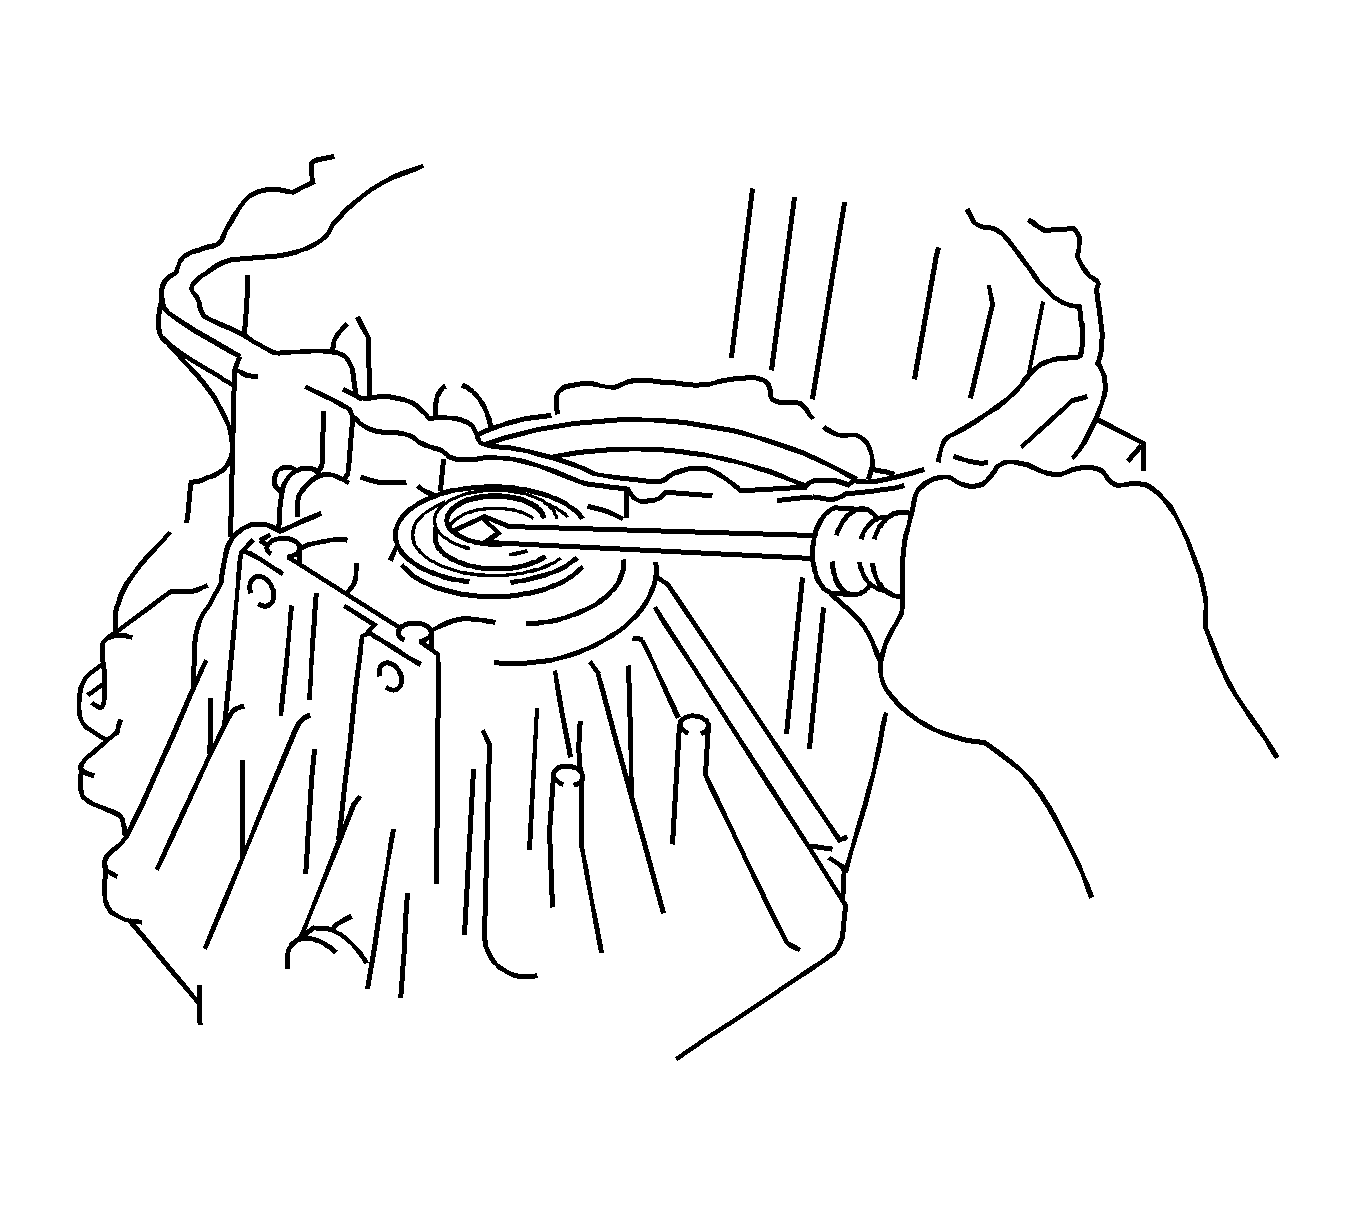
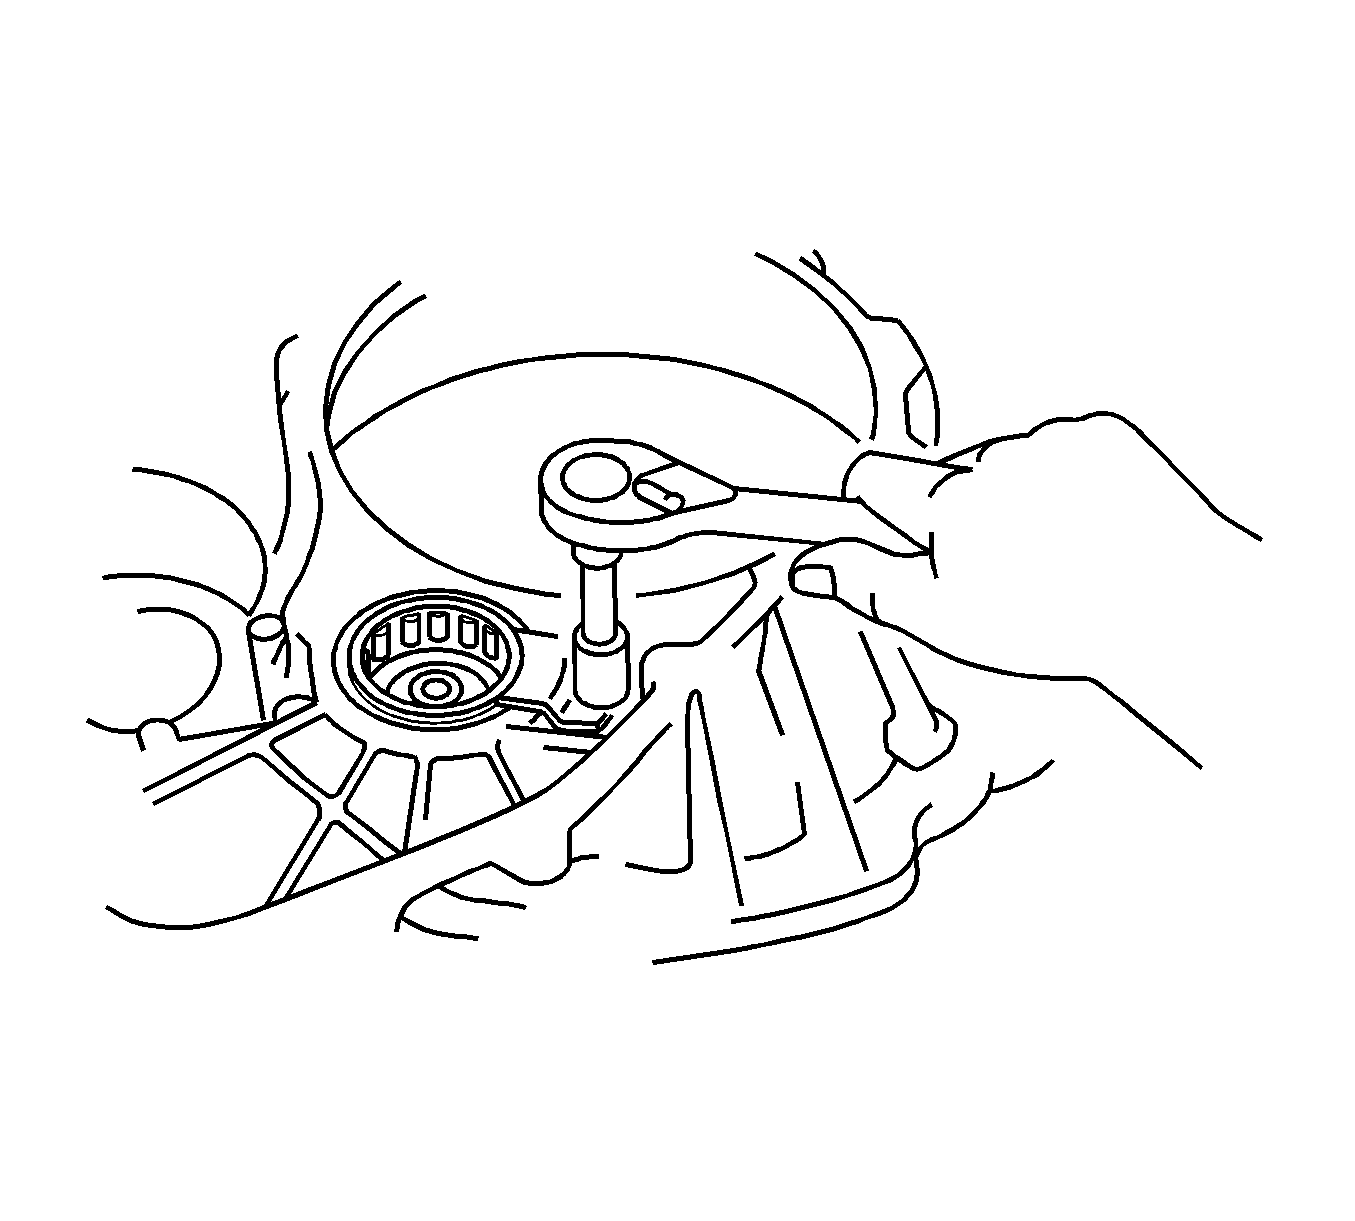
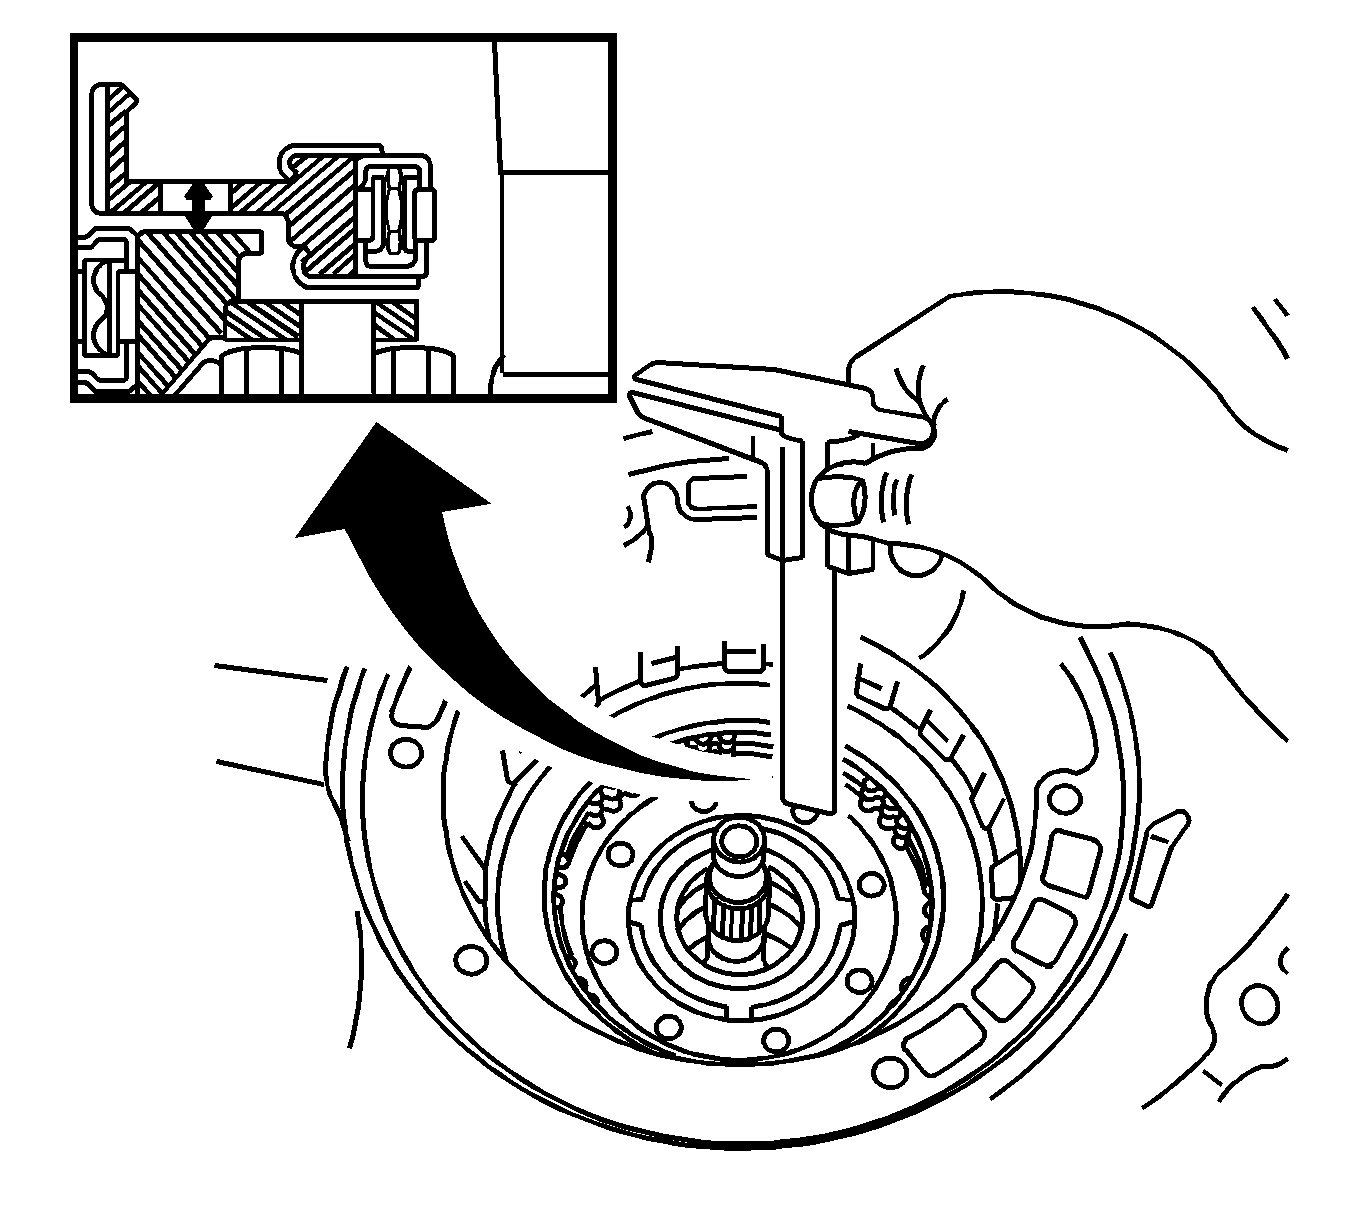
- Using a torque wrench, measure the starting torque of the counter drive gear.
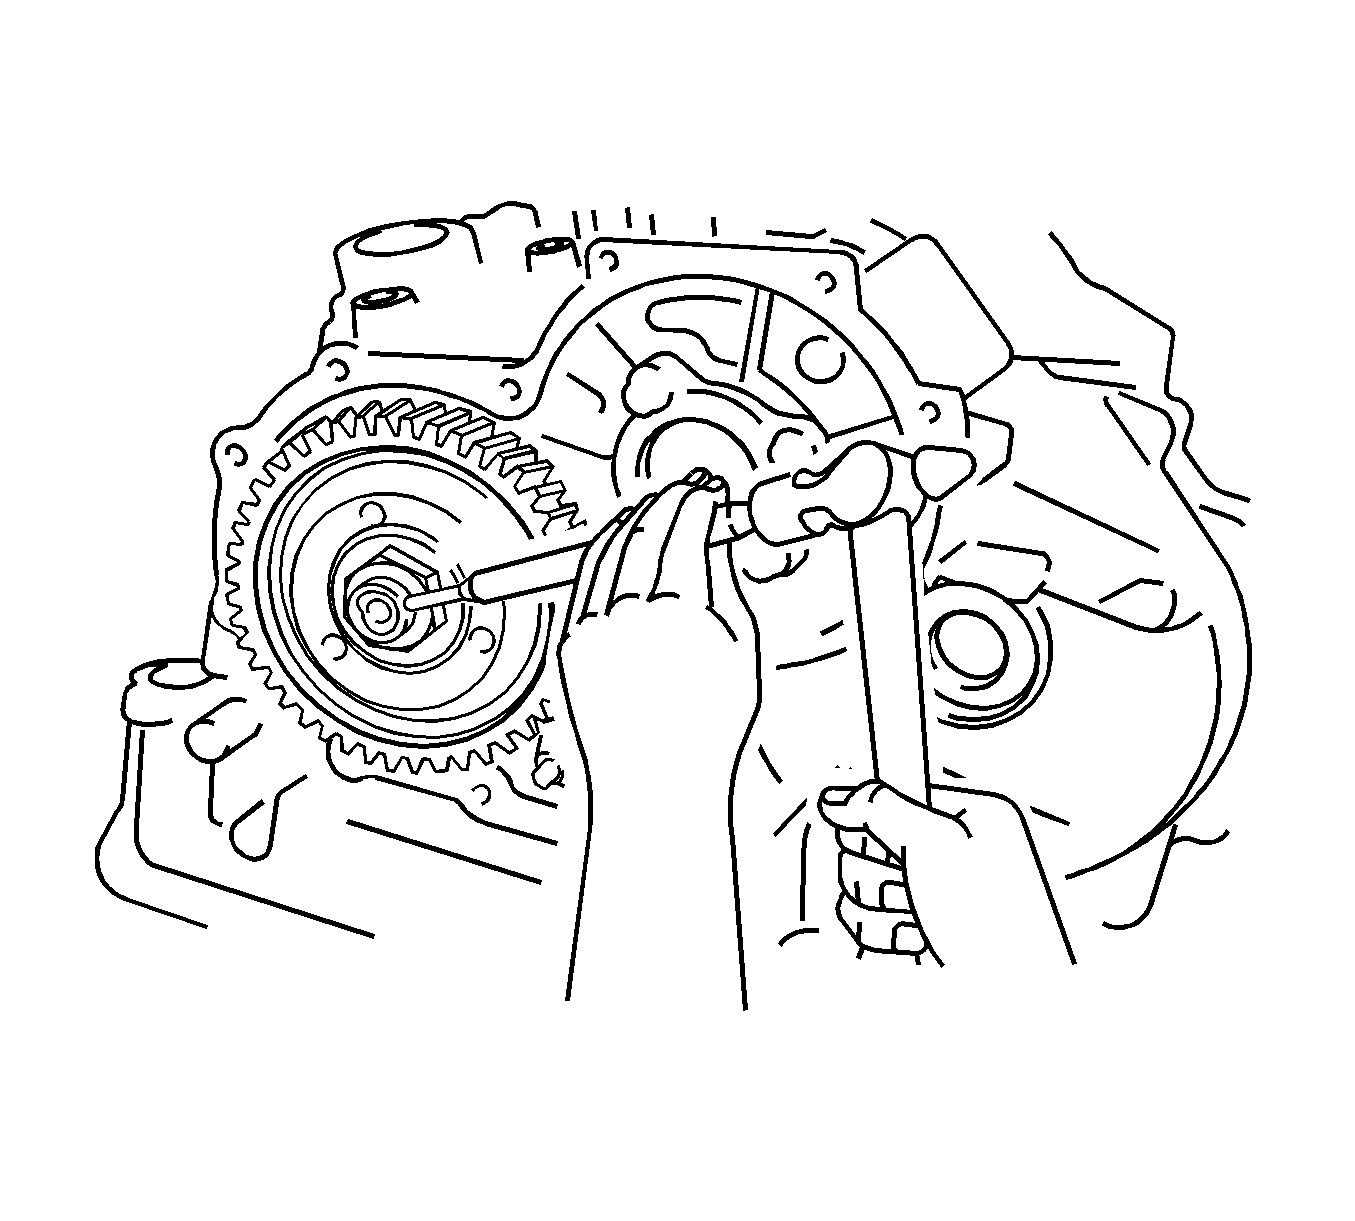
- Using a pin punch and hammer, stake the counter drive gear nut.
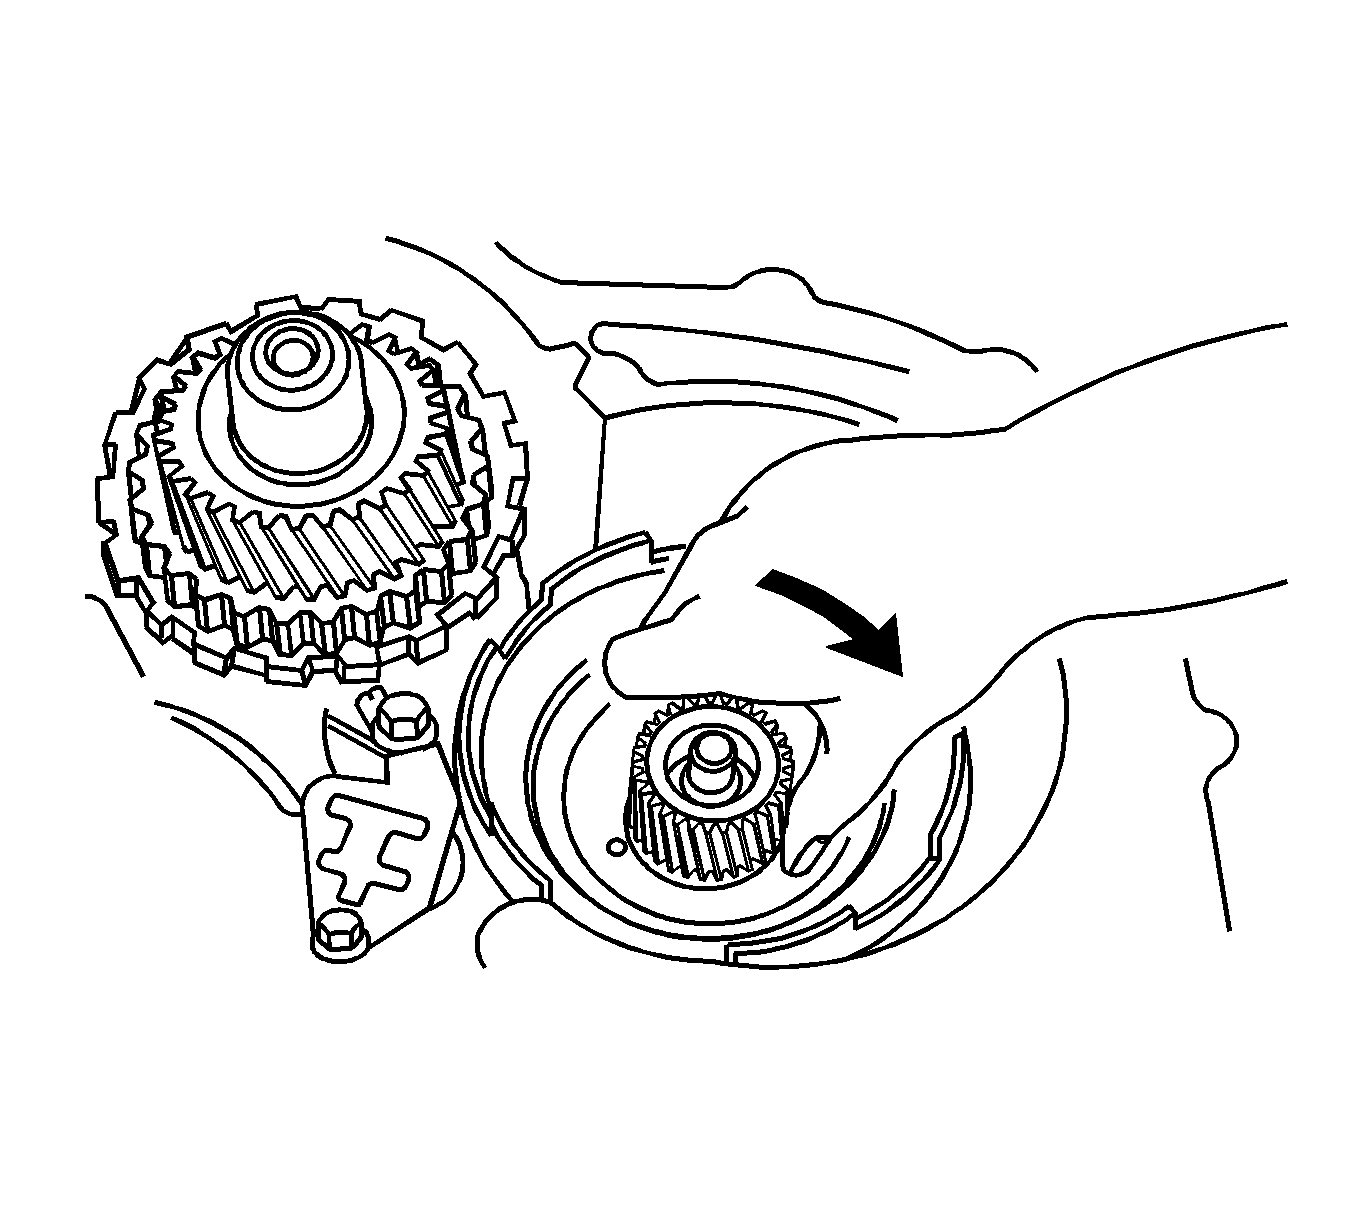
- Install the needle roller bearing in the transaxle case.
- Using a press, install the counter driven gear on the transaxle case.
- Install a new counter driven gear nut.
- Using a dial indicator, measure the endplay of the countershaft.
- Using a pin punch and hammer, stake the counter driven gear nut.
- Clean the mating surfaces of the transaxle case and the case cover.
- Apply RTV Silicone Sealant GM P/N 12346240 (Canadian P/N 10953493) or the equivalent to the transaxle case cover.
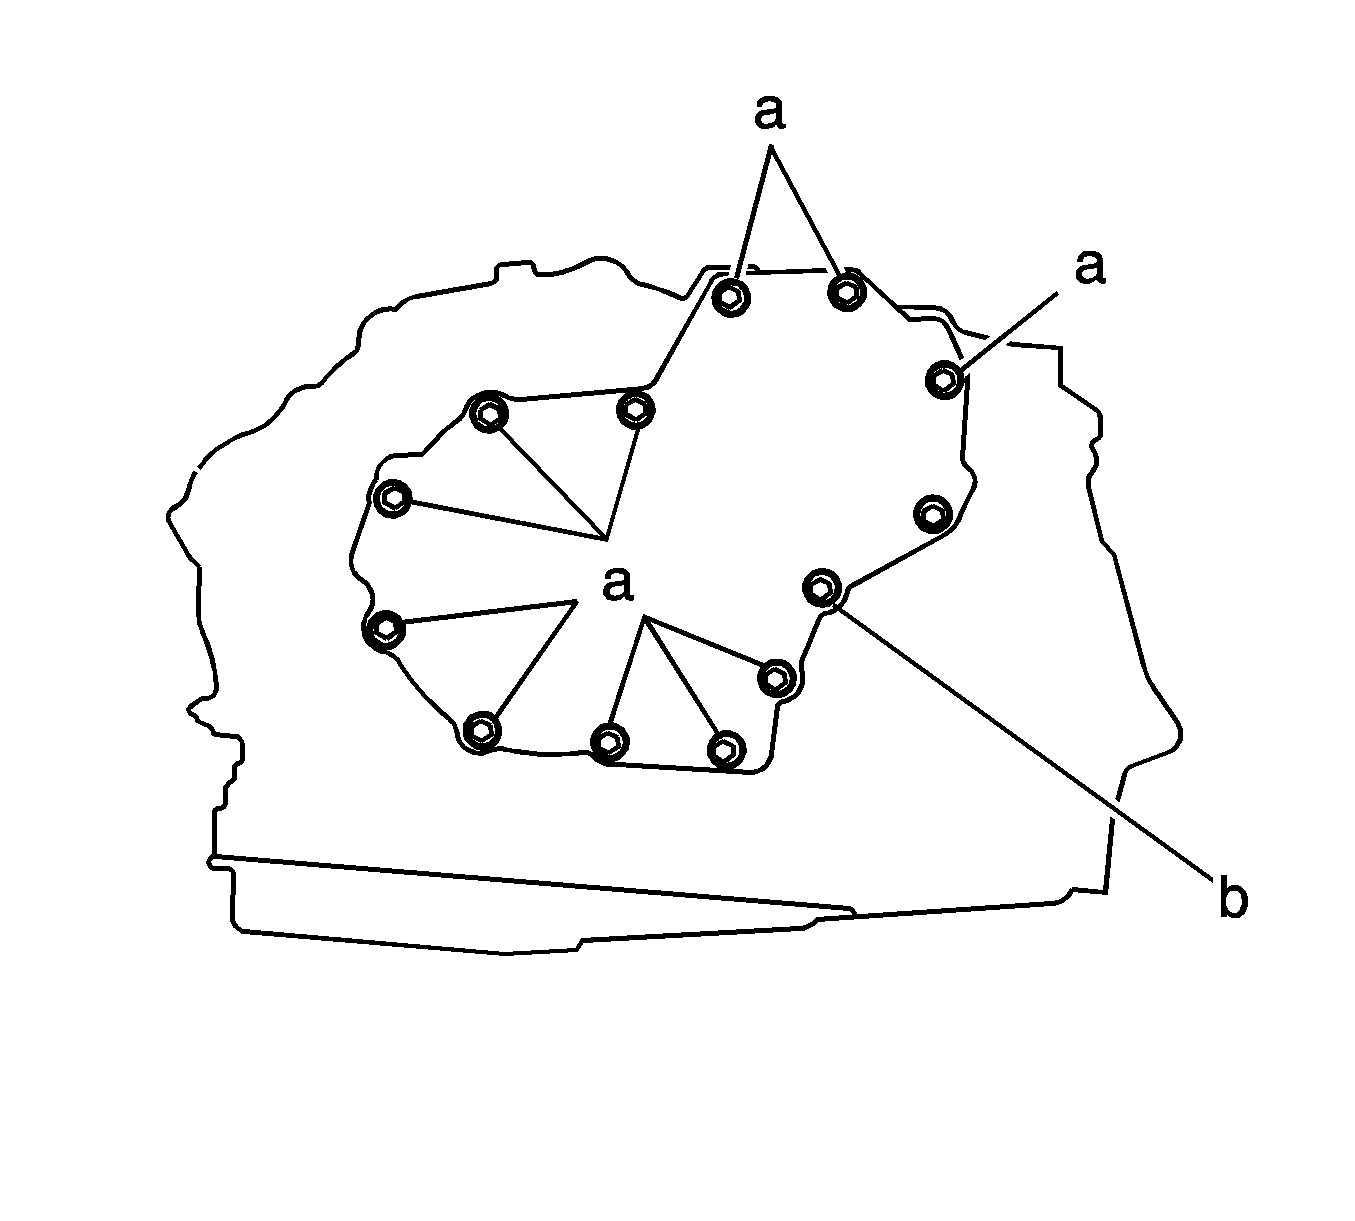
- Install bolts A: 25 mm (0.98 in) in length into the positions shown.
- Install bolts B: 32 mm (1.26 in) in length into the positions shown.
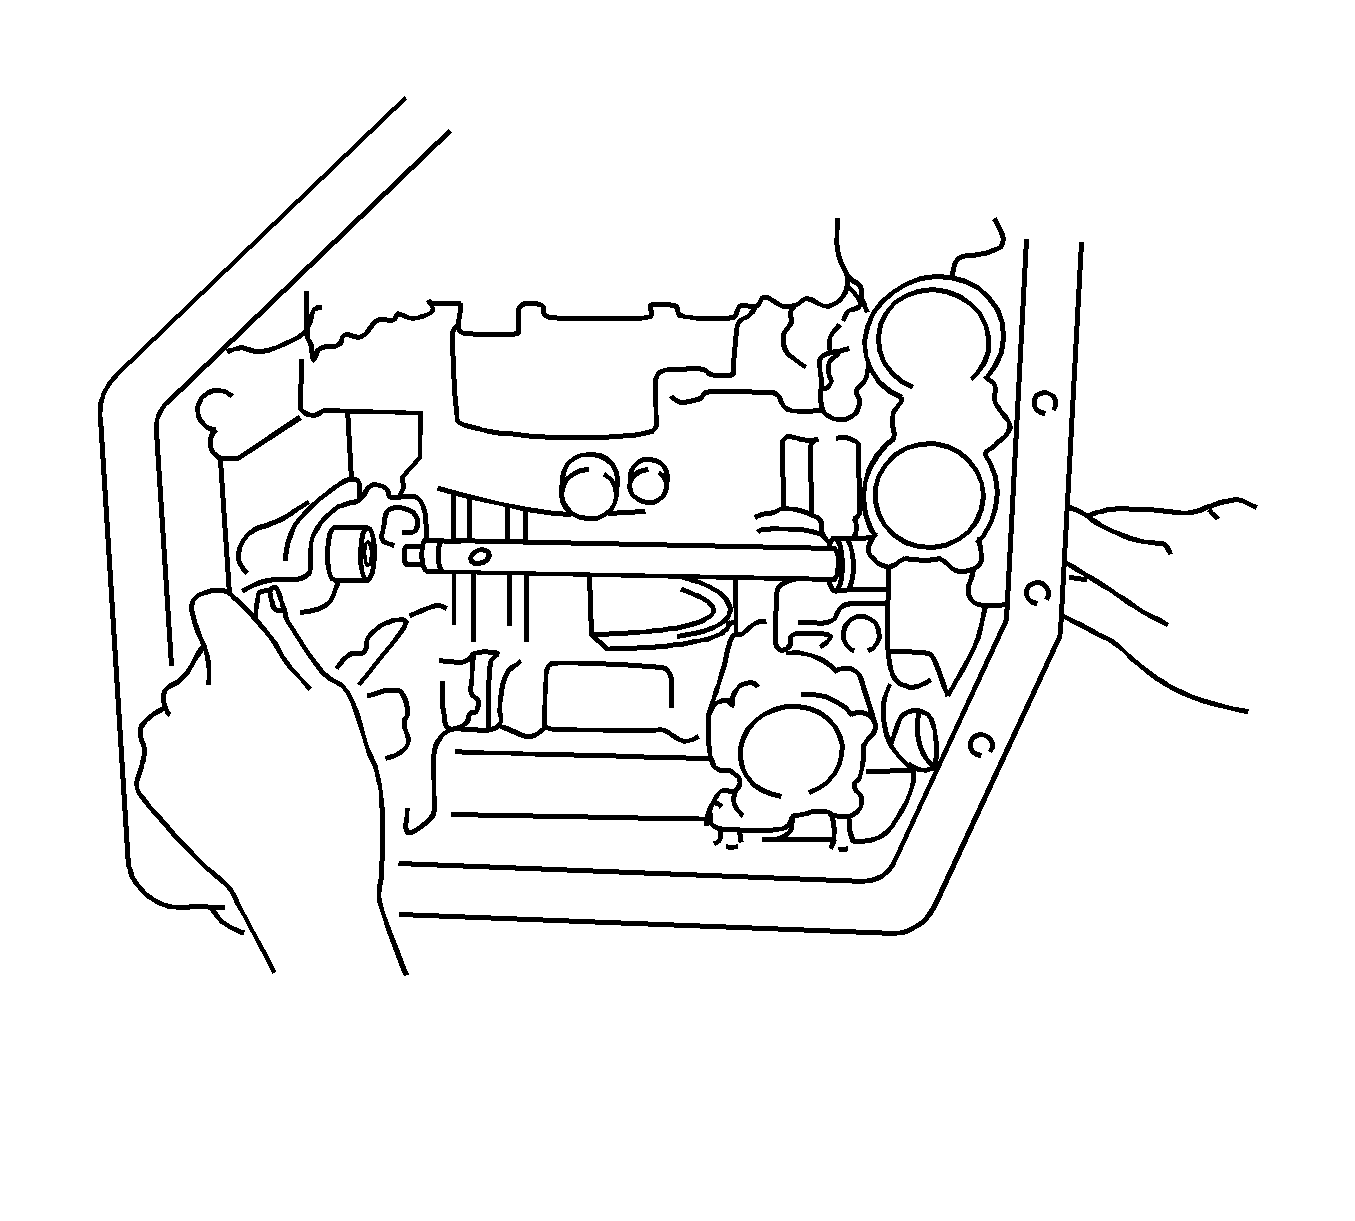
- Ensure that the intermediate shaft sub-assembly turns smoothly.
- Coat the 2 new 1st and reverse O-rings with T-IV automatic transmission fluid.
- Install the new O-rings on the 1st and reverse brake piston.
- Install the 1st and reverse brake piston into the bore of the case, facing the spring seats upward.
- Install the 1st and reverse brake return spring and snap ring into position.
- Using a press, compress the 1st and reverse brake return spring sub-assembly.
- Using snap ring pliers, install the snap ring.
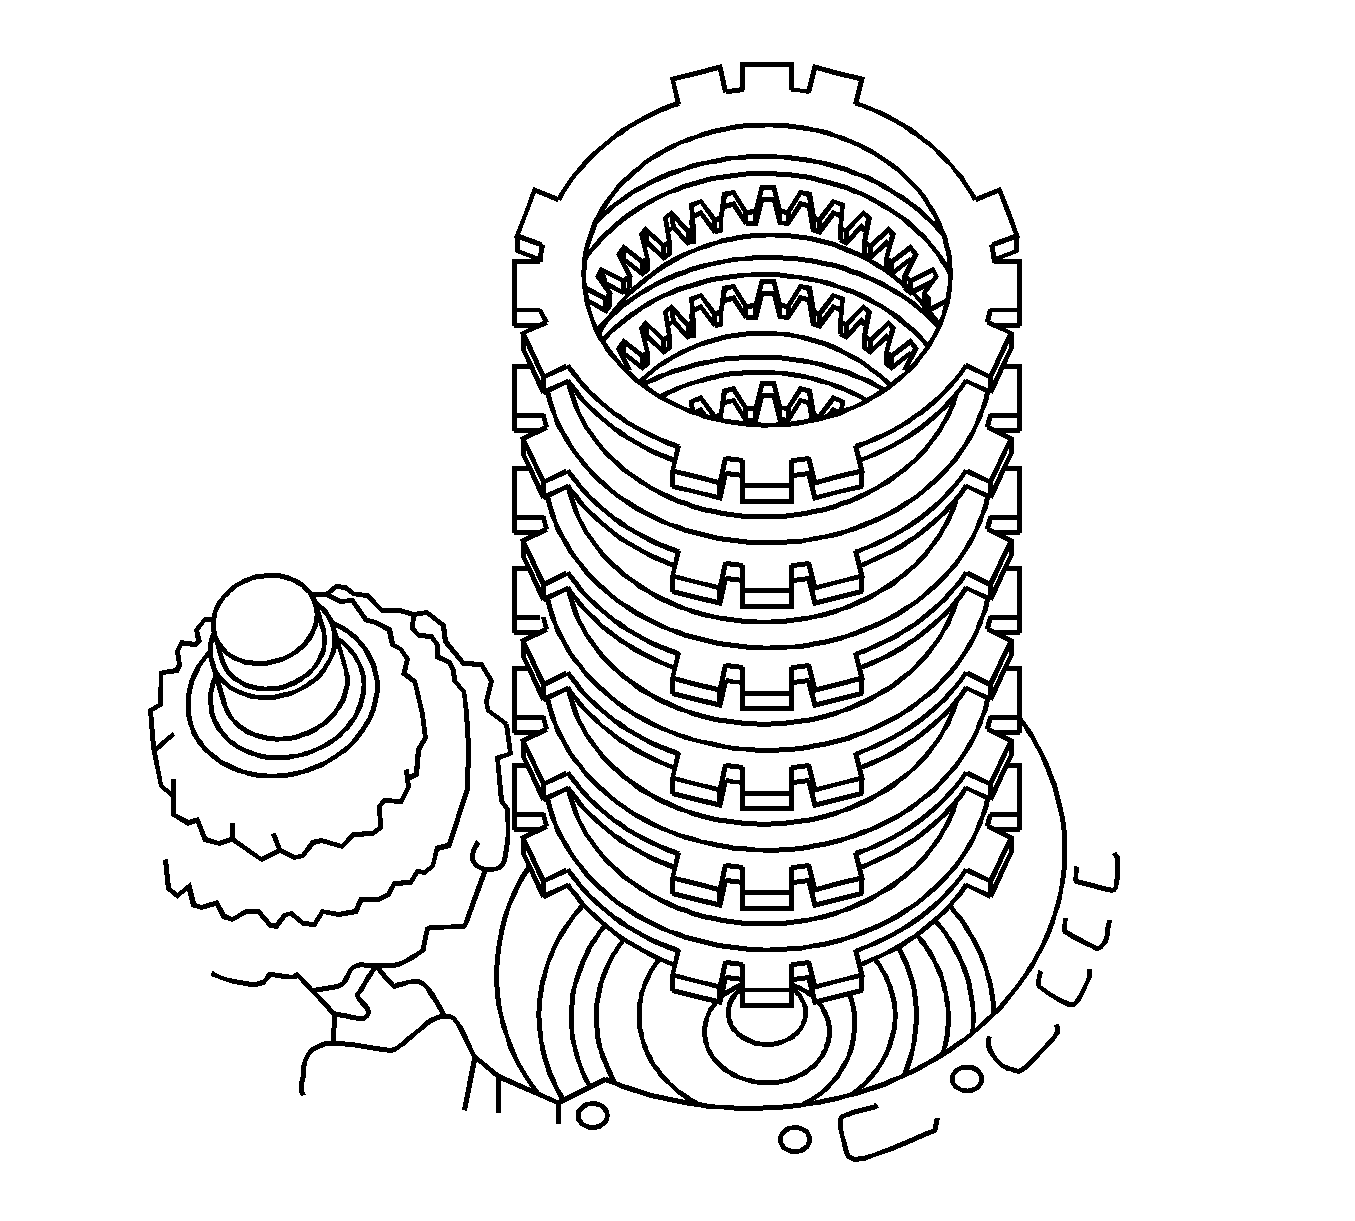
- Install the 1st and reverse brake clutch discs, in the following order: P - D - P - D - P - D - P - D - P - D - P - D.
- Install the outer flange with the flat side facing downward.
- Using a screwdriver, install the snap ring to the transaxle case.
- Using a feeler gage, measure the 1st and reverse brake pack clearance. Pack clearance should be 1.19-2.25 mm (0.0469-0.0886 in).
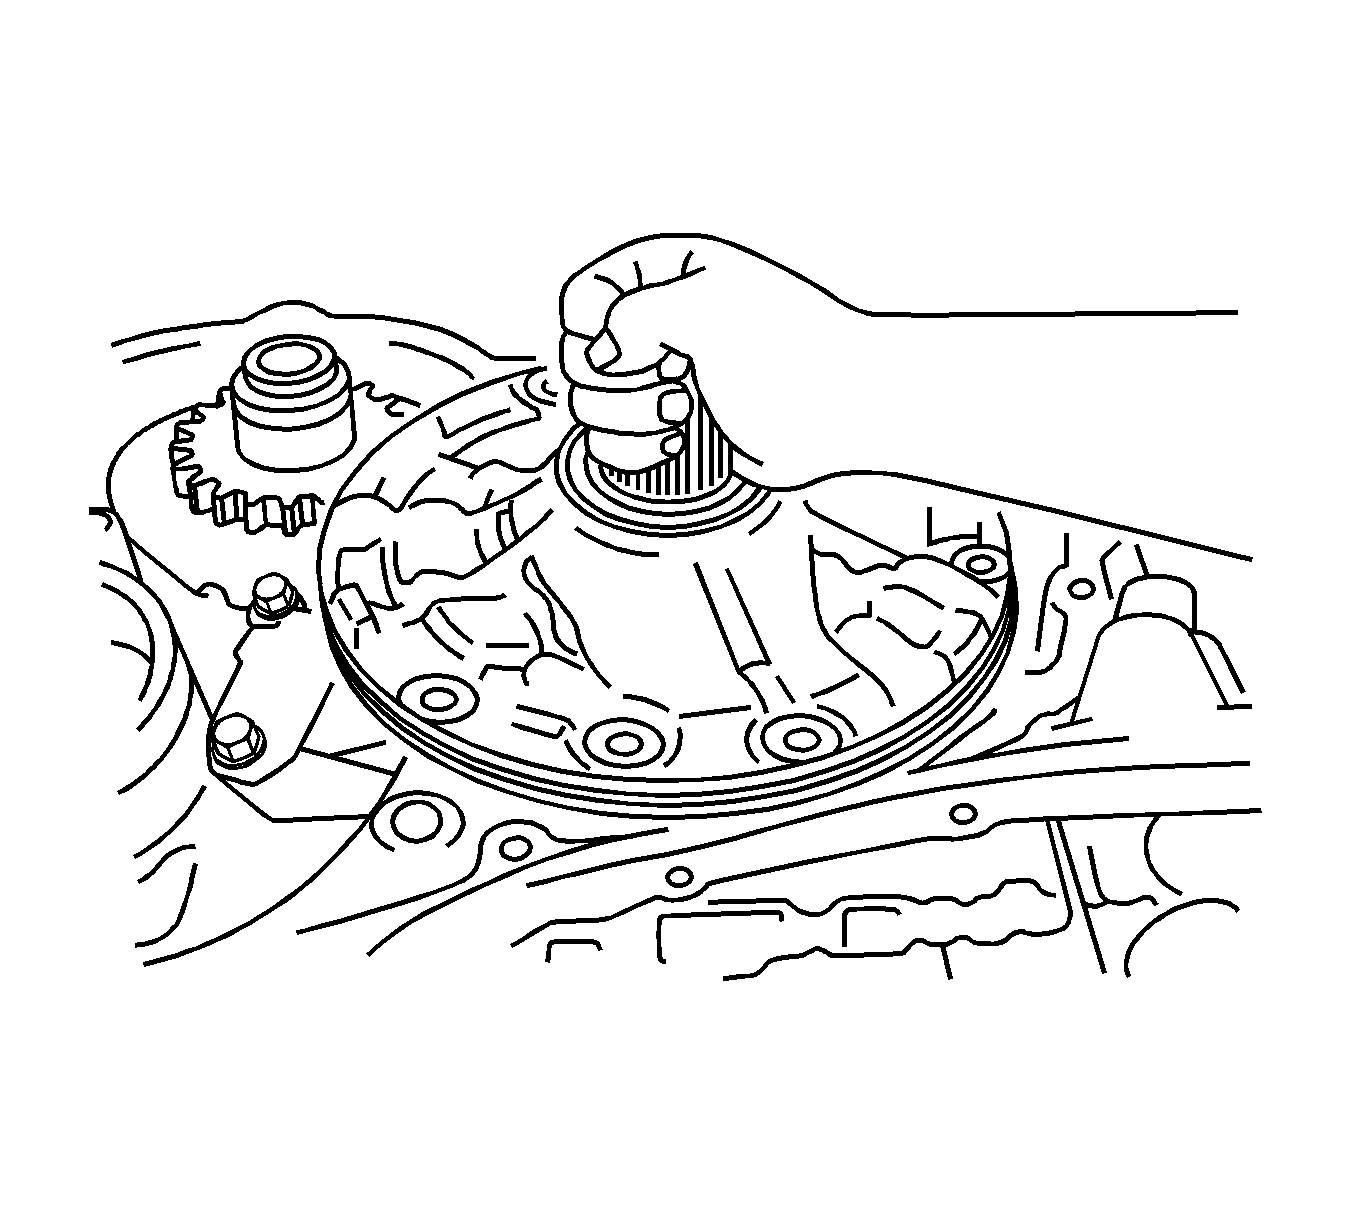
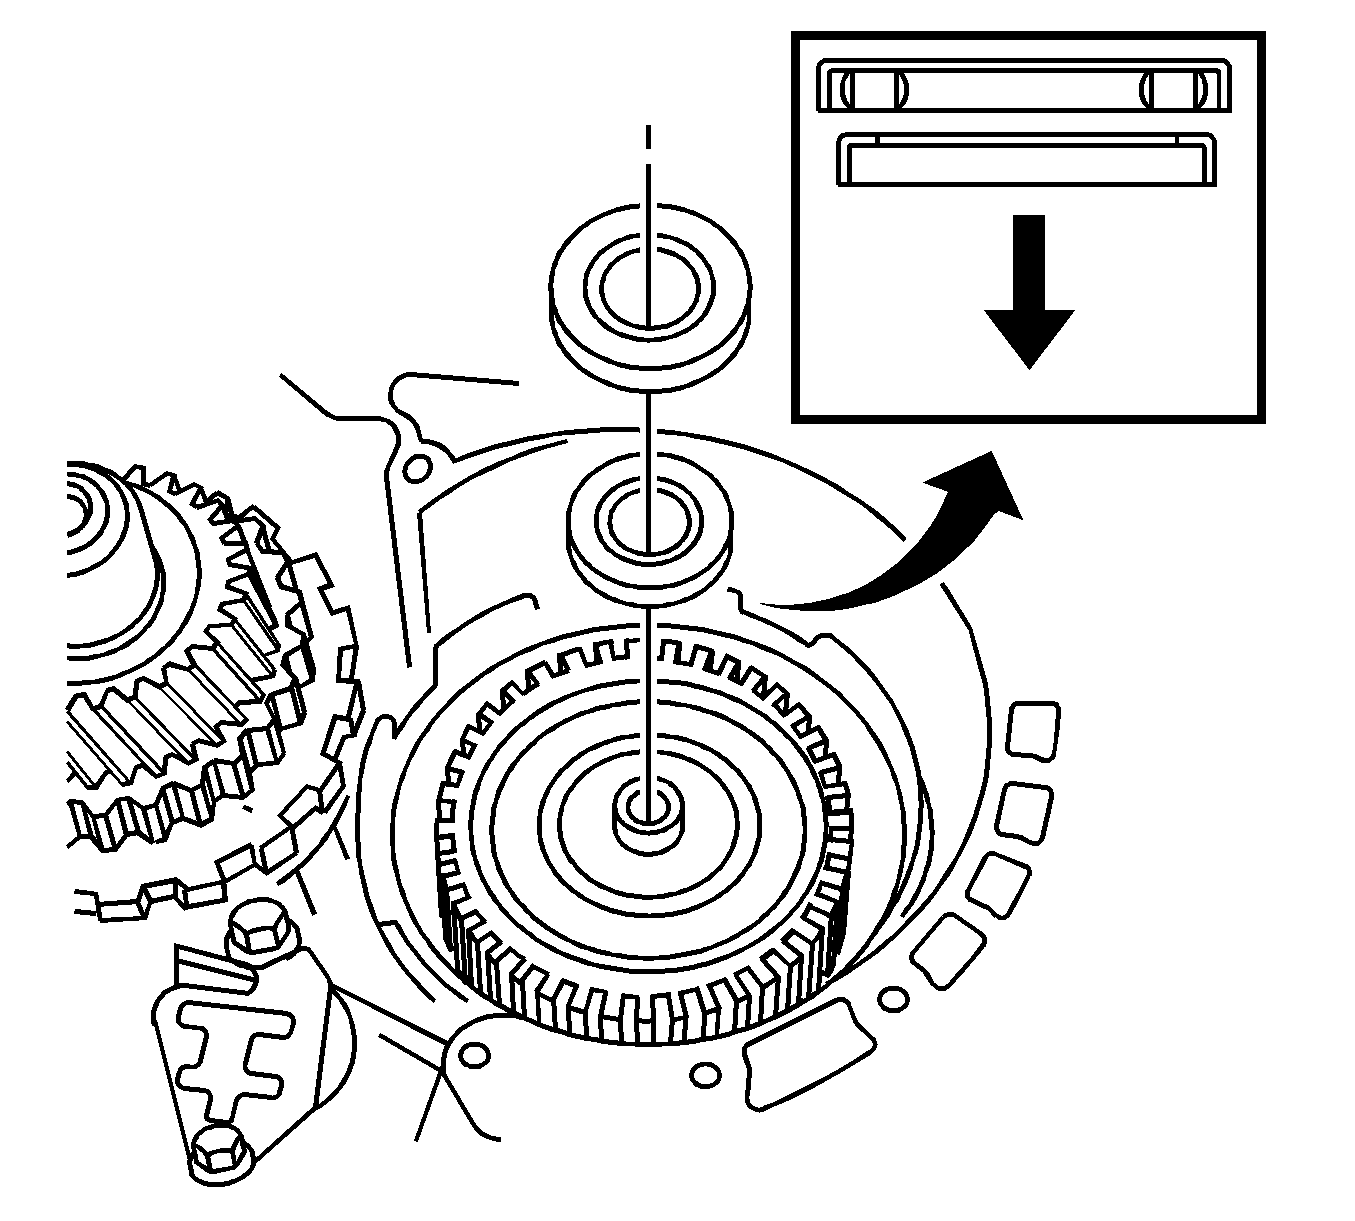
- Coat the needle roller bearing with petroleum jelly, then install the bearing on the ring gear.
- Coat the planetary gear thrust washer No. 2 with petroleum jelly, then install the thrust washer on the rear planetary gear assembly.
- Align the splines of the rear planetary gear assembly with the flukes of the discs, then install the rear planetary gear assembly into the 1st and reverse brake discs.
- Check that (1) of the rear planetary gear assembly is below the upper surface of the flange.
- Place the 1 way clutch No. 2 in the transaxle case with the shiny side facing upward.
- Install the 1 way clutch onto the inner race while turning the rear planetary gear assembly clockwise (2).
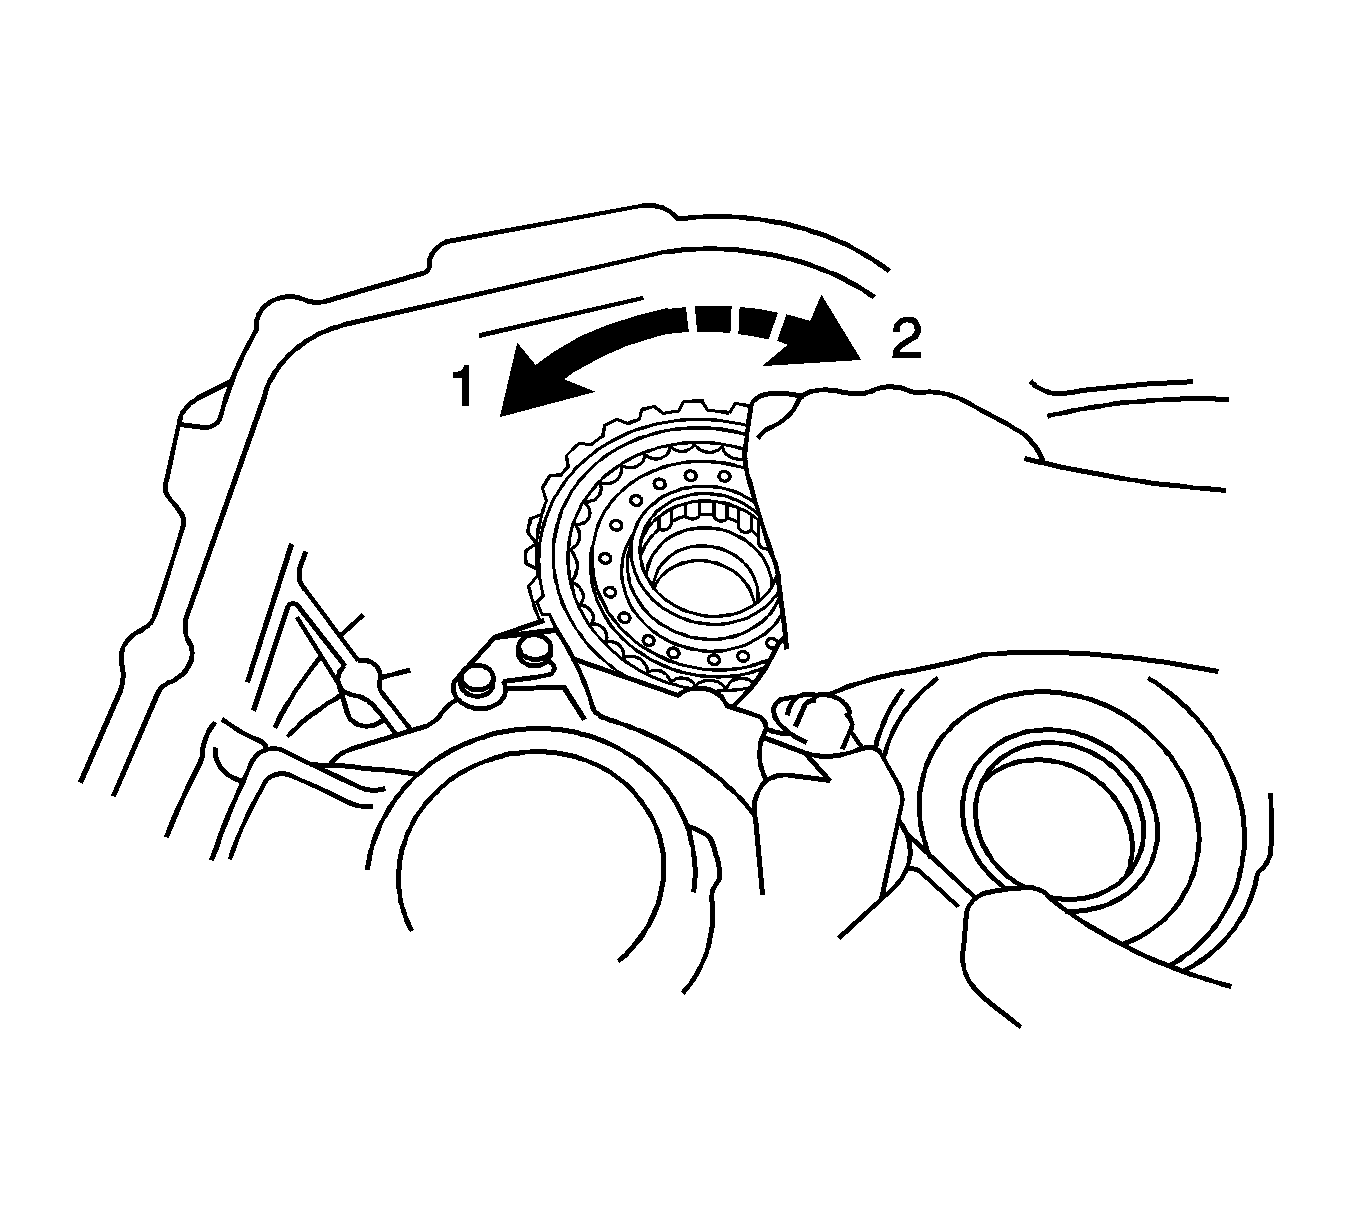
- Check that the rear planetary gear assembly turns freely clockwise (2) and locks when turned counterclockwise (1).
- Coat the planetary gear thrust washer No.2 with petroleum jelly, then install it on the planetary gear.
- Ensure the end gap of the snap ring is not aligned with the cut outs.
- Install the 2nd brake clutch flange with the flat side facing upward.
- Install the 2nd brake clutch discs and plates, in the following order: D - P - D - P - D - P.
- Install each of the 2nd brake piston return spring sub-assembly over the protrusions in the transaxle case.
- Install the 2nd coast brake band guide plate retainer and brake band plate retainer so that its tip touches the transaxle case.
- Install the retaining bolt.
- Align the groove of the drum with the bolt and place the 2nd brake piston assembly into the transaxle case.
- Place both ends of the snap ring in the groove, then set the snap ring in the transaxle case.
- While compressing the piston return springs over the drum with hammer handles, install the snap ring.
- Using compressed air, check that the 2nd brake piston moves smoothly.
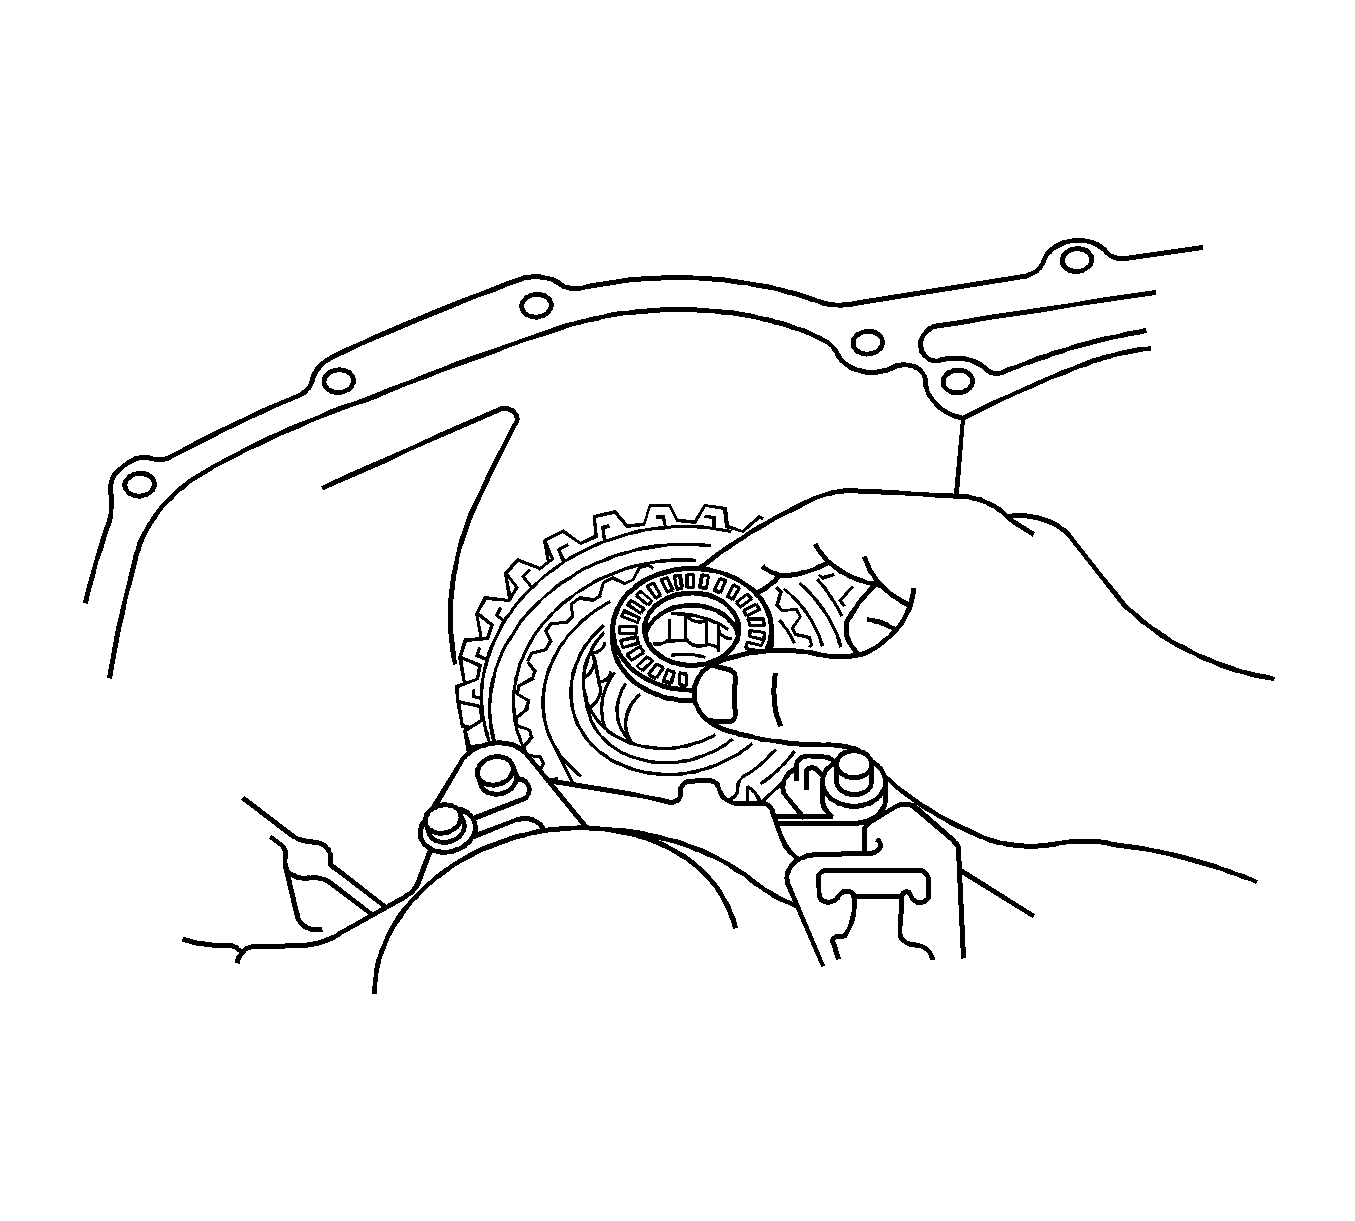
- Using a screwdriver, align the flukes of the discs in the 2nd brake.
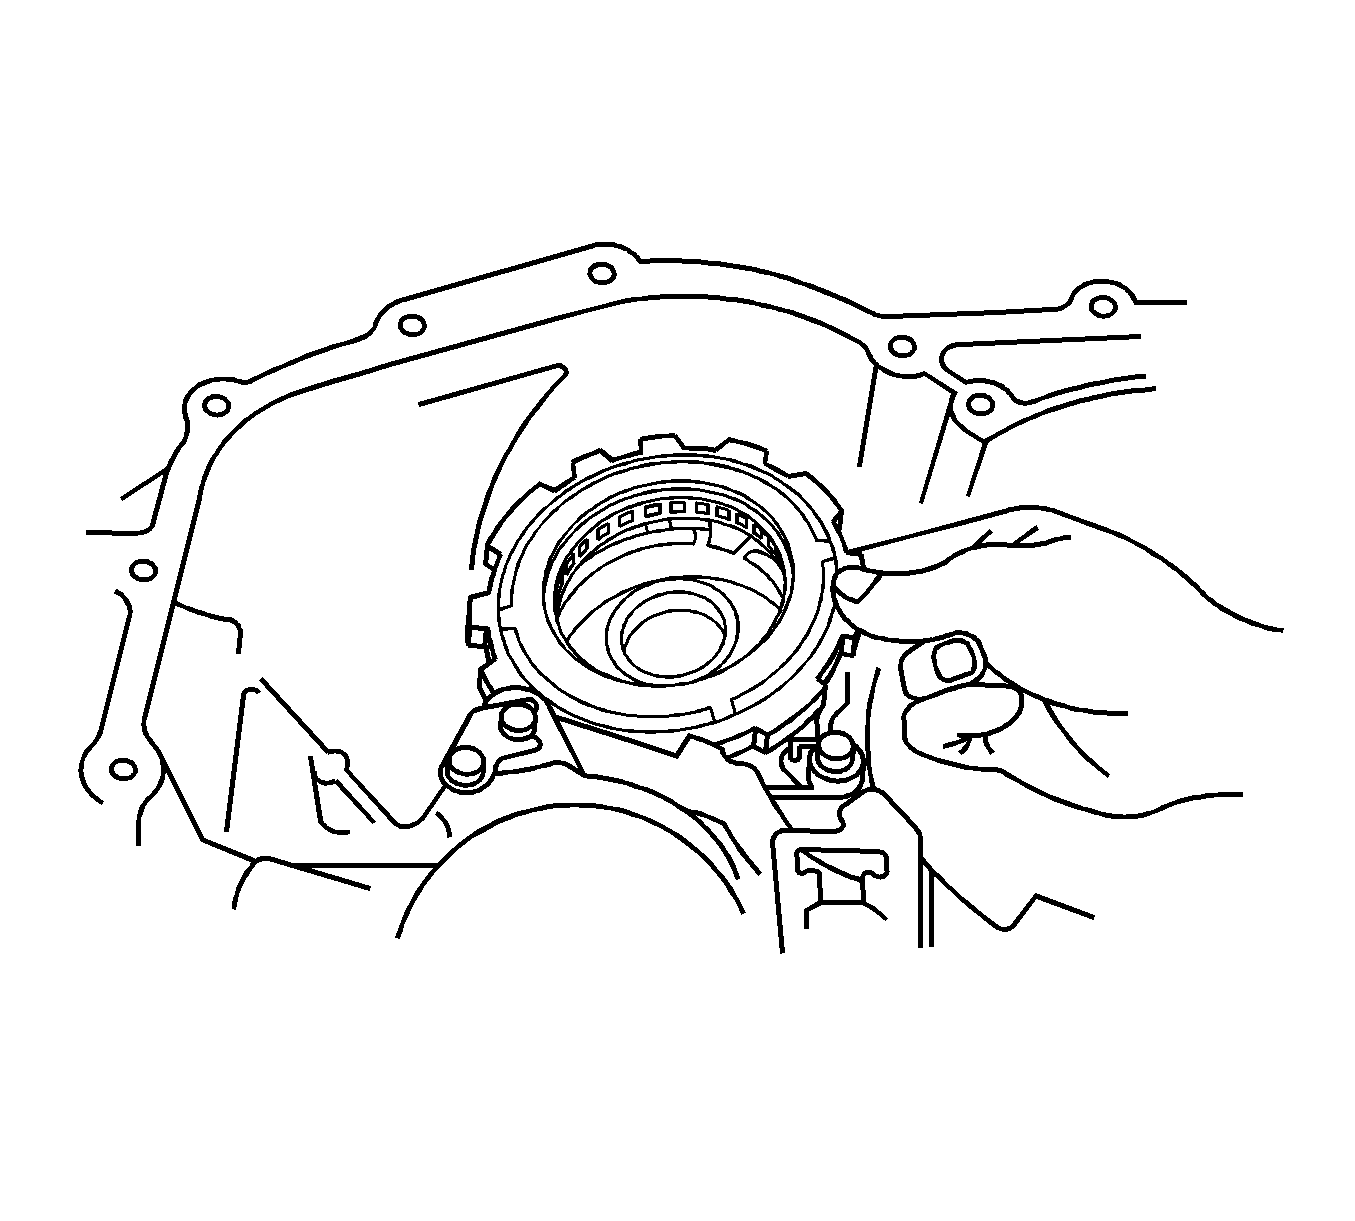
- Align the spline of the 1 way clutch with the flukes of the discs then install the 1 way clutch to the 2nd brake discs.
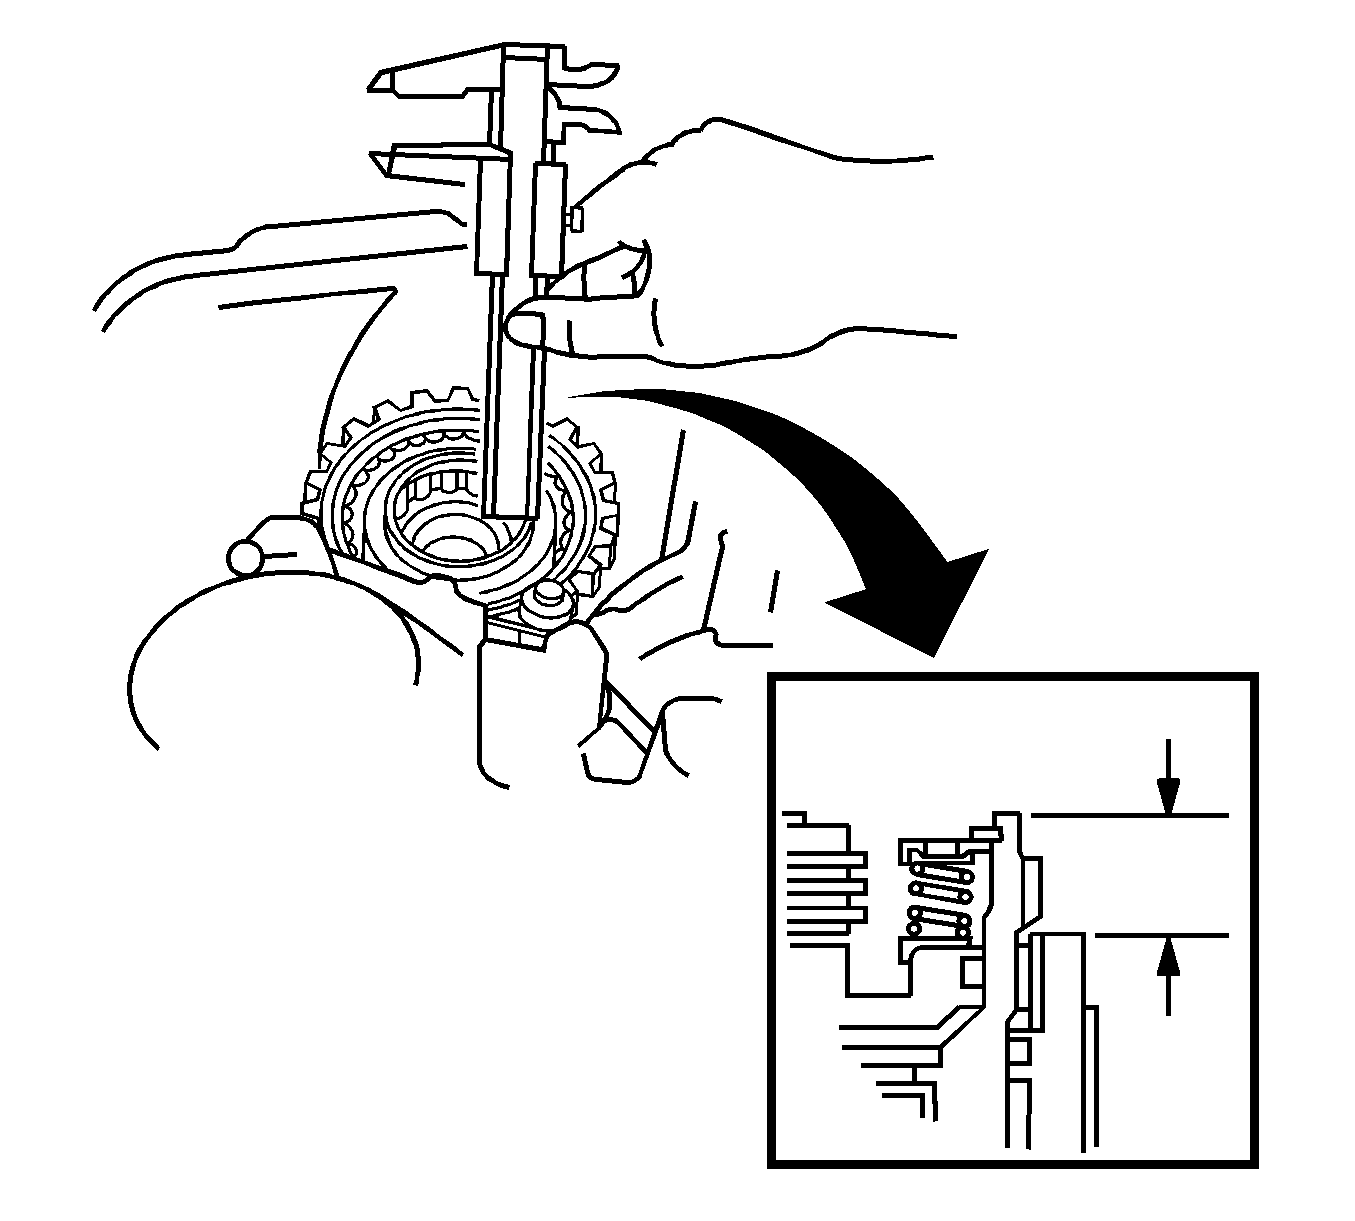
- Check the clearance between the surface of the 2nd brake hub and the rear planetary gear. The clearance should be approximately 5 mm (0.20 in).
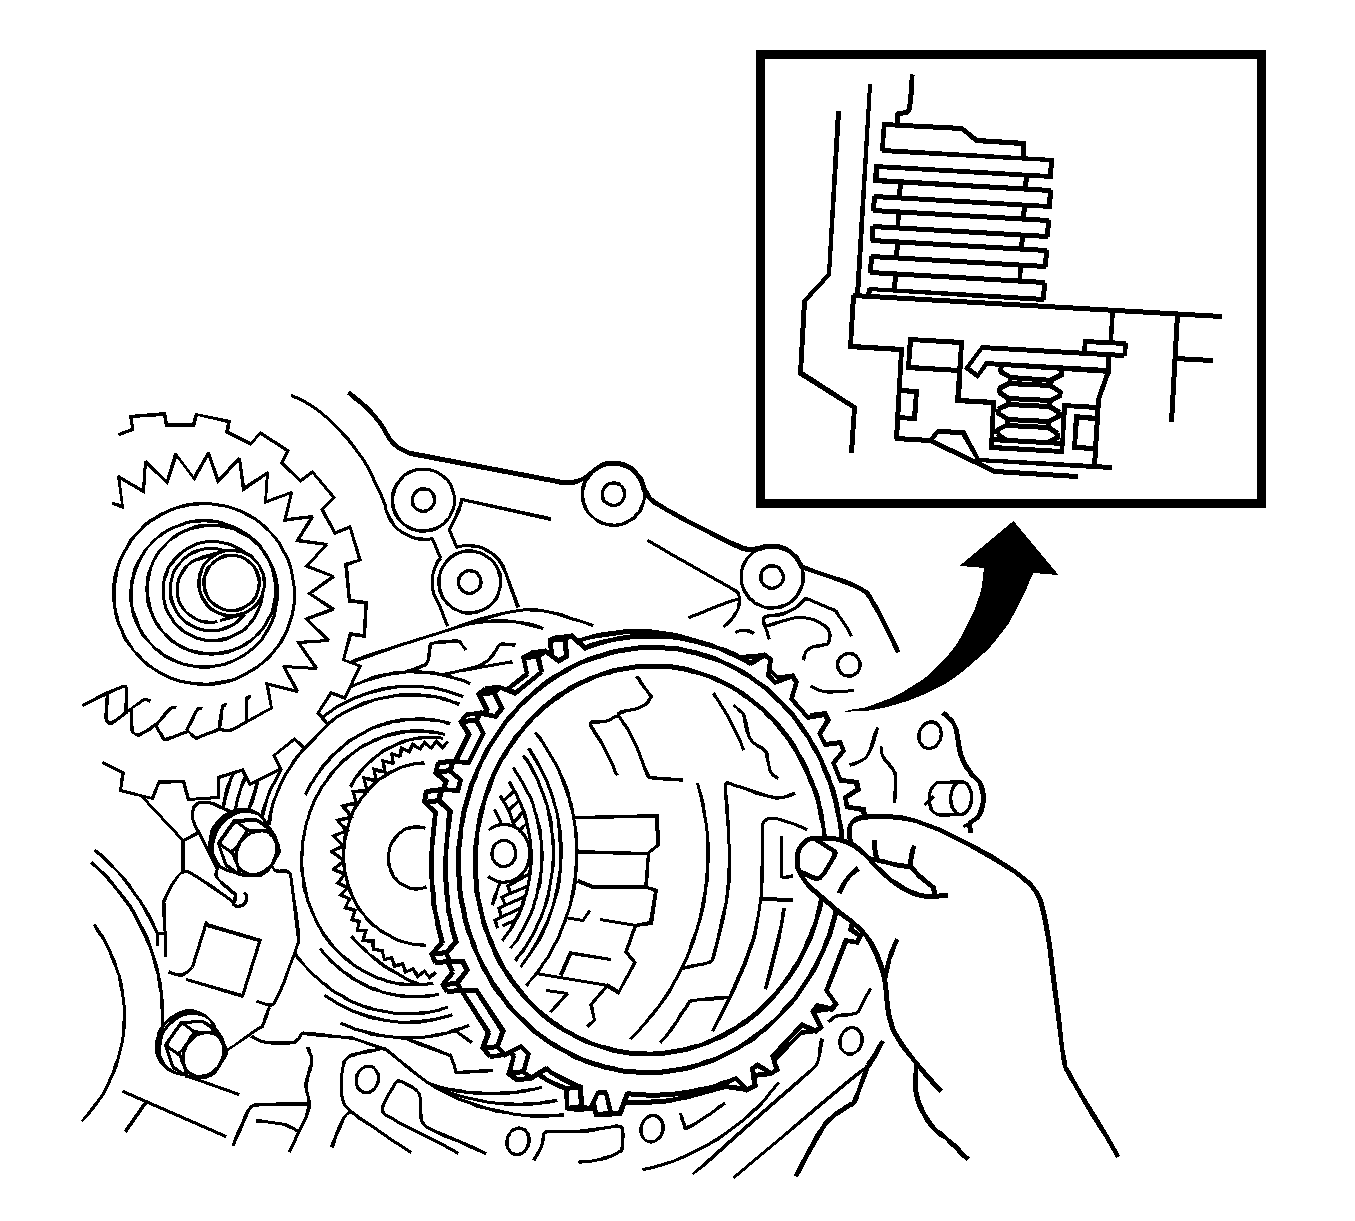
- Coat the planetary carrier thrust washer No. 3 with petroleum jelly, then install the thrust washer on the sun gear input drum.
- Position the sun gear input drum into the 1 way clutch assembly, then turn the sun gear input drum clockwise to seat the assembly in the installed position.
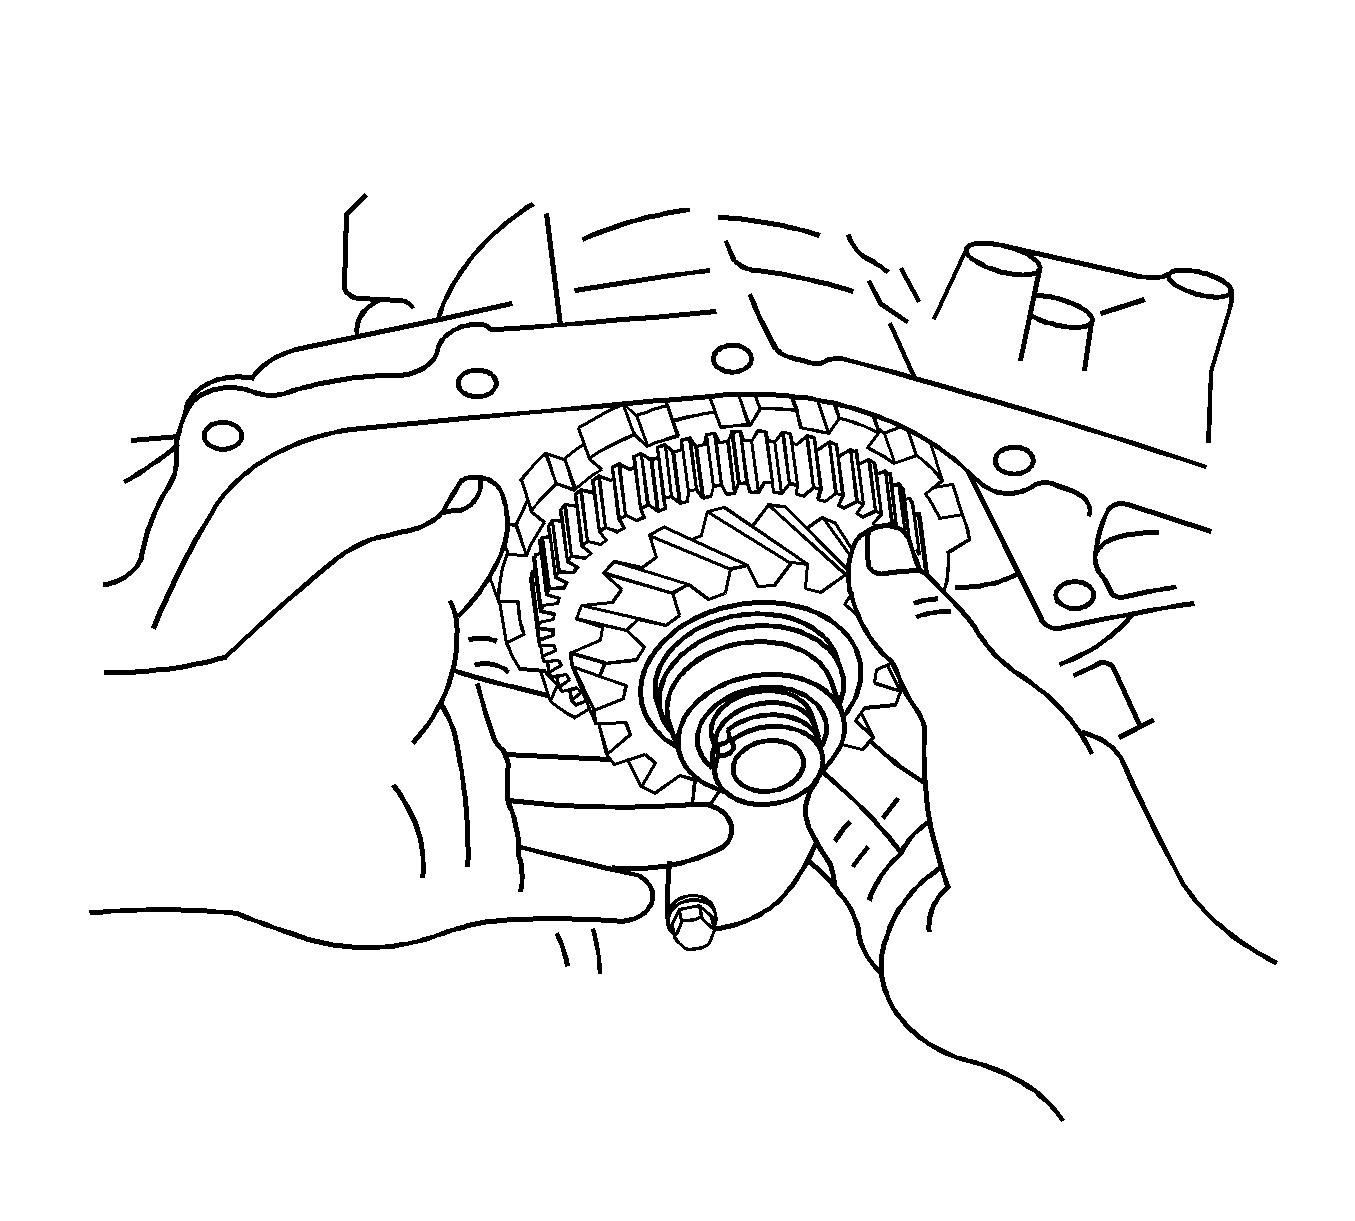
- Coat the thrust roller bearing and thrust bearing race with petroleum jelly, then install them on the front planetary gear assembly.
- Install the front planetary gear assembly.
- Coat the thrust bearing race and thrust roller bearing with petroleum jelly.
- Install the thrust bearing race, then the thrust roller bearing on the front planetary ring gear assembly.
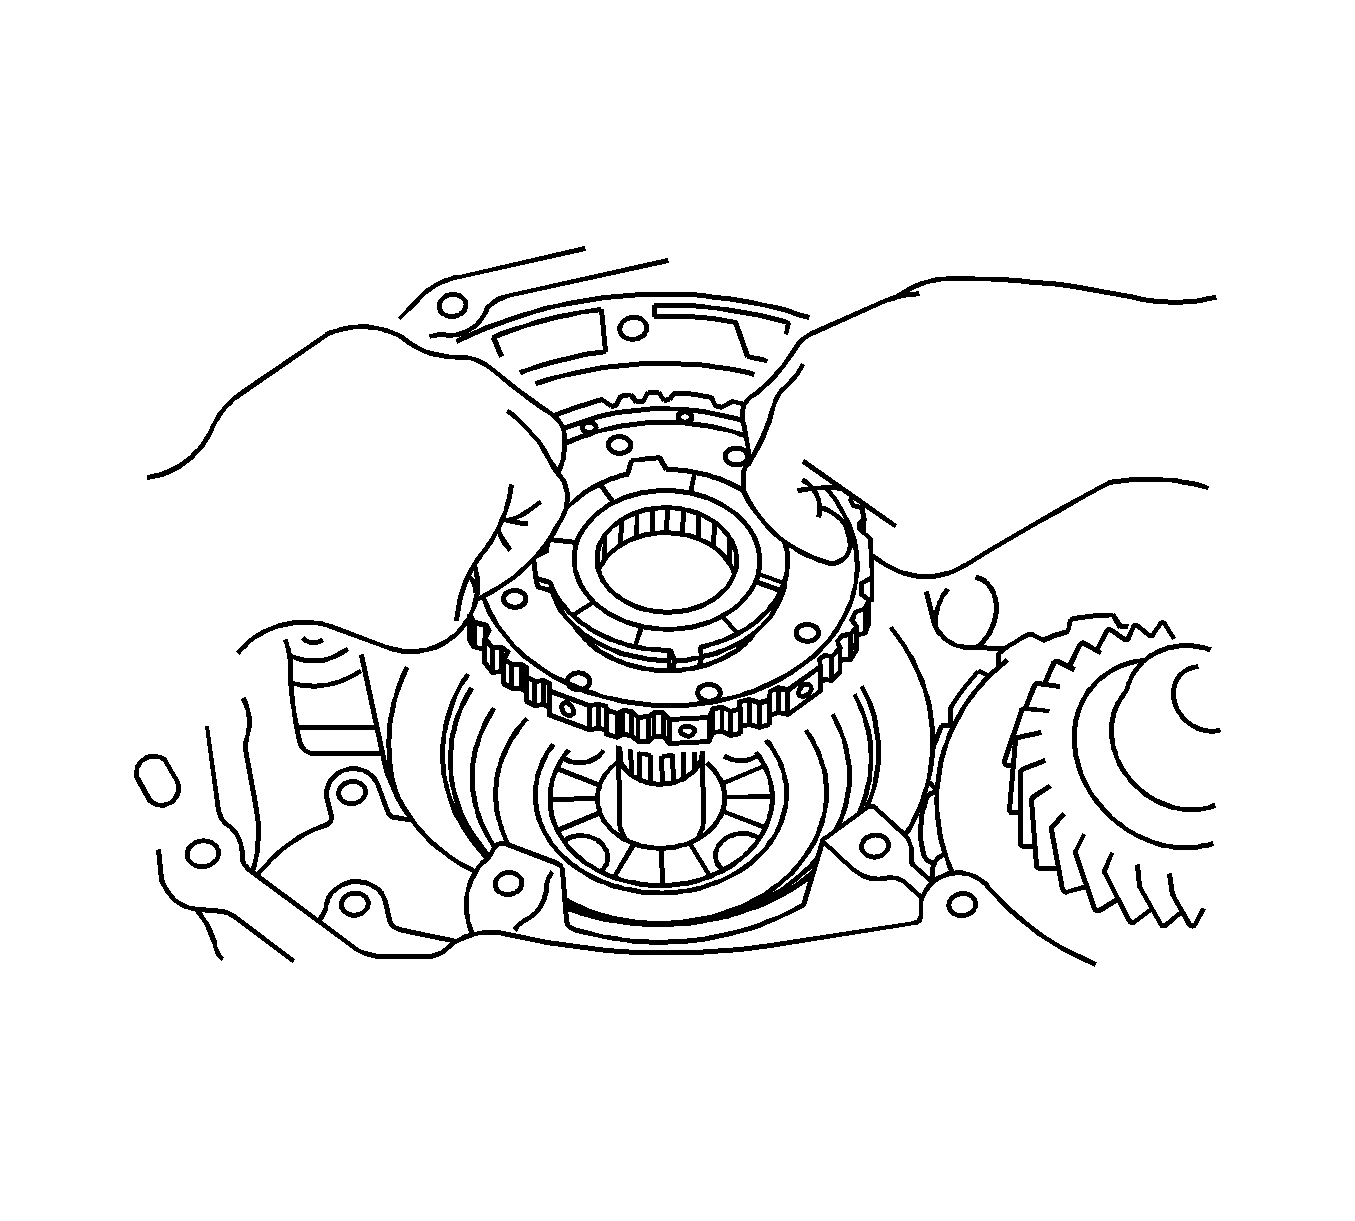
- Install the front planetary ring gear in the transaxle case.
- To ensure the front planetary ring gear and the other parts are installed correctly into the case, the end of the bushing with the ring gear flange will be flush with or under the shoulder of the intermediate shaft.
- Coat the thrust roller bearing and thrust bearing race with petroleum jelly, then install the bearing and race on the tip of the ring gear flange.
- Place the 2nd coast brake band assembly into the transaxle case.
- Install the 2nd coast brake band pin in the transaxle case.
- Coat the thrust roller bearing with petroleum jelly, then install the bearing on the forward clutch drum.
- Coat the clutch drum thrust washer with petroleum jelly, then install the thrust washer on the direct clutch drum with the oil groove facing upward.
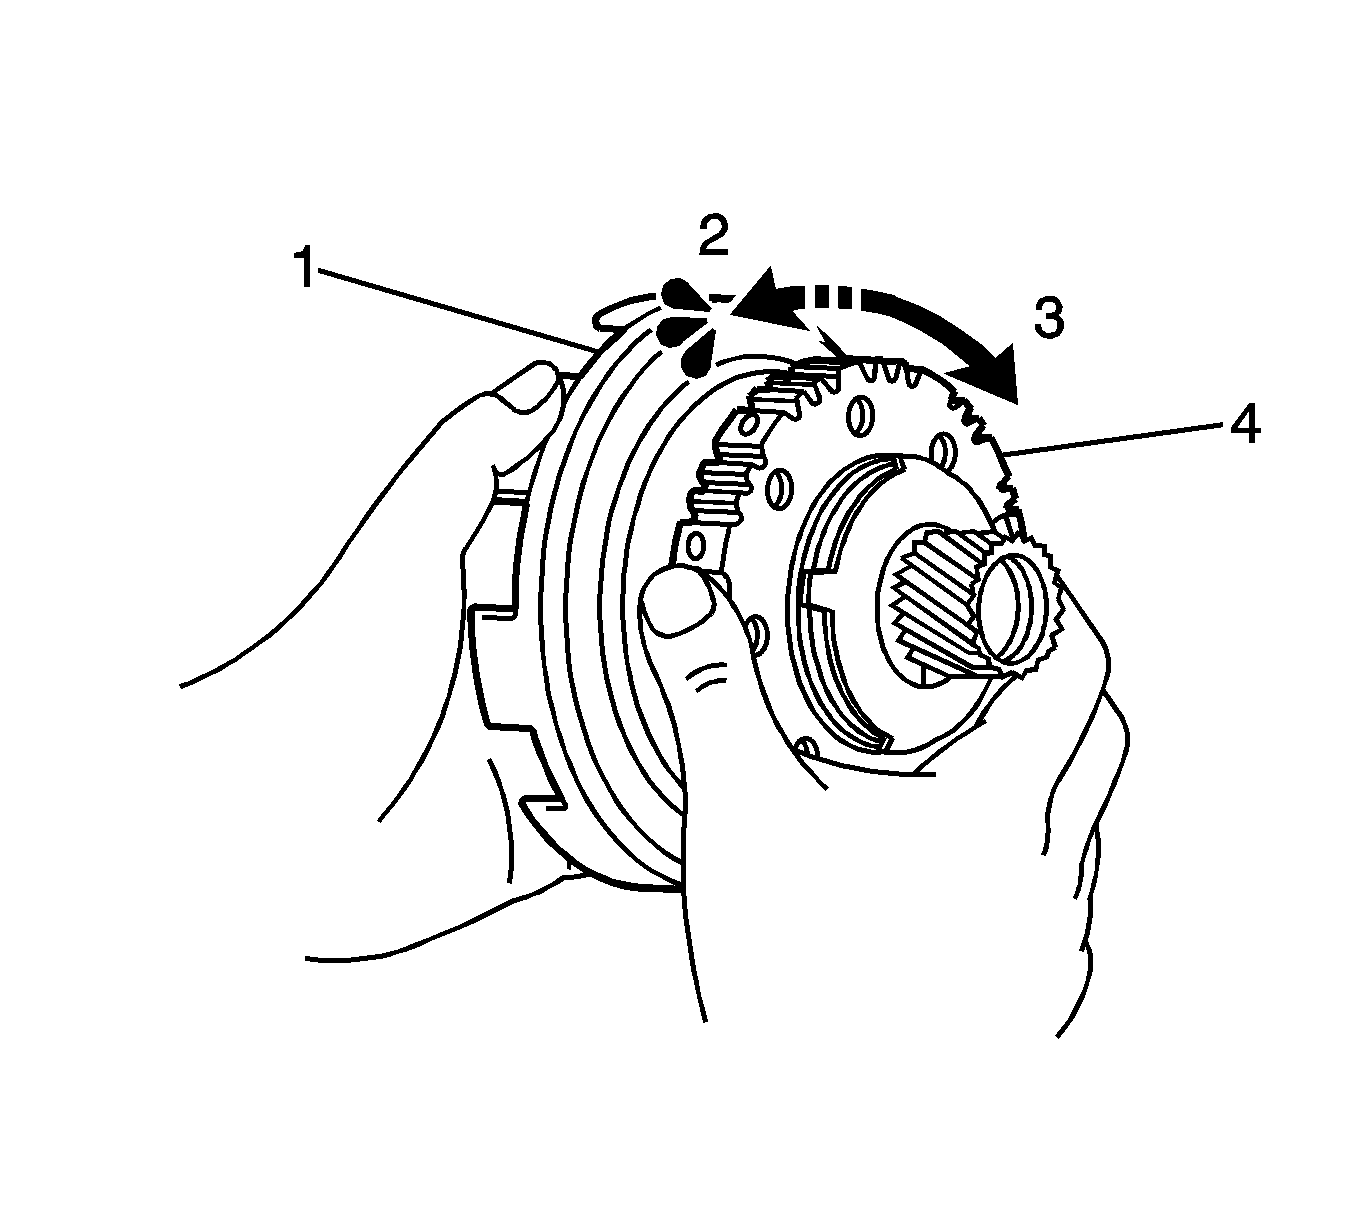
- Using a screwdriver, align the flukes of the discs in the direct clutch.
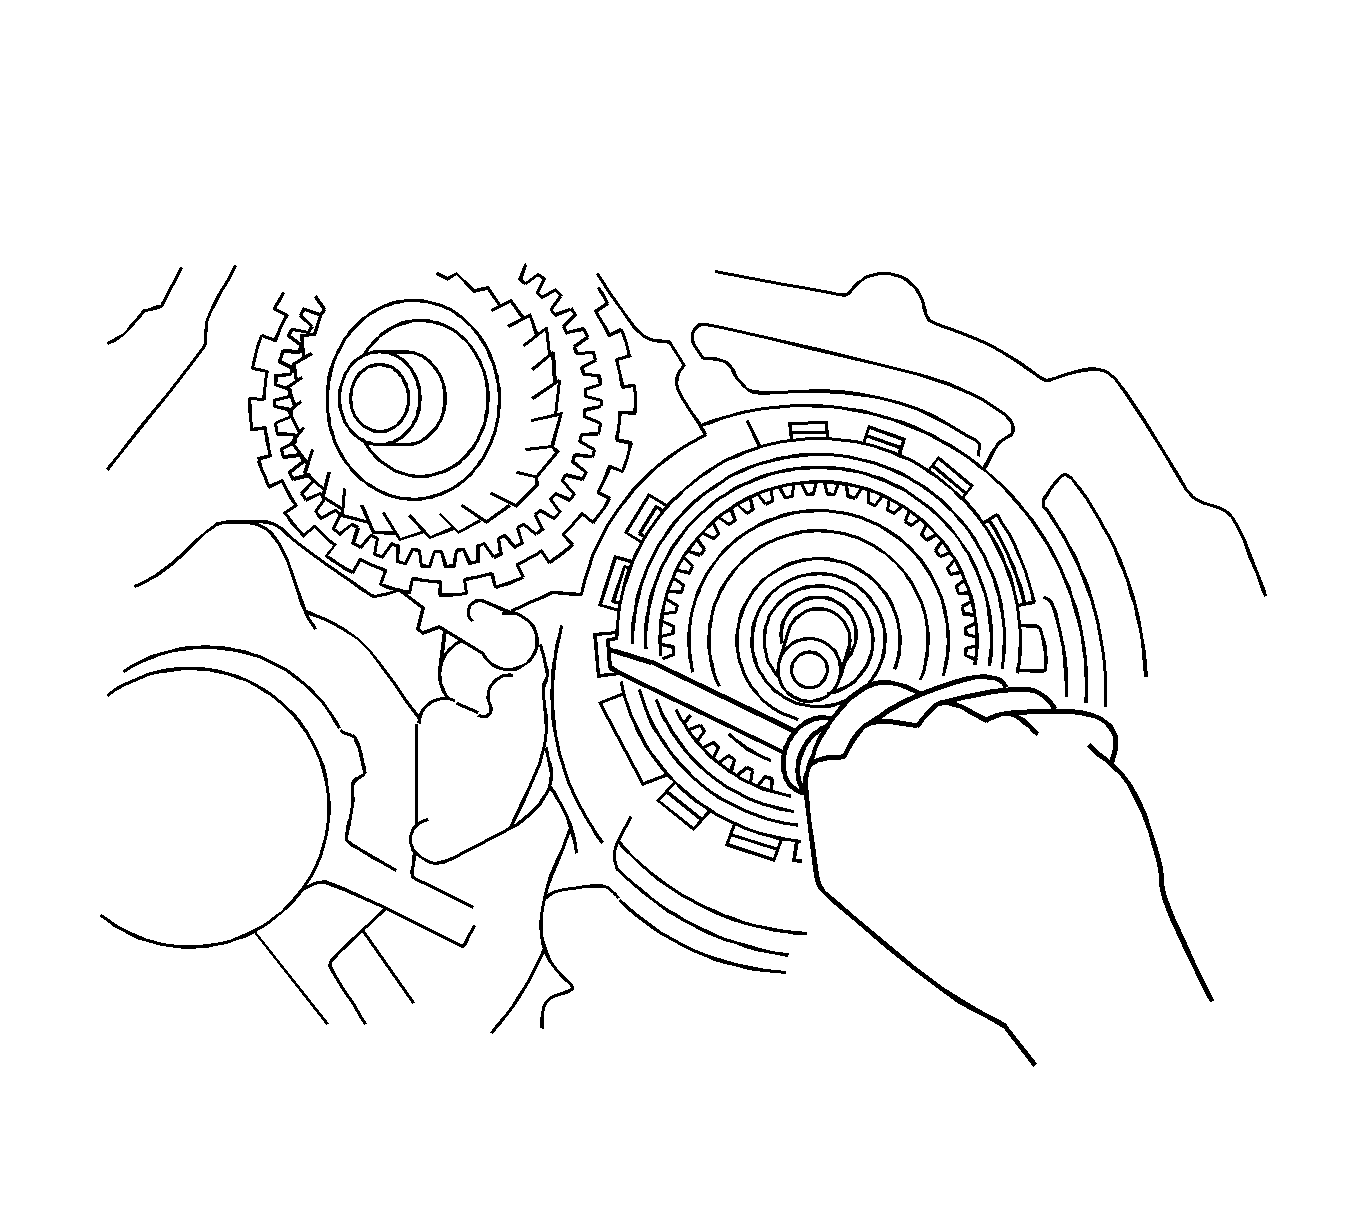
- Mesh the hub with flukes of the direct clutch while turning the forward clutch drum.
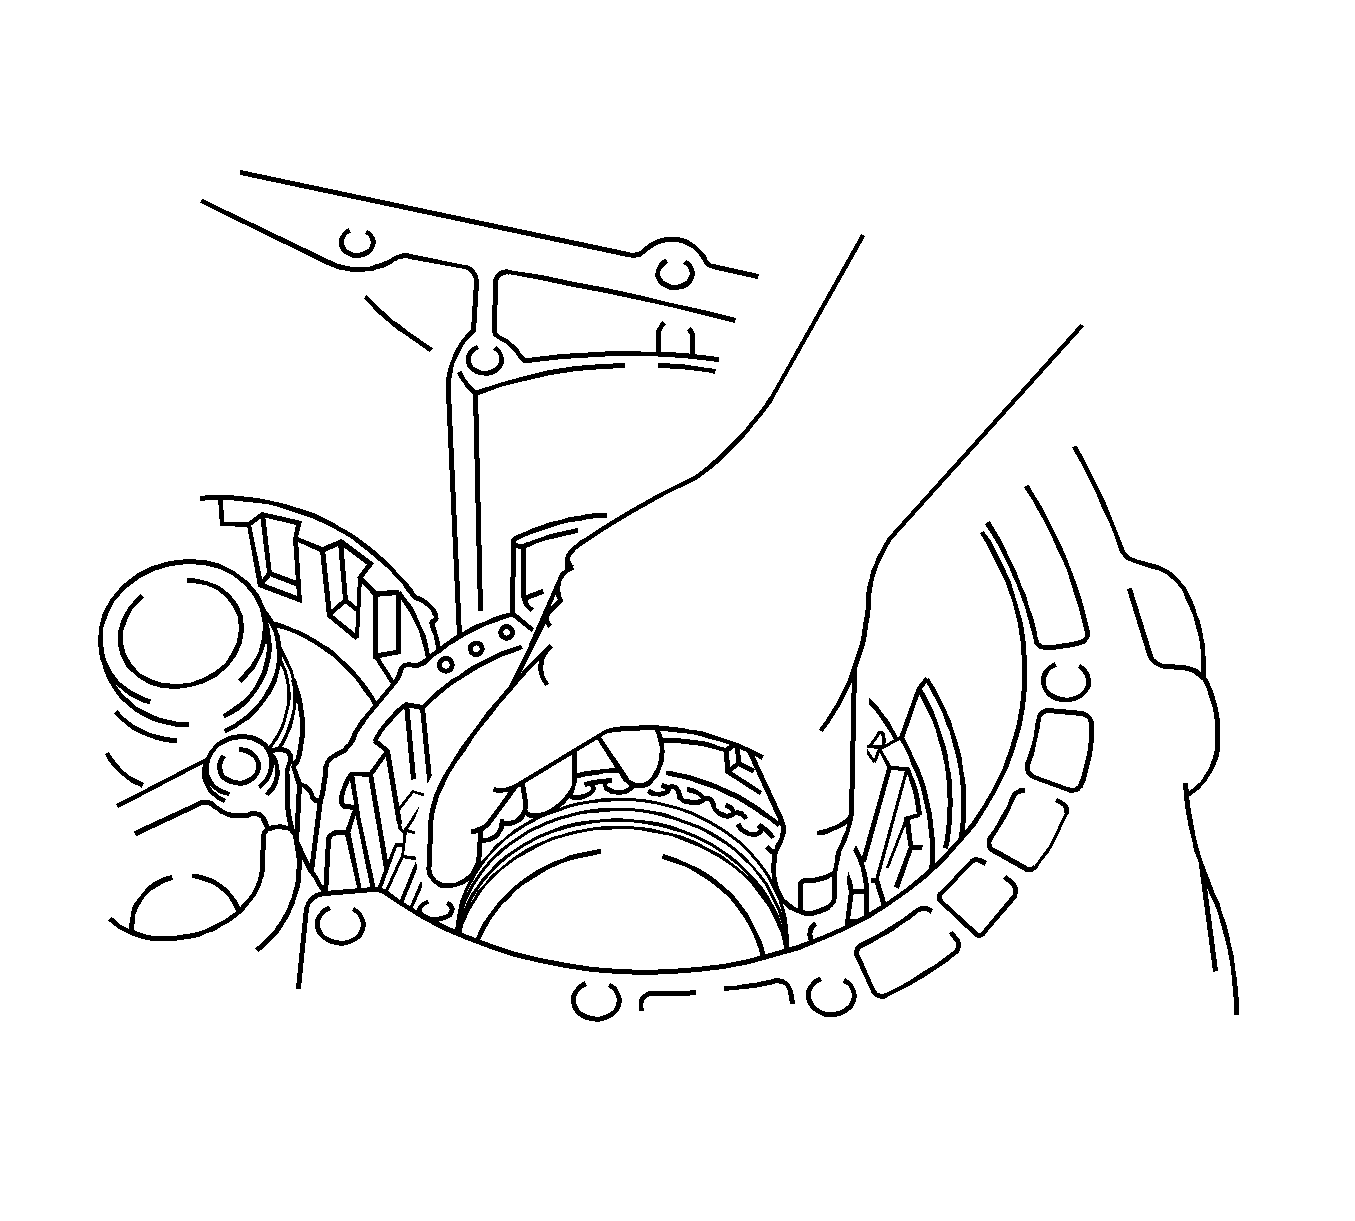
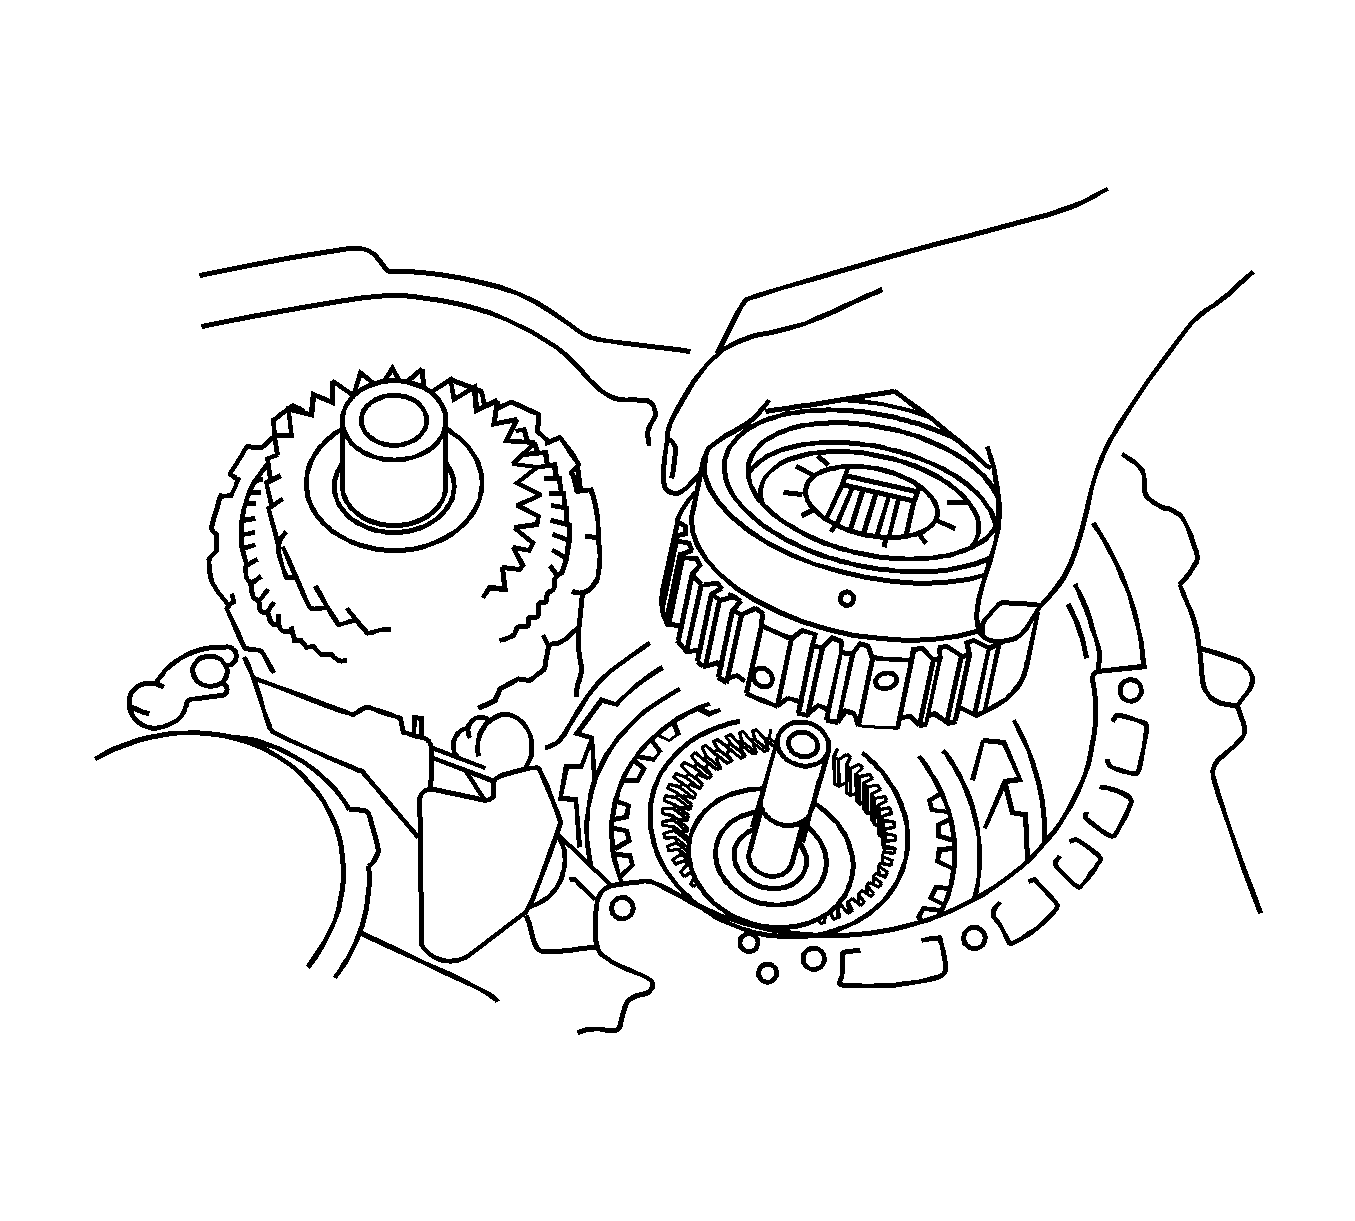
- Place the direct clutch assembly and the forward clutch assembly into the transaxle case.
- While rotating the forward clutch assembly to mesh the front planetary ring gear and discs, install the assembly in the transaxle case.
- Using a feeler gage, check the clearance between points (1) and (2). The clearance should be 3 mm (0.118 in).
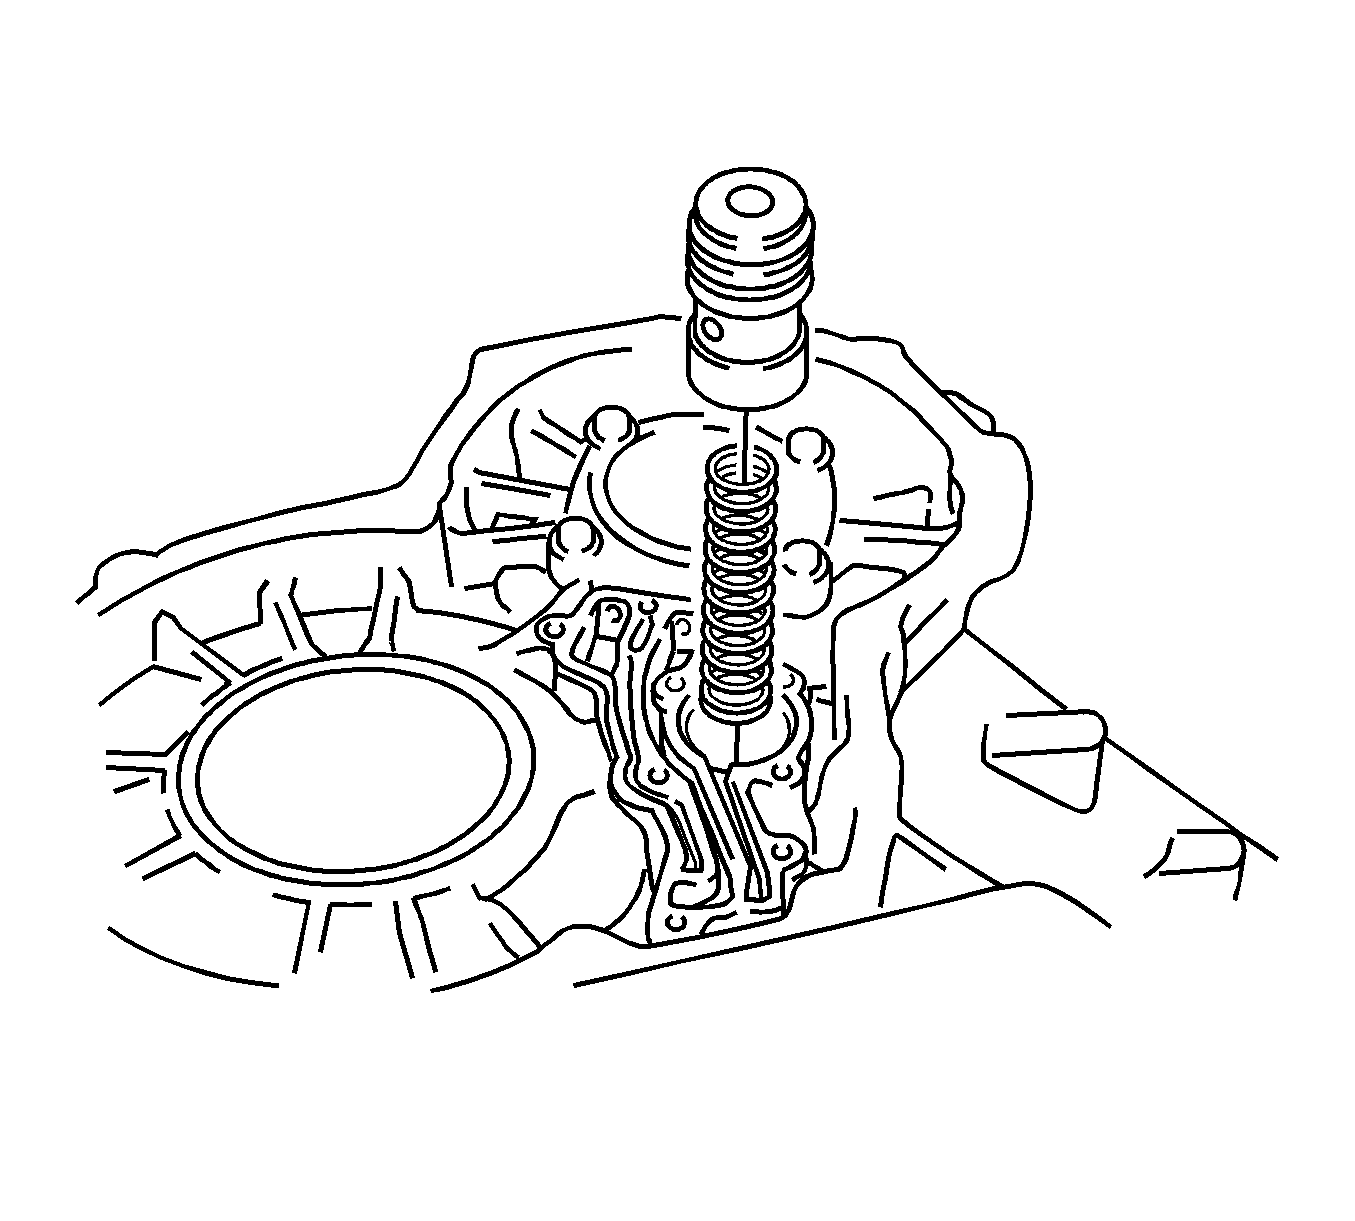
- Coat the 2 new O-rings with T-IV automatic transmission fluid, then install the O-rings on the 2nd coast brake cover.
- Install the spring 2nd coast brake piston assembly and 2nd coast brake cover into the transaxle case.
- Using snap ring pliers, install the 2nd coast brake piston snap ring
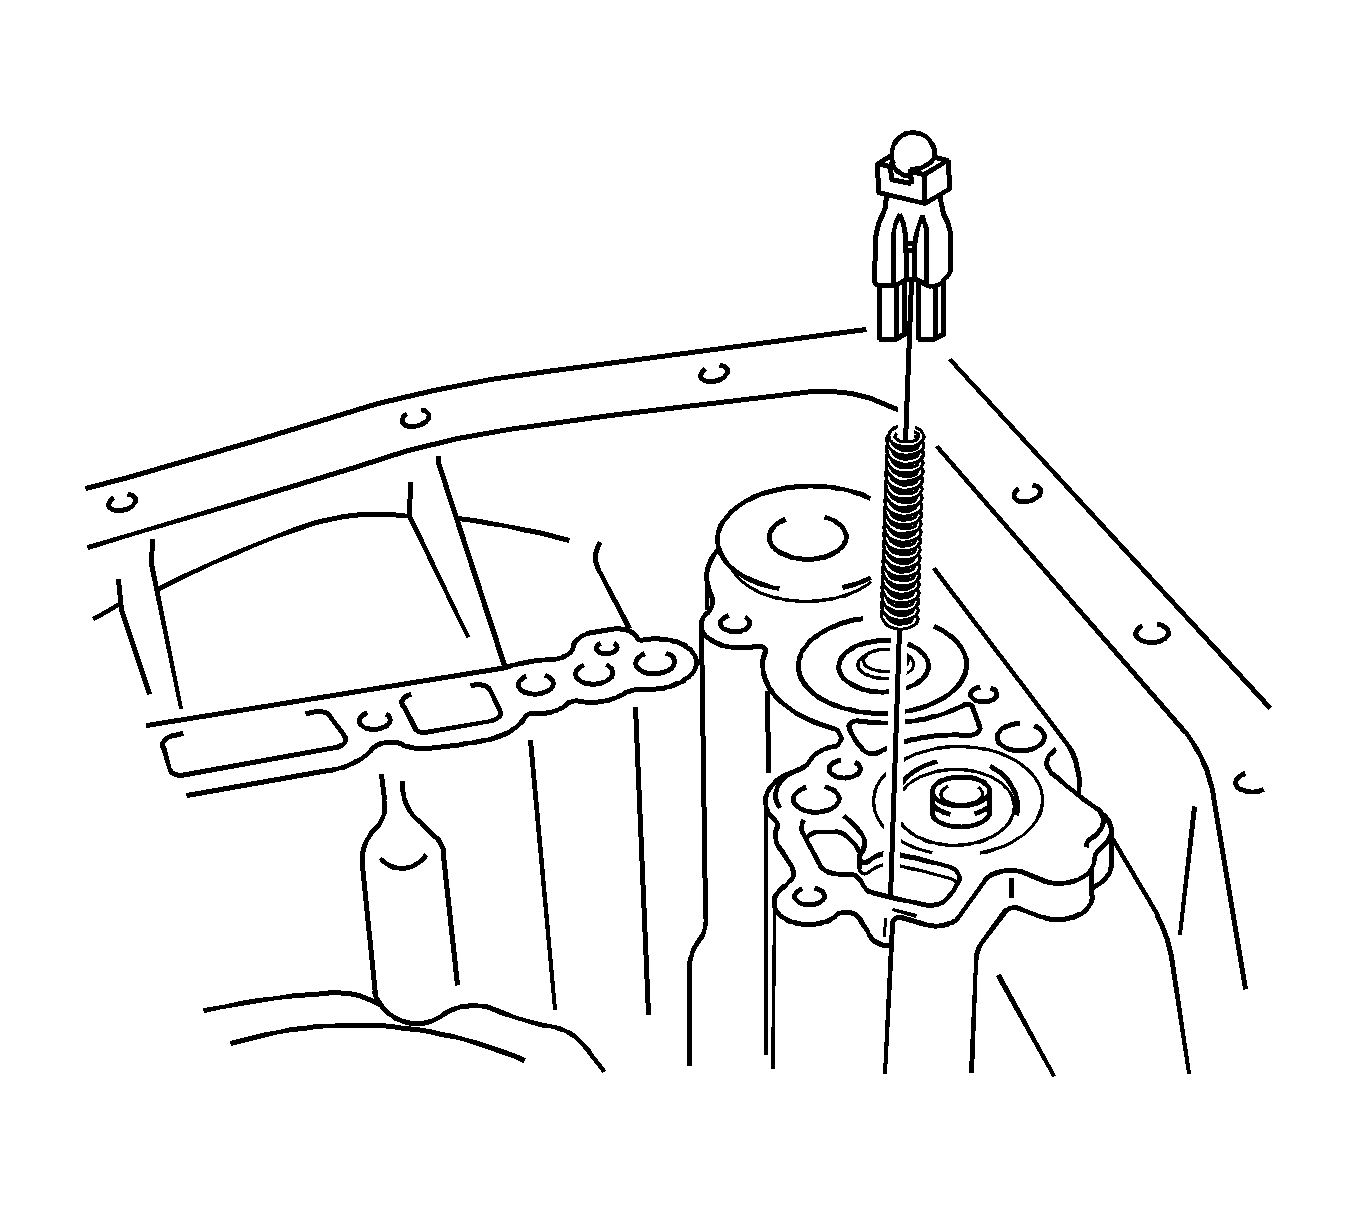
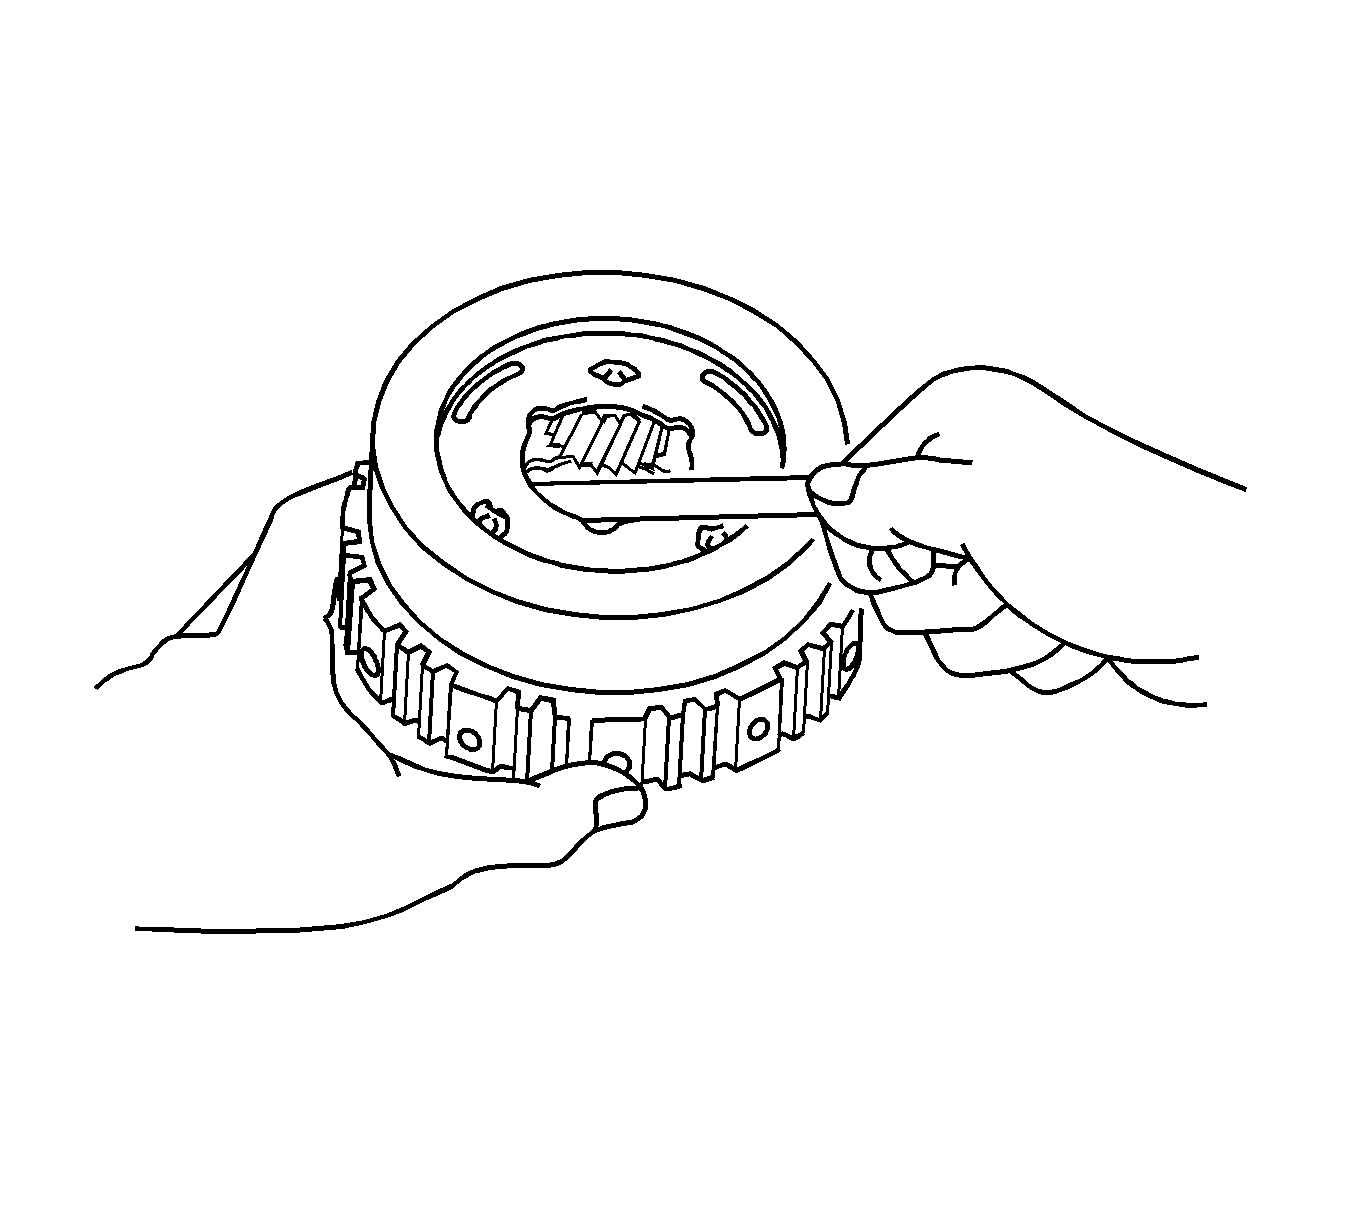
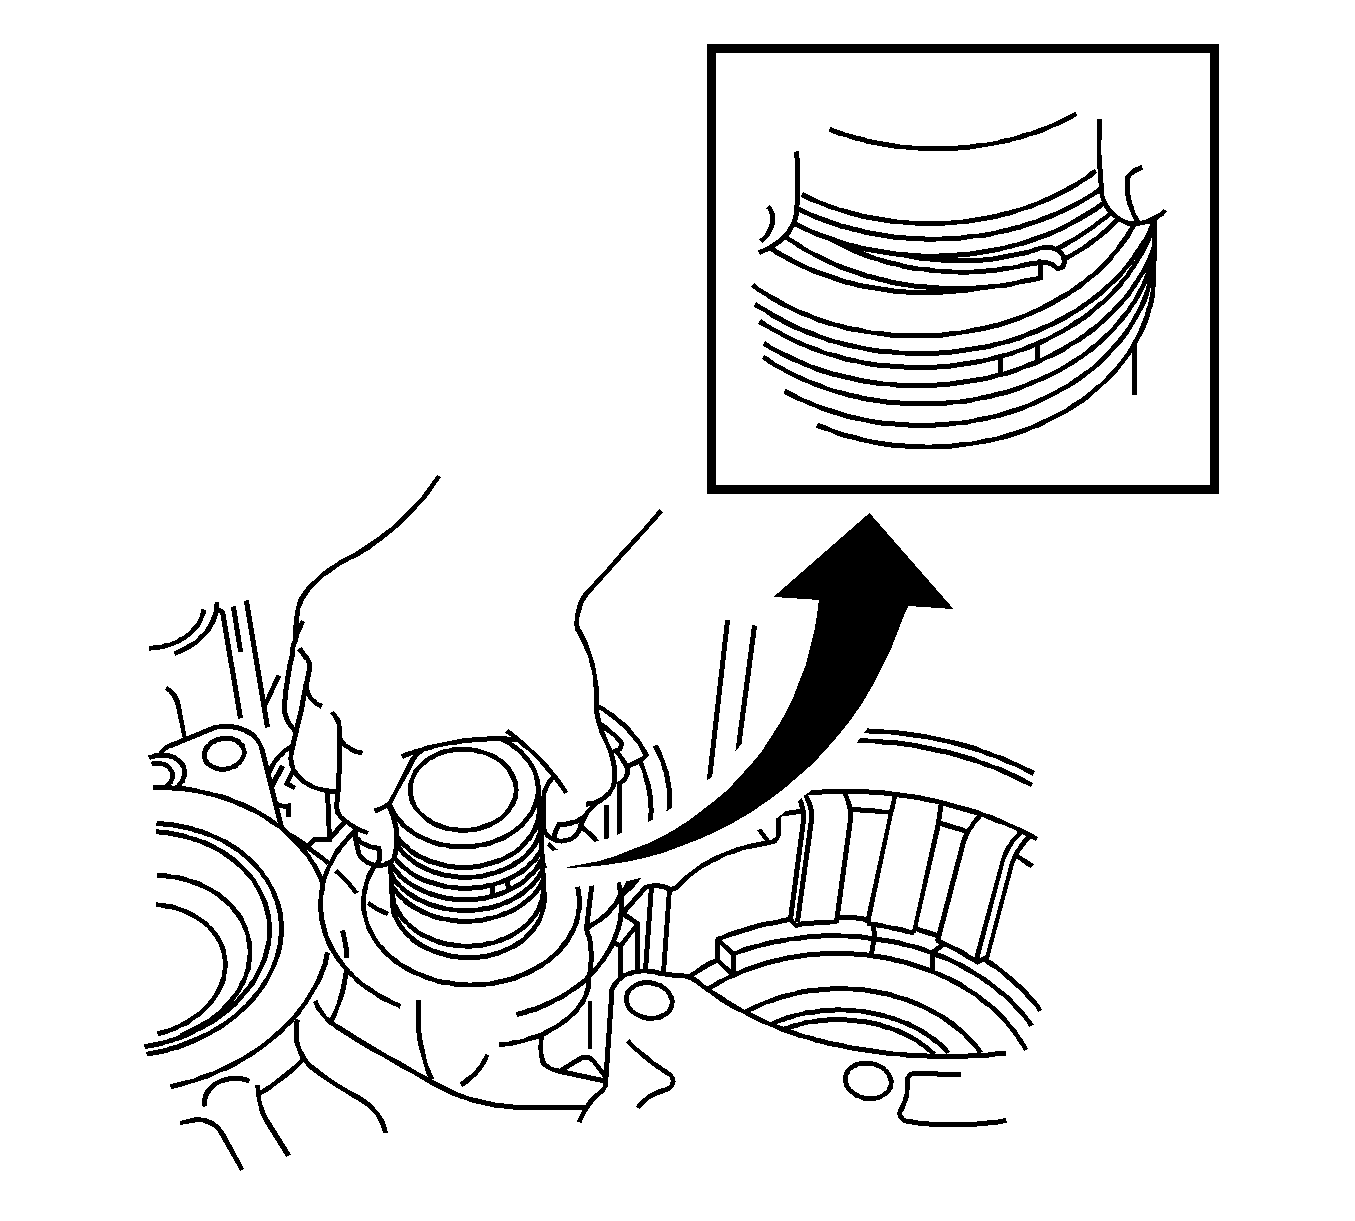
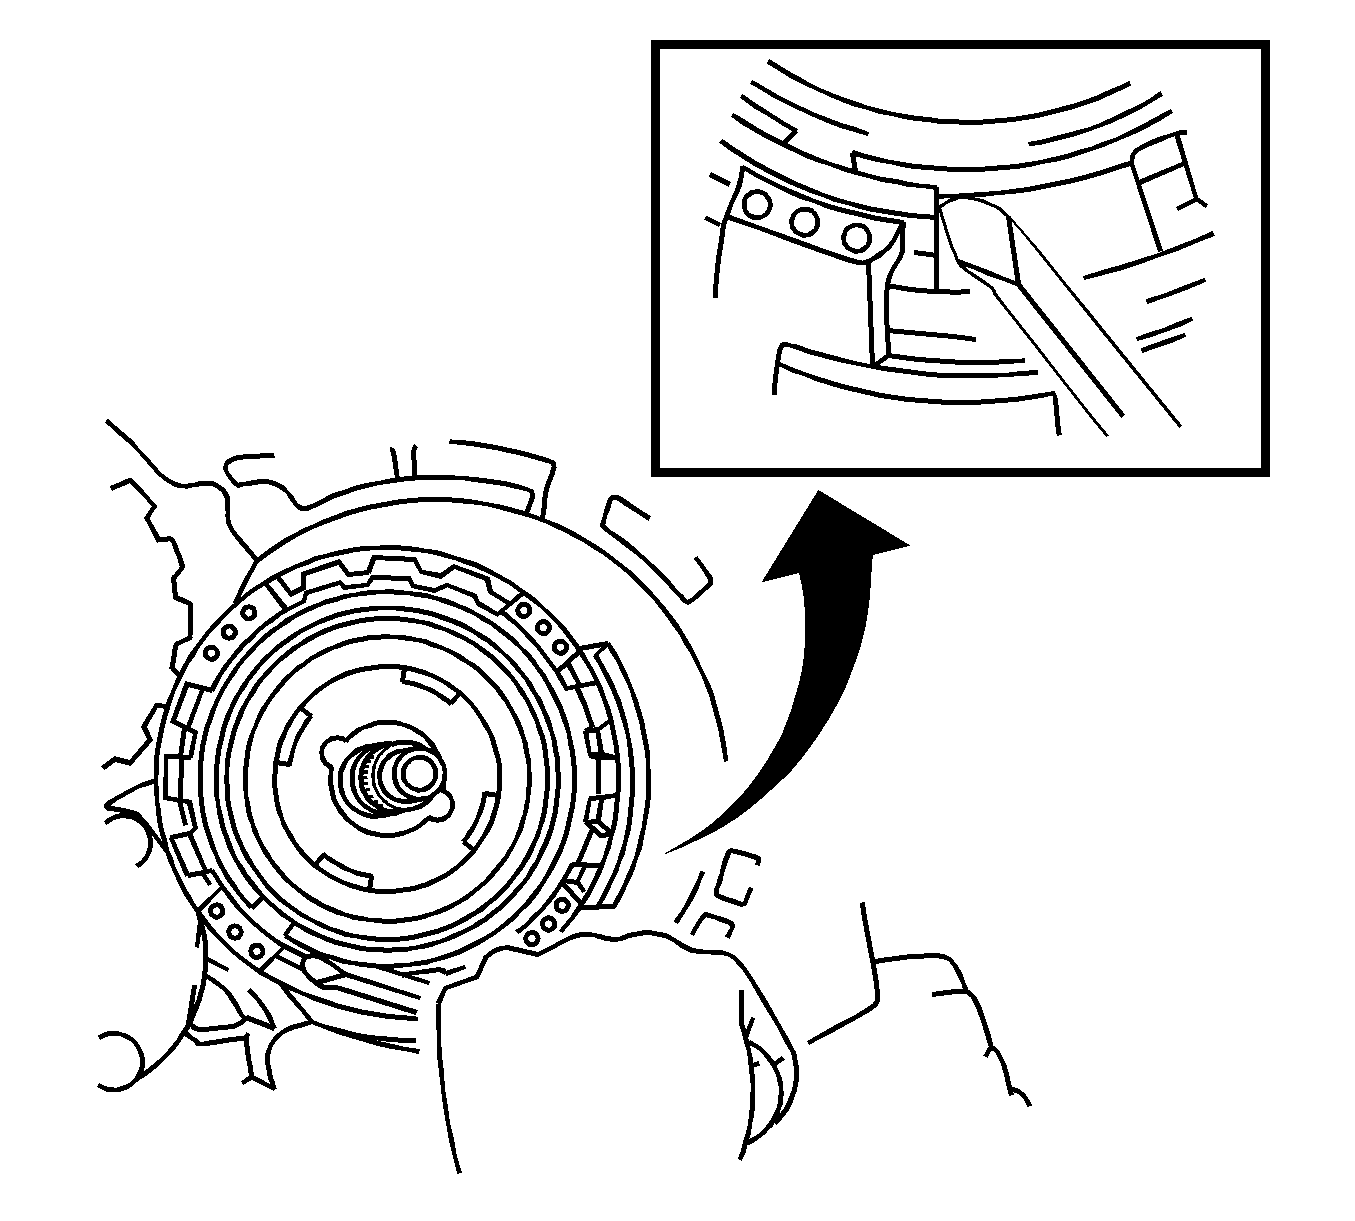
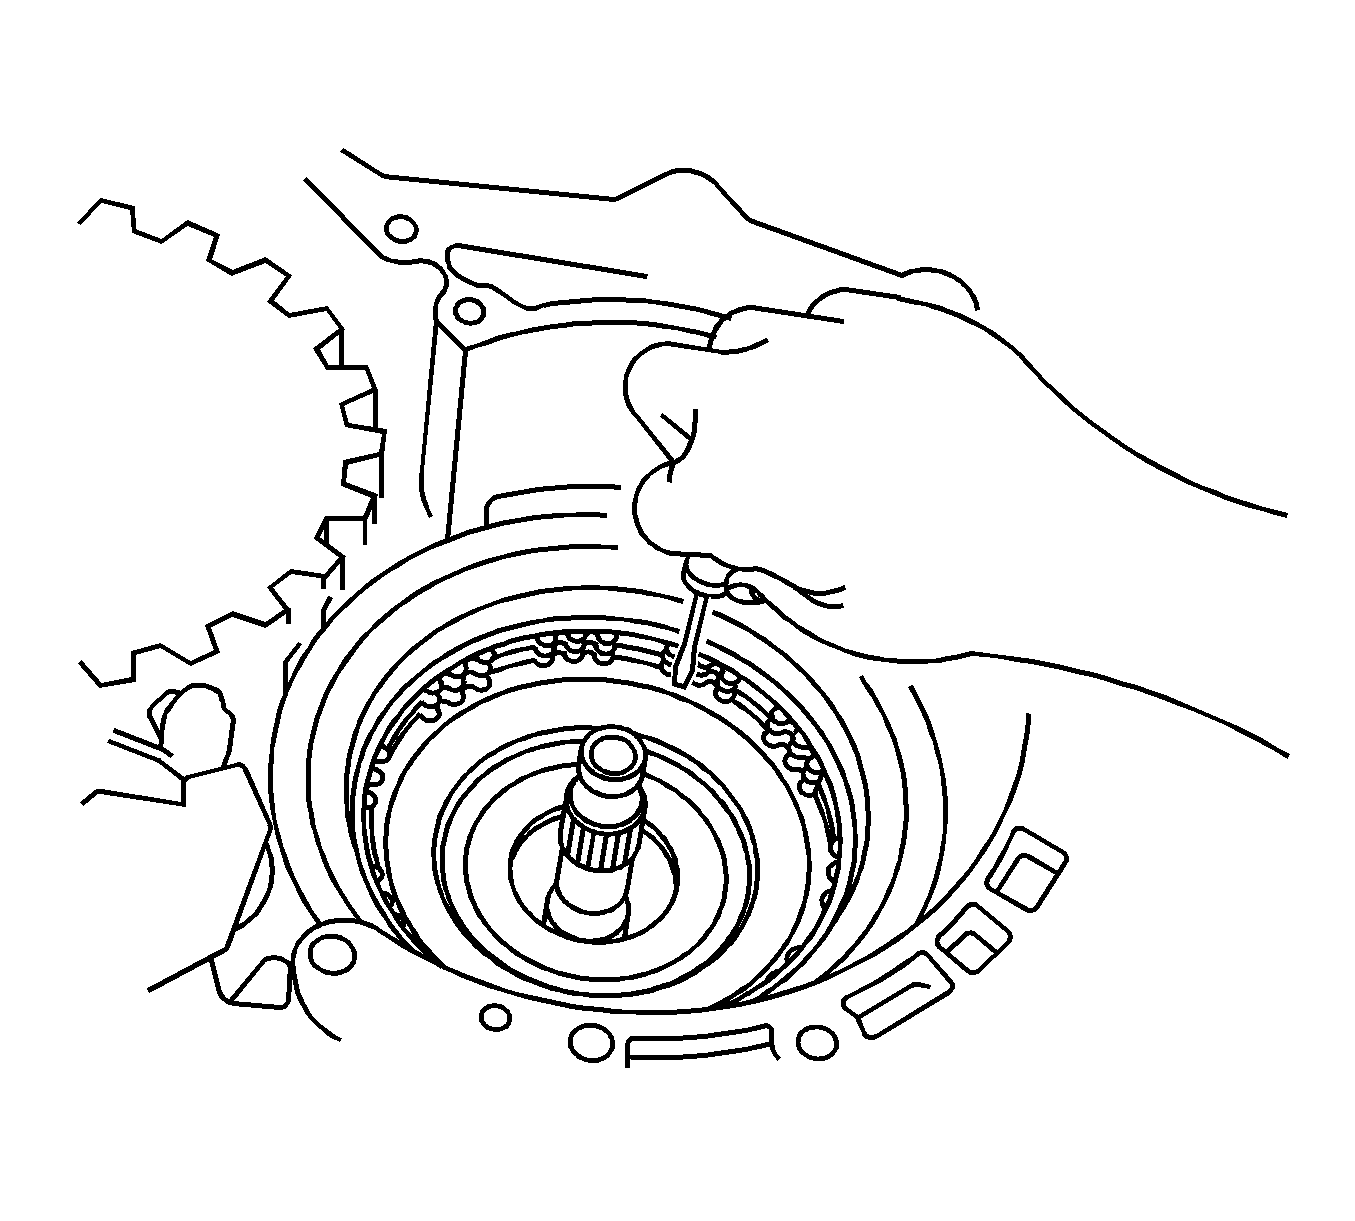
- Inspect the piston stroke of the 2nd coast brake by applying a small amount of paint to the piston rod where it meets the case.
- While applying and releasing compressed air at a pressure of 392-785 kPa (57-114 psi) measure the piston stroke.
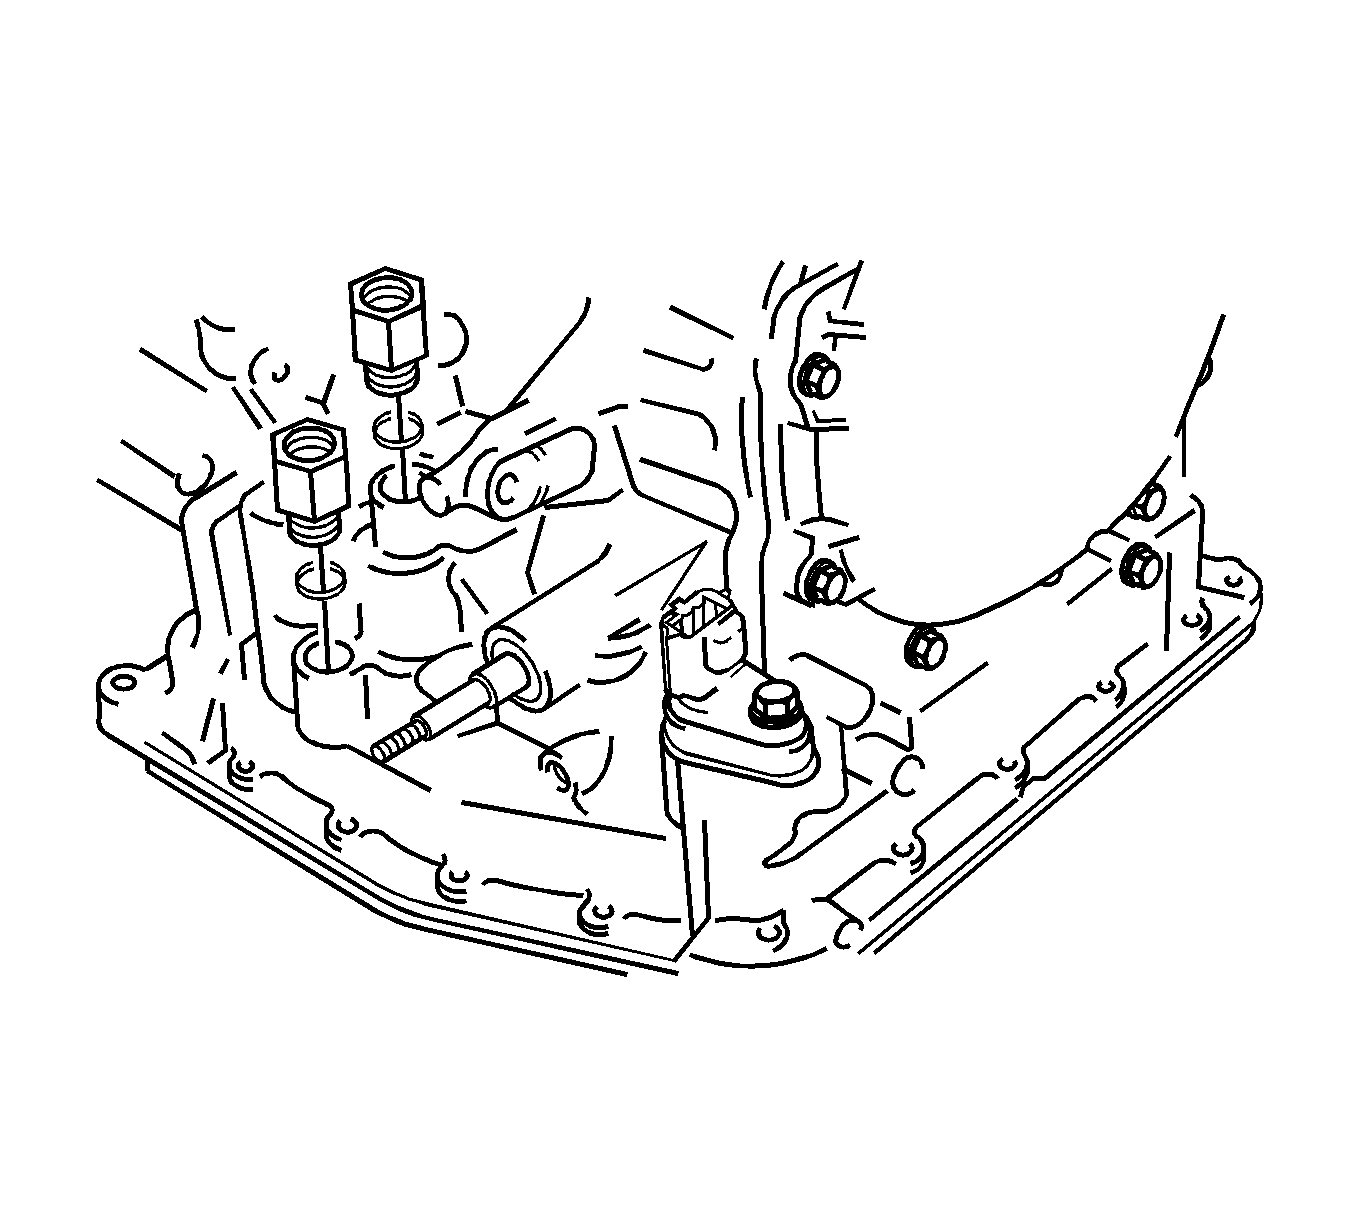
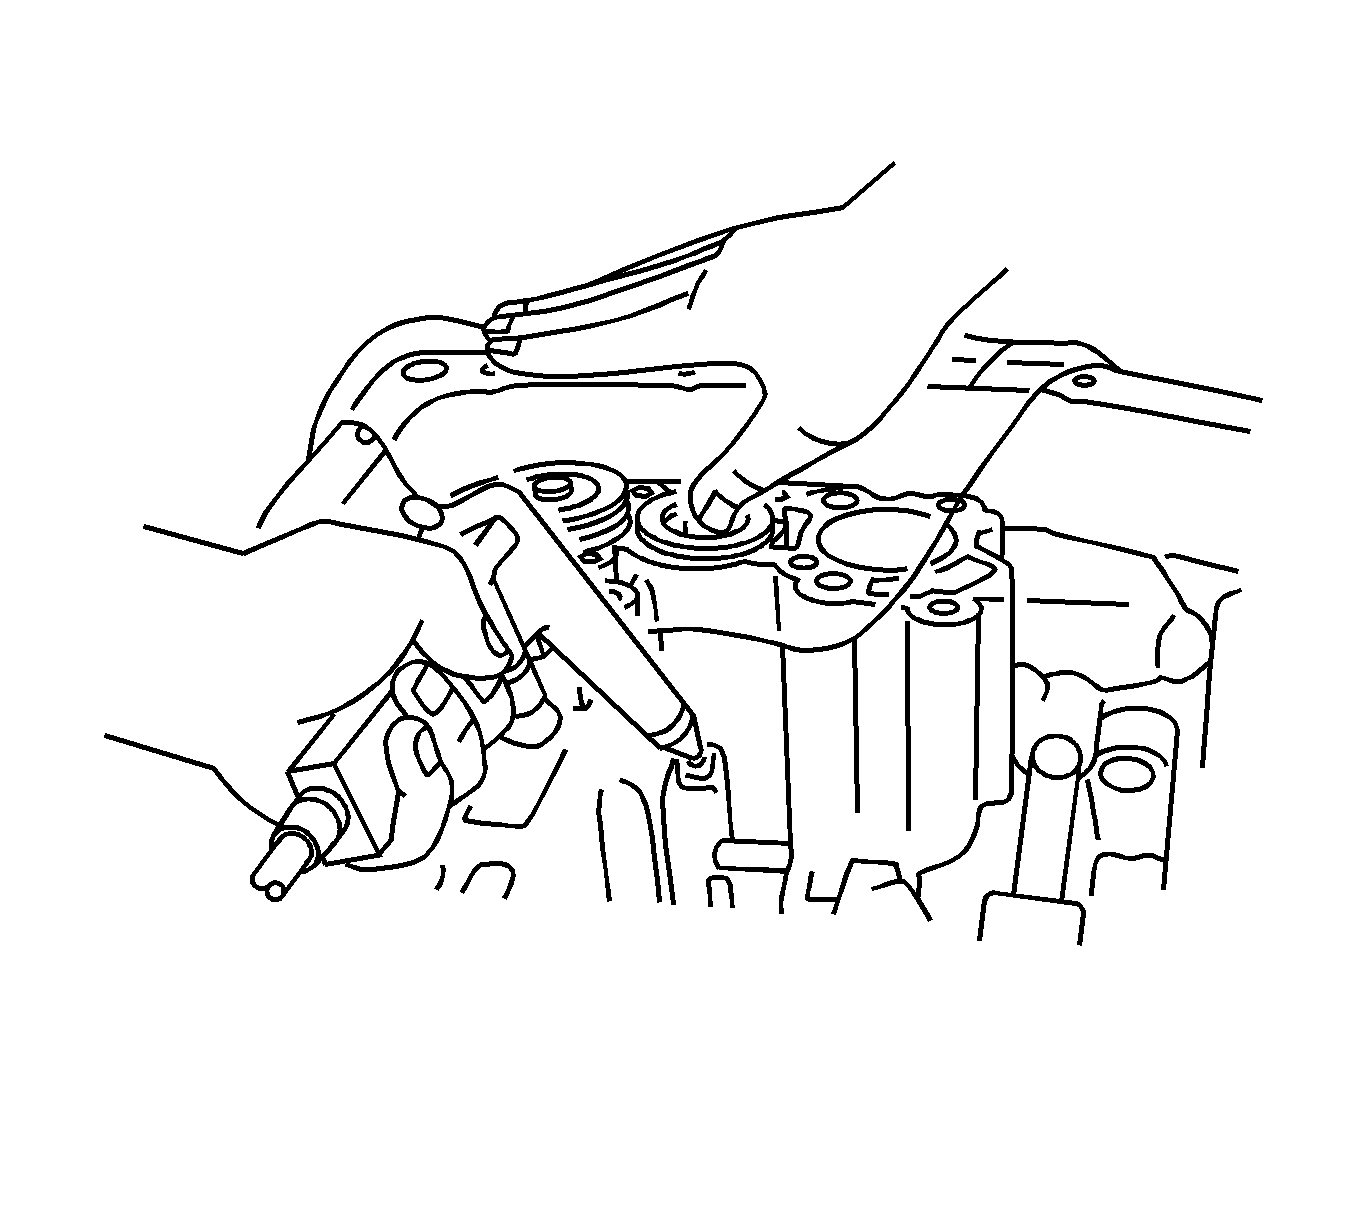
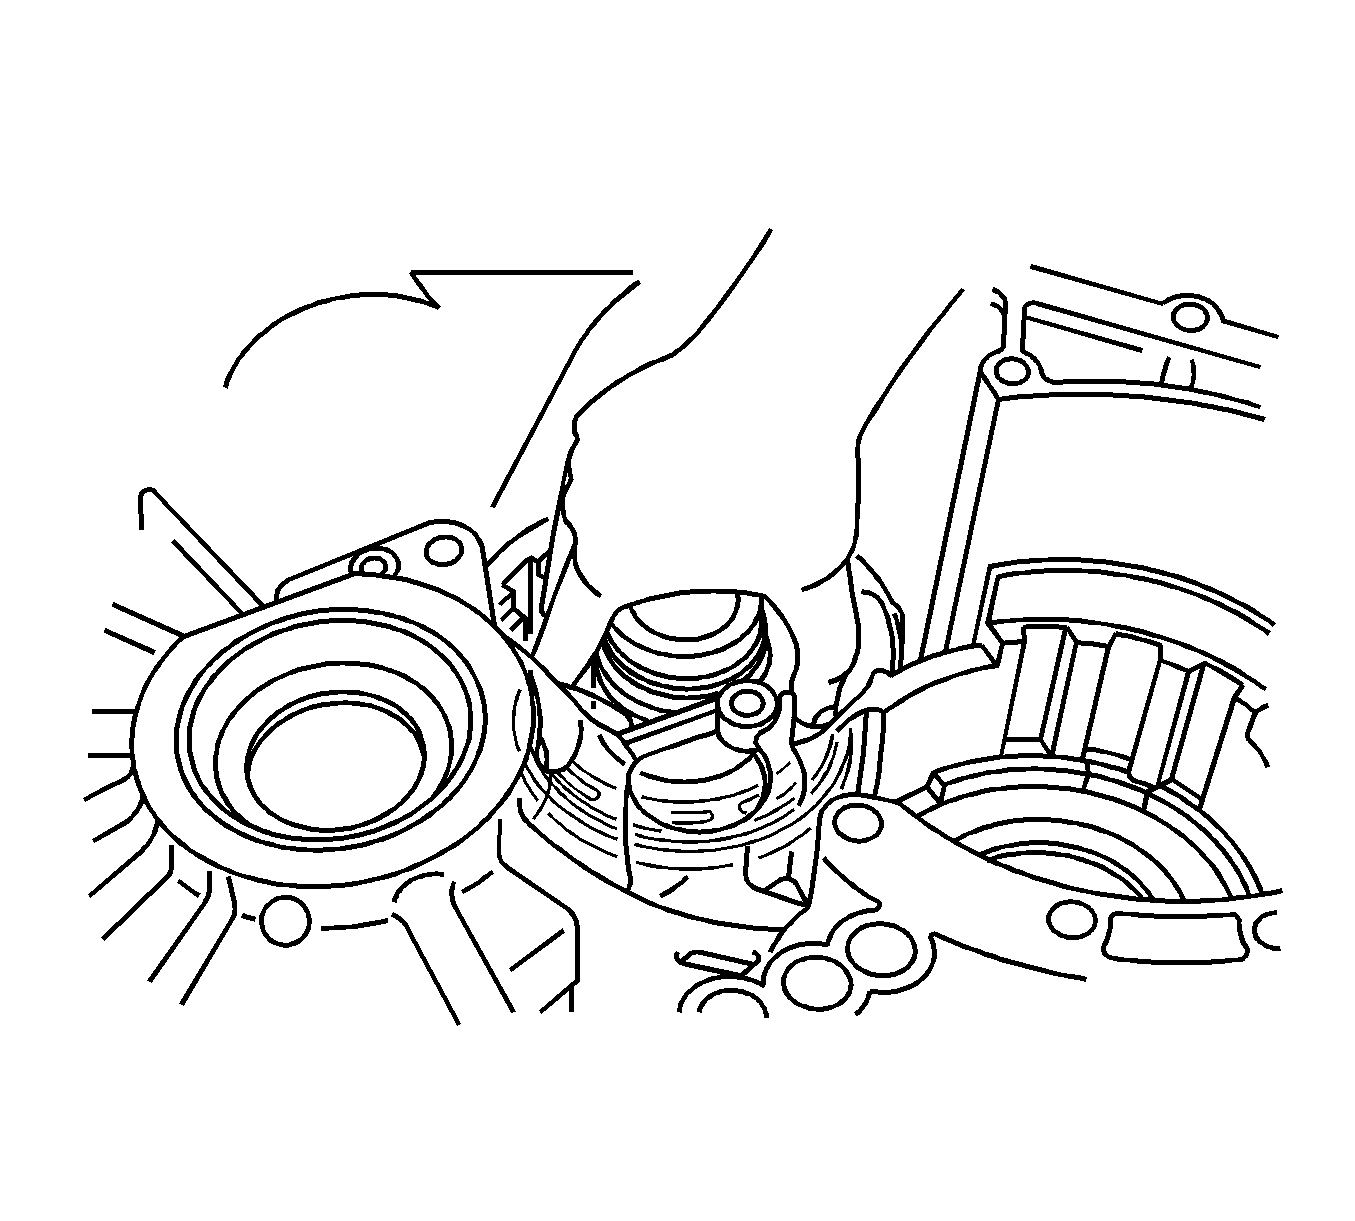
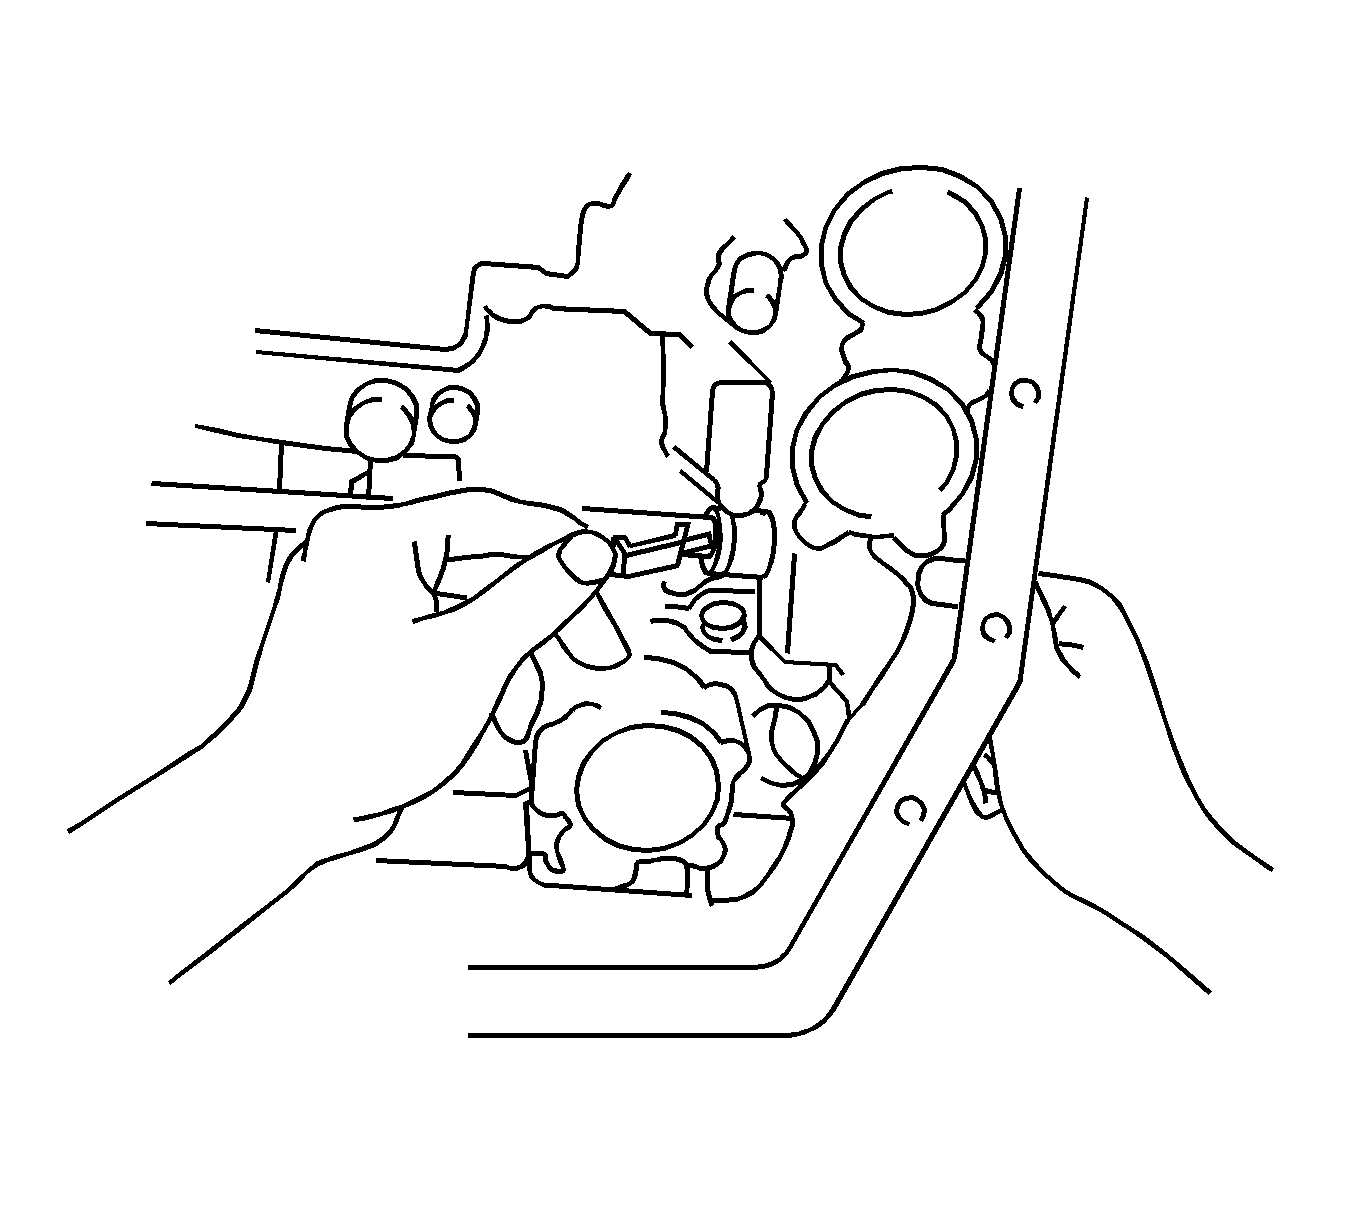
- Using a soft faced hammer, install the governor pressure tube in the transaxle case.
- Install the transaxle apply tube clamp and bolt in the transaxle case.
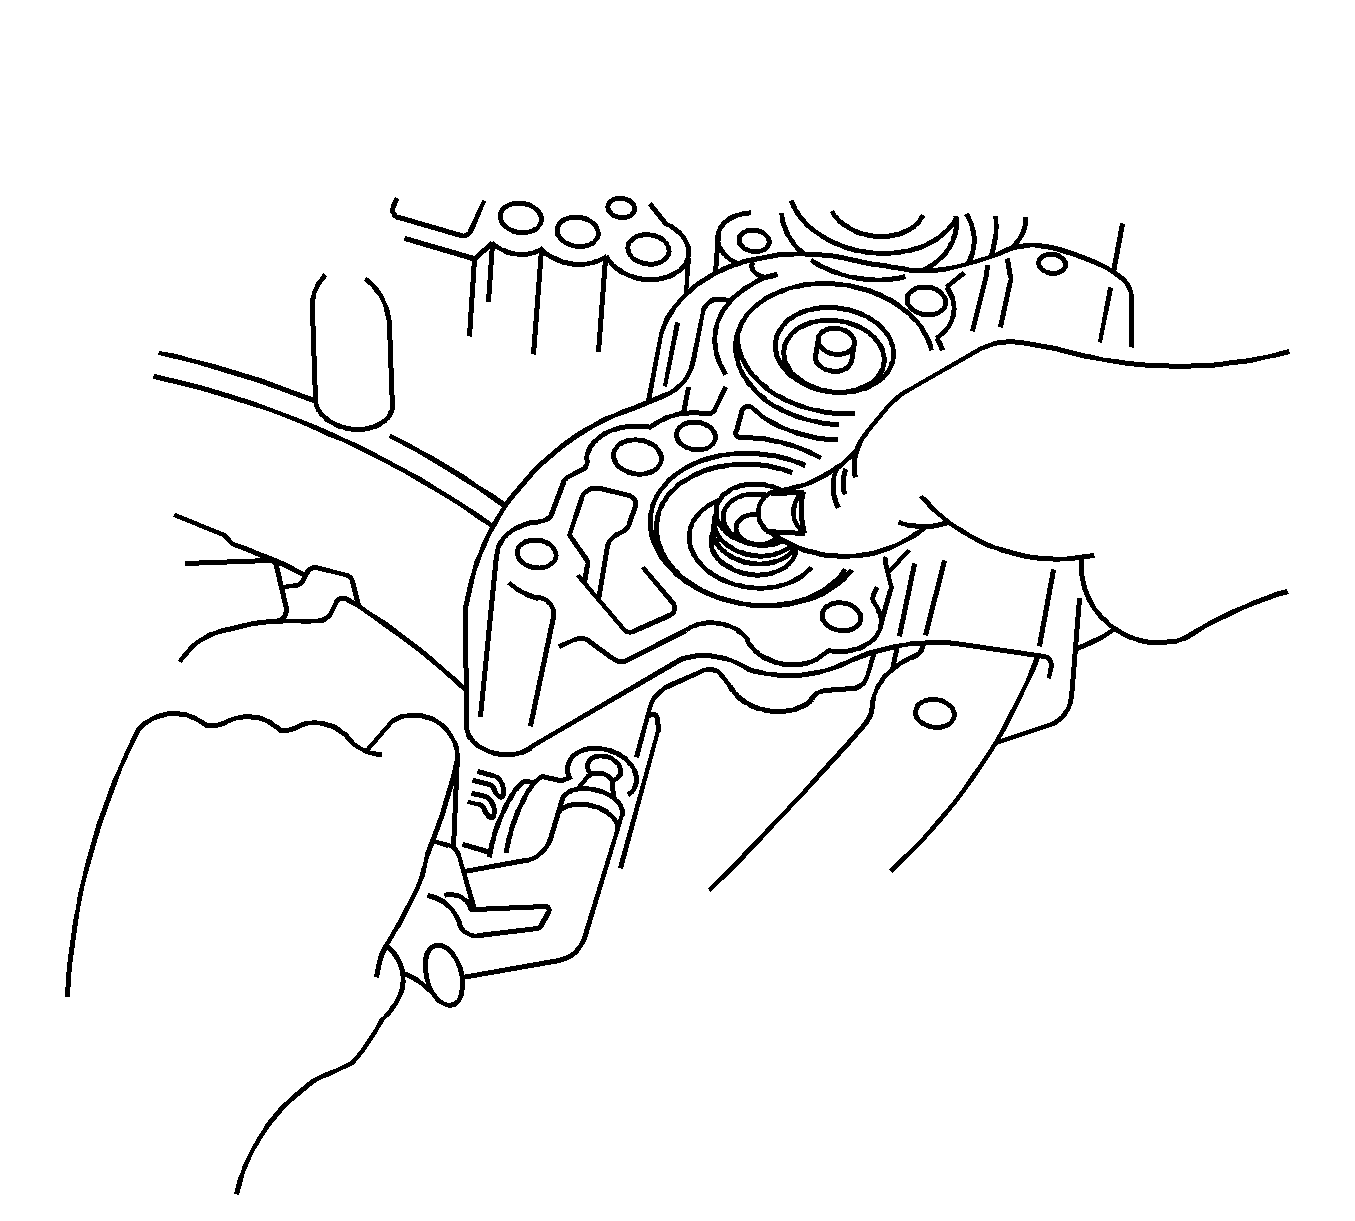
- Coat a new O-ring with T-IV automatic transmission fluid, then install the O-ring on the oil pump.
- Place the oil pump over the input shaft, then align the bolt holes of the pump body with holes in the transaxle case.
- Hold the input shaft, and lightly press the oil pump body to slide the oil seal rings on the input shaft through the direct clutch drum.
- Install the 6 bolts.
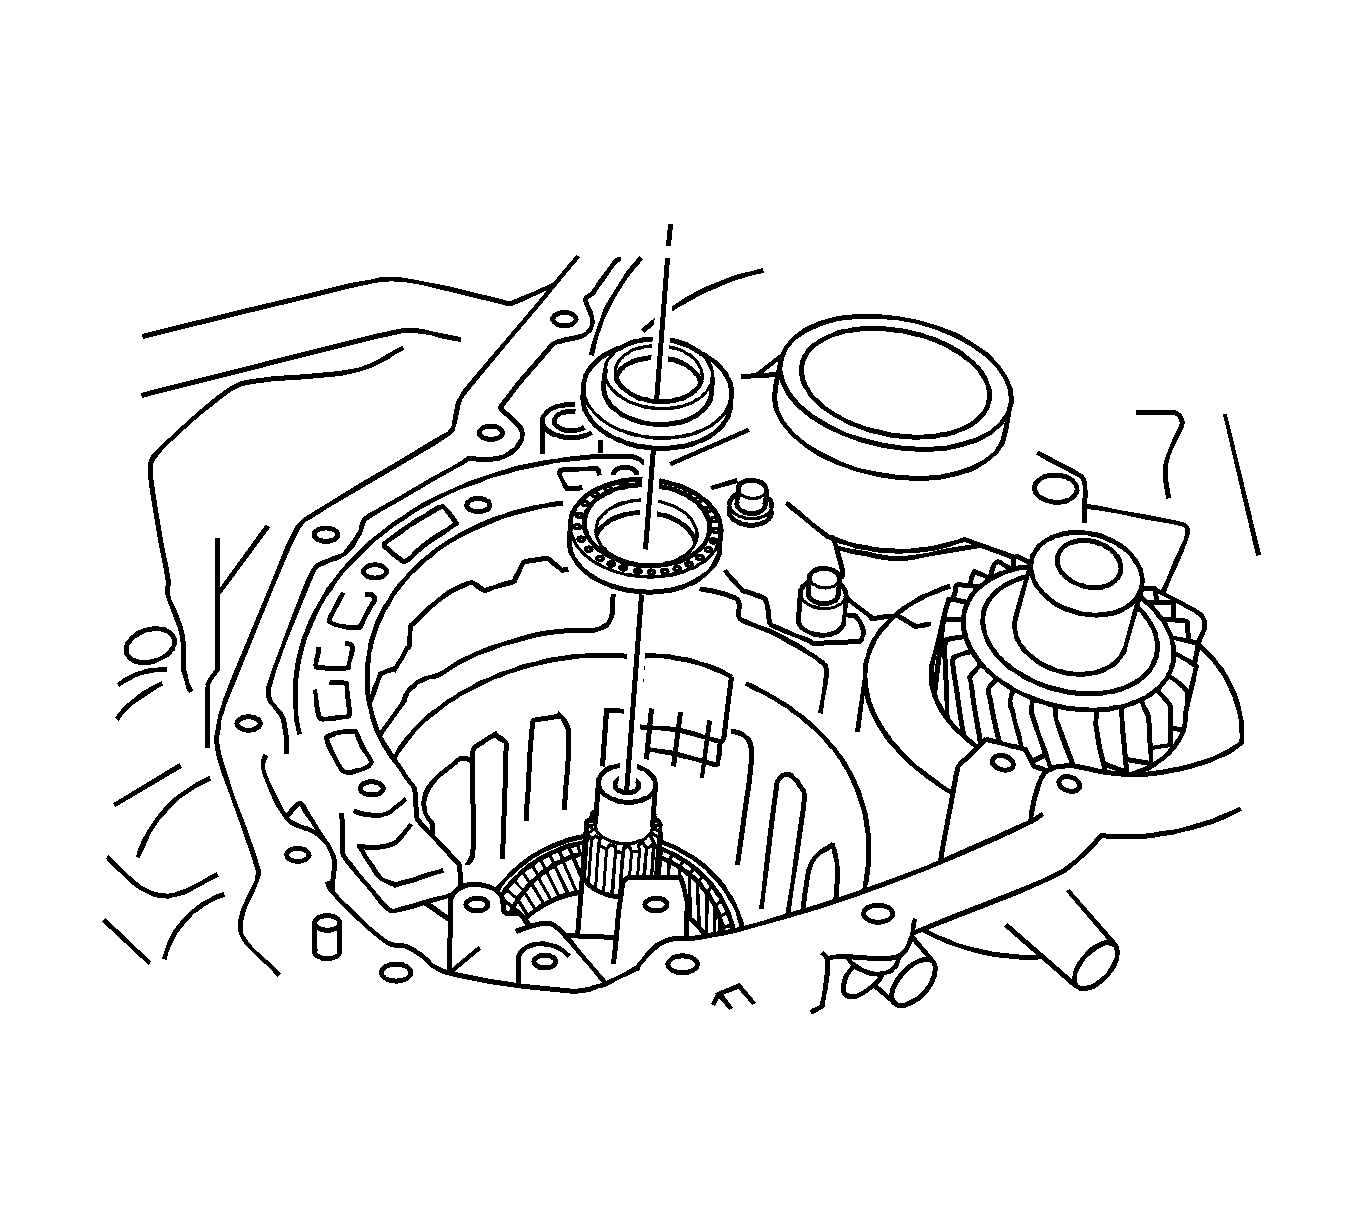
- Using a dial indicator, measure the end play of the input shaft.
- Ensure that the input shaft rotates smoothly.
- Install the governor apply gasket No. 2 in the transaxle case.
- Install the transaxle case plate No.1 and bolt in the transaxle case.
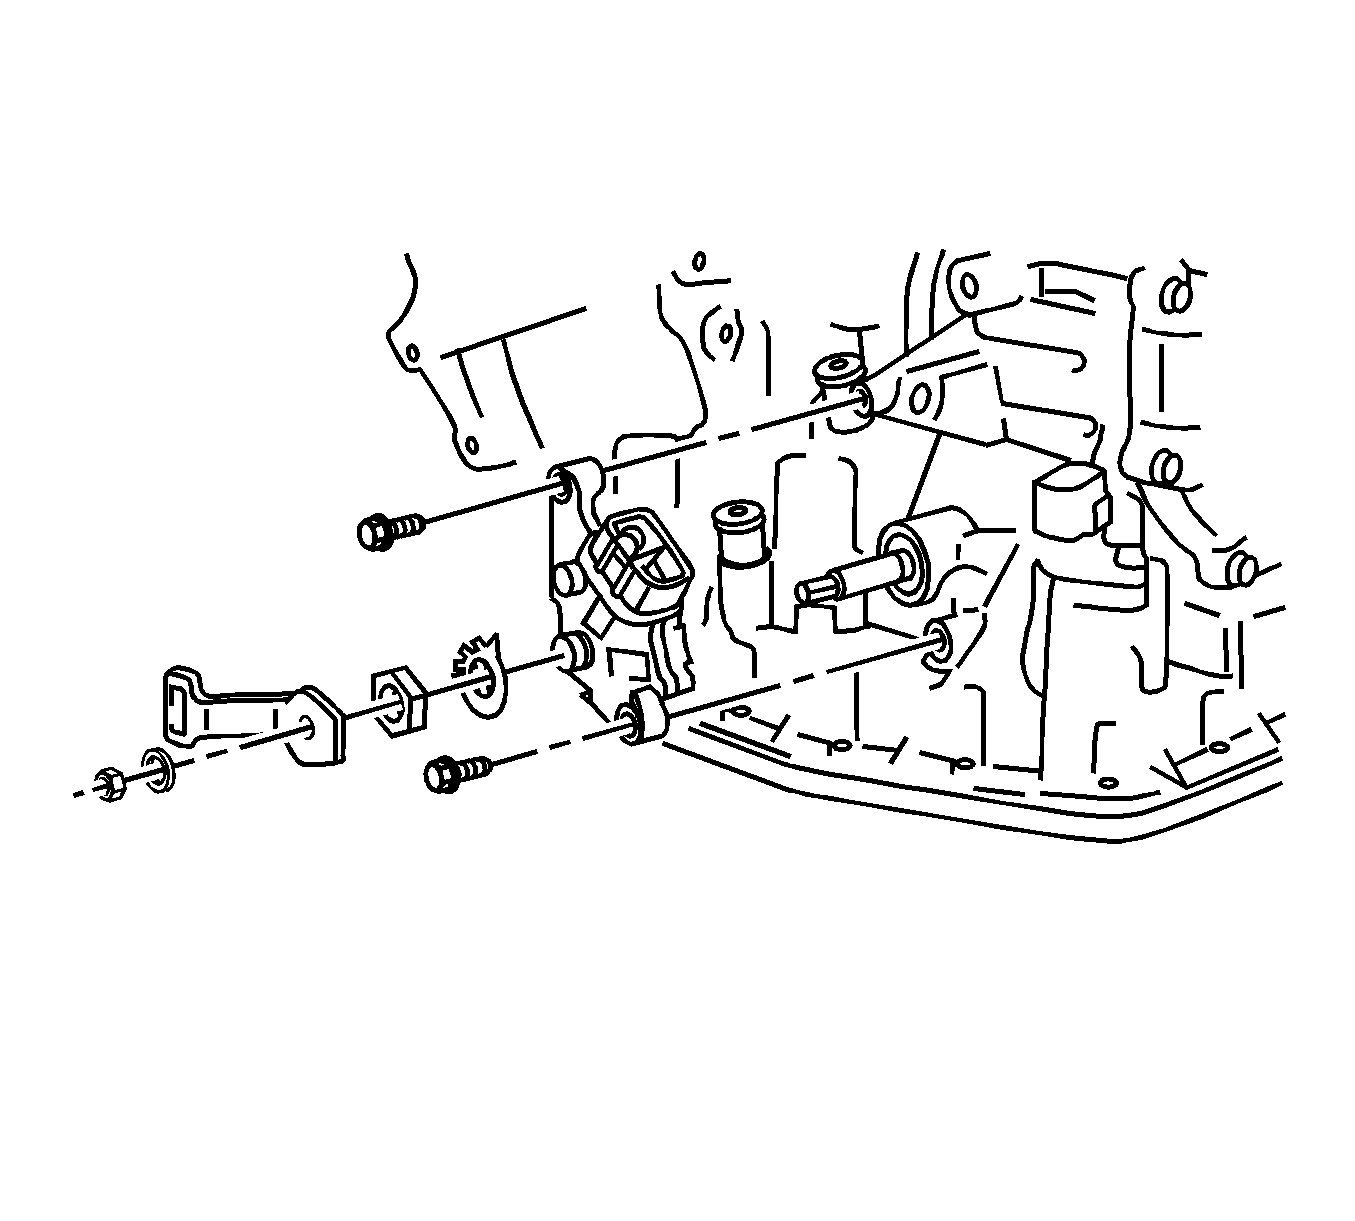
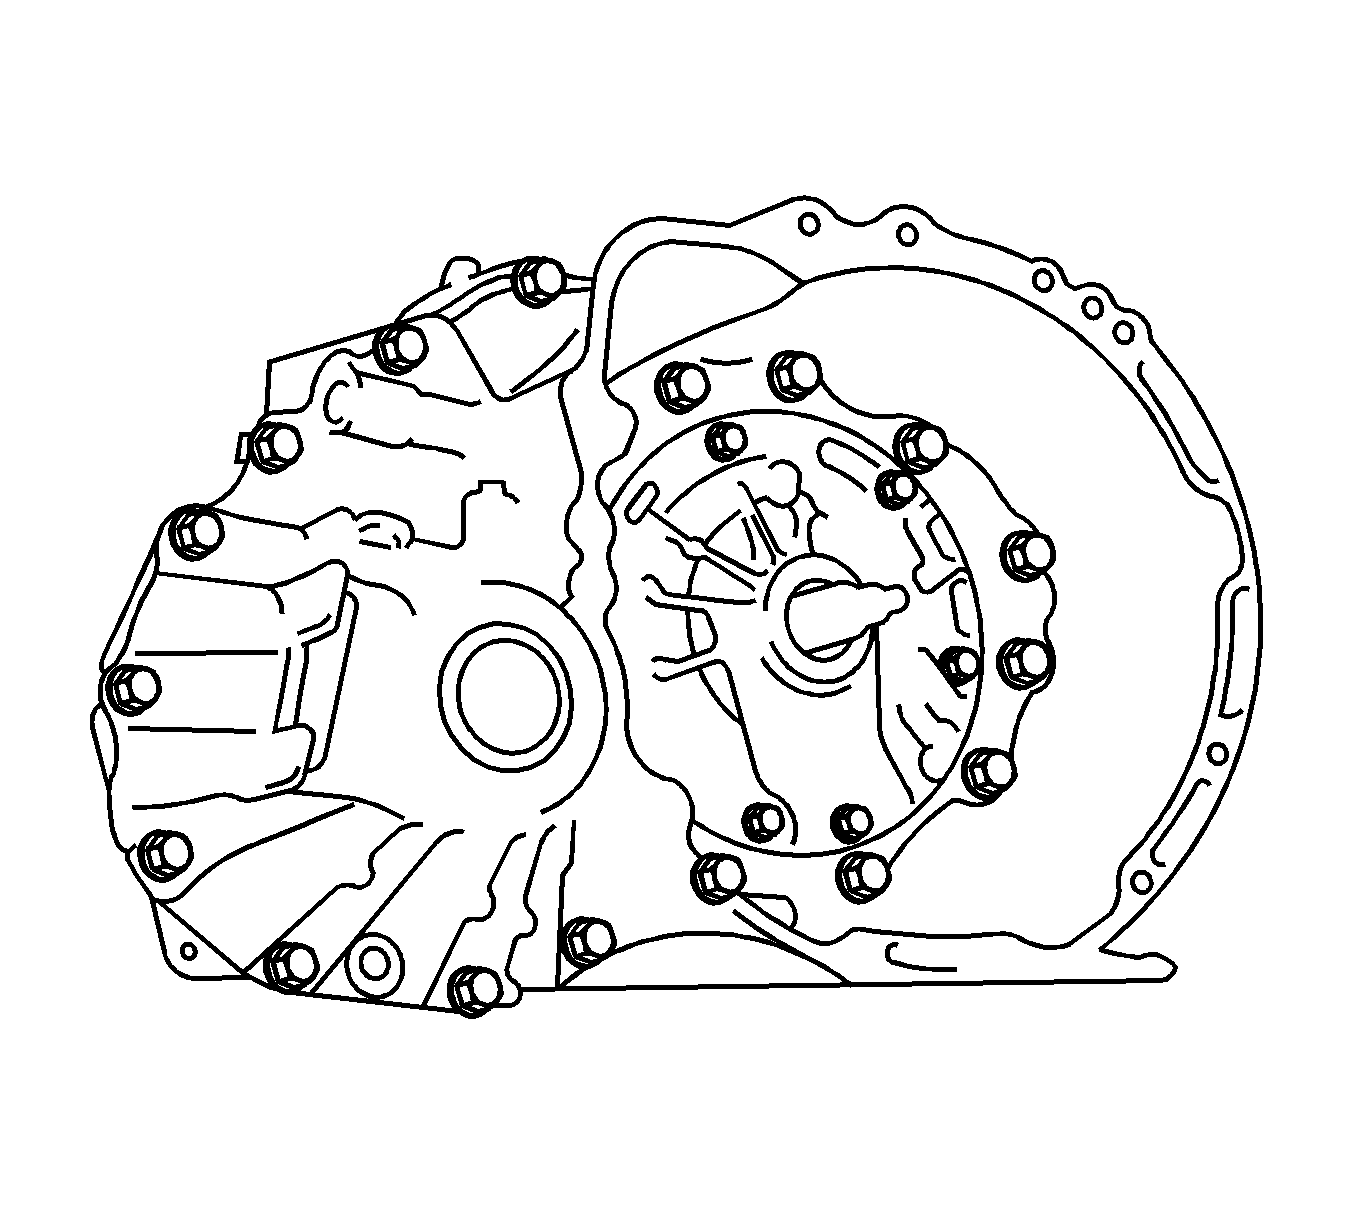
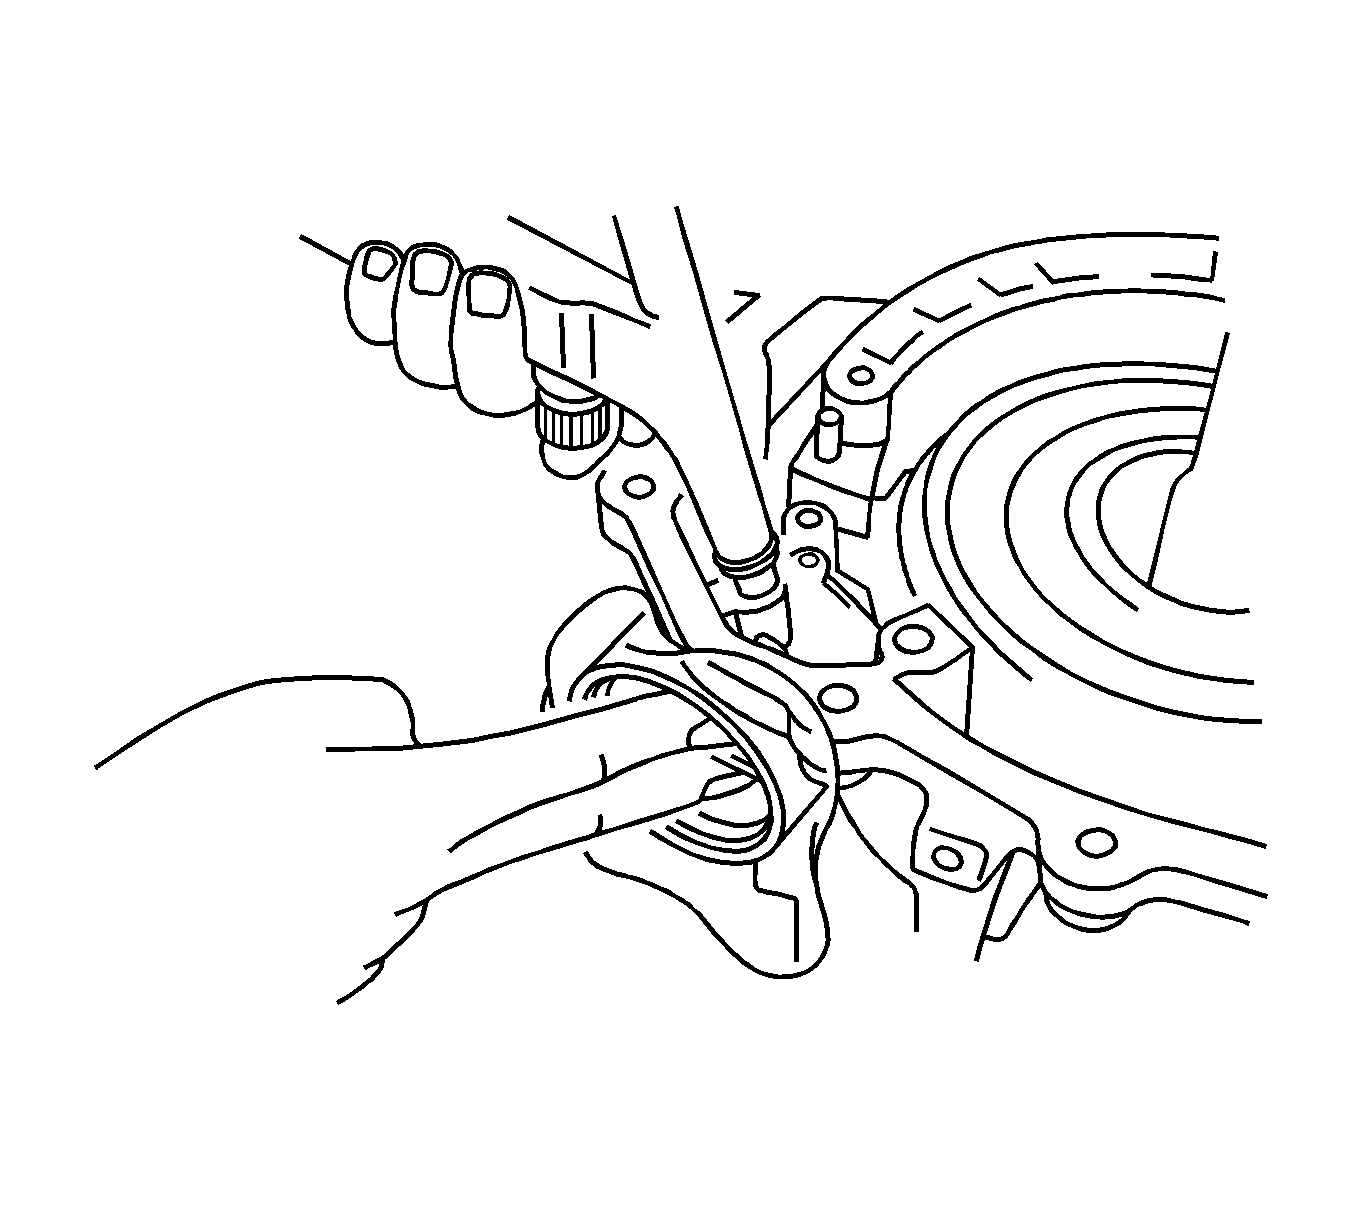
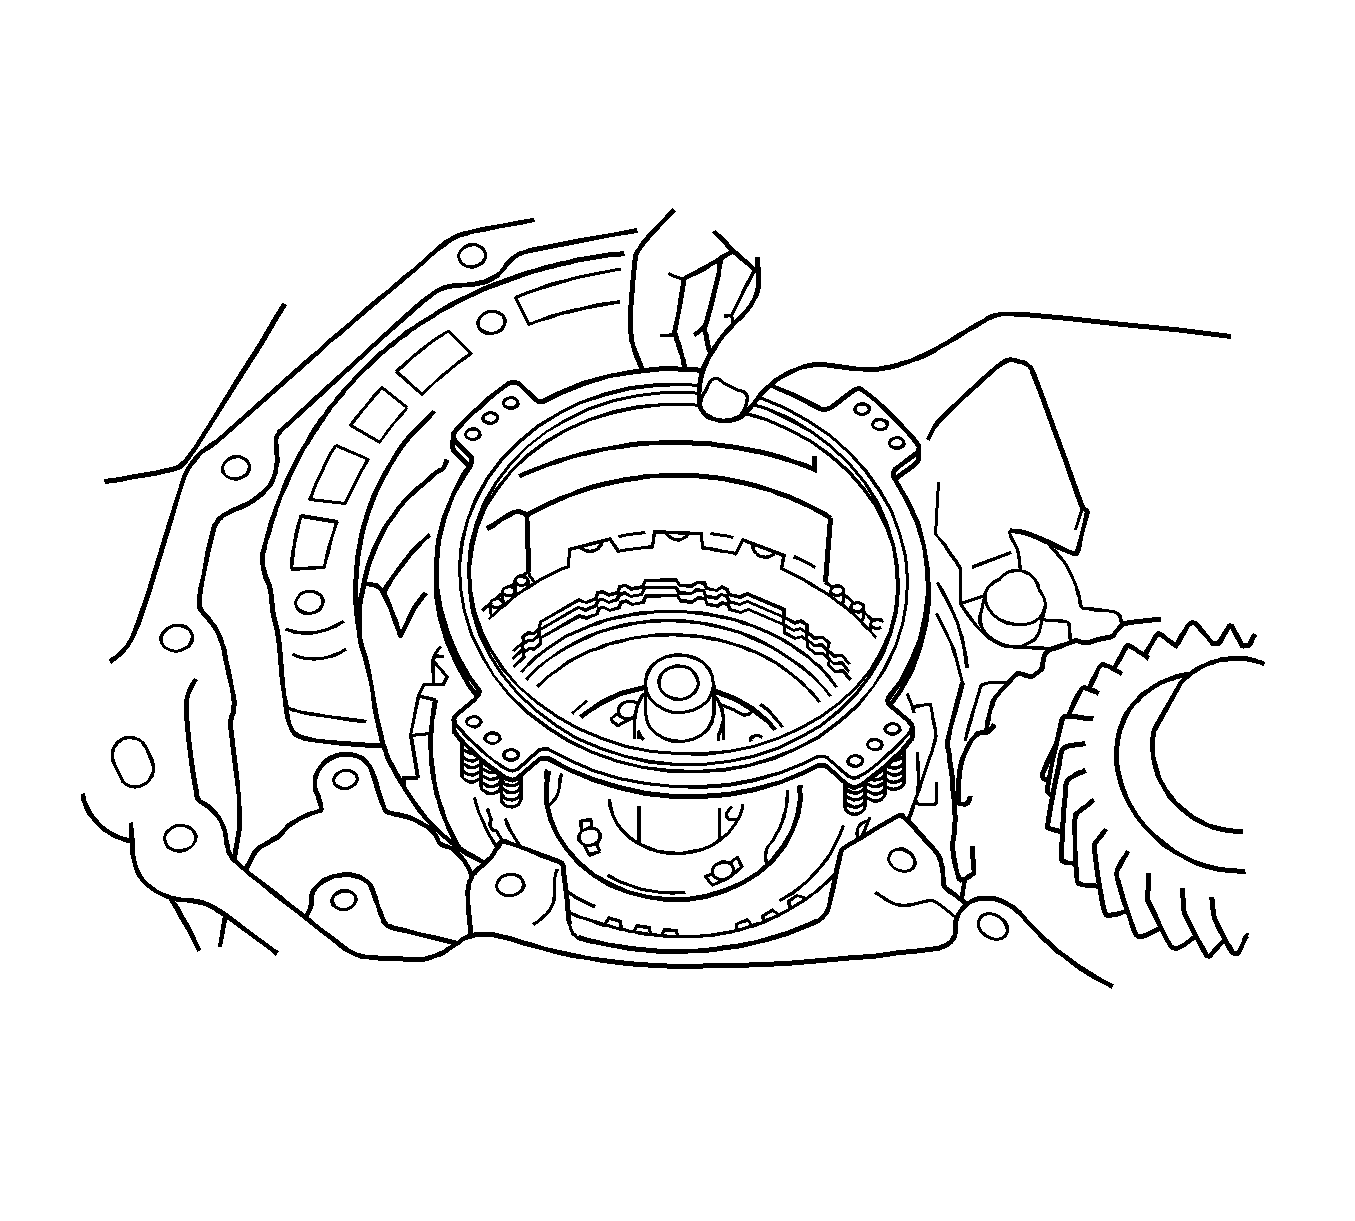
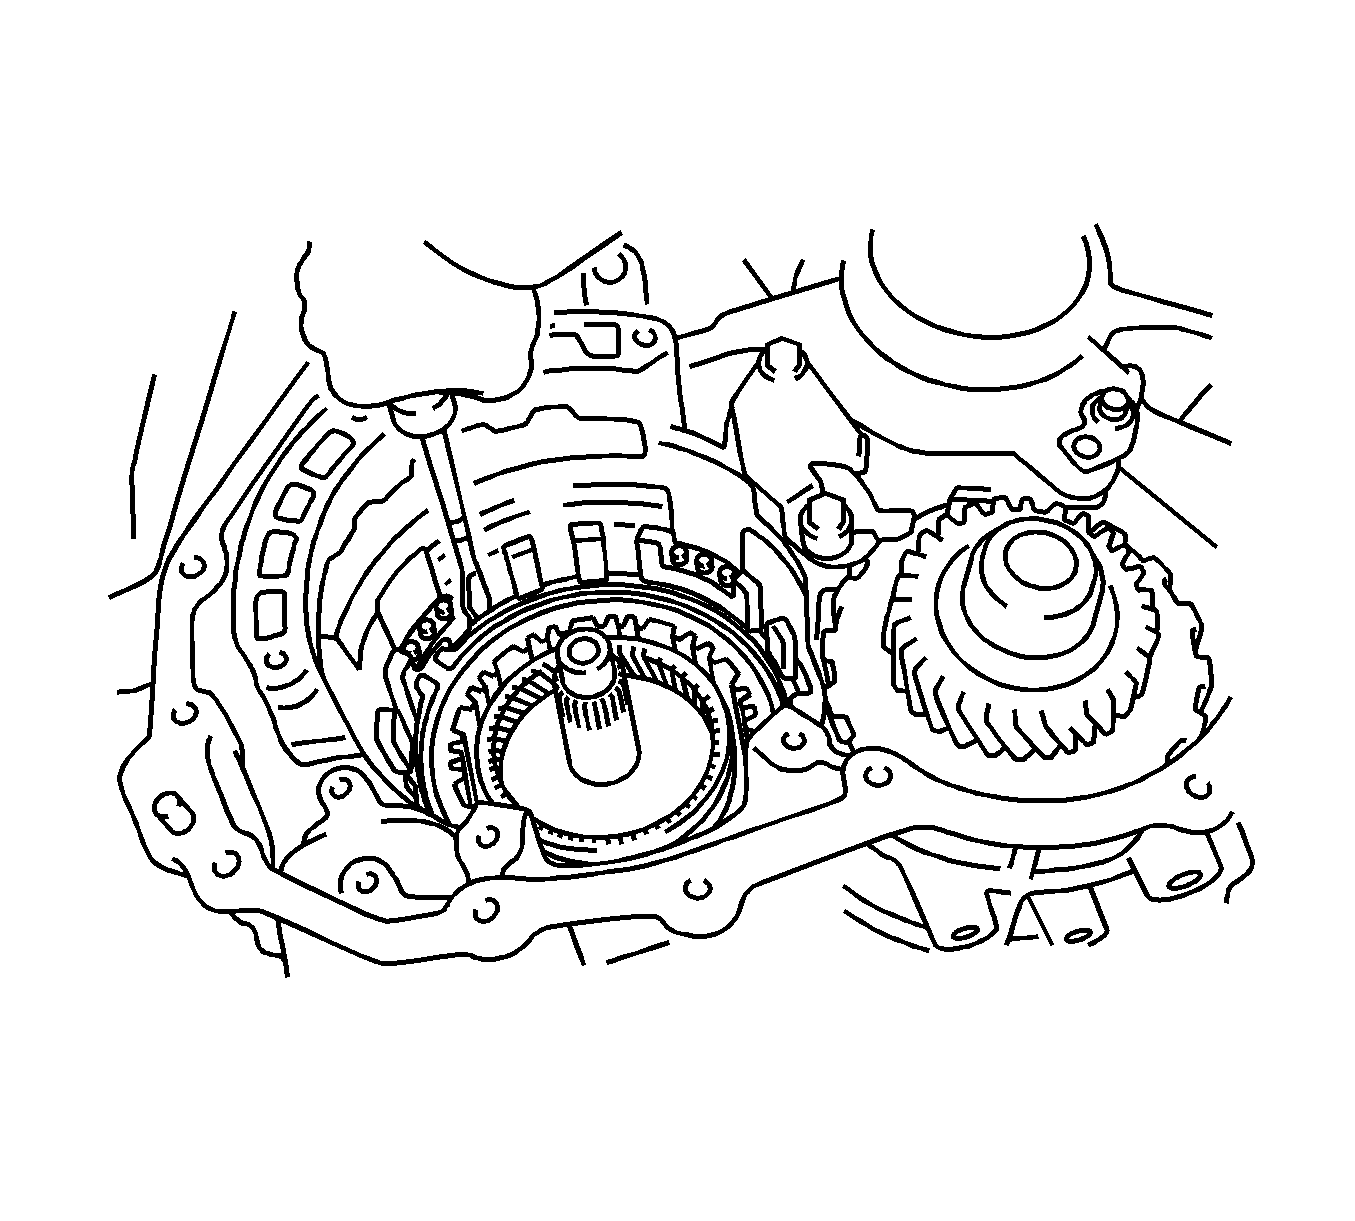
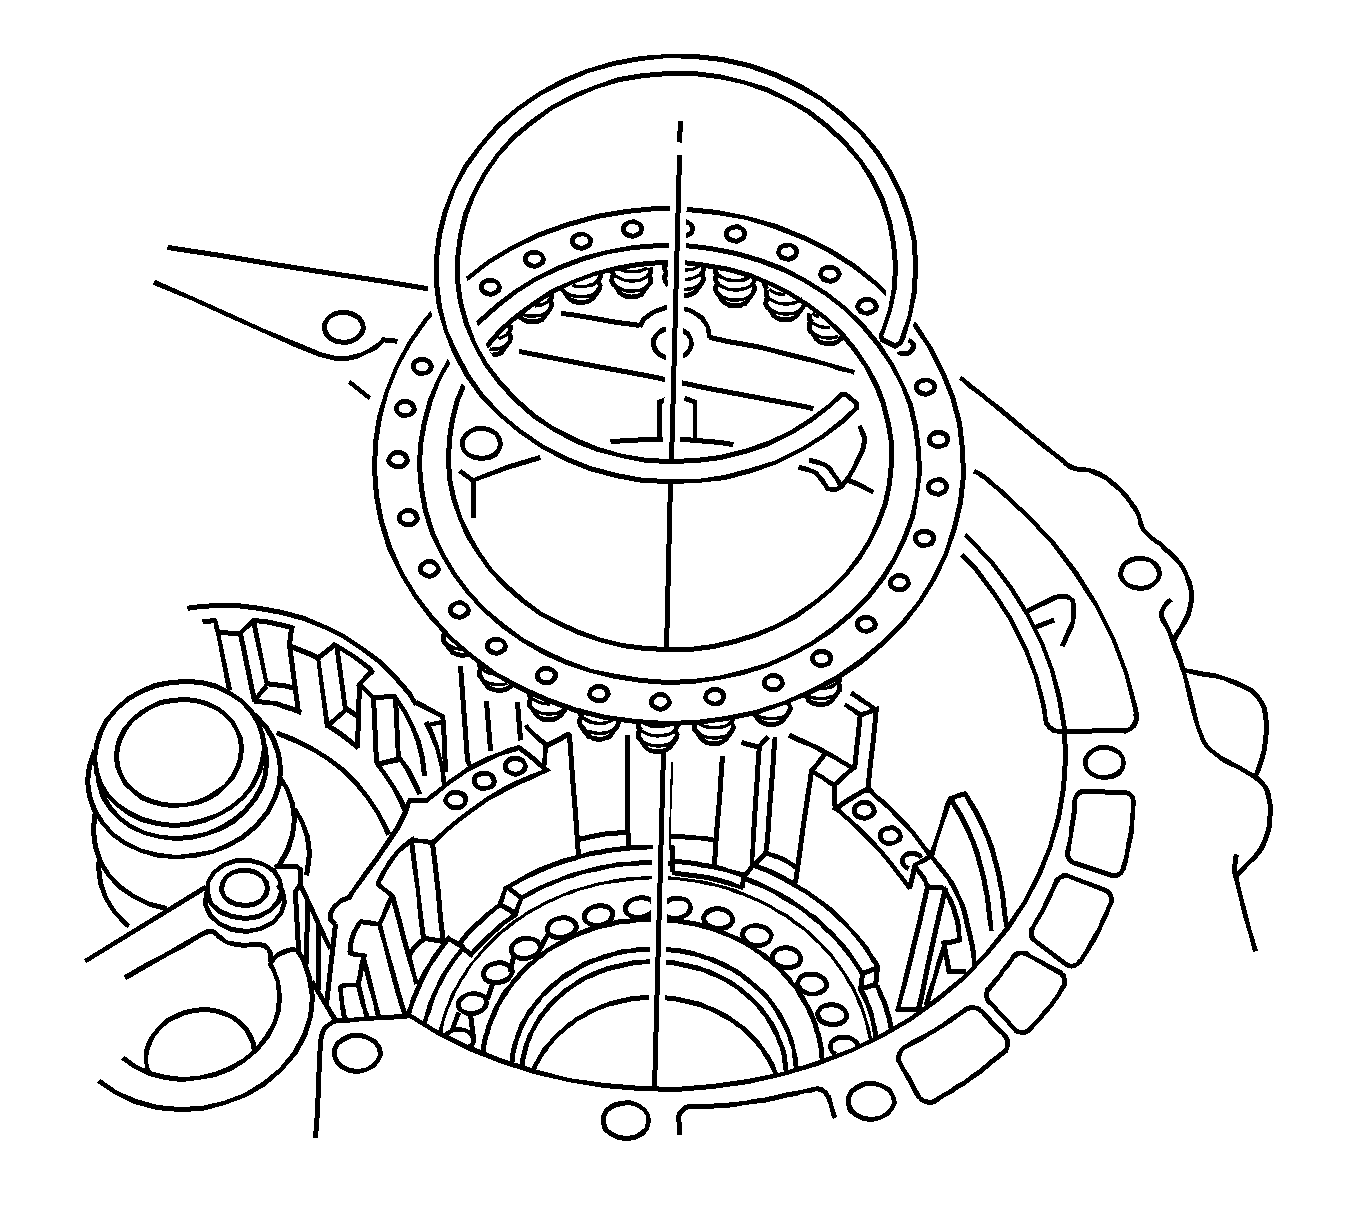
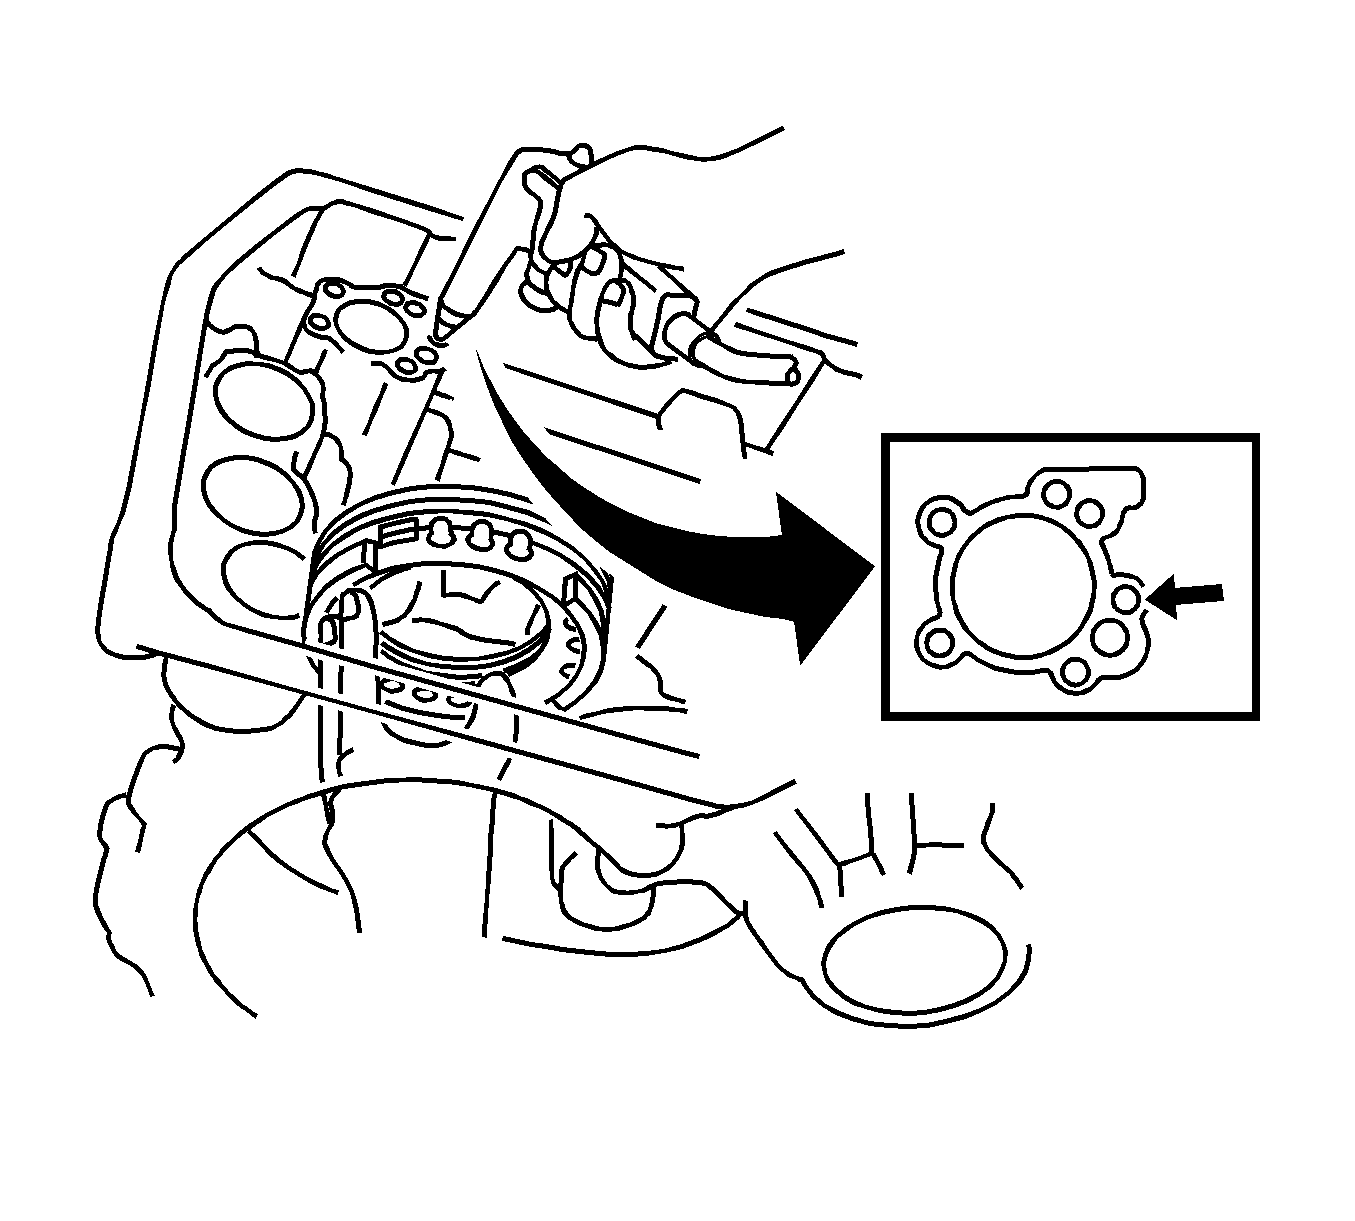
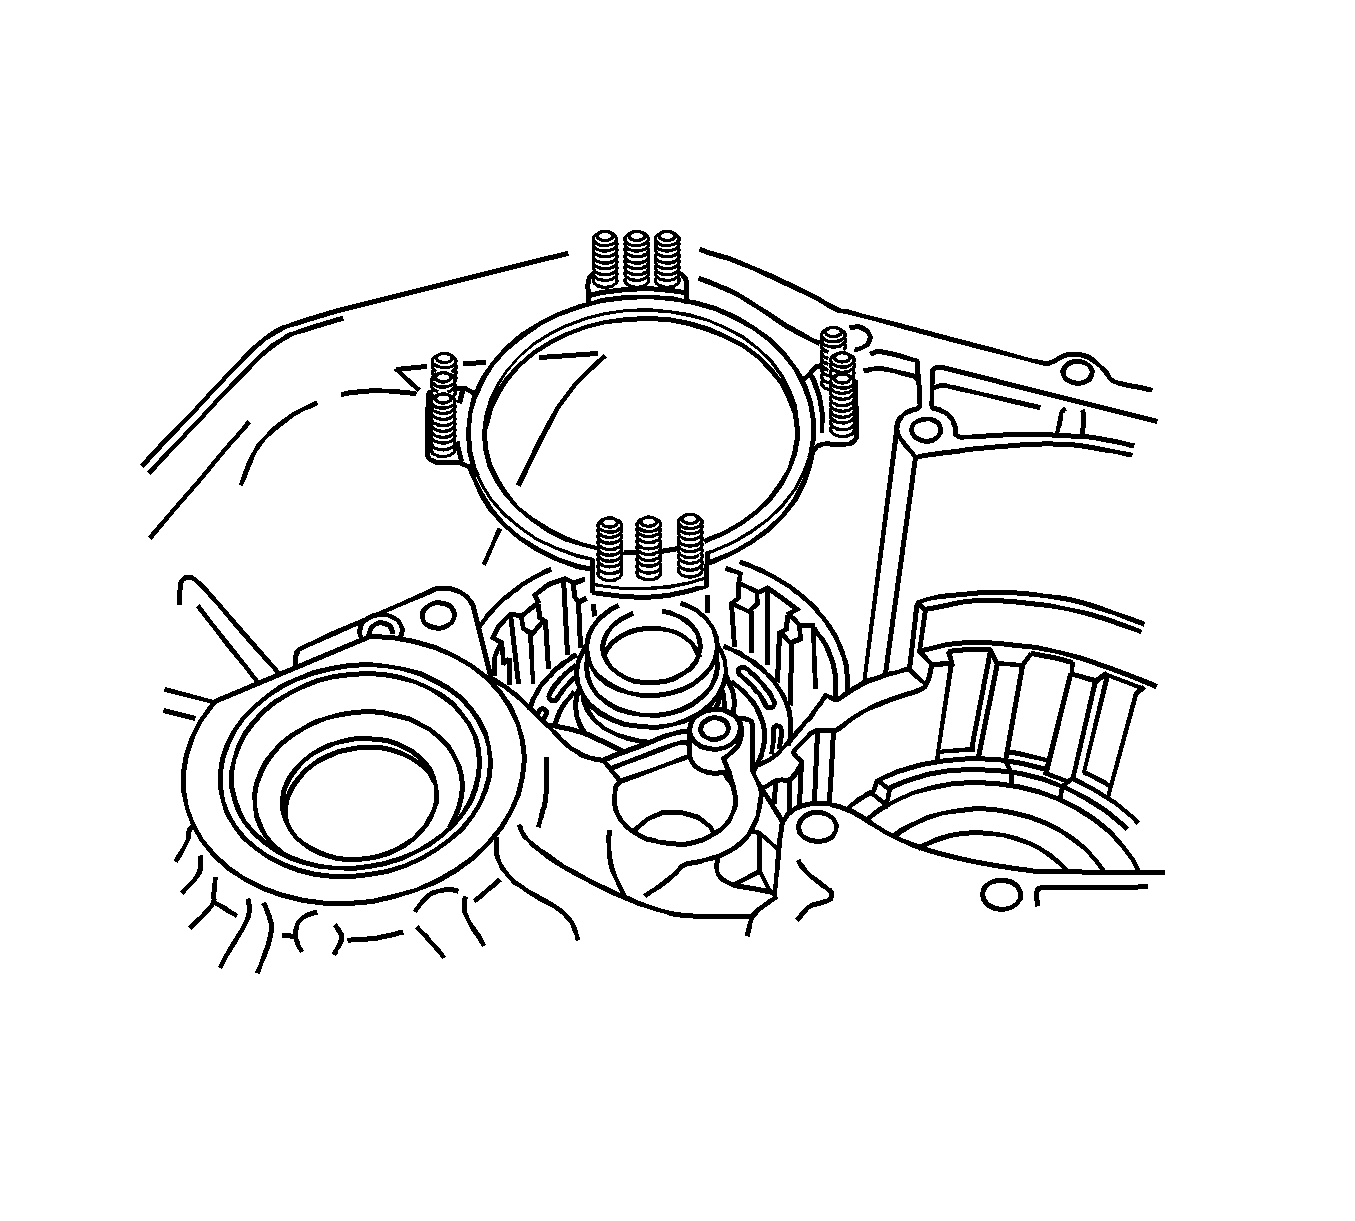
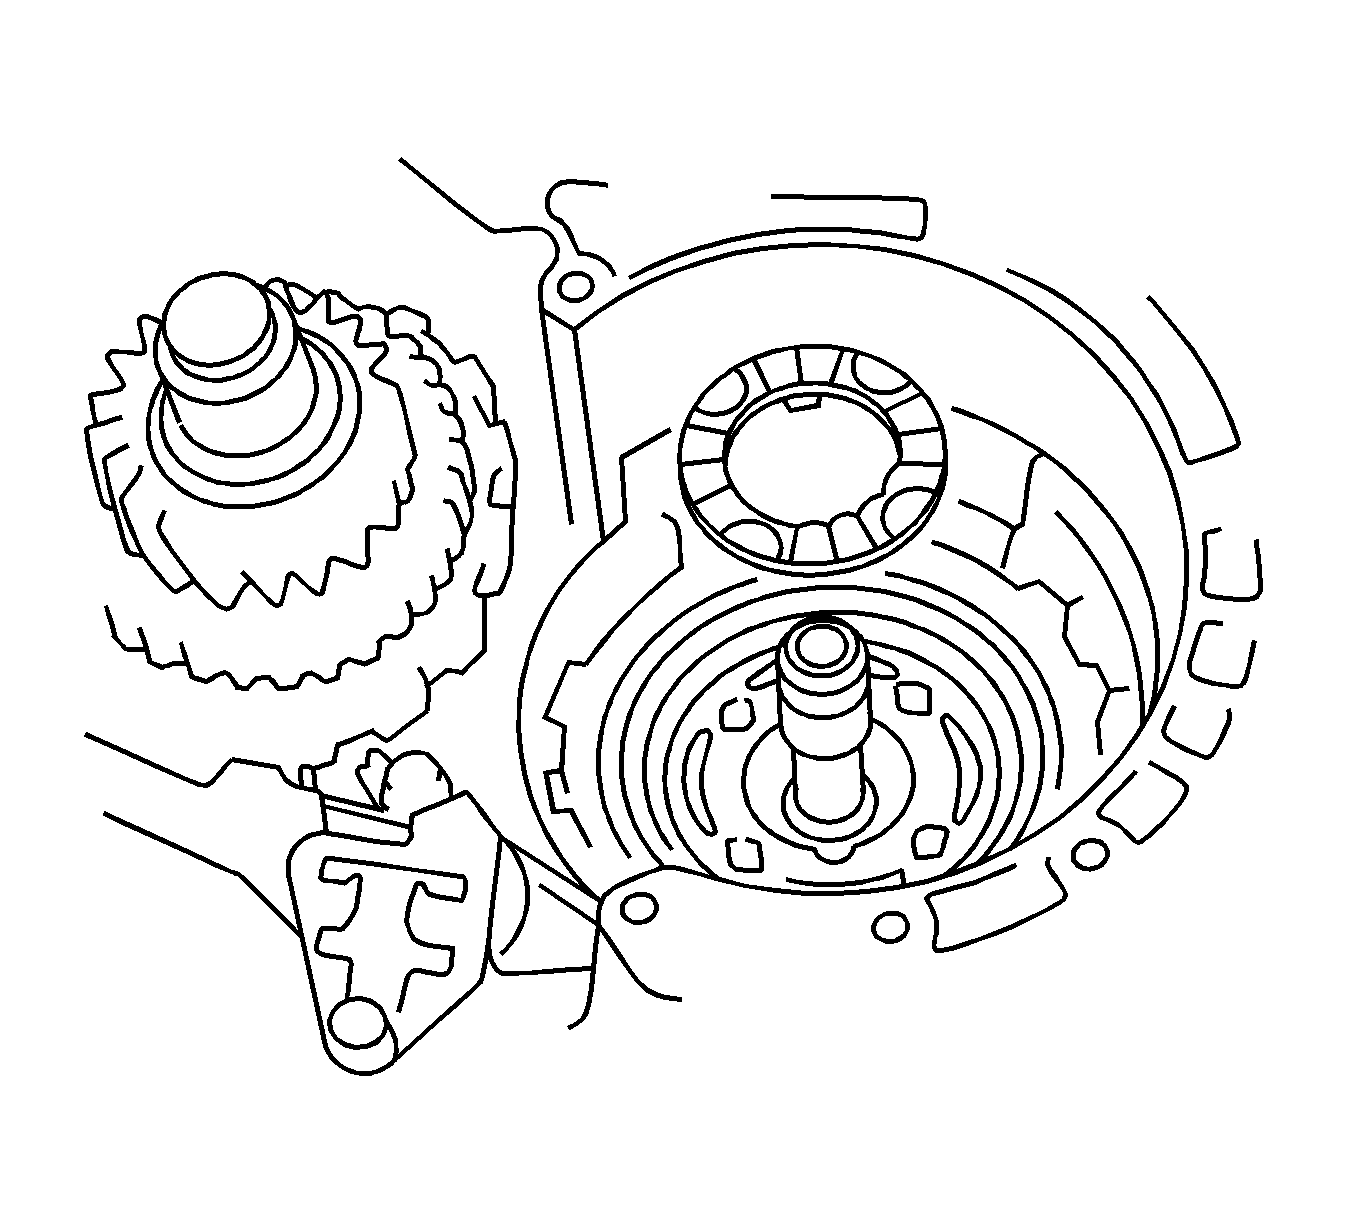
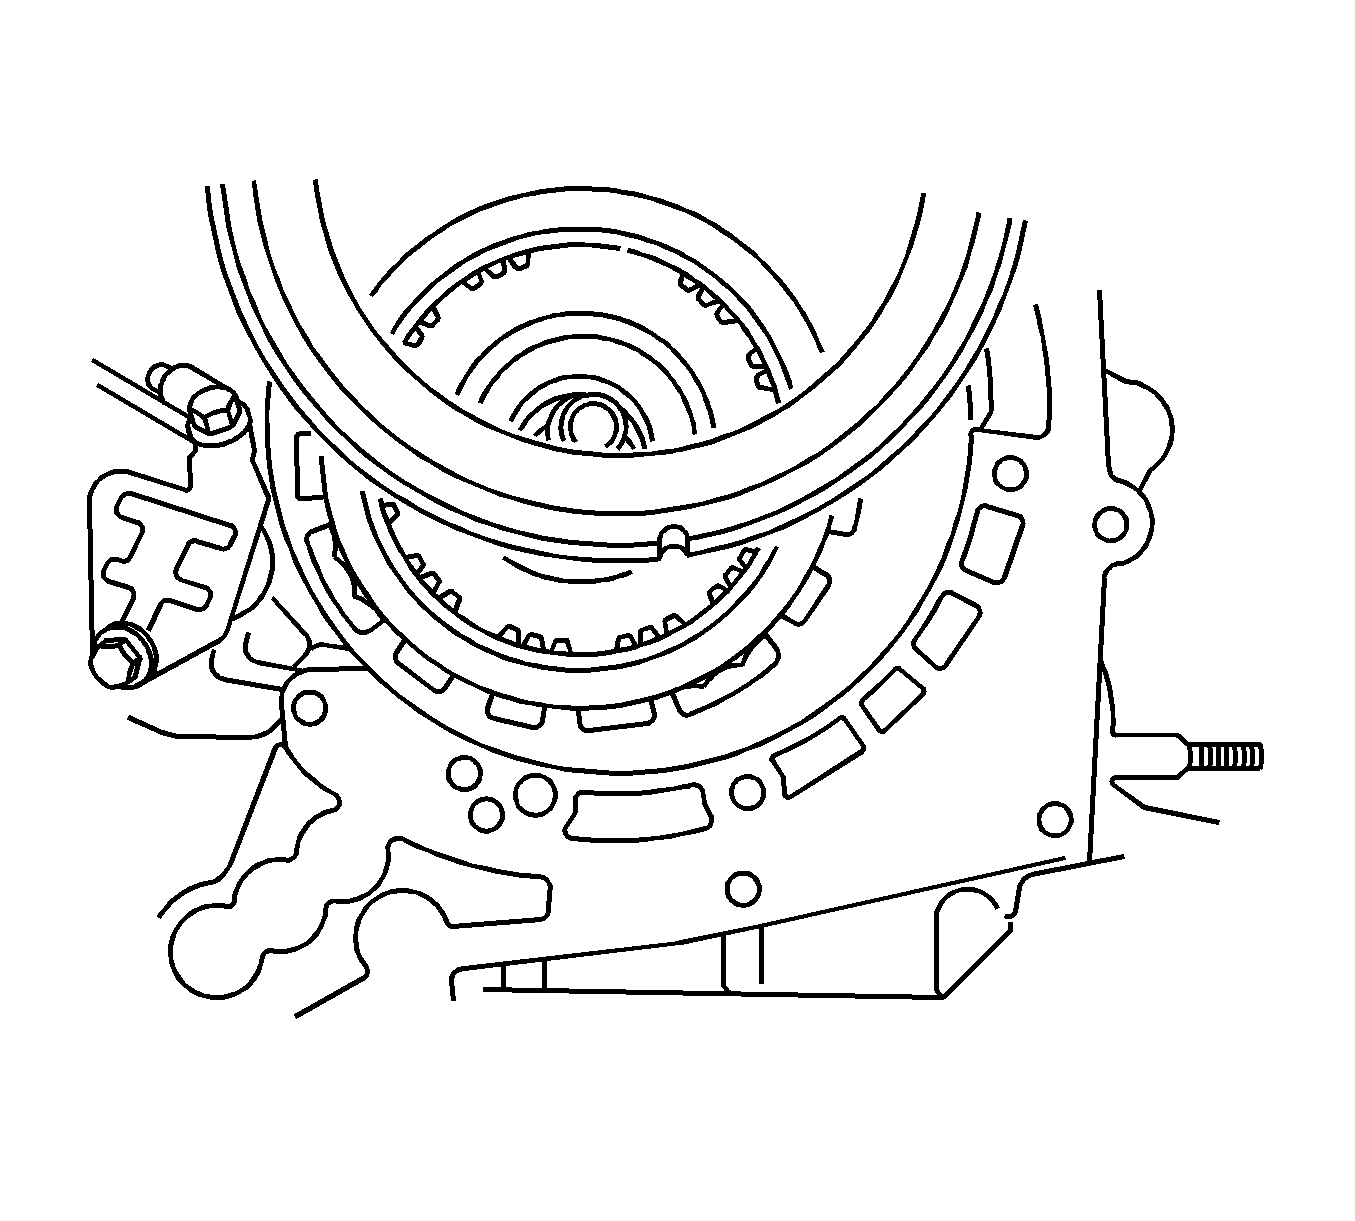
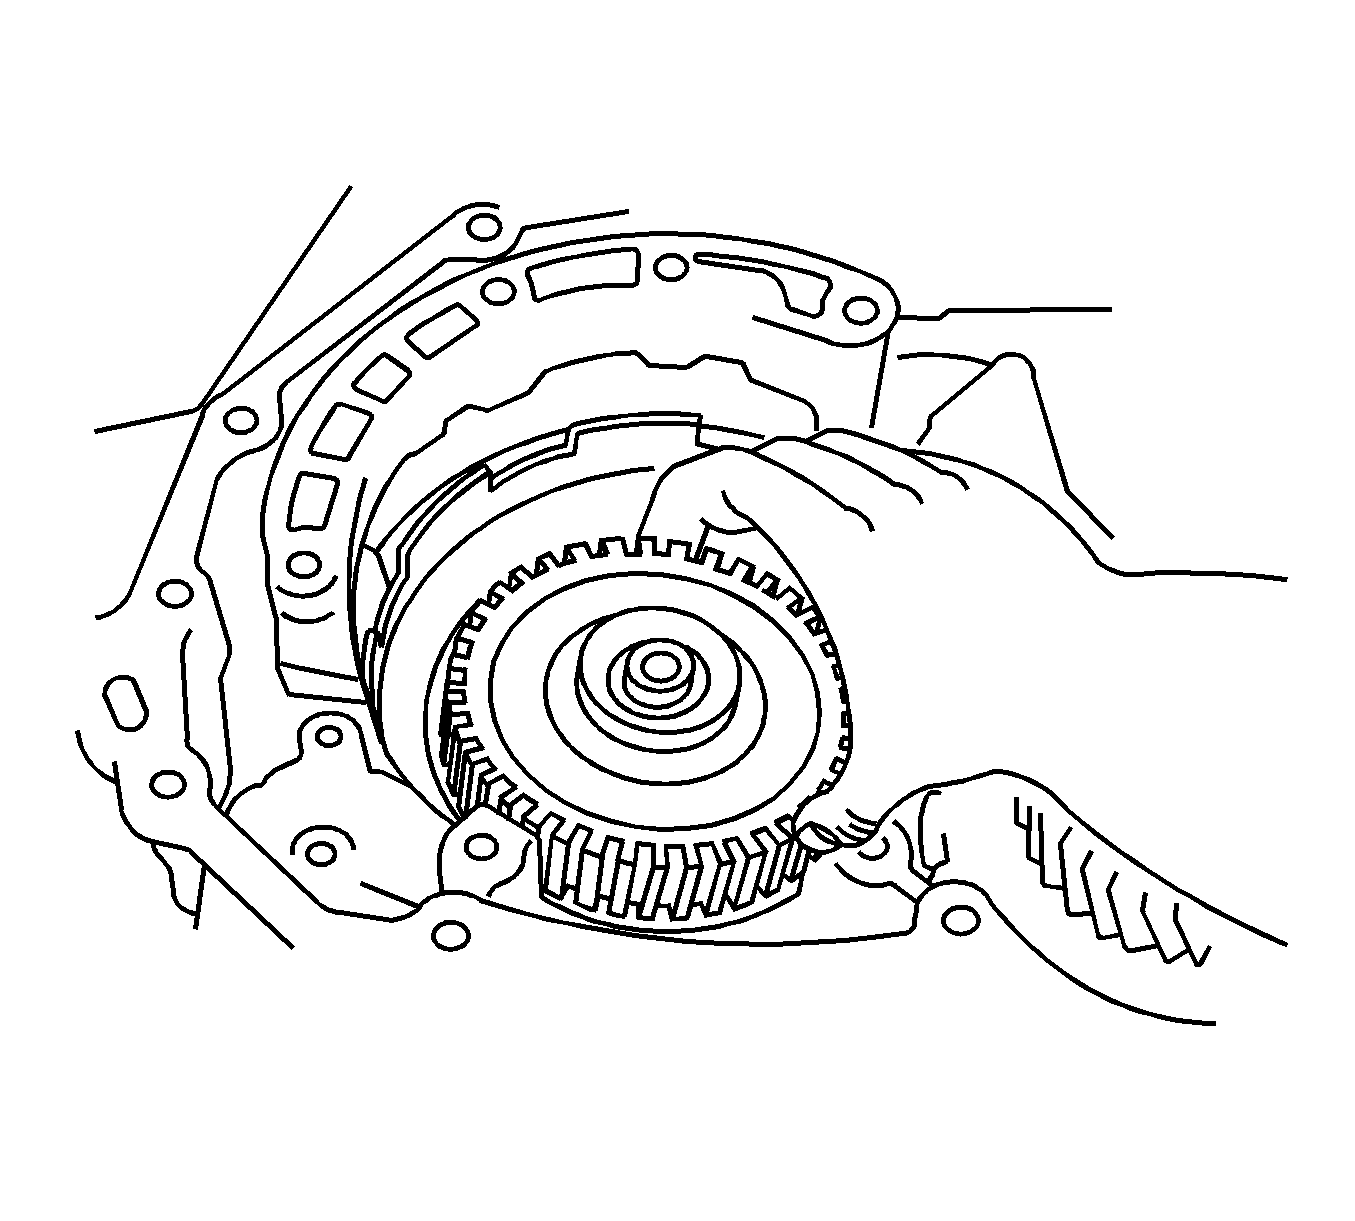
- Install the differential assembly into the transaxle case.
- Clean the mating surfaces of the transaxle case and the transaxle housing.
- Apply RTV Silicone Sealant GM P/N 12346240 (Canadian P/N 10953493) or the equivalent to the transaxle case cover.
- Apply Threadlocker 242 GM P/N 12345382 or the equivalent to the threads of bolts (2). These bolts are 35 mm (1.38 in) in length.
- Install the (2) bolts.
- Install the (1) bolts.
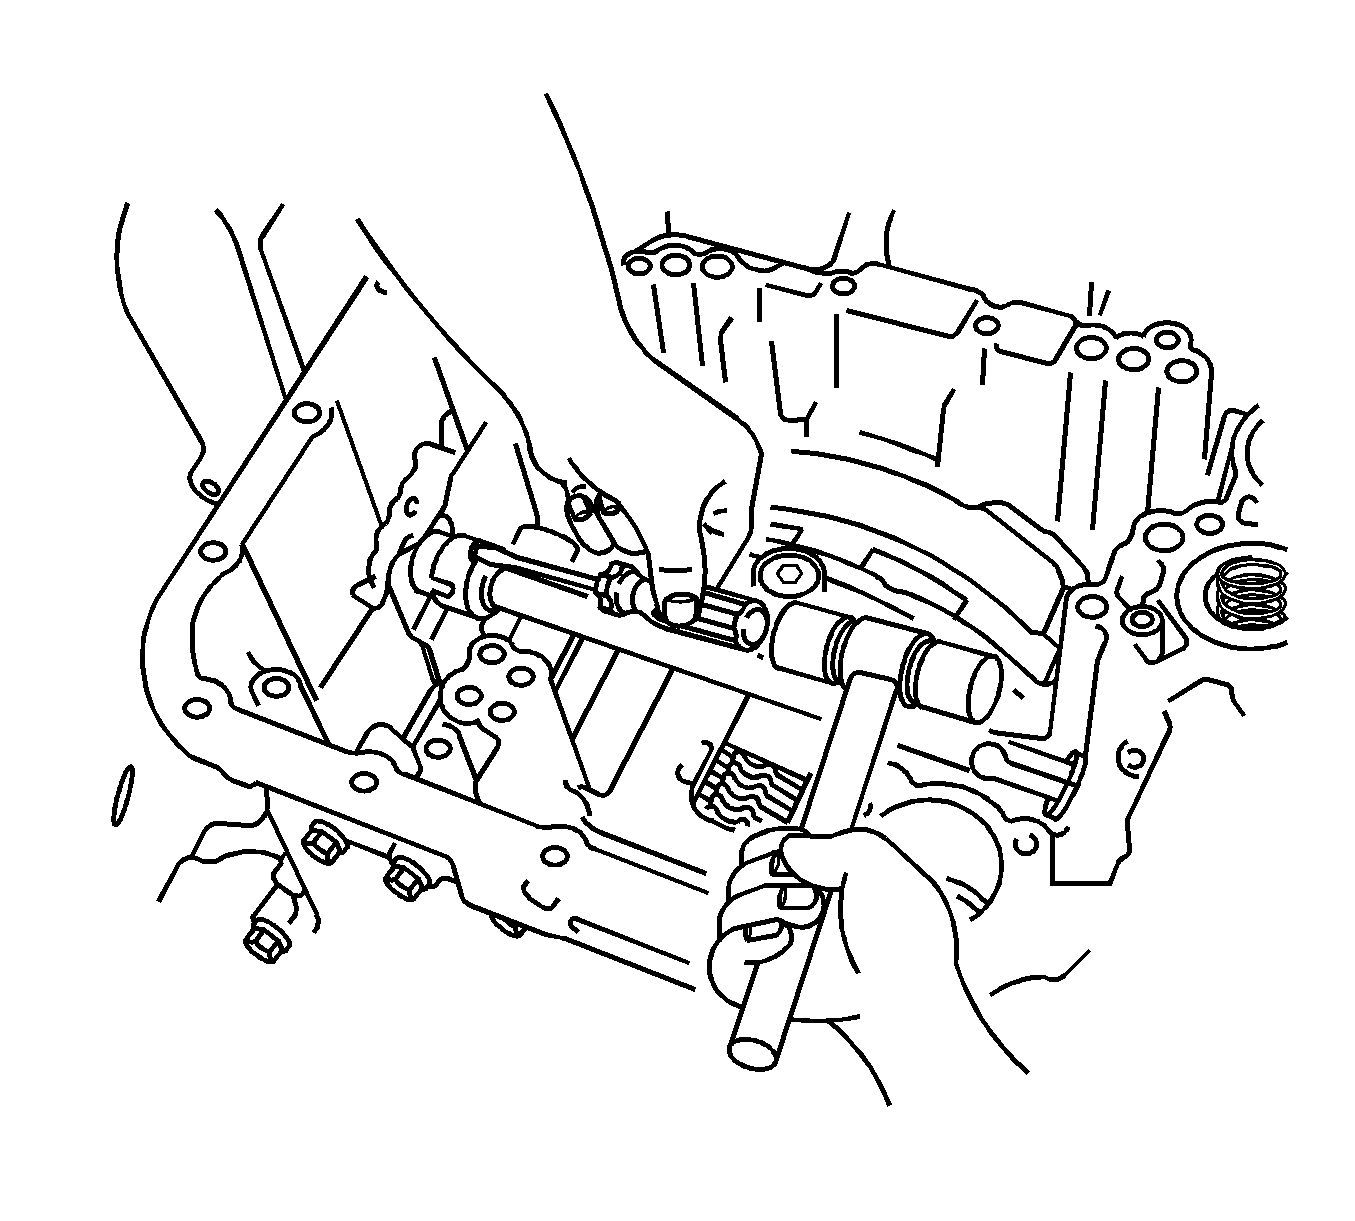
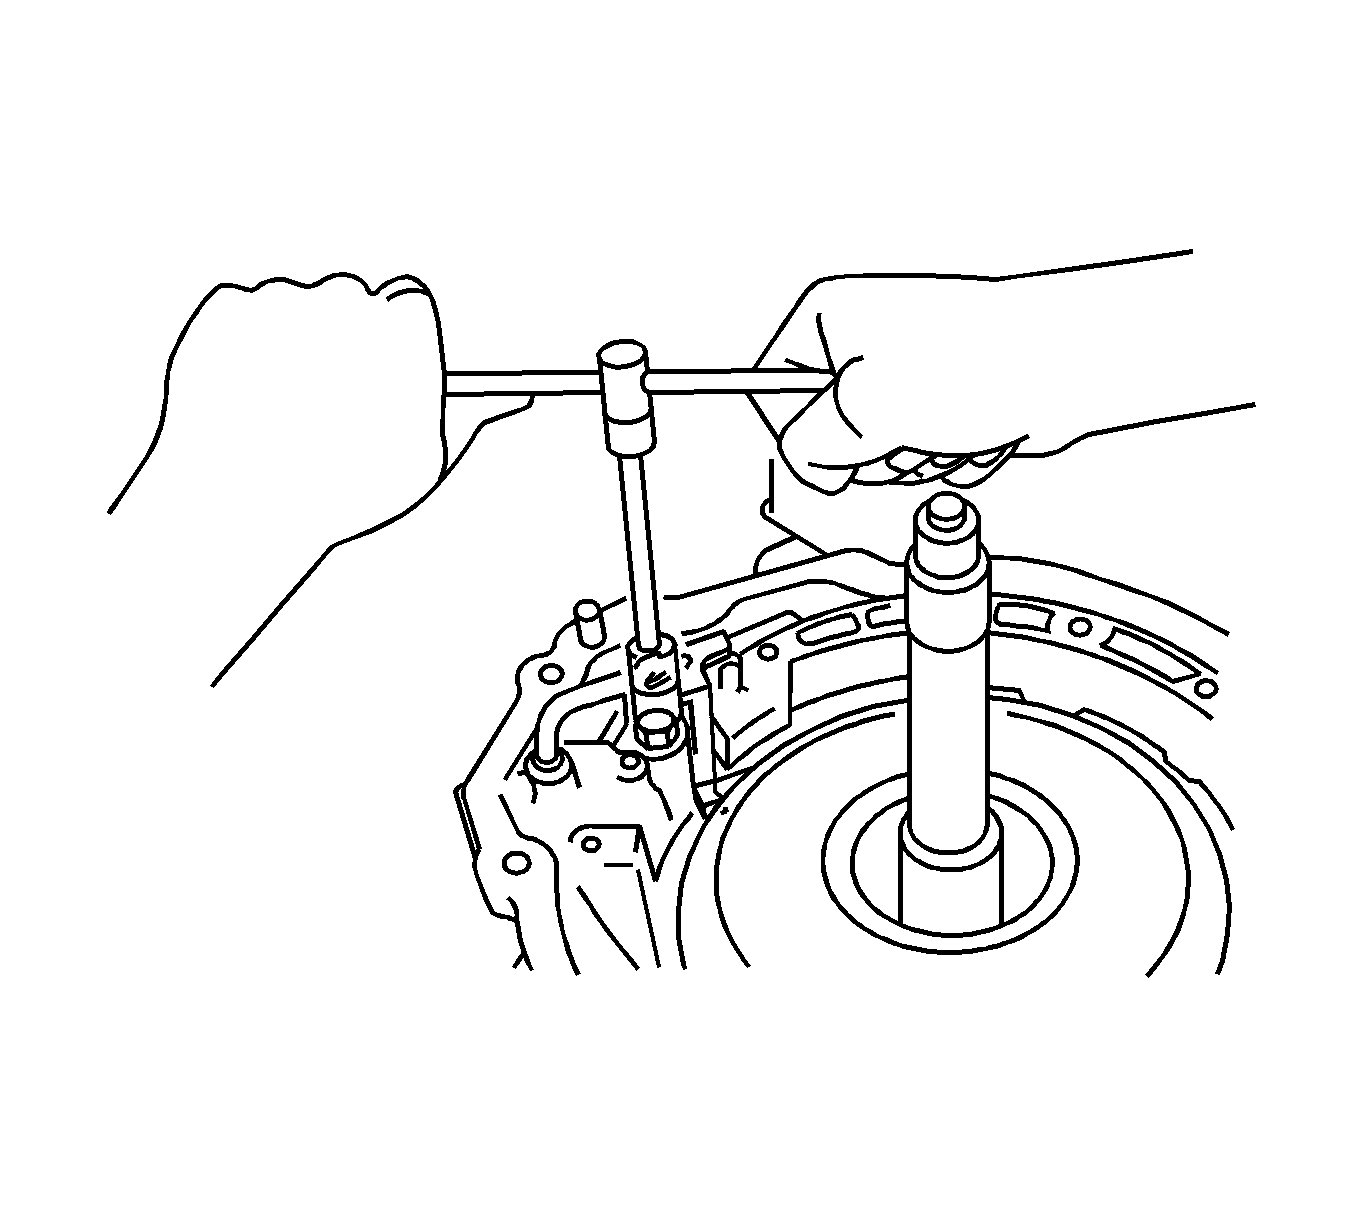
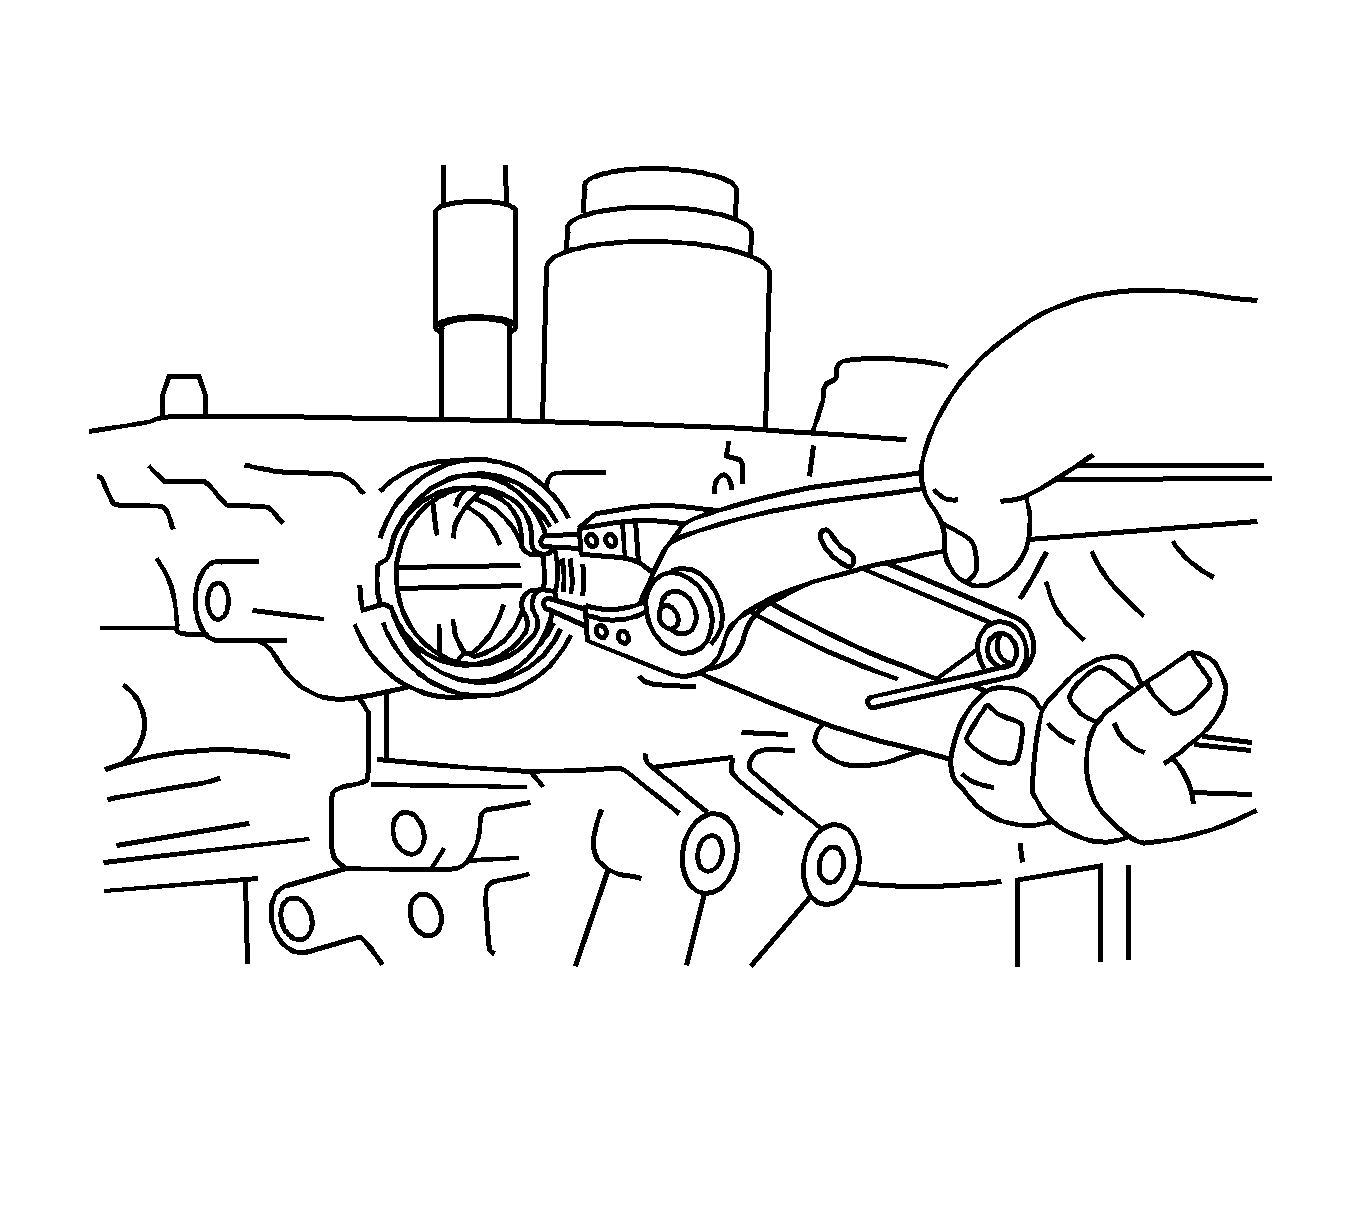
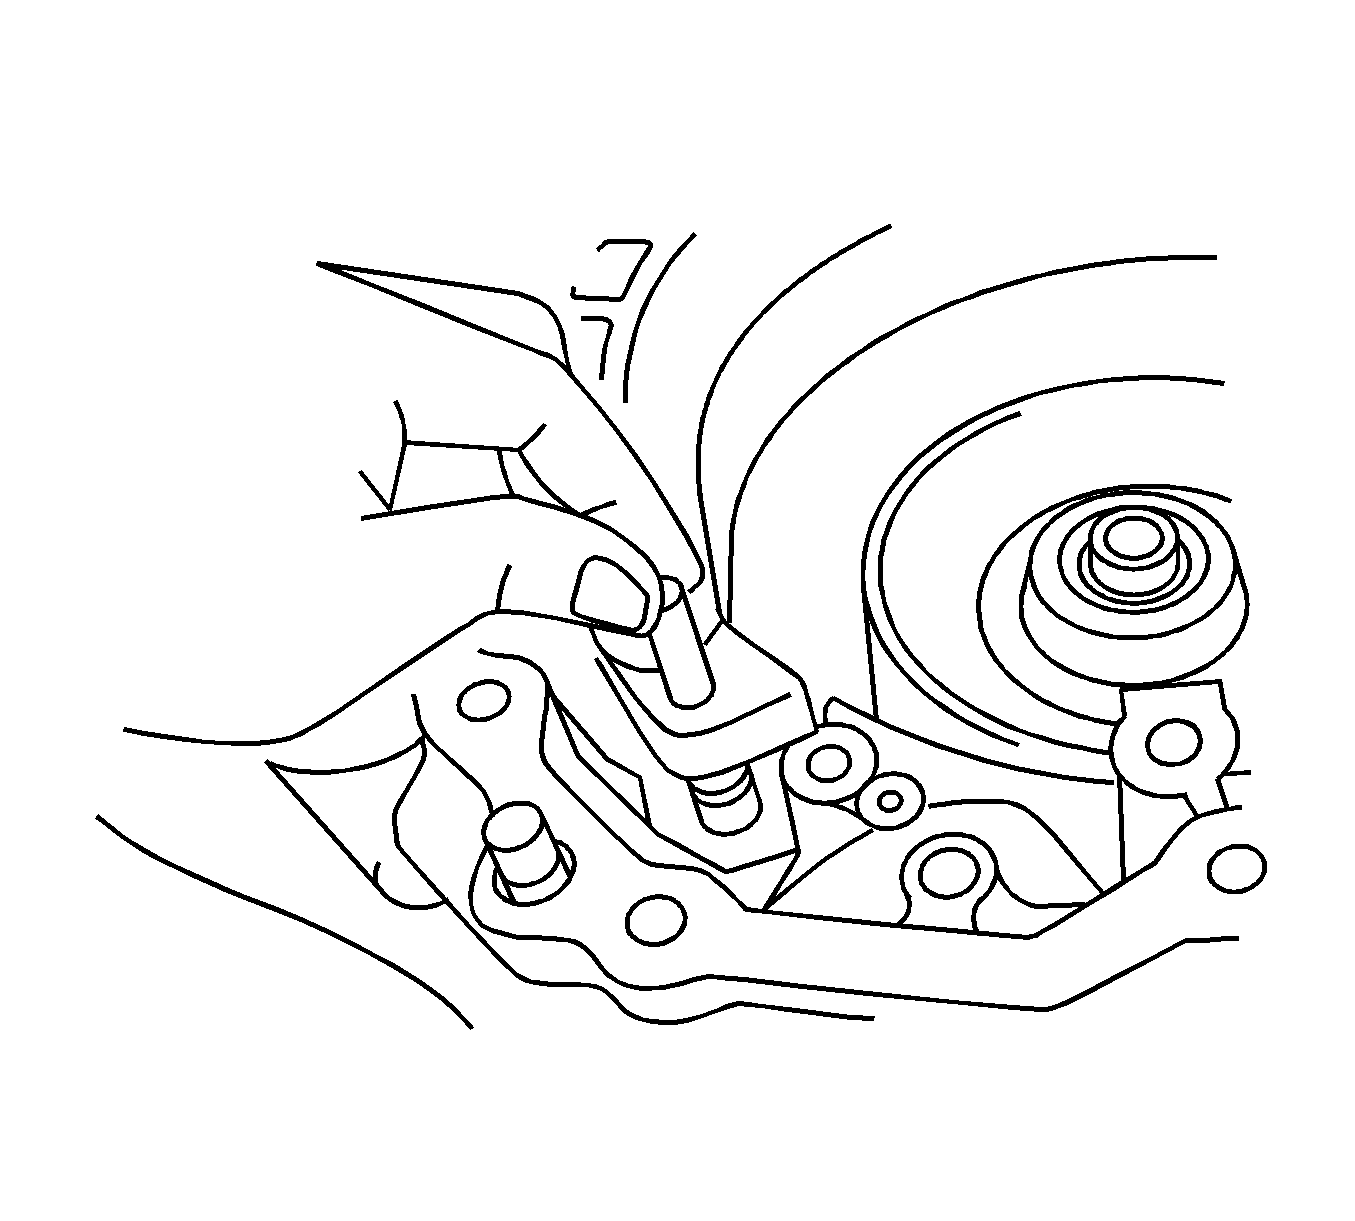
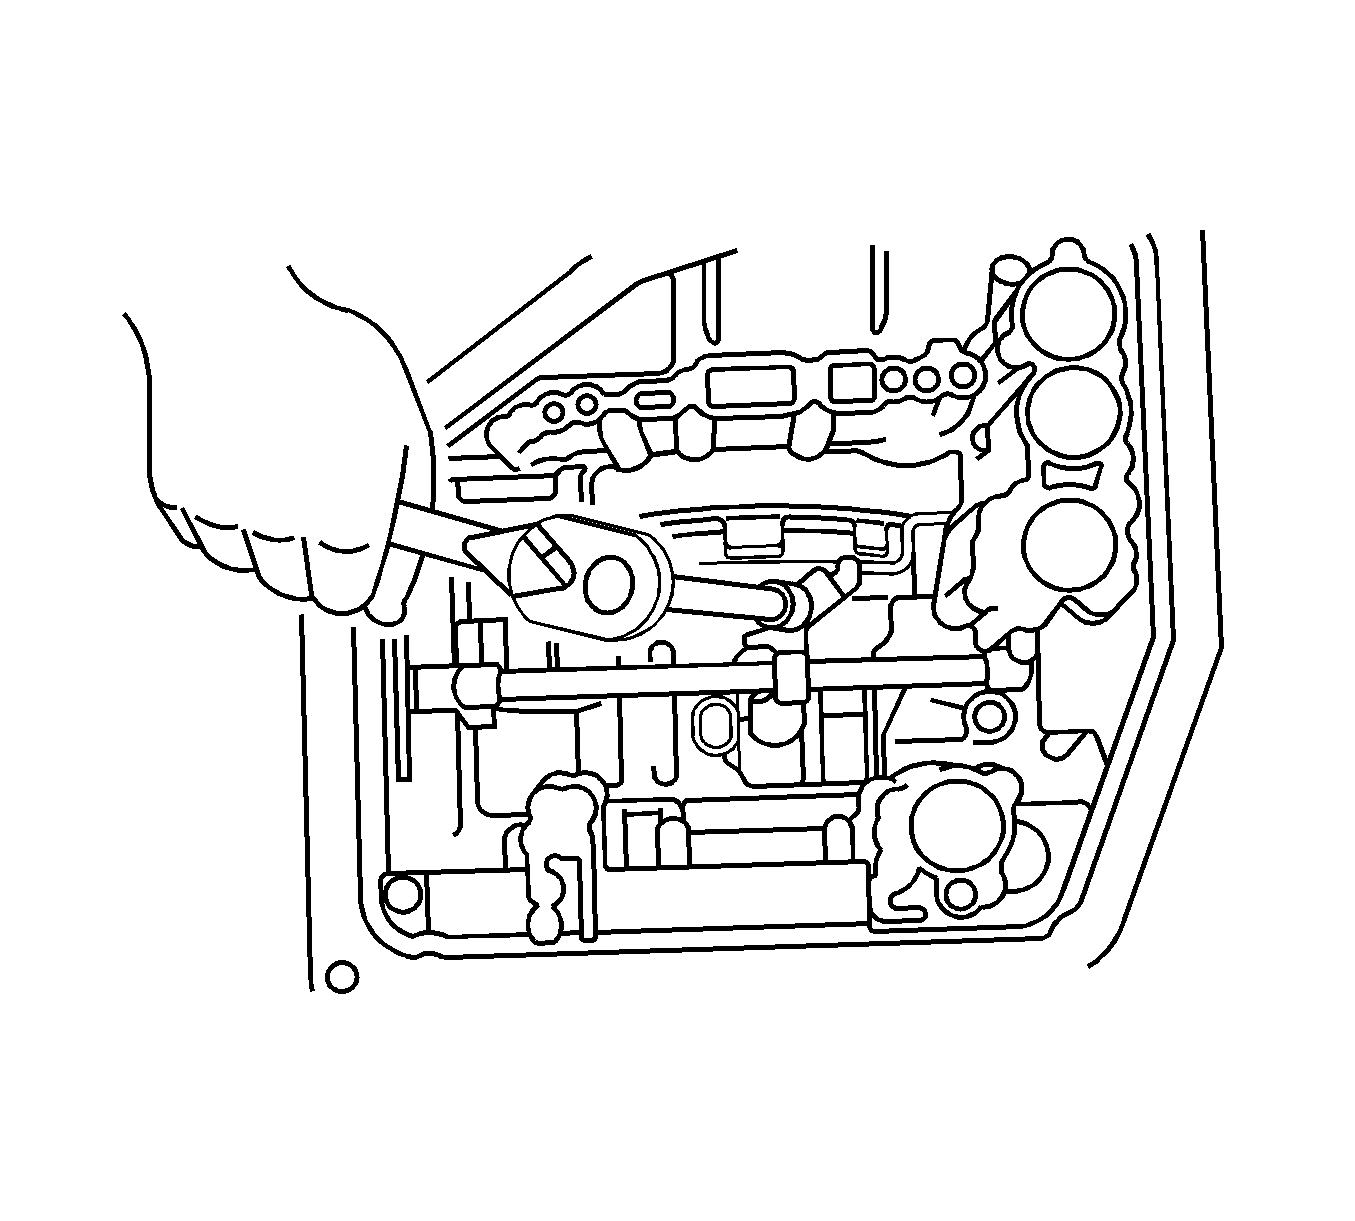
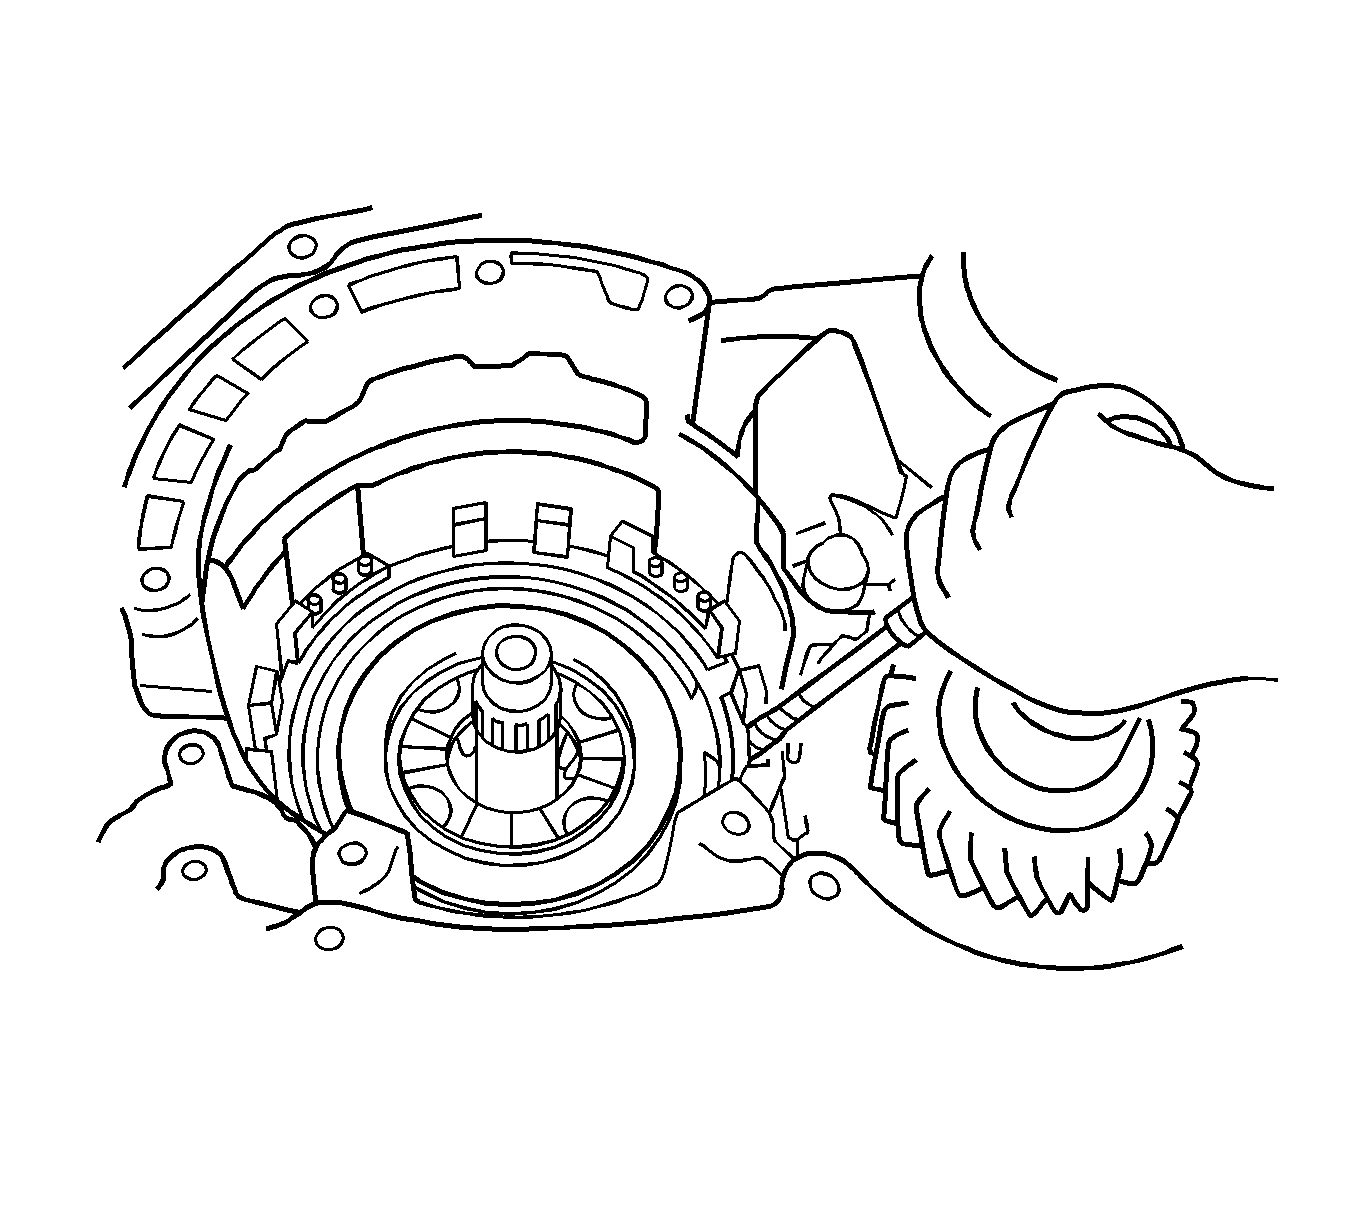
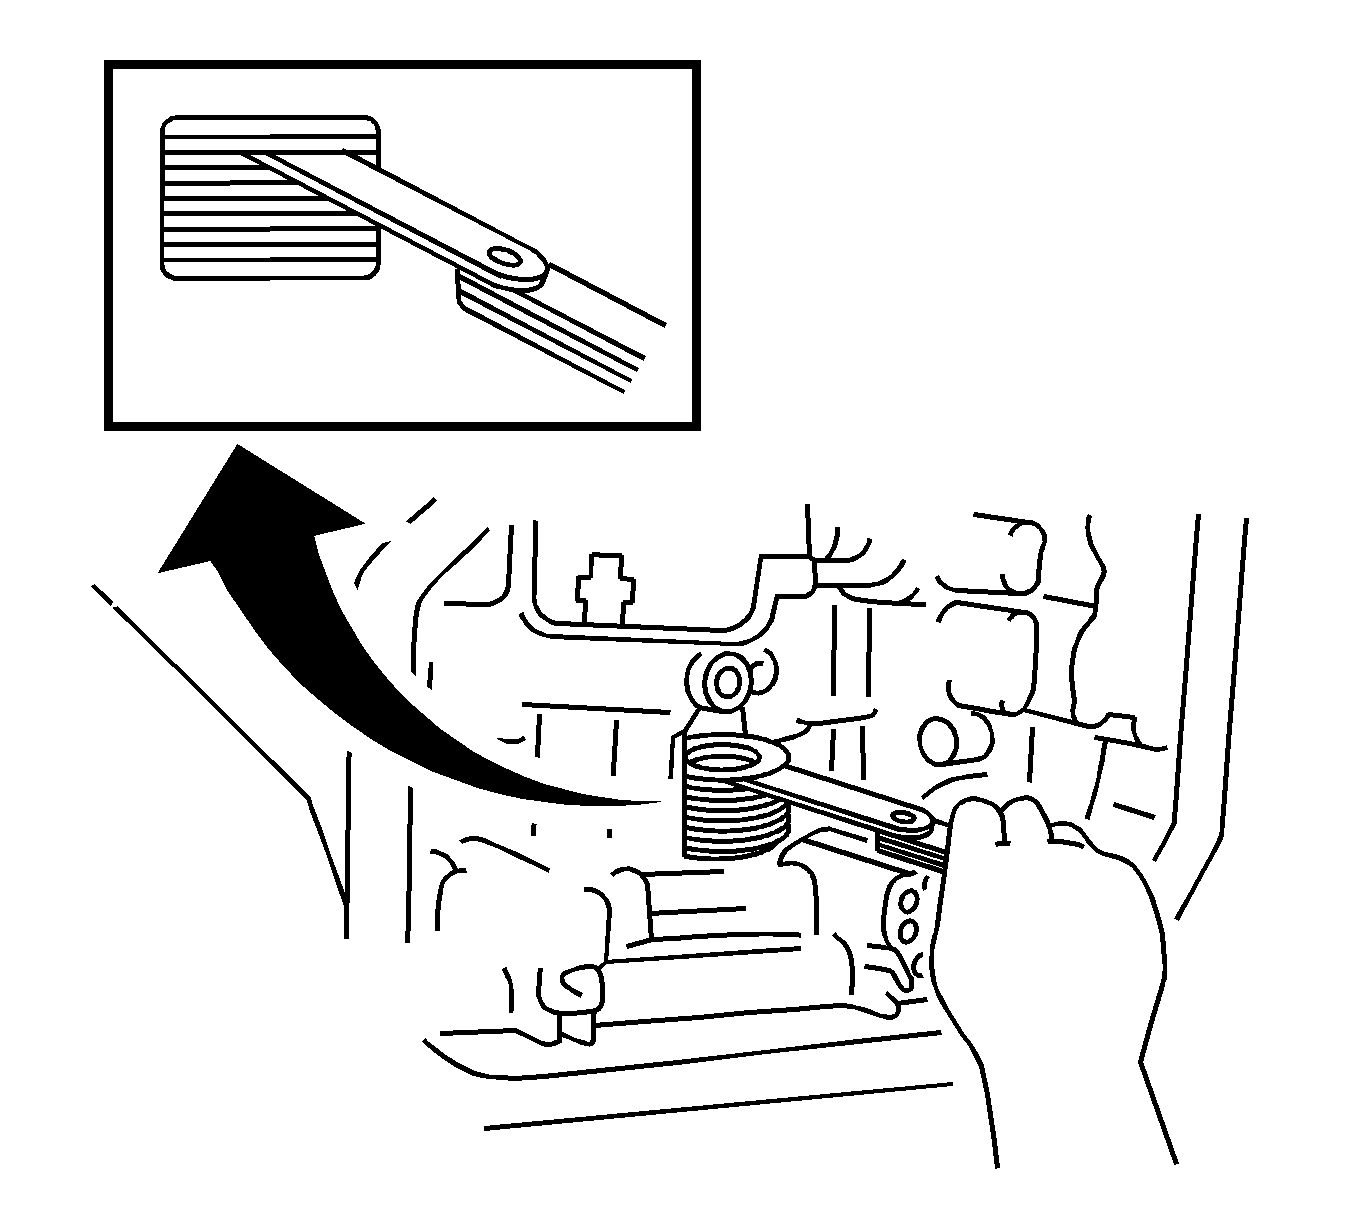
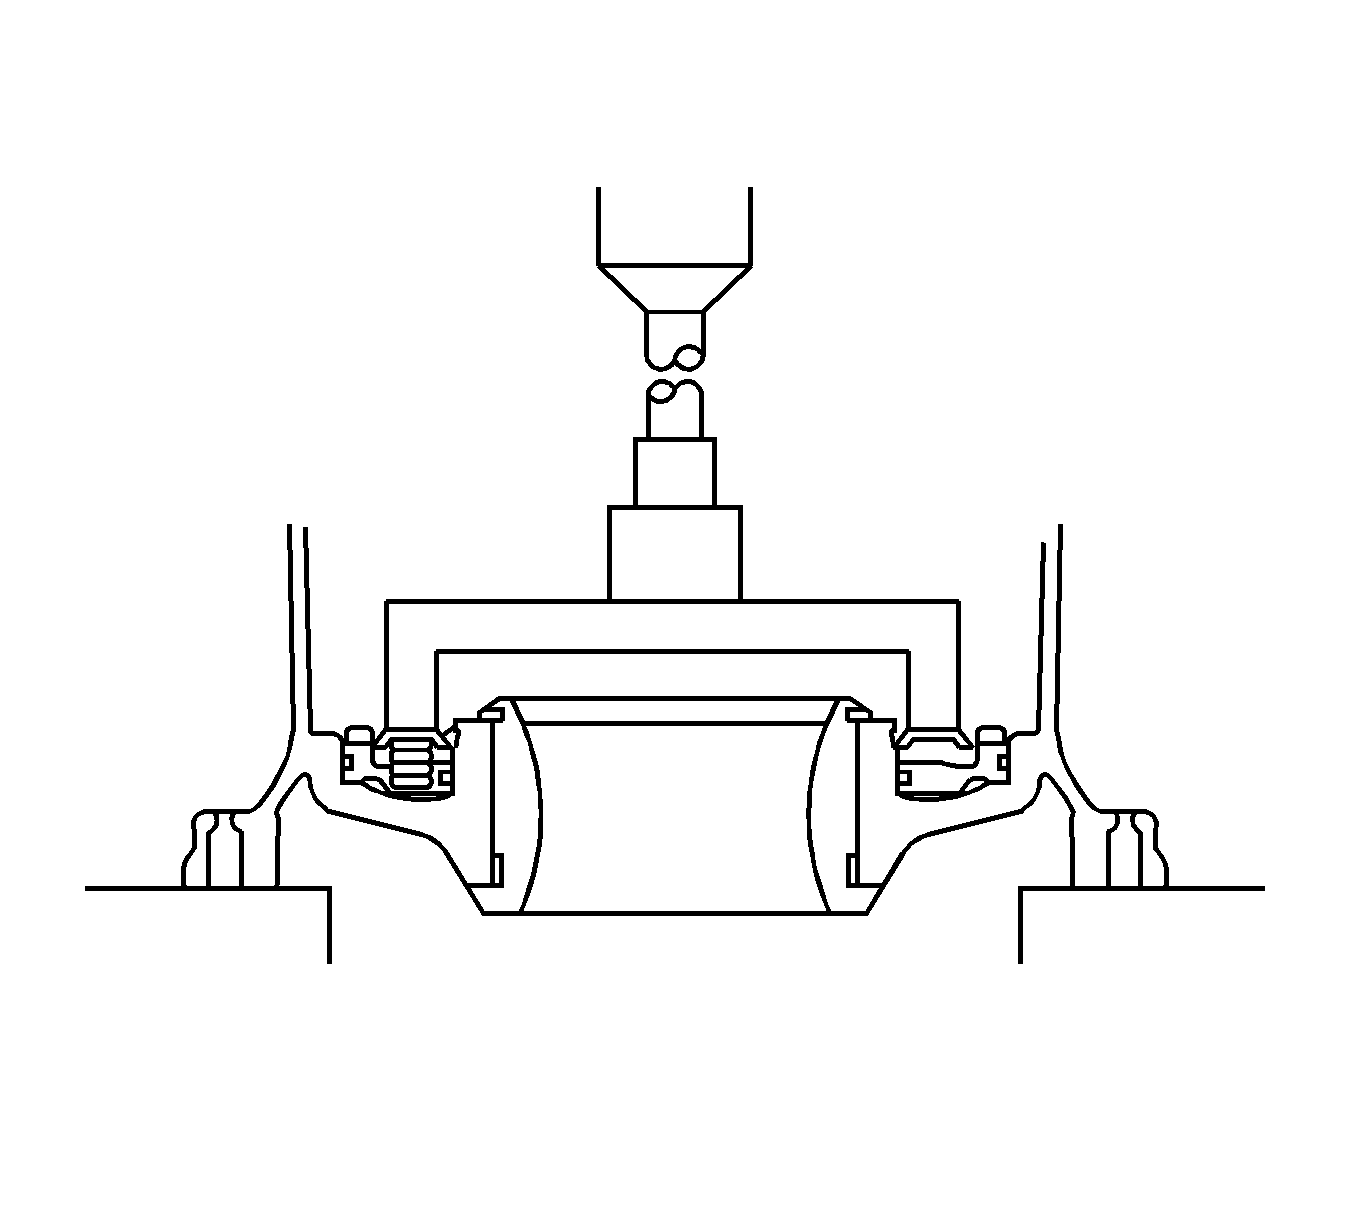
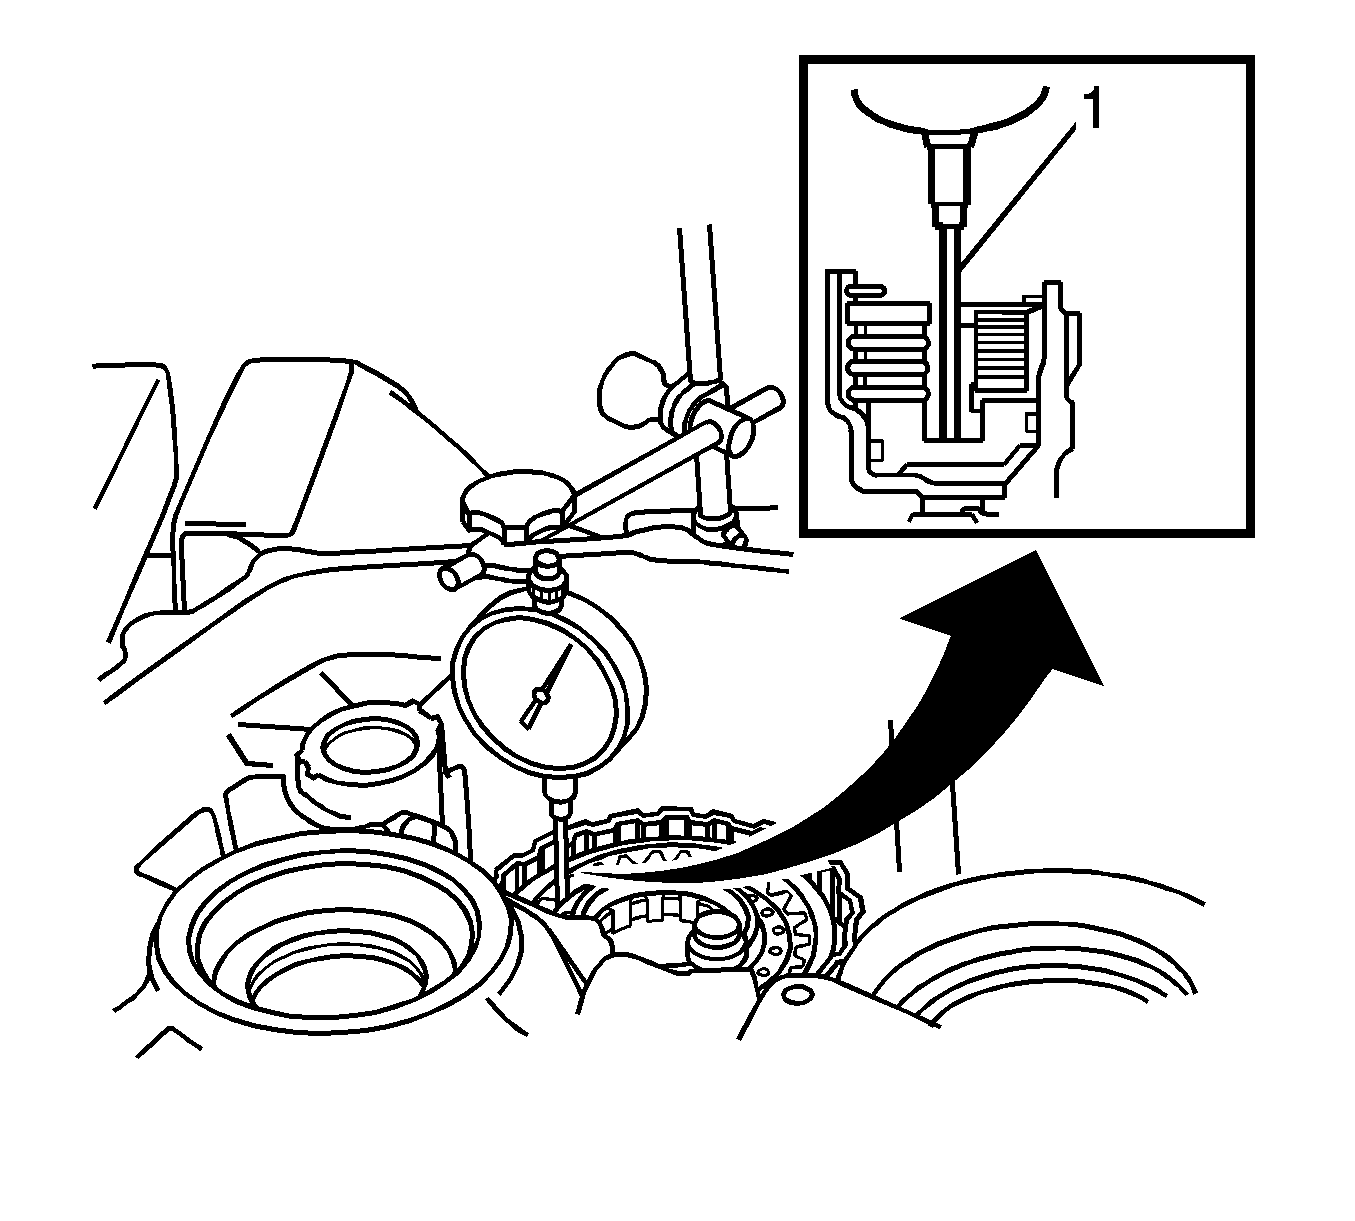
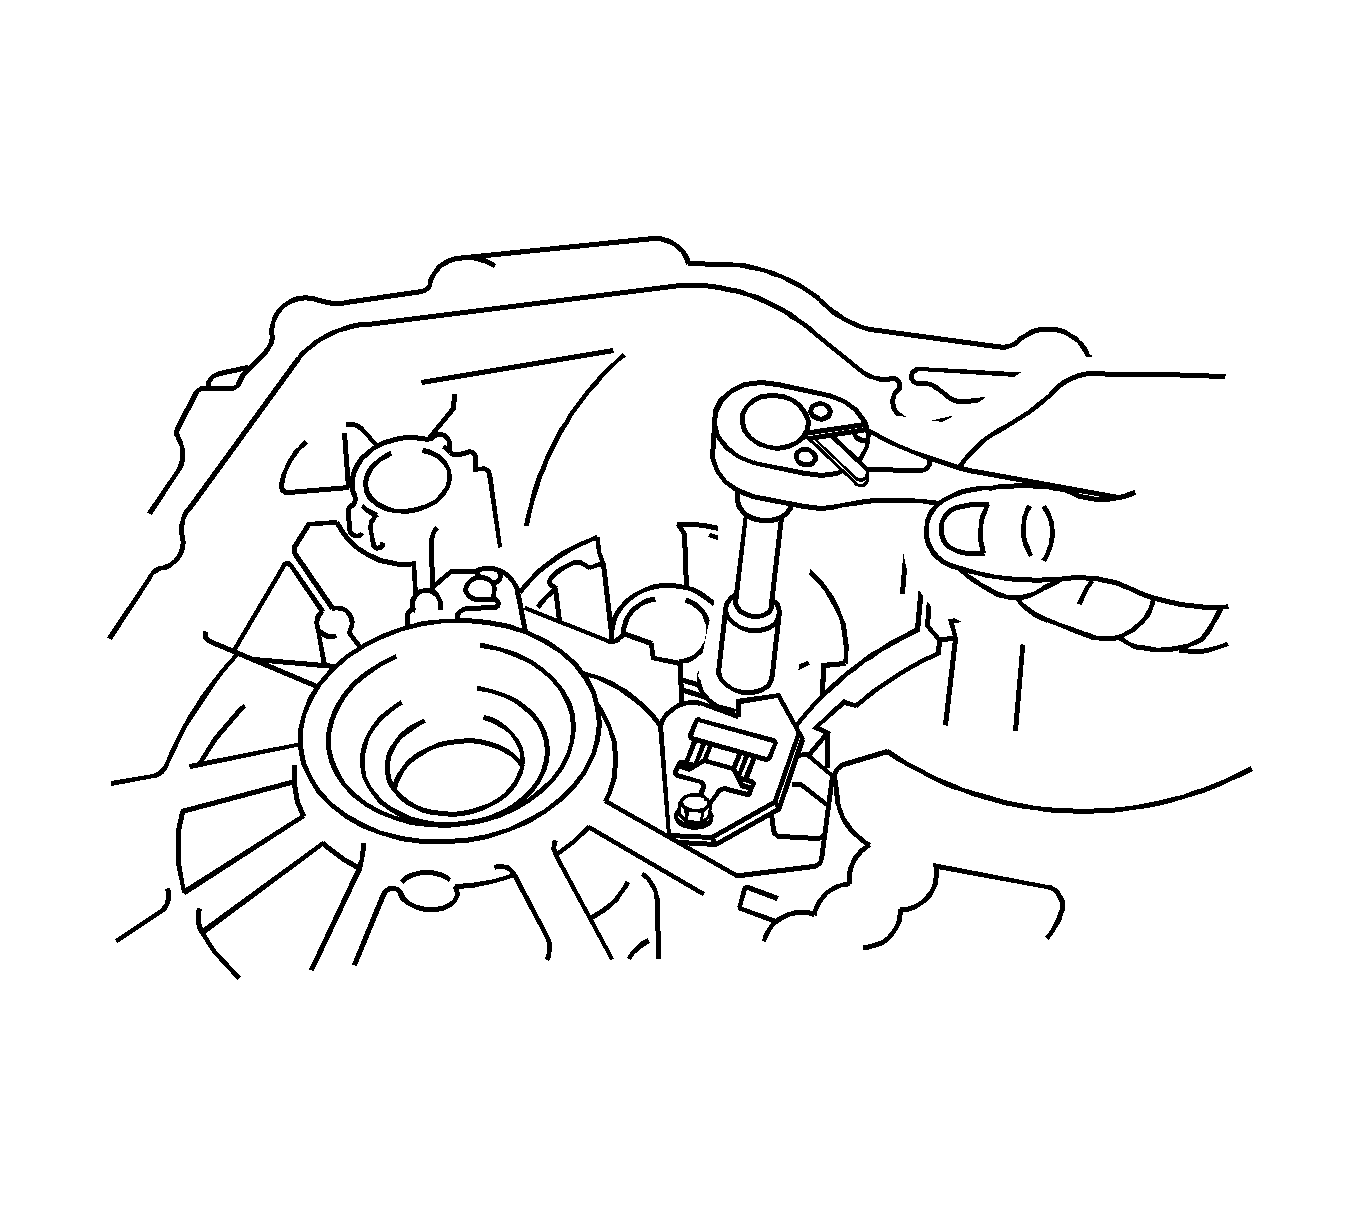
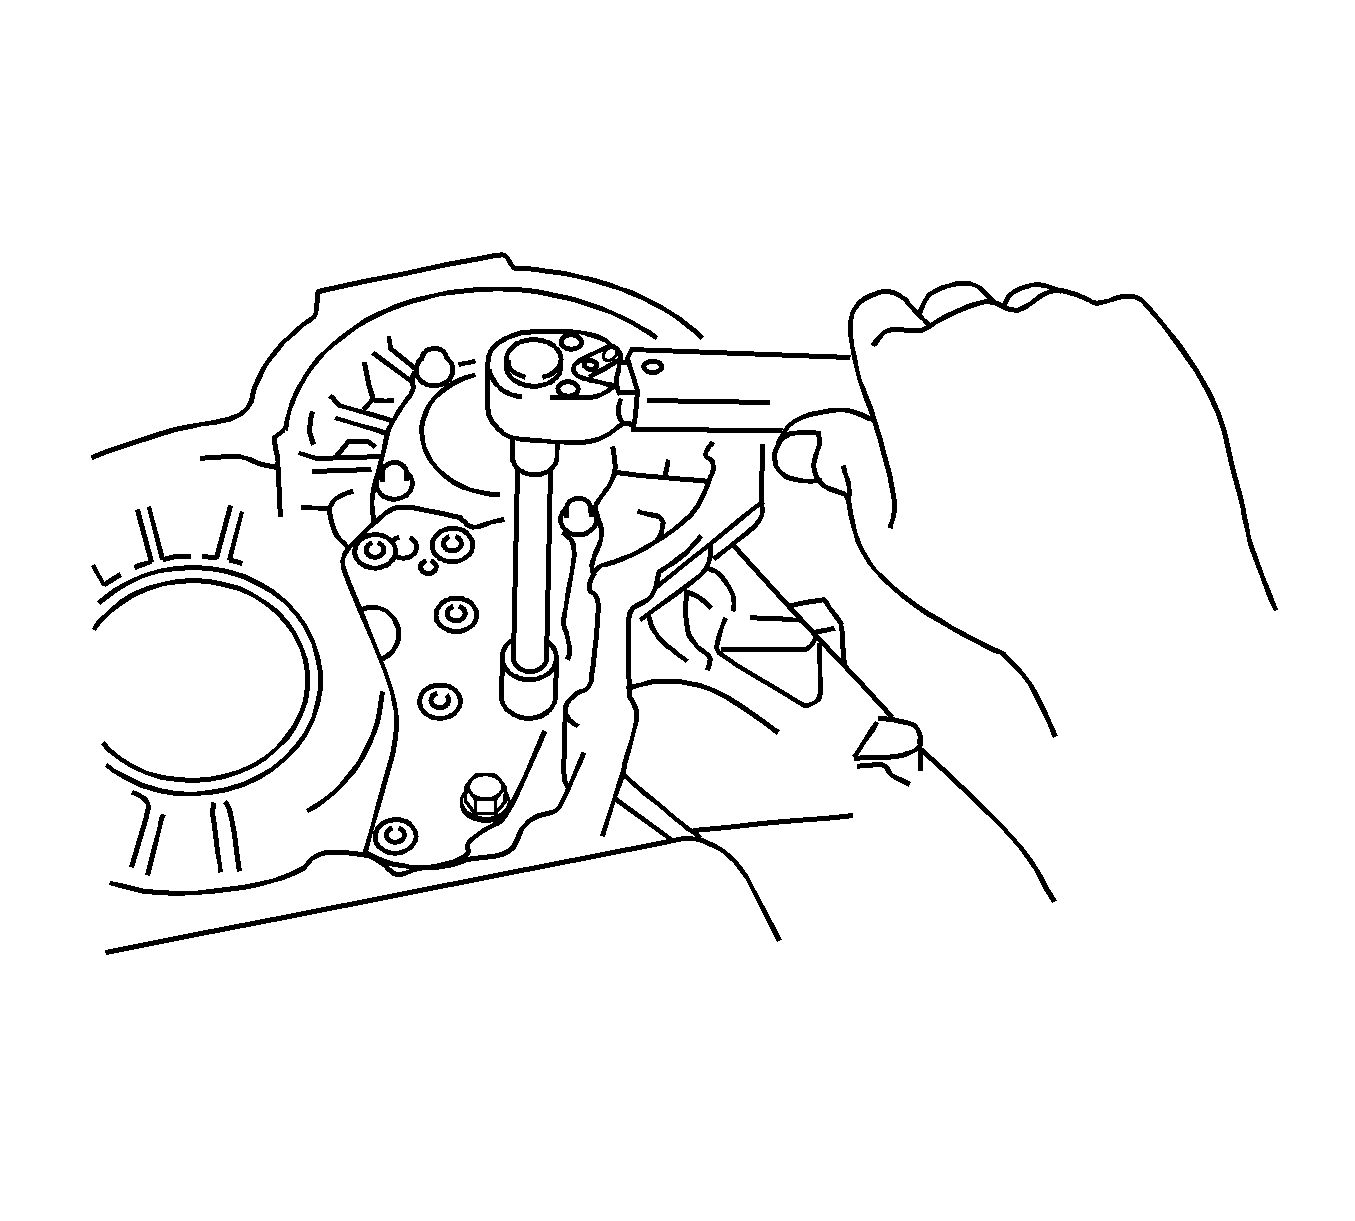
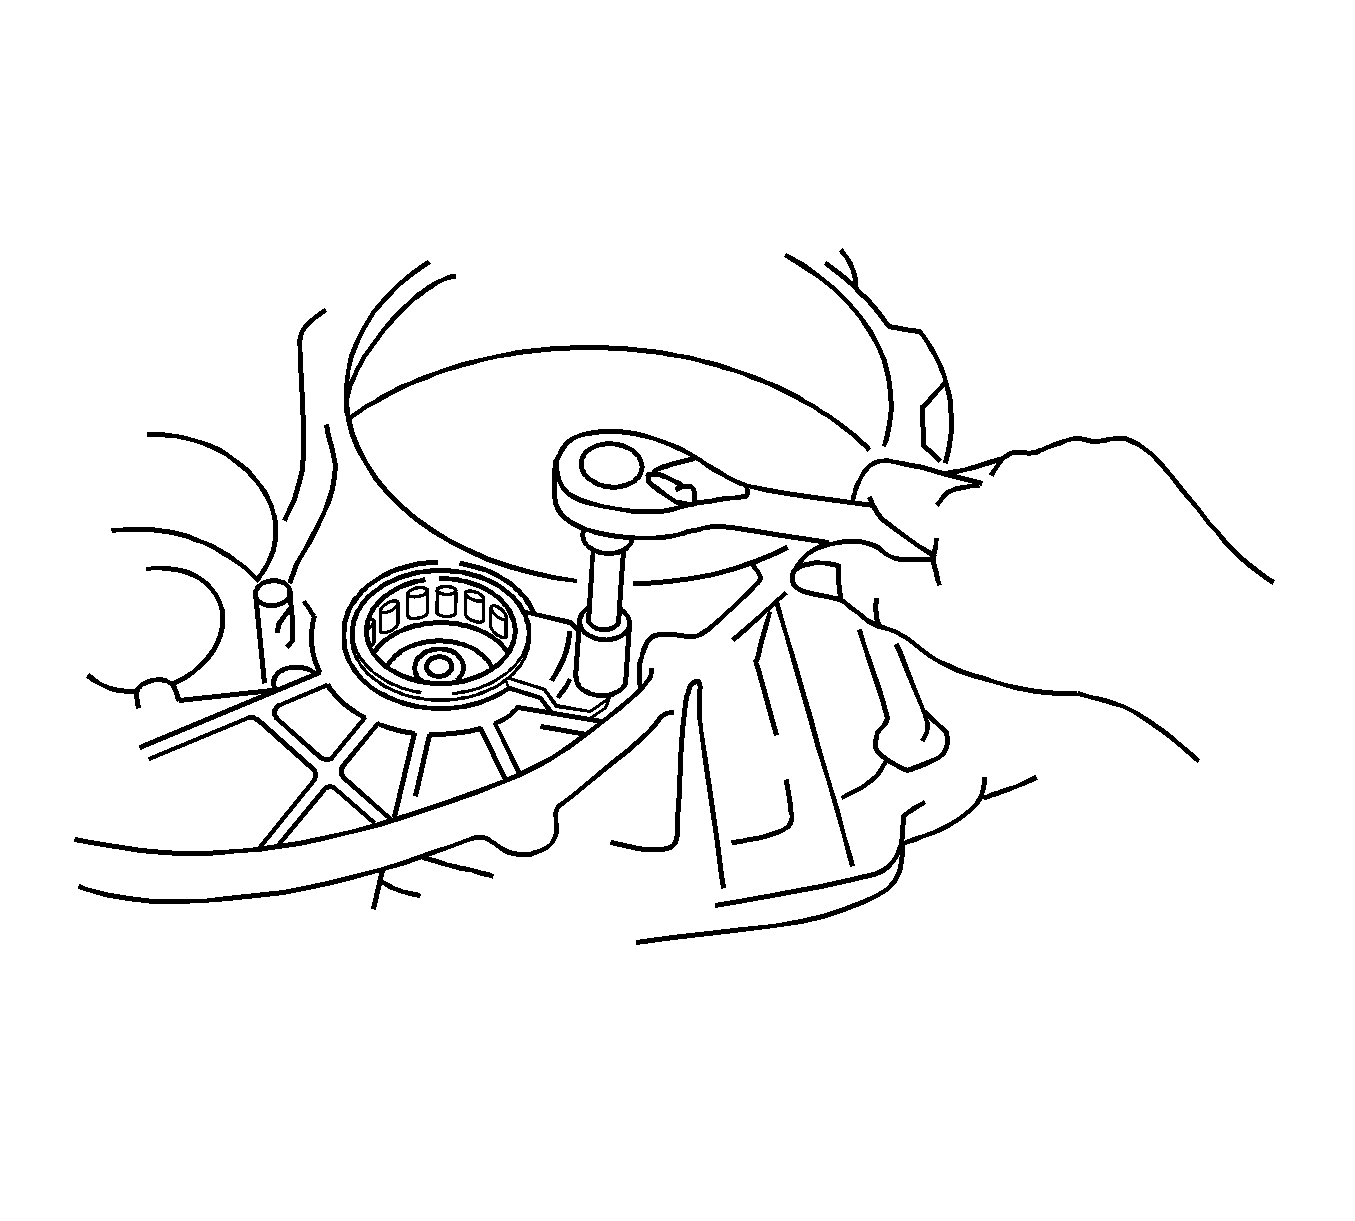
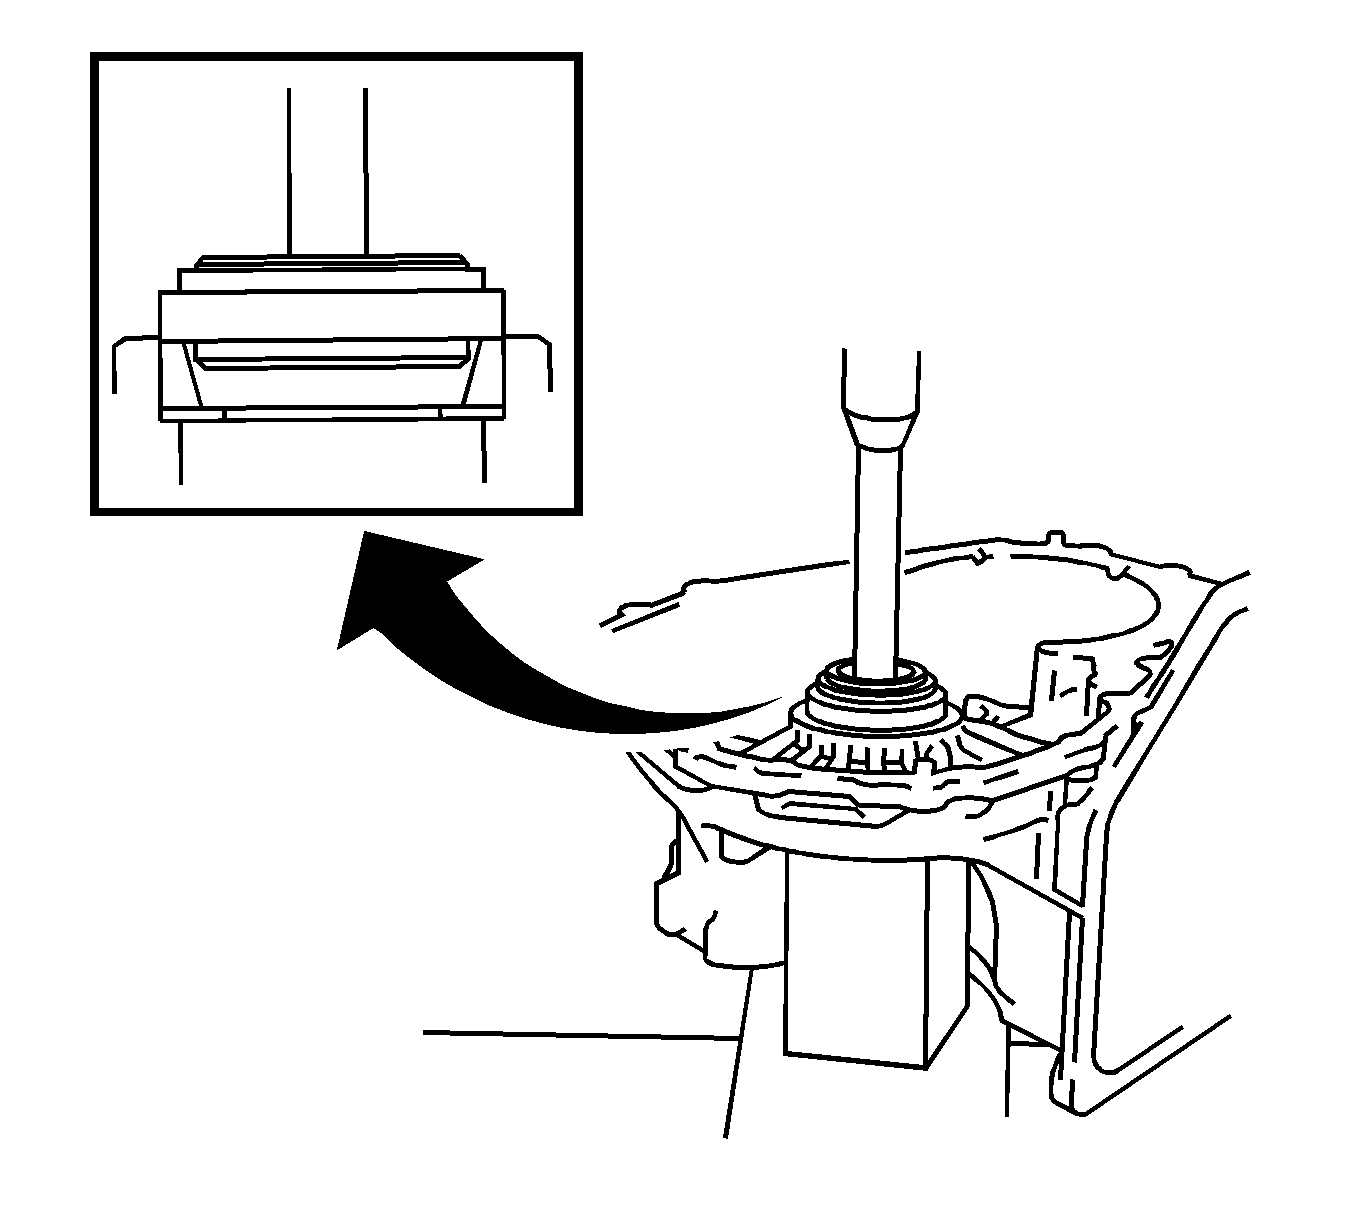
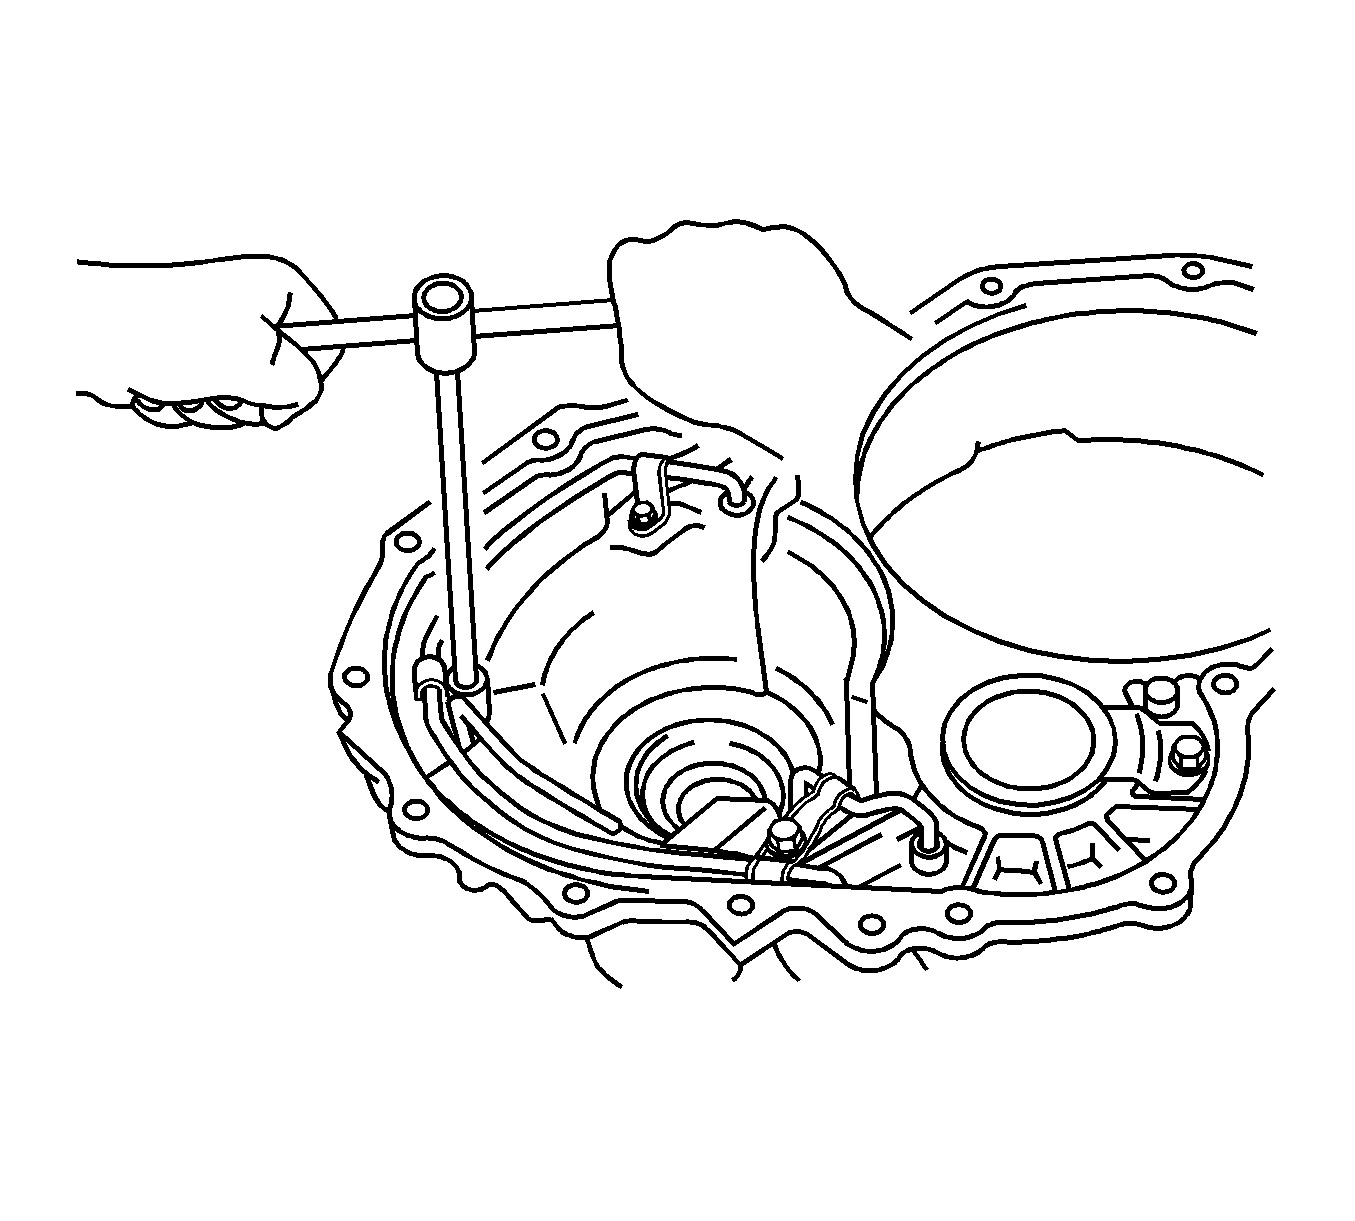
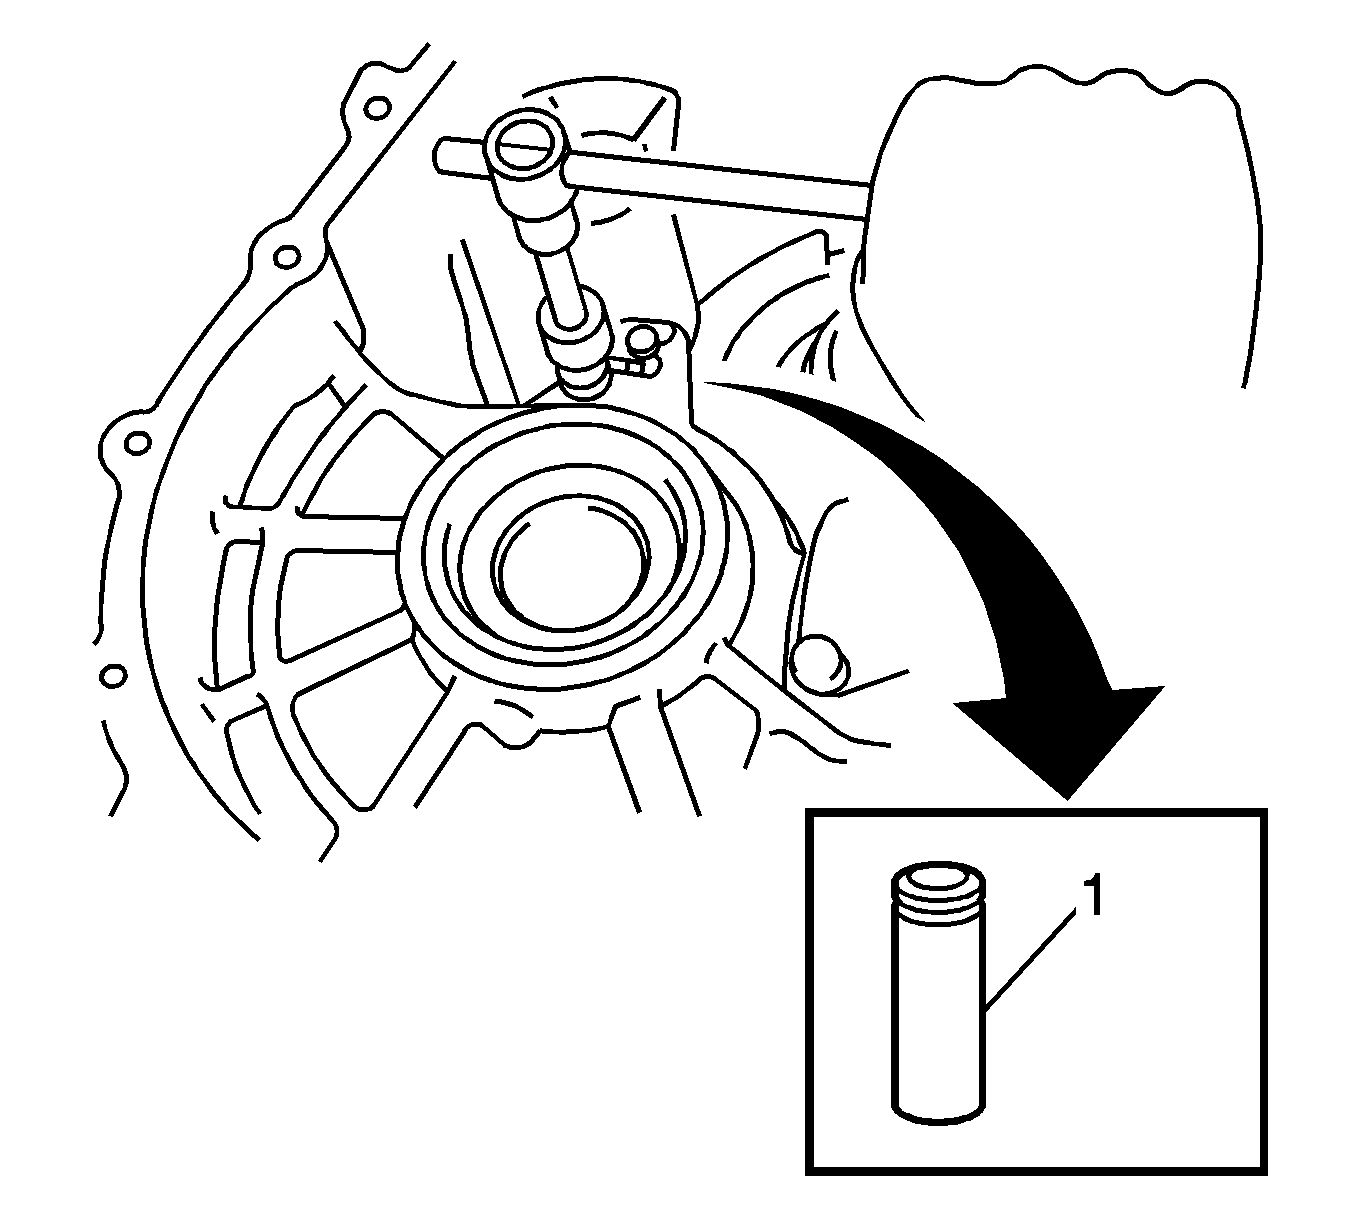
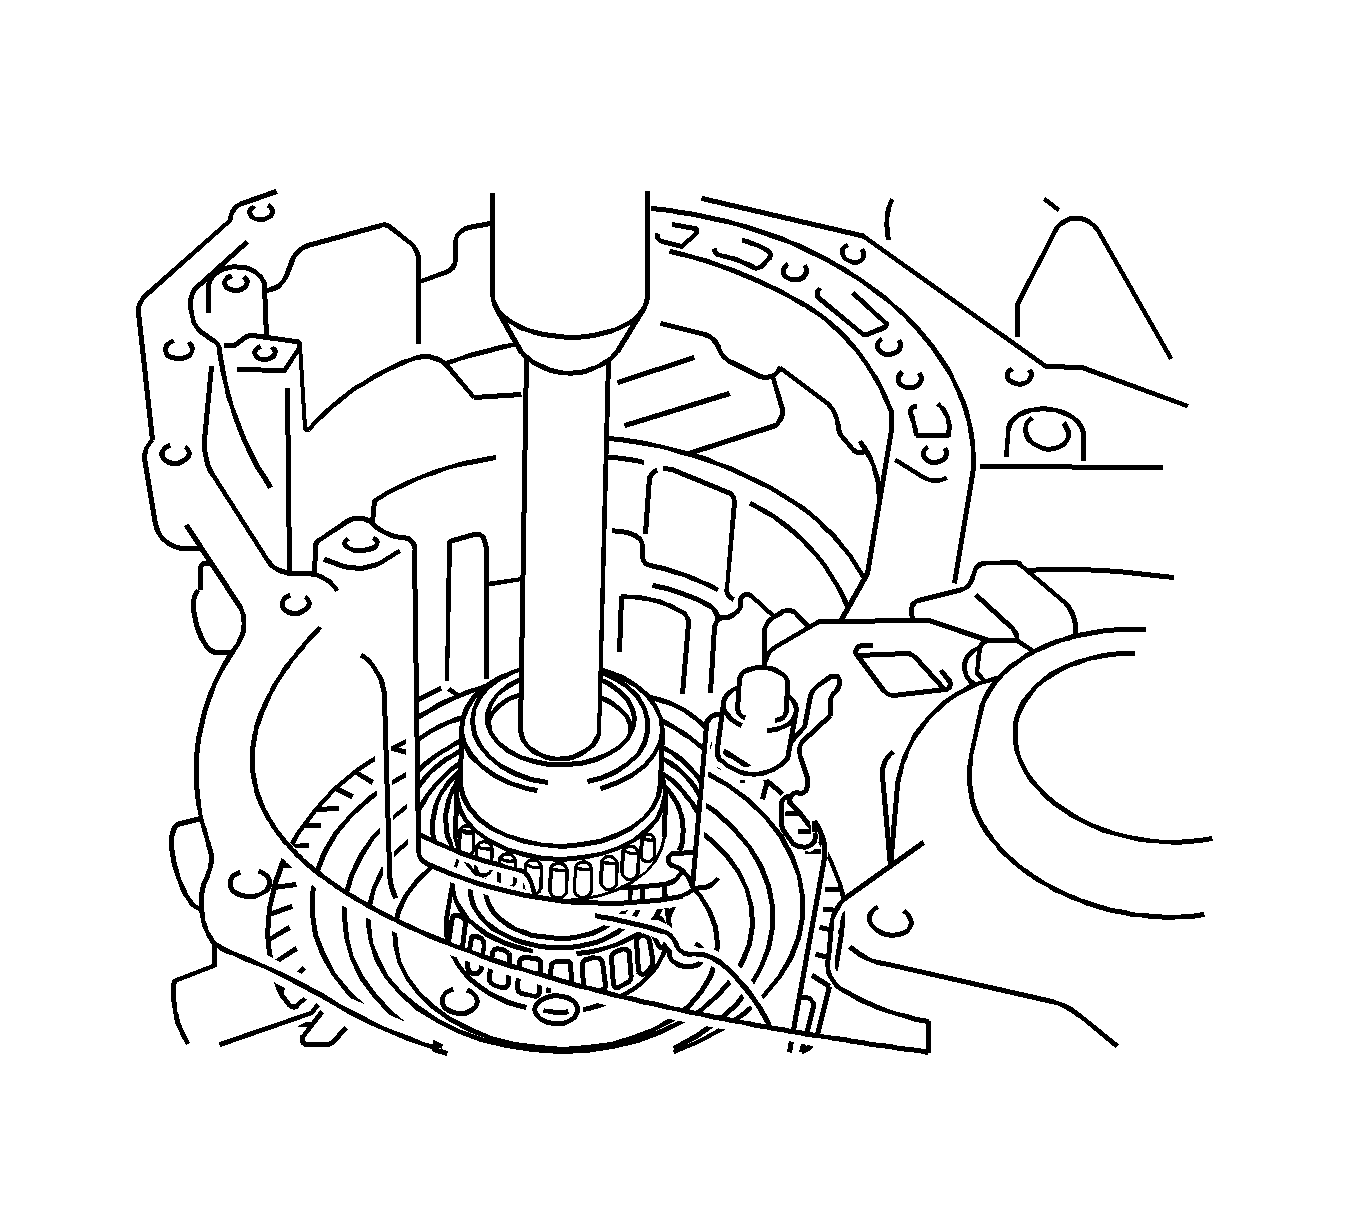
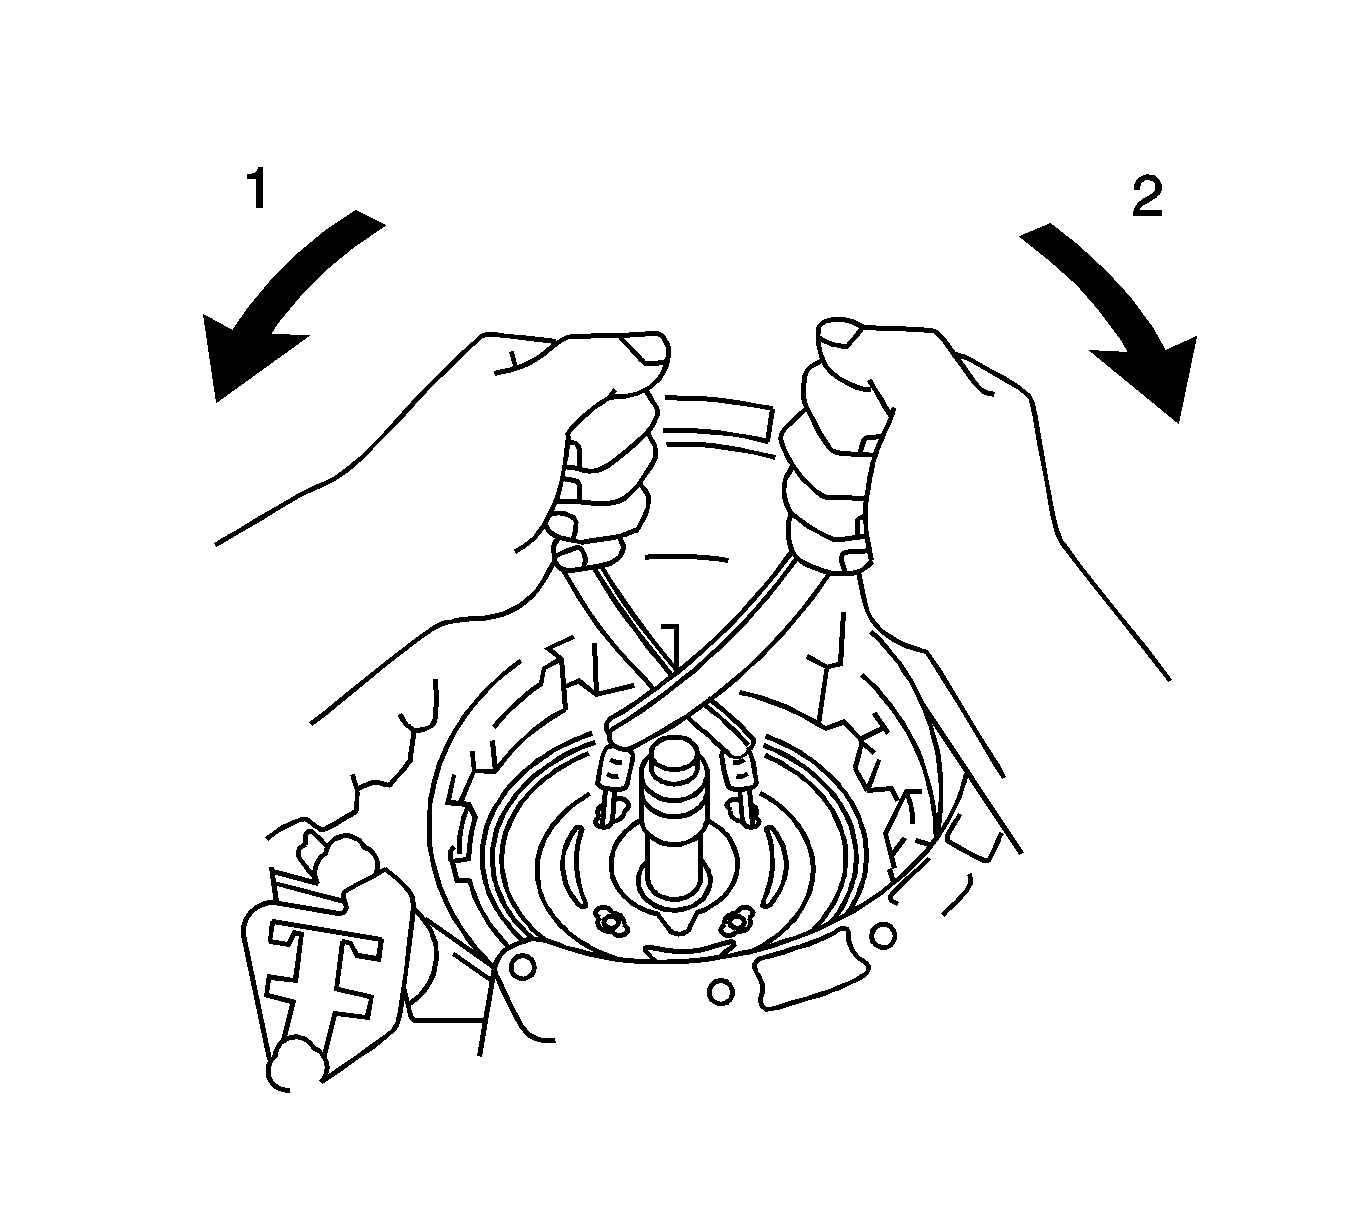
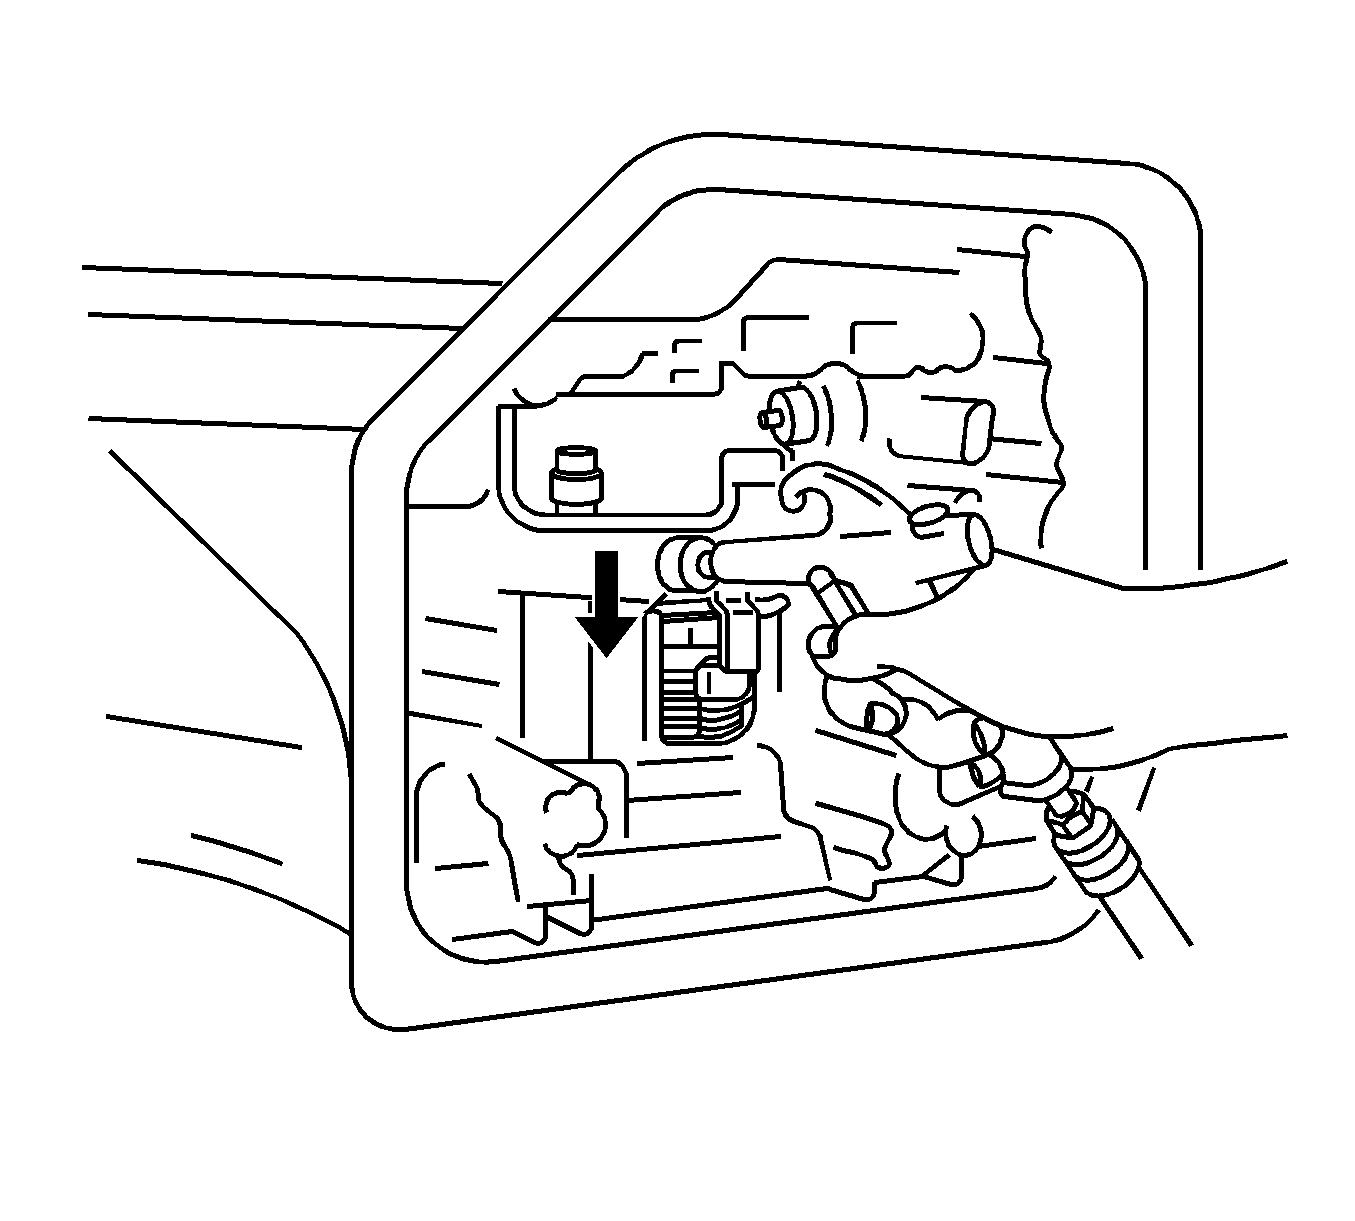
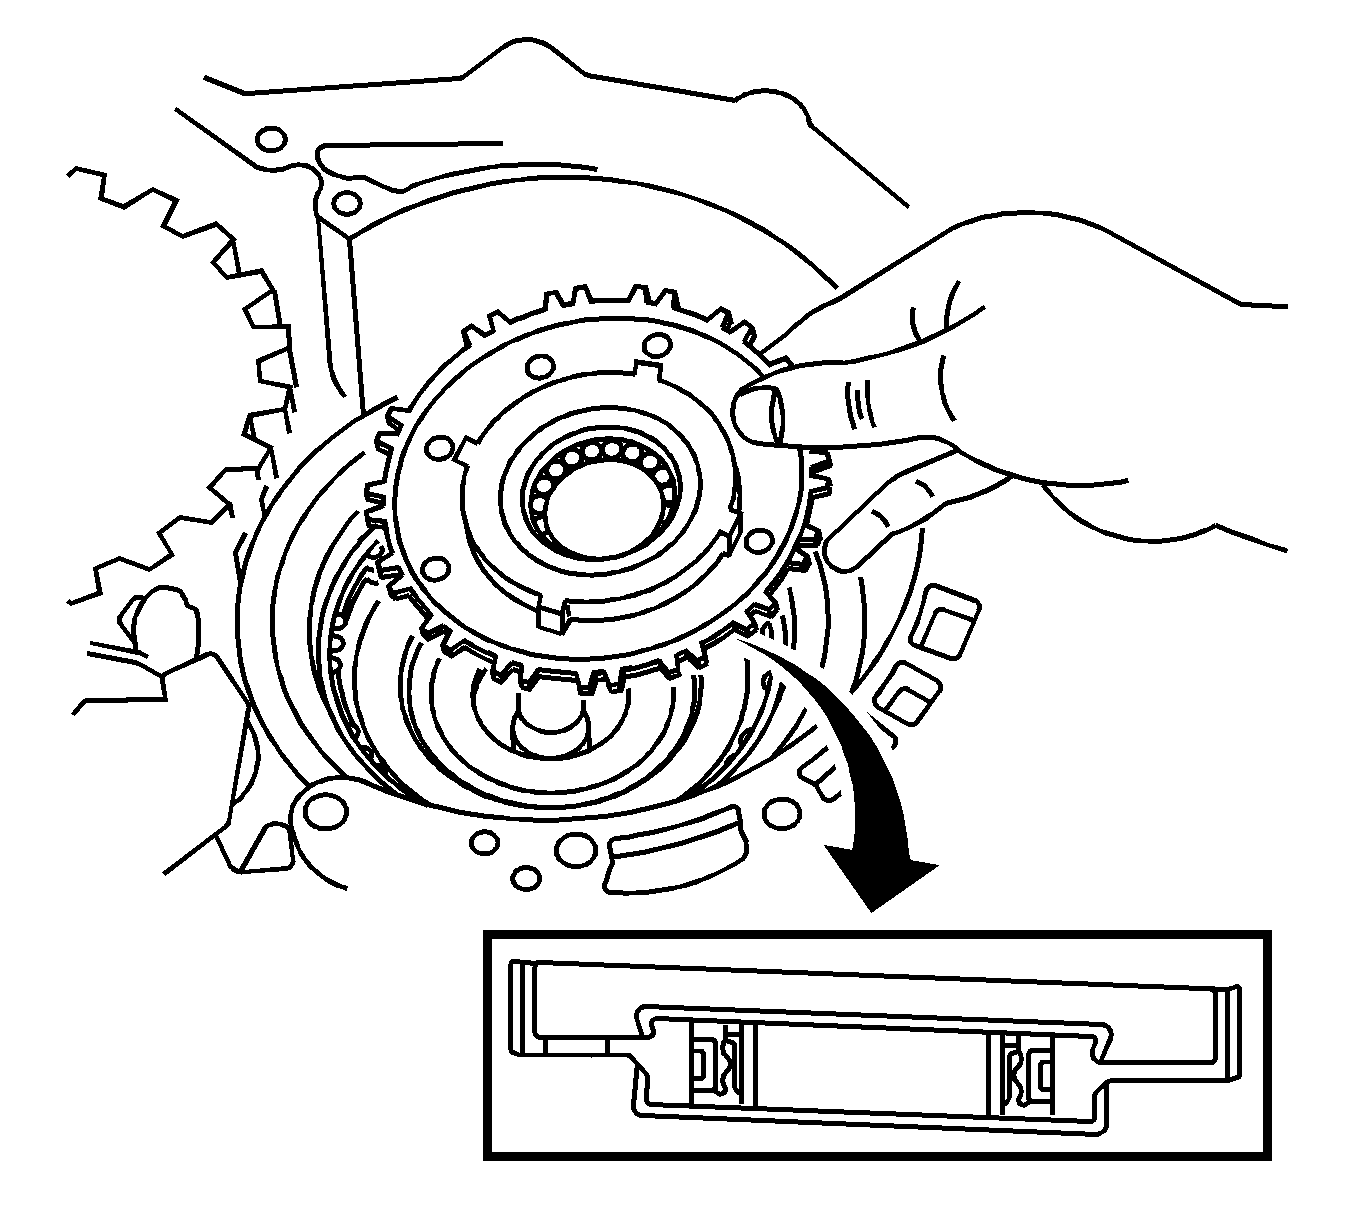
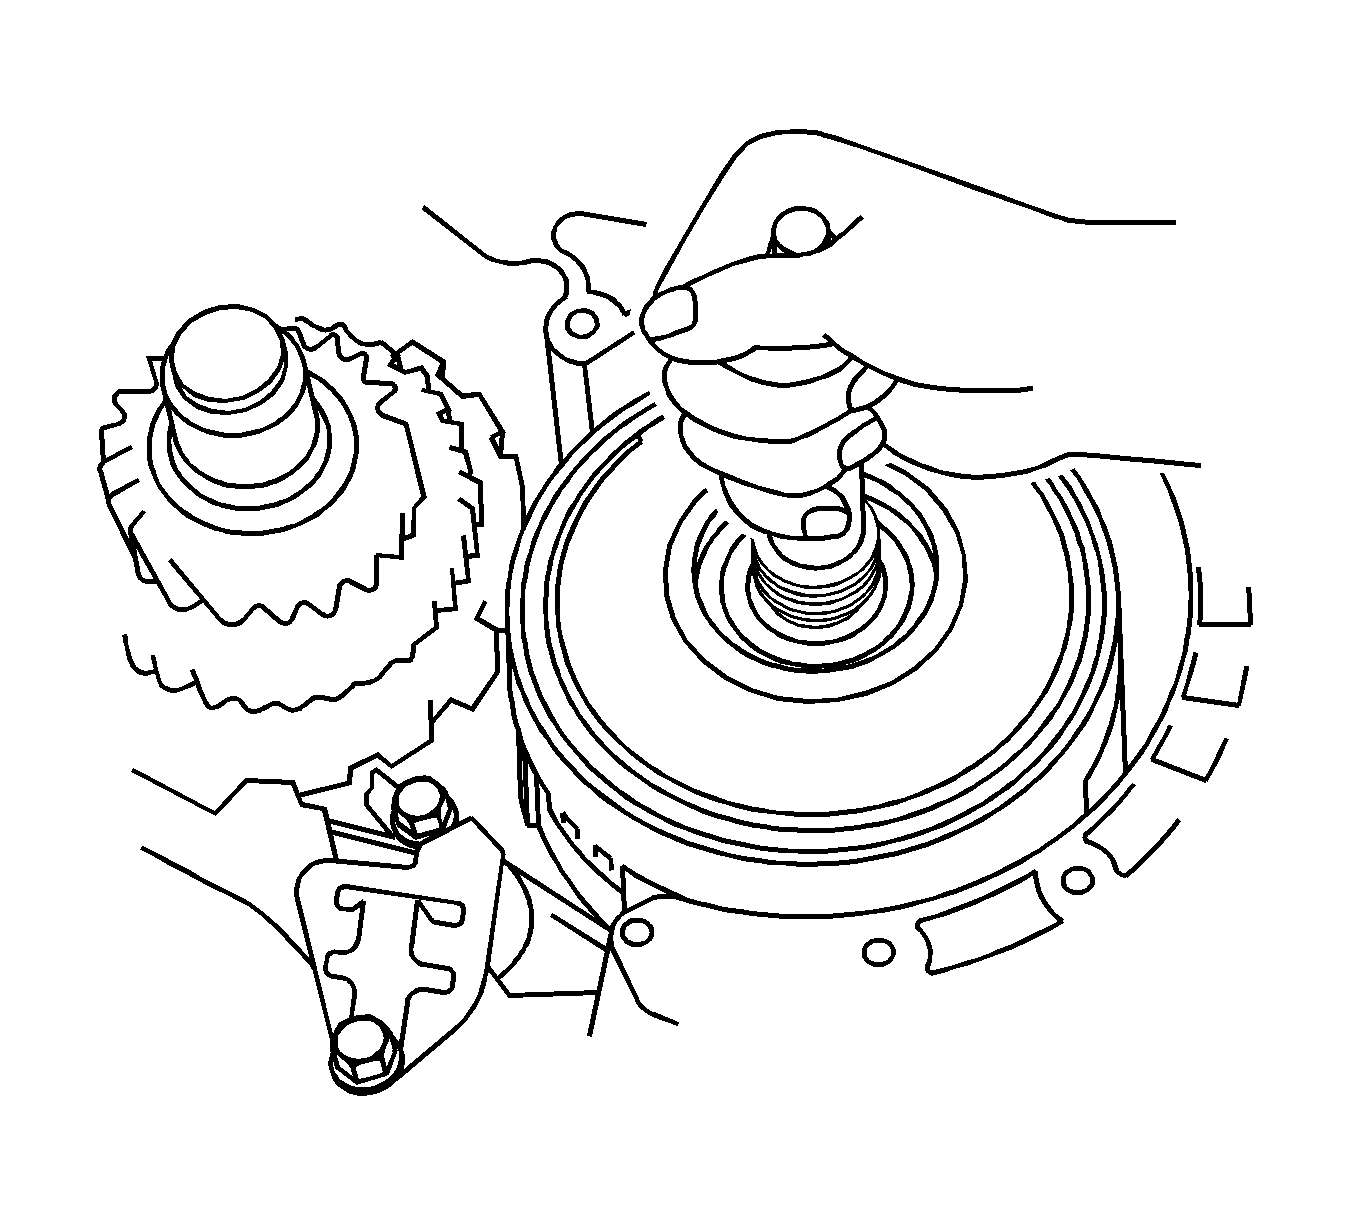
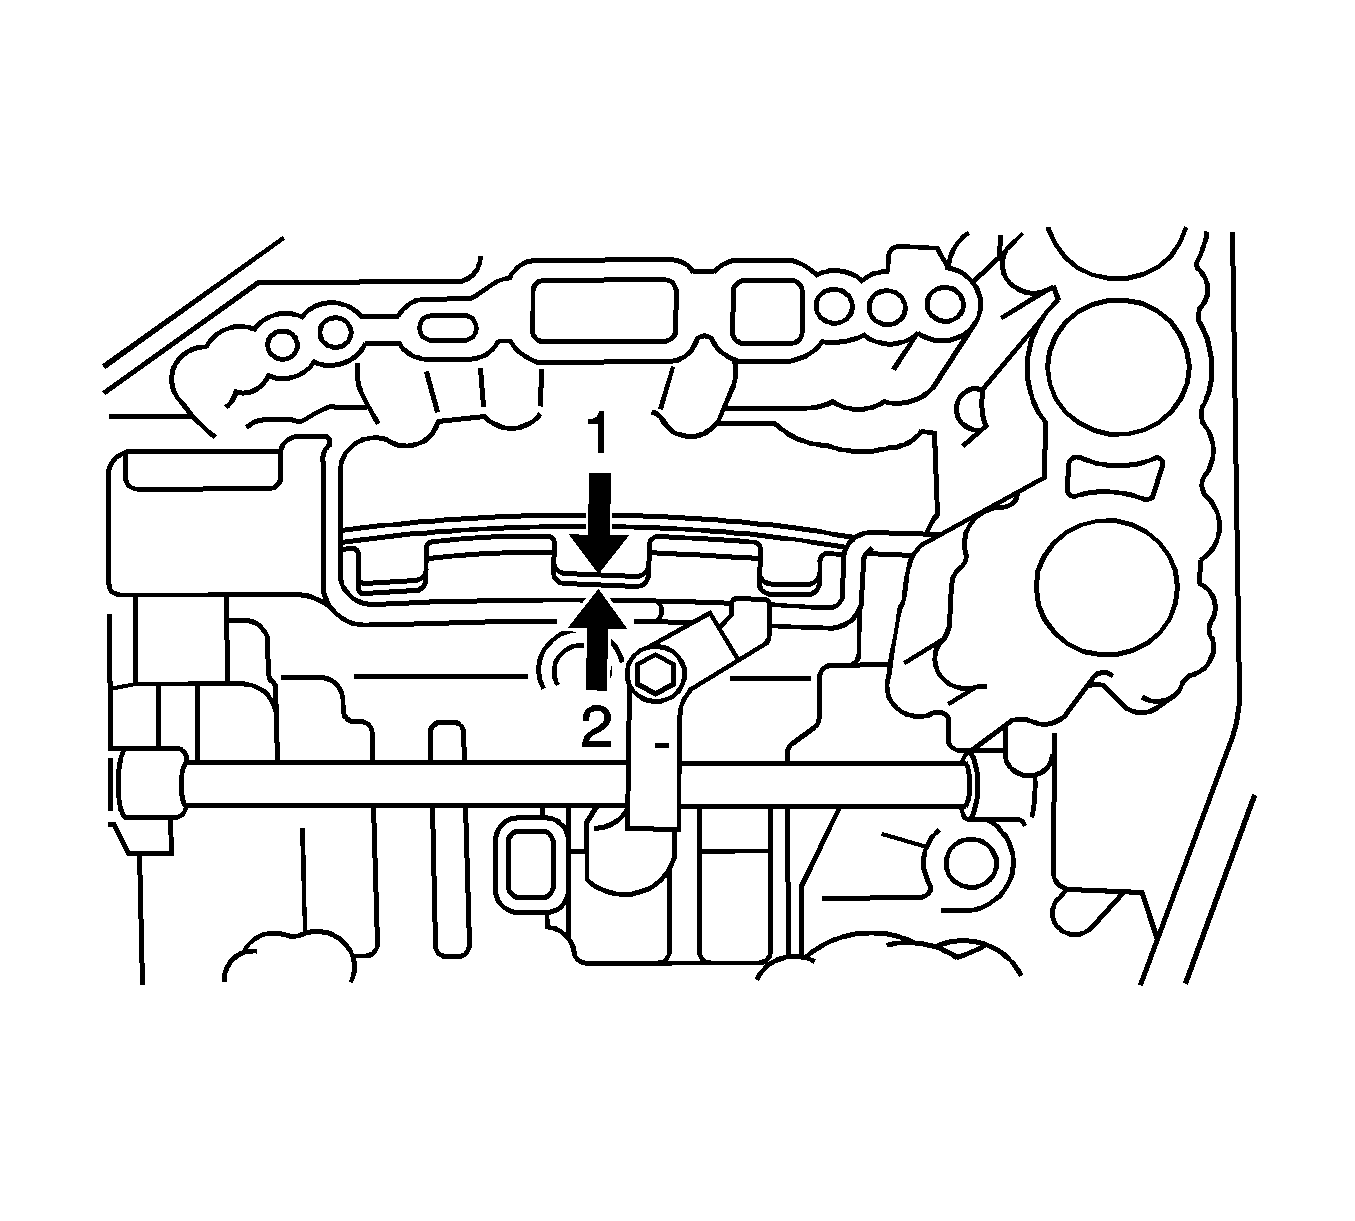
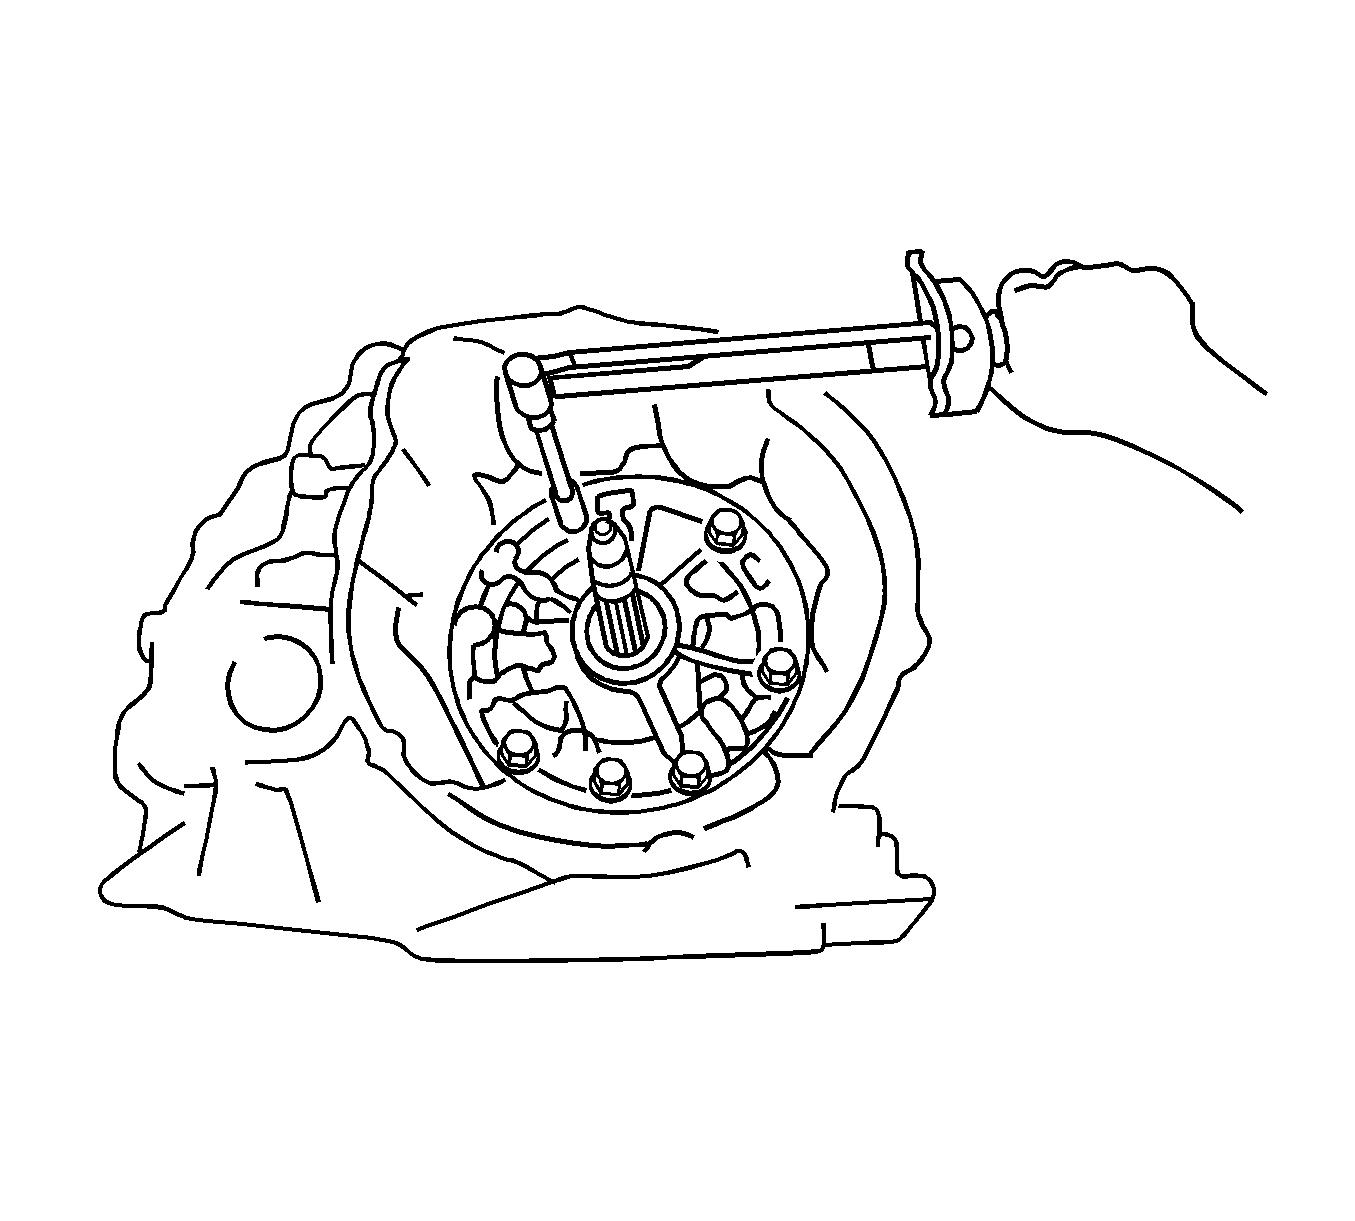
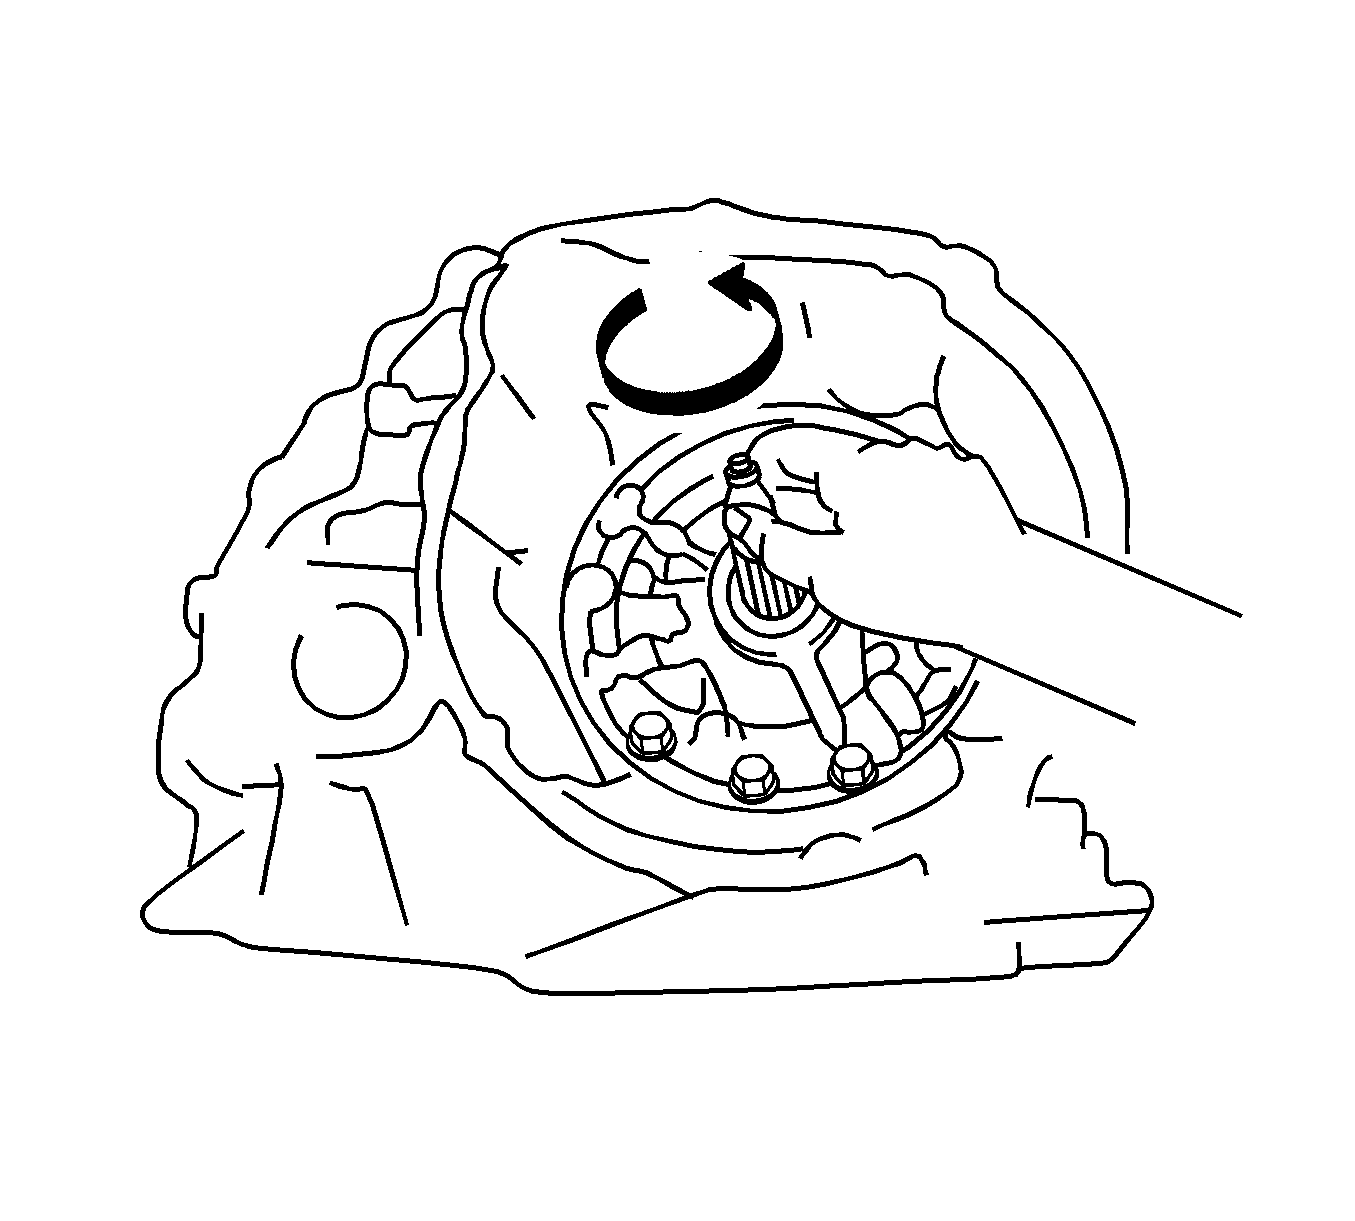
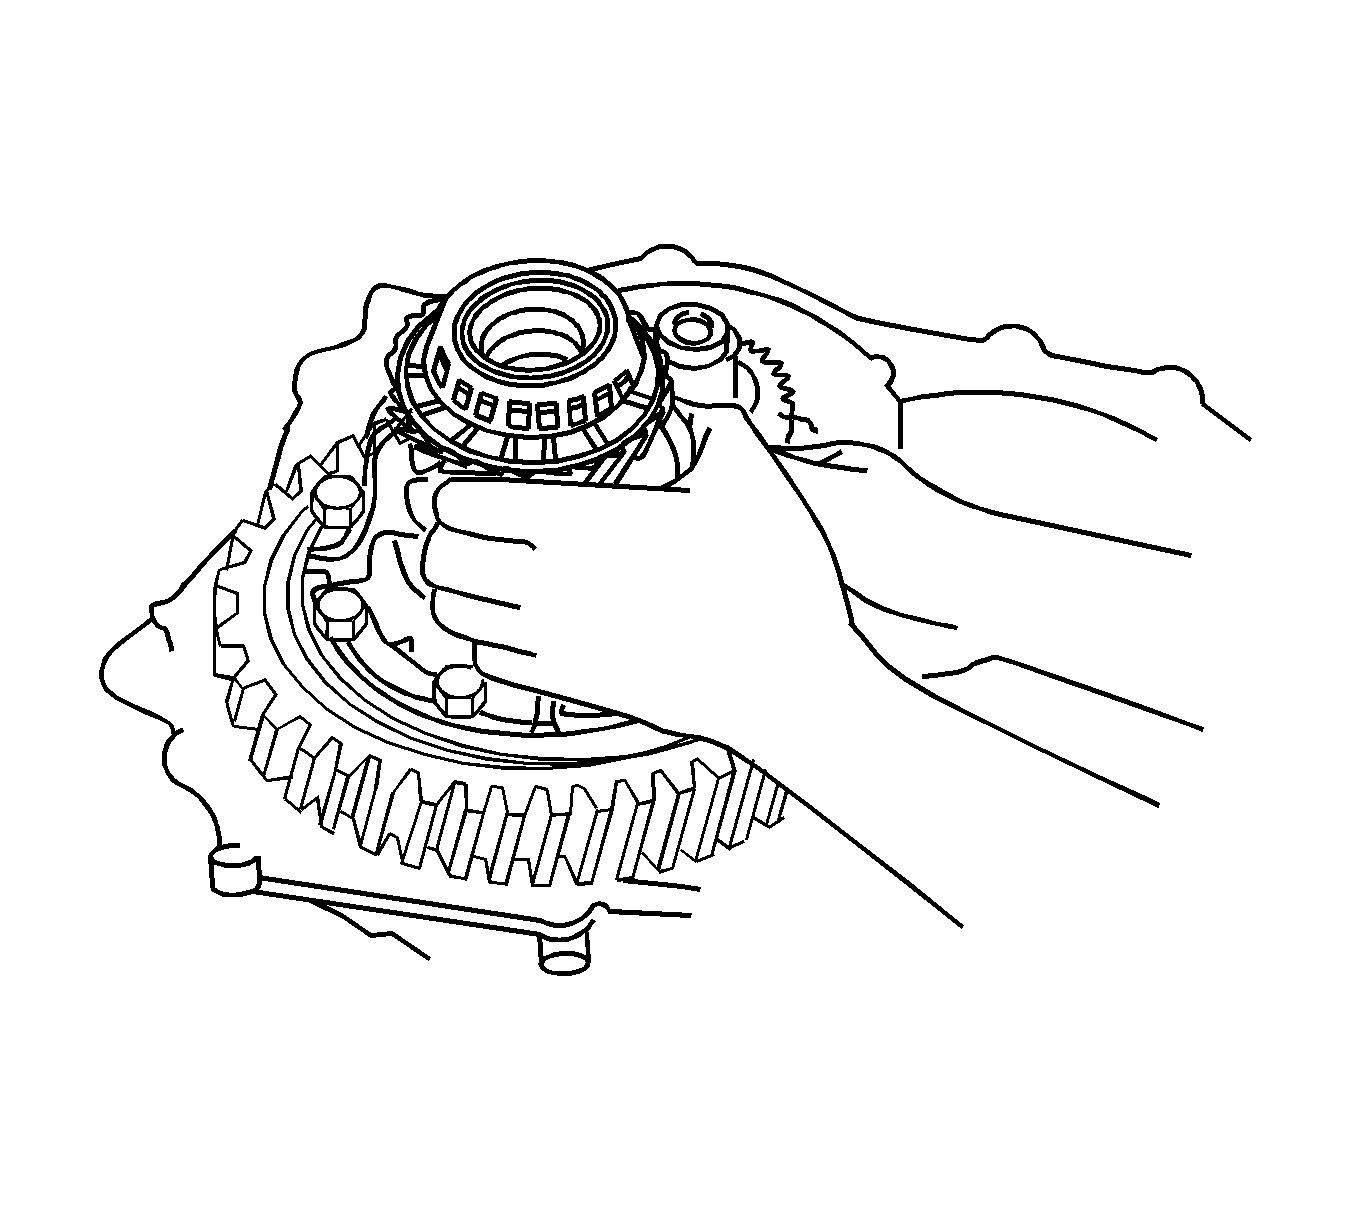
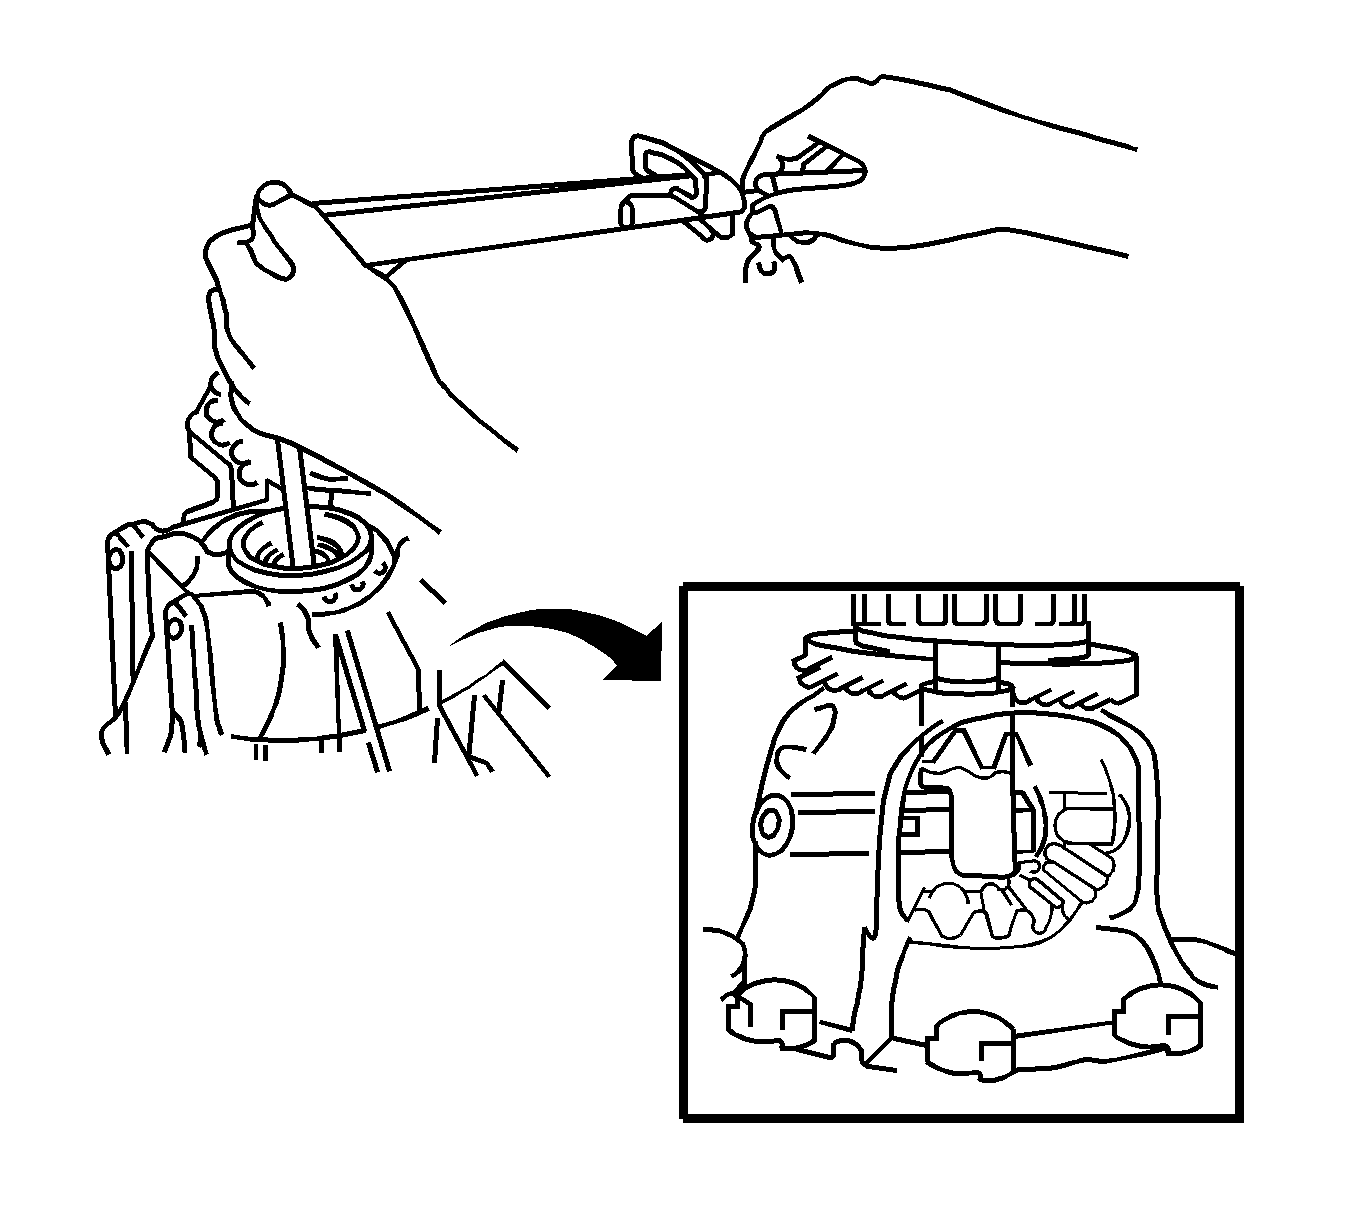
- Using J 35405 and a torque wrench, rotate the differential in both directions to seat the bearing.
- Using J 35405 and a torque wrench, measure the preload of the side bearing.
- If the preload is not within specification, remove the differential from the transaxle case. Select a new transaxle case side adjusting shim. Refer to General Specifications .
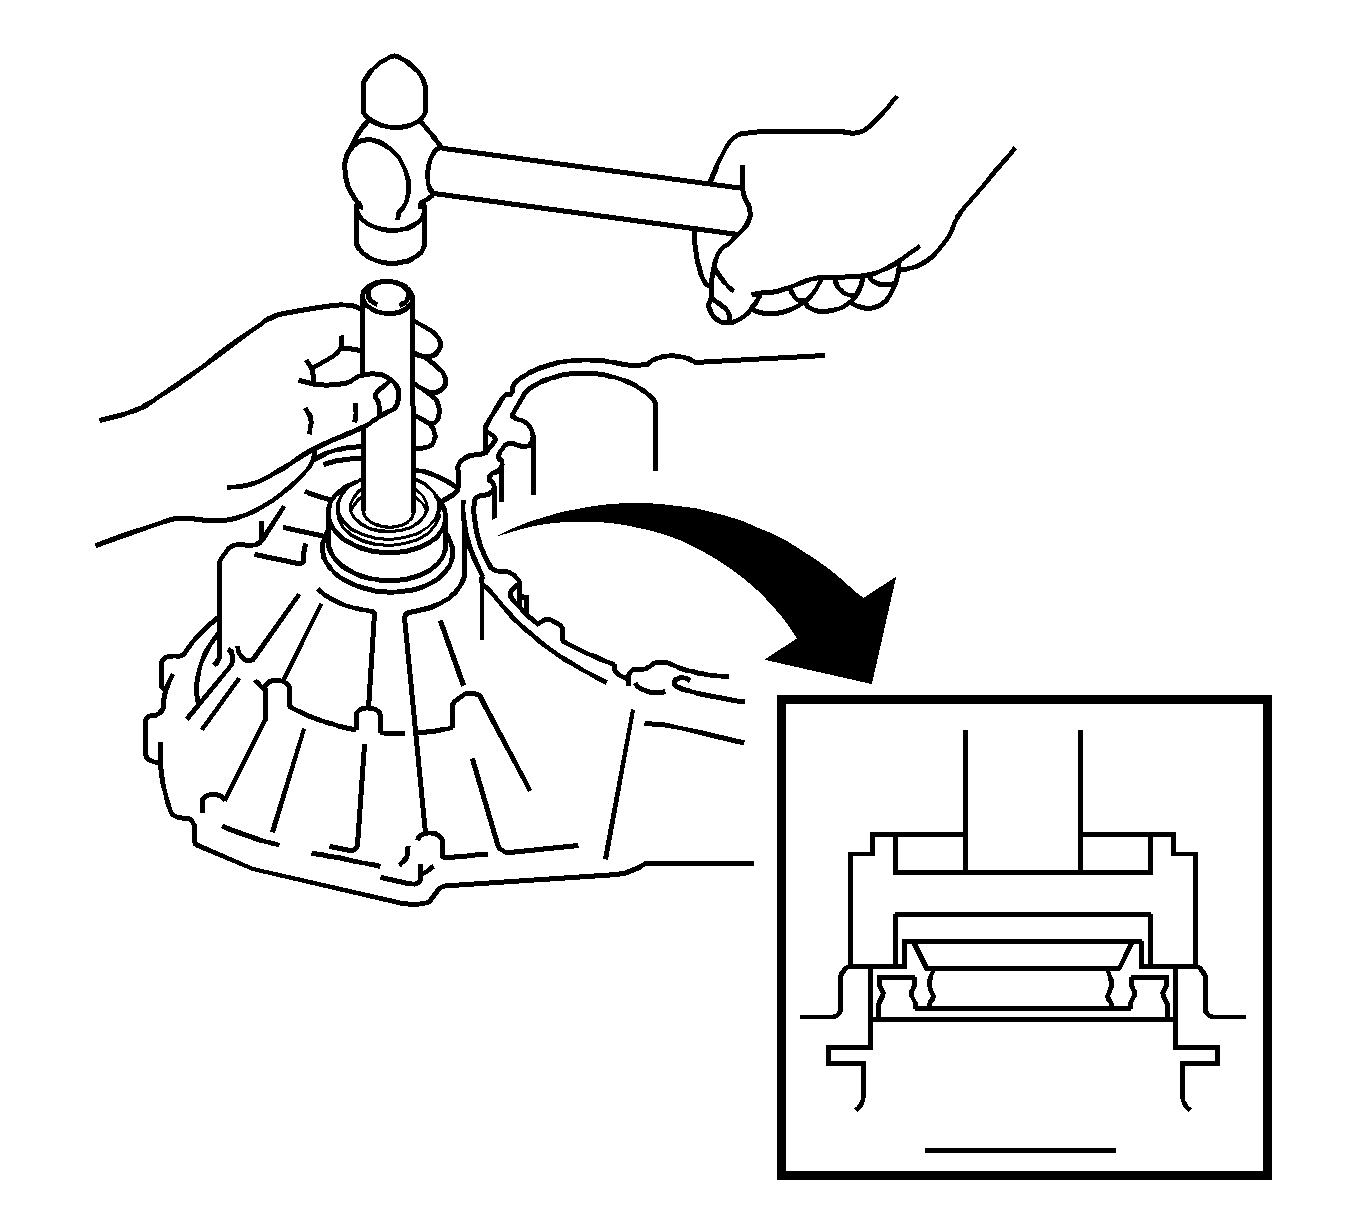
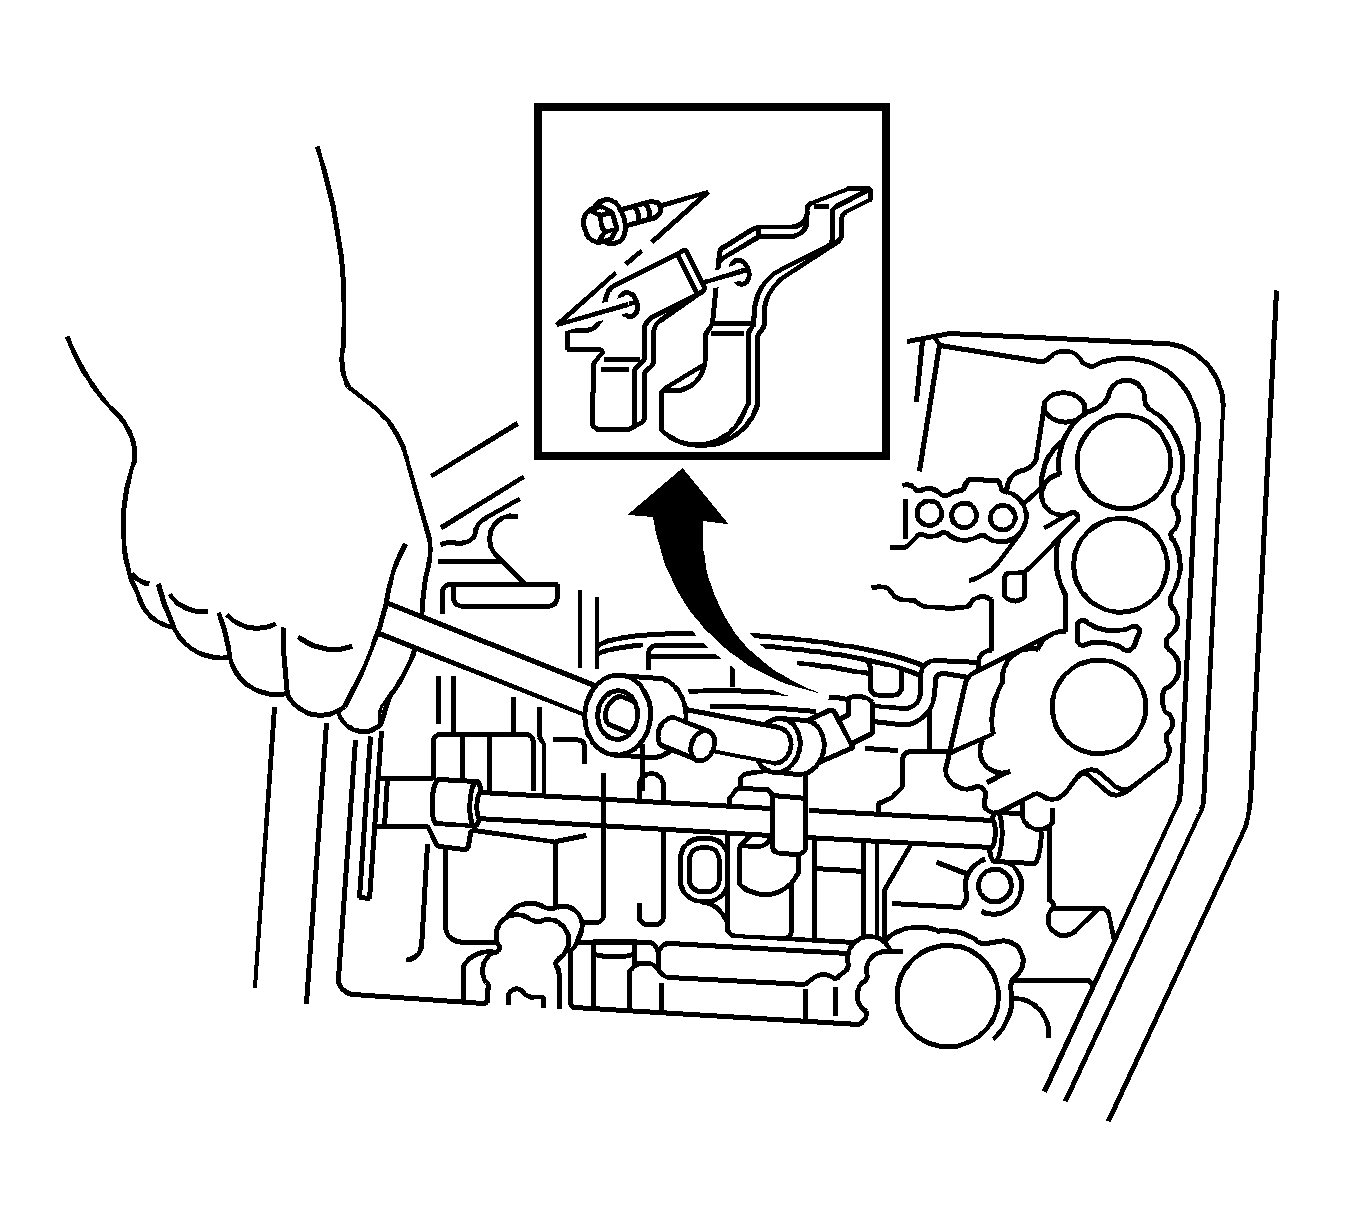
- Using a 14 mm (0.55 in) socket and hammer, drive in a new manual valve lever shaft oil seal.
- Apply multi-purpose grease to the seal lip.
- Install the parking lock rod assembly to the manual valve lever sub-assembly.
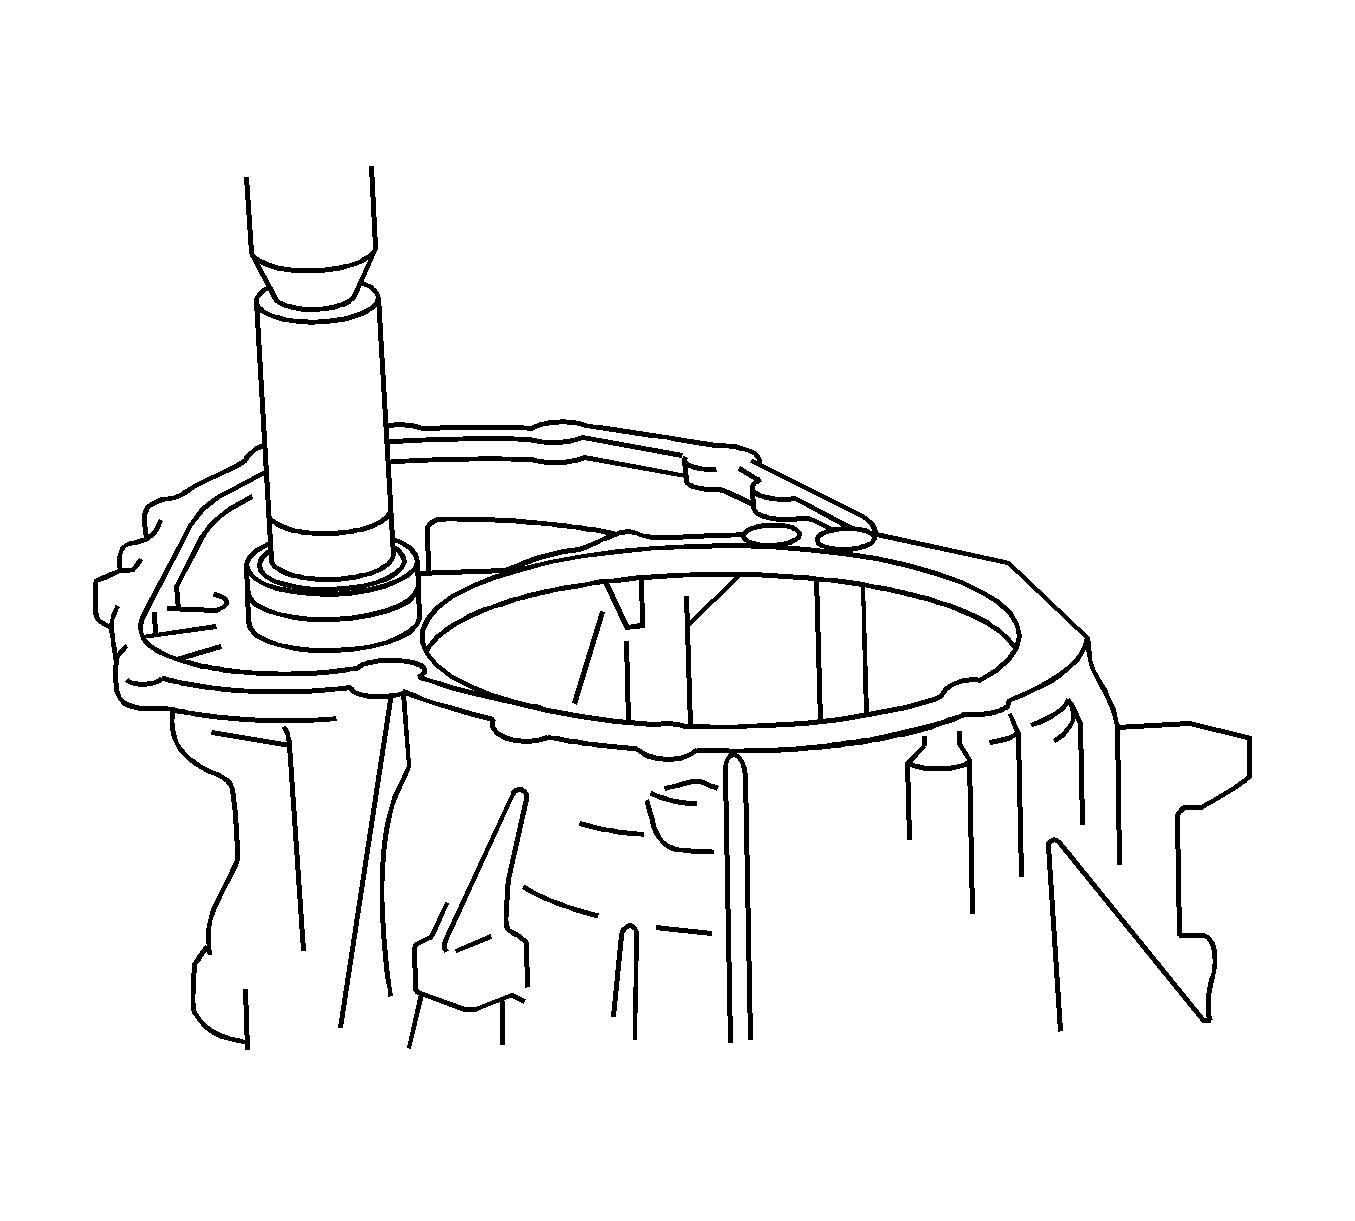
- Slide in the manual valve lever shaft, then install the washer plate, a new spacer and manual valve lever sub-assembly.
- Install the retainer spring.
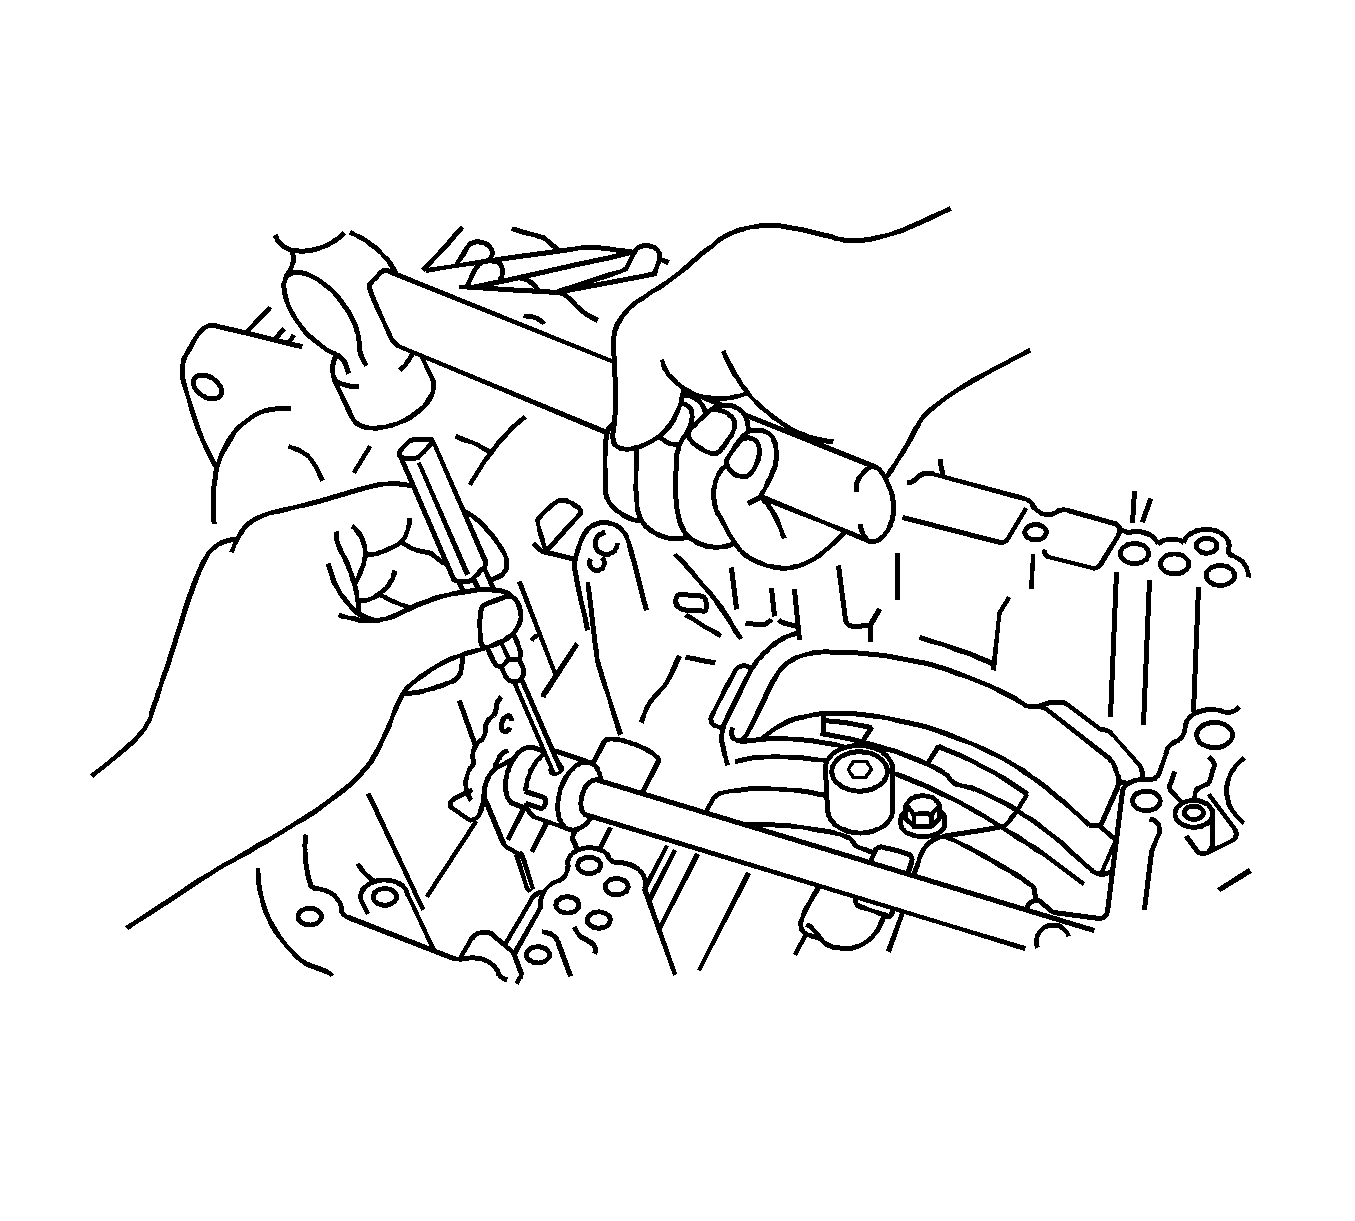
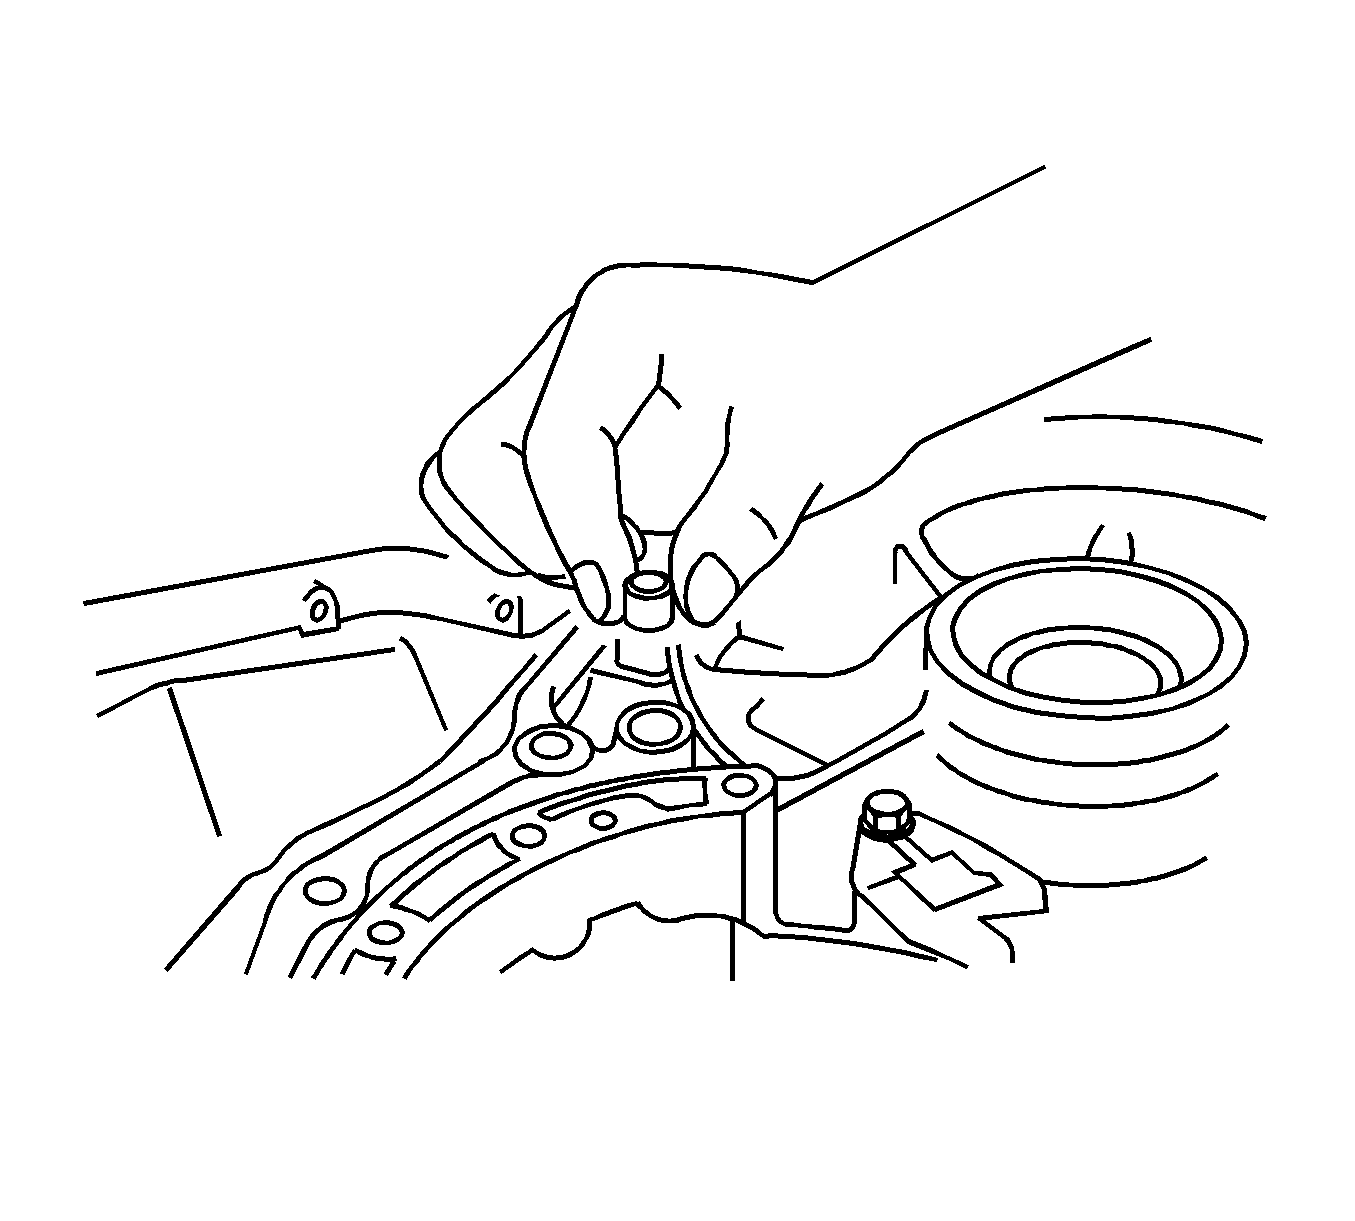
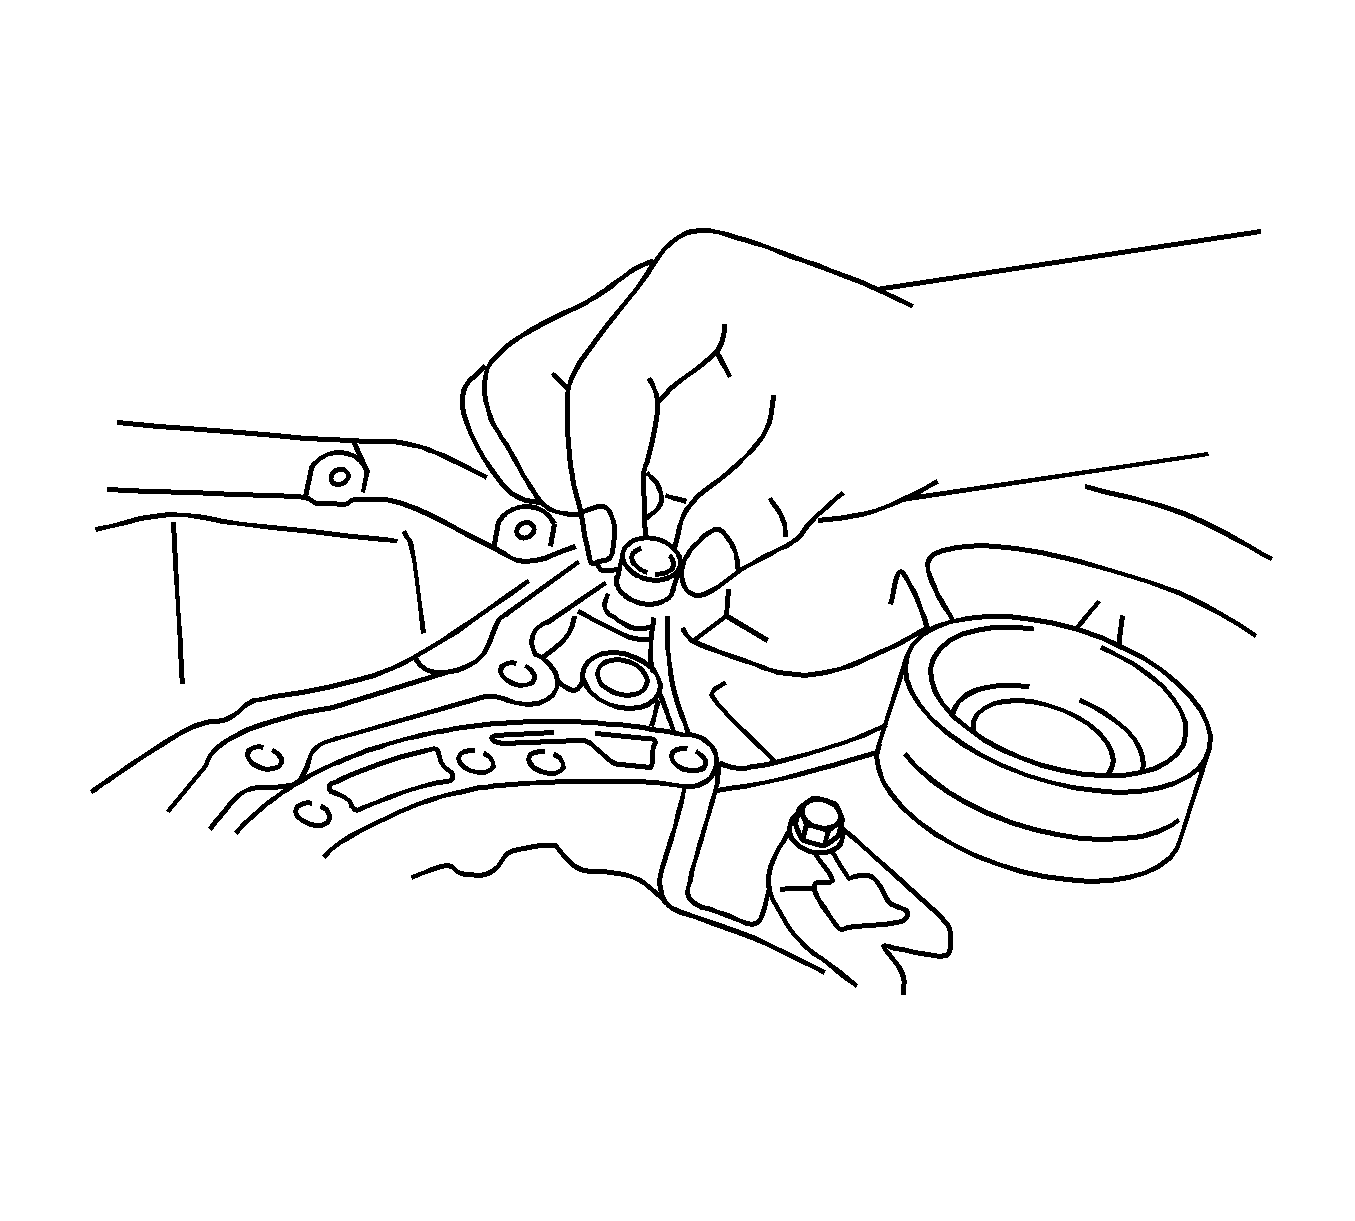
- Using a pin punch and hammer, install the roll pin.
- Position the spacer, then stake the spacer.
- Coat the new O-rings with T-IV automatic transmission, them install the O-rings on the accumulator pistons.
- Install the accumulator springs and pistons in the transaxle case.
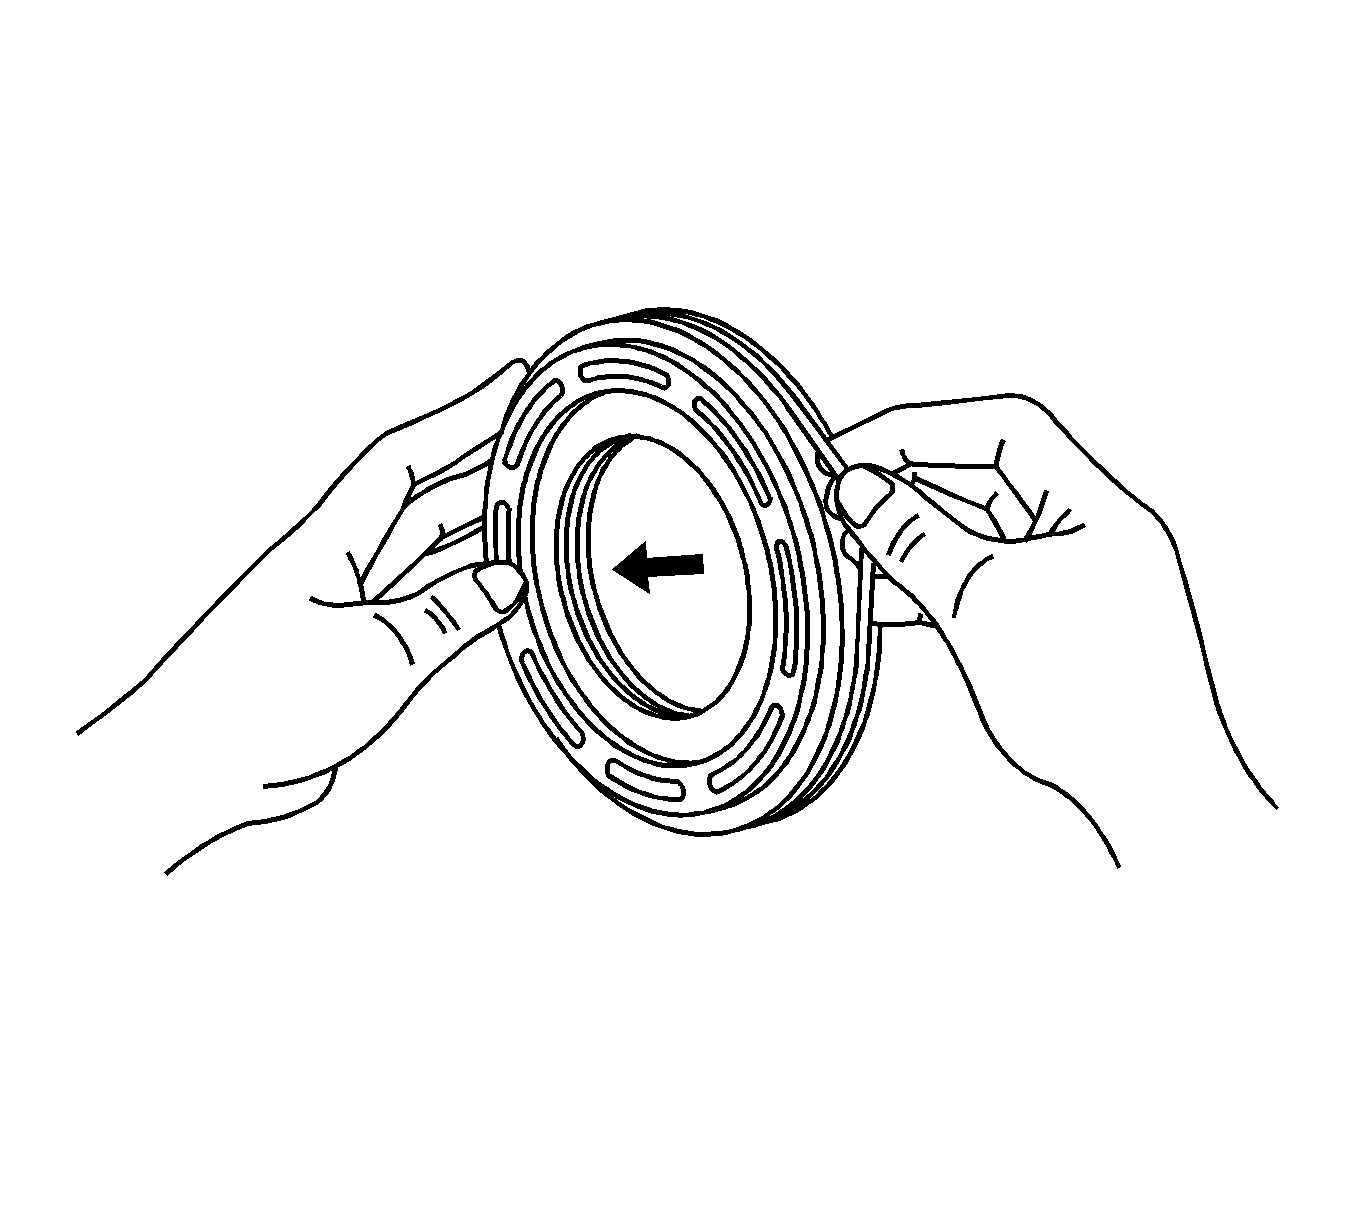
- Install a new brake drum gasket until it makes contact with the 2nd brake drum.
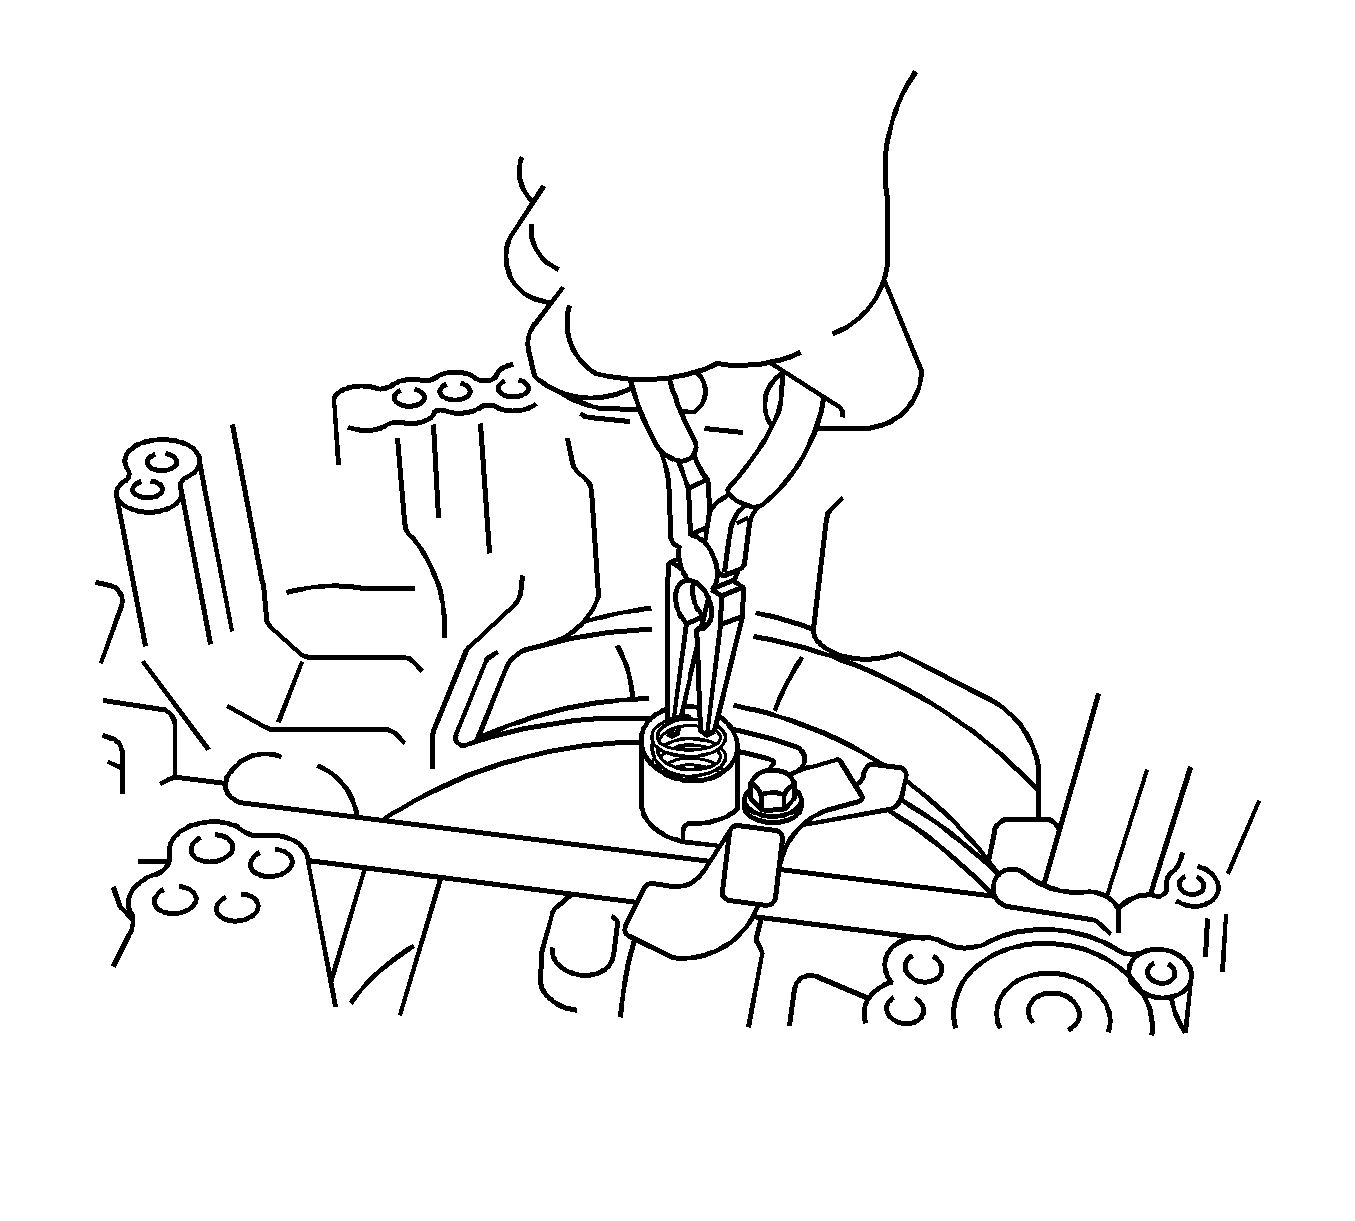
- Install the new governor apply gasket No.1 in the transaxle case.
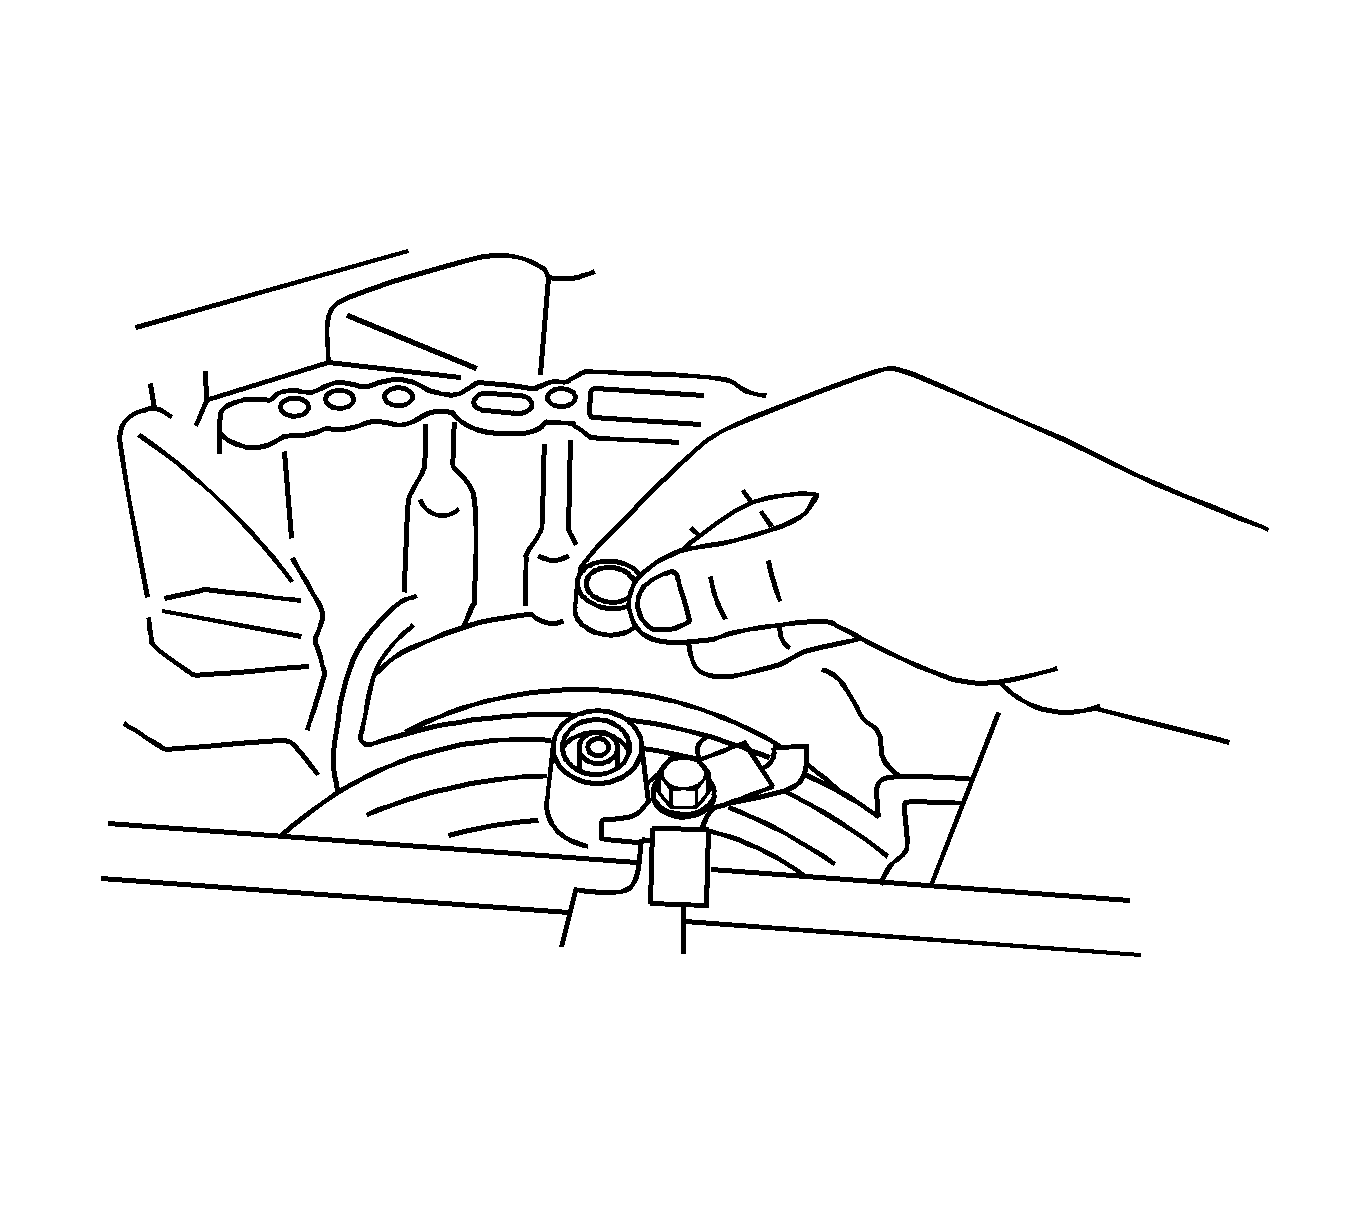
- Install the check ball body and spring in the transaxle case.
- Coat a new O-ring with T-IV automatic transmission fluid, then install the O-ring on the transmission wire harness connector.
- Install the transmission wire into the transaxle case.
- Install the connector retaining bolt.
- Connect the manual valve connecting rod to the manual valve lever.
- Install the valve body with the 17 retaining bolts.
- Connect the solenoid connectors.
- Install the manual detent spring sub-assembly.
- Install the manual detent spring cover and bolt.
- Install the valve body oil filter and gasket, then install the 3 bolts
- Install the 2 transaxle oil pan magnets on the oil pan.
- Install a new oil pan gasket and oil pan on the transaxle case.
- Install the 18 oil pan retaining bolts.
- Coat 2 new O-rings with T-IV automatic transmission fluid.
- Install the O-rings on the 2 oil cooler pipe unions.
- Install the unions on the transaxle case.
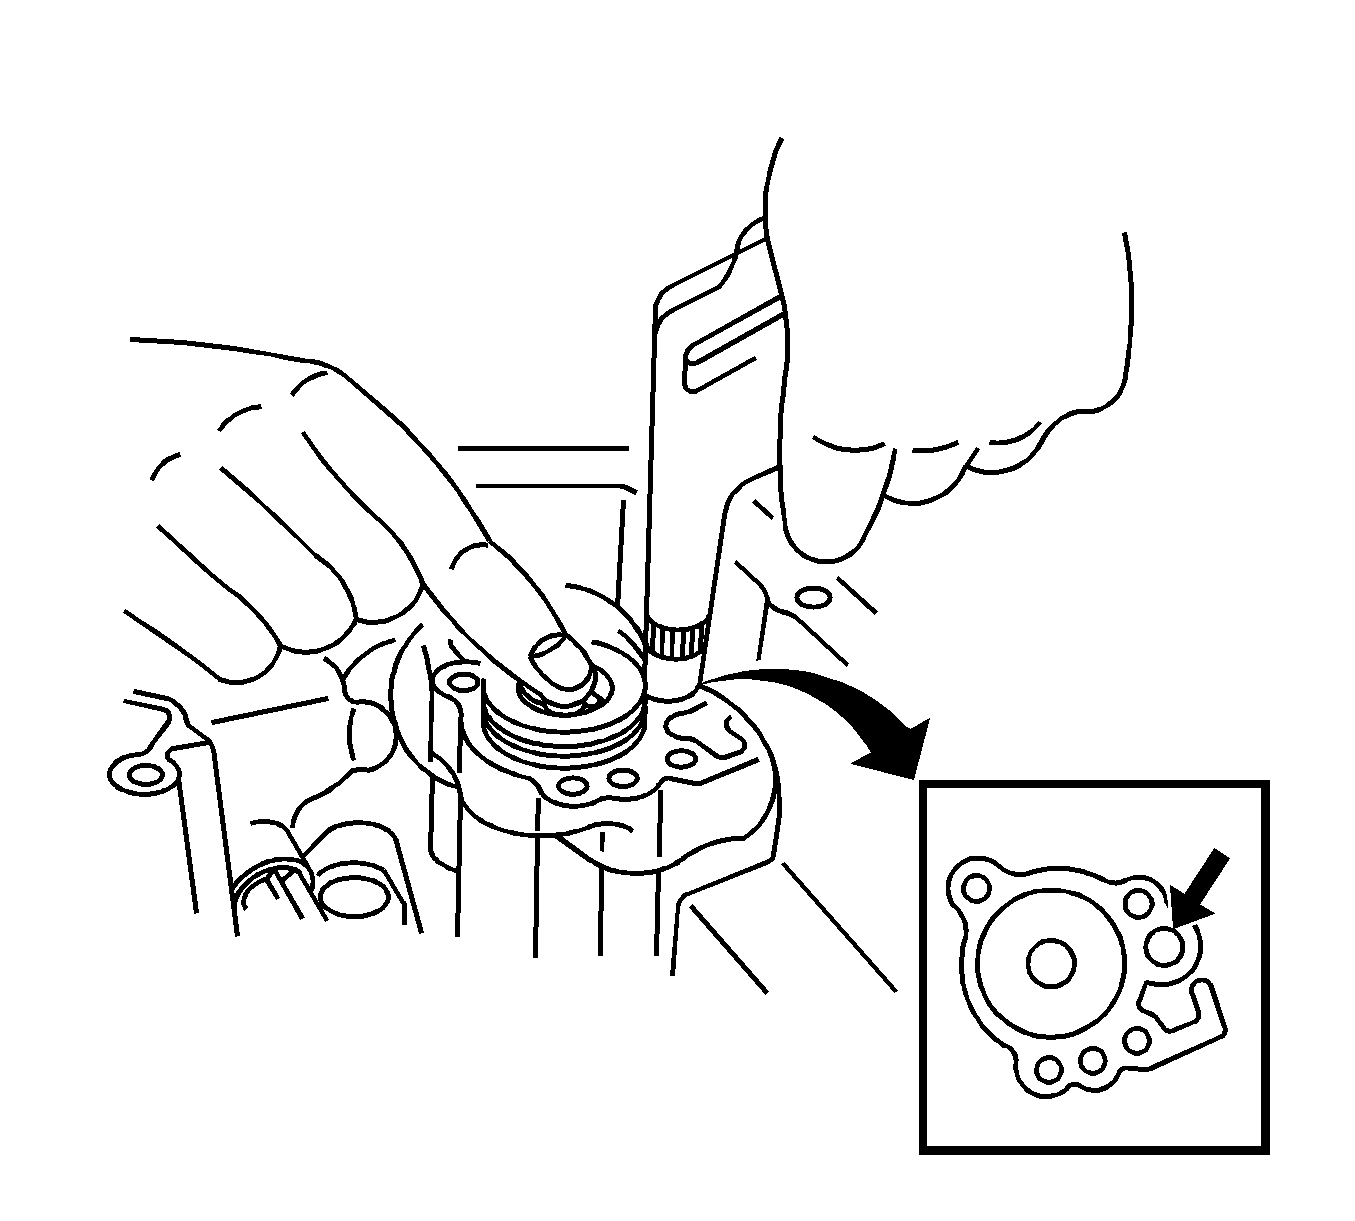
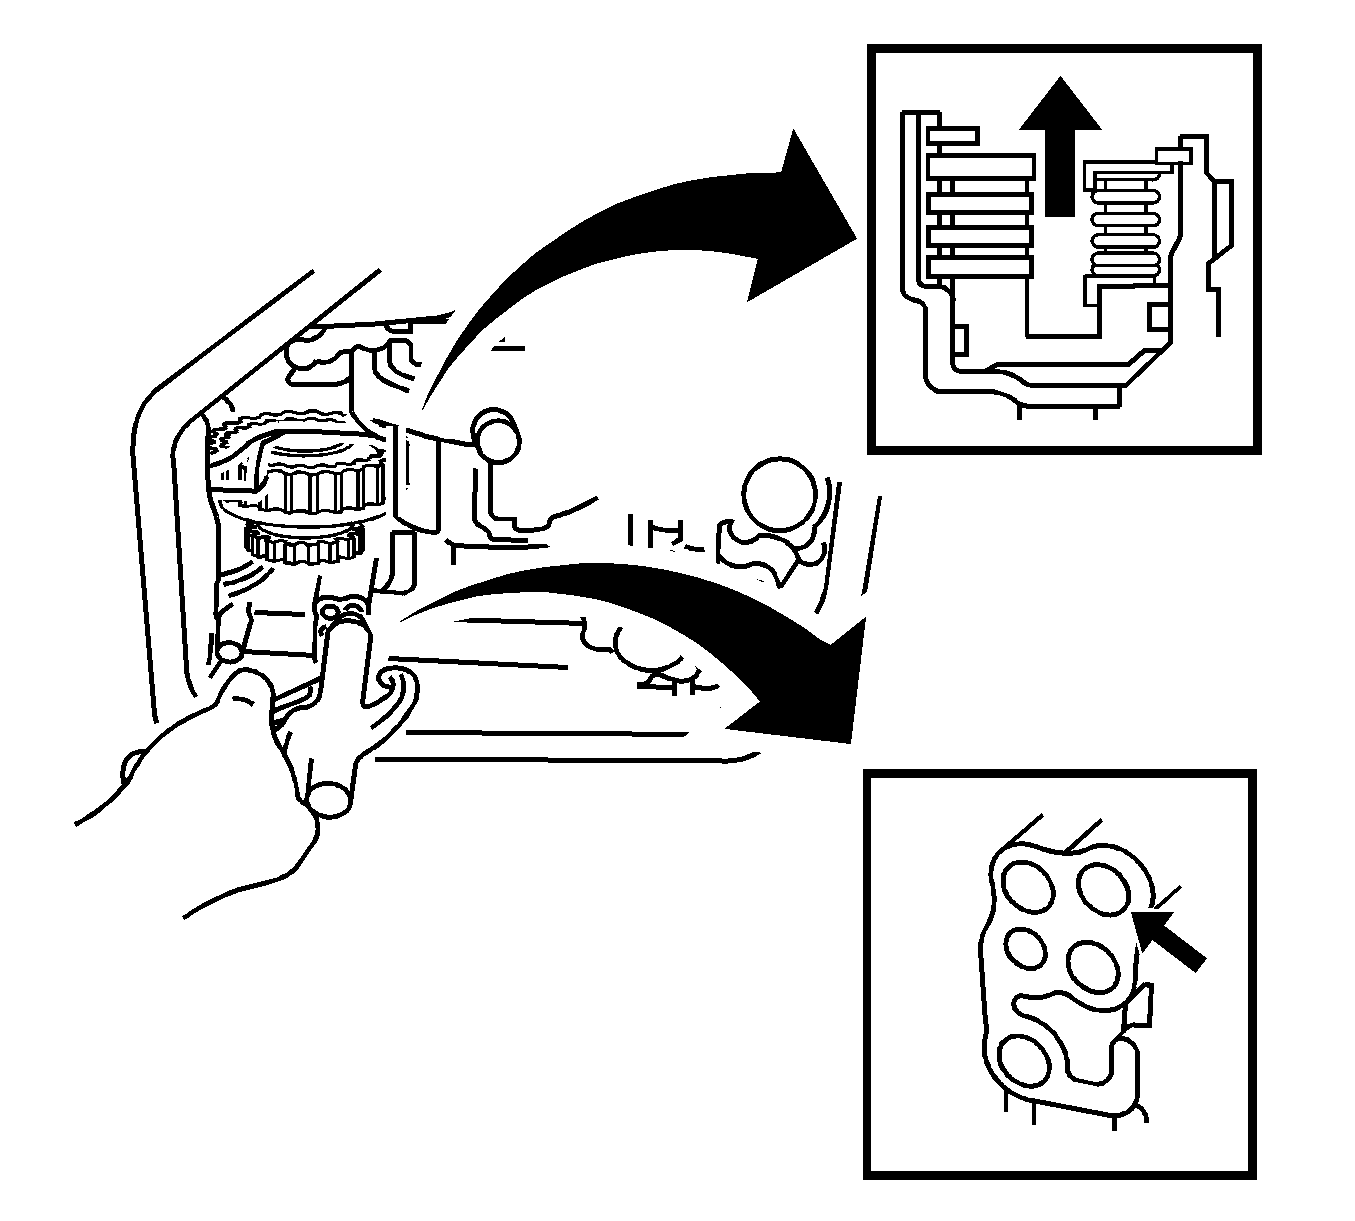
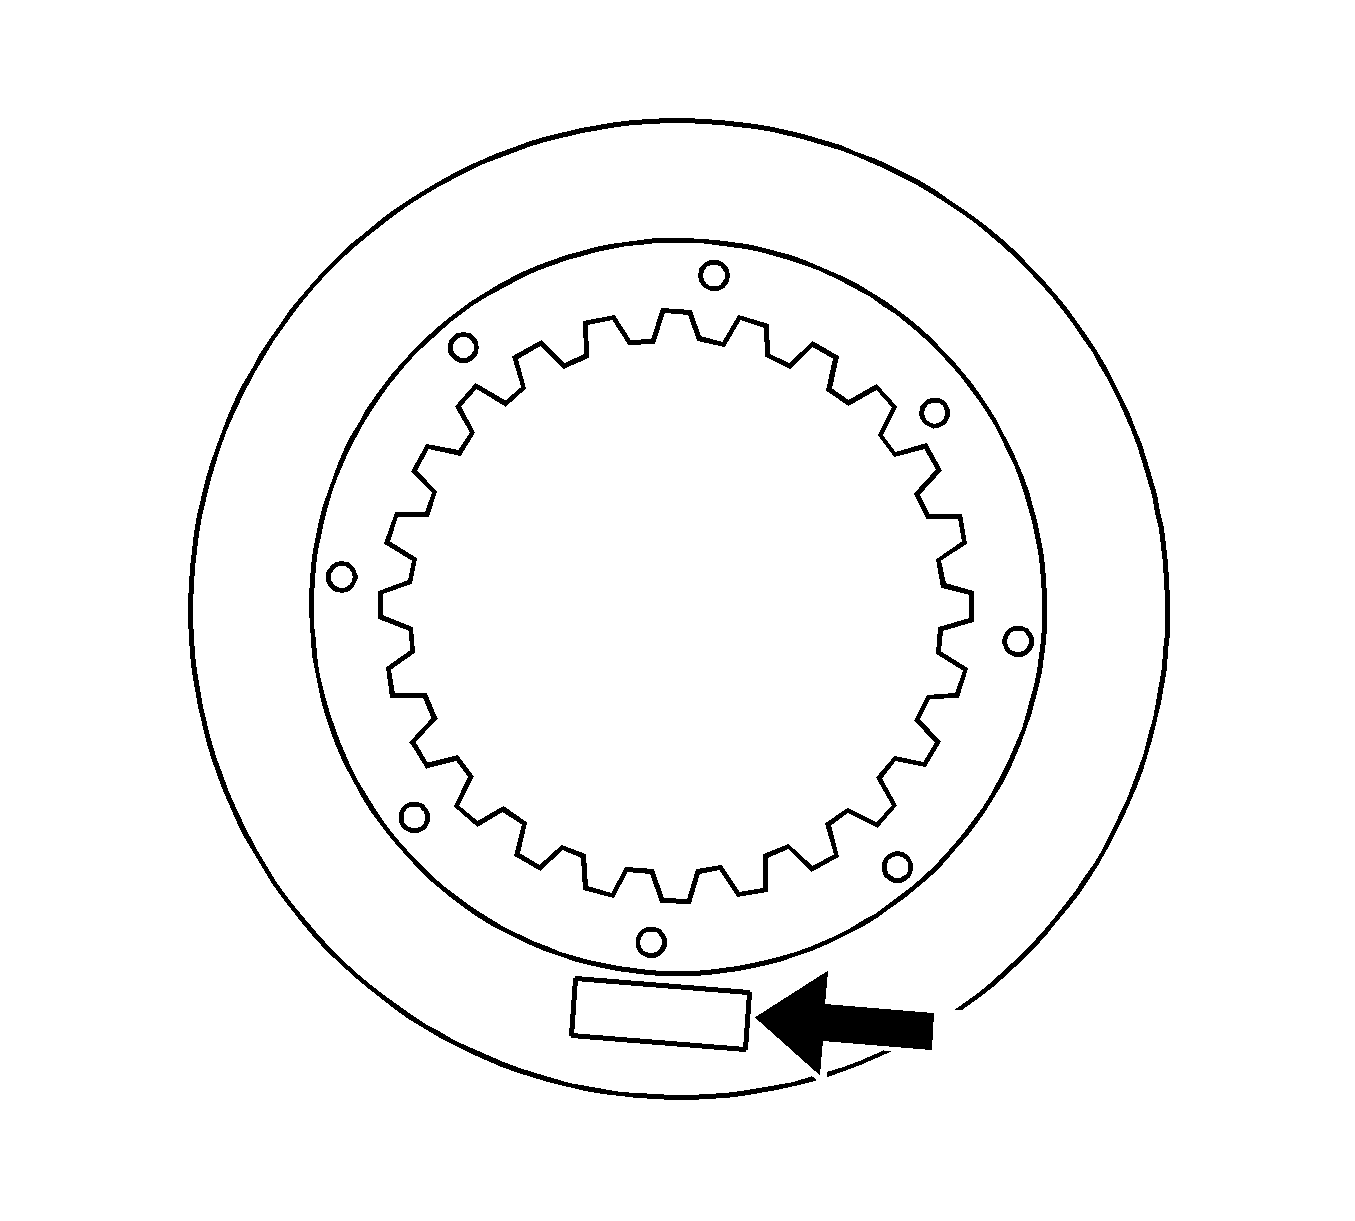
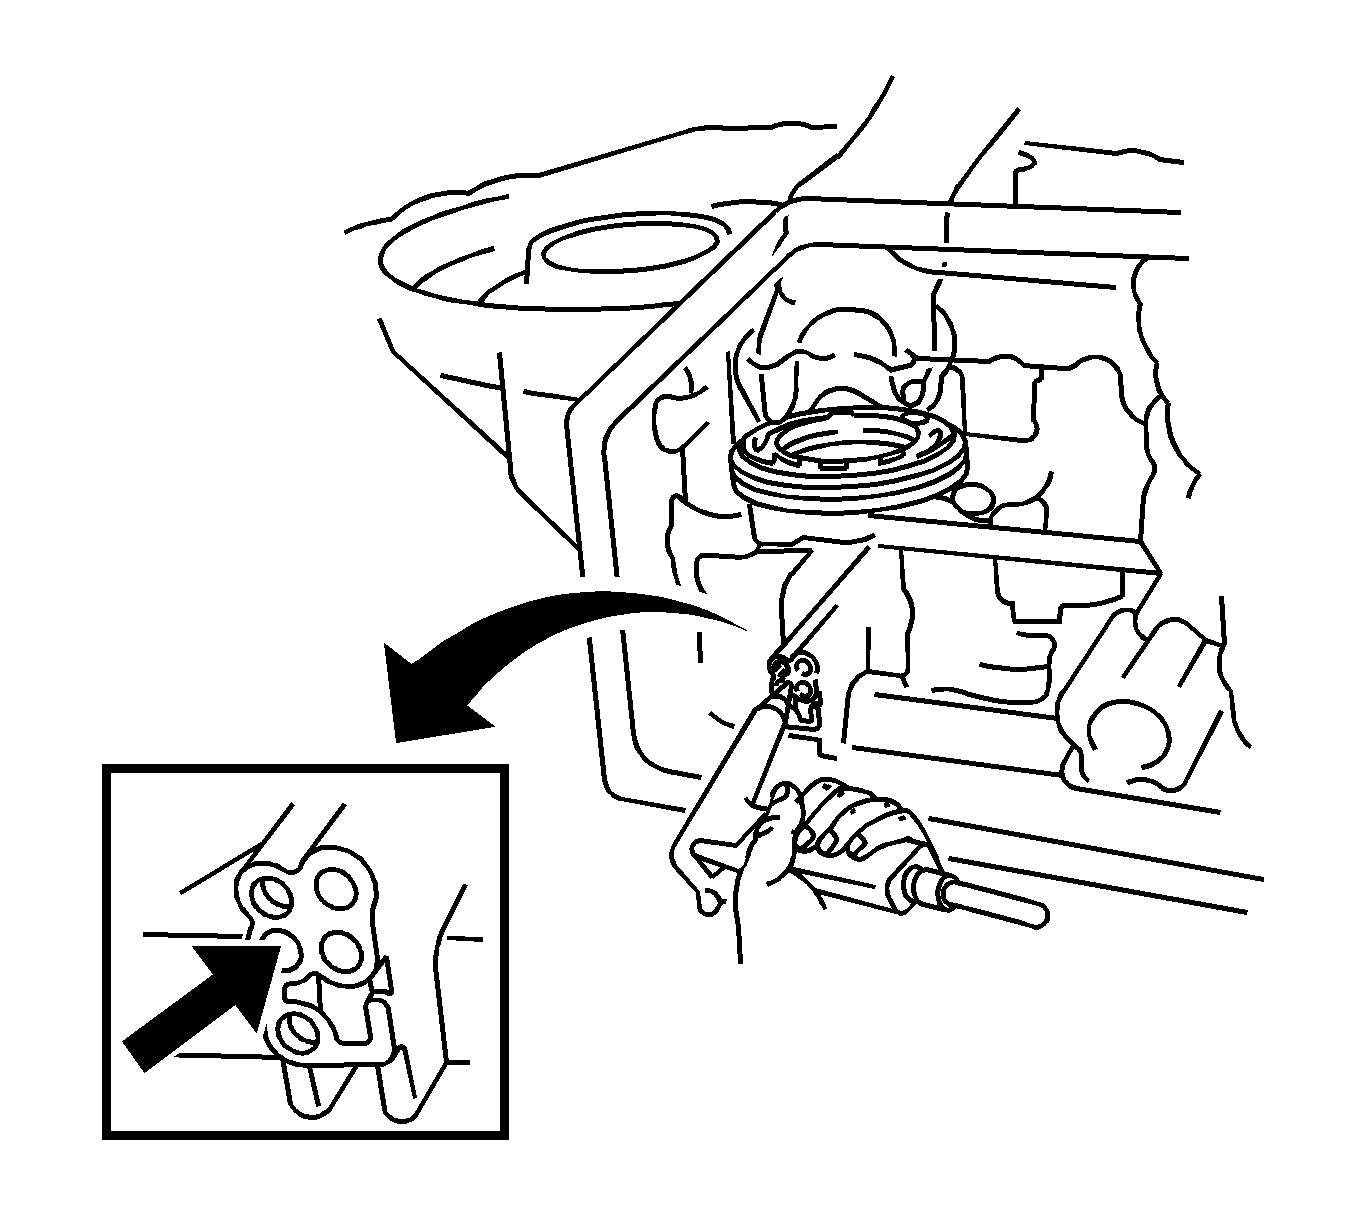
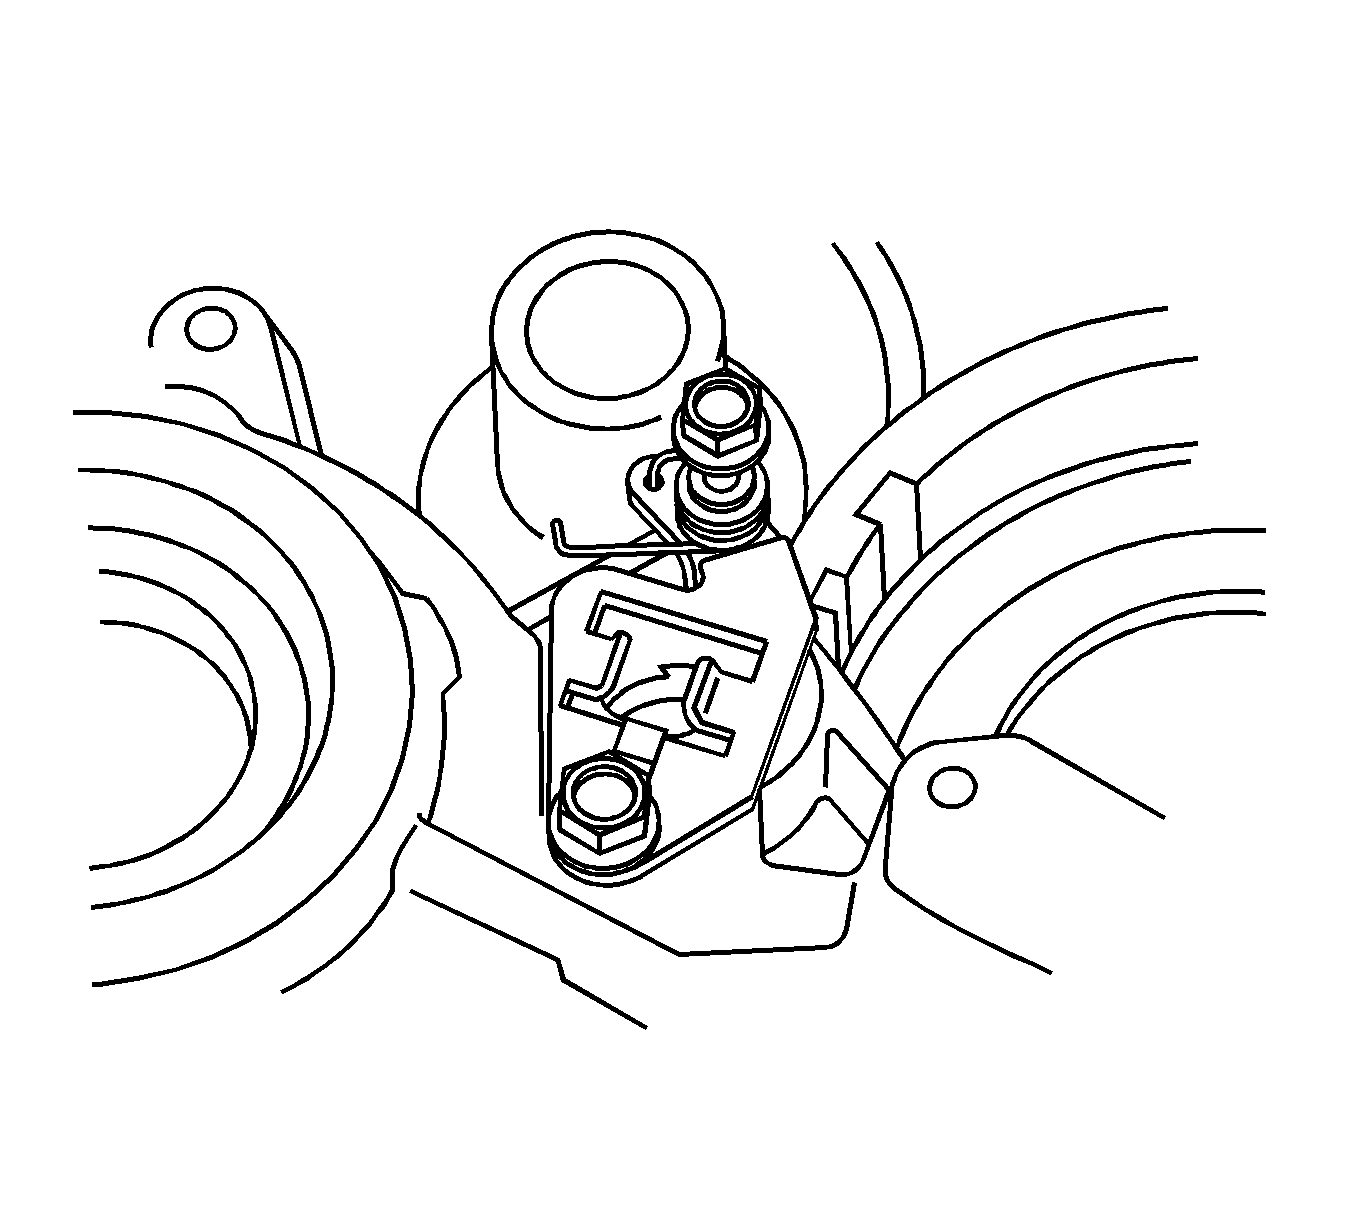
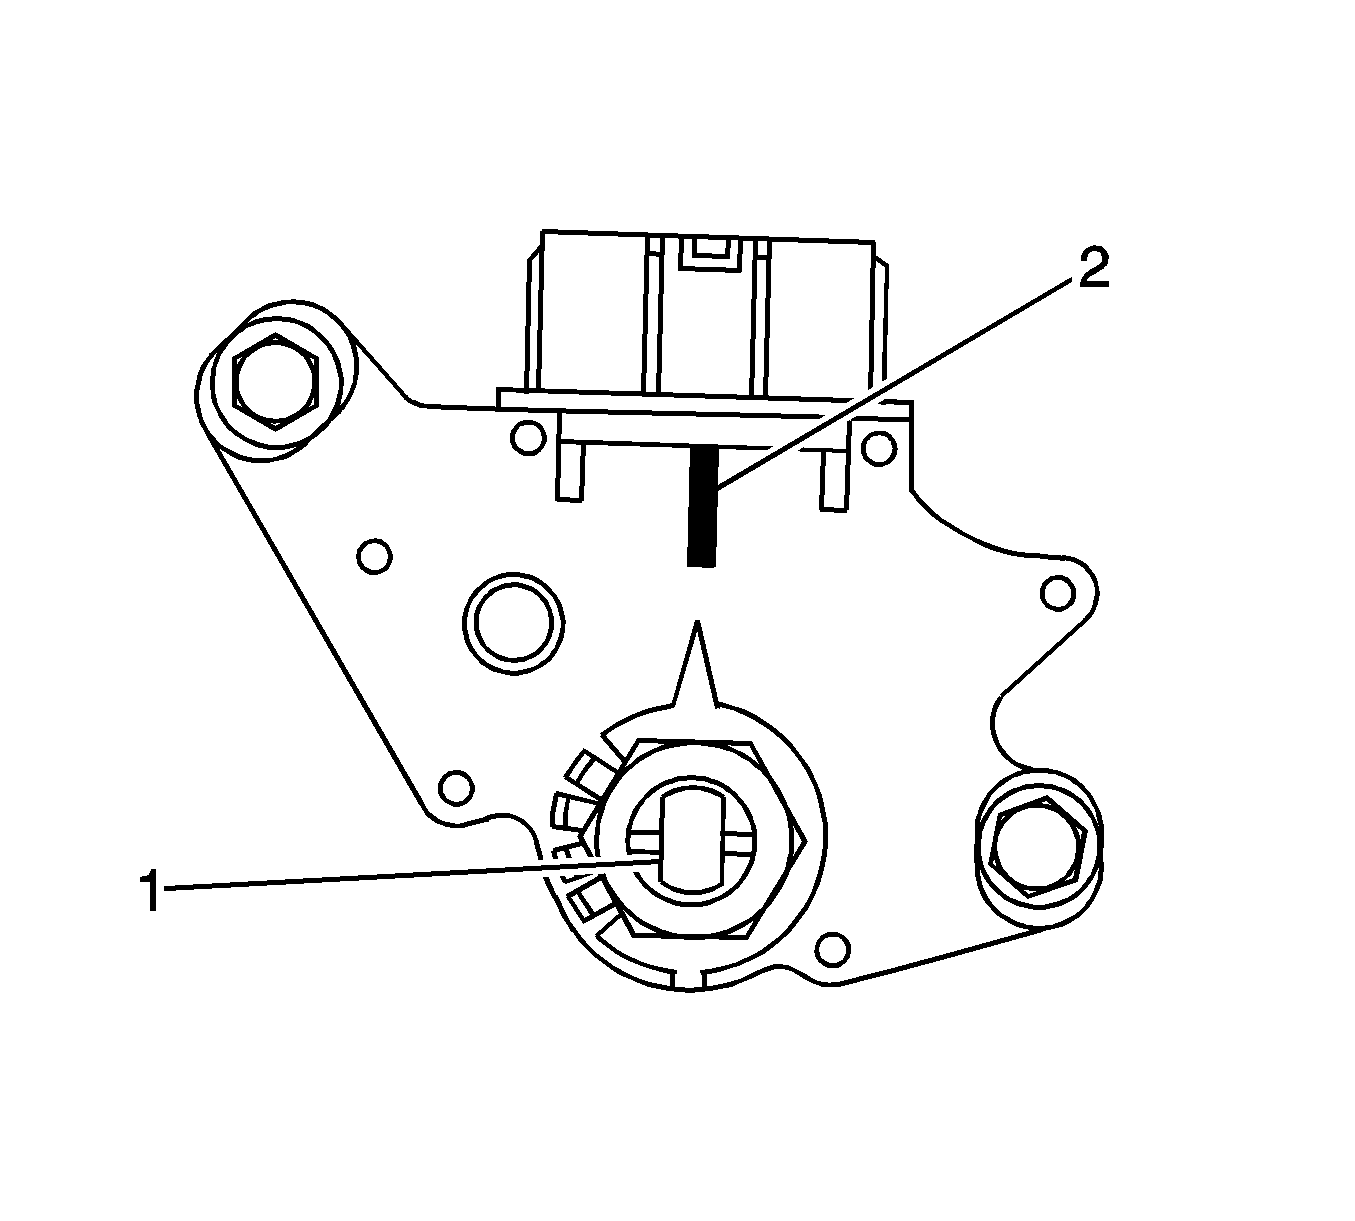
- Install the PNP switch to the manual shift lever
- Place a new lock washer and nut on the manual shift lever.
- Temporarily install the 2 PNP switch retaining bolts.
- Temporarily install the transmission control shift lever.
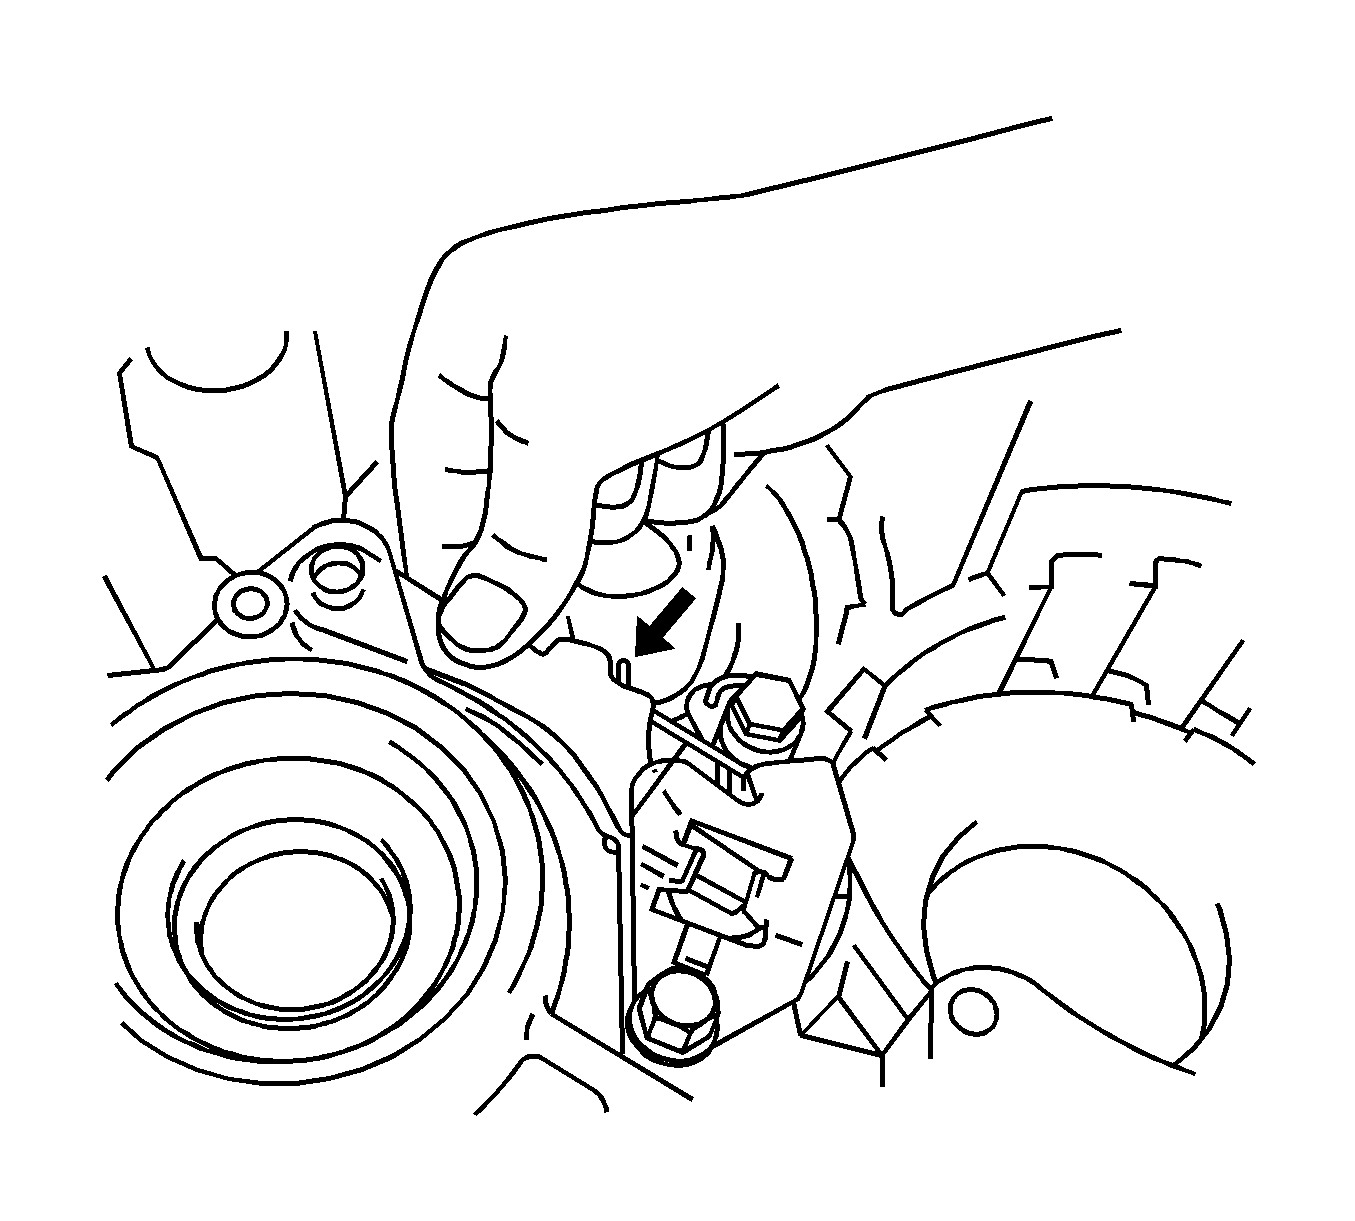
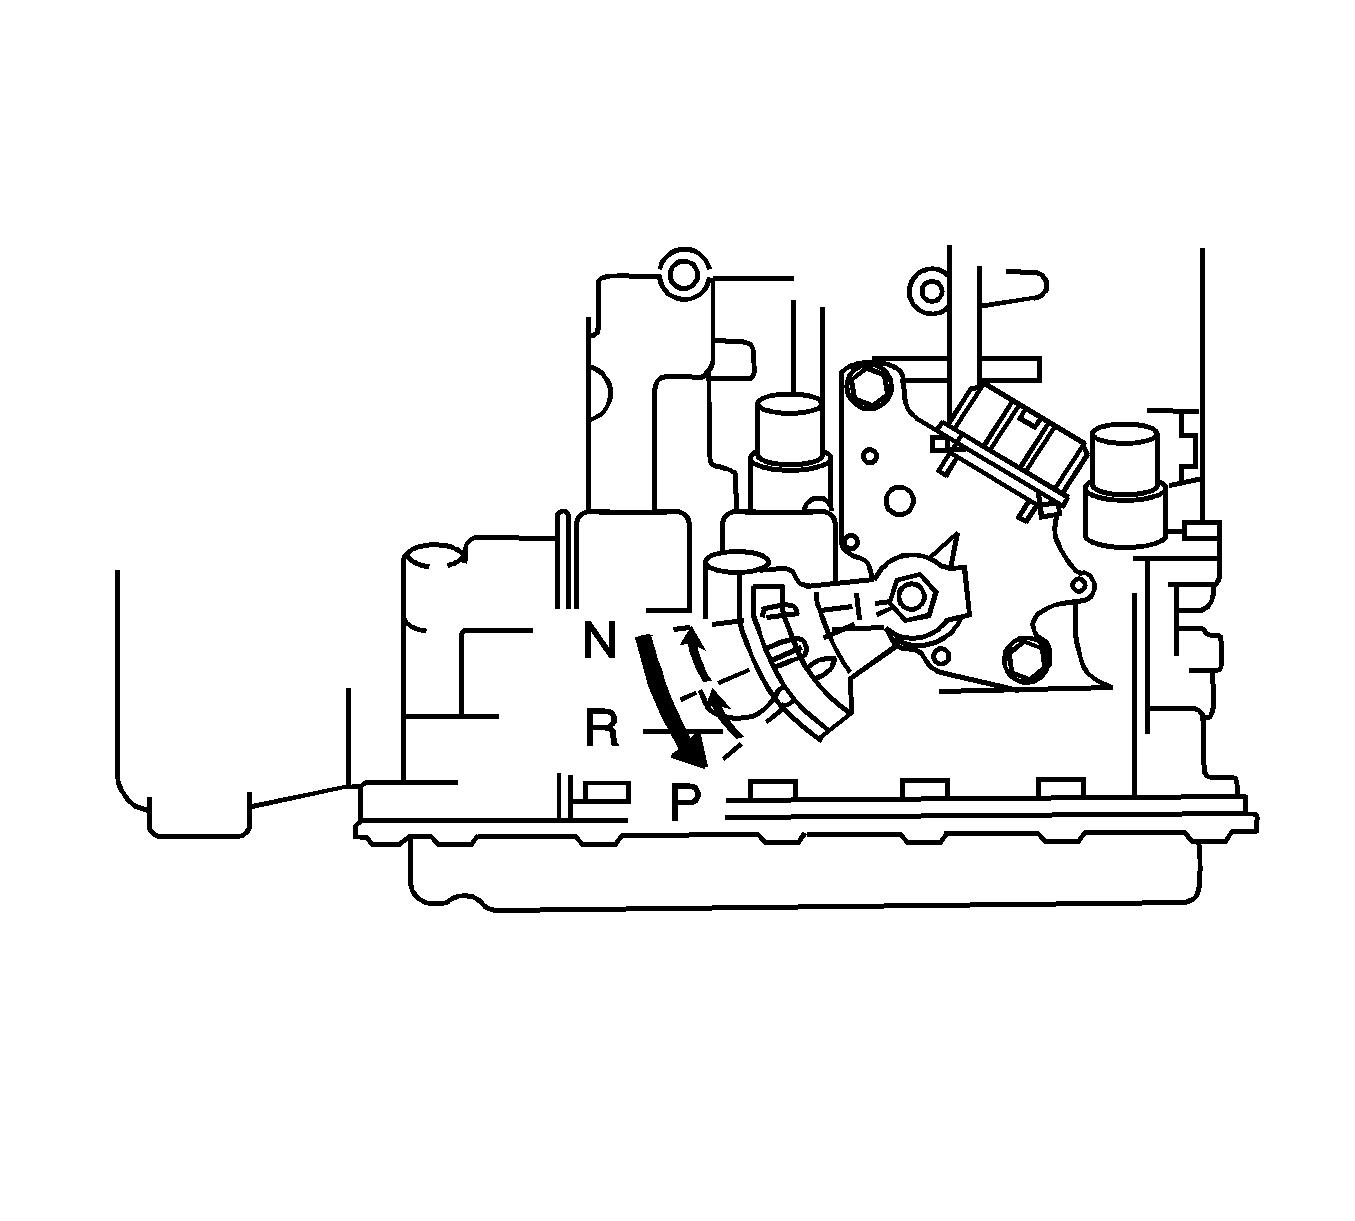
- Turn the lever counterclockwise until it stops, then turn the lever clockwise 2 notches.
- Remove the lever from the transaxle case.
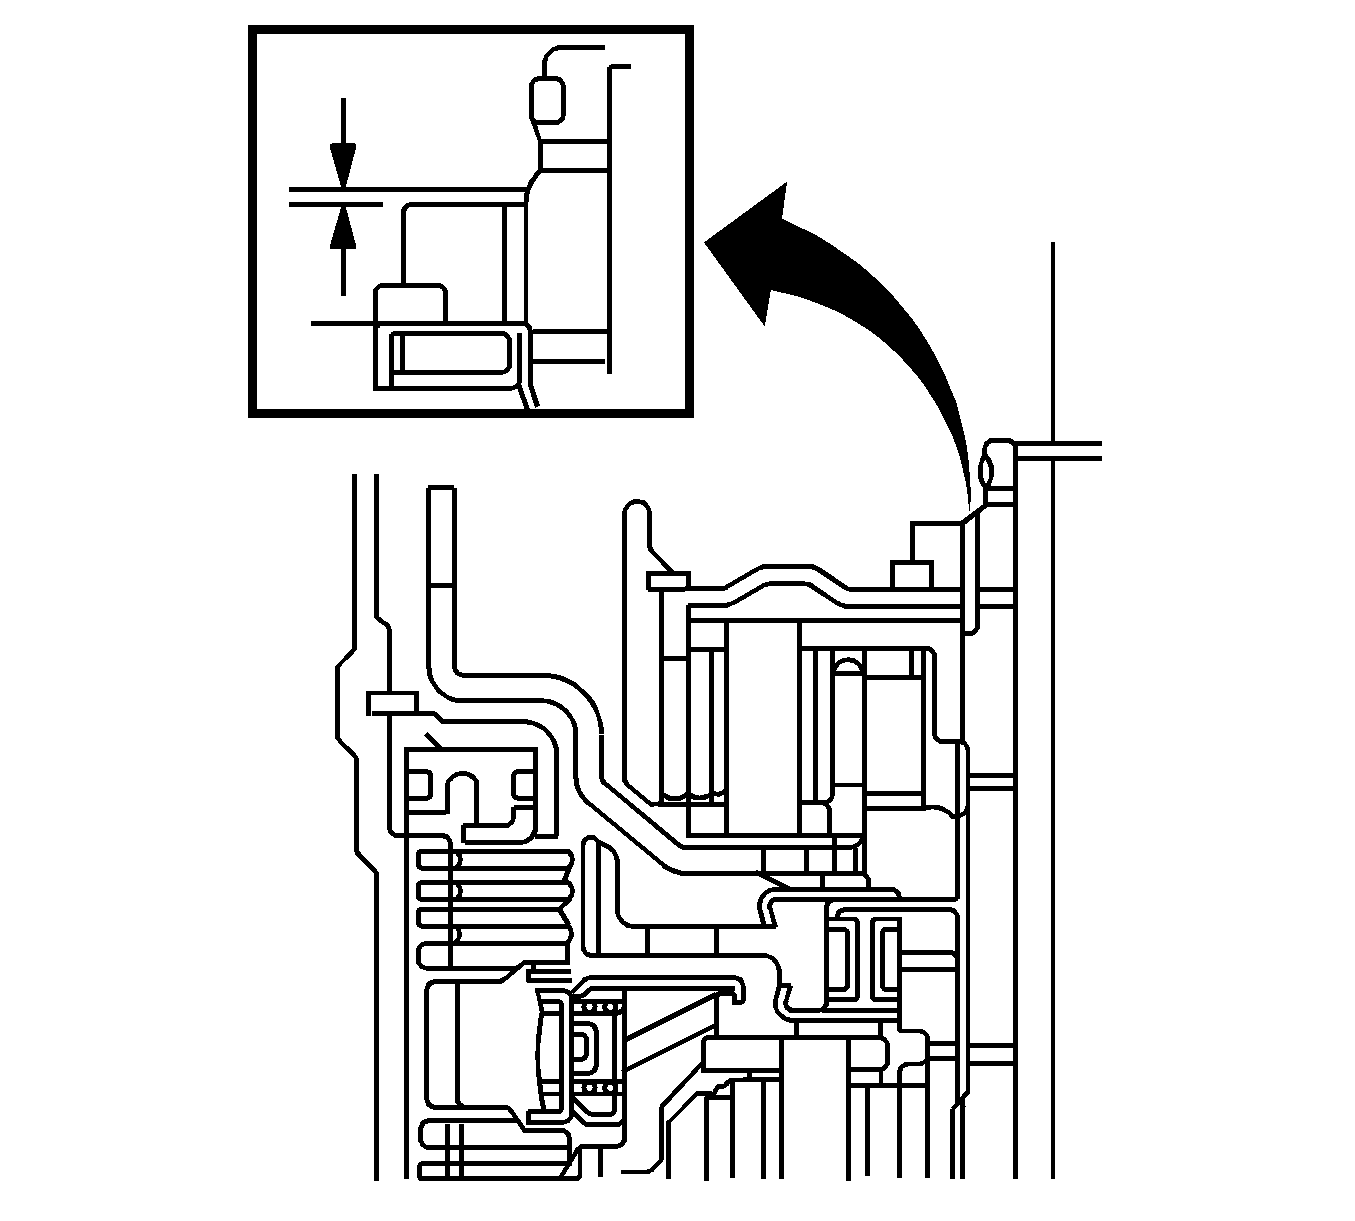
- Align the groove (1) with neutral line (2).
- Tighten the 2 bolts.
- Install the transmission control shaft lever with the nut and washer.
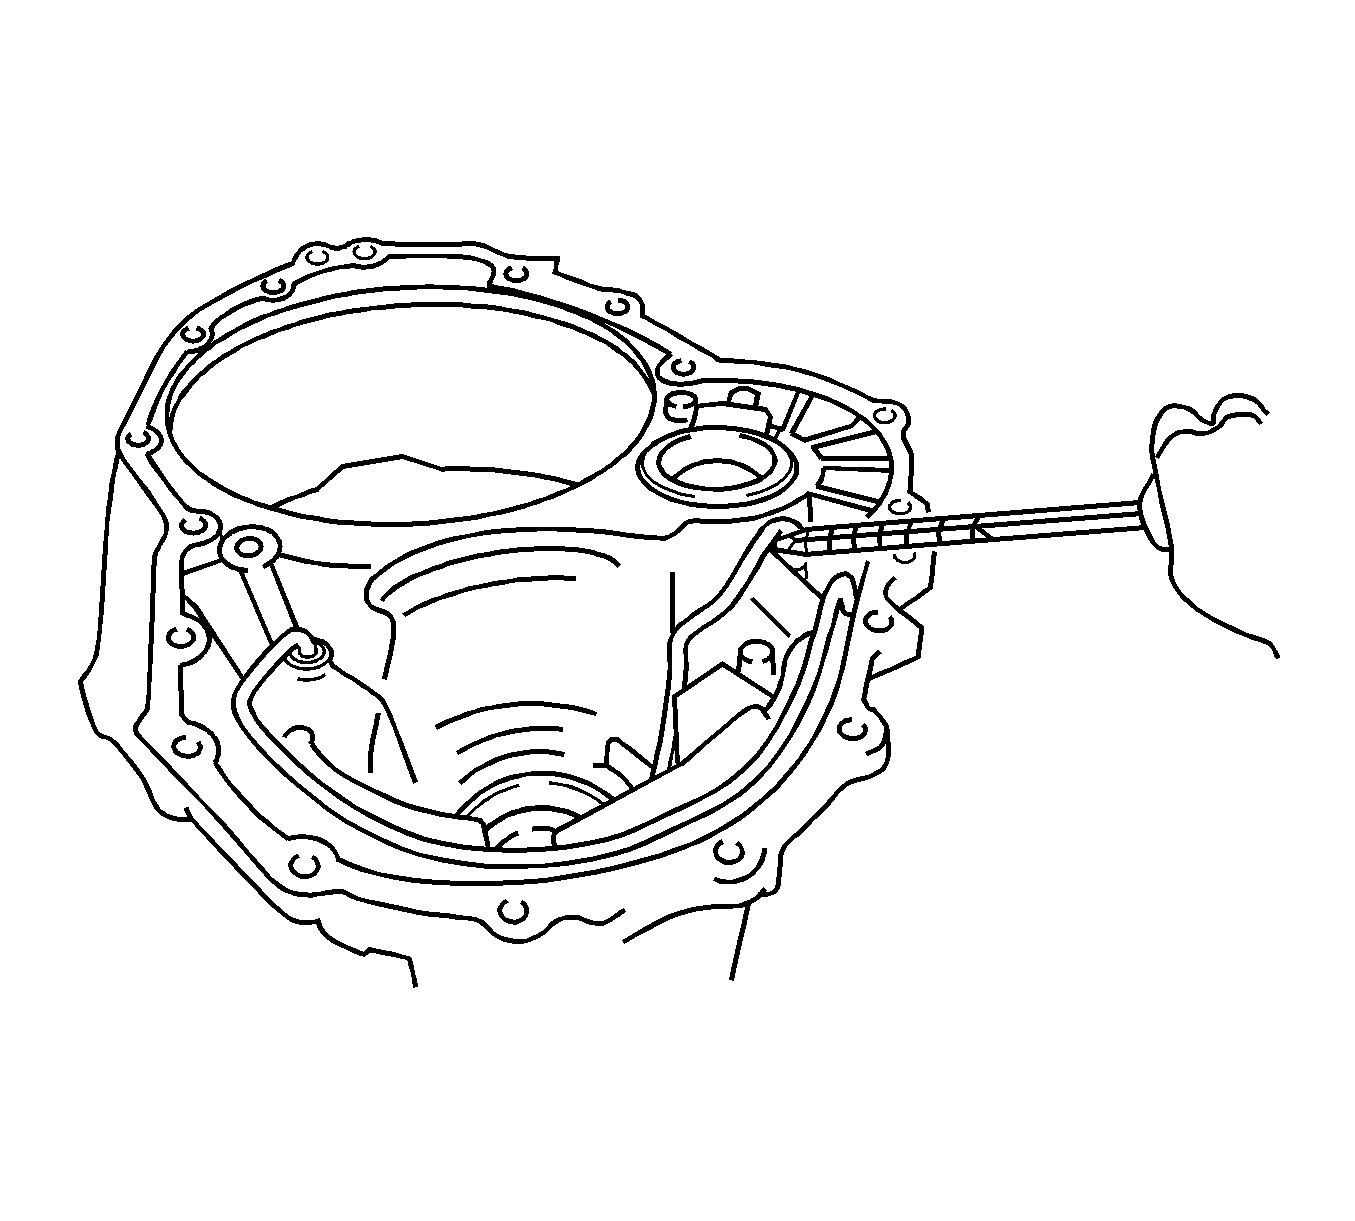
- Install the transaxle case plug No. 1 with a new O-ring on the transaxle case.
- Install the breather plug No. 1 with a new O-ring on the transaxle case.
- Install the breather hose.
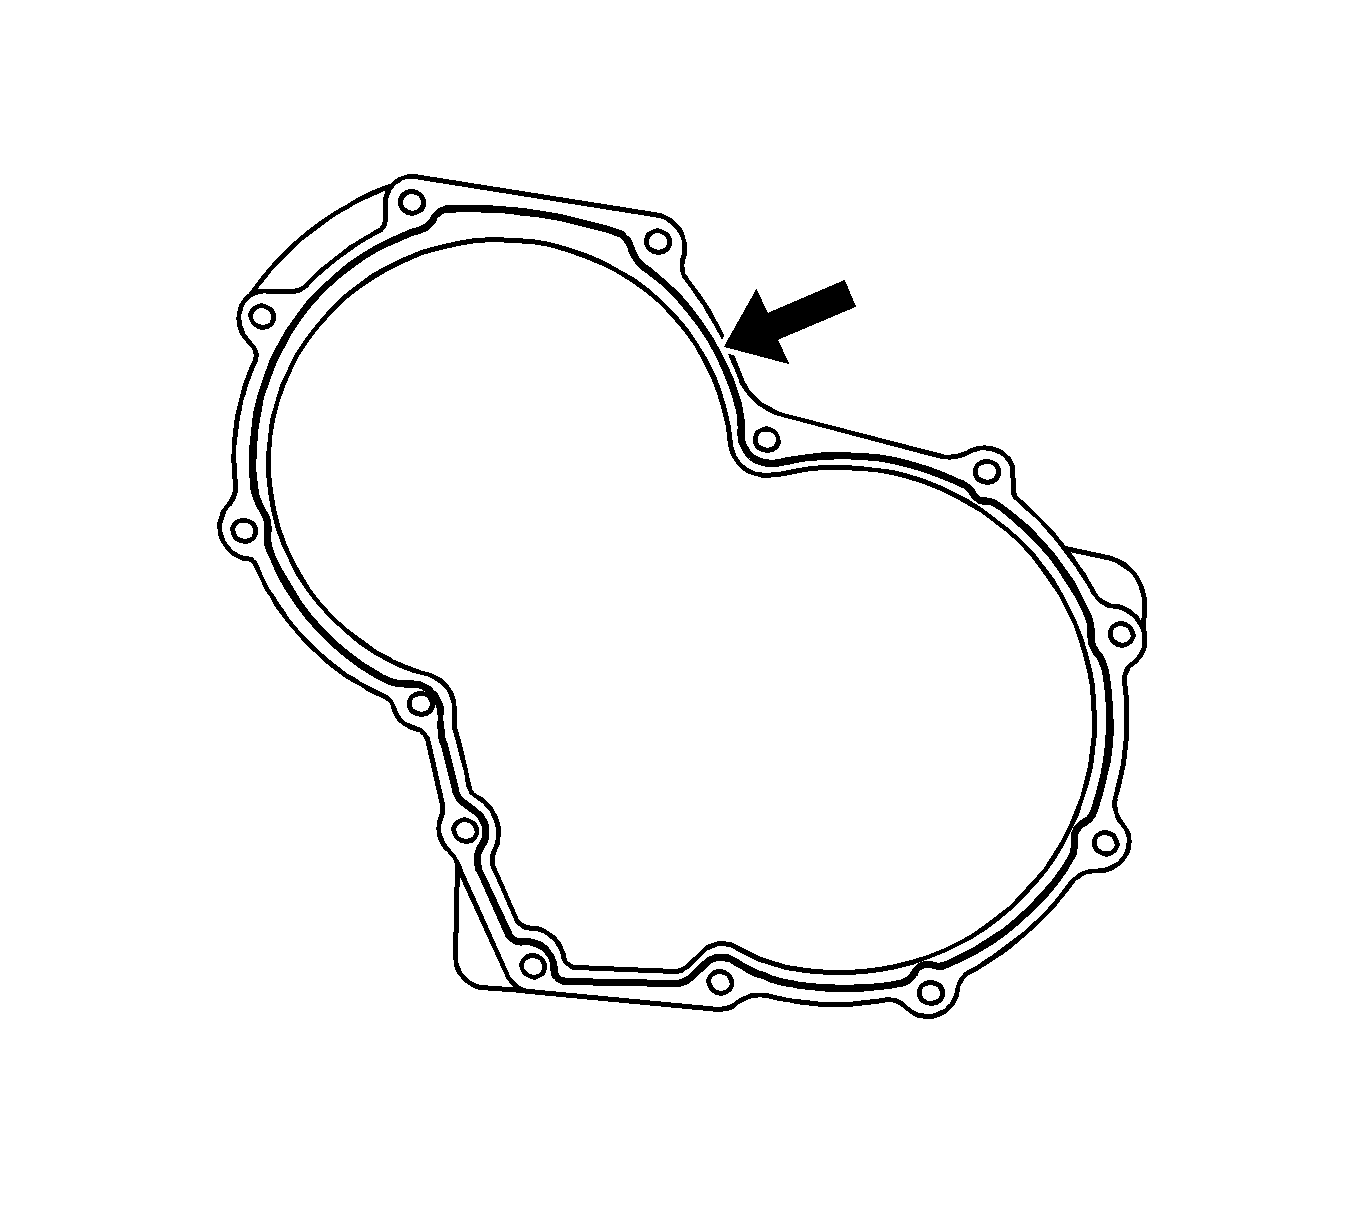
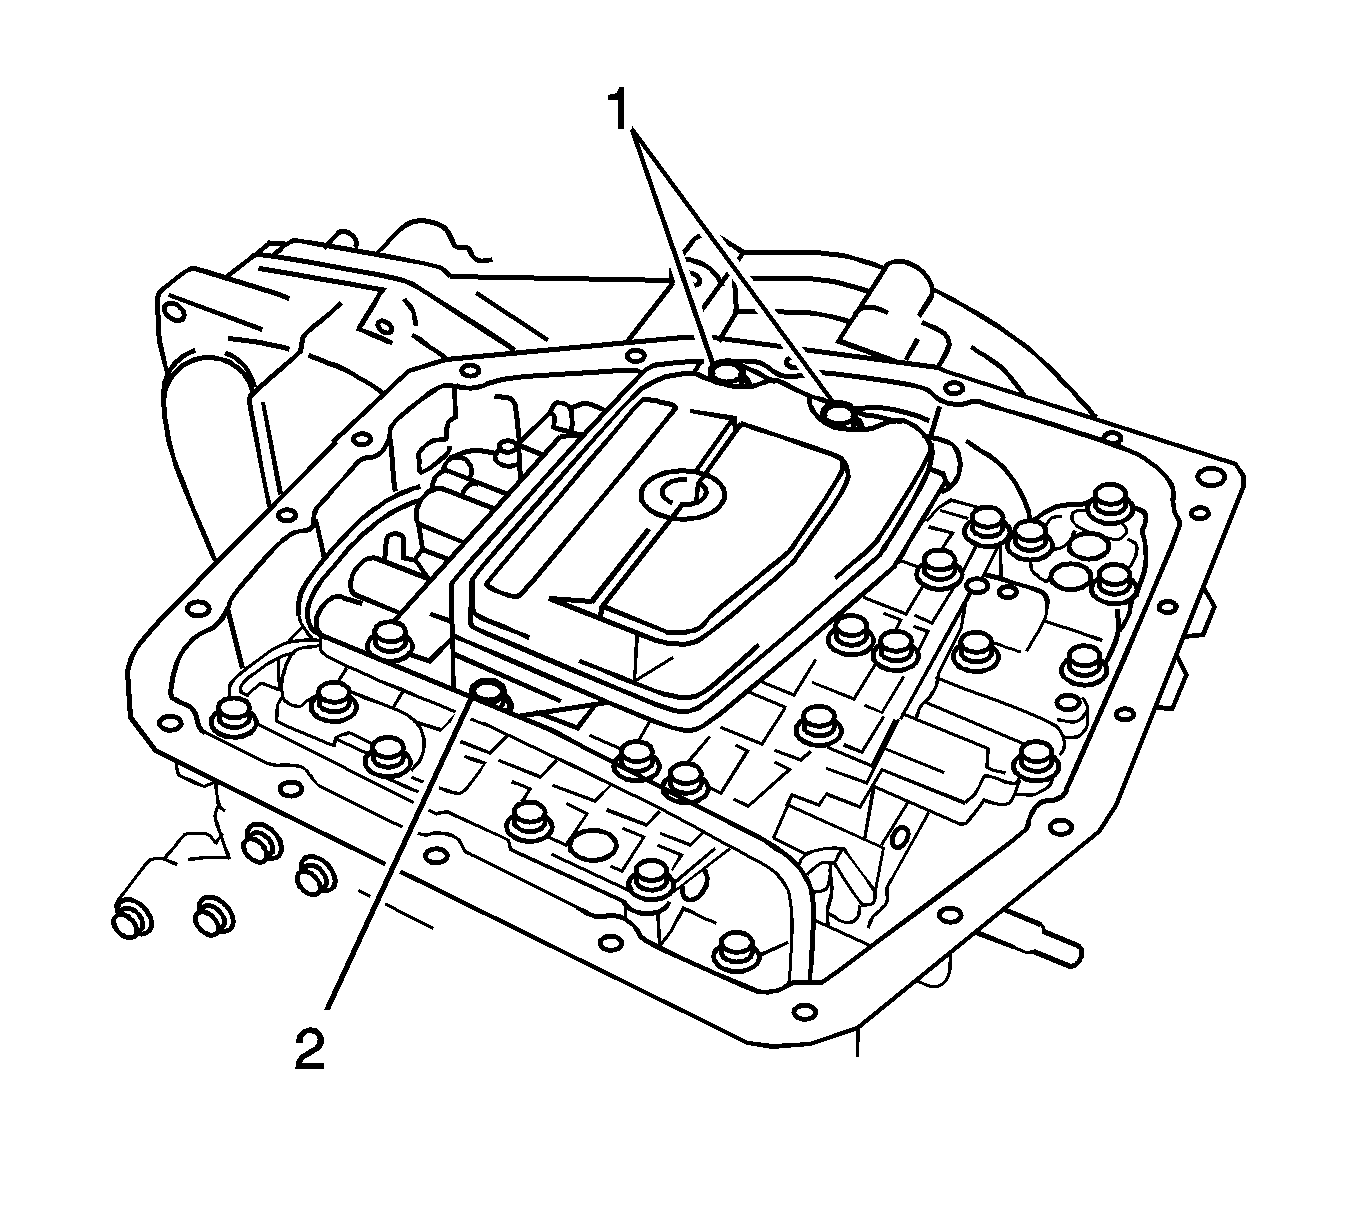
Important: Do not turn the transaxle over to remove the oil pan as it will contaminate the valve body with foreign material within the oil pan.
Important: Drive out the spring pin slowly so that it does not fall into the transaxle case.


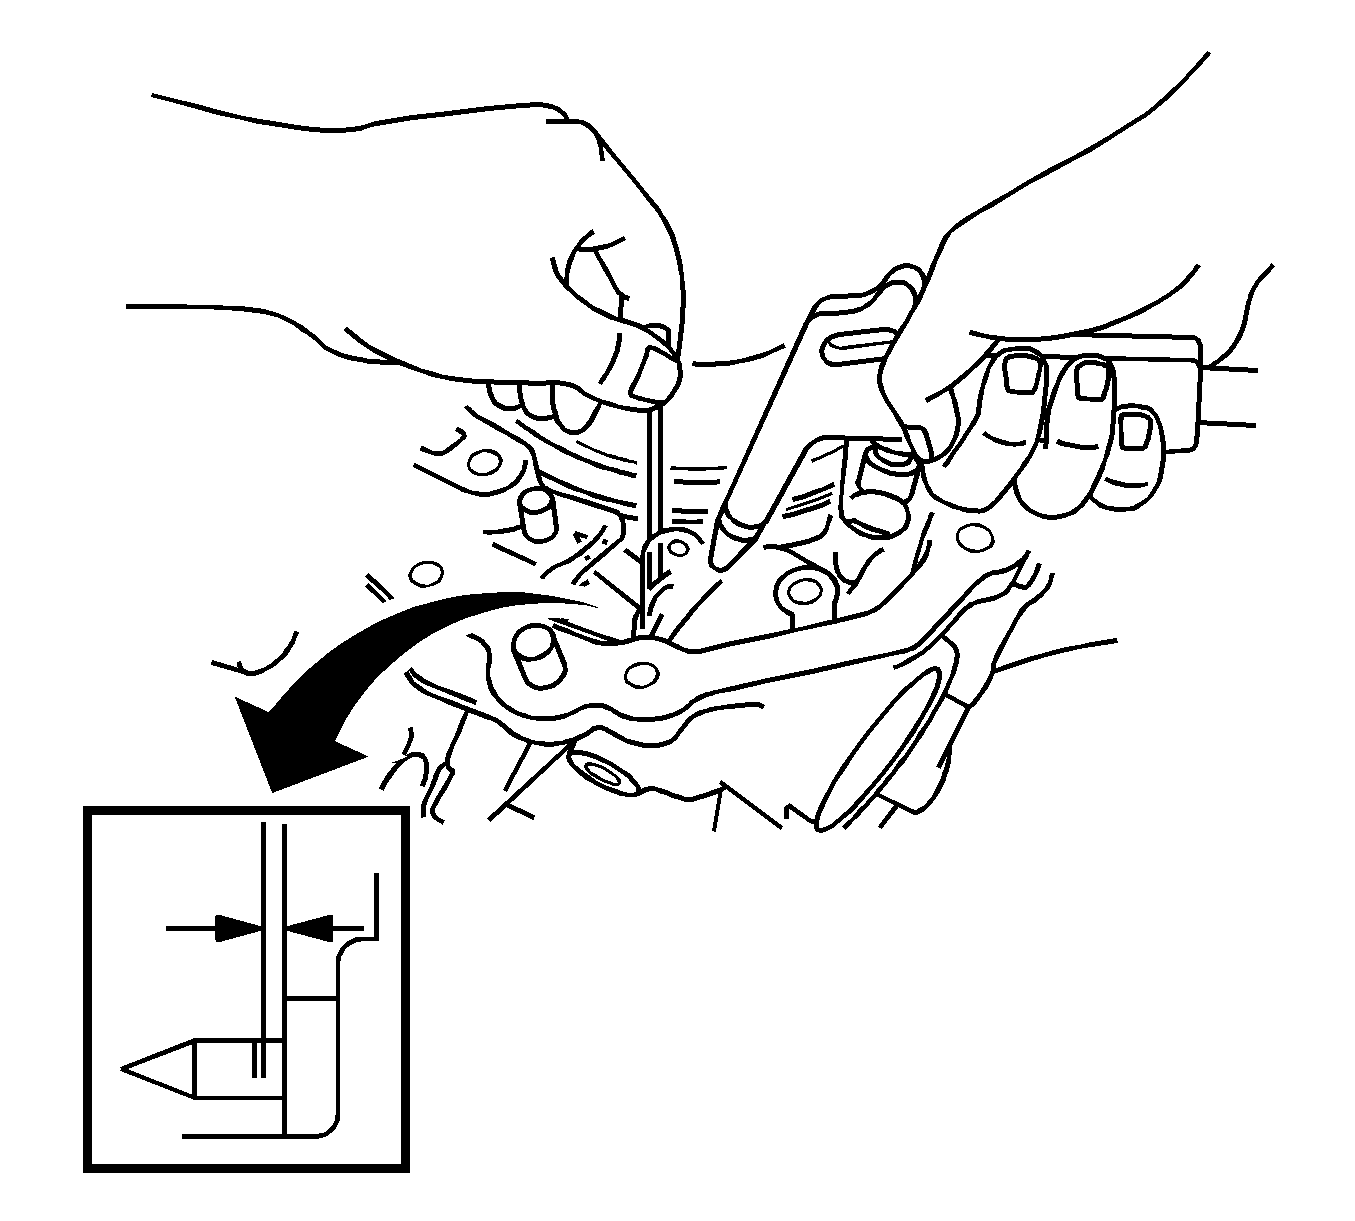
Important: If the piston stroke is not within 1.5-3.0 mm (0.059-0.118 in). Inspect the brake band.


Important: If the piston stroke is not within 1.5-1.9 mm (0.059-0.075 in). Install a new flange during assembly.

Important: If the clearance is not within 1.15-1.97 mm (0.0453-0.0766 in). Inspect the discs.

Notice: Refer to Fastener Notice in the Preface section.
Tighten
Tighten the bolt to 17 N·m (13 lb ft).
Tighten
Tighten the bolts to 5.5 N·m (49 lb in).

Tighten
Tighten the bolts to 10 N·m (7 lb ft).
Tighten
Tighten the screws to 10 N·m (7 lb ft).
Tighten
Tighten the bolts to 13 N·m (9 lb ft).
Tighten
Tighten the bolts to 5.5 N·m (49 lb in).
Important: Install the flange with the flat side facing downward.
Important: While applying compressed air, measure the pack clearance. The pack clearance should be within 1.15-1.97 mm (0.0453-0.0776 in). If the pack clearance is not as specified, check for incorrect assembly.
Important: If the piston stroke is not within 1.5-1.9 mm (0.059-0.075 in). Install a different size flange. There are 4 thicknesses available, 2.04 mm (0.803), 2.20 mm (0.866), 2.40 mm (0.945), 2.50 mm (0.984).

Tighten
Tighten the nut to 180 N·m (133 lb ft).
Important: If the torque exceeds the limit, replace the spacer.
Starting Torque
0.11-0.70 N·m (0.9-6.1 lb in).
Rotating Torque
0.04-0.30 N·m (0.3-2.6 lb in).
Tighten
Tighten the nut to 180 N·m (133 lb ft).
Endplay
Endplay should be within 0.2-0.9 mm (0.008-0.035 in).
Tighten
Tighten all 13 bolts to 10 N·m (7 lb ft).


Important: Ensure that the snap ring end gap is not aligned with one of the cutouts.

Important: If the clearance is not within specification, parts have been misaligned and should be rechecked for correct installation.

Important: Ensure that the different lug shapes match the corresponding openings on the gear.
Tighten
Tighten the bolt to 5.5 N·m (49 lb in).

Important: Ensure the end gap of the snap ring is not aligned with one of the cut outs.
Important: When the flukes of the discs are meshed correctly, the end of the bushing on the direct clutch will be flush with the surfaces of the forward clutch.
Important: If the piston stroke exceeds 1.5-3.0 mm (0.059-0.118 in). Install a new piston rod.
Tighten
Tighten the bolt to 5.5 N·m (49 lb in).
Tighten
Tighten the bolts to 25 N·m (18 lb ft).

Important: If the end play is not within 0.3-0.9 mm (0.012-0.035 in). Replace the race for the end of the input shaft assembly. There are 3 thicknesses available, 0.8 mm (0.31 in), 1.40 mm (0.055 in), 1.0 mm (0.039 in).
Tighten
Tighten the bolt to 10 N·m (7 lb ft).
Tighten
Tighten the bolts to 28 N·m (20 lb ft).
Tighten
Tighten the bolts to 28 N·m (20 lb ft).
Starting Preload
| • | New Bearing: 0.8-1.4 N·m (6.9-12.2 lb in). |
| • | Used Bearing: 0.04-0.7 N·m (3.5-6.1 lb in). |
Important: The preload will change about 0.3-0.4 N·m (2.6-2.9 lb in) according to a change in shim thickness of 0.05 mm (0.0020 in).
Important: Ensure there is a washer between the retaining spring and case.

Important: Springs should be installed in the following order: A - Yellow, B - Yellow, C - Light Blue, D - Purple, E - Pink.
Tighten
Tighten the bolt to 5.5 N·m (49 lb in).
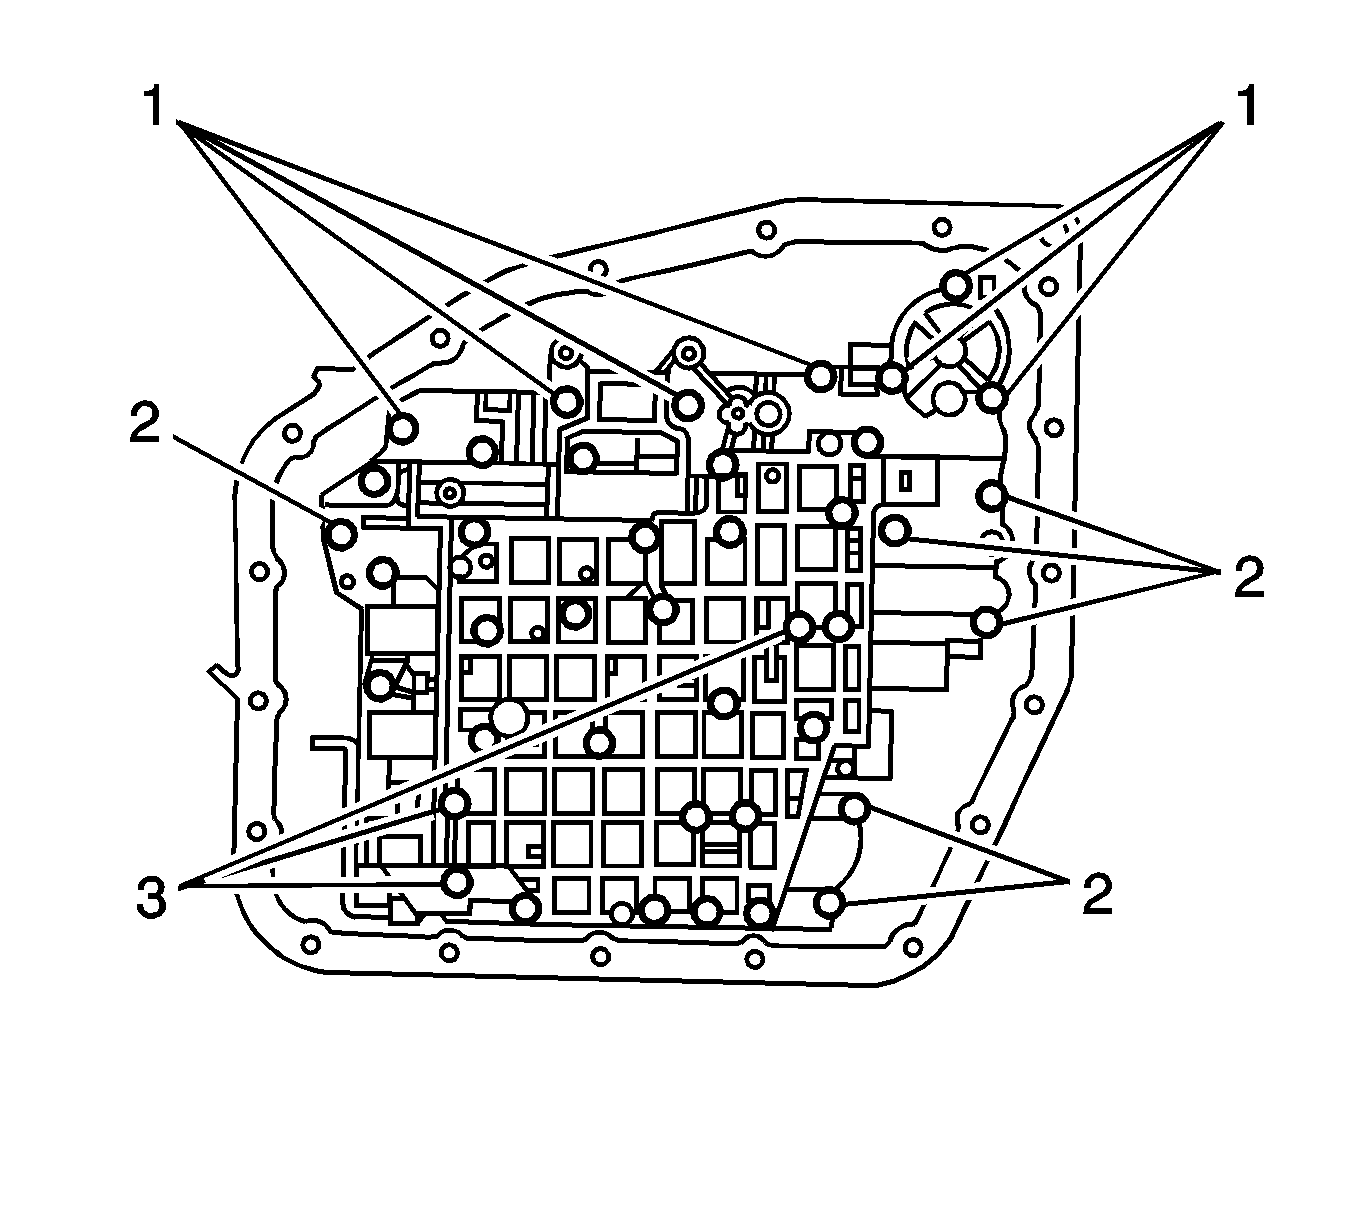
Important: The bolt length for: Locations (1) - 20 mm (0.79 in), Locations (2) - 28 mm (1.18 in), Locations (3) - 50 mm (1.97 in).
Tighten
Tighten the bolt to 10 N·m (7 lb ft).
Important: The bolt length for: Locations (1) - 12 mm (0.47 in), Location (2) - 20 mm (0.79 in).
Tighten
Tighten the bolts to 10 N·m (7 lb ft).
Tighten
Tighten the bolts to 5.3 N·m (47 lb in).
Tighten
Tighten the unions to 28 N·m (20 lb ft).
Tighten
Tighten the nut to 7.0 N·m (62 lb in).
Tighten
Tighten the bolts to 5.5 N·m (49 lb in).
Tighten
Tighten the nut to 12 N·m (8 lb ft).
