On-Vehicle Inspection
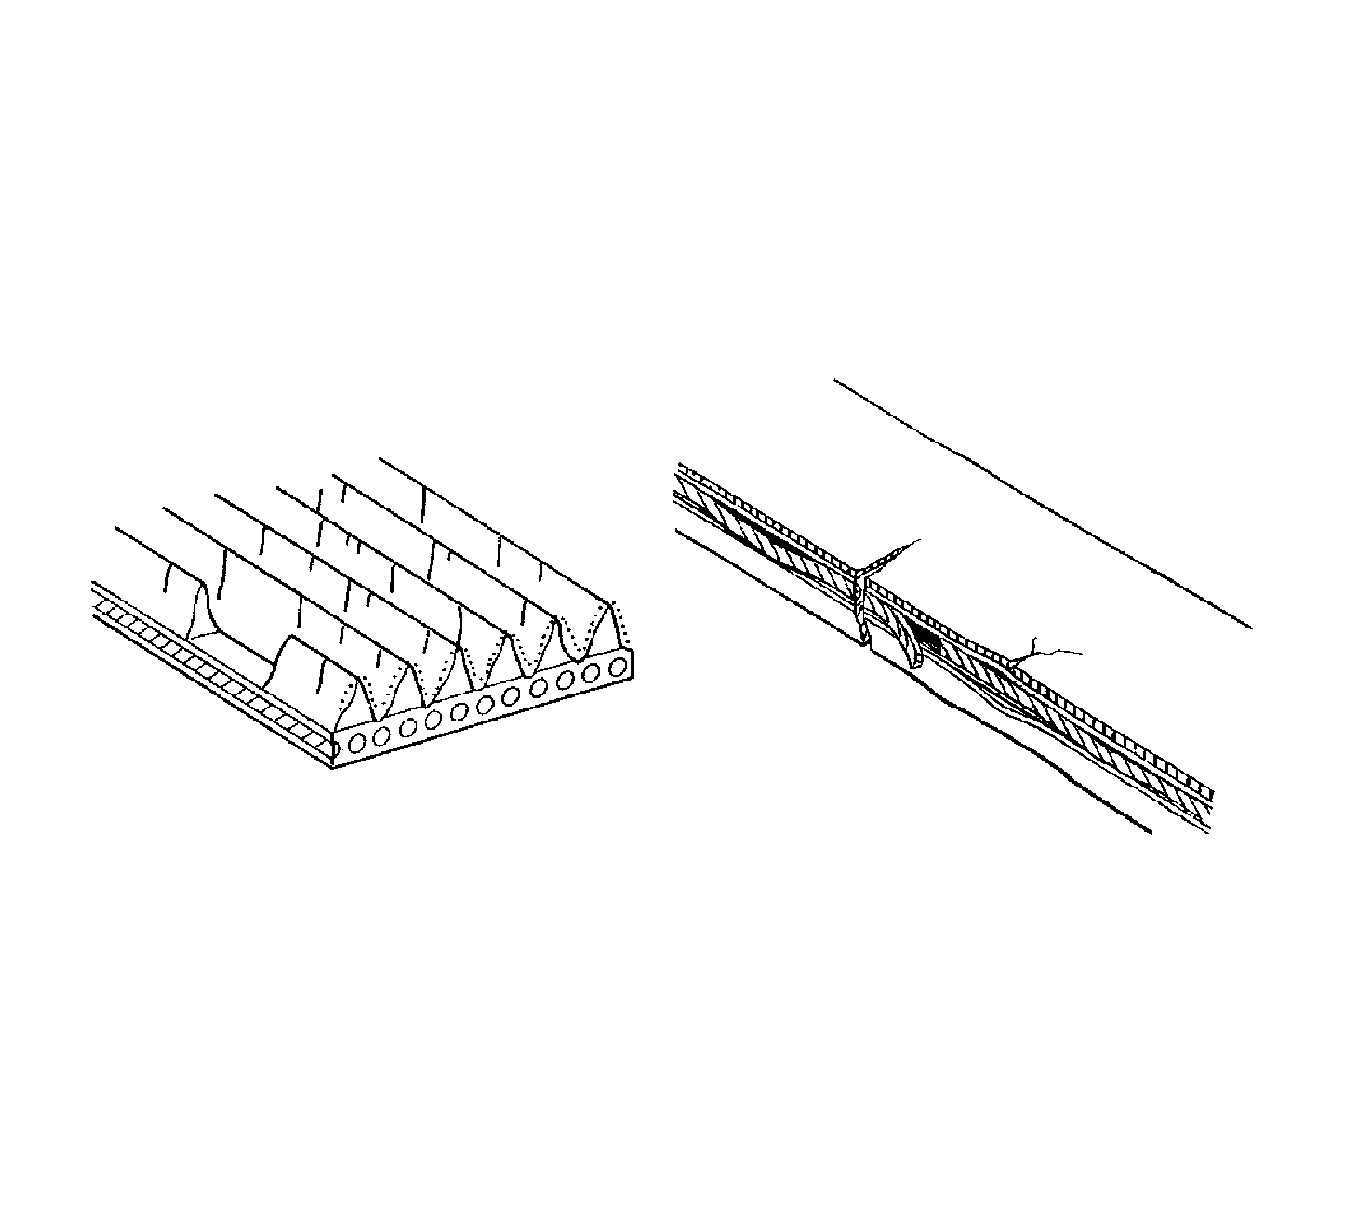
- Inspect the V-ribbed belt for wear, cracks or other signs of damage.
If any of the following defects is found, replace
the V-ribbed belt.
| • | The belt is worn out to the extent that wires are exposed. |
| • | The belt has chunks missing from the ribbed grooves. |
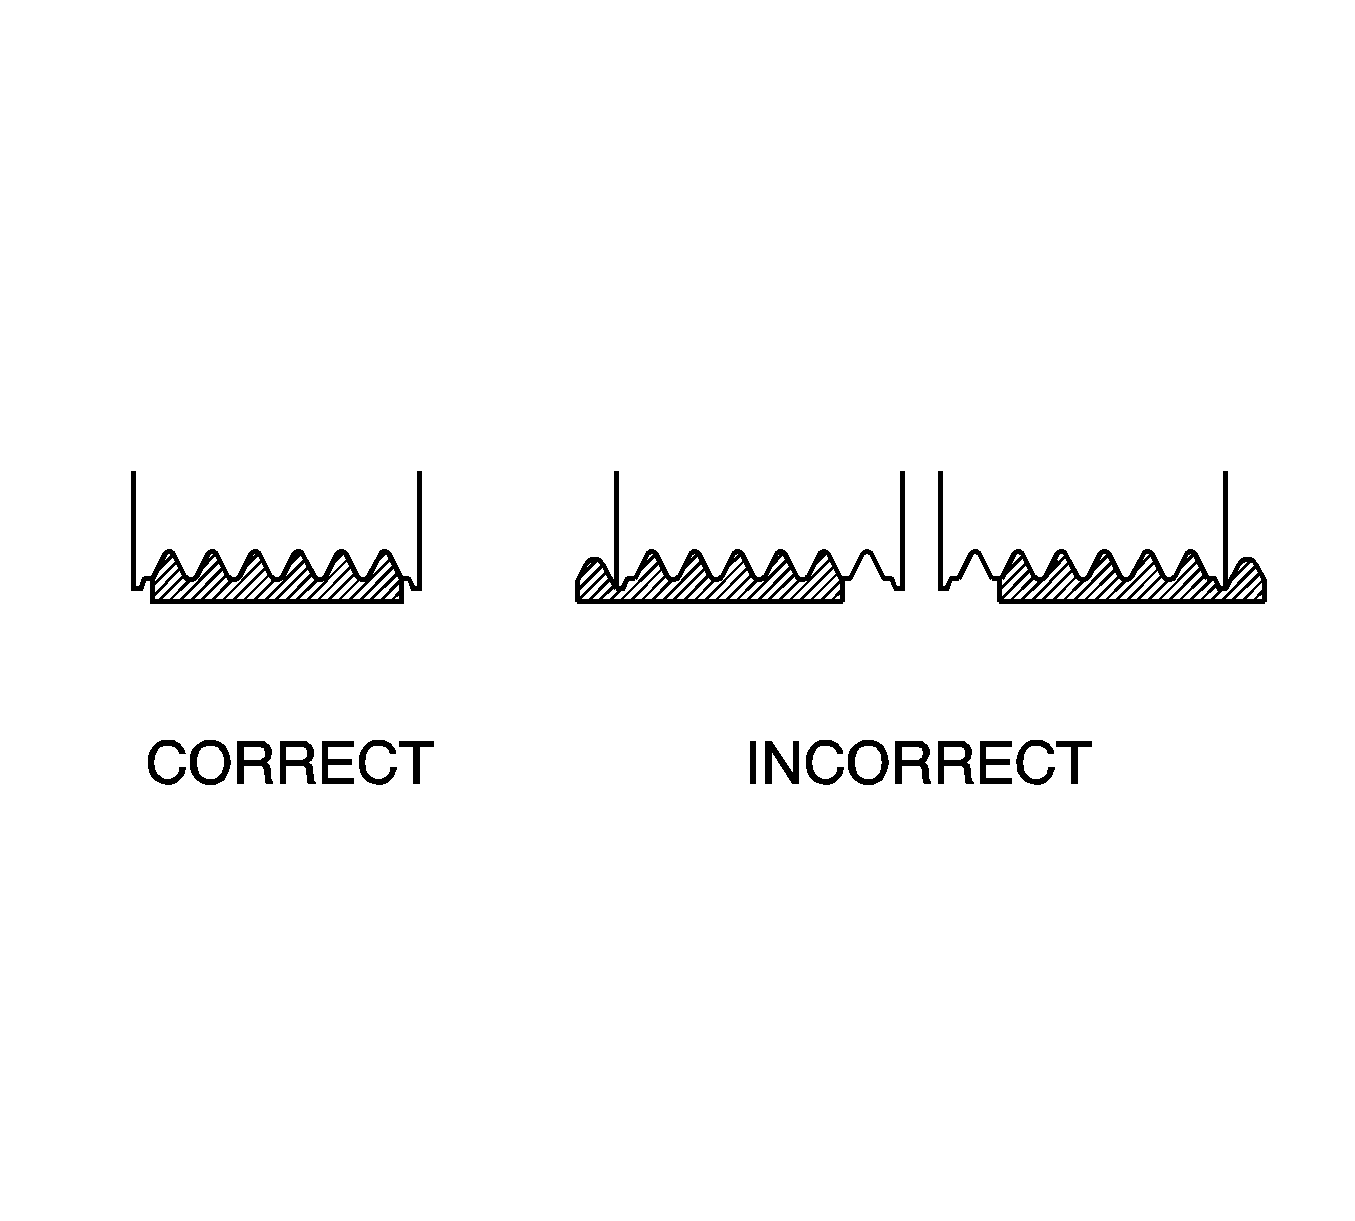
Note: Check by hand to confirm that the belt has not slipped out of the grooves on the bottom to the pulley. If it has slipped out, replace the V-ribbed belt. Install a new V-ribbed belt correctly.
- Check that the belt fits properly in the ribbed grooves.
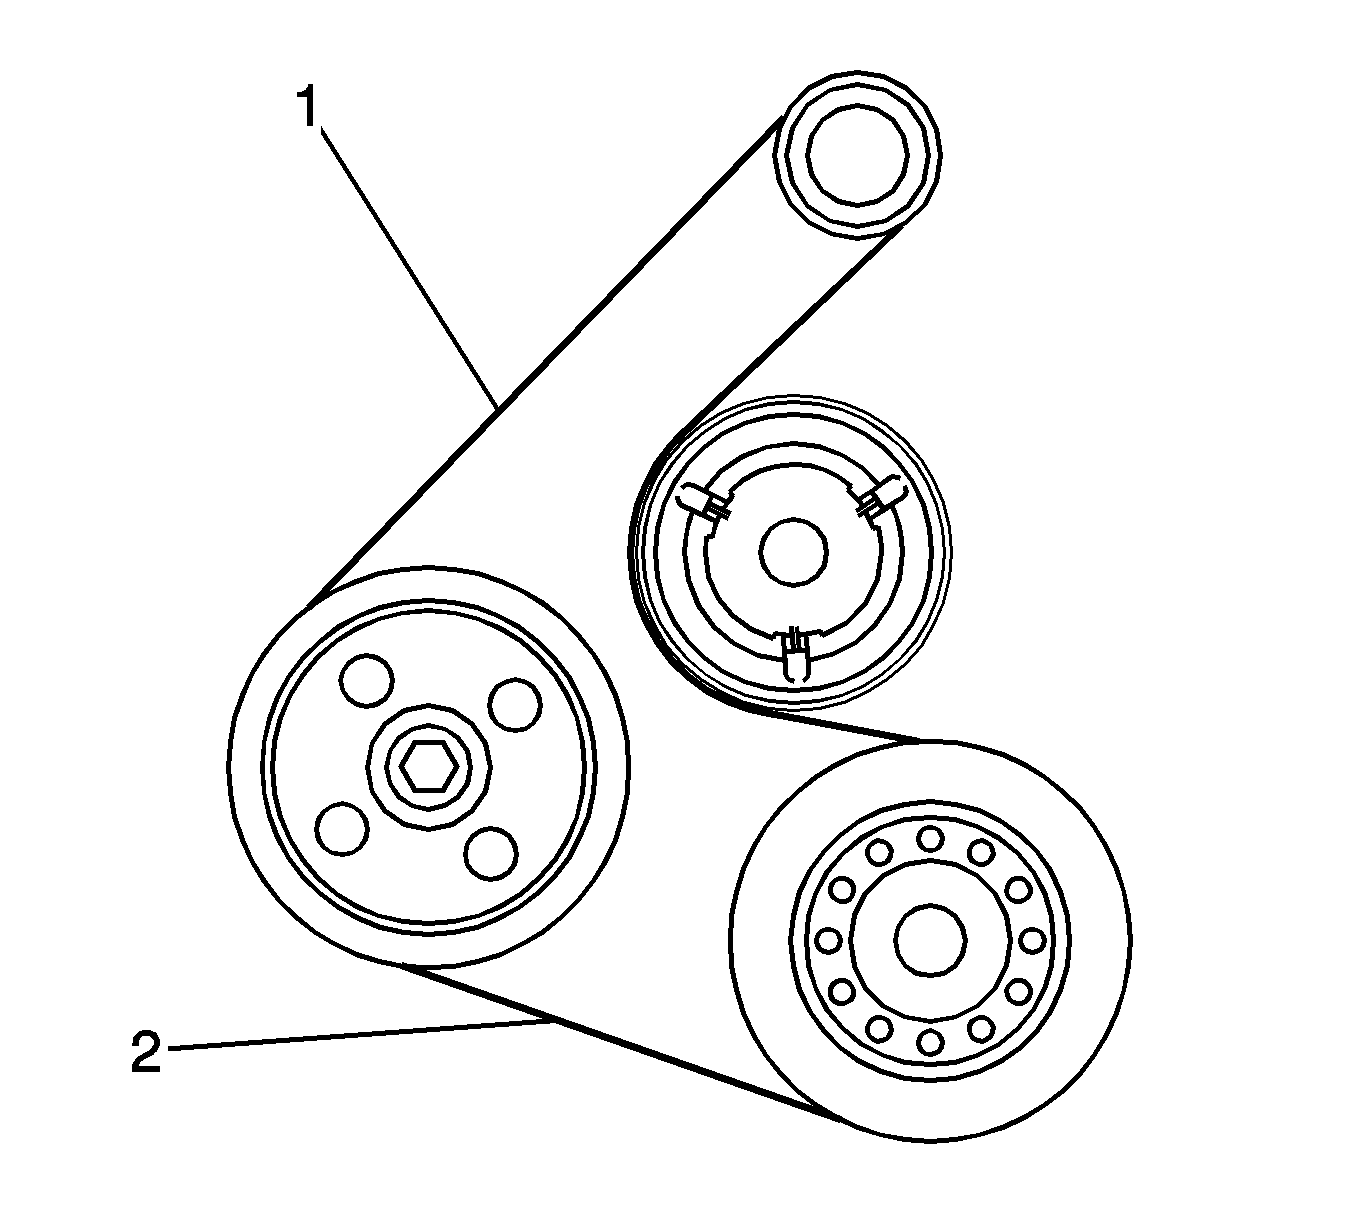
- On vehicles equipped with air conditioning, check the belt deflection and tension in positions shown (1, 2).
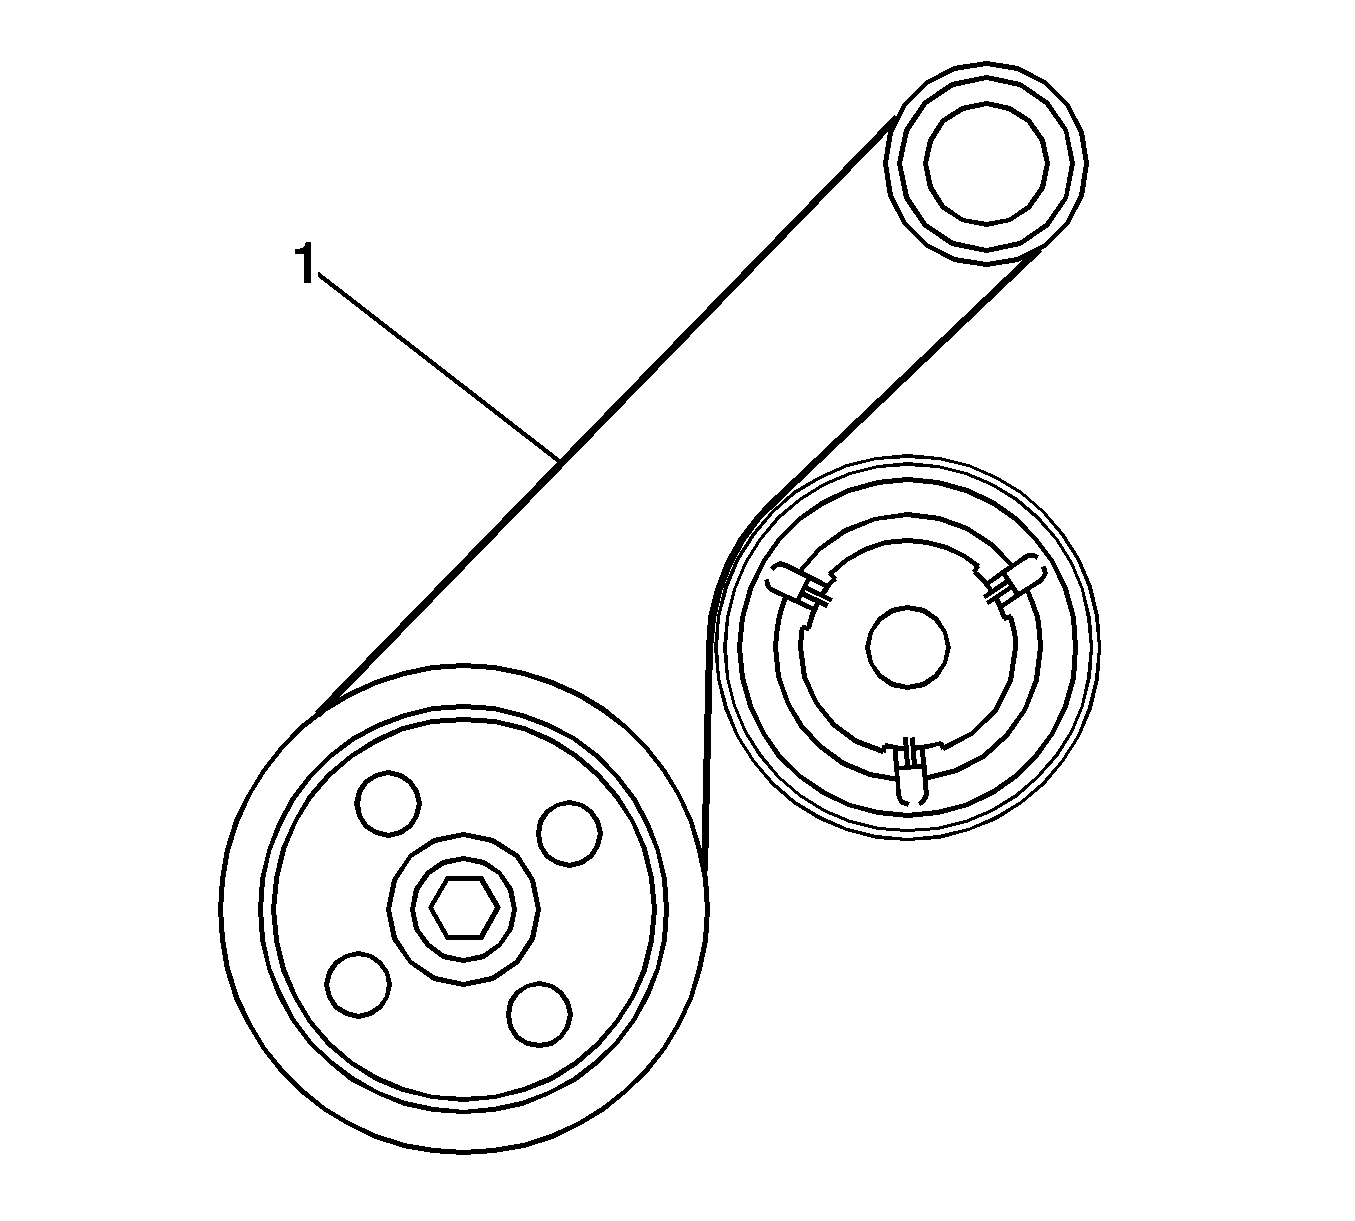
- On vehicles without air conditioning, check the belt deflection and tension in position shown (1).
- If the belt deflection is not as specified, adjust it. Refer to
Engine Mechanical Specifications.
| • | When inspecting the belt deflection, apply 98 N (10 kgf) tensile force to it. |
| • | After installing a new belt, run the engine for approximately 5 minutes and then re-adjust the tension to (new belt) specifications. |
| • | Check the V-ribbed belt deflection and tension at the specified point. |
| • | V-ribbed belt tension and deflection should be checked after 2 revolutions of the engine. |
| • | V-ribbed belt tension and deflection should be checked at TDC crank angle and cold condition. |
| • | When adjusting a belt, adjust its deflection and tension to the intermediate values of the specification. |
| • | When reinstalling a belt which has been used for over 5 minutes, adjust its deflection and tension to the used belt specification. |
| • | When using a belt tension gauge, confirm its accuracy by using a master gauge first. |
| • | If using a sonic tension meter: Input data for sonic tension meter. |
Specification
| • | Span: 188 mm (7.40 in) (w/A/C) |
| • | Span: 282 mm (11.1 in) (without A/C) |
Removal Procedure
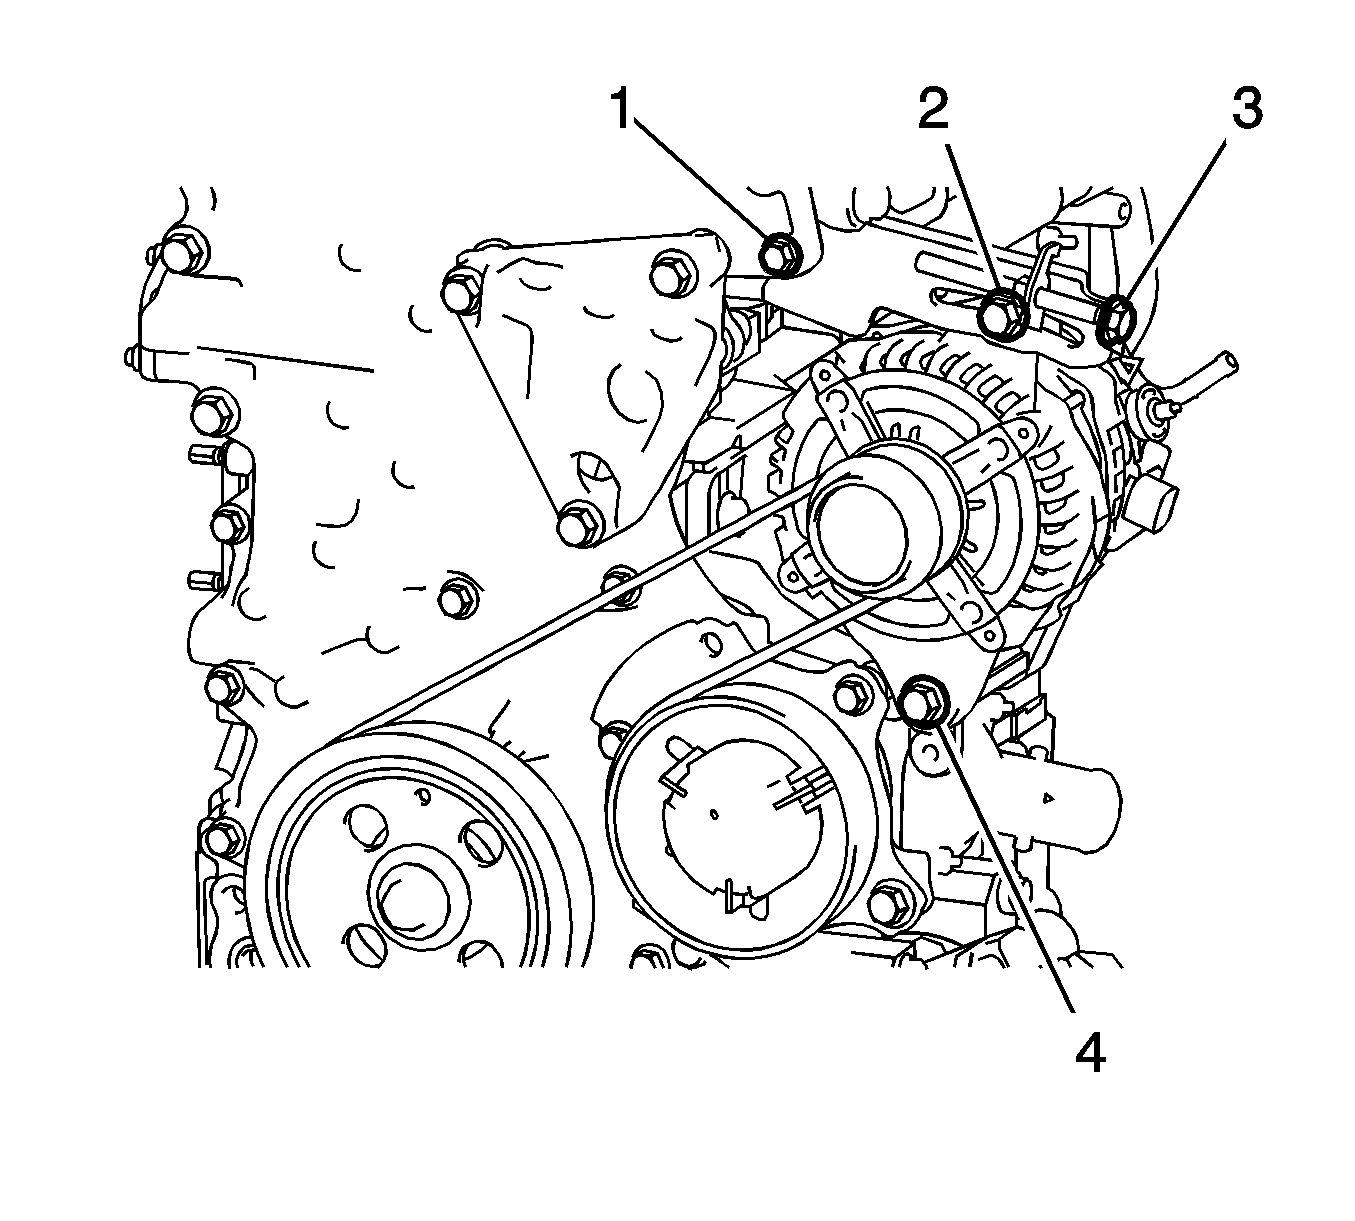
- Remove the engine cover. Refer to
Engine Mount Replacement.
- Remove the engine under cover RH.
- Remove the V-ribbed belt.
| 3.1. | Loosen bolts (2, 4). |
| 3.2. | Loosen bolt (3) then remove the V-ribbed belt. |
Installation Procedure

- Install the V-ribbed belt
Caution: Refer to Fastener Caution in the Preface section.
- Adjust the V-ribbed belt
| 2.1. | Turn bolt 3 to adjust the tension of the V-ribbed belt. |
| 2.2. | Install bolts 2 and 4 and tighten. |
| • | Bolt 2 to
19 N·m (14 lb ft). |
| • | Bolt 4 to
43 N·m (32 lb ft). |
- Inspect the V-ribbed belt.
- Install the engine under cover RH.
- Install the engine cover. Refer to
Engine Mount Replacement.


