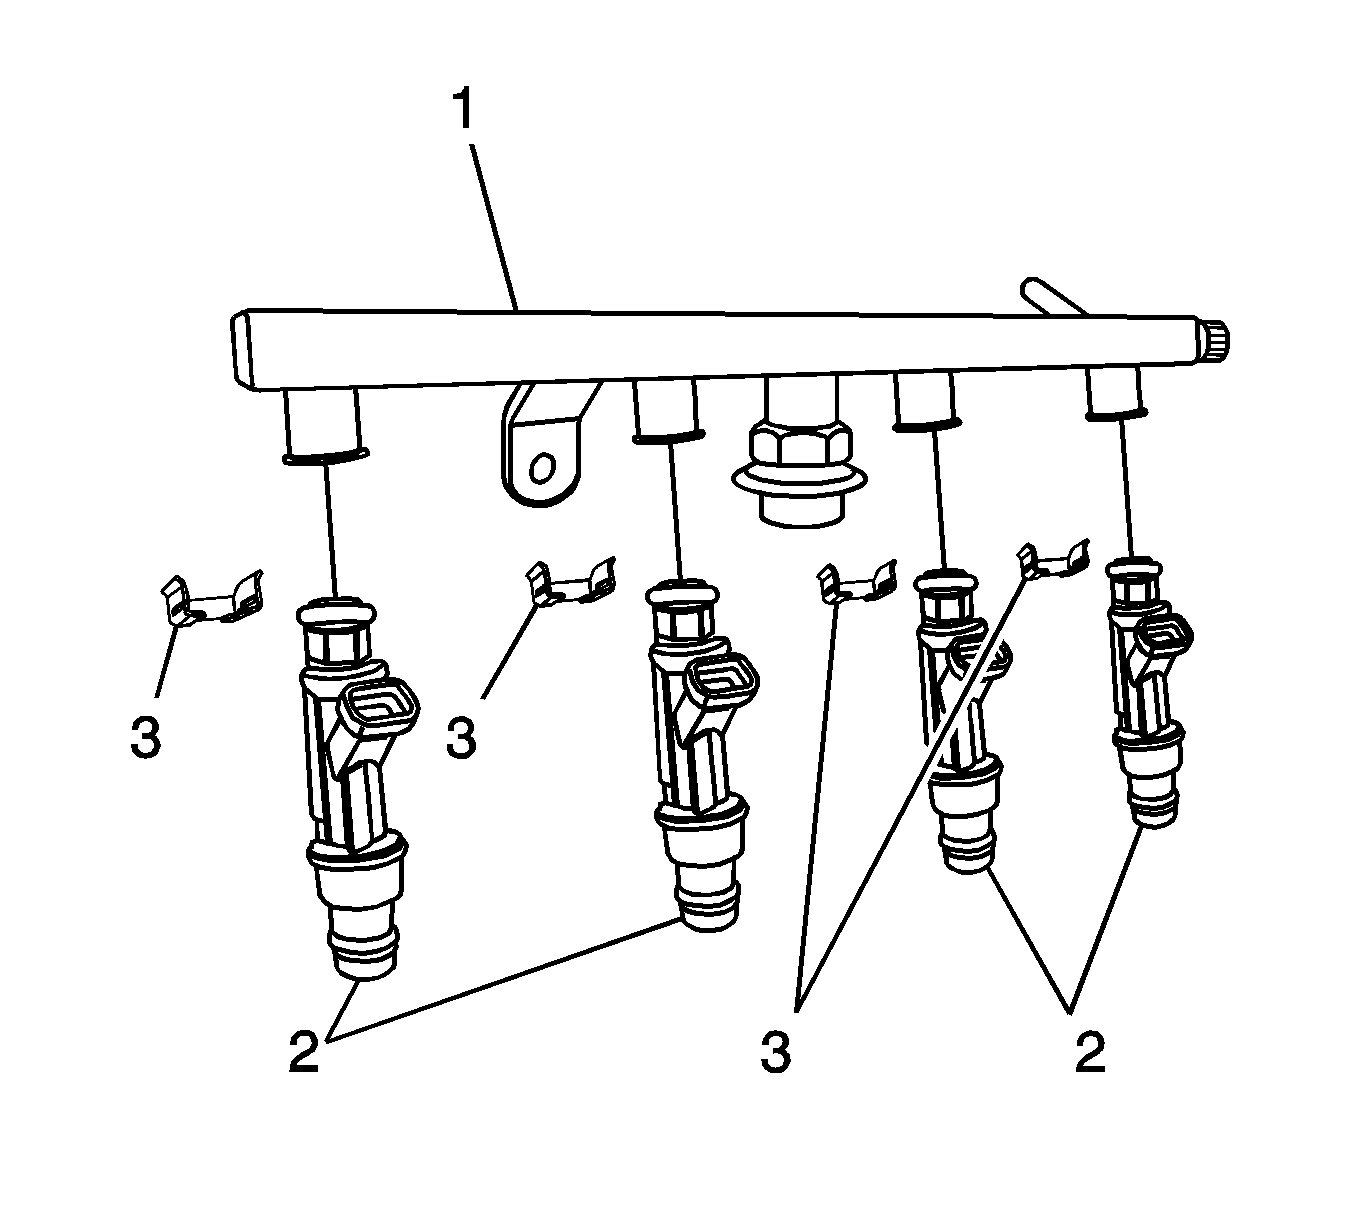
For 1990-2009 cars only
Removal Procedure
- Disconnect the battery negative cable. Refer to Battery Negative Cable Disconnection and Connection.
- Relieve the fuel pressure. Refer to Fuel Pressure Relief.
- Remove the air cleaner assembly. Refer to Air Cleaner Assembly Replacement.
- Disconnect the quick connector fuel feed line from the fuel rail.
- Disconnect the wiring harness from the upper side of the fuel rail.
- Disconnect the fuel injector harness connector.
- Remove the fuel rail mounting bolts.
- Remove the fuel rail with the fuel injectors attached.
- Remove the fuel injector retainer clips (3).
- Remove the fuel injectors (2) by pulling down and out.
- Discard the fuel injector O-rings.
Warning: Refer to Battery Disconnect Warning in the Preface section.
Caution: Refer to Fuel Pressure Caution in the Preface section.

Installation Procedure
- Install the new O-rings on the fuel injectors (2).
- Install the retainer clip (3) after installing injectors on the fuel rail (1).
- Install the fuel rail and injector assembly to the intake manifold.
- Install the fuel rail retaining bolts and tighten to 10 N·m (7.3 lb ft).
- Connect the fuel injector harness connectors.
- Connect the harness on the upper side of the fuel rail.
- Connect the quick connector fuel feed line on the fuel rail.
- Install the air cleaner assembly. Refer to Air Cleaner Assembly Replacement
- Connect the battery negative cable. Refer to Battery Negative Cable Disconnection and Connection.

Note: Different injectors are calibrated for different flow rates. When ordering new fuel injectors, be certain to order the identical part number that is inscribed on the old injector.
Caution: Refer to Fastener Caution in the Preface section.
