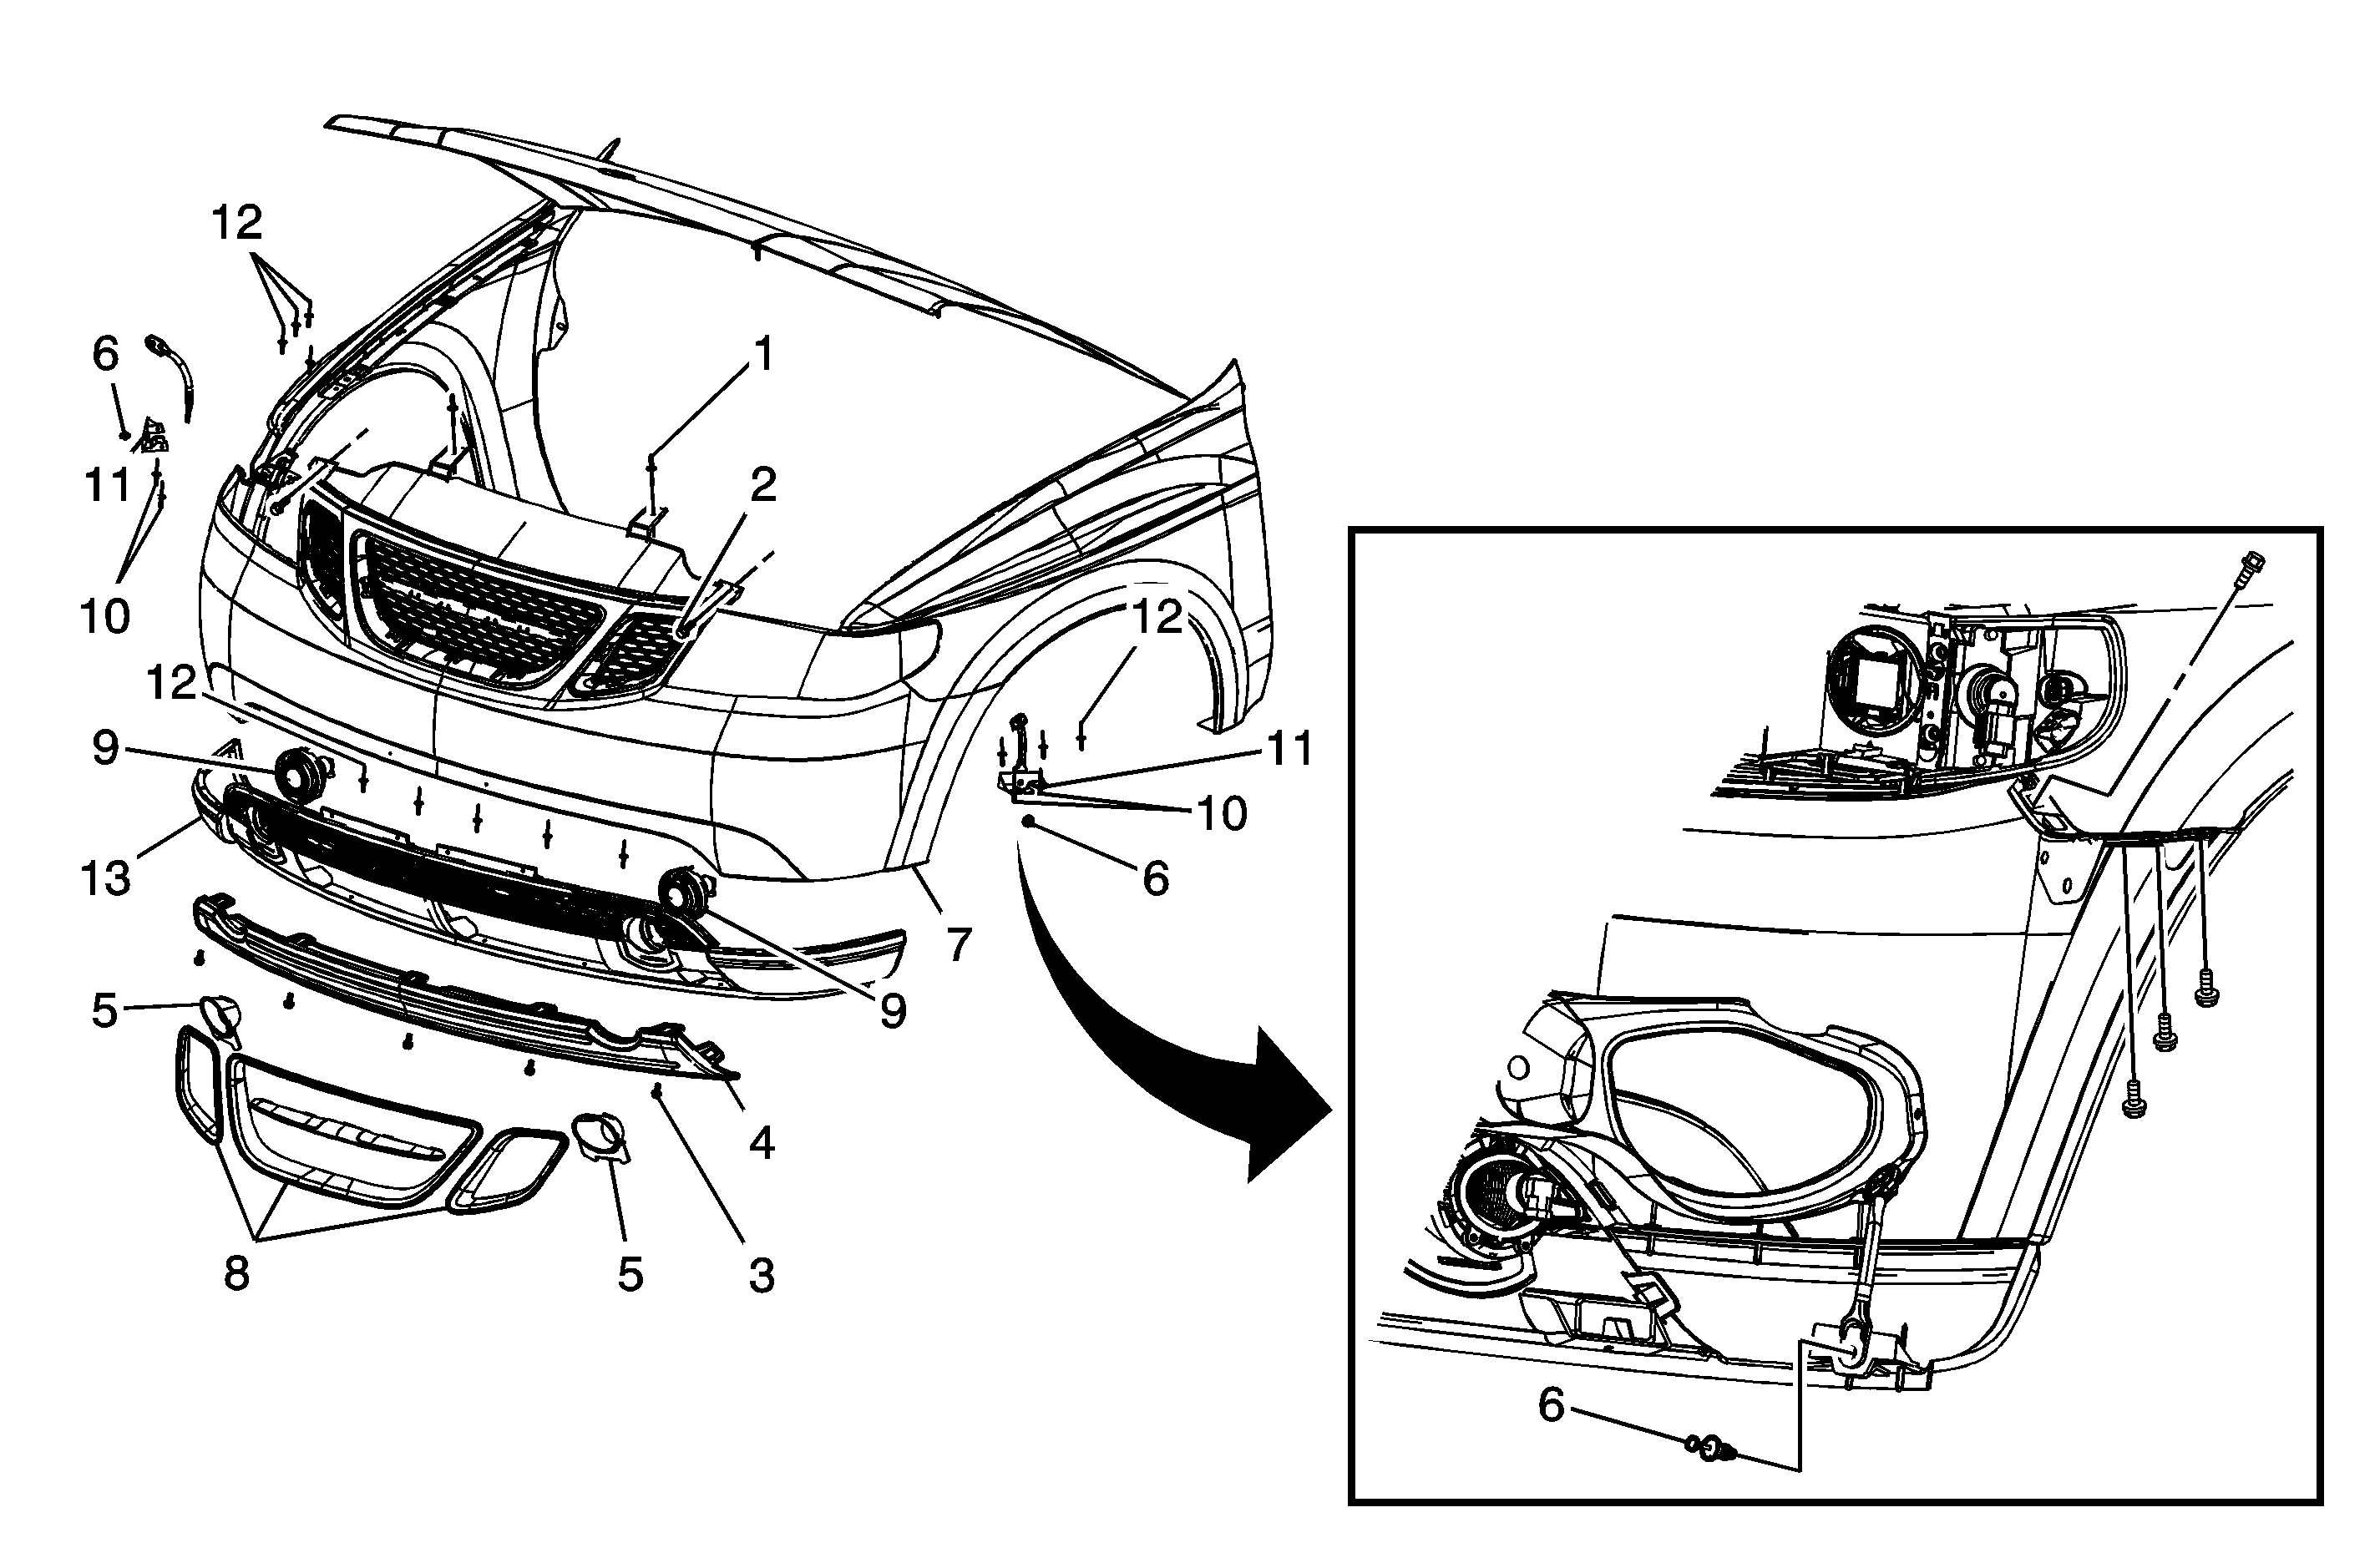
Callout
| Component Name
|
Preliminary Procedures
- Open the hood.
- Raise and support the vehicle. Refer to
Lifting and Jacking the Vehicle.
- Remove the wheelhouse panels from the left and right sides. Refer to
Wheelhouse Panel Replacement.
|
1
| Hood Filler Close Out Panel Retainers (Qty: 2)
|
2
| Hood Filler Close Out Panel Screws (Qty: 2)
Caution: Refer to Fastener Caution in the Preface section.
Tip
Filler close out panel is part of the fascia.
Tighten
2 N·m (18 lb in) |
3
| Front Fascia Extension Screws (Qty: 5)
Tip
The screws are located across the bottom of the fascia extension.
Tighten
2 N·m (18 lb in) |
4
| Front Fascia Extension
Tip
Pull forward to release the extension from the upper retainers. |
5
| Front Fog Lamp Bezels (Qty: 2)
|
6
| Front Bumper Lower Fascia Retainers (Qty: 2)
Tip
One in each lower corner of the fascia. |
7
| Front Bumper Upper Fascia
Tip
The fascia upper corners are retained by push snap retainers. Grabbing the inside corner of the fascia and pull forward to until fully released. |
8
| Front Bumper Grille Bezel
Refer to
Grille Replacement.
|
9
| Front Fog Lamps
Refer to
Front Fog Lamp Replacement.
|
10
| Front Bumper Lower Fascia Bracket Rivets (Qty: 4)
Tip
It will be necessary to drill out the rivets that attach the bracket to the fascia. |
11
| Front Bumper Lower Fascia Brackets (Qty: 2)
|
12
| Front Bumper Lower Fascia Rivets (Qty: 16)
Tip
It will be necessary to drill out rivets that attach the upper fascia to the lower fascia. |
13
| Front Bumper Lower Fascia
|