- Remove the rear side door trim panel. Refer to
Rear Side Door Trim Panel Replacement
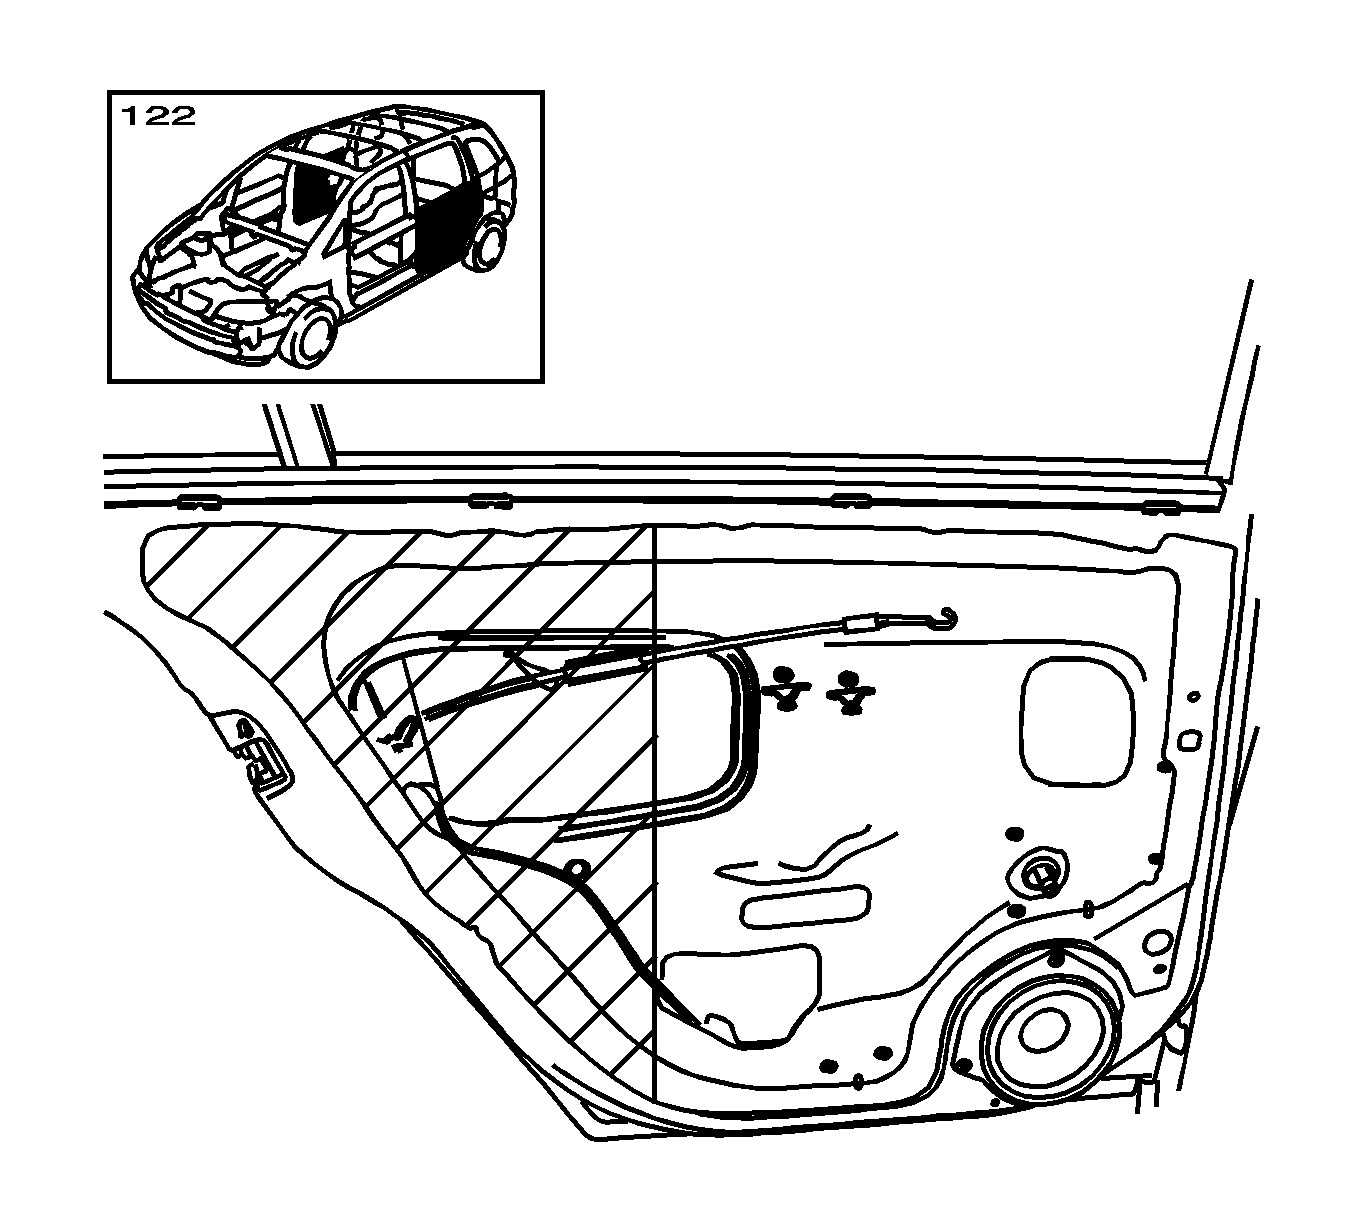
- Partly loosen the water vapor barrier.
Loosen the water vapor barrier in the area of the hatching.

- Remove the front door access panel.
Remove the panel (1) with a plastic wedge.
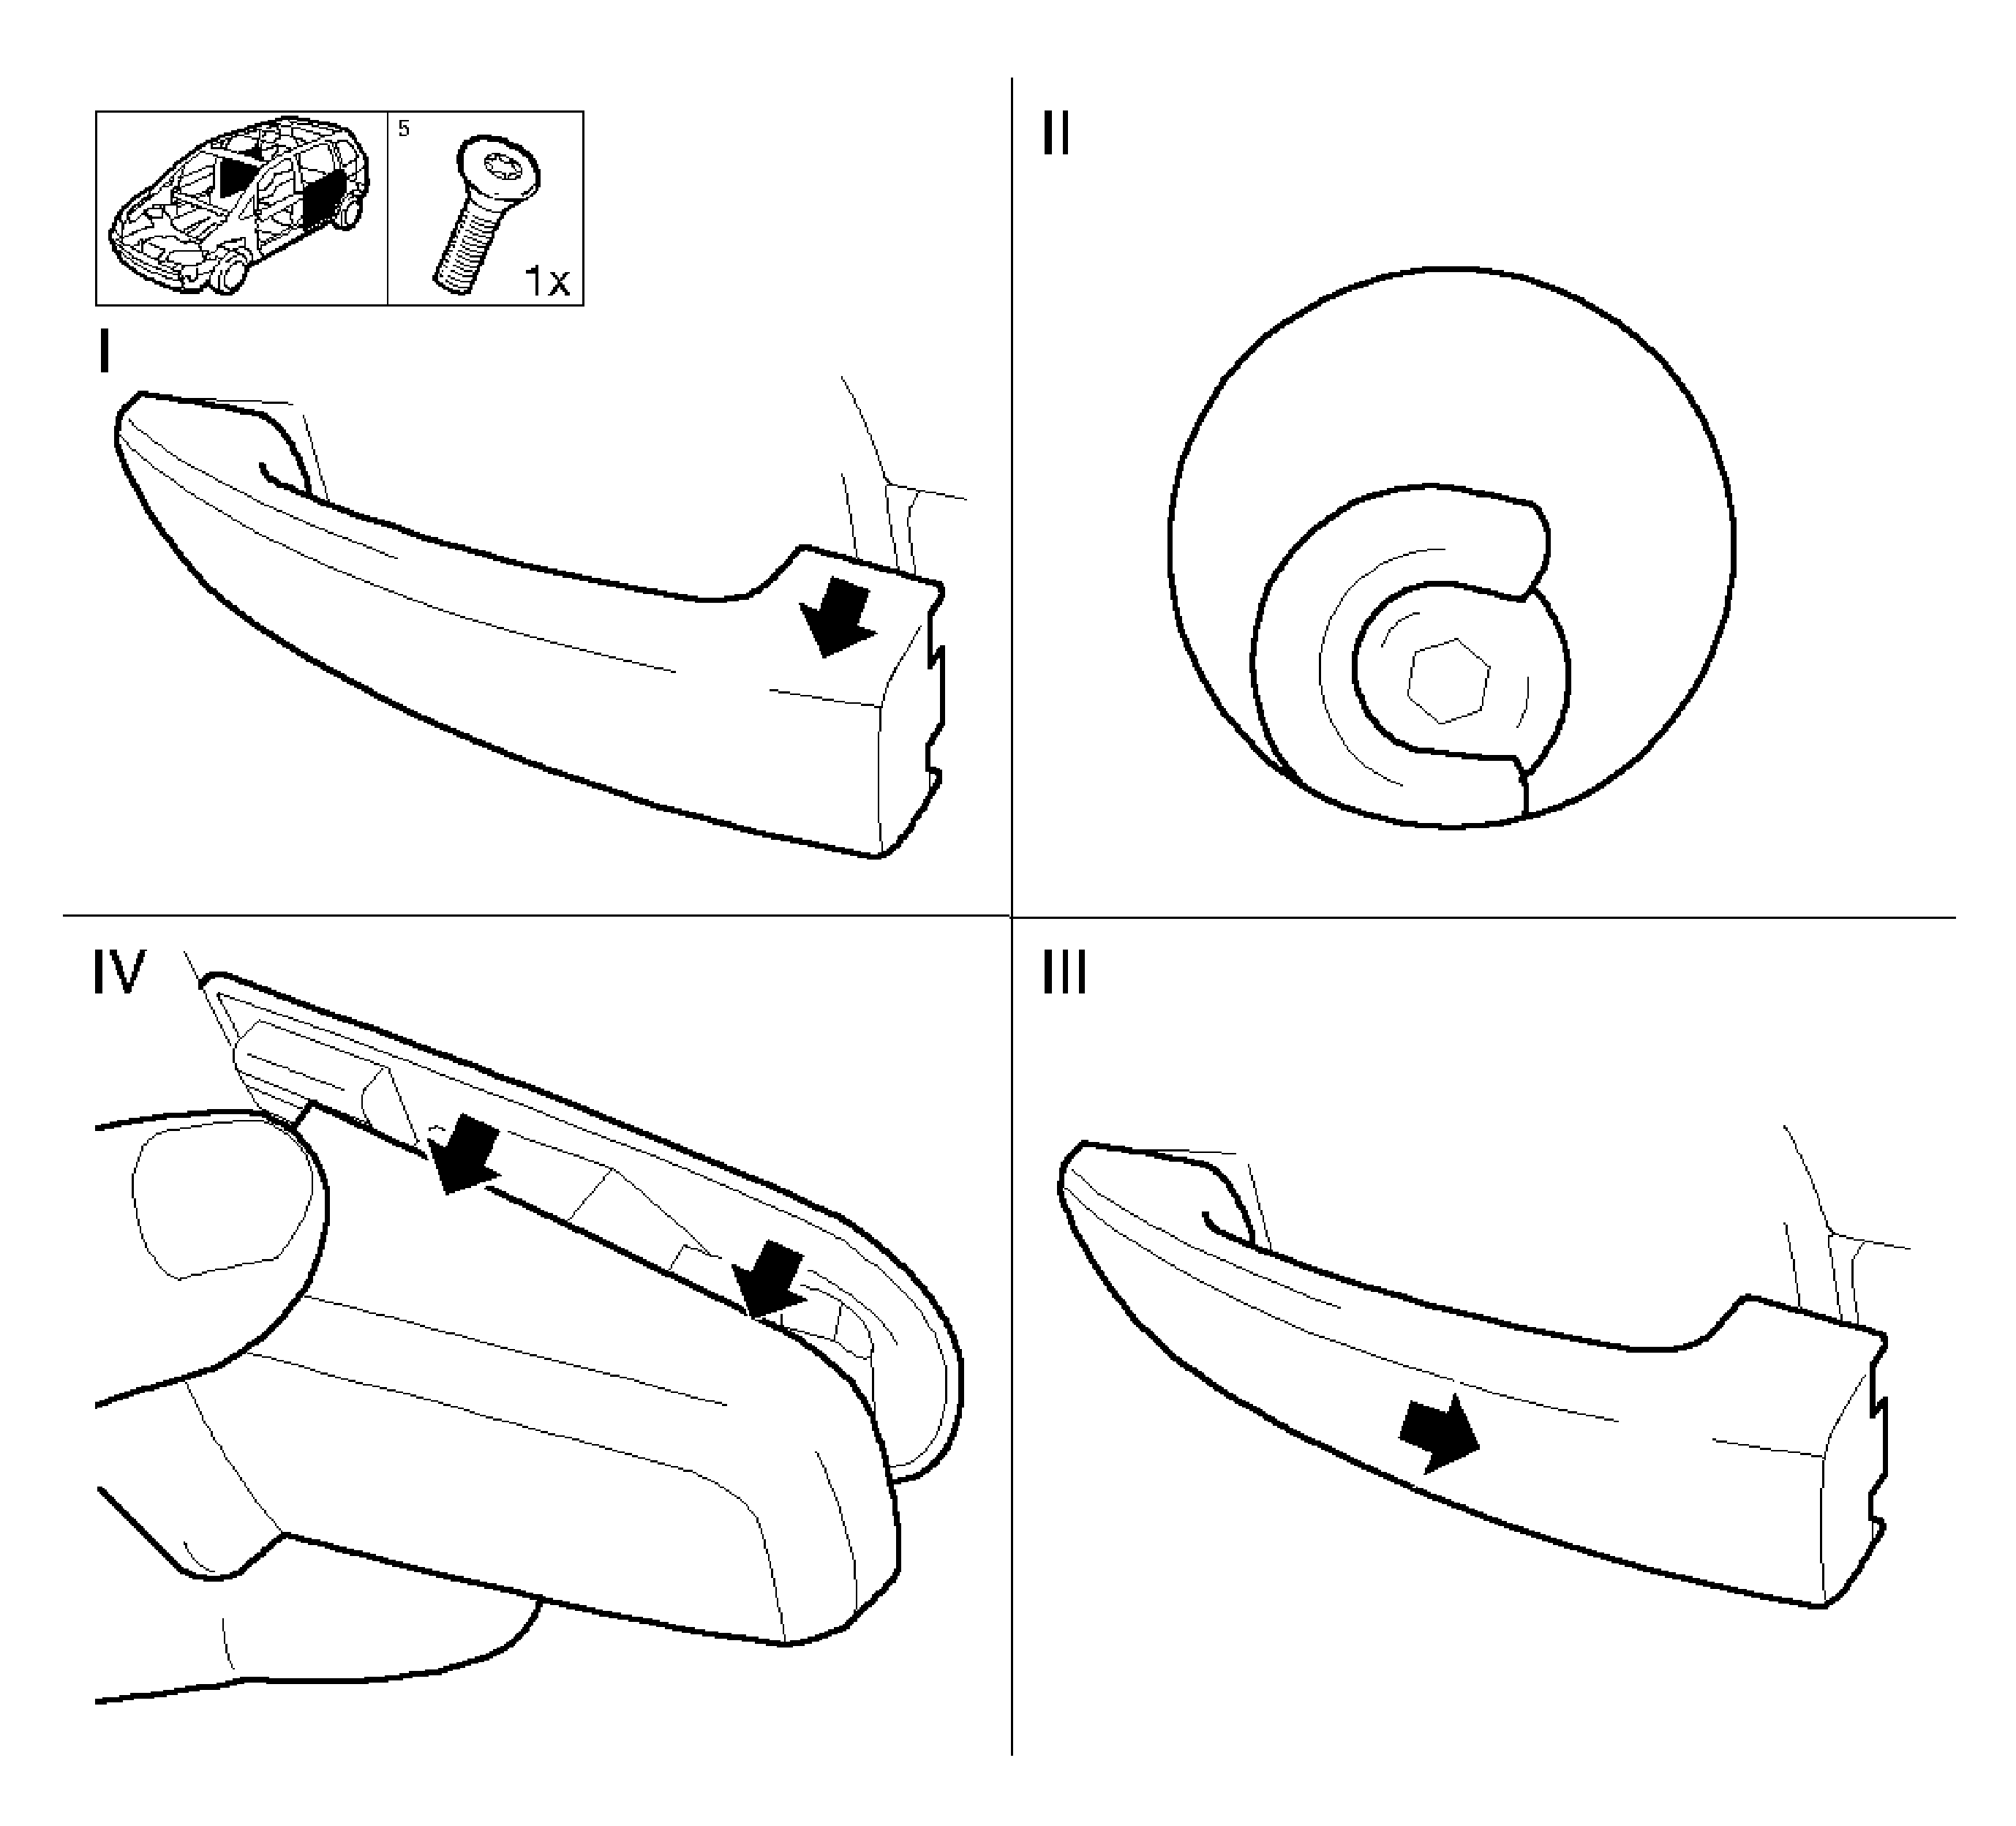
Important: The moveable handle part must now be secured in pulled position.
- Remove the rear door fixed handle part.
| • | Pull out and hold the moveable handle part (I). |
| • | Turn the bolt (II) left until it stops. |
| • | Remove the fixed handle part with lock cylinder (IV). |
- Remove the door handle.
Pull back the moveable handle part (III) to remove.
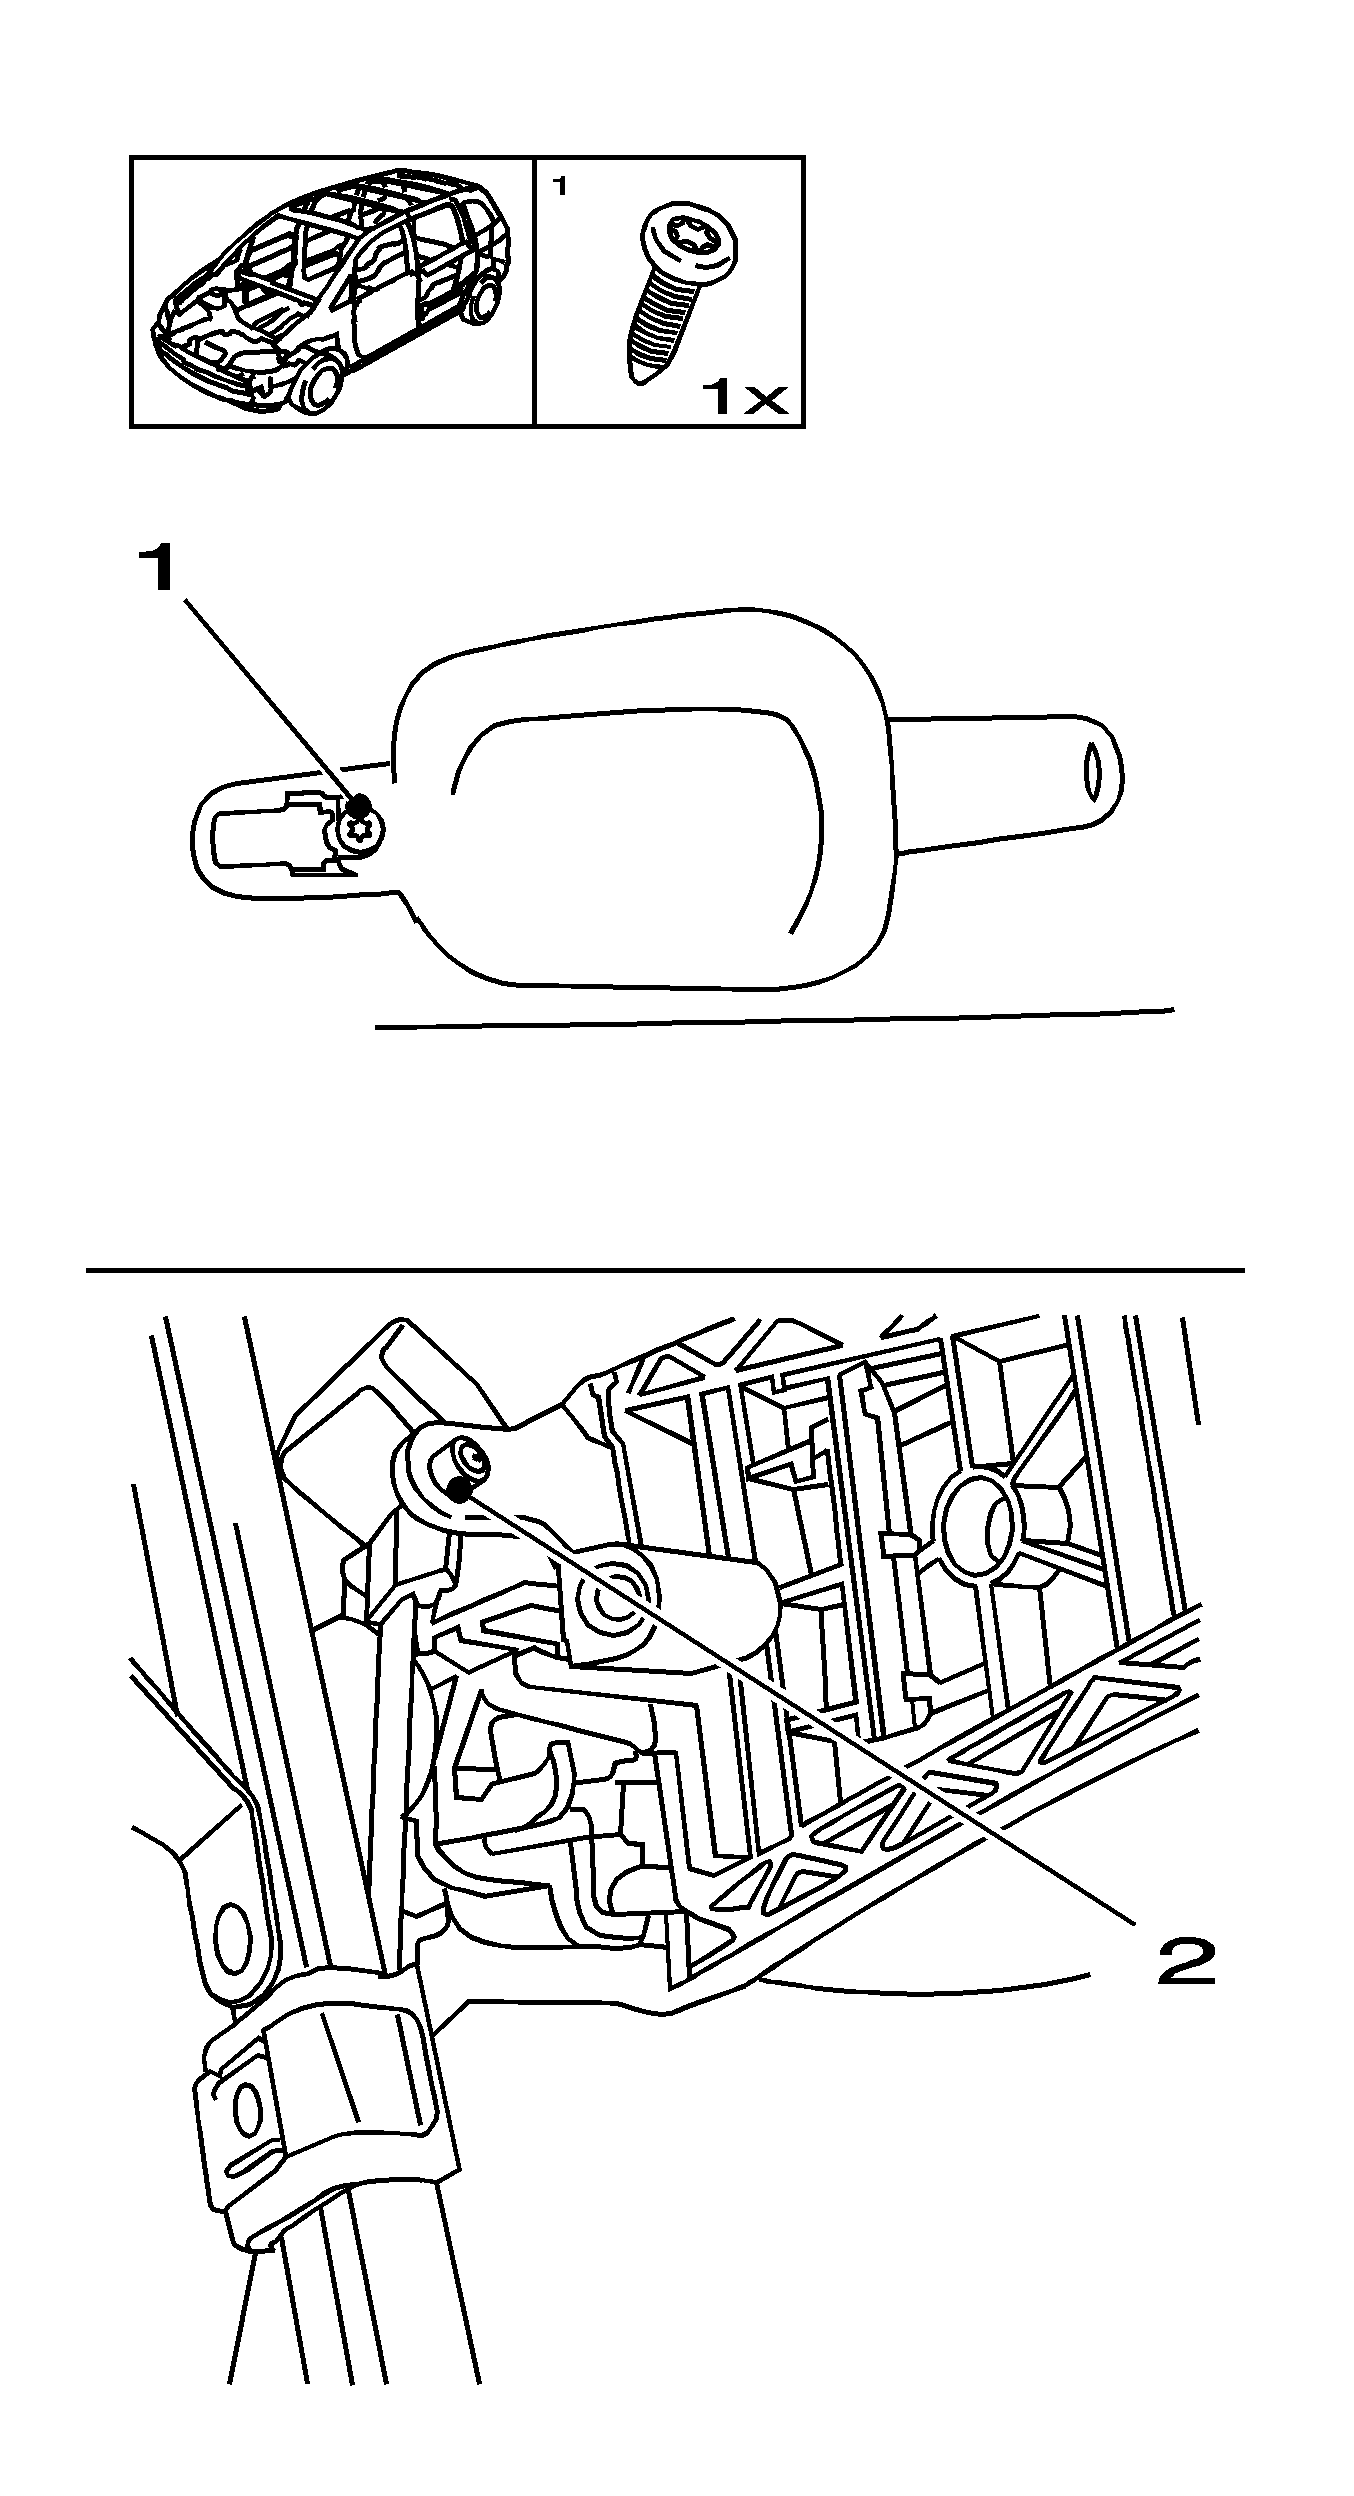
- Remove the bracket for the outer door handle.
| • | Remove the linkage (2). |
Installation Procedure
Notice: Refer to Fastener Notice in the Preface section.
- Install the bracket for the outer door handle.
Install the linkage.
Tighten
Tighten the bolt to 3 N·m (26 lb in).
- Refit the door handle.
Install the moveable handle part into door panel.
- Install the rear door fixed handle part.
| • | Pull out and hold the moveable handle part. |
| • | Tighten the bolt until it stops. |
| • | Close the moving part of the handle. |
- Install the front door access panel.
- Install the water vapor barrier.
- Install the rear door side trim panel. Refer to
Rear Side Door Trim Panel Replacement
