Removal Procedure

- Remove the radiator grille.
| • | Remove the 4 body-bound rivets. |
| • | Release from the front paneling upward. |

- Release the solvent container at the top front.
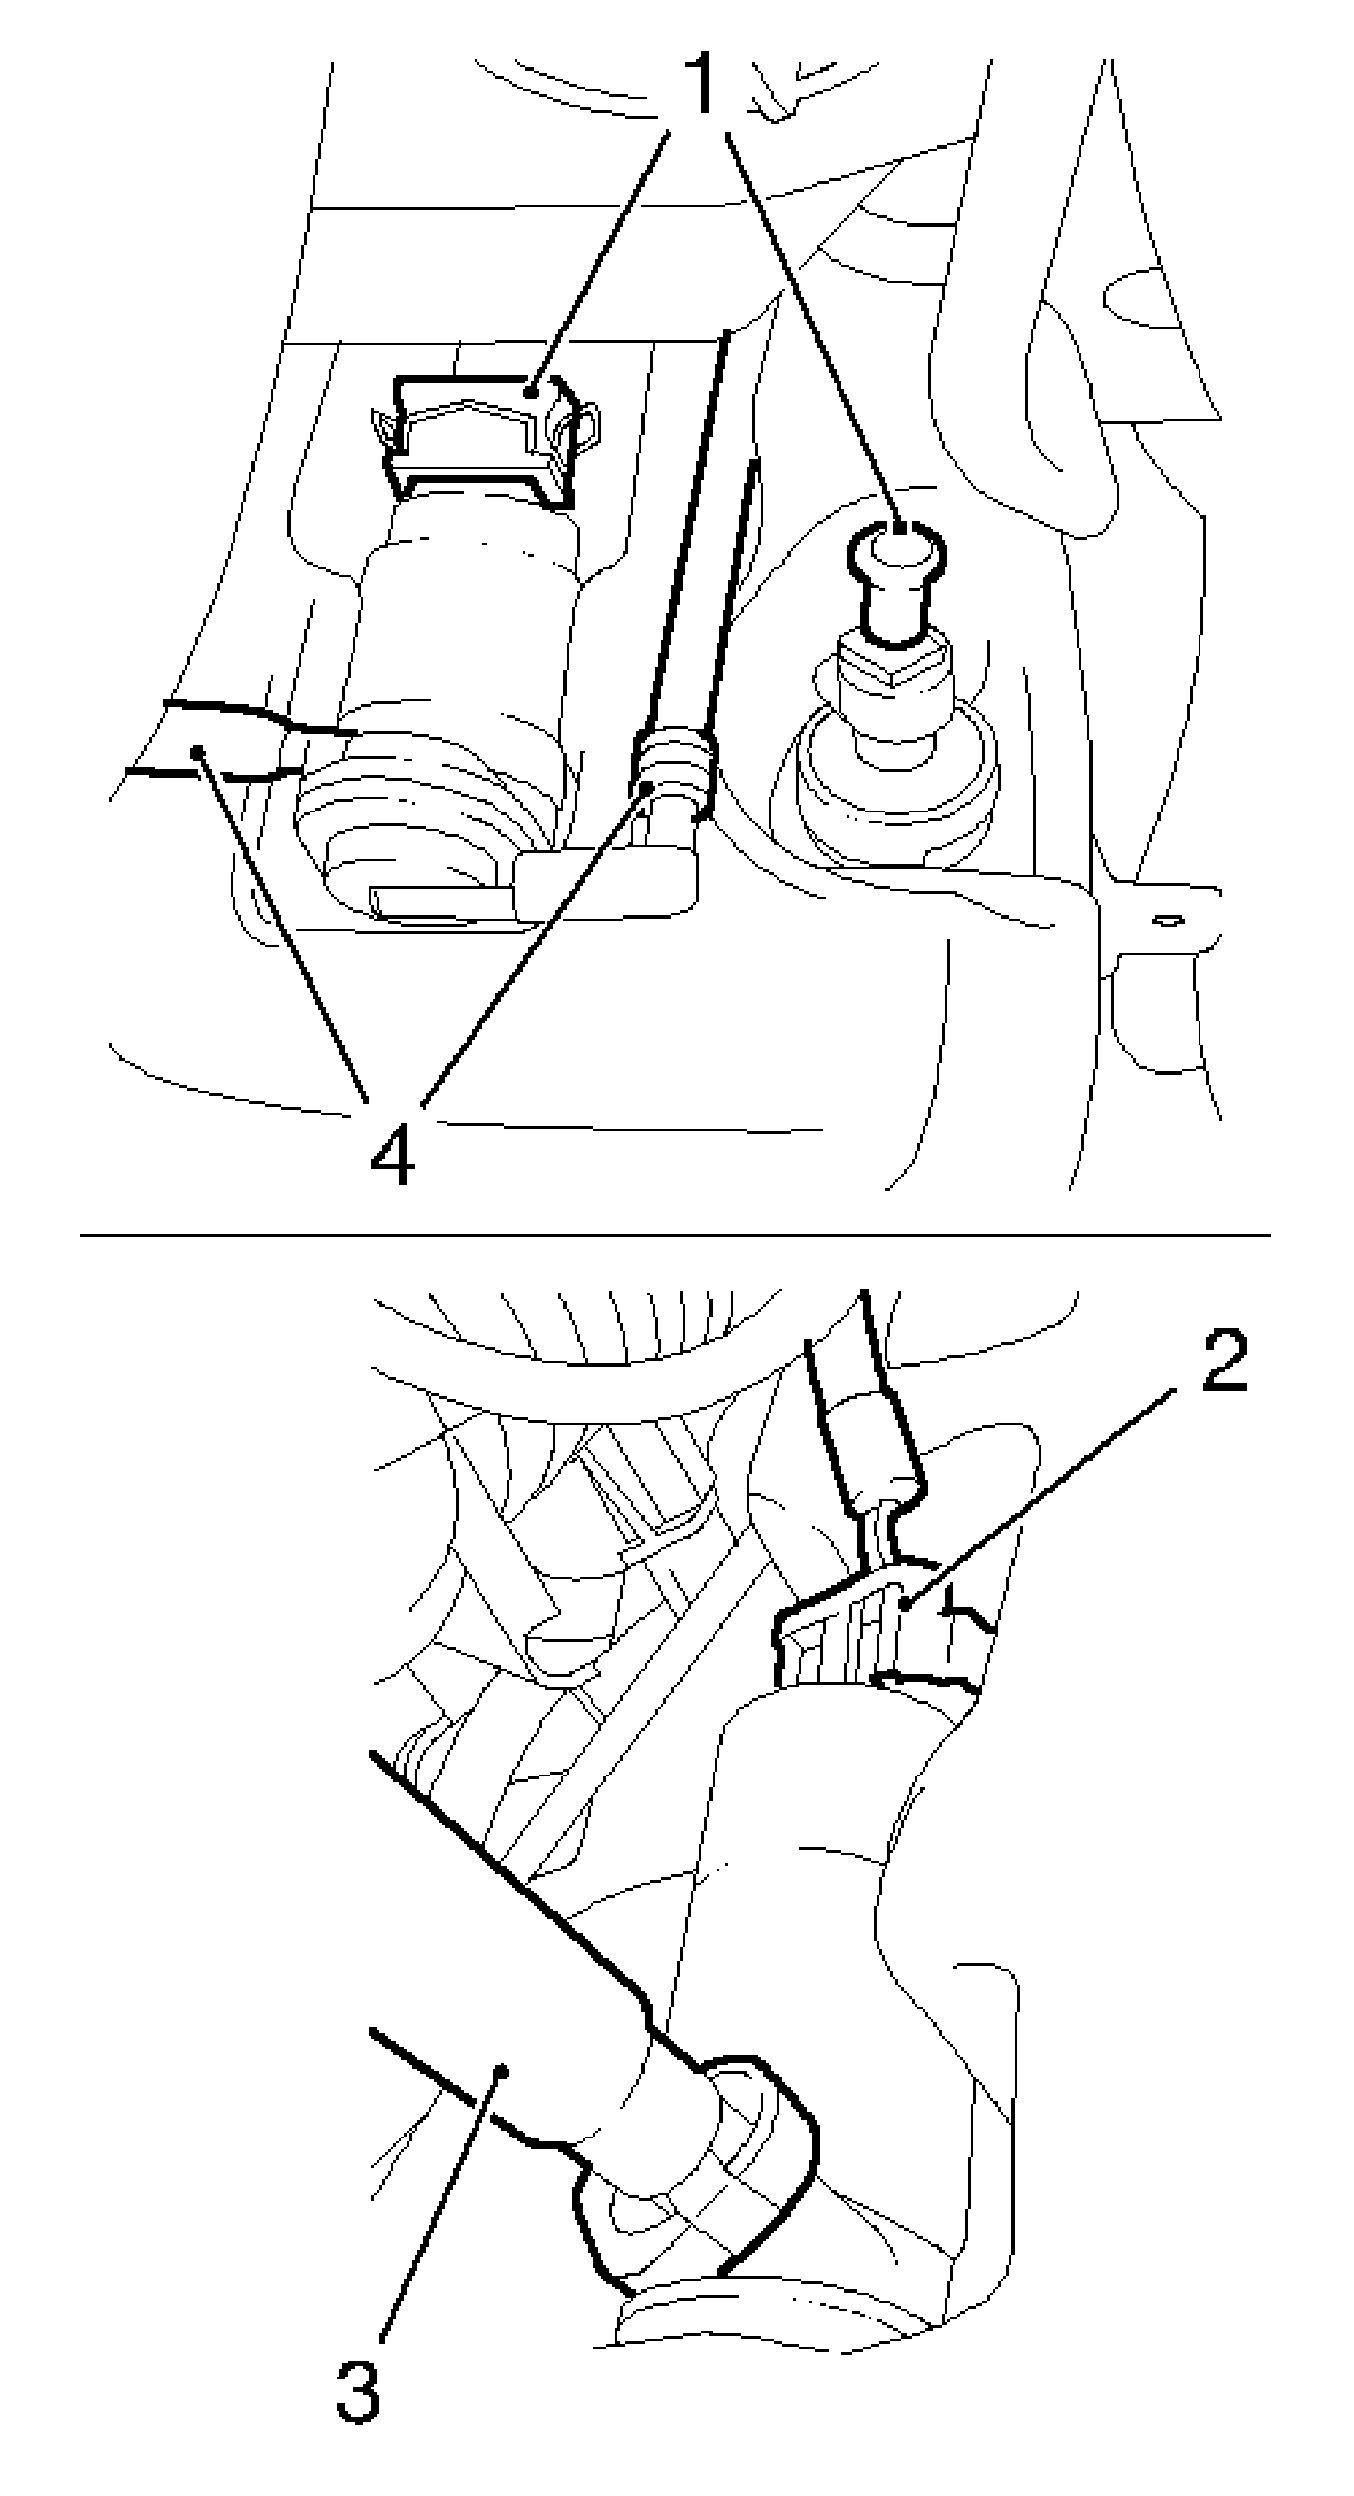
Remove the bolt (1).
- Release the solvent container at the base.
Remove the 2 bolts (2).
Important: Drain the washer solvent into a suitable container.
- Remove the hoses and wiring harness plugs.
| | Important: Depending on vehicle design.
|
| • | Disconnect the 3 wiring harness plugs (1, 2). |
| | Important: Depending on vehicle design.
|
| • | Disconnect the 3 hoses (3, 4). |
| • | Remove the solvent container downward. |
| • | Remove the wiring harness. |
Important: Depending on vehicle design.
- Remove the attachment.
| • | Remove the pump for the front and rear screens. |
| • | Remove the pump for the headlamp washer system. |
| • | Remove the fill level sensor. |
| • | Bring the pin to vertical position for removal. |
Installation Procedure
Important: Depending on vehicle design.
- Install the attachments.
| • | Install the pump for the front and rear screens. |
| • | Install the pump for the headlamp washer system. |
| • | Install the fill level sensor. |
- Install the solvent container at the base.
Notice: Refer to Fastener Notice in the Preface section.
- Install the cable tie.
Tighten
Tighten the 2 screws to 3.5 N·m (31 lb in).
Important: Depending on vehicle design.
- Install the hoses and the wiring harness plugs.
| • | Connect the 3 wiring harness plugs. |
- Install the solvent container at the top front.
Tighten
Tighten the bolt to 3.5 N·m (31 lb in).
- Install the radiator grille.
| • | Insert the 4 body-bound rivets. |
| • | Install the front paneling downward. |
- Top up the washer fluid.
