Headlining Trim Panel Replacement Sedan
Removal Procedure
Caution: Refer to Battery Disconnect Caution in the Preface section.
- Disconnect the battery.
- Remove the rear compartment cover.
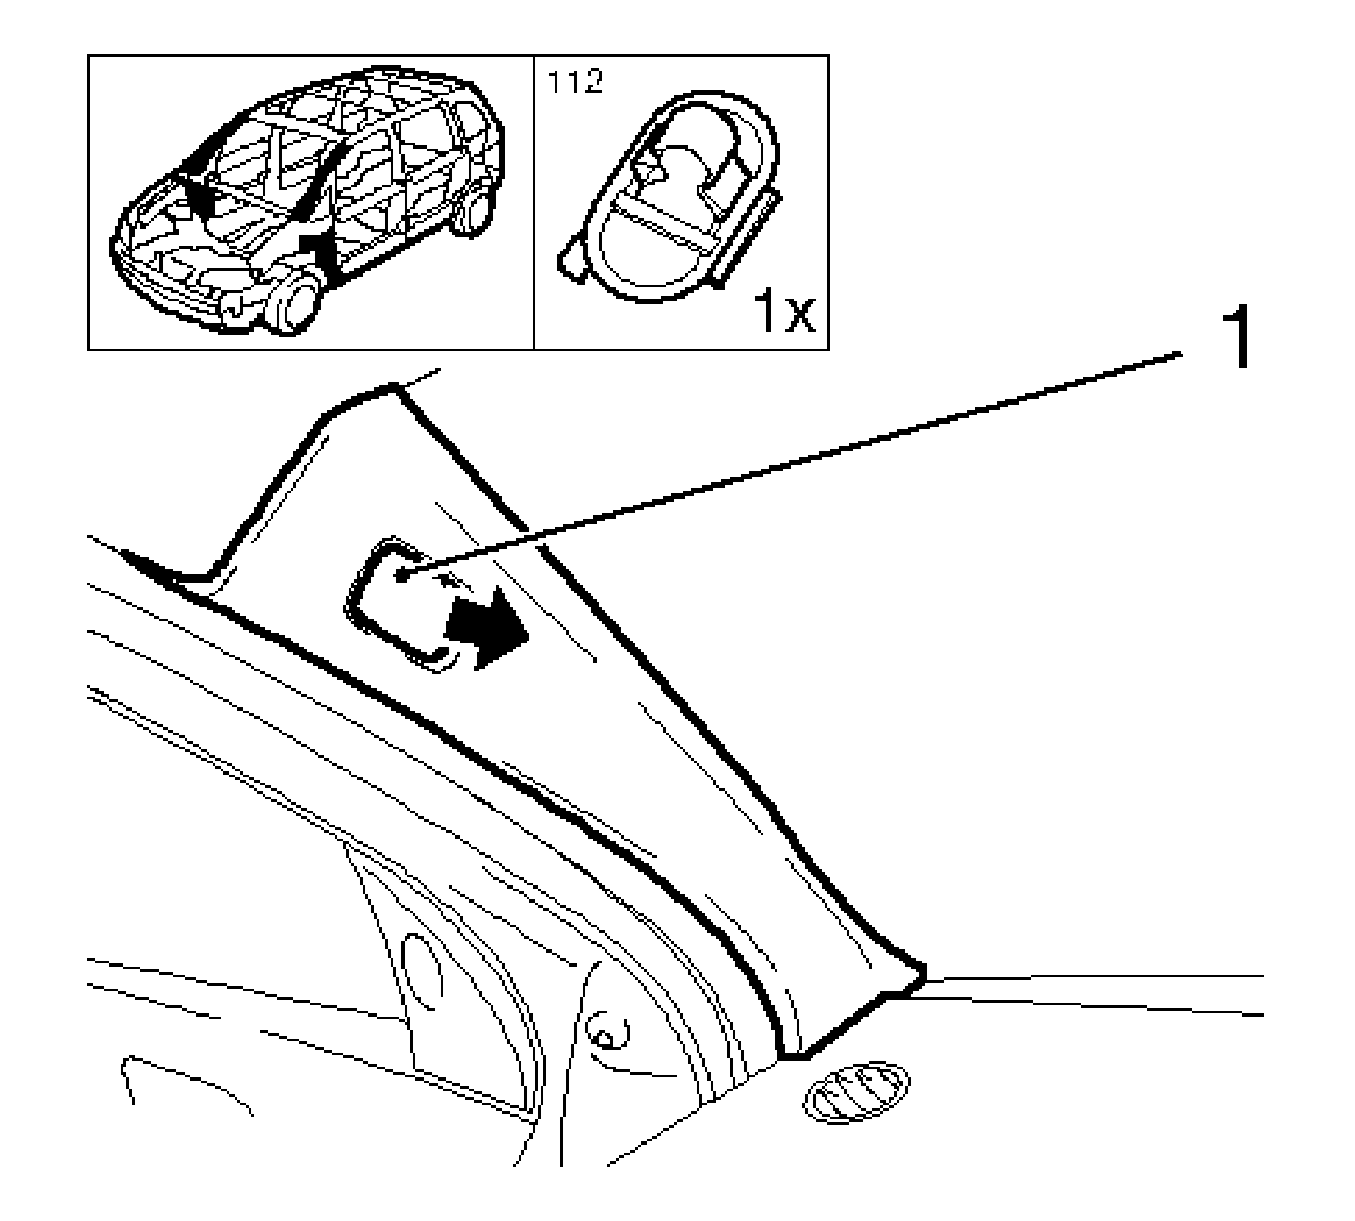
- Remove the windshield garnish molding, left side.
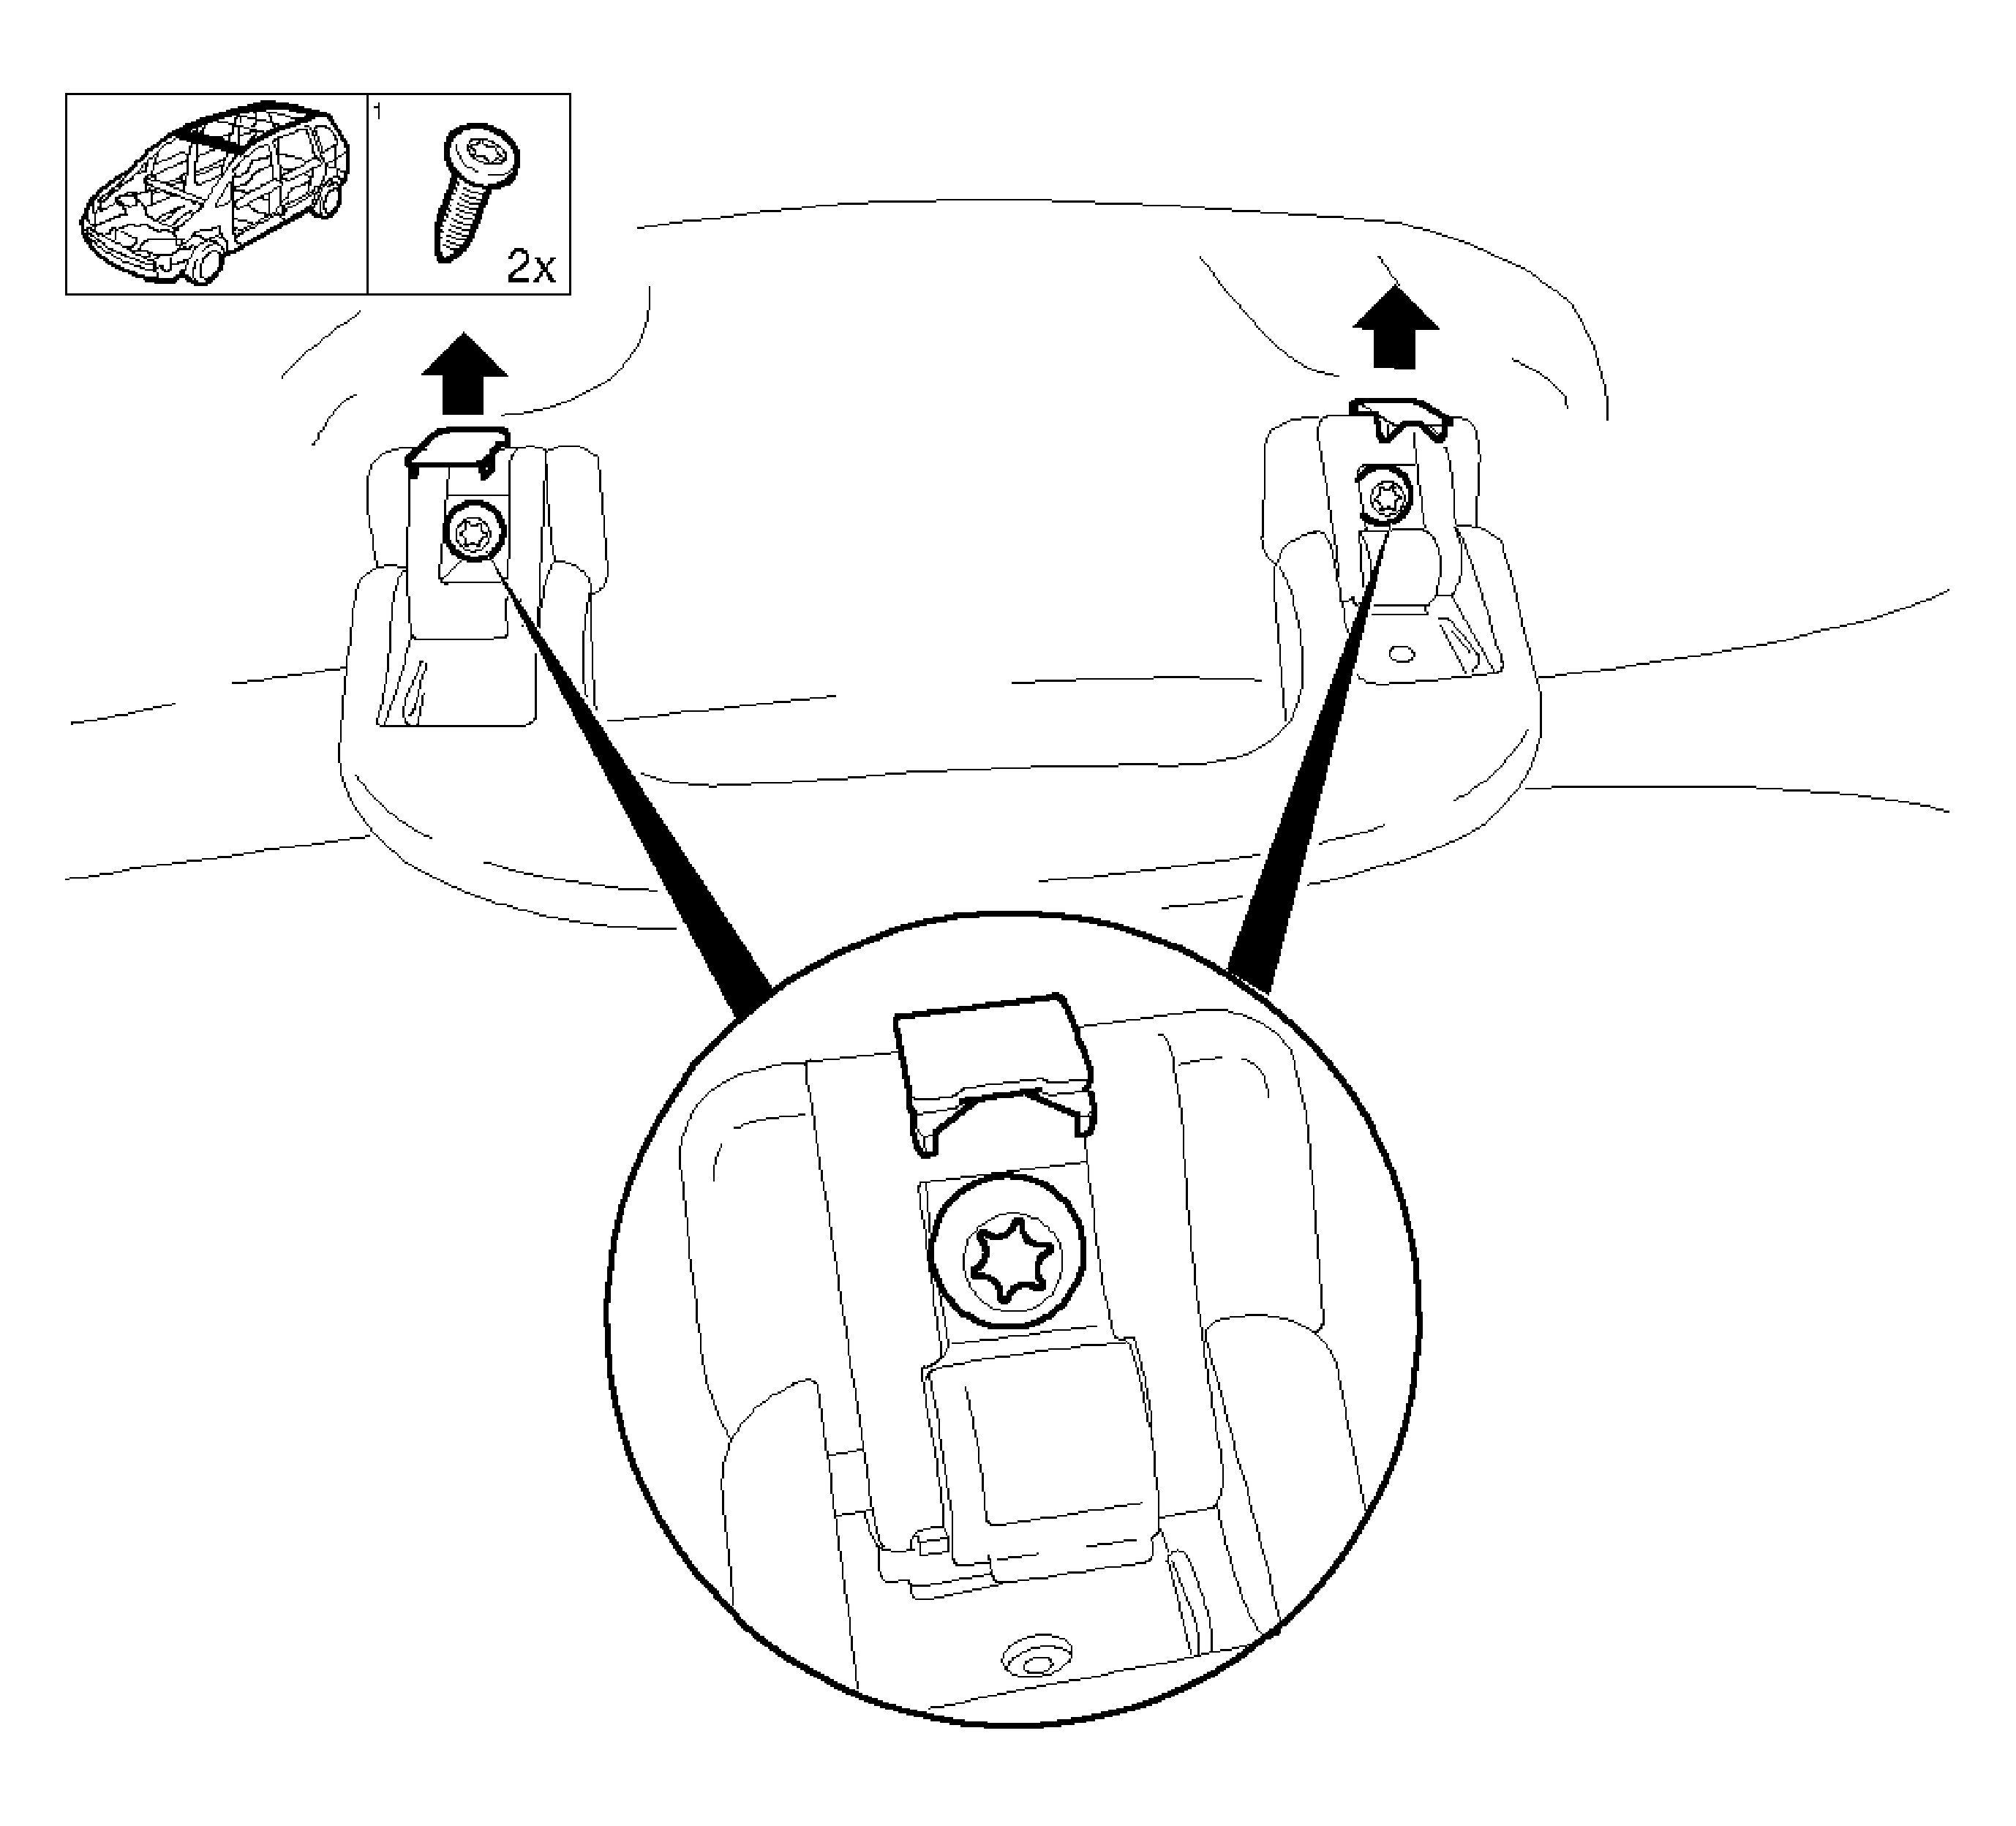
| 3.1. | Remove the access panel (1). |
| 3.3. | Remove the windshield garnish molding. |
- Remove the windshield garnish molding, right side.
| 4.1. | Remove the panel (1). |
| 4.3. | Remove the windshield garnish molding. |
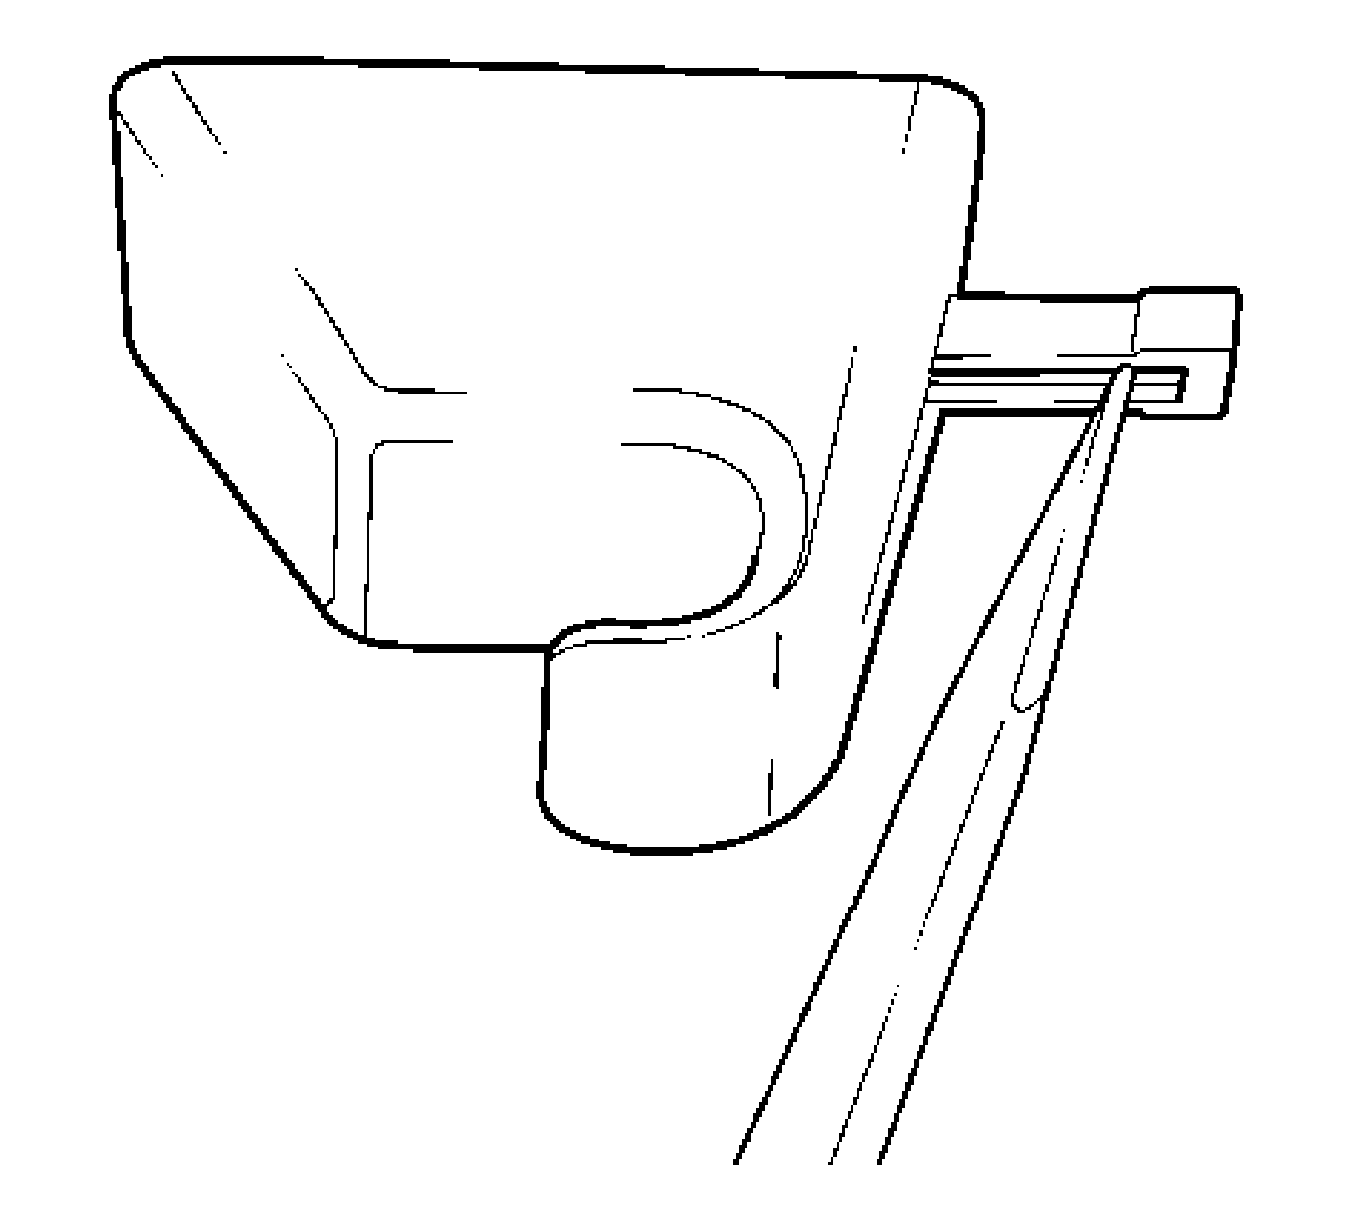
- Remove the front seat belt trim panel (1).
Release and remove the trim panel upward (arrow).
- Remove the seat belt from the front seat.
Remove the bolt (2).

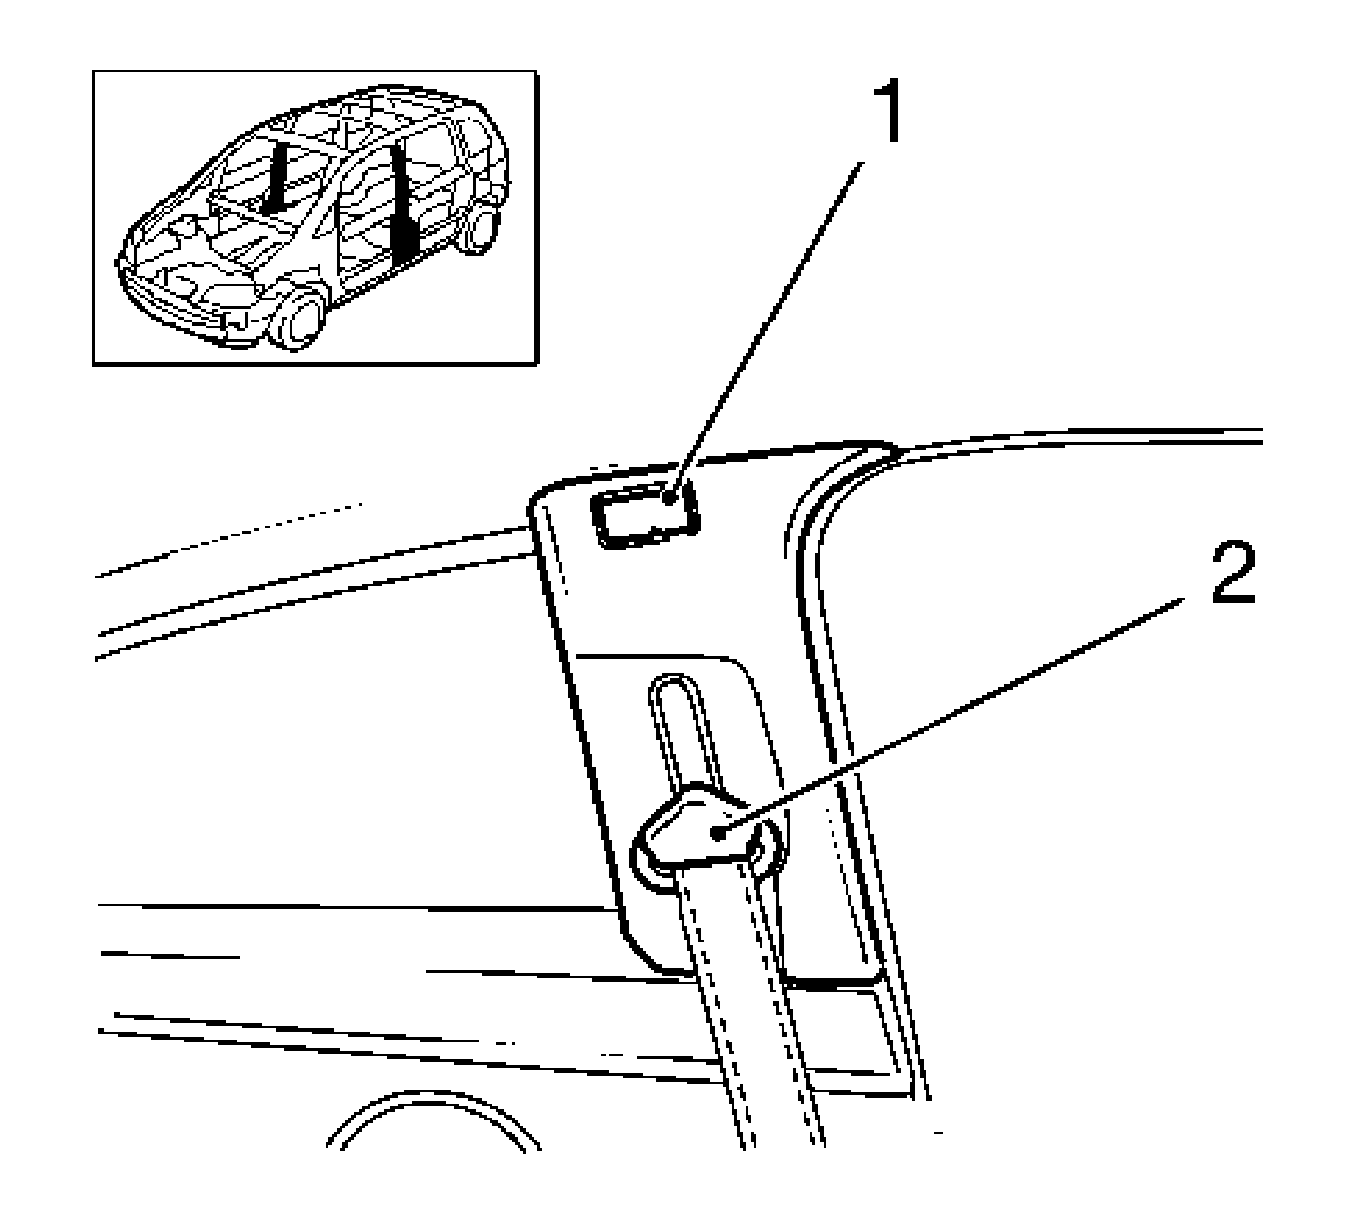
- Remove the upper center pillar trim, left side.
| 7.1. | Remove the access panel (1). |
| 7.2. | Loosen the upper center pillar in lower area (2) and remove the upper center pillar panel. |
| 7.3. | Release the 6 clips. |
| 7.4. | Remove the upper center pillar . |
- Remove the top center pillar, right side.
| 8.1. | Remove the panel (1). |
| 8.2. | Loosen the upper center pillar in the lower area (2) and remove the upper center pillar. |
| 8.3. | Release the 6 clips. |
| 8.4. | Remove the center pillar. |
- Remove the quarter upper trim, left and right side. Refer to
Quarter Upper Trim Panel Replacement
.
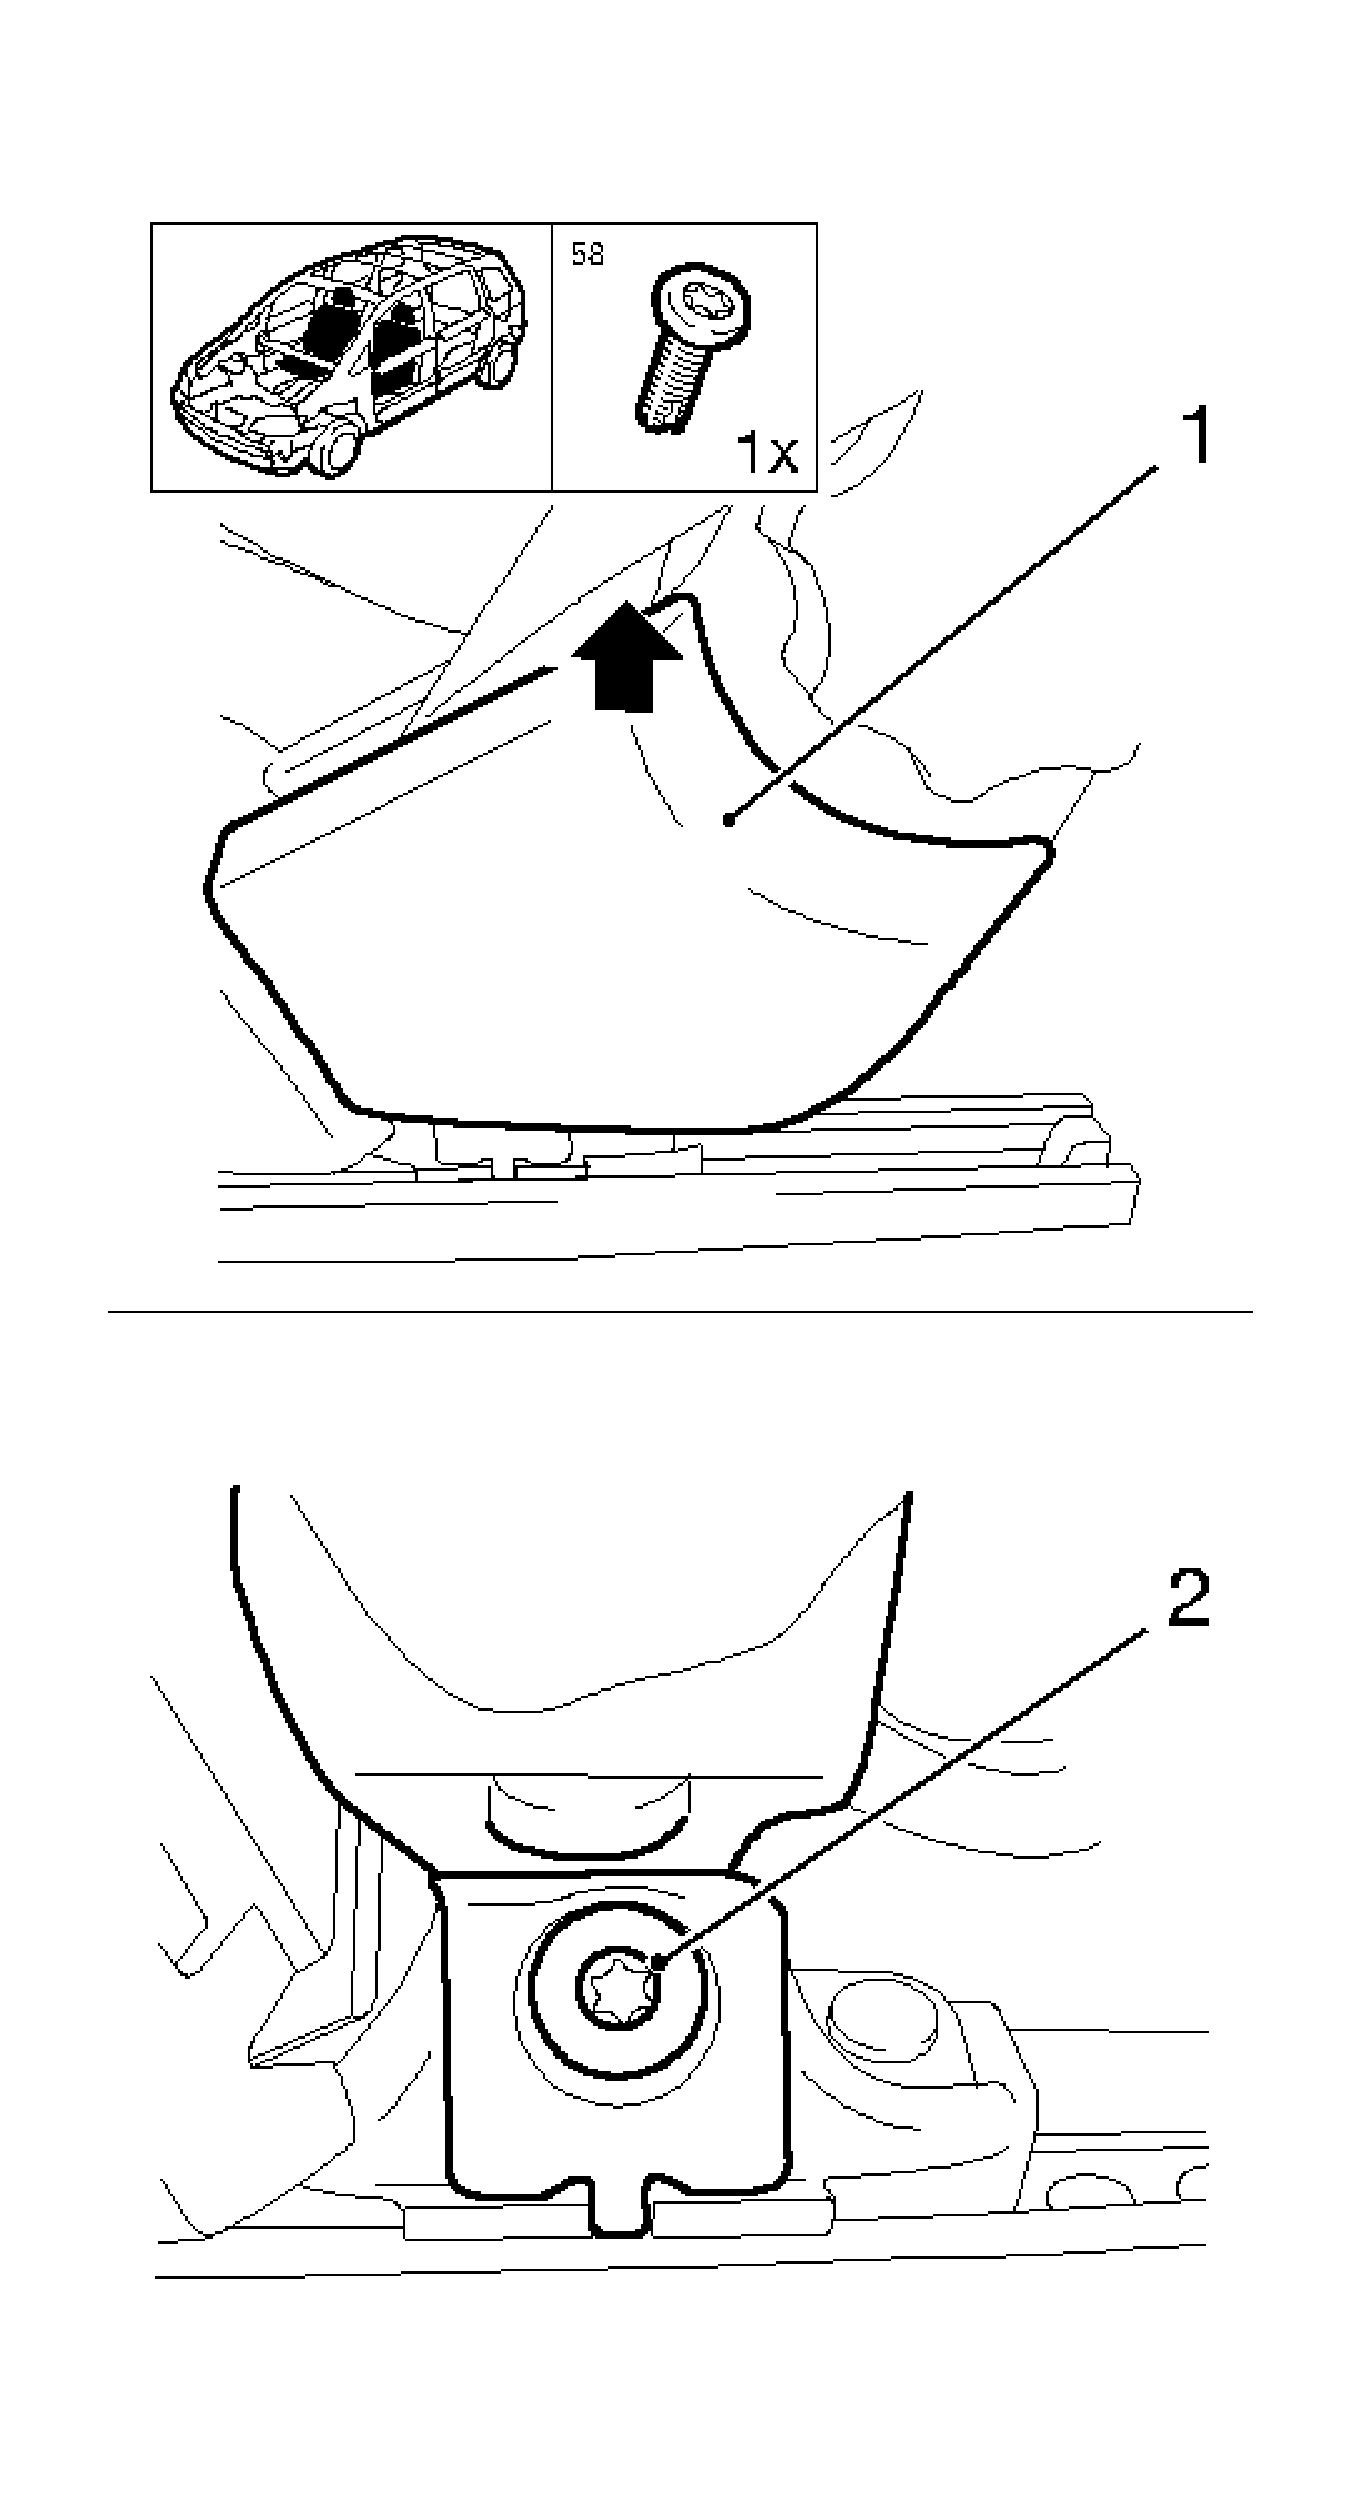
- Remove the roof rail front stowage compartment from the headlining.
| 10.1. | Open the panel (arrow). |
| 10.2. | Remove the 2 bolts. |
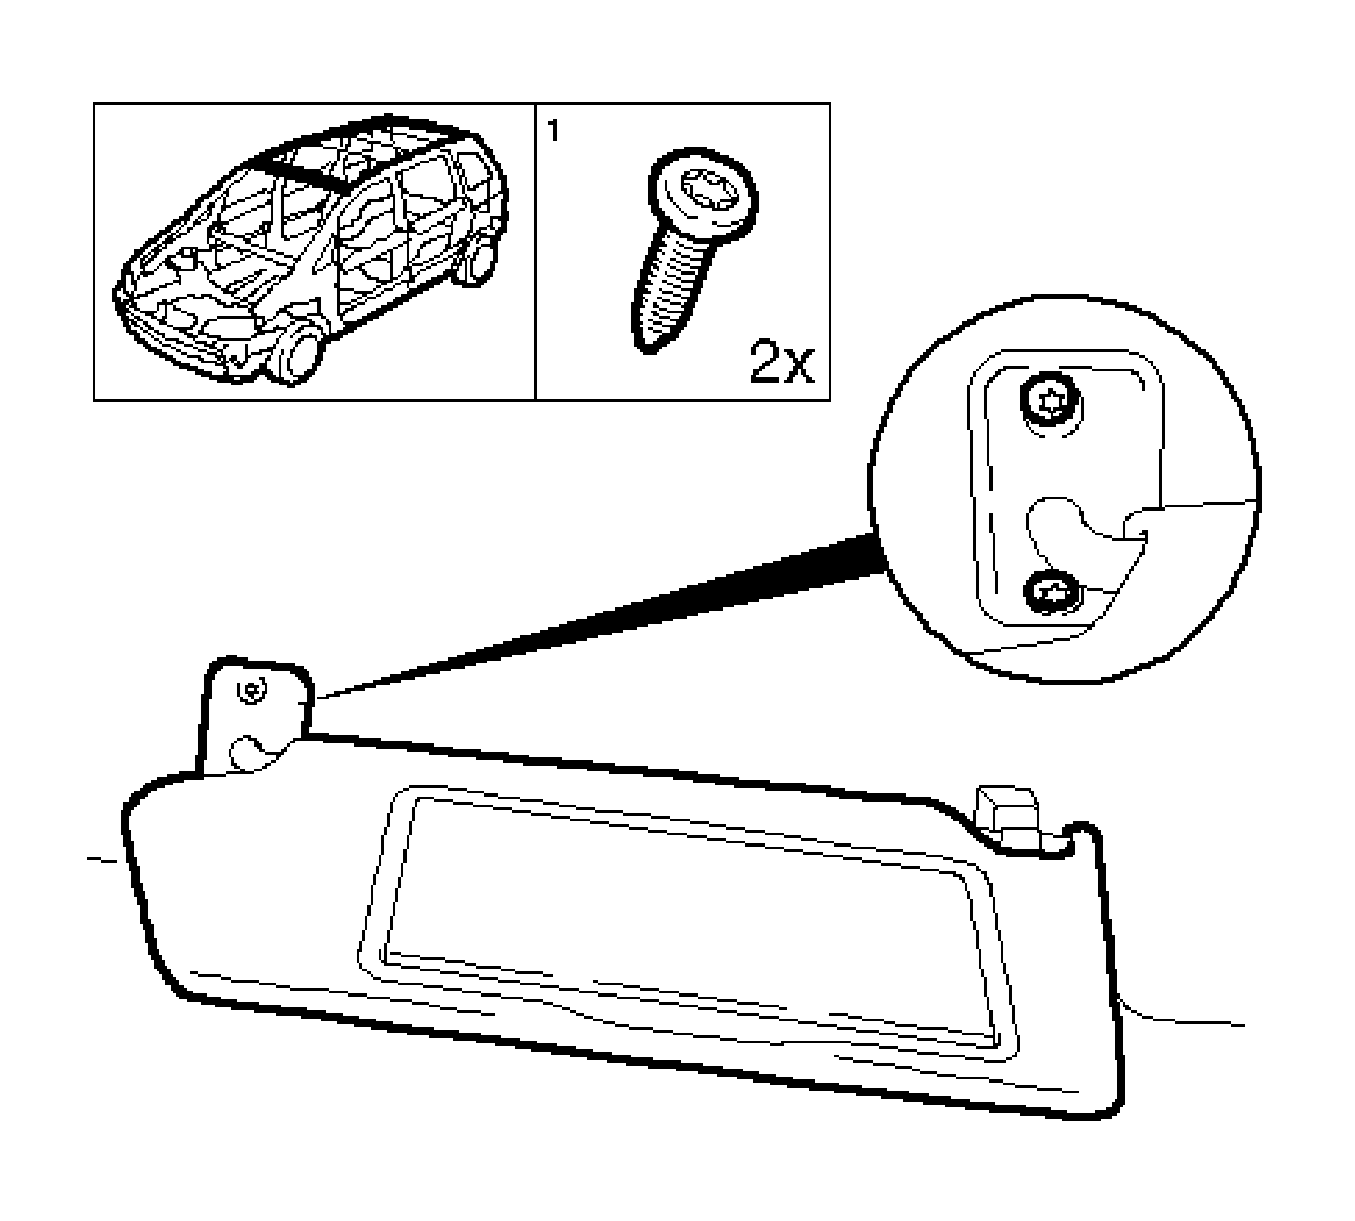
- Remove the sunshade, left side.
| 11.1. | Remove the 2 bolts. |
| 11.2. | Disconnect the wiring harness plug. |
| 11.3. | Release the sunshade from the support and remove. |
- Remove the sunshade, right side.
| 12.1. | Remove the 2 bolts. |
| 12.2. | Disconnect the wiring harness plug. |
| 12.3. | Release the sunshade from the support and remove. |
Important: The spring of the main bracket is not secured and may fall down.
- Remove the sunshade support, right side.
Pull out the main bracket wedge and remove the main bracket.
Important: The spring of the main bracket is not secured and may fall down.
- Remove the sunshade support, left side.
Pull out the main bracket wedge and remove the main bracket.
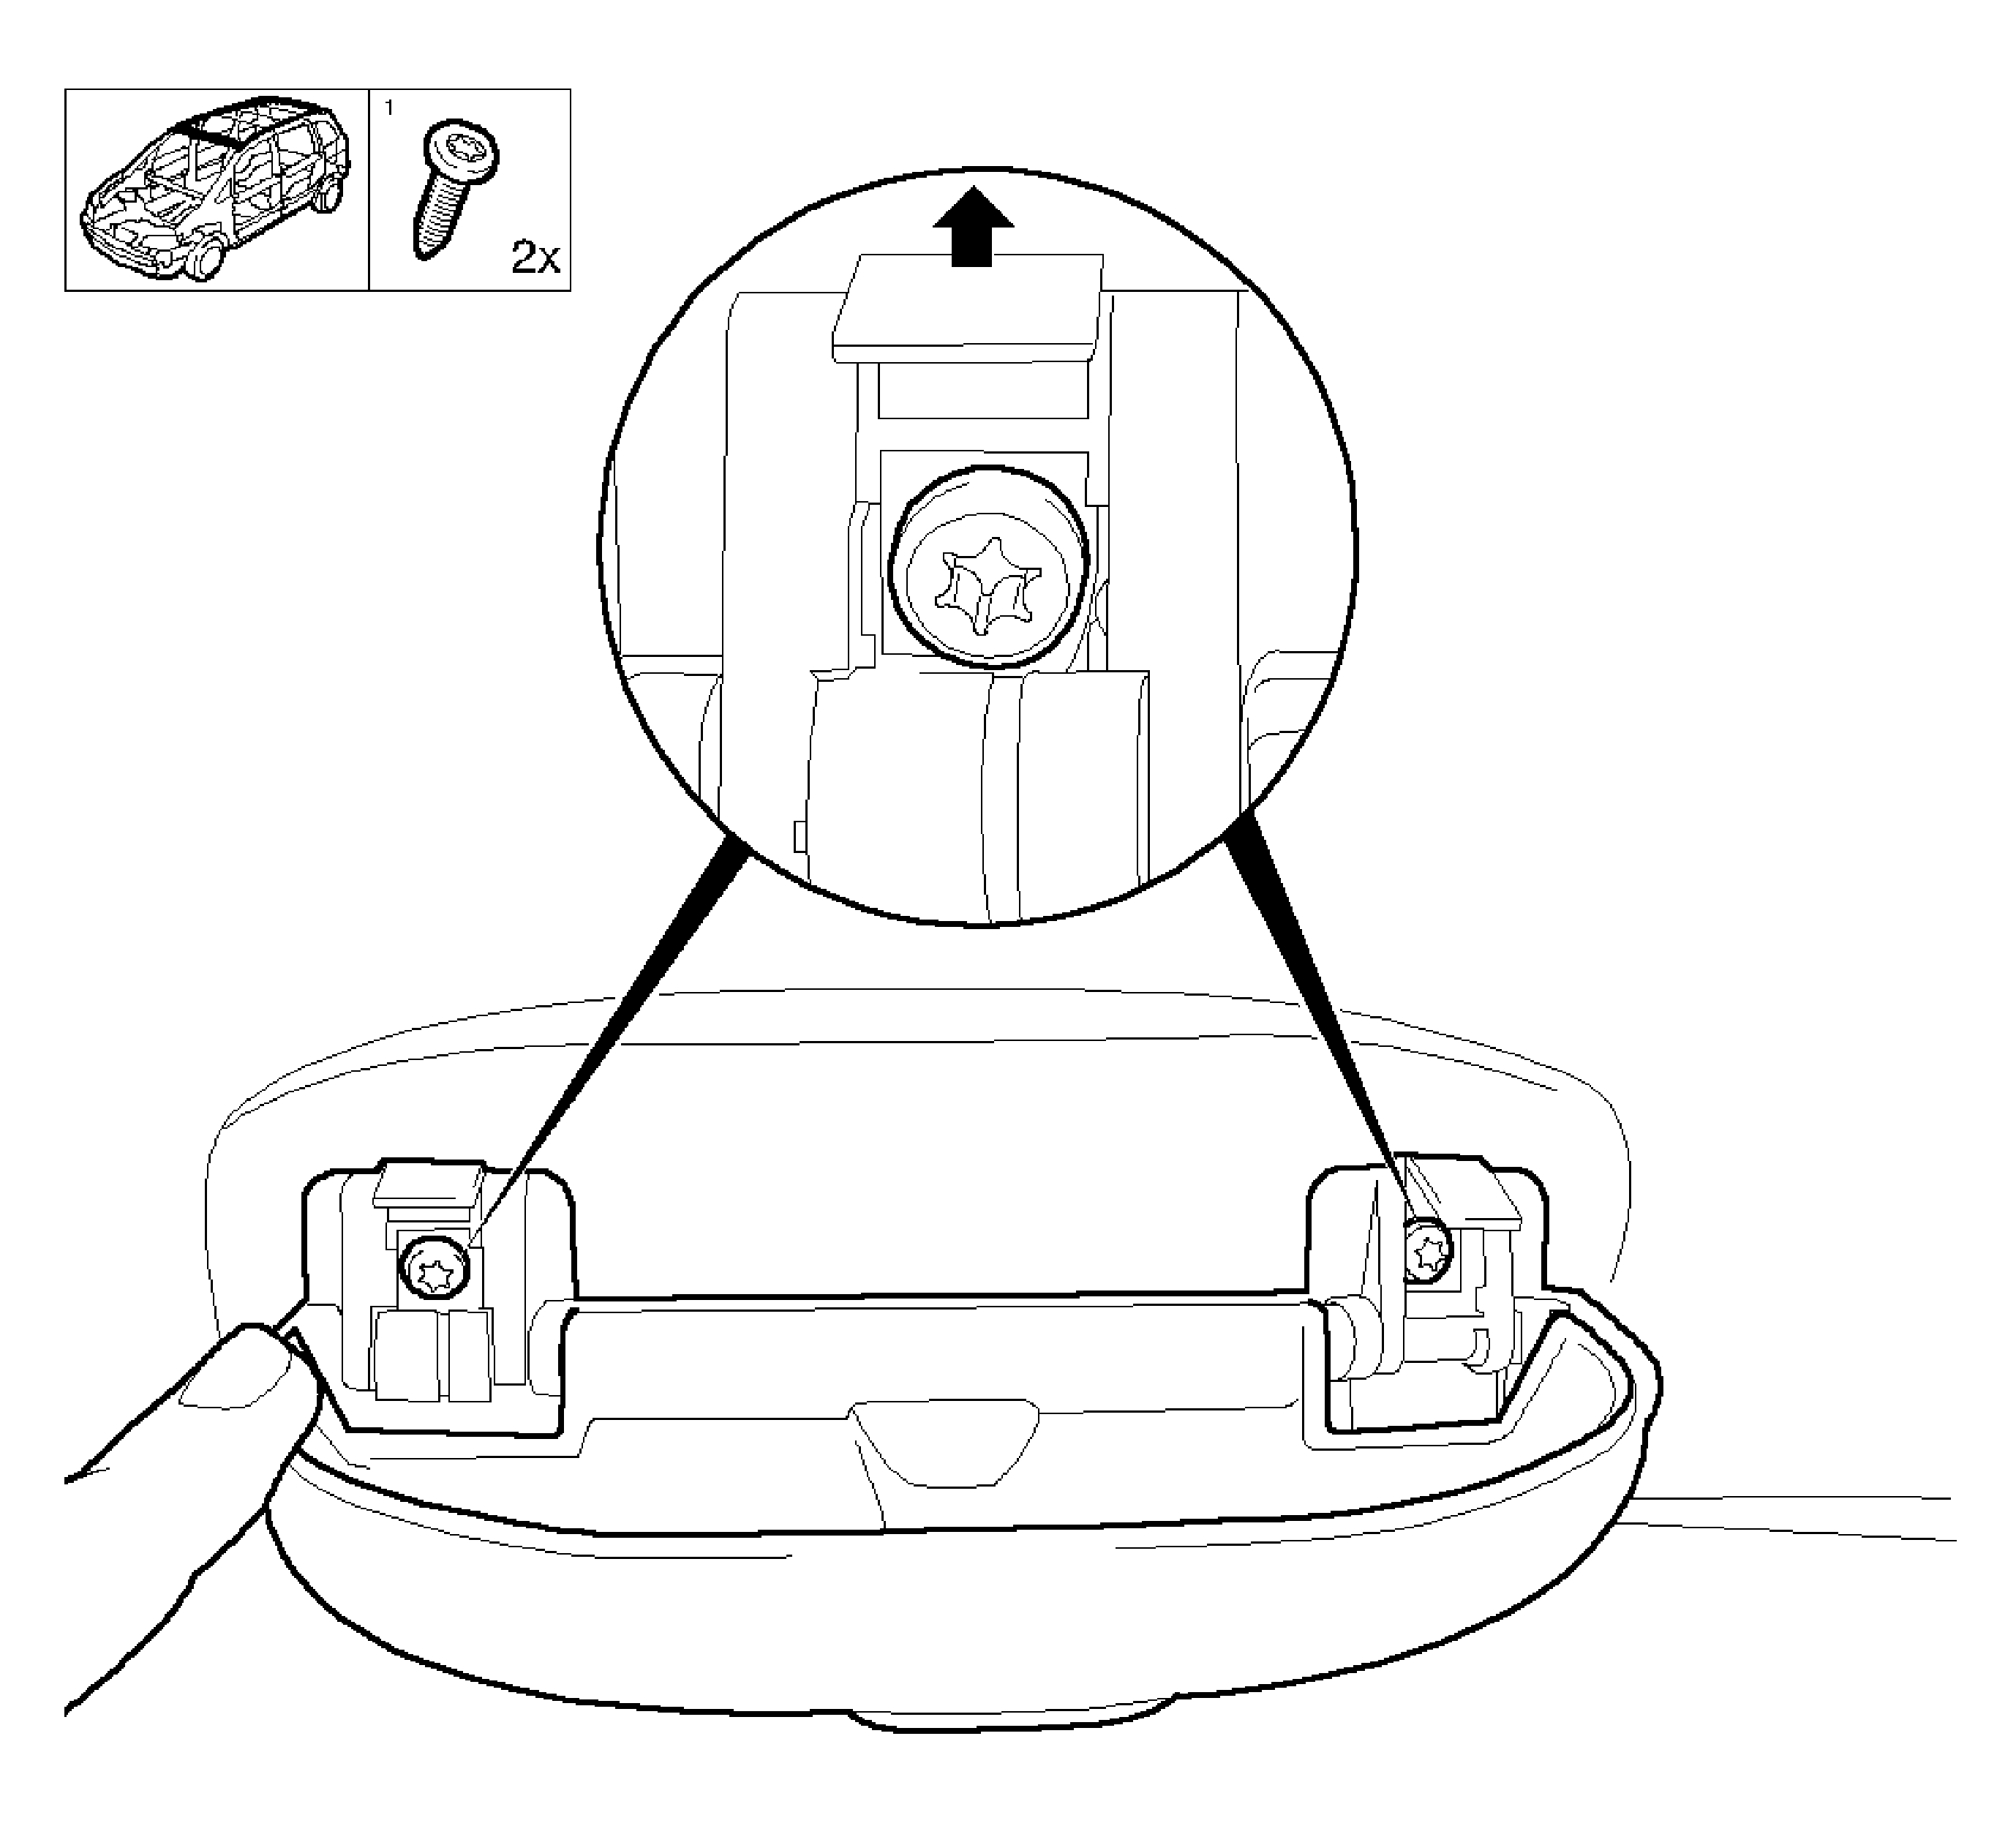
- Remove the molded headlining assist handle, right side.
| 15.1. | Open the panel (arrow). |
| 15.2. | Remove the 2 bolts. |
- Remove the molded headlining assist handle, left side.
| 16.1. | Open the panel (arrow). |
| 16.2. | Remove the 2 bolts. |
- Remove the rear headlining handle, right side.
| 17.1. | Open the panel (arrow). |
| 17.2. | Remove the 2 bolts. |
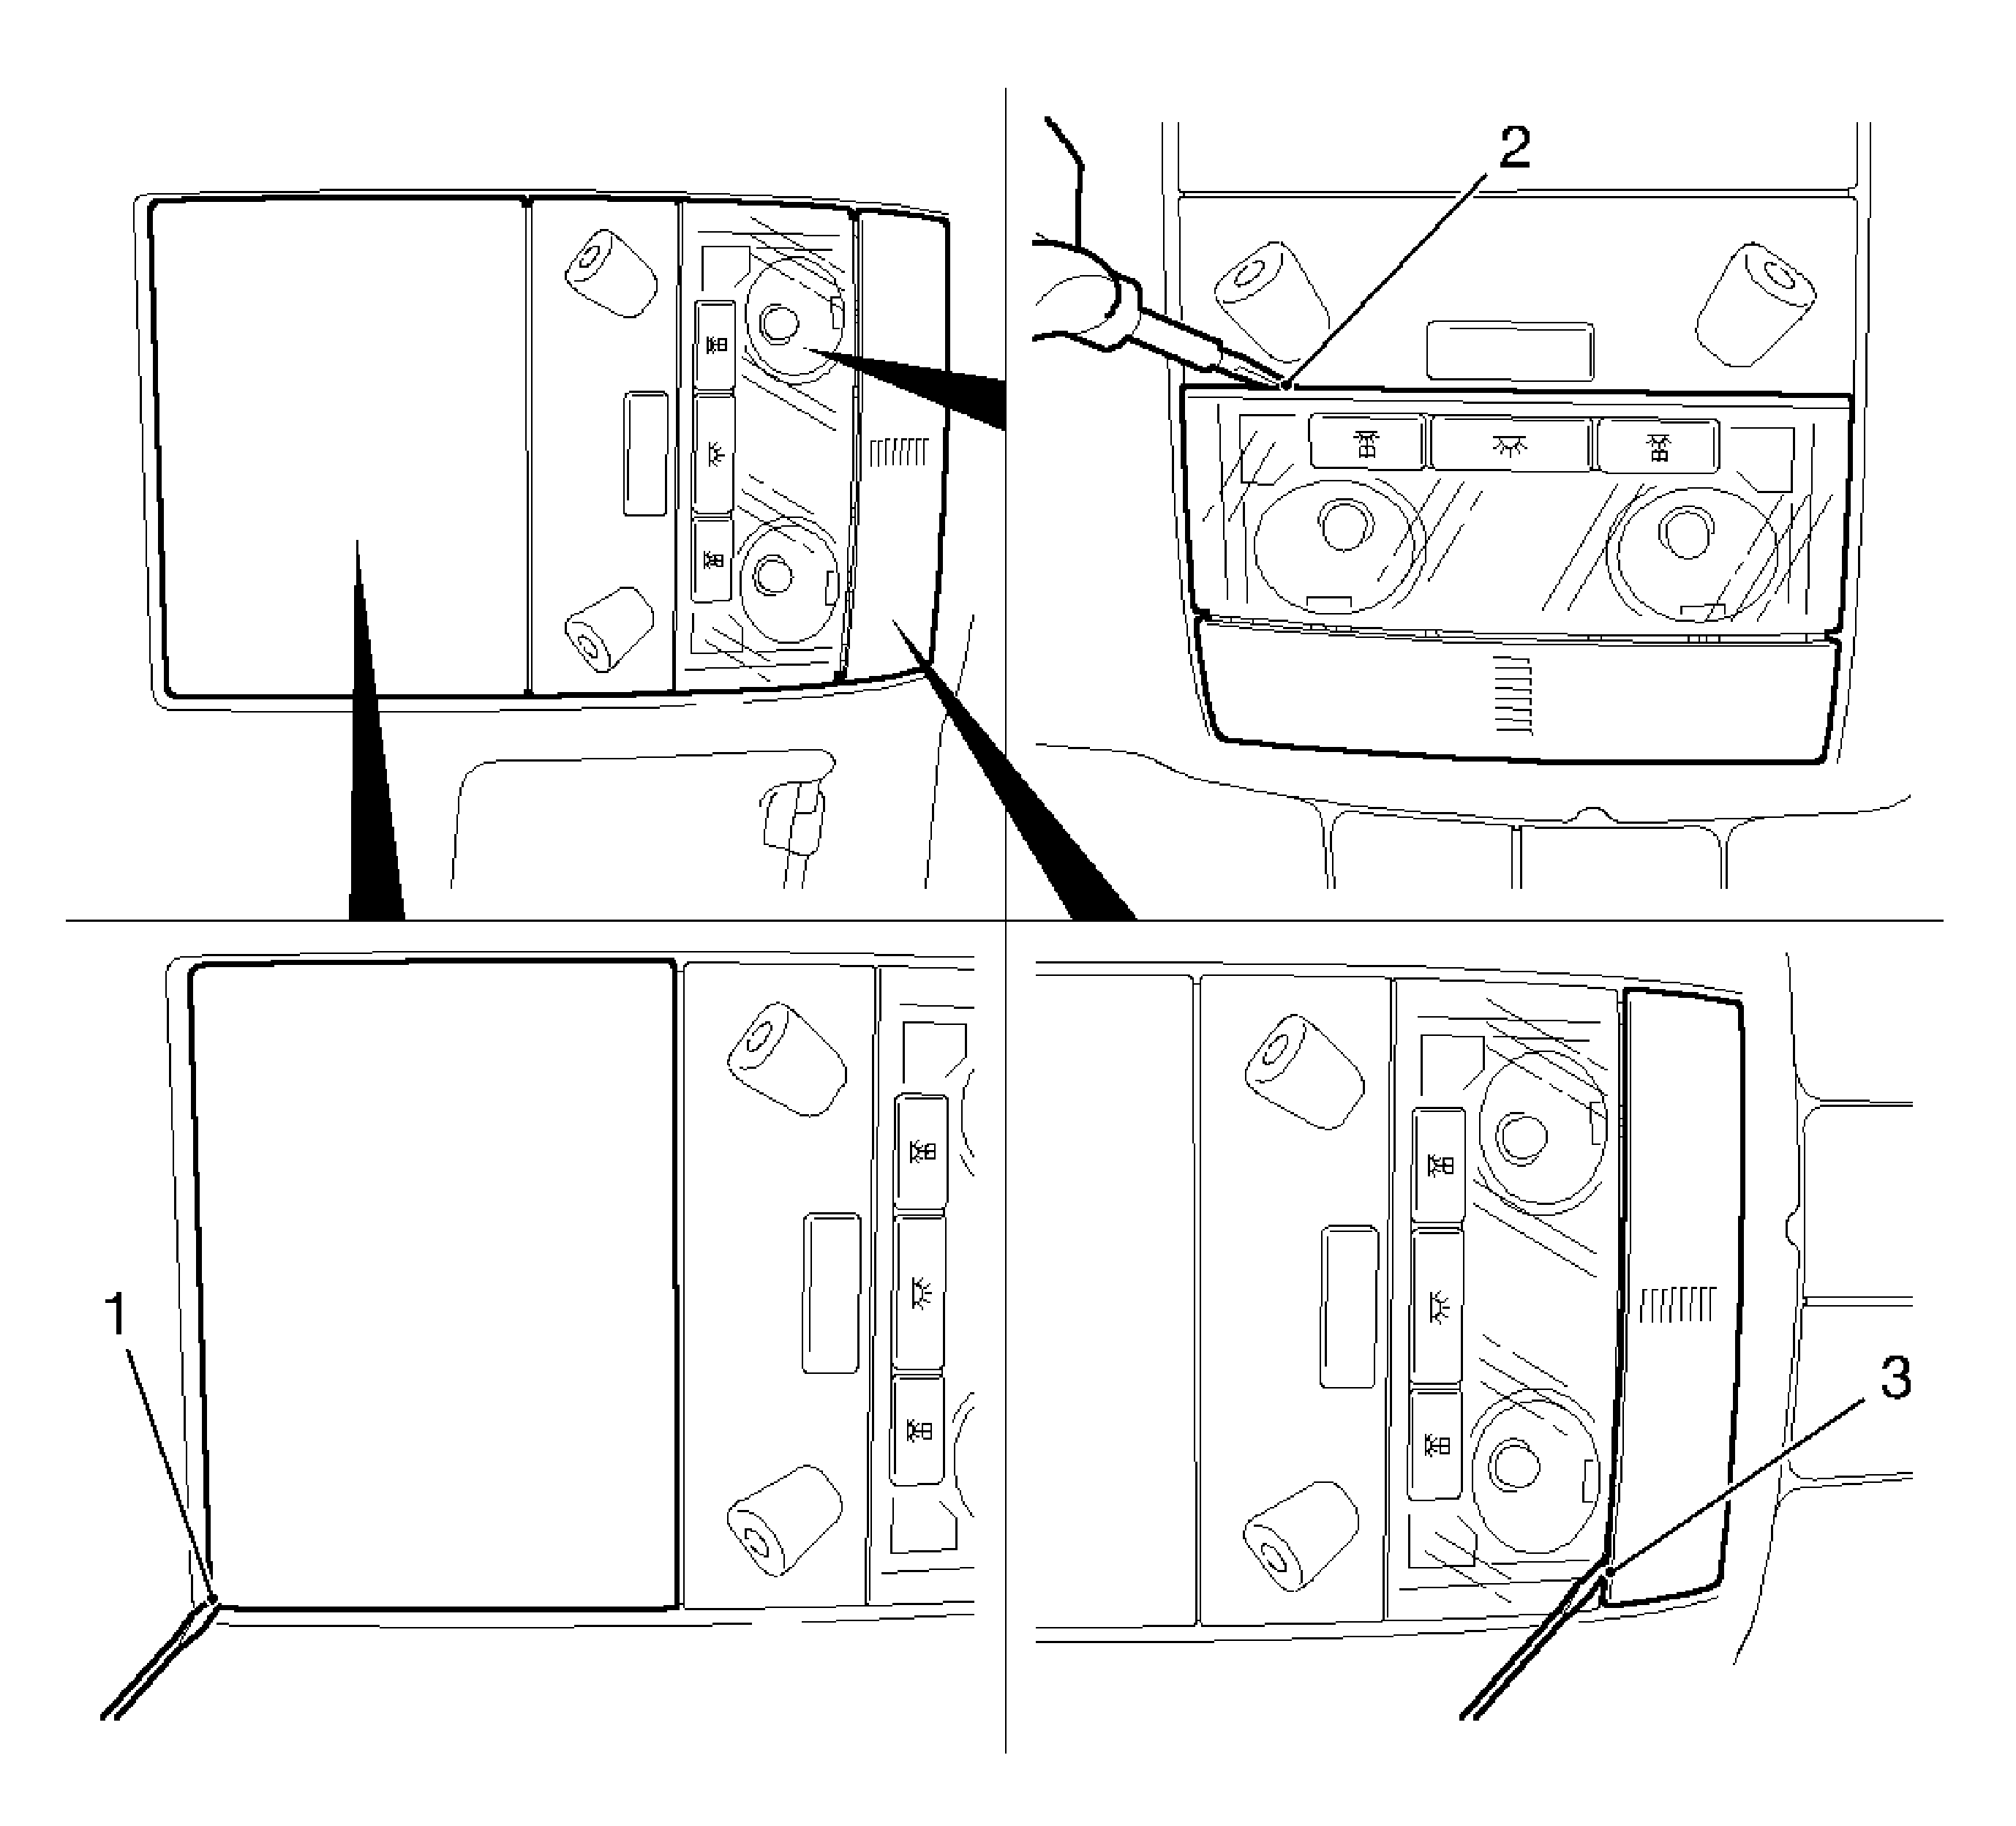
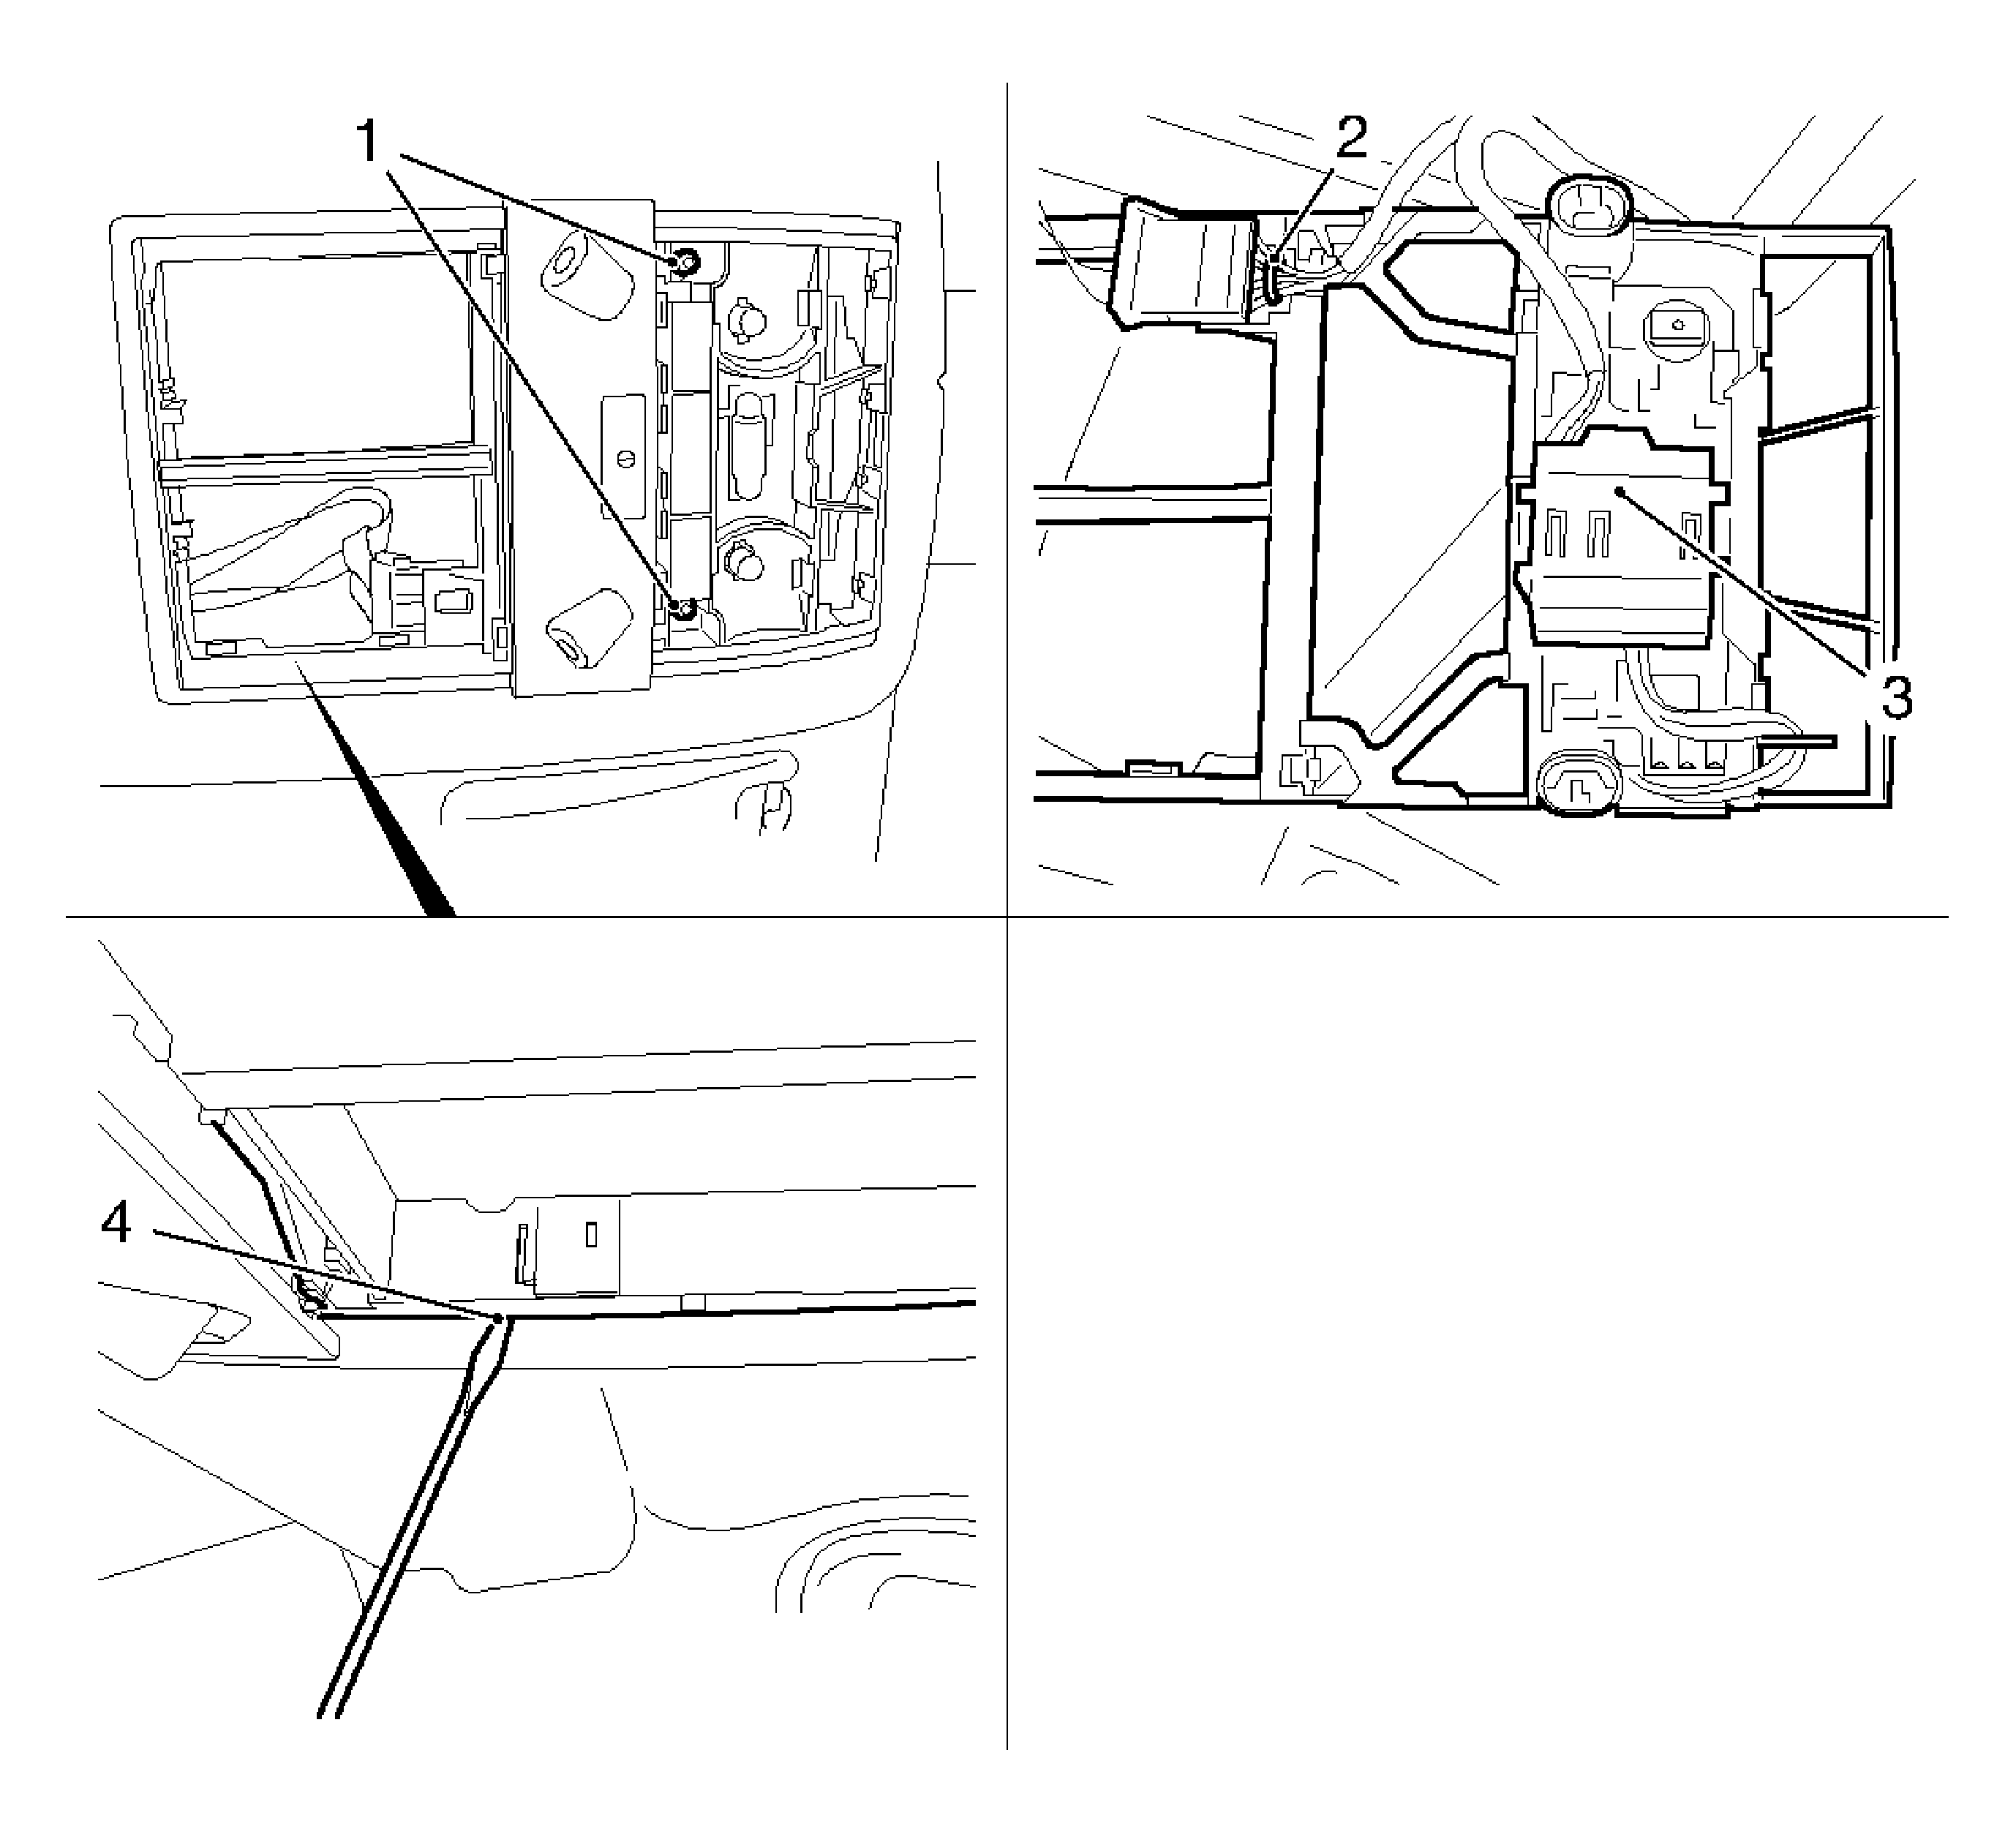
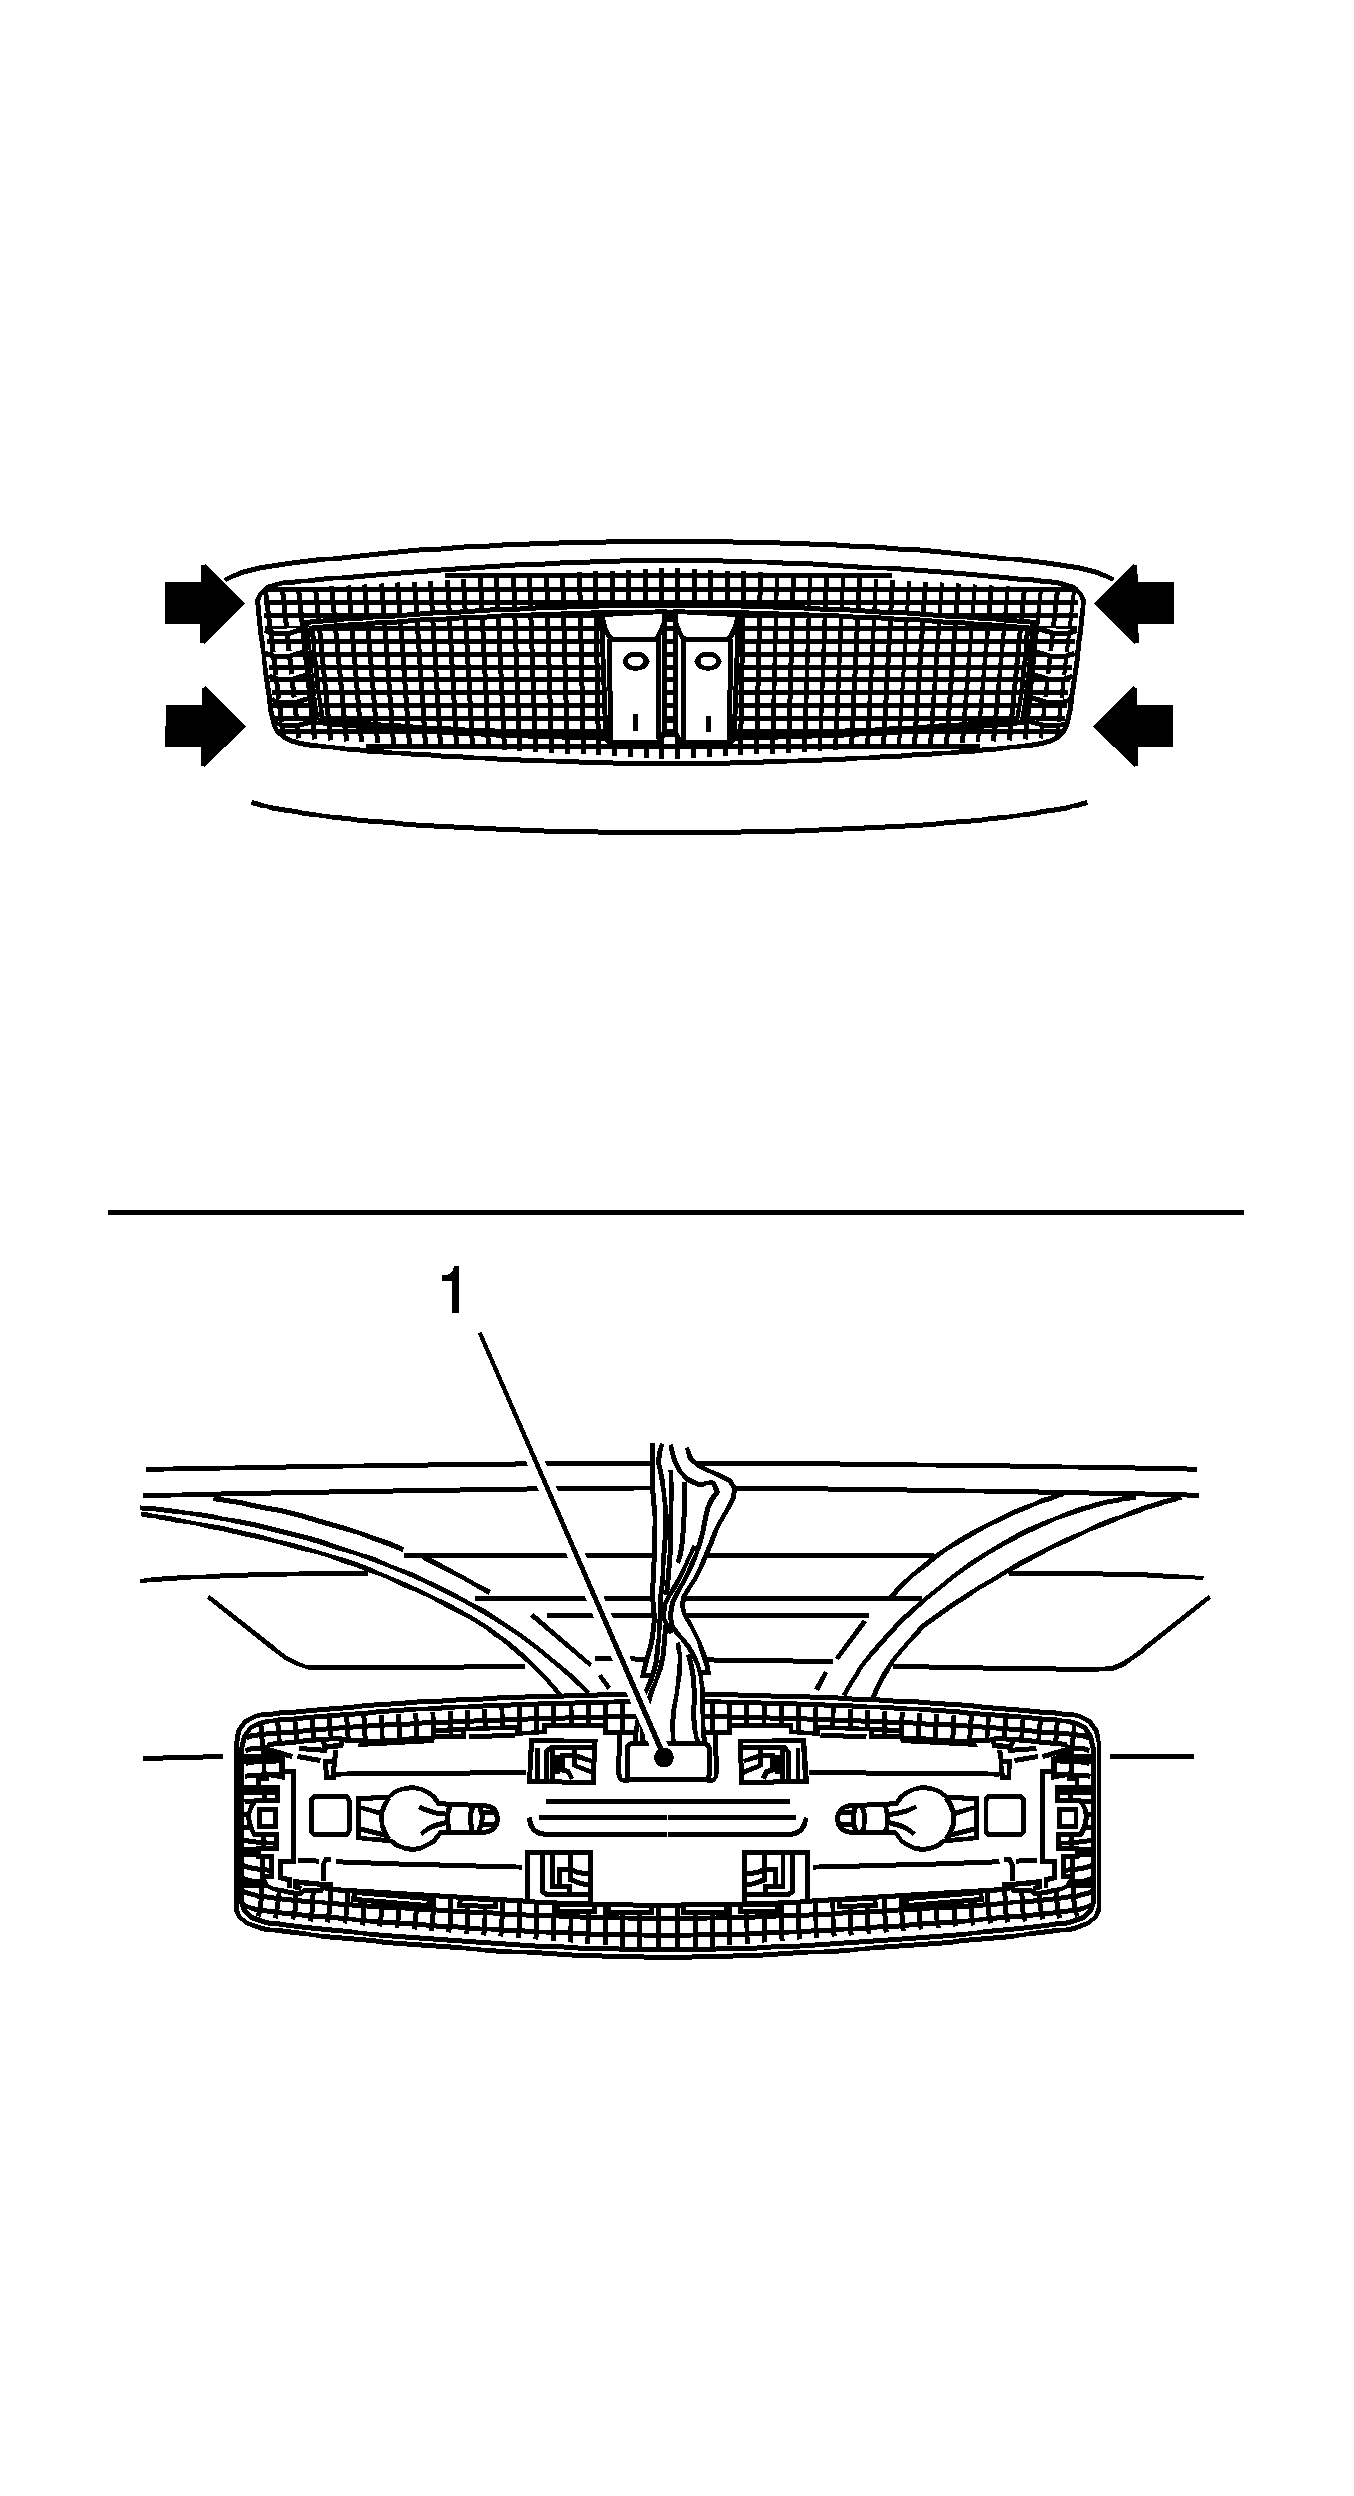
- Remove the rear interior lamp.
| 18.1. | Remove the interior light with a plastic wedge. |
| 18.2. | Disconnect the wiring harness plug. |

- Remove the sunroof operating unit and interior light.
| 19.1. | Disconnect 2 wiring harness plugs. |
| 19.2. | Remove the 2 bolts. |

- Loosen and remove the surrounding headlining.
Disconnect 2 wiring harness plugs.
Installation Procedure
- Insert the headlining.
Connect the 2 wiring harness plug.
- Fasten the headlining all the way around.
Place the headlining in the door weatherstrip.
Notice: Refer to Fastener Notice in the Preface section.
- Fasten the sunroof operating unit and the interior light.
| 3.1. | Connect the 2 wiring harness plugs. |
| 3.2. | Tighten the 2 bolts. |
Tighten
Tighten the 2 bolts to 2.8 N·m (23 lb in).
- Install the assist handle, left side.
| 4.1. | Tighten the 2 bolts. |
Tighten
Tighten the 2 bolts to 2.8 N·m (23 lb in).
- Install the rear assist handle, right side.
| 5.1. | Tighten the 2 bolts. |
Tighten
Tighten the 2 bolts to 2.8 N·m (23 lb in).
- Install the front assist handle, right side.
| 6.1. | Tighten the 2 bolts. |
Tighten
Tighten the 2 bolts to 2.8 N·m (23 lb in).
- Install the roof rail stowage compartment to the headlining.
| 7.1. | Tighten the 2 bolts. |
Tighten
Tighten the 2 bolts to 2.8 N·m (23 lb in).
- Install the sunshade support, right side.
Install the wedge with groove downward.
- Install the sunshade, left side.
Install the wedge with the groove downward.
- Install the sunshade, left side.
| 10.1. | Connect the wiring harness plug. |
| 10.2. | Install the sunshade into the main bracket. |
| 10.3. | Tighten the 2 bolts. |
Tighten
Tighten the 2 bolts to 1.5 N·m (13 lb in).
- Install the sunshade support, right side.
| 11.1. | Connect the wiring harness plug. |
| 11.2. | Install the sunshade into the main bracket. |
| 11.3. | Tighten the 2 bolts. |
Tighten
Tighten the 2 bolts to 1.5 N·m (13 lb in).
- Install the upper center pillar, left and right side. Refer to
Center Pillar Upper Garnish Molding Replacement
.
- Install the upper quarter trim, left side.
| 13.1. | Place the upper quarter trim, clip in the upper quarter trim paneling in the lower center pillar trim. |
| 13.2. | Install the 6 clips. |
- Install the seat belt on front seat, left side.
Tighten
Tighten bolt 20 N·m (15 lb ft).
- Use the screw locking compound.
- Install the front seat belt fastening, left side.
Install the trim panel.
- Install the rear quarter trim panel, right side.
| 16.1. | Place the rear quarter trim panel, clip in the upper rear quarter trim panel in the lower rear quarter trim panel. |
| 16.2. | Install the 6 clips. |
- Install the seat belt on the front seat, right side.
Tighten
Tighten bolt 20 N·m (15 lb ft).
- Use the screw locking compound.
- Install the front seat belt fastening, right side.
Install the trim panel.
- Install the windshield garnish molding, right side.
| 19.1. | Place inner windshield garnish molding. |
- Install the windshield garnish molding, left side.
| 20.1. | Install the windshield garnish molding. |
| 20.2. | Install the trim panel. |
- Install the rear compartment cover.
- Reposition the front seat to the original position.
- Connect the battery.
- For programming procedures, refer to
Control Module References
.
Headlining Trim Panel Replacement with Sunroof
Removal Procedure
Caution: Refer to Battery Disconnect Caution in the Preface section.
- Disconnect the battery.
- Remove the rear compartment cover.
- Remove the windshield garnish molding, both sides.
| 3.1. | Remove the access panel (1). |
| 3.3. | Remove the windshield garnish molding. |
- Remove the front seat belt trim panel (1).
Release and remove the trim panel upward (arrow).
- Remove the seat belt from front seat.
Remove the bolt (2).
- Remove the center pillar inner paneling, both sides.
| 6.1. | Remove the access panel (1). |
| 6.2. | Loosen the upper center pillar panel in lower area (2) and remove the upper center pillar panel. |
| 6.3. | Release the 6 clips. |
| 6.4. | Remove the center pillar trim. |
- Remove the rear quarter upper trim, both sides. Refer to
Quarter Upper Trim Panel Replacement
.
- Remove the roof rail front stowage compartment from the headlining.
| 8.1. | Open the panel (arrow). |
- Remove the sunshade, both sides.
| 9.2. | Disconnect the wiring harness plug. |
| 9.3. | Release the sunshade from the support and remove. |
Important: The spring of the main bracket is not secured and may fall down.
- Remove the sunshade support, both sides.
Release the main bracket wedge and remove the main bracket.
- Remove the 3 assist handles in the molded headlining.
| 11.1. | Open the panel (arrow). |
| 11.2. | Remove the 2 bolts. |
- Remove the rear interior lamp.
| 12.1. | Remove the interior light with a plastic wedge. |
| 12.2. | Disconnect the wiring harness plug. |
- Remove the sunroof operating unit and the interior light.
| 13.1. | Disconnect the 2 wiring harness plugs. |
| 13.2. | Remove the 2 bolts. |
- Remove the headlining piping.
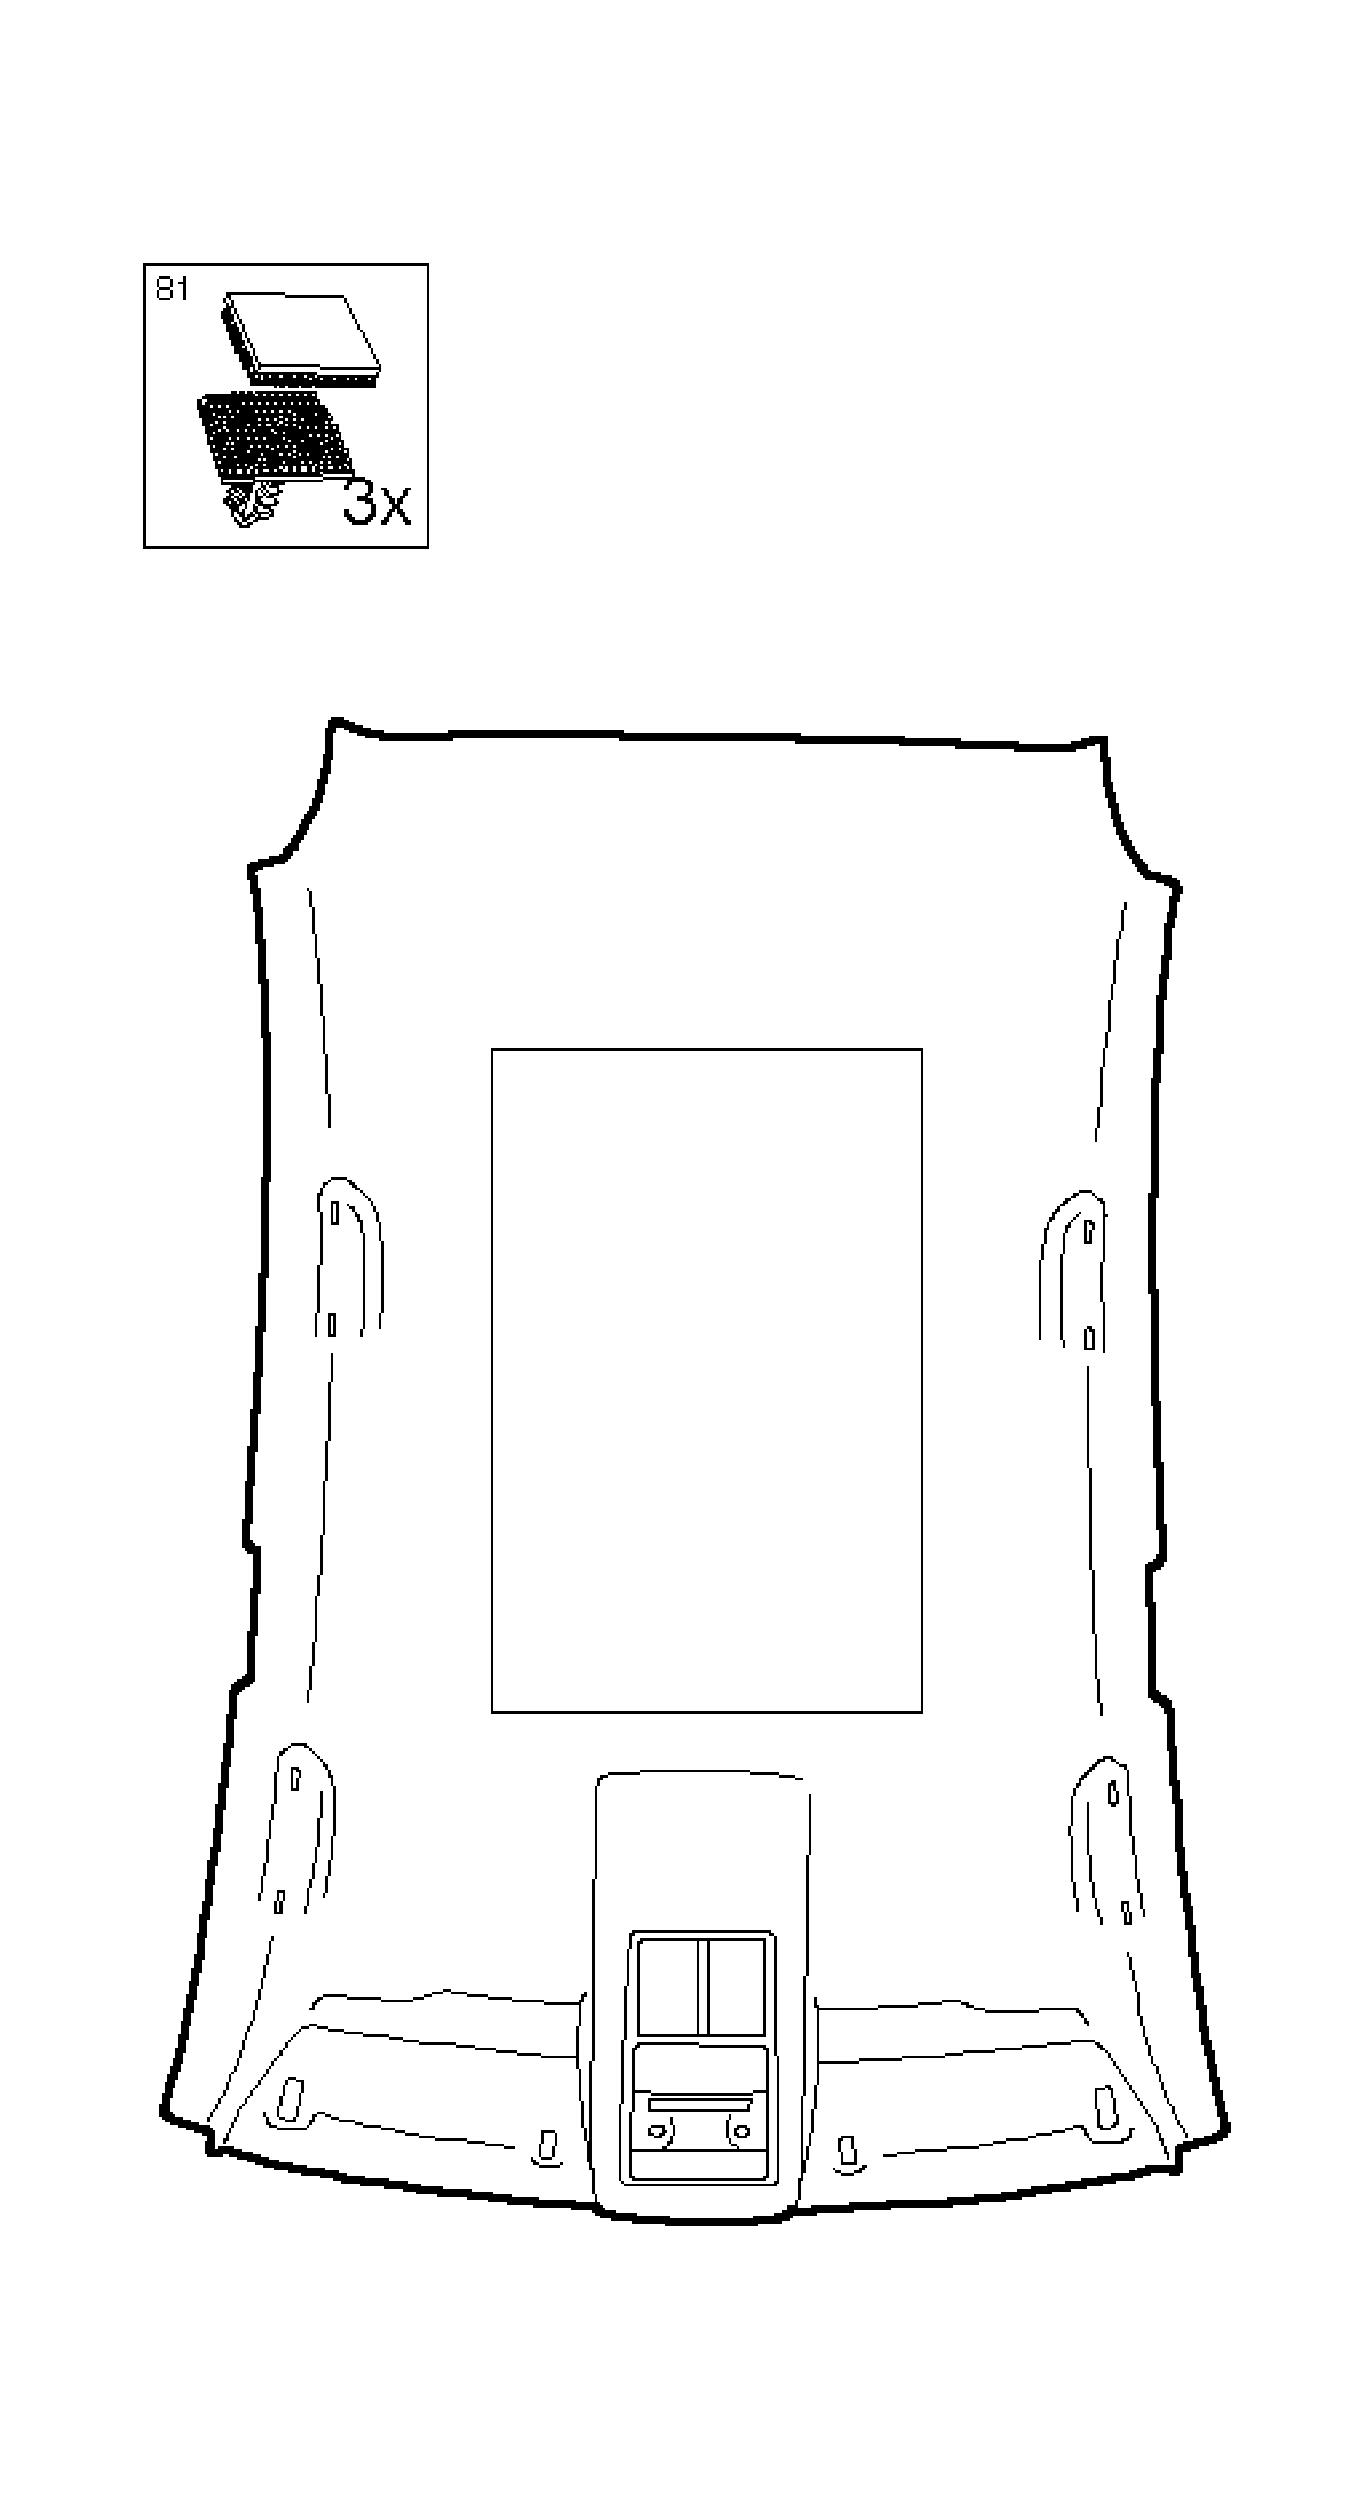
- Loosen and remove the surrounding headlining.
| 15.1. | Release in the area of the sunroof. |
| 15.2. | Disconnect the 2 wiring harness plugs. |
Installation Procedure
- Install the headlining.
| 1.1. | Install in the area of the sunroof. |
| 1.2. | Connect the 2 wiring harness plugs. |
- Fasten the headlining all the way around.
Place the headlining in the door weatherstrip.
Notice: Refer to Fastener Notice in the Preface section.
- Fasten the sunroof operating unit and the interior light.
| • | Install the interior light. |
| • | Connect the 2 wiring harness plugs. |
Tighten
Tighten the 2 bolts to 1.5 N·m (13 lb in).
- Install the 3 headlining assist handles at the rear.
| 4.1. | Tighten the 2 bolts. |
Tighten
Tighten the 2 bolts 2.8 N·m (23 lb in).
- Install the roof rail stowage compartment headlining.
| 5.1. | Tighten the 2 bolts. |
Tighten
Tighten the 2 bolts 2.8 N·m (23 lb in).
- Install the sunshade support, both sides.
Install the wedge with the groove downward.
- Install the sunshade, both sides.
| 7.1. | Connect the wiring harness plug. |
| 7.2. | Install the sunshade into the main bracket. |
| 7.3. | Tighten the 2 bolts. |
Tighten
Tighten 2 bolts 1.5 N·m (13 lb ft).
- Install the rear upper quarter trim panel, both sides. Refer to
Quarter Upper Trim Panel Replacement
.
- Install the upper center pillar molding, both sides. Refer to
Center Pillar Upper Garnish Molding Replacement
.
| 9.1. | Position the center pillar trim, install the upper center pillar trim in the lower center pillar trim . |
| 9.2. | Install the 6 clips. |
- Install the seat belt on front seat, both sides.
Use screw locking compound.
Tighten
Tighten bolt 20 N·m (15 lb ft).
- Install the front seat belt securing panel, both sides.
Install the panel.
- Install the windshield garnish molding, both sides.
| • | Place the windshield garnish molding. |
- Install the load compartment cover.
- Reposition the front seat to the original position.
- Connect the battery.
- For programming procedures, refer to
Control Module References
.
Headlining Trim Panel Replacement Coupe
Removal Procedure
- Remove the windshield. Refer to
Windshield Replacement
.
- Remove the rear compartment cover.
- Remove the upper center pillar, left side.
| 3.1. | Pull out the access panel (1) from the center pillar molding. |
| 3.2. | Remove the seat belt bolts from the center pillar. |
| 3.4. | Remove the upper center pillar upward. |
- Remove the upper center pillar molding, right side.
| 4.1. | Pull out the panel from the center pillar molding. |
| 4.2. | Remove the seat belt bolts from the center pillar. |
| 4.4. | Remove the upper center pillar upward. |

- Remove the upper rear quarter trim, left side.
| 5.1. | Remove the upper rear quarter trim seat belt fastening screws. |
| 5.2. | Remove the cover cap (1). |
| 5.3. | Release the 3 rear quarter trim inner paneling clips. |
- Remove the upper rear quarter trim, right side.
| 6.1. | Remove the upper rear quarter trim seat belt fastening screws. |
| 6.2. | Remove the cover cap. |
| 6.3. | Release the 3 upper rear quarter trim inner paneling clips. |

- Remove the left sunshade.
| 7.1. | Remove the 2 bolts (arrows). |
| 7.2. | Loosen the wiring harness plug insulating tape. |
| 7.3. | Disconnect the mirror lighting wiring harness plug (1). |
Important: The spring of the main bracket is not secured and may fall down.
- Remove the left sunshade support.
| 8.1. | Remove the sunshade. |
| 8.2. | Pull out the main bracket wedge and remove the main bracket. |
- Remove the right sunshade.
| 9.2. | Loosen the wiring harness plug insulating tape. |
| 9.3. | Disconnect the mirror lighting wiring harness plug. |
Important: The spring of the main bracket is not secured and may fall down.
- Remove the right sunshade support.
| 10.1. | Remove the sunshade. |
| 10.2. | Pull out the main bracket wedge and remove the main bracket. |
- Release the microphone panels (3) and release the sunroof actuation unit panel (1).
Release using a suitable tool (screwdriver).
- Remove the interior light lens (2).
- Loosen the front interior light bracket.
| 13.1. | Remove the 2 bolts (1). |
| 13.2. | Remove the brackets (4) all around. |
| 13.3. | Release the wiring harness brackets (2). |
| 13.4. | Disconnect the wiring harness plugs (3). |
- Remove the assist handle in the molded headlining.
| 14.1. | Release the 2 covers (arrow). |
| 14.2. | Remove the 2 bolts. |
- Remove the front roof rail stowage compartment.
| 15.1. | Release the 2 covers (arrow). |
| 15.2. | Remove the 2 bolts. |
- Remove the rear seat interior light.
| 16.1. | Release the left light, side. |
| 16.2. | Disconnect the wiring harness plug (1). |
Important: Removal of the headlining is only possible through the windshield. Place the front seats as far back as possible.
- Remove the headlining.
| 17.1. | Disconnect the rear inner lighting wiring harness plug. |
| 17.2. | Loosen the 4 hook and loop fasteners. |
| 17.3. | Position the headlining in the vehicle interior. |
- Remove the headlining through the windshield opening.
Installation Procedure
- Insert the headlining through the windshield opening.
- Install the headlining.
| 2.1. | Join the 4 hook and loop fasteners. |
| 2.2. | Position the door seal cover lip left and right over the headlining. |
| 2.3. | Connect the rear interior light wiring harness plug. |
- Install the rear seats interior light.
| 3.1. | Connect the wiring harness plug. |
Notice: Refer to Fastener Notice in the Preface section.
- Install the front roof rail stowage compartment.
| 4.1. | Tighten the 2 bolts. |
Tighten
Tighten 2 bolts to 2.8 N·m (23 lb in).
| 4.2. | Install the 2 covers. |
- Install the right front assist handle.
| 5.1. | Tighten the 2 bolts. |
Tighten
Tighten 2 bolts to 2.8 N·m (23 lb in).
- Secure the front interior light bracket.
| 6.1. | Connect the wiring harness plug. |
| 6.2. | Install the wiring harness bracket. |
| 6.3. | Install the bracket in all around. |
Tighten
Tighten the 2 bolts to 1.5 N·m (13 lb in).
- Install the interior light lens.
Install the 4 clips.
- Install the microphone panel and the sunroof actuation unit panel.
Install the 2 panels.
- Install the left sunshade support.
Install the support assembly in the front roof frame.
- Install the left sunshade.
| 10.1. | Connect the mirror lighting wiring harness plug. |
| 10.2. | Fasten the wiring harness plug insulating tape. |
Tighten
Tighten the 2 bolts to 2.2 N·m (19 lb in).
| 10.3. | Install the sunshade into the support. |
- Install the right sunshade support.
Install the support assembly in front roof frame.
- Install the right sunshade.
| 12.1. | Connect the mirror lighting wiring harness plug. |
| 12.2. | Fasten the wiring harness plug insulating tape. |
Tighten
Tighten the 2 bolts to 2.2 N·m (19 lb in).
| 12.3. | Install the sunshade into the support. |
- Install upper rear quarter trim inner paneling, left side.
| 13.1. | Install the 3 rear quarter trim inner paneling clips. |
| 13.2. | Tighten the rear quarter trim seat belt fastening screws. |
| 13.3. | Install the cover cap. |
- Install the upper rear quarter trim inner paneling, right side.
| 14.1. | Install the 3 rear quarter trim inner paneling clips. |
| 14.2. | Tighten the rear quarter trim seat belt fastening screws. |
| 14.3. | Install the cover cap. |
- Install the upper center pillar trim, left side.
| 15.1. | Guide the center pillar trim paneling from above in the inner paneling guide front of rear quarter panel. |
| 15.2. | Install the upper center pillar trim paneling. |
| 15.3. | Press in the expanding bolt. |
| 15.4. | Tighten the seat belt bolt. |
Tighten
Tighten the bolt to 35 N·m (26 lb ft).
| 15.5. | Install the cover cap. |
| 15.6. | Pull the door seal edge spoiler over the molding. |
- Install the upper center pillar trim moulding, right side.
| 16.1. | Guide the center pillar trim paneling from above in the inner paneling guide front of the rear quarter panel. |
| 16.2. | Install the upper center pillar trim paneling. |
| 16.3. | Press in the expanding bolt. |
| 16.4. | Tighten the seat belt bolt. |
Tighten
Tighten the bolt to 35 N·m (26 lb ft).
| 16.5. | Install the cover cap. |
| 16.6. | Pull the door seal edge spoiler over the molding. |
- Install the rear compartment cover.
- Reposition the front seat to the original position.
- Install the windshield. Refer to
Windshield Replacement
.
