Tools Required
| • | J 44014 Torque Converter Bolt Magnetic Socket |
| • | J 42098 V6 Crankshaft Bolt Socket |
| • | J 43405 Engine Support Fixture Adapter |
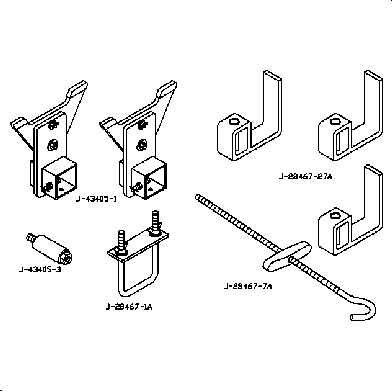
| • | SA9105E Engine Support Bar Assembly |
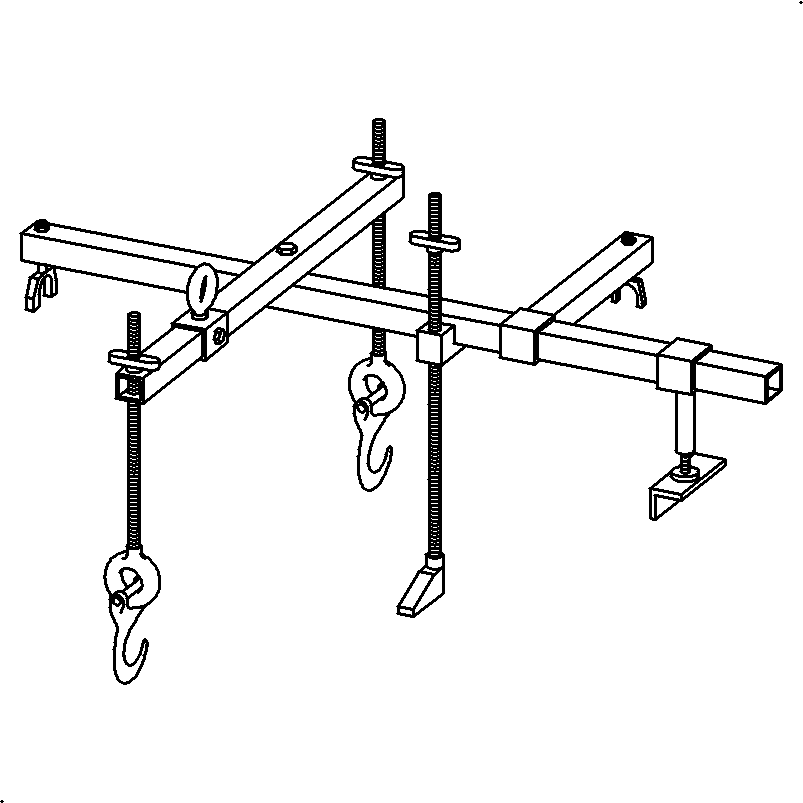
Removal Procedure
- Position the vehicle on a hoist.
- Remove the battery. Refer to Battery Replacement .
- Disconnect the underhood fuse block (UHFB). Refer to Underhood Electrical Center or Junction Block Replacement.
- Remove the battery tray fasteners and battery tray.
- Remove the Transaxle Electrical connector and ground strap.
- Remove the remaining wiring harness attachment from the transaxle.
- Disconnect the control cable from the transaxle range switch lever with a screwdriver.
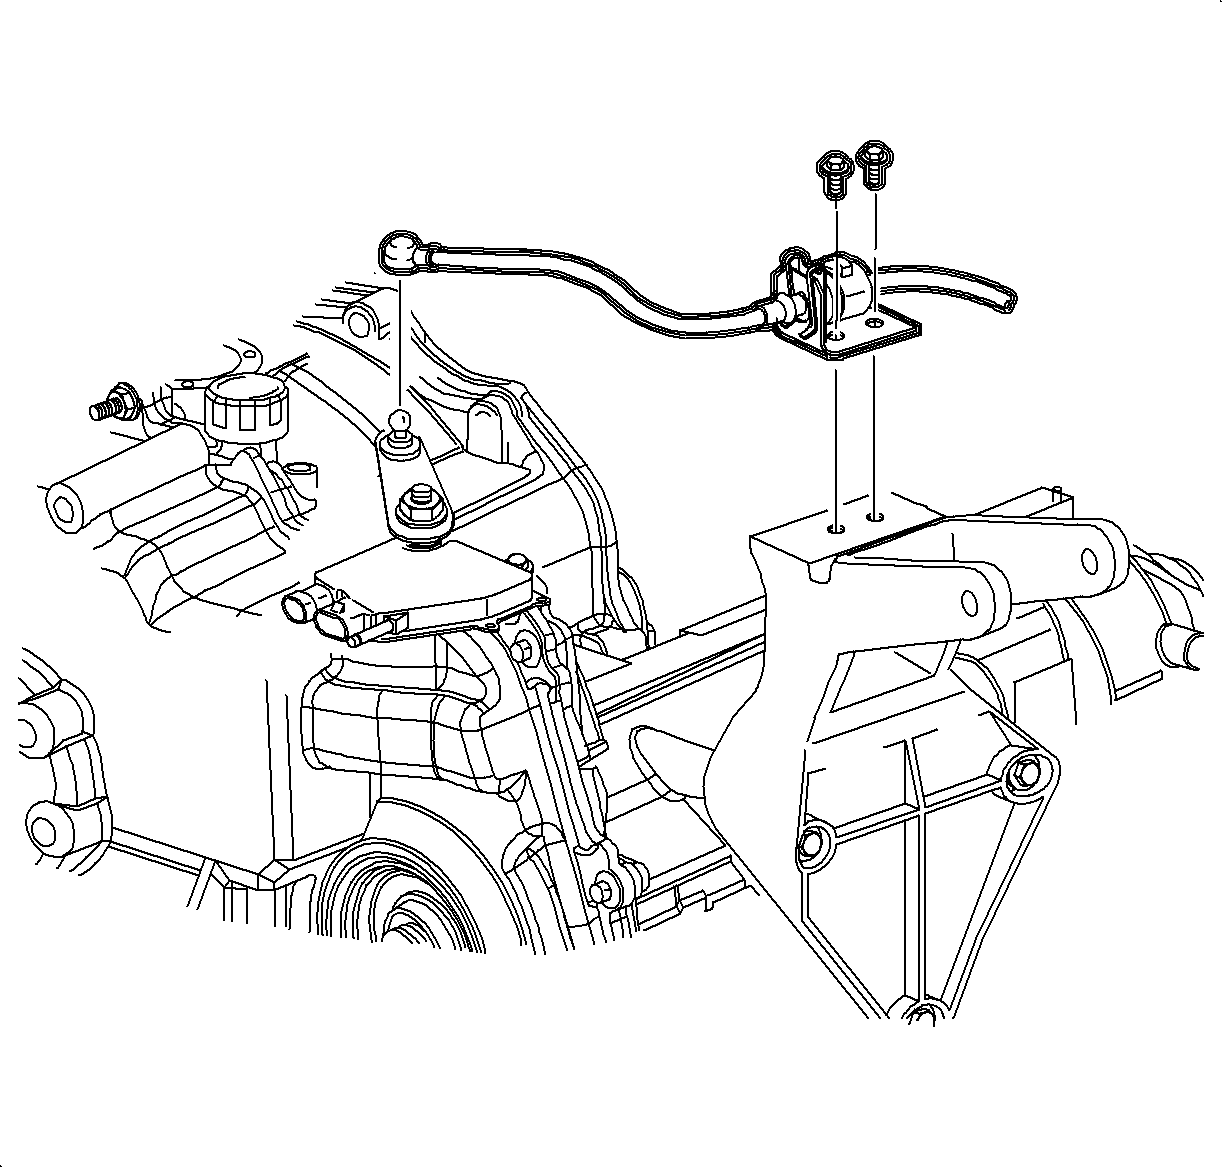
- Remove the control cable bracket from the rear powertrain mount. Tie the cable and bracket to the dash panel.
- Remove the transaxle range switch electrical connector.
- Remove the upper engine-to-transaxle mounting bolts.
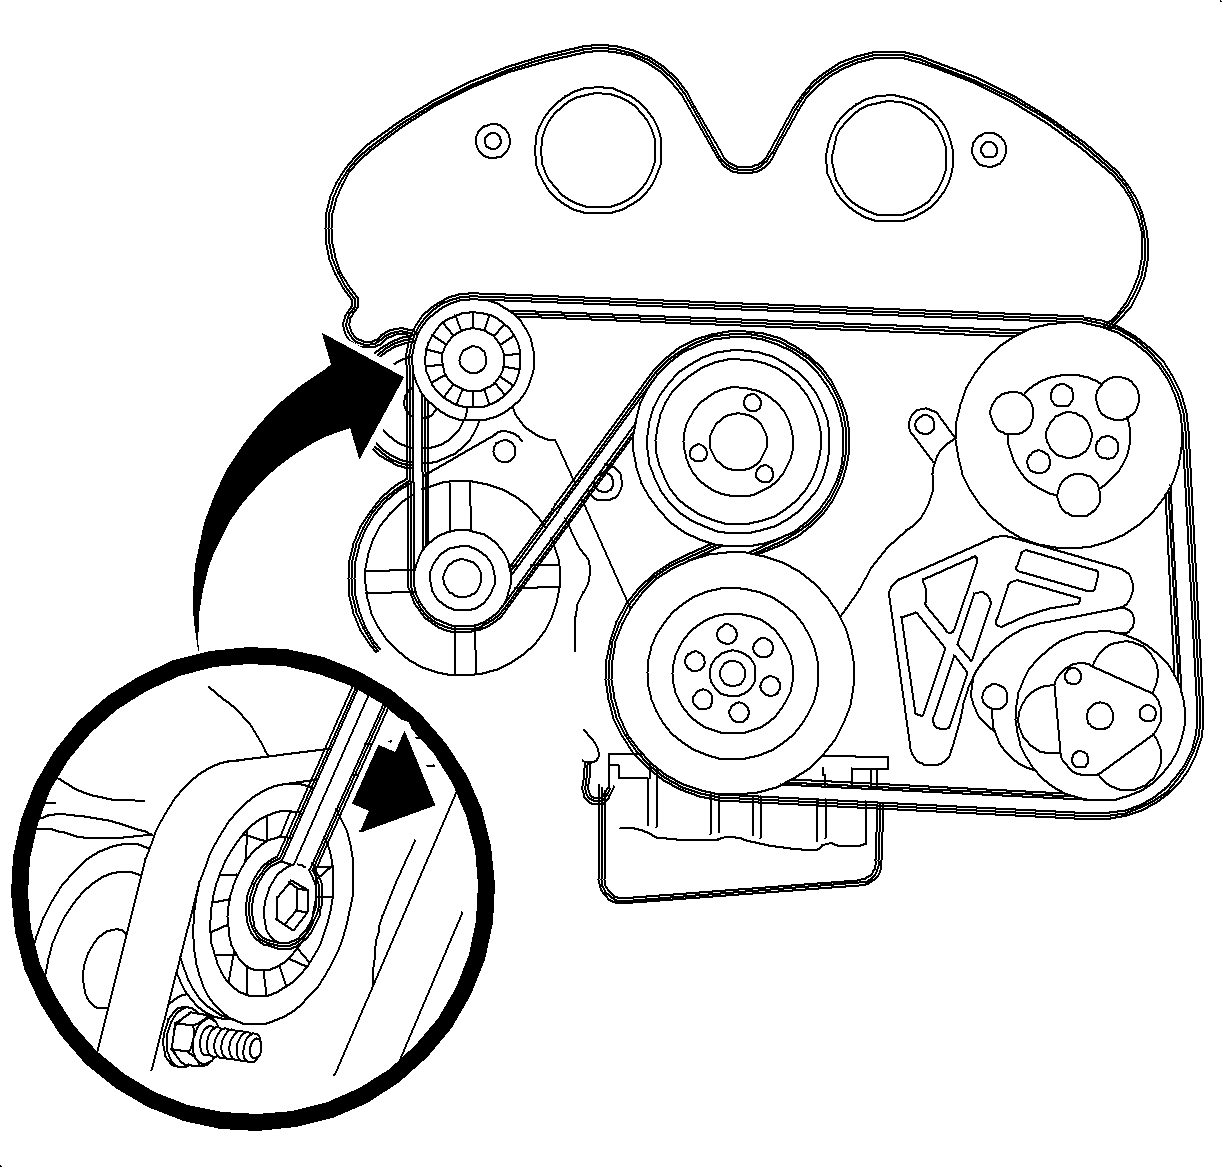
- Remove the accessory drive belt from the generator. There is no need to remove the belt (L81 [V6] only).
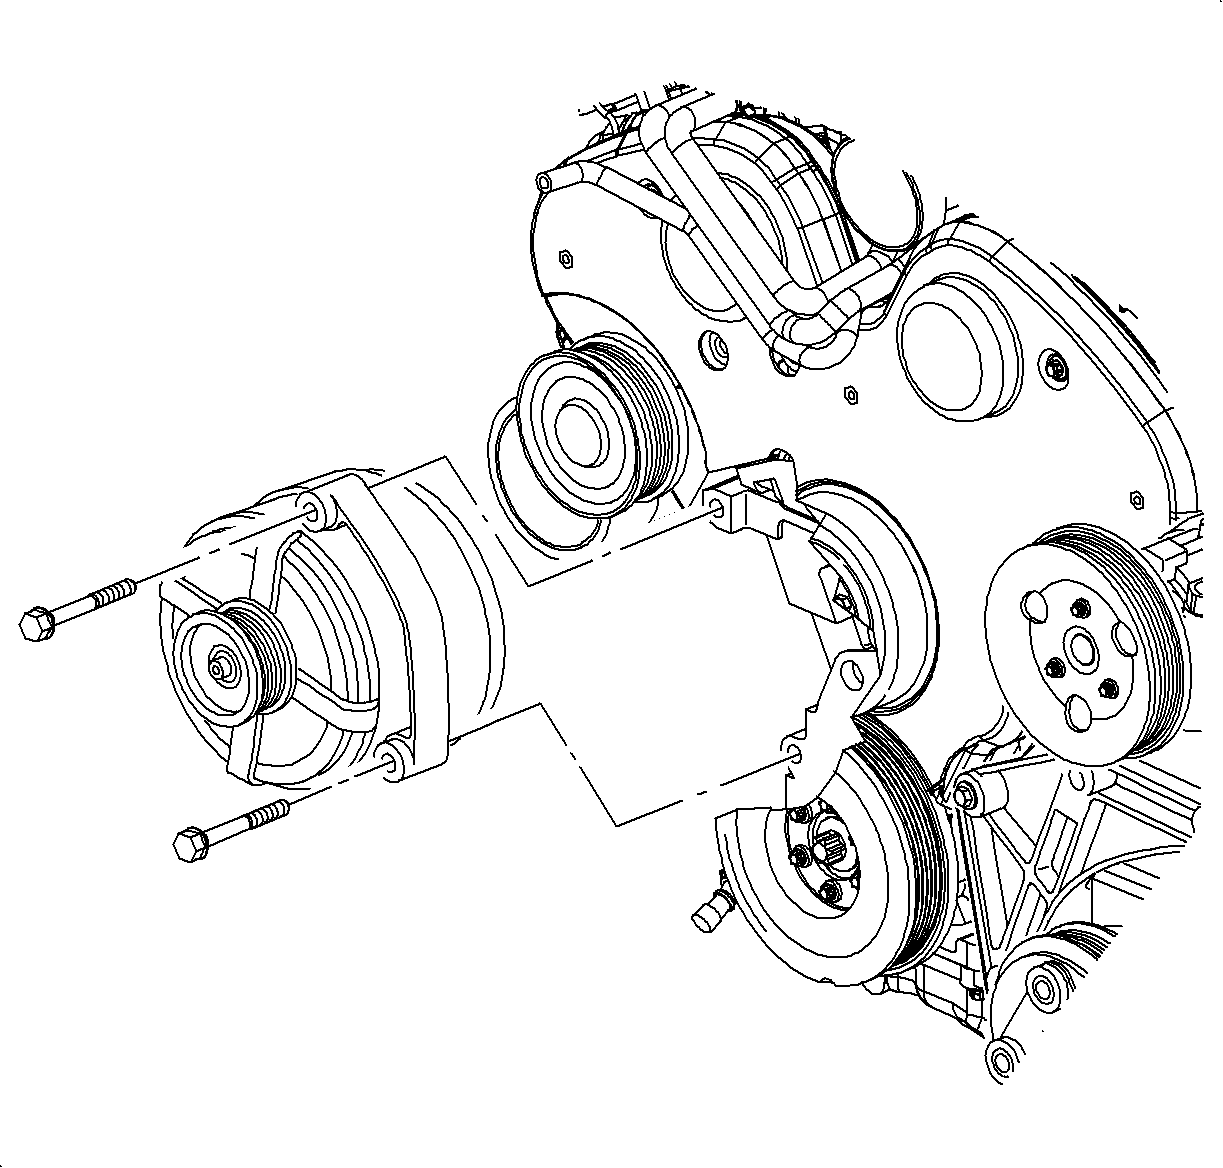
- Remove the accessory drive belt tensioner assembly (81 [V6] only).
- Remove the generator (L81 [V6] only).
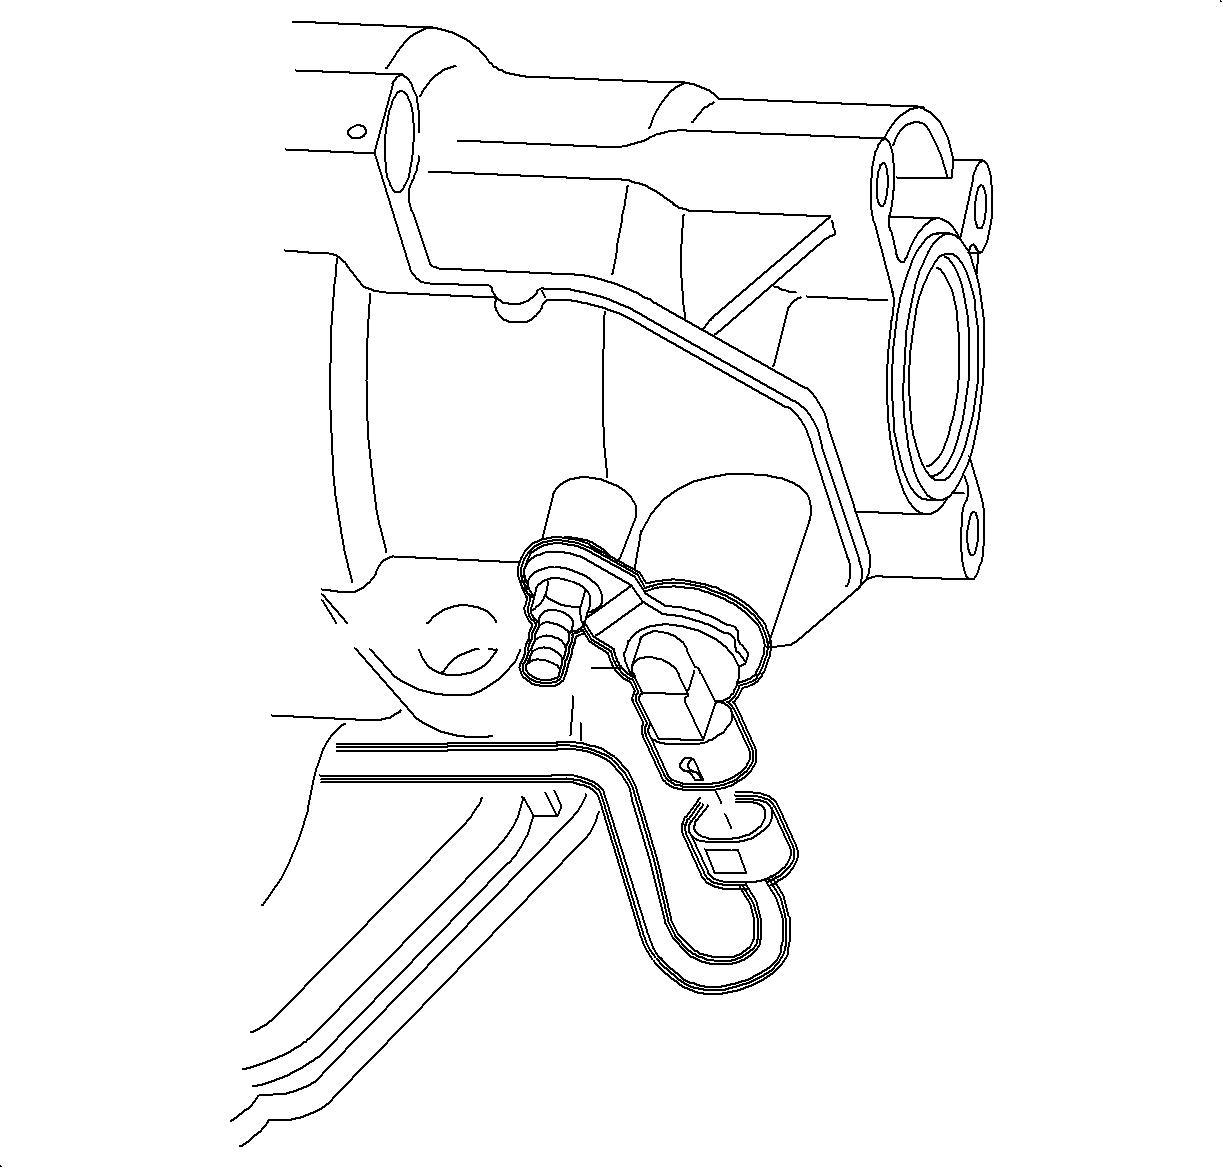
- Disconnect the output speed sensor electrical connector. Remove the harness from the mounting stud.
- Install the SA9105E with J 43405 as shown for L61 L4.
- Install the SA9105E with J 43405 as shown for L81 V6.
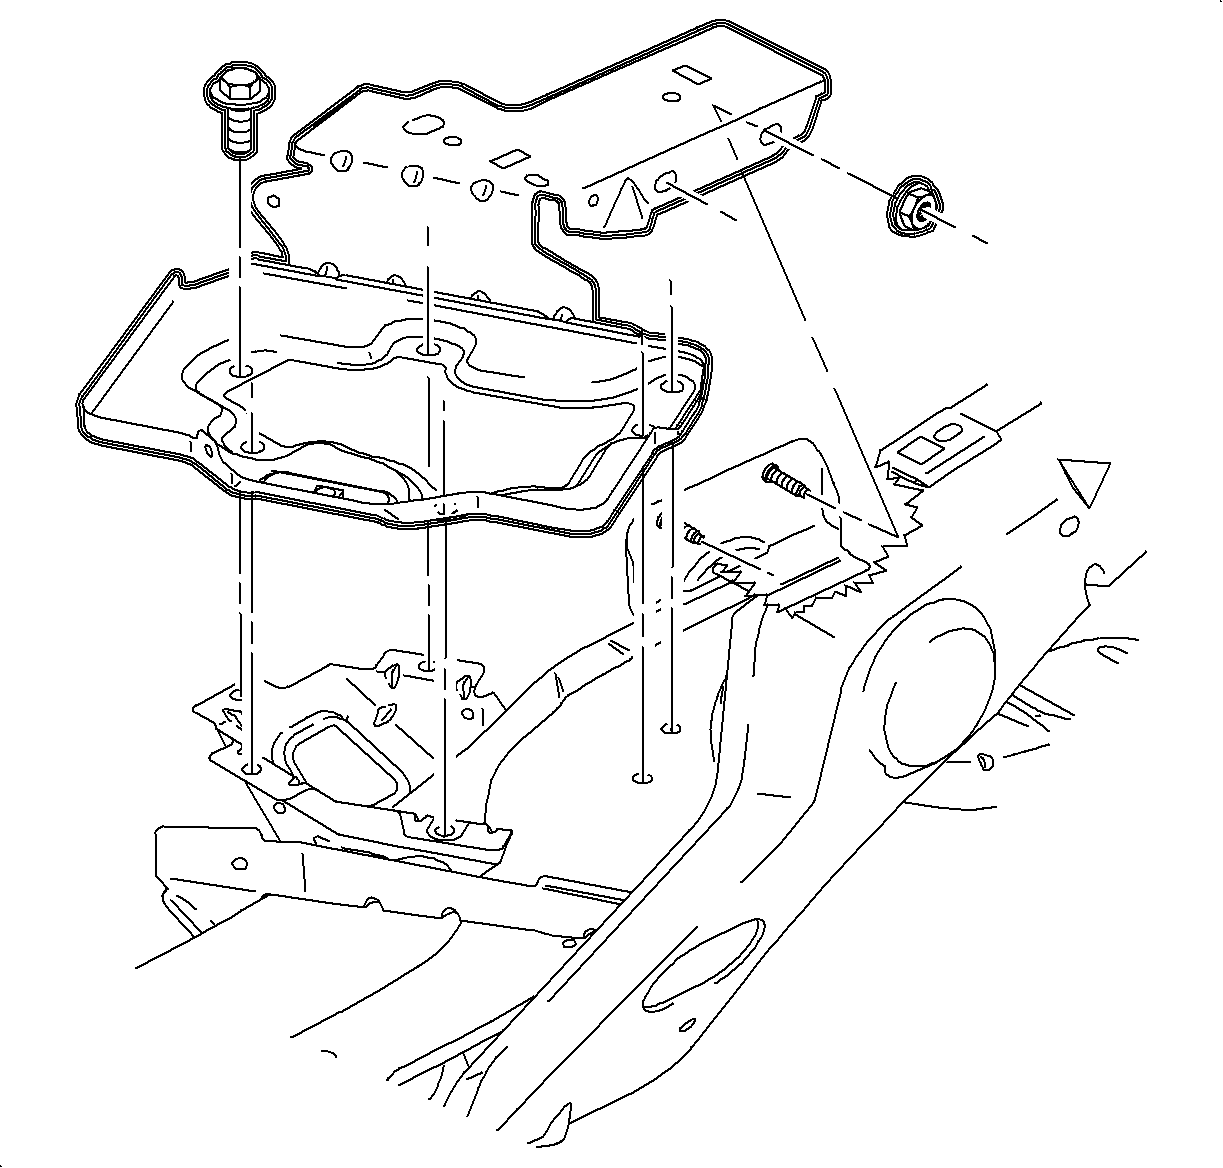
- Remove the frame assembly. Refer to Frame Replacement in Frame.
- Use a pry bar to remove the axle shafts from the transaxle. Leave axle shafts in the steering knuckles and secure the axle shafts up and out of the way of the transaxle removal path.
- Remove the engine-to-transaxle bracket. (L4 shown, V6 similar).
- Remove the starter solenoid electrical connections.
- Remove the starter motor. (V6 shown, L4 similar)
- Use J 44014 to remove the flexplate to torque converter bolts through starter opening in the engine block. TORX® V6 J 42098 can be used to turn the V6 crankshaft.
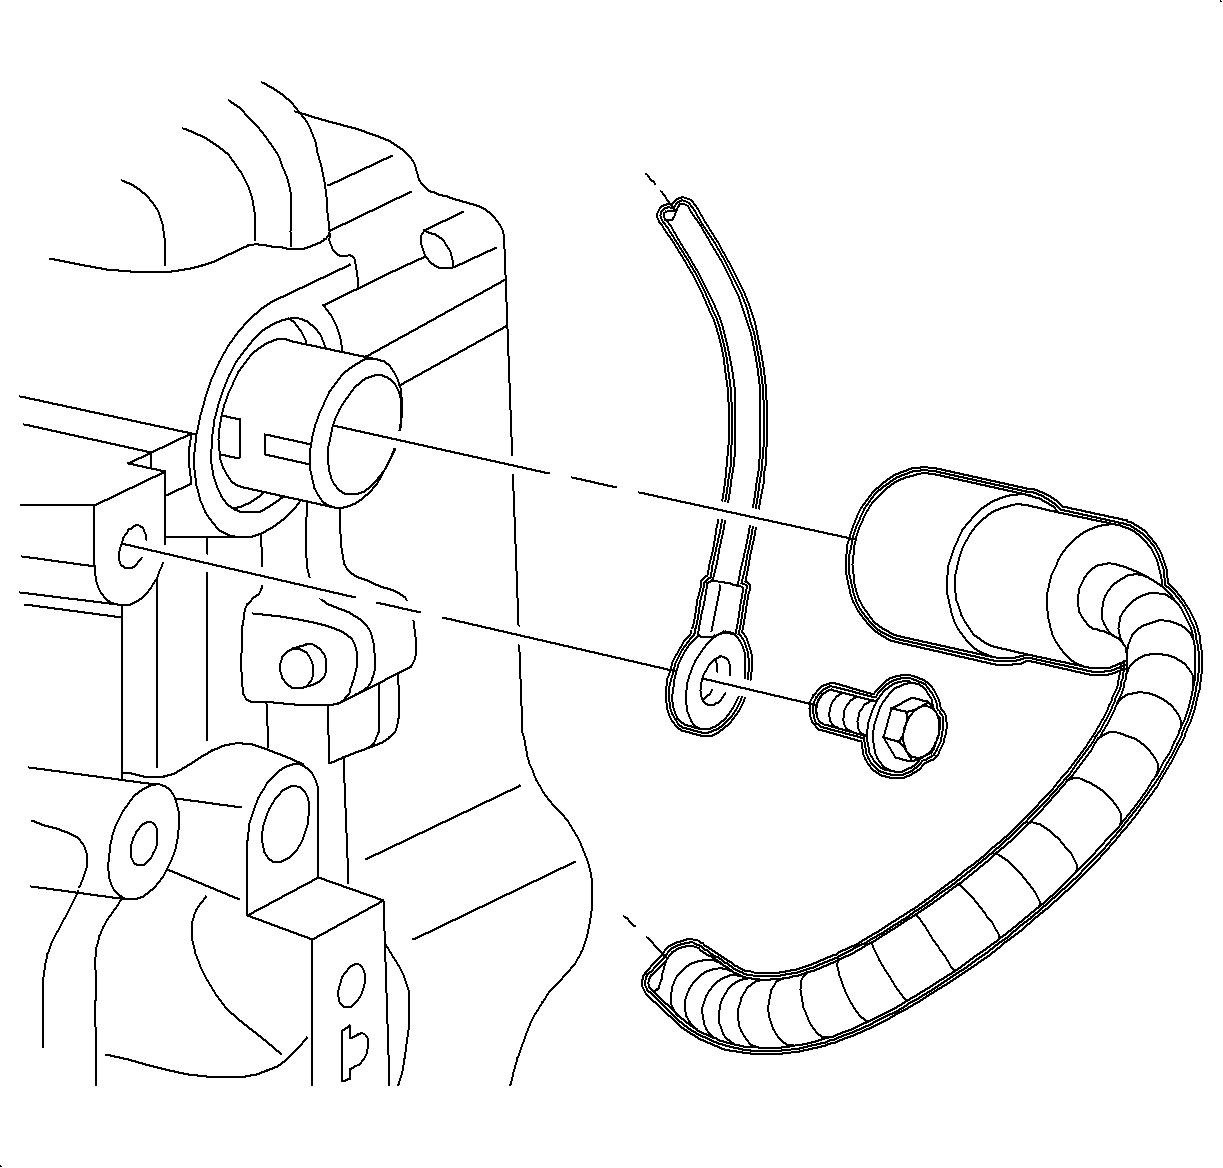
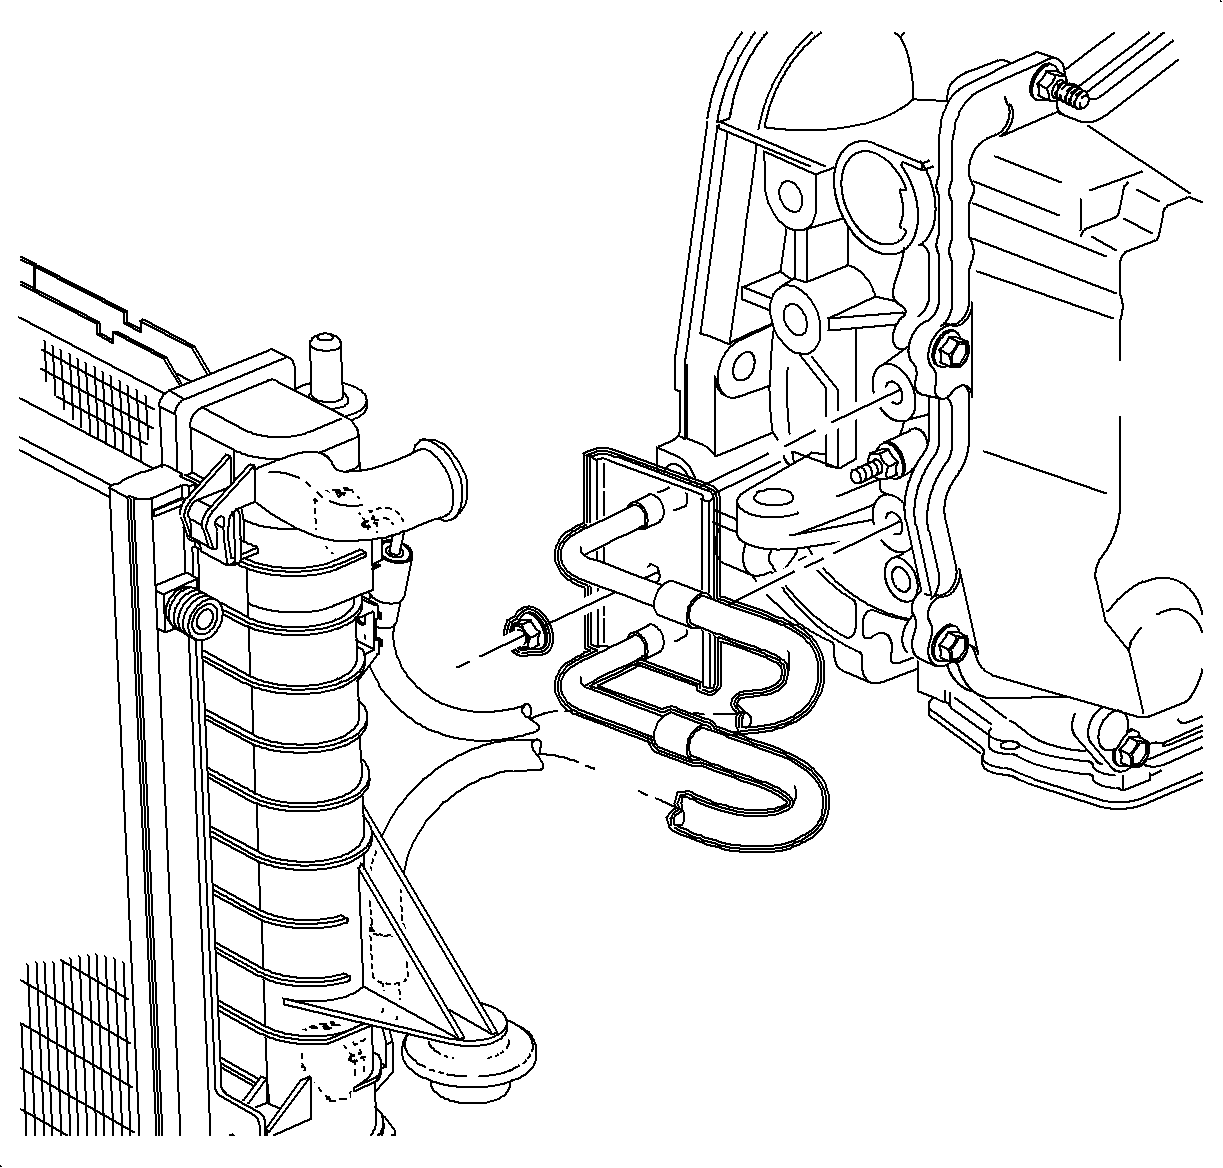
- Remove the transaxle oil cooler line assembly from the transaxle.
- Remove the lower two engine to transaxle mounting bolts.
- Lower the vehicle.
- Mark the position of and remove the left transaxle mount bolts.
- Raise the vehicle.
- Slide the hydraulic lift table under the transaxle.
- Lower the vehicle slowly until transaxle is on the hydraulic lift table. Place a wood block between barrel of transaxle and surface of table.
- Remove the remaining engine-to-transaxle mounting bolts.
- Slide the transaxle away from the engine assembly and raise vehicle away from the transaxle. (V6 shown, L4 similar)

Caution: Ensure that the vehicle is properly supported and squarely positioned. To help avoid personal injury when a vehicle is on a hoist, provide additional support for the vehicle on the opposite end from which the components are being removed.
Important: One of the wiring harness mounting brackets on the L81 (V6) engine is fastened behind an engine-to-transaxle mounting bolt. This bracket cannot be removed at this point. It will be removed prior to engine/transaxle separation.


Notice: To prevent damage to CV Joint boots, be careful not to allow them to contact other parts during the removal/installation process. Also, never pull on the shaft assembly.


Important: To gain access to V6 starter assembly mounting bolts, the wiring harness mounting bracket on the rear of the engine block must be removed.
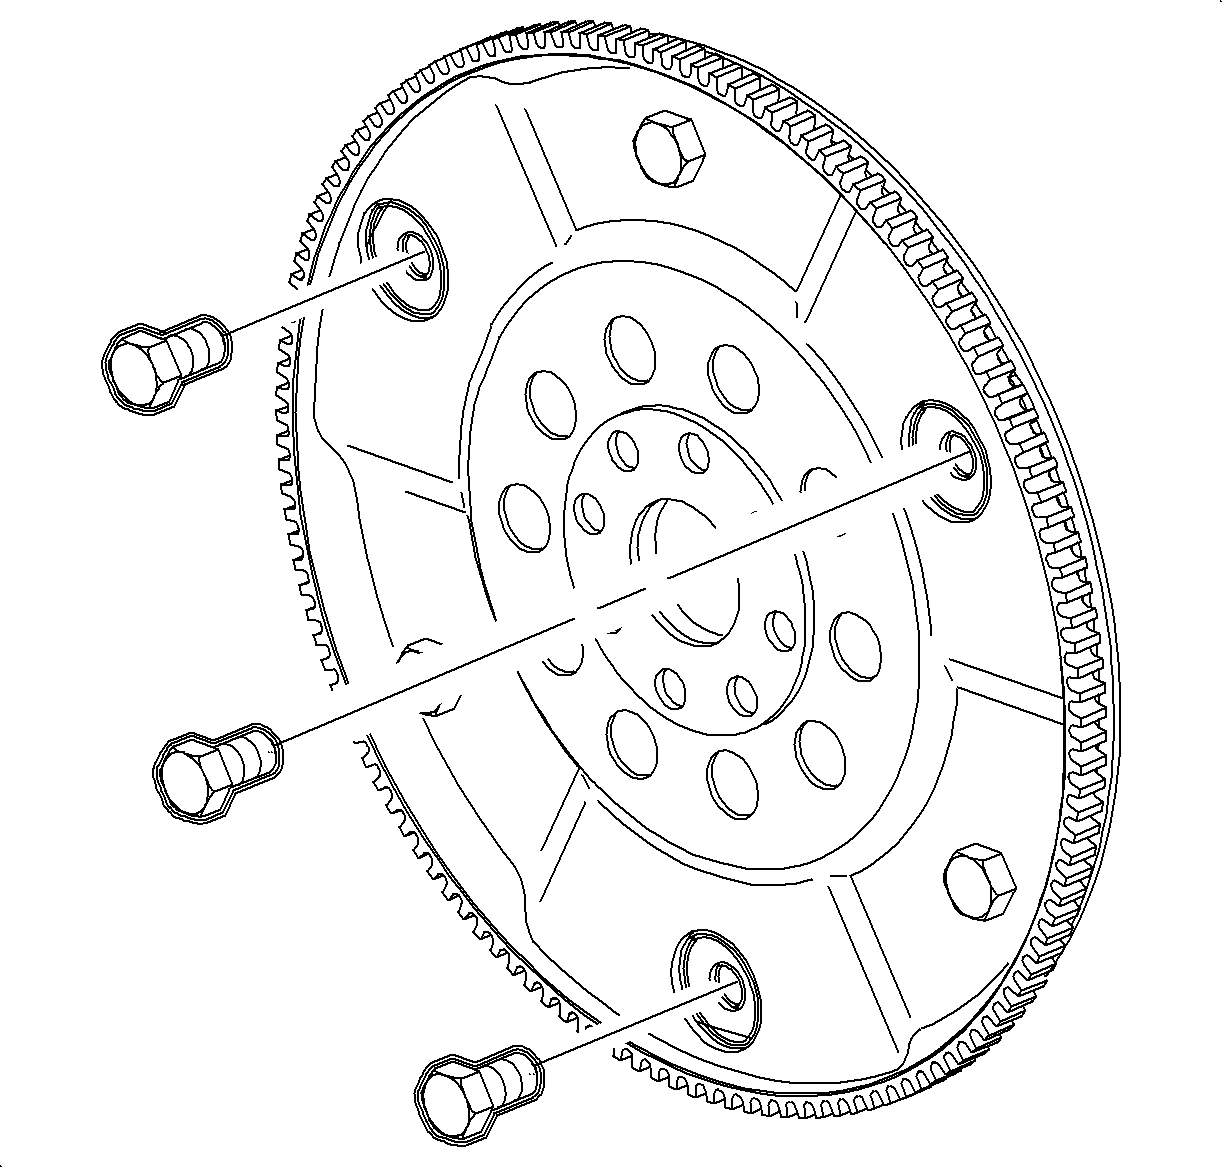
Important: The V6 flexplate has 6 bolts, 3 of these connect the flexplate to the torque converter and are recessed in the plate. The 4 cylinder flexplate has only 3 bolts and all reused to connect the flexplate to the torque converter.

Installation Procedure
- Place the transaxle on a hydraulic lift table and position the table under the vehicle.
- Slowly lower the vehicle and position the transaxle to the engine.
- Install the engine-to-transaxle mounting bolts as shown. V6 shown, L4 similar.
- Raise the vehicle and remove the hydraulic lift table.
- Lower the vehicle.
- Reference the alignment marks made during disassembly and install the left transaxle mount bolts.
- Raise the vehicle.
- Install the 2 bottom engine-to-transaxle mounting bolts.
- Install the transaxle oil cooler line assembly to the transaxle.
- Loosely install the flex plate to torque converter bolts using the J 44014 through the starter opening. The J 42098 can be used to turn the V6 crankshaft. After all bolts are installed, torque to specification.
- Install the starter assembly. V6 shown, L4 similar.
- Connect the starter solenoid electrical connections.
- Install the wire harness mounting bracket to the rear of the engine block. V6 only.
- Install the engine-to-transaxle bracket. L4 shown, V6 similar.
- Install the new axle shaft retaining rings on the end of the output shafts of the transaxle and install the axle shafts into the transaxle.
- Install the frame assembly. Refer to Frame Replacement Front in Frame and Underbody.
- Lower the vehicle and remove the engine support fixture.
- Connect the output speed sensor electrical connector. Secure the harness to the mounting stud.
- Install the generator for V6 only.
- Install the accessory drive belt tensioner assembly for V6 only.
- Install the accessory drive belt for V6 only.
- Install the remaining transaxle-to-engine mounting bolts.
- Install the transaxle electrical connector and ground wire to the transaxle.
- Install the remaining wire harness attachments to the transaxle side cover.
- Install the control cable mounting bracket to the rear powertrain mount.
- Connect the control cable to the transaxle range switch lever.
- Install the battery tray and battery tray fasteners.
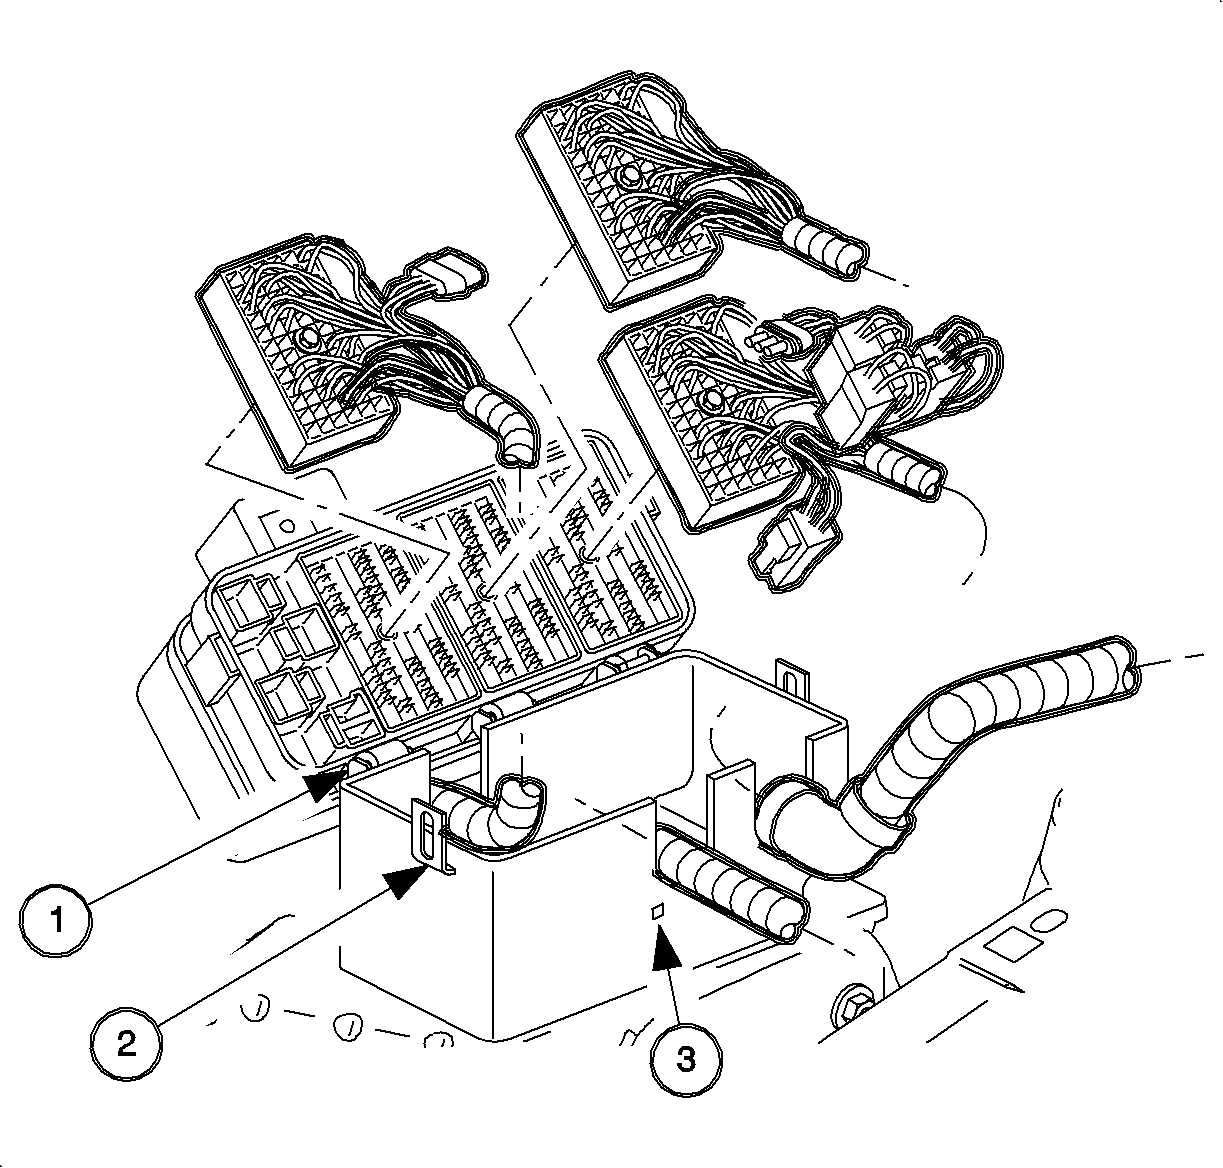
- Install the underhood fuse block case to the battery tray and install the bolt.
- Install the wire harnesses to the fuse block case. The wire harness grommets have retaining tabs that lock into the case when the harnesses are fully installed.
- Snap the fuse block onto the fuse block case hinges.
- Install the following connectors to the underhood fuse block:
- Install the following connectors to the underhood fuse block:
- Secure the underhood fuse block to the fuse block case by rotating down and snapping into place.
- Install the underhood fuse block cover.
- Secure the coolant hose into place on the fuse block cover.
- Install the battery feed cable to underhood fuse block.
- Install the battery.
- Fill the transaxle assembly to the specified refill capacity using DEXRON® VI automatic transaxle fluid P/N 21019223 or equivalent.
- Start the engine, warm up the transaxle, and check for fluid leaks.
- Inspect for proper fluid level. Refer to Transmission Fluid Check Procedure.
- Reset the TAP values. Refer to Transmission Adaptive Functions .
Notice: Refer to Fastener Notice in the Preface section.
Important: The bottom 2 and top 3 engine-to-transaxle mounting bolts will be installed later in this procedure.
Important: Ensure that the wiring harness bracket is installed behind the engine-to-transaxle mounting bolt near the starter motor on the V6 engine.
Tighten
Tighten engine-to-transaxle bolts to 65 N·m (48 lb ft).
Notice: If the powertrain mount is not reinstalled in its original position, it could lead to premature mount wear.
Tighten
Tighten the transaxle mount (left)-to-transaxle mount bracket bolts to 55 N·m (41 lb ft).
Notice: Failure to lubricate the cooler line seals with automatic transaxle fluid DEXRON® III before installing into the case or before installing the cooler line pipes into the seals may cause damage to the seal.
Tighten
Tighten the transaxle oil cooler line assembly nut to 8 N·m (71 lb in).
Important: The J 44014 must be used to install the flex plate to torque converter bolts. Care must be taken not to drop the bolts inside the torque converter housing of the transaxle. If a bolt is dropped inside the housing, the transaxle must be separated from the engine to retrieve it.
Tighten
Tighten the flex plate-to-torque converter bolts to 45 N·m (33 lb ft).
Tighten
Tighten the starter assembly bolts to 40 N·m (30 lb ft).
Tighten
Tighten the engine-to-transaxle bracket bolts to 35 N·m (26 lb ft).
Notice: In order to prevent damage to the axle shaft splines during vehicle operation, add grease P/N 7843867 to the splines prior to installing the axle shafts.
Tighten
Tighten the generator bolts to 40 N·m (30 lb ft).
Tighten
Tighten the accessory drive belt tension assembly bolts to 40 N·m (30 lb ft).
Tighten
Tighten the engine-transaxle bolts to 65 N·m (48 lb ft).
Tighten
Tighten the ground wire bolt to 25 N·m (18 lb ft).
Tighten
Tighten the wiring harness attachment fasteners to 20 N·m (15 lb ft).
Tighten
Tighten the control cable mounting bracket bolts to 20 N·m (15 lb ft).
Tighten
Tighten the battery tray bolts to 15 N·m (11 lb ft).
Tighten
Tighten the underhood fuse block case bolt to 9 N·m (80 lb in).

| • | Engine (A) |
| • | Forward Lamp (B) |
| • | Instrument Panel (I/P) (C) |
| • | Engine 68-way (1) |
| • | Forward Lamp 68-way (2) |
| • | I/P 68-way (3) |
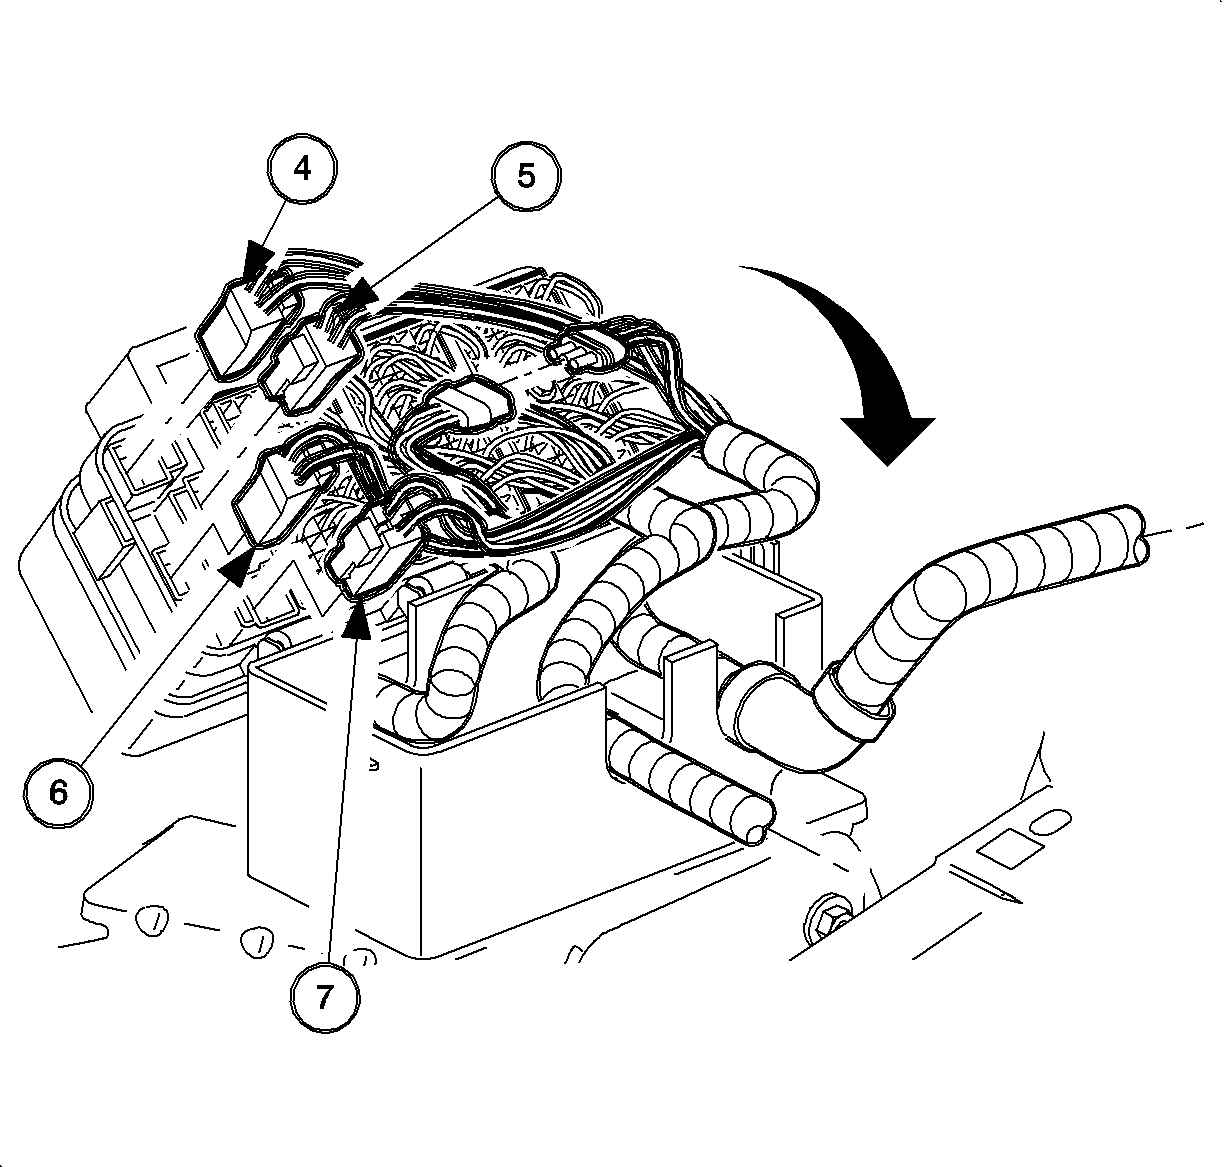
| • | Forward Lamp 2-way (White) (4) |
| • | I/P 2-way (Black) (5) |
| • | I/P 2-way (Green) (6) |
| • | I/P 2-way (Brown) (7) |
Tighten
Tighten the battery feed cable-to-underhood fuse block bolt to 16 N·m (12 lb ft).
| 37.1. | Install the battery into the battery tray. |
| 37.2. | Install the battery hold-down bracket. |
Tighten
Tighten the battery hold down bracket bolt to 20 N·m (15 lb ft).
| 37.3. | Install the fan control module by sliding down onto the battery hold-down bracket. |
| Important: The positive battery terminal must be connected first to prevent arcing. |
| 37.4. | Install the positive battery cable and then the negative battery cable. |
Tighten
Tighten the battery cables-to-battery to 17 N·m (13 lb ft).
Important: If a new transaxle assembly was installed, the transaxle was filled with the proper amount of transaxle fluid at the factory. No additional fluid is required.
Specification
| • | The bottom pan removal capacity is approximately 6.5 L (6.9 qt). |
| • | The complete overhaul capacity is approximately 9 L (9.5 qt). |
| • | The dry capacity is approximately 12.2 L (12.9 qt). |
Important: It is recommended that transmission adaptive pressure (TAP) information be reset.
Resetting the TAP values using a scan tool will erase all learned values in all cells. As a result, The ECM, PCM or TCM will need to relearn TAP values. Transmission performance may be affected as new TAP values are learned.