For 1990-2009 cars only
Removal Procedure
- Turn the ignition OFF.
- Remove the battery cover.
- Disconnect the negative battery cable. Refer to Battery Negative Cable Disconnection and Connection .
- Remove the battery. Refer to Battery Replacement .
- Loosen the battery tray bracket screw and remove the bracket.
- On antilock brake system (ABS) models, remove the electronic brake traction control module (EBTCM) bracket fasteners.
- Place a shop towel under the clutch master cylinder in order to catch any fluid loss.
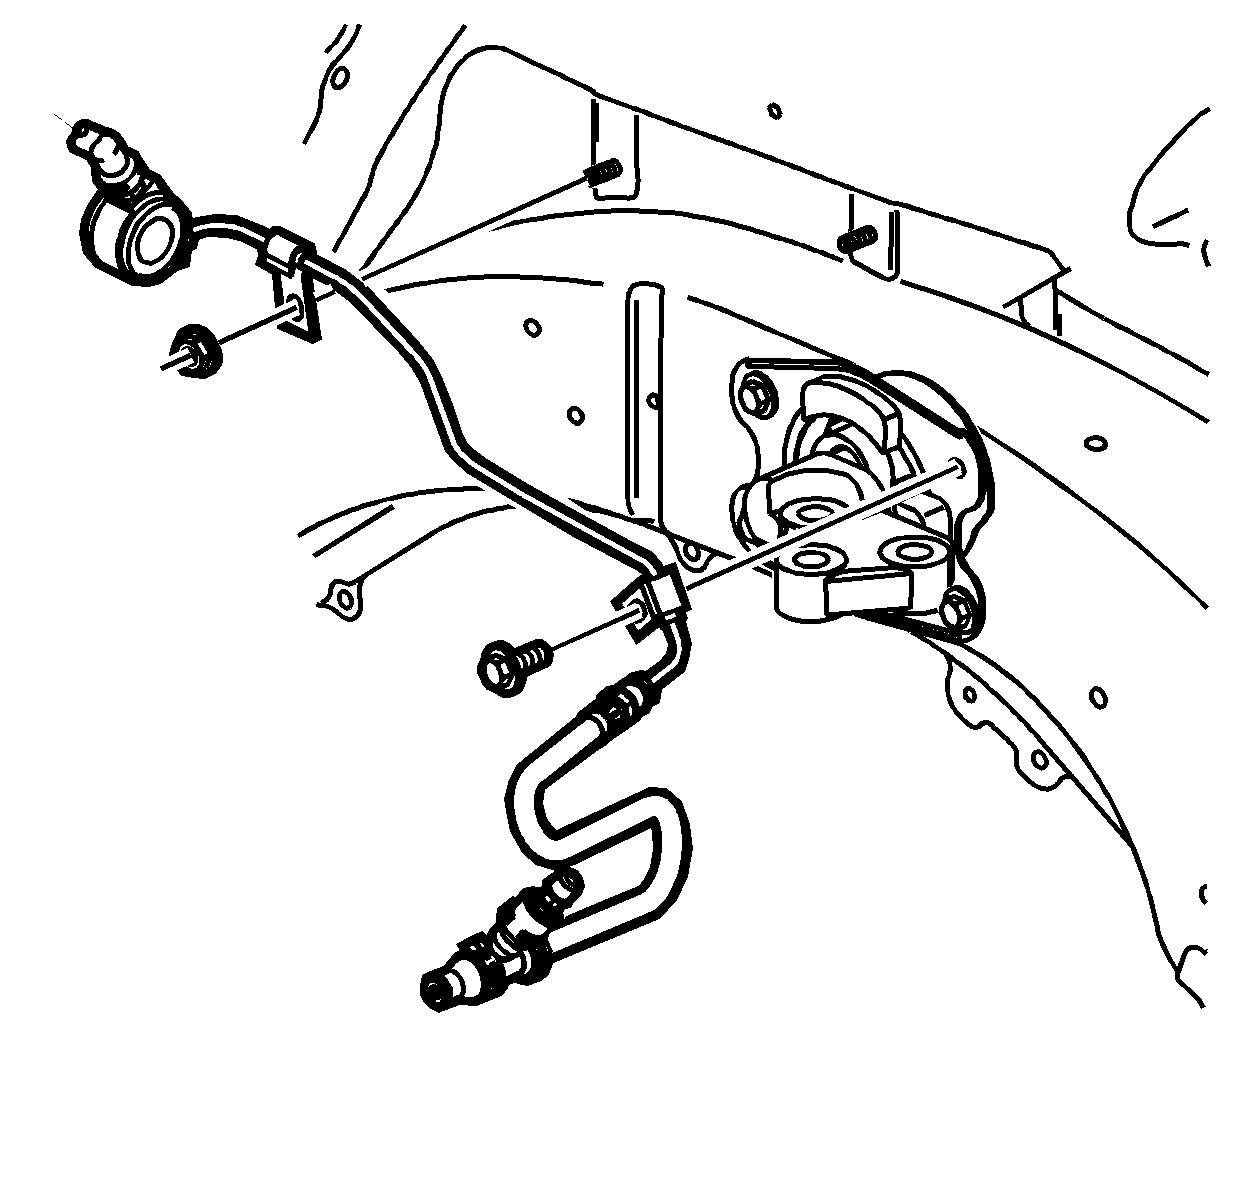
- Disconnect the clutch master cylinder line from the transaxle by removing the C-clip.
- Drain the clutch fluid into a suitable container.
- Remove the top transaxle mount retaining bolt.
- Disconnect the clutch line from the clutch master cylinder.
- Remove the clutch hydraulic line.
Notice: Refer to Brake Fluid Effects on Paint and Electrical Components Notice in the Preface section.

Important: Do not damage the brake lines.
Installation Procedure
- Install the clutch hydraulic line.
- Connect the clutch line to the clutch master cylinder.
- Remove the shop towel and discard into a suitable container.
- Install the top transaxle mount retaining bolt.
- Connect the clutch hydraulic line to the transaxle by pushing it until it seats.
- Fill the brake/clutch reservoir with DOT 3 hydraulic fluid to the proper level.
- Bleed the clutch hydraulic system. Refer to Hydraulic Clutch Bleeding .
- On ABS models, install the EBTCM bracket fasteners.
- Install the battery tray bracket . Refer to Battery Tray Replacement .
- Connect the negative battery cable. Refer to Battery Negative Cable Disconnection and Connection .
- Install the battery. Refer to Battery Replacement .
Important:
• Do not damage the brake lines. • Ensure that the clutch line locks securely in place.
Notice: Refer to Fastener Notice in the Preface section.
Tighten
Tighten the bolt to 37 N·m (27 lb ft).
Tighten
Tighten the fasteners to 15 N·m (11 lb ft).
