For 1990-2009 cars only
Special Tools
| • | J 43653 Flywheel Holding Tool |
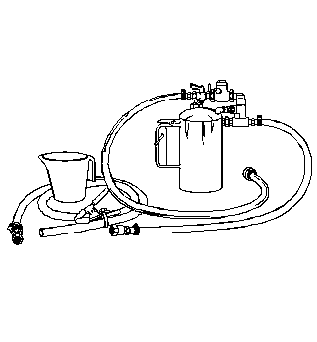
| • | J 35944-A Transmission Oil Cooler Flusher |
Removal Procedure
- Remove the battery tray support bracket. Refer to Battery Tray Support Bracket Replacement.
- Remove the generator control module, if equipped with 2.4L (LAT). Refer to Generator Control Module Replacement.
- Remove the auxiliary fluid pump and pipes, if equipped with 2.4L (LAT). Refer to one of the following:
- Remove the air cleaner outlet duct. Refer to Air Cleaner Outlet Duct Replacement.
- Disconnect the transmission electrical wiring harness connector from the park neutral position (PNP) switch.
- Disconnect the transmission main wiring harness from the transmission.
- Remove the wiring harness from the retainer on the transmission.
- Remove the battery ground cable from the transmission, if equipped.
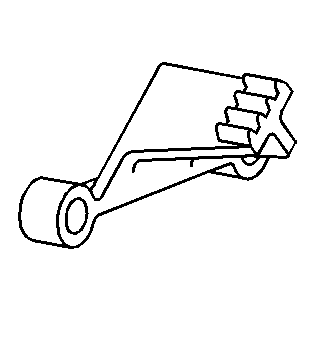
- Disconnect the transmission shift control cable terminal (2) from the transmission manual shift lever pin (1).
- Press the locking tabs (3) inward in order to release the transmission shift control cable from the cable bracket (4).
- Remove the shift cable bracket bolts (1, 3).
- Remove the shift cable bracket (2).
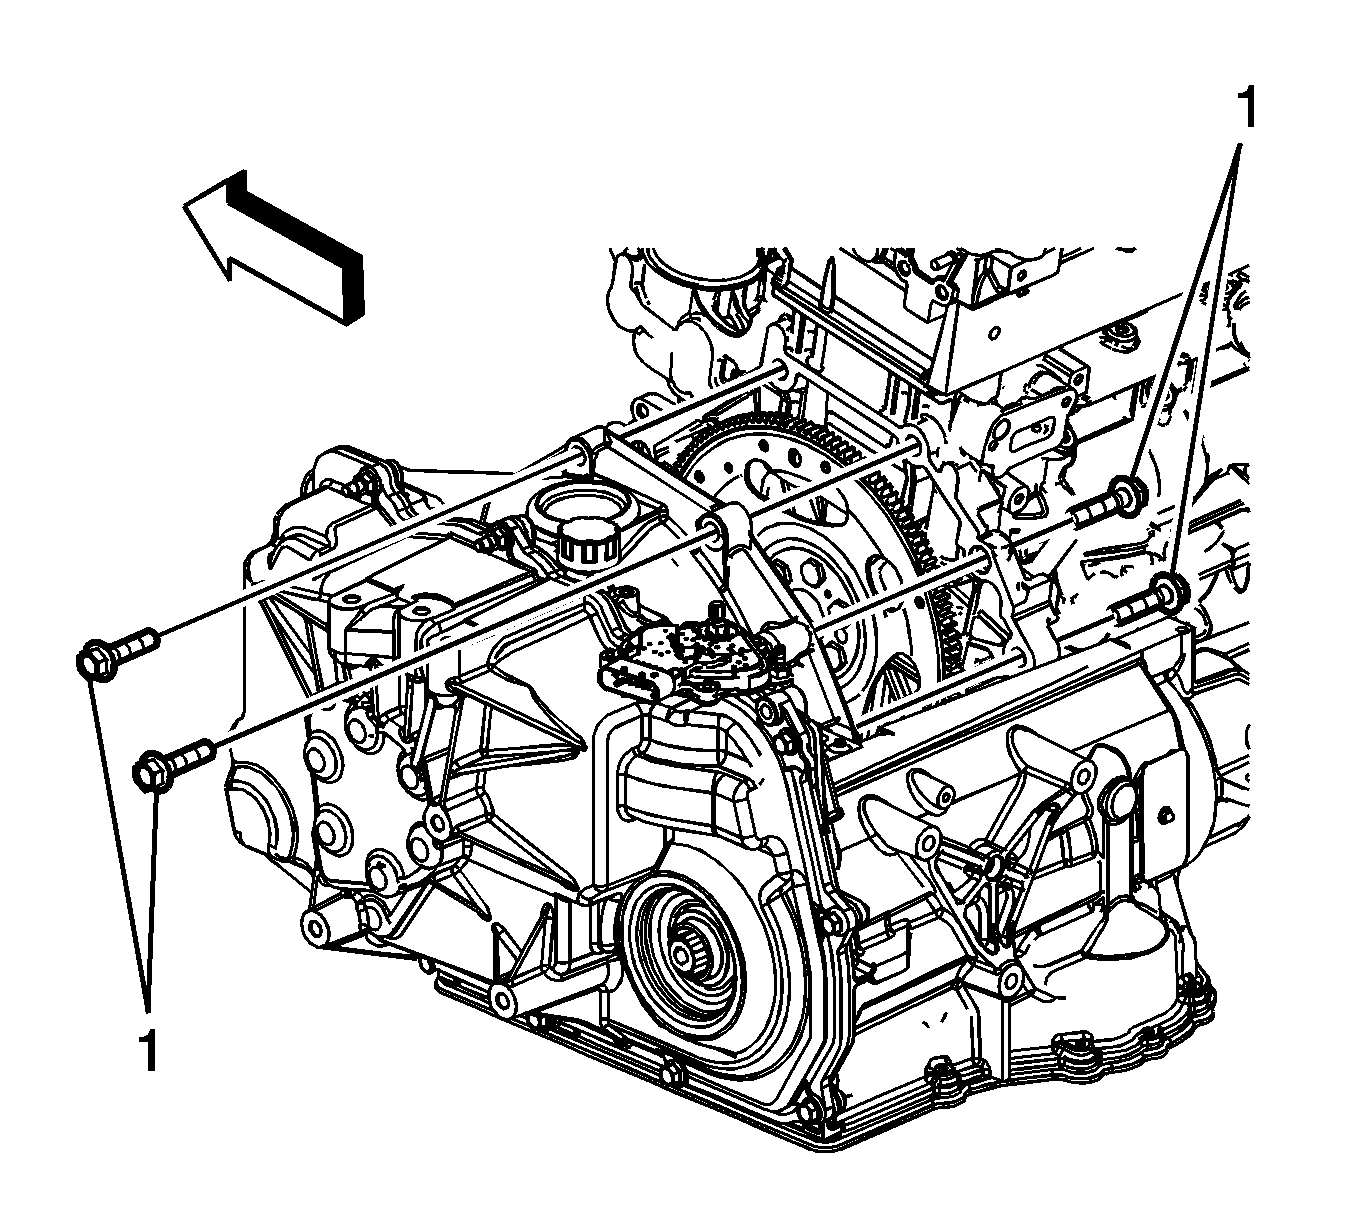
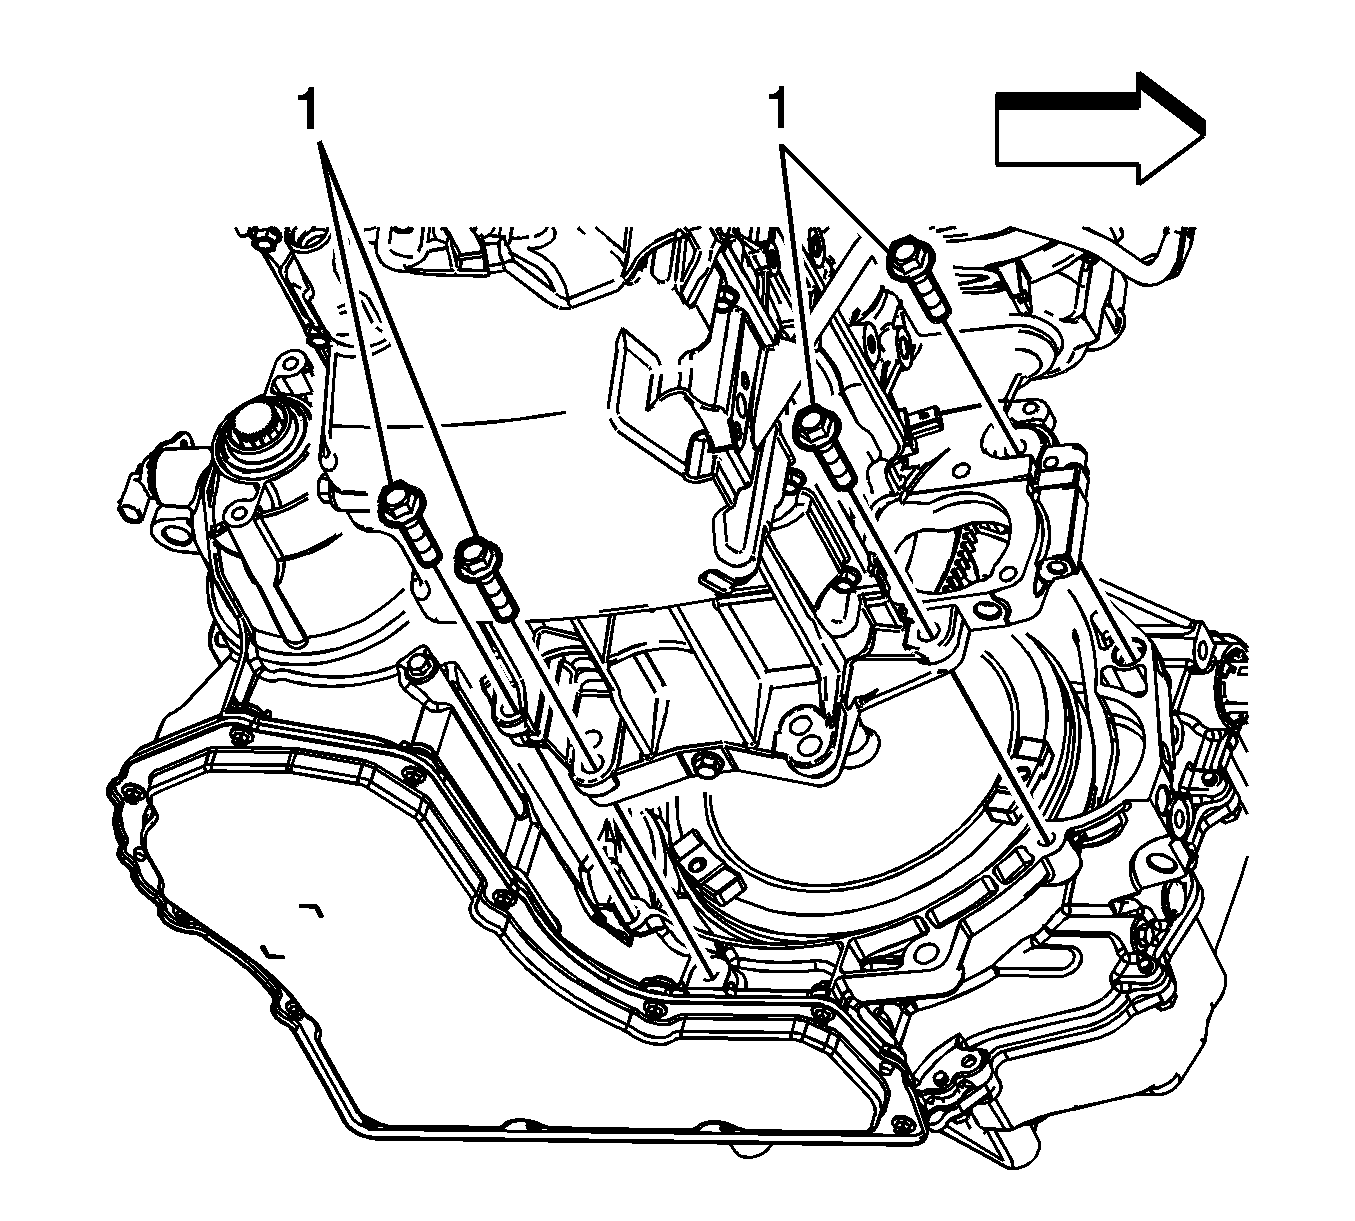
- Remove the upper transmission to engine bolts (1).
- Remove the vehicle frame. Refer to Frame Replacement.
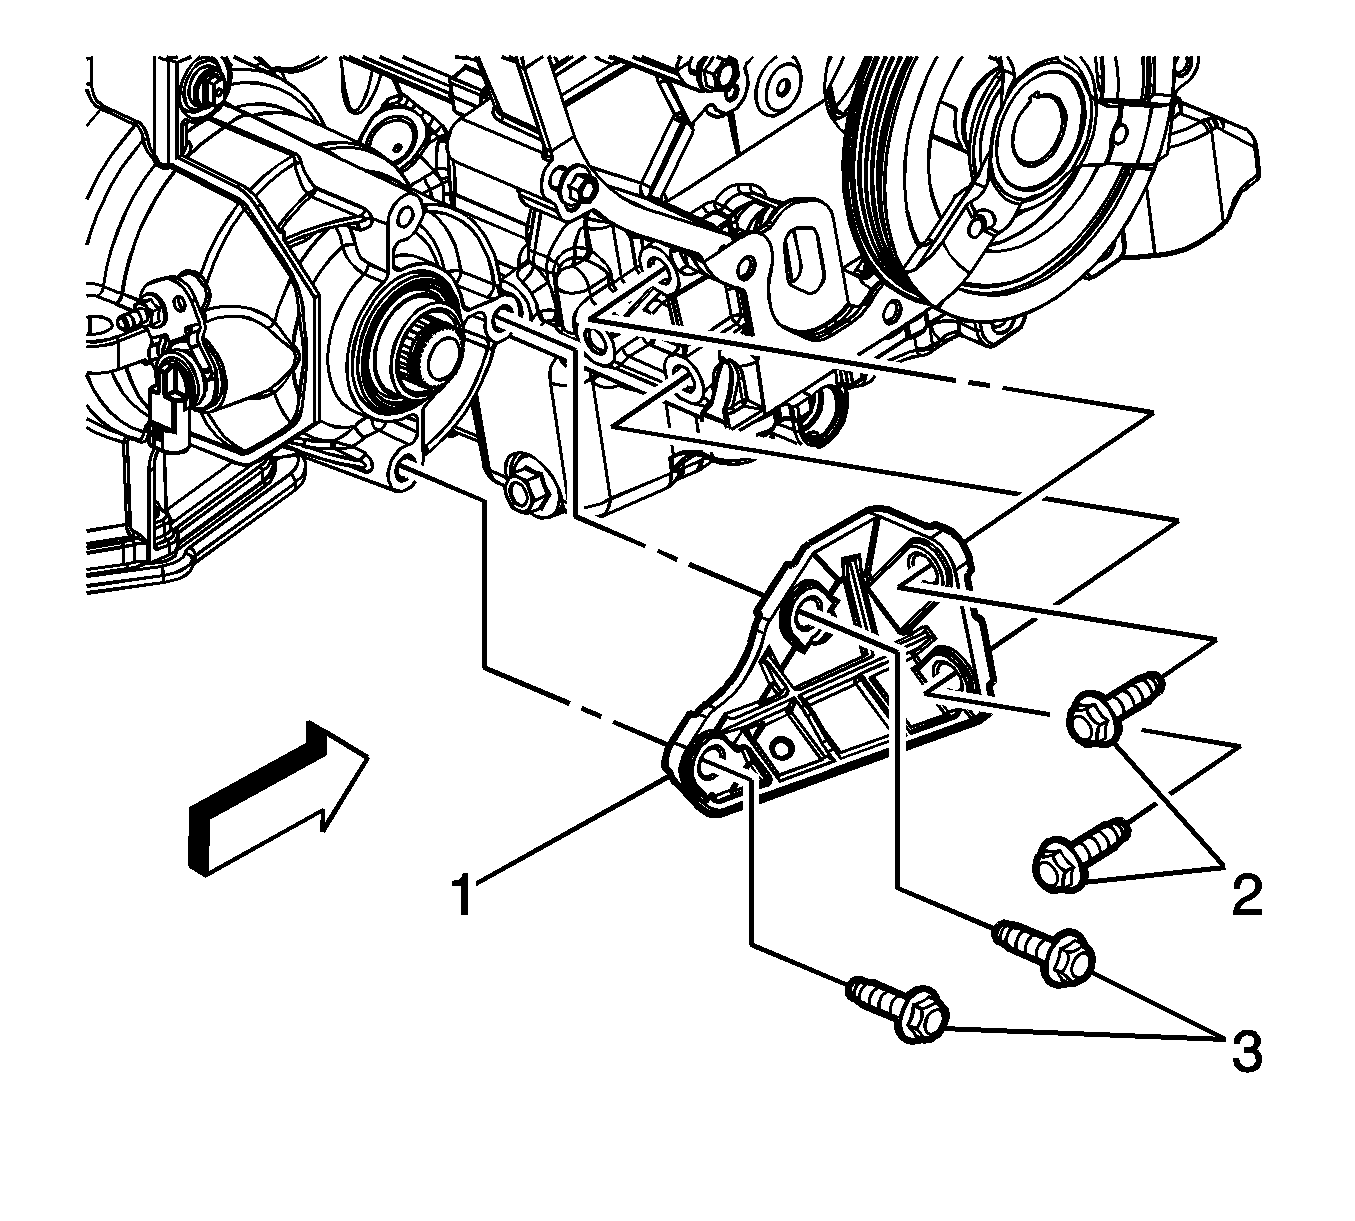
- Remove the bolts (2, 3) from the transmission brace.
- Remove the transmission brace (1).
- Remove the starter. Refer to Starter Motor Replacement.
- Mark the relationship of the flywheel to the torque converter for reassembly.
- Use the J 43653 to prevent the crankshaft from rotating.
- Remove the torque converter to flywheel bolts.
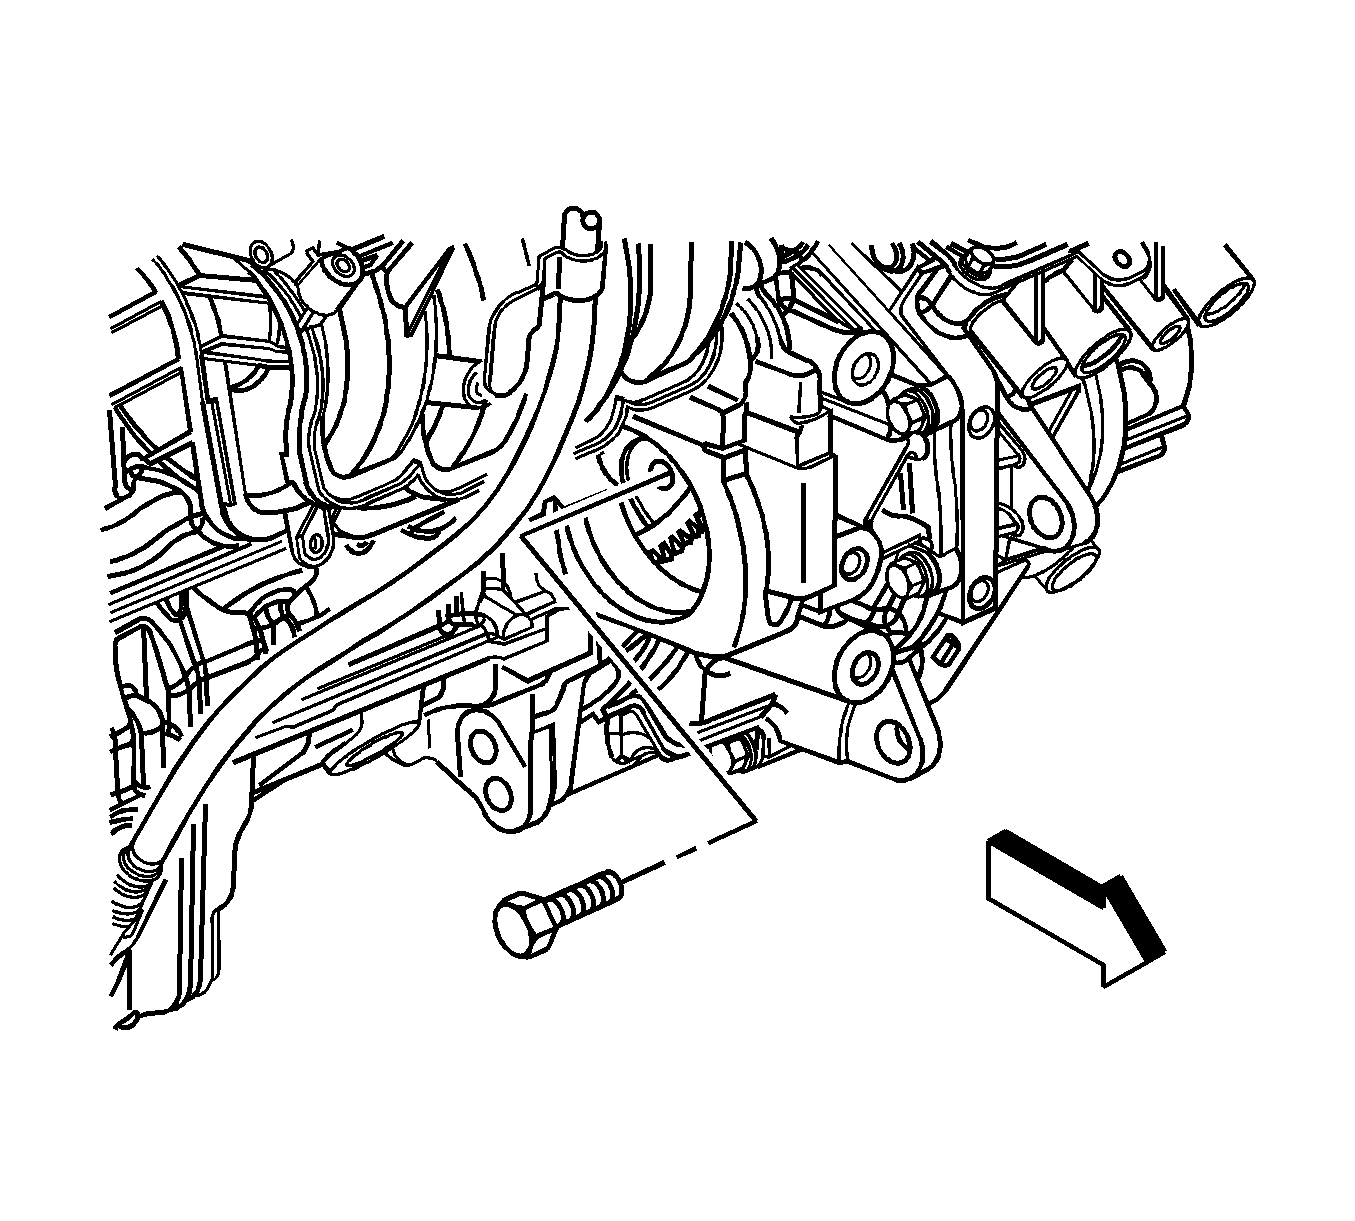
- Remove the nut holding the transmission cooler line retainer to the transmission.
- Disconnect the transmission cooler lines from the transmission.
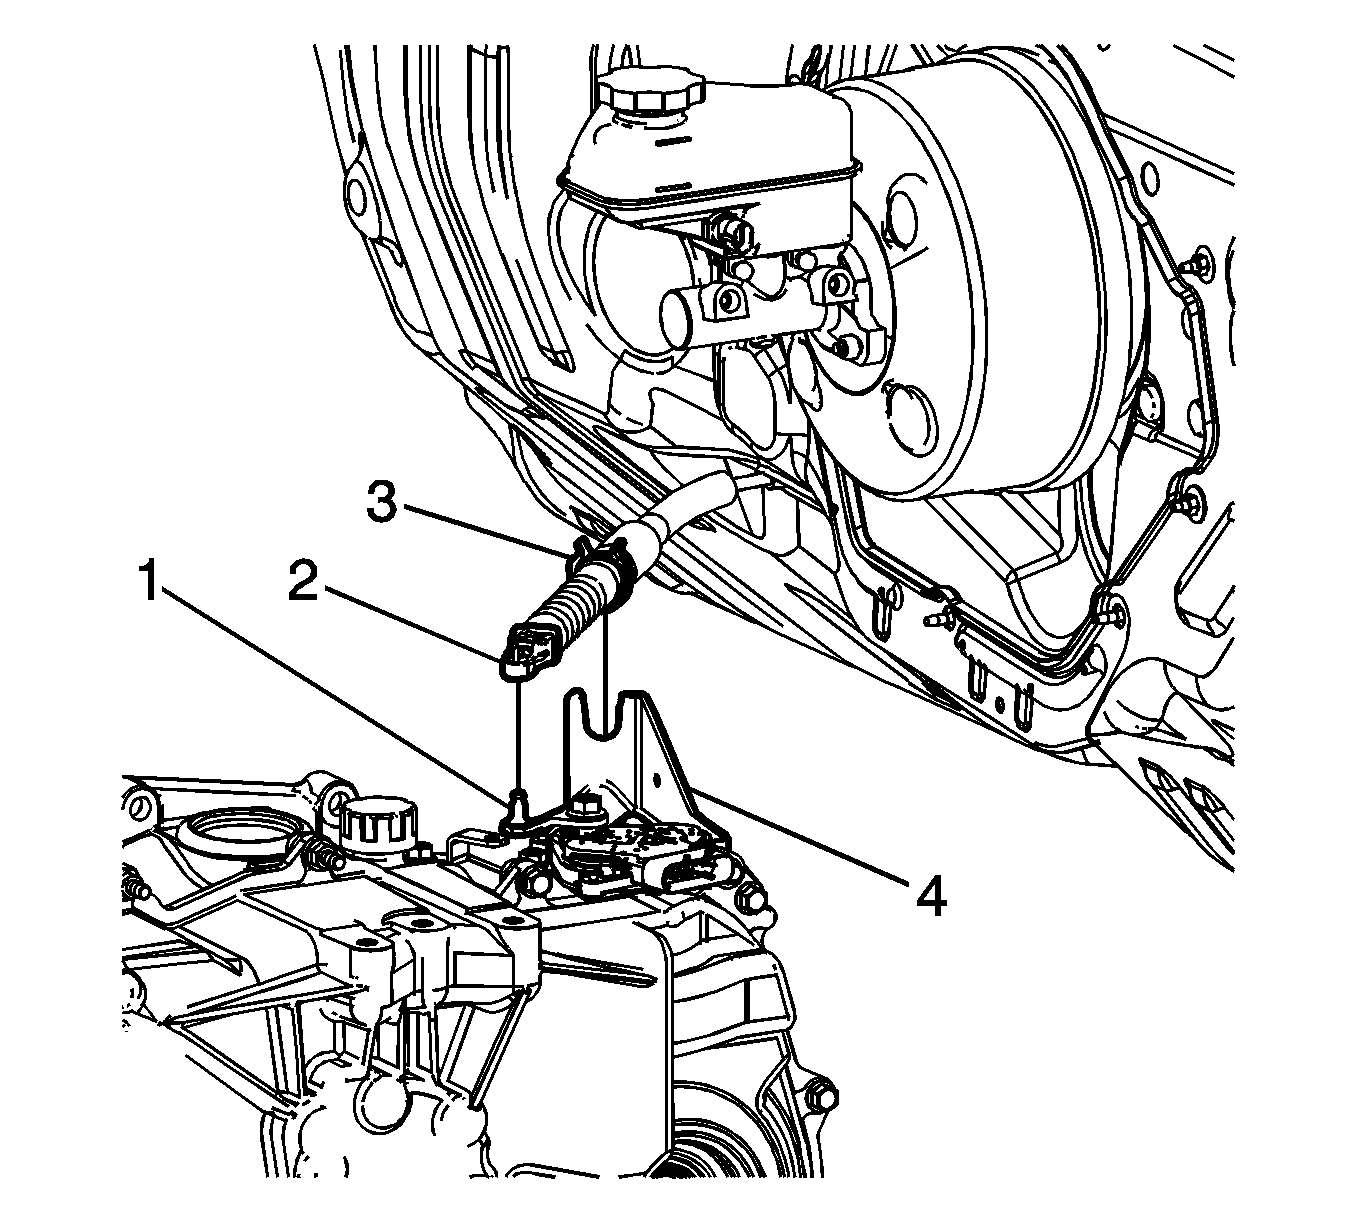
- Disconnect the vehicle speed sensor (VSS) wiring harness connector and retainer from the sensor.
- Lower the vehicle.
- Remove the left transmission mount and spacer. Refer to Transmission Mount Replacement - Left Side.
- Raise the vehicle. Refer to Lifting and Jacking the Vehicle.
- Disconnect the wheel drive shafts from the transmission. Refer to Front Wheel Drive Shaft Replacement.
- Support the transmission with a suitable jack.
- Remove the lower transmission to engine bolts (1).
- Separate the engine from the transmission.
- Remove the transmission from the vehicle.
- If the transmission is being replaced, remove the PNP switch from the transmission. Refer to Park/Neutral Position Switch Replacement.
- Flush the transmission cooler and the lines with J 35944-A .


Installation Procedure
- If previously removed, install the PNP switch. Refer to Park/Neutral Position Switch Replacement.
- Position the transmission to the engine.
- Install the lower transmission to engine bolts (1) and tighten to 75 N·m (55 lb ft).
- Install the wheel drive shafts to the transmission. Refer to Front Wheel Drive Shaft Replacement.
- Lower the vehicle.
- Install the left transmission mount and spacer. Refer to Transmission Mount Replacement - Left Side.
- Raise the vehicle. Refer to Lifting and Jacking the Vehicle.
- Lubricate the transmission cooler pipes before inserting into the seals.
- Connect the transmission cooler pipes to the transmission.
- Install the transmission cooler pipes retainer nut and tighten to 7 N·m (62 lb in).
- Connect the wiring harness connector and retainer to the VSS.
- Use the J 43653 to prevent the crankshaft from rotating.
- Install the torque converter to flywheel bolts and tighten to 60 N·m (44 lb ft).
- Install the starter. Refer to Starter Motor Replacement.
- Install the transmission brace (1).
- Install the transmission brace bolts (2, 3) and tighten to 53 N·m (39 lb ft).
- Install the frame. Refer to Frame Replacement.
- Lower the vehicle.
- Install the upper transmission to engine bolts (1) and tighten to 75 N·m (55 lb ft).
- Install the shift cable bracket (2).
- Install the shift cable bracket bolts (1, 3) and tighten to 20 N·m (15 lb ft).
- Install the transmission shift control cable (3) to the cable bracket (4).
- Connect the transmission shift control cable terminal (2) to the transmission manual shift lever pin (1).
- Connect the transmission main electrical wiring harness connector to the transmission.
- Connect the transmission electrical wiring harness connector to the park neutral position (PNP) switch.
- Attach the wiring harness to the retainer on the transmission.
- Install the battery ground cable to the transmission, if equipped.
- Install the air cleaner outlet duct. Refer to Air Cleaner Outlet Duct Replacement.
- Install the auxiliary fluid pump and pipes, if equipped with 2.4L (LAT). Refer to one of the following:
- Install the generator control module, if equipped with 2.4L (LAT). Refer to Generator Control Module Replacement.
- Install the battery tray support bracket. Refer to Battery Tray Support Bracket Replacement.
- Add automatic transmission fluid (ATF) and verify the proper fluid level of the transmission.
- Reset the TAP values. Refer to Transmission Adaptive Functions.
- Road test the vehicle.
- Raise the vehicle. Refer to Lifting and Jacking the Vehicle.
Caution: Refer to Fastener Caution in the Preface section.
Note: It is recommended that transmission adaptive pressure (TAP) information be reset.
Resetting the TAP values using a scan tool will erase all learned values in all cells. As a result, the ECM, PCM or TCM will need to relearn TAP values. Transmission performance may be affected as new TAP values are learned.