For 1990-2009 cars only
Tail Lamp Replacement CSV SWBHSV VXR8
Removal Procedure - Tail Lamp - Type B
- Disconnect the battery negative cable. Refer to Battery Negative Cable Disconnection and Connection.
- Remove the rear end trim finish panel trim (1) from the vehicle (2).
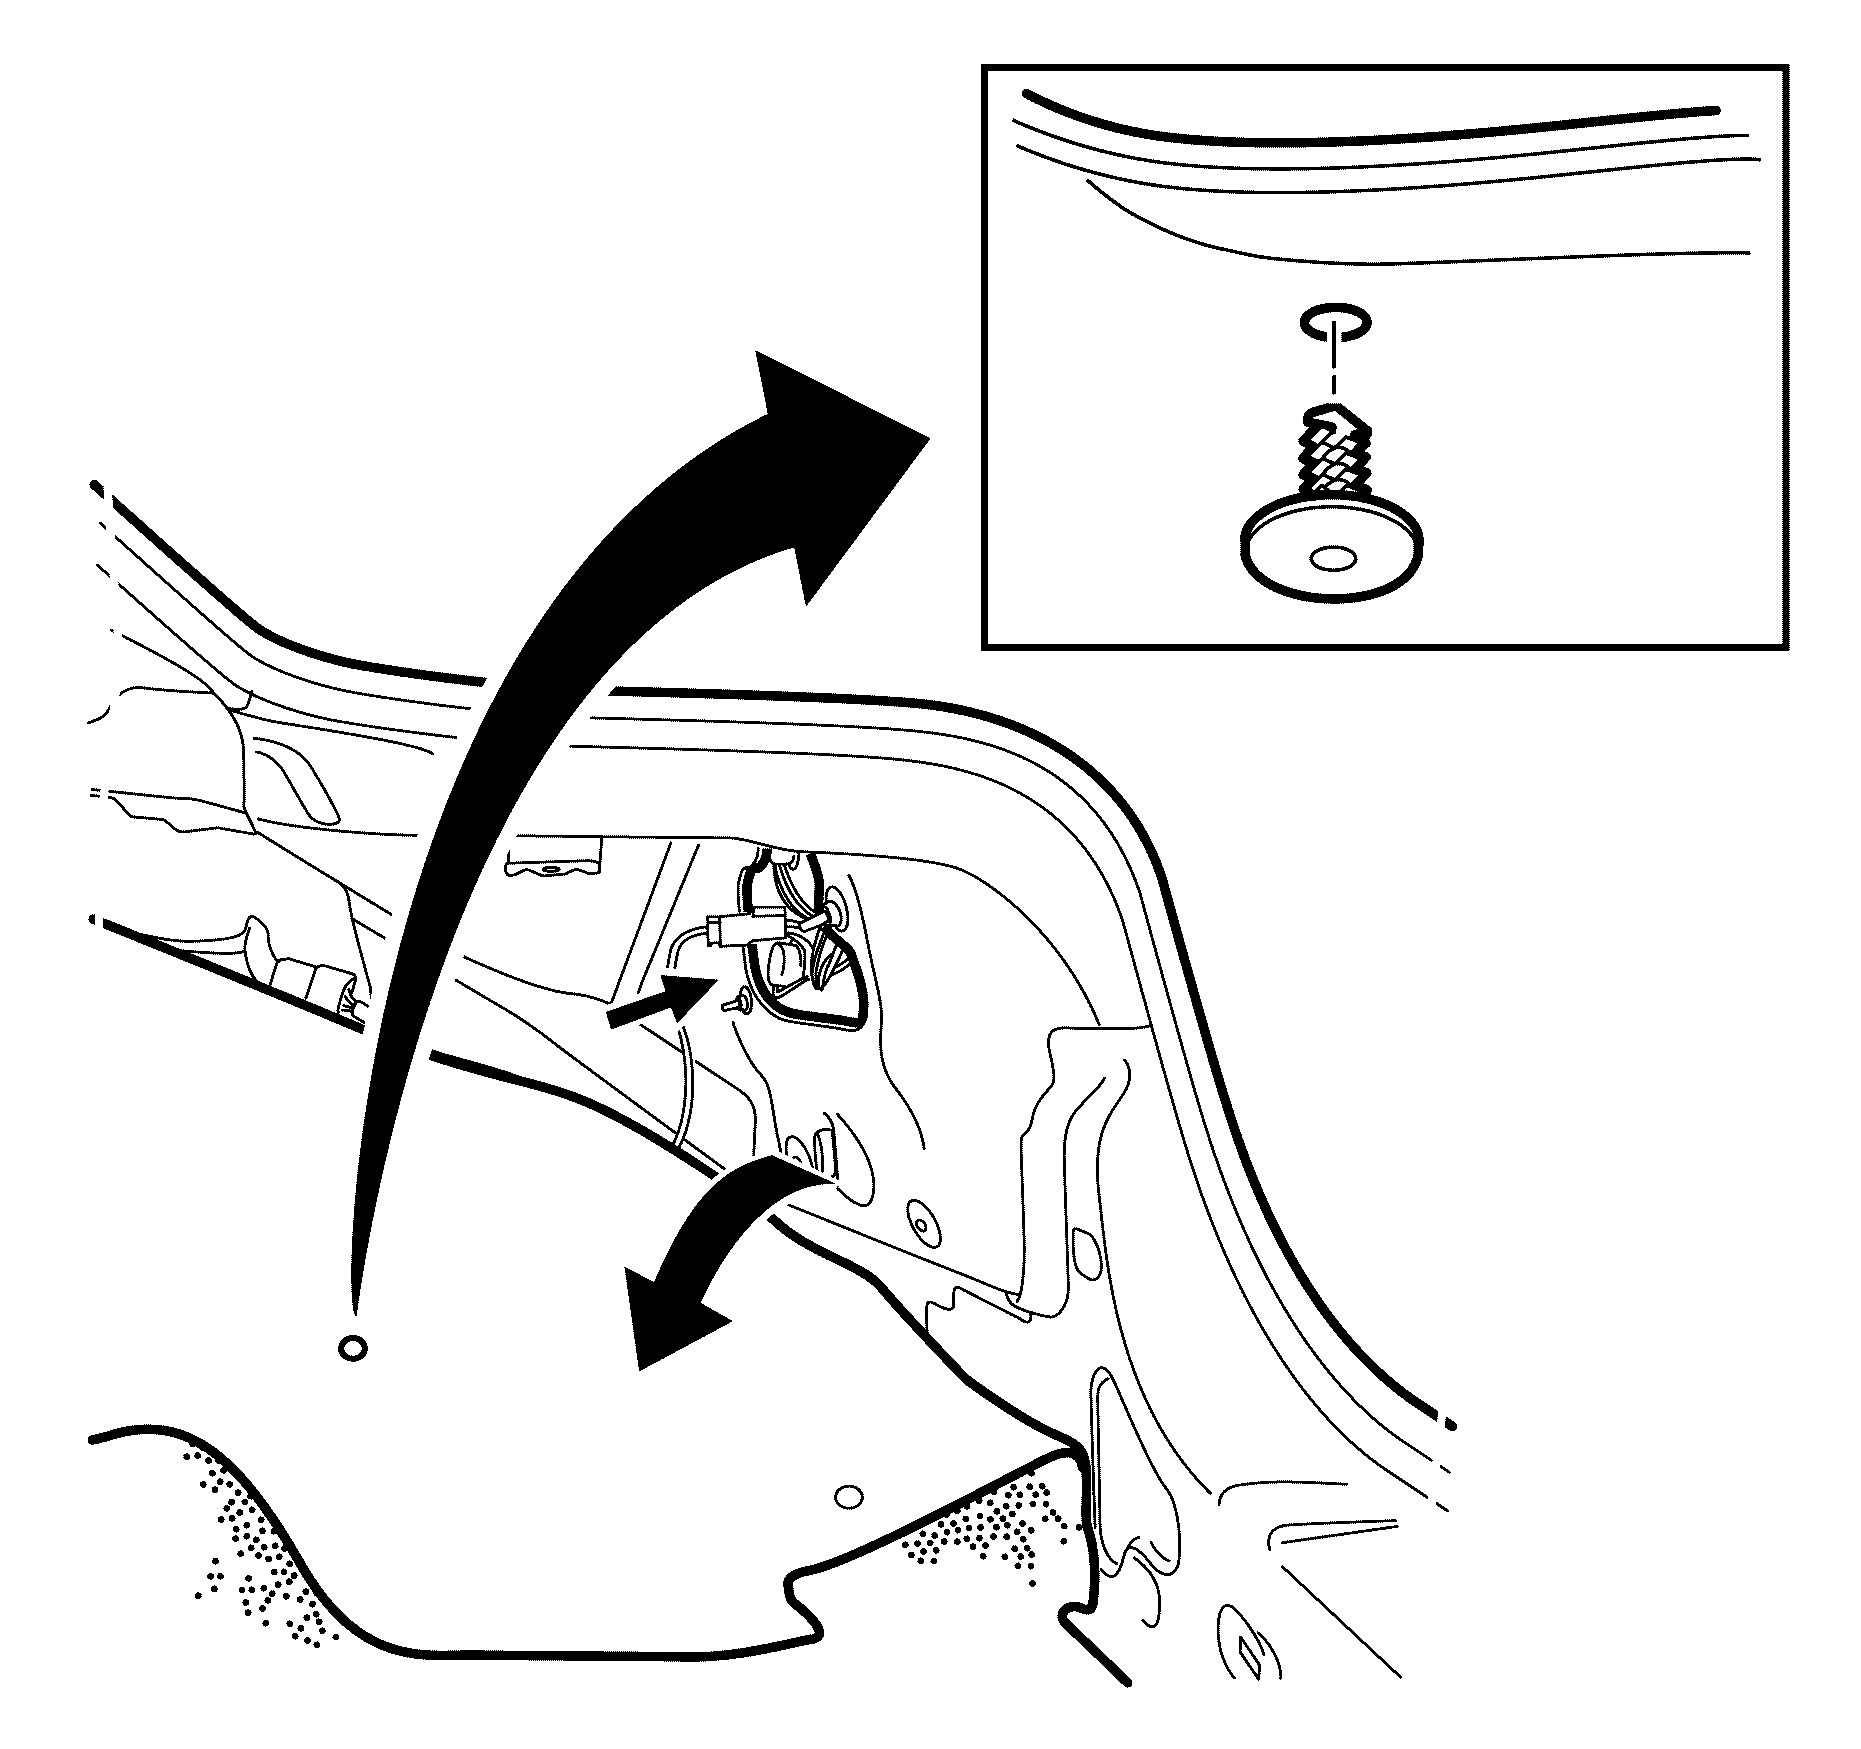
- Remove the rear compartment side trim panel clip (1).
- Pull back the panel (3) to access to the tail lamp (2).
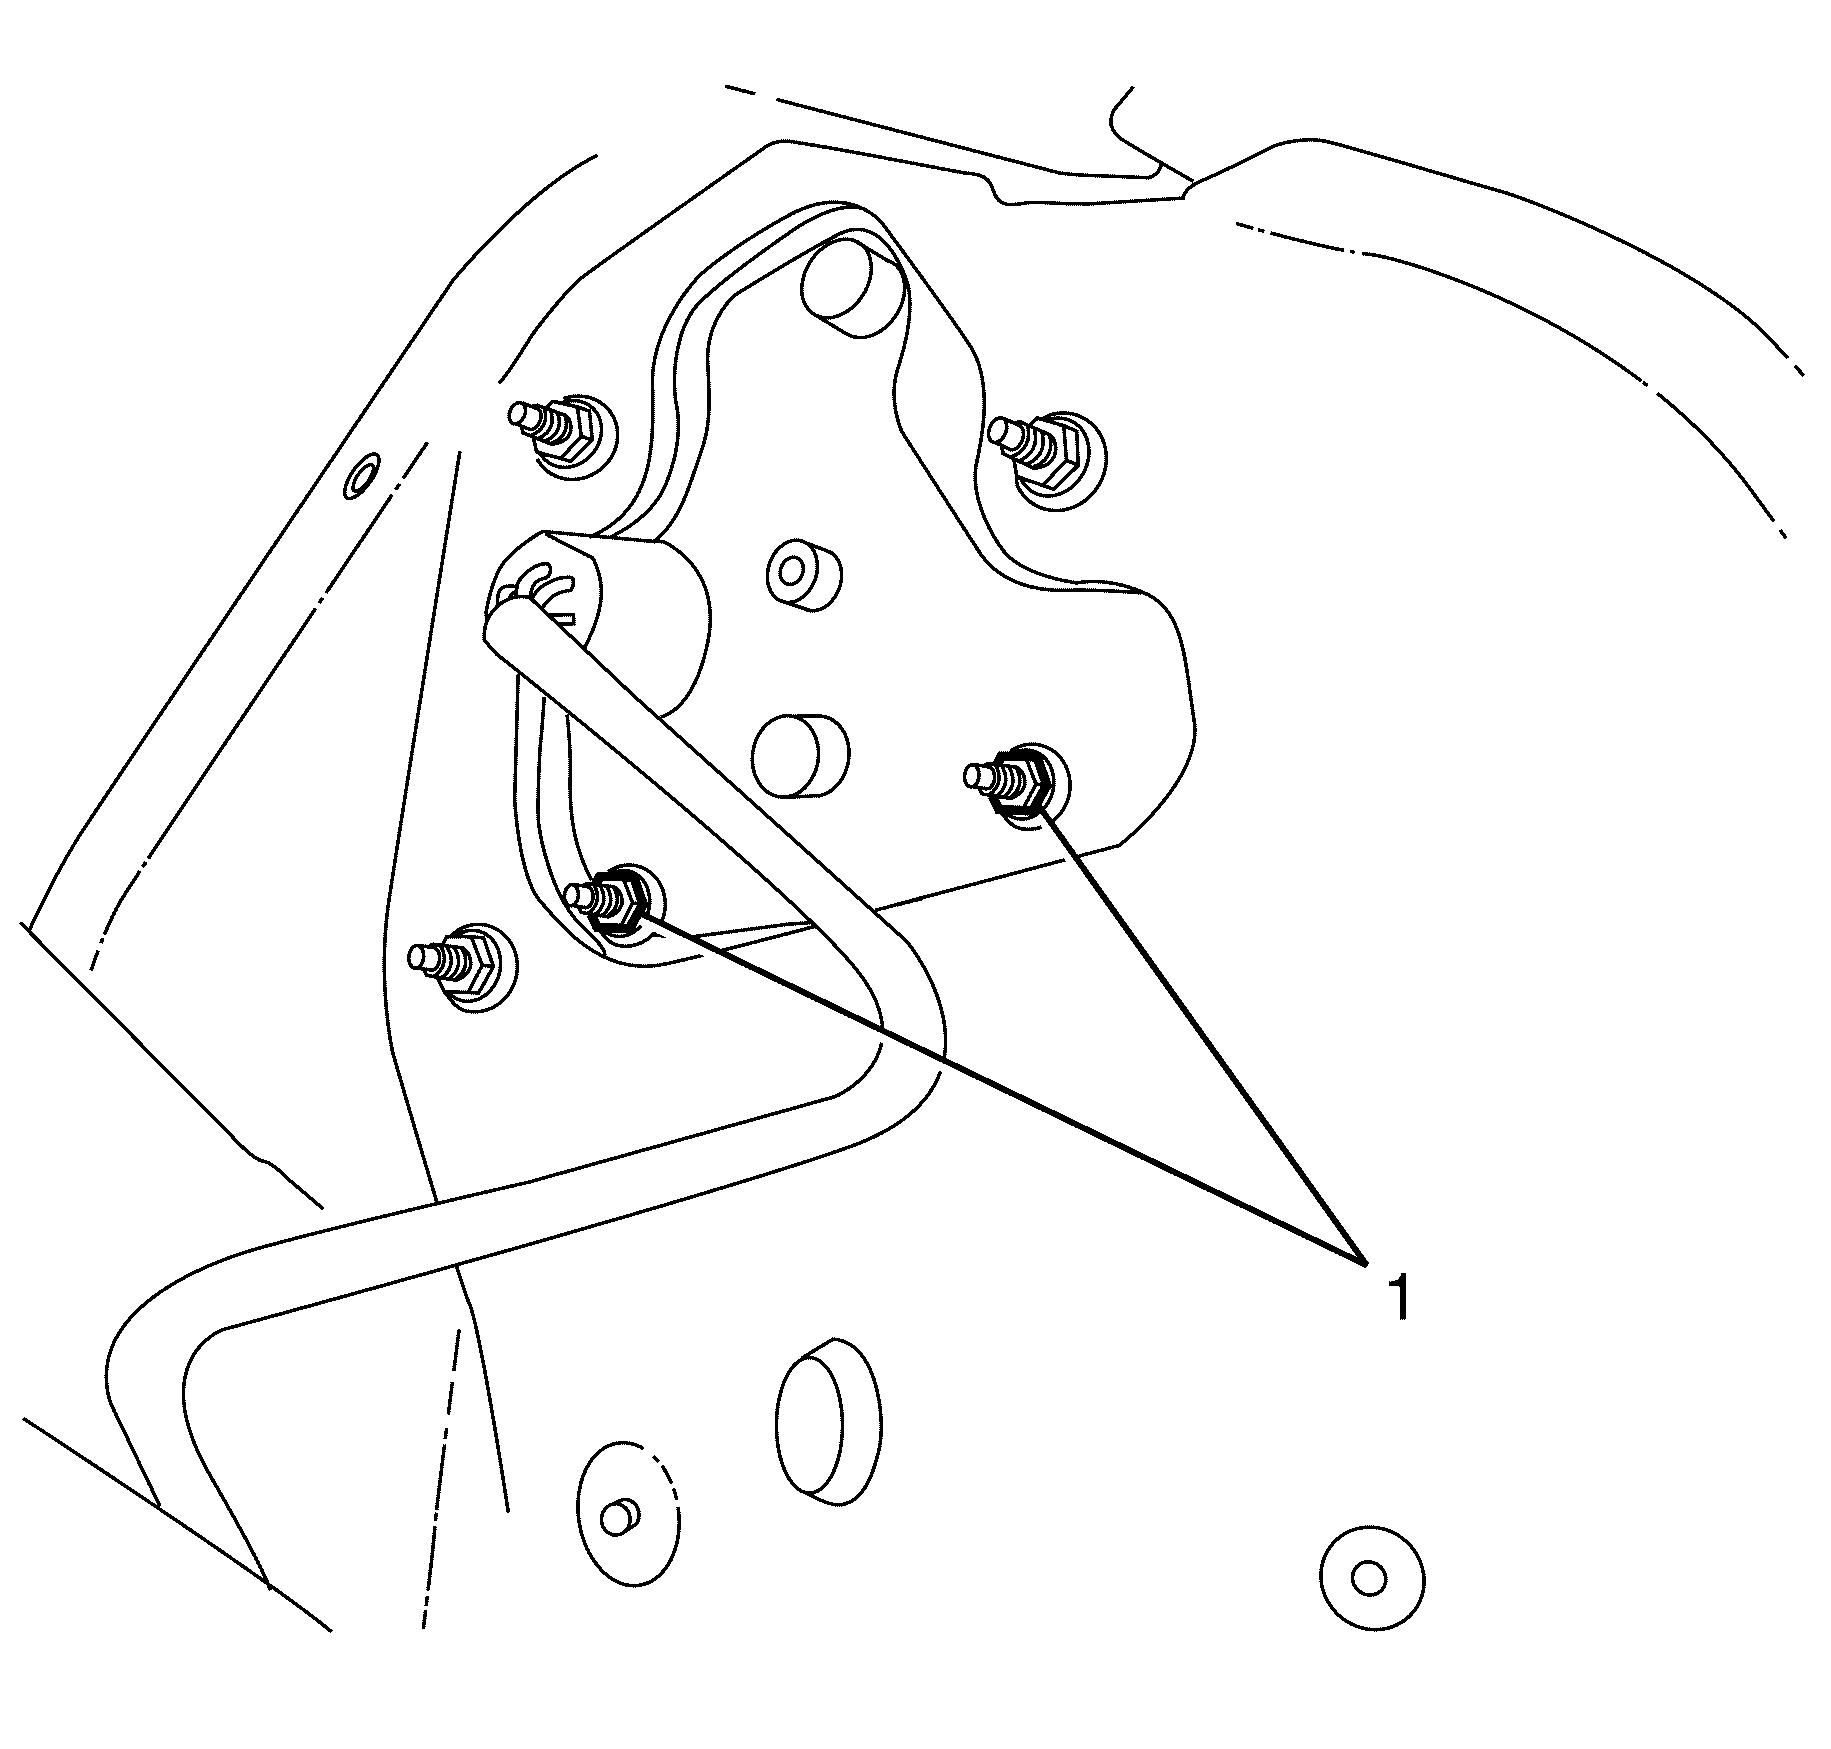
- Remove the tail lamp to body retaining nuts (1).
- Detach the tail lamp from the vehicle.
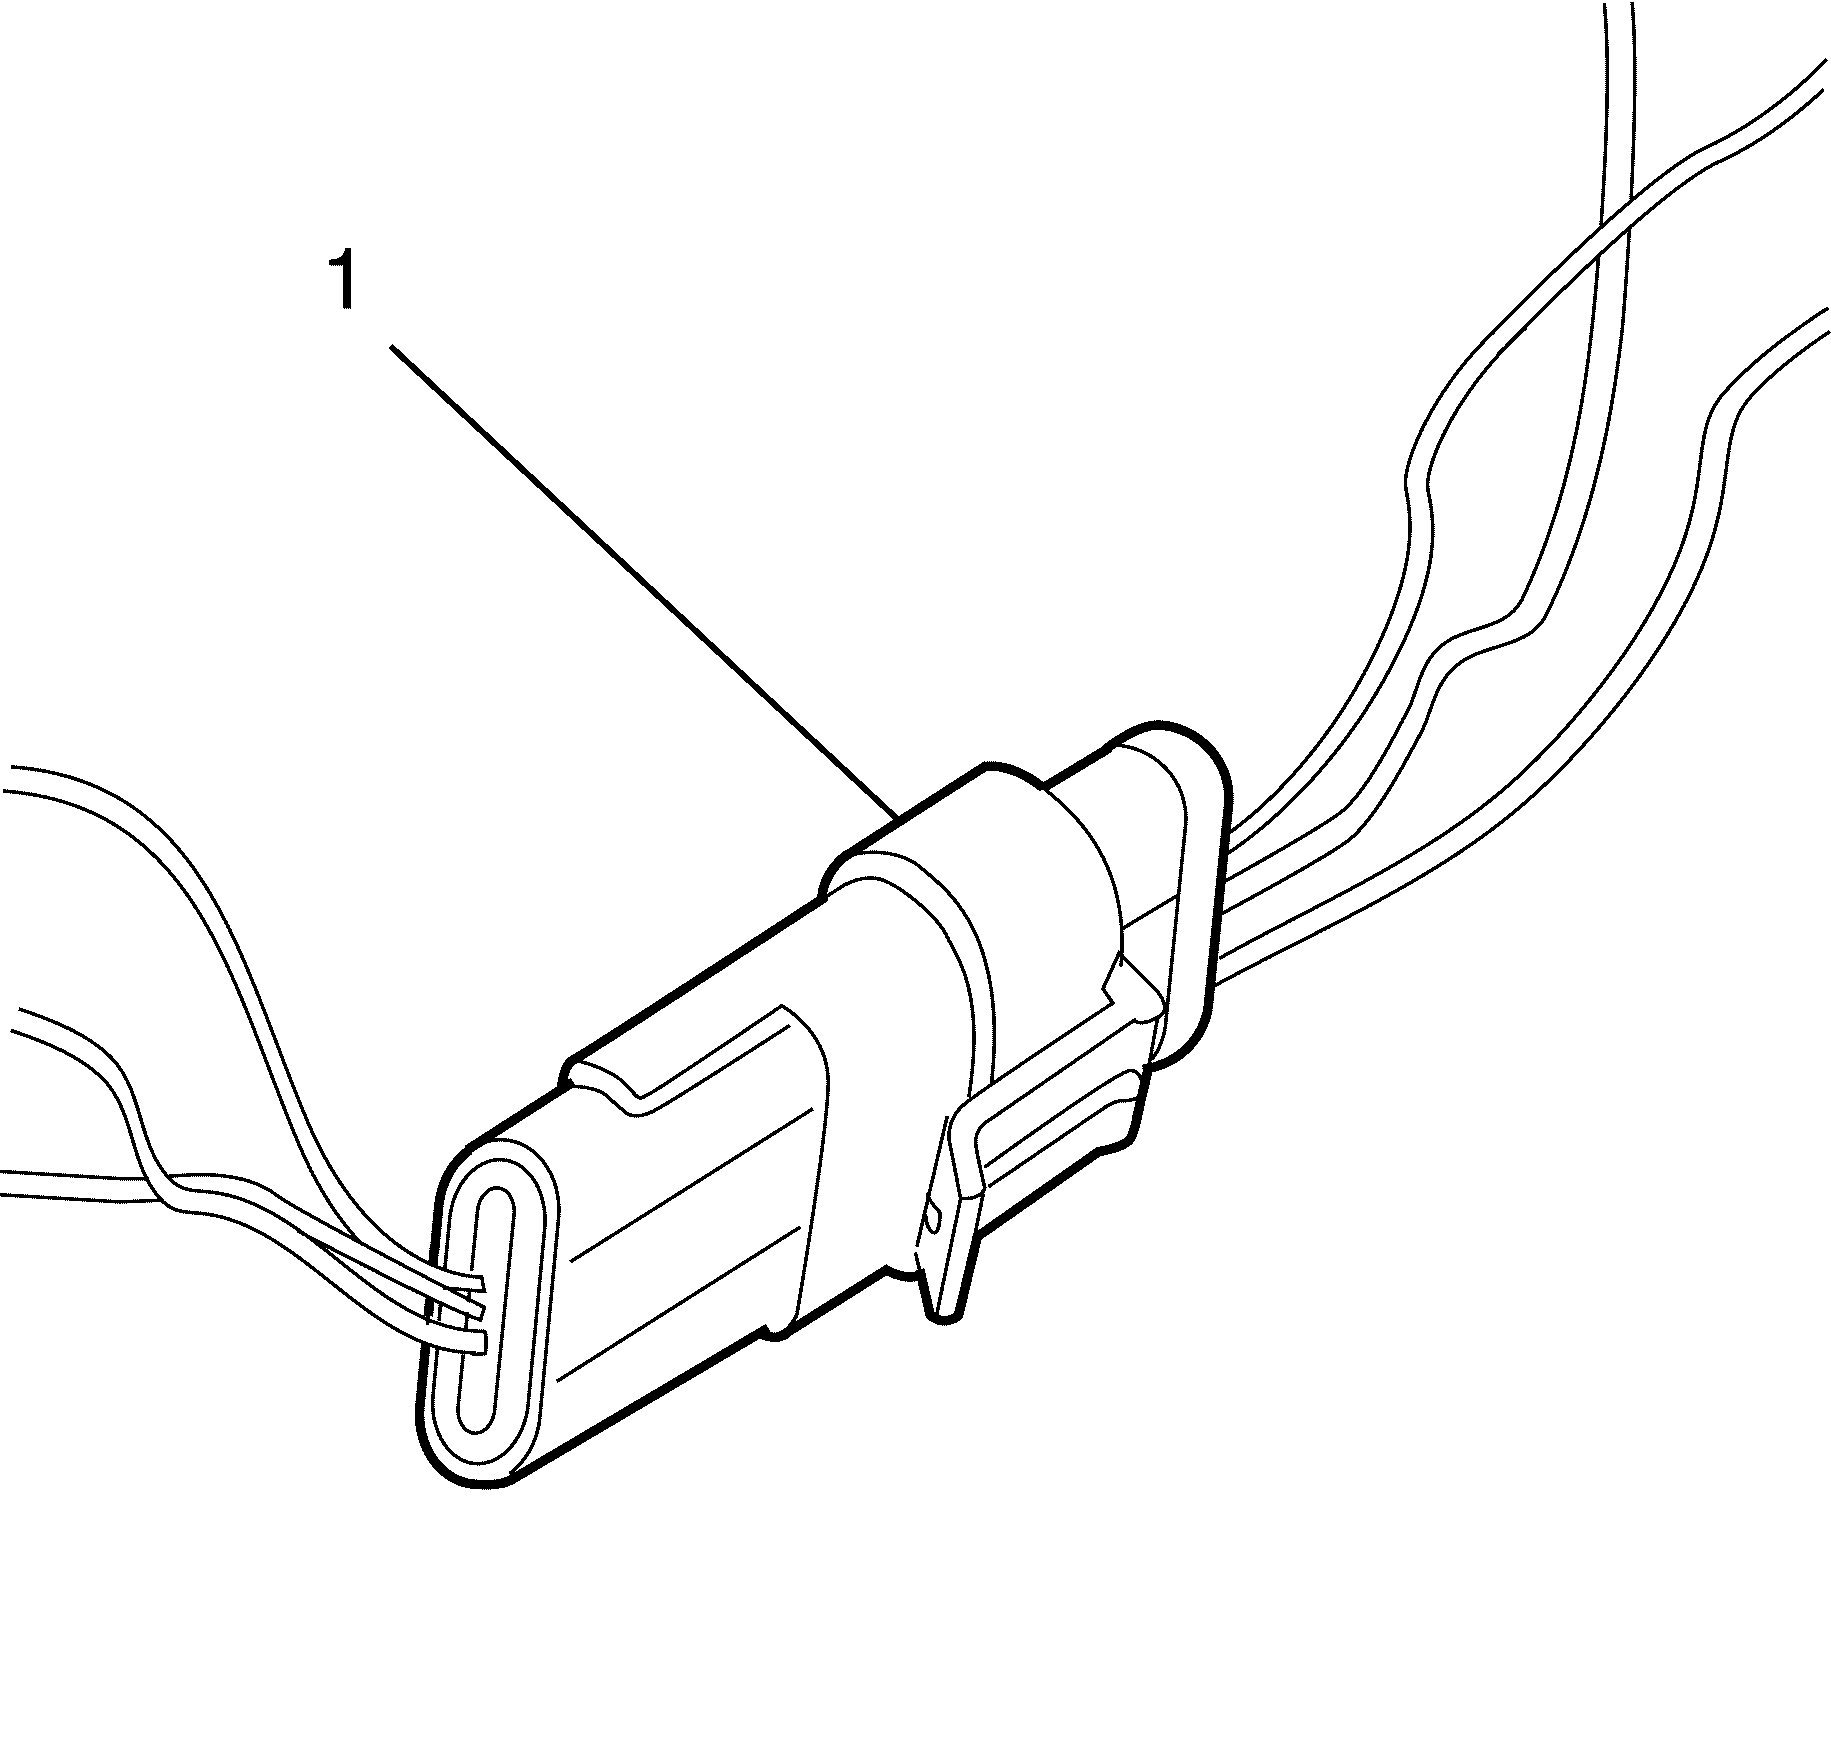
- Disconnect the tail lamp electrical connector (1).
- Remove the tail lamp from the vehicle.
Caution: Refer to Battery Disconnect Caution in the Preface section.
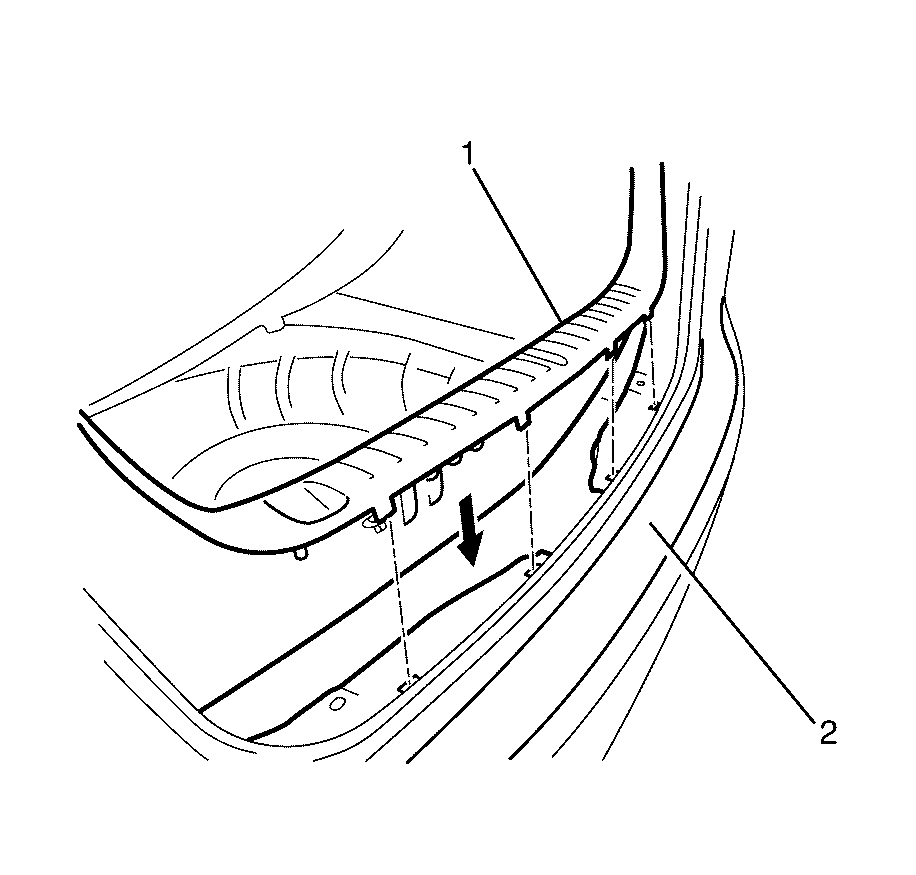
Important: Pull on the rear end trim finish panel trim (1) to release the retaining clips.
Installation Procedure - Tail Lamp - Type B
- Position the tail lamp to the vehicle.
- Connect the tail lamp electrical connector (1).
- Install the tail lamp, making sure that the tail lamp locates on the guide (2) and locating hole (1).
- Install the tail lamp to body retaining nuts (1).
- Install the rear compartment side trim panel (2) and retaining clip (1).
- Install the rear end trim finish panel (1) to the vehicle (2).
- Connect the battery negative cable. Refer to Battery Negative Cable Disconnection and Connection.

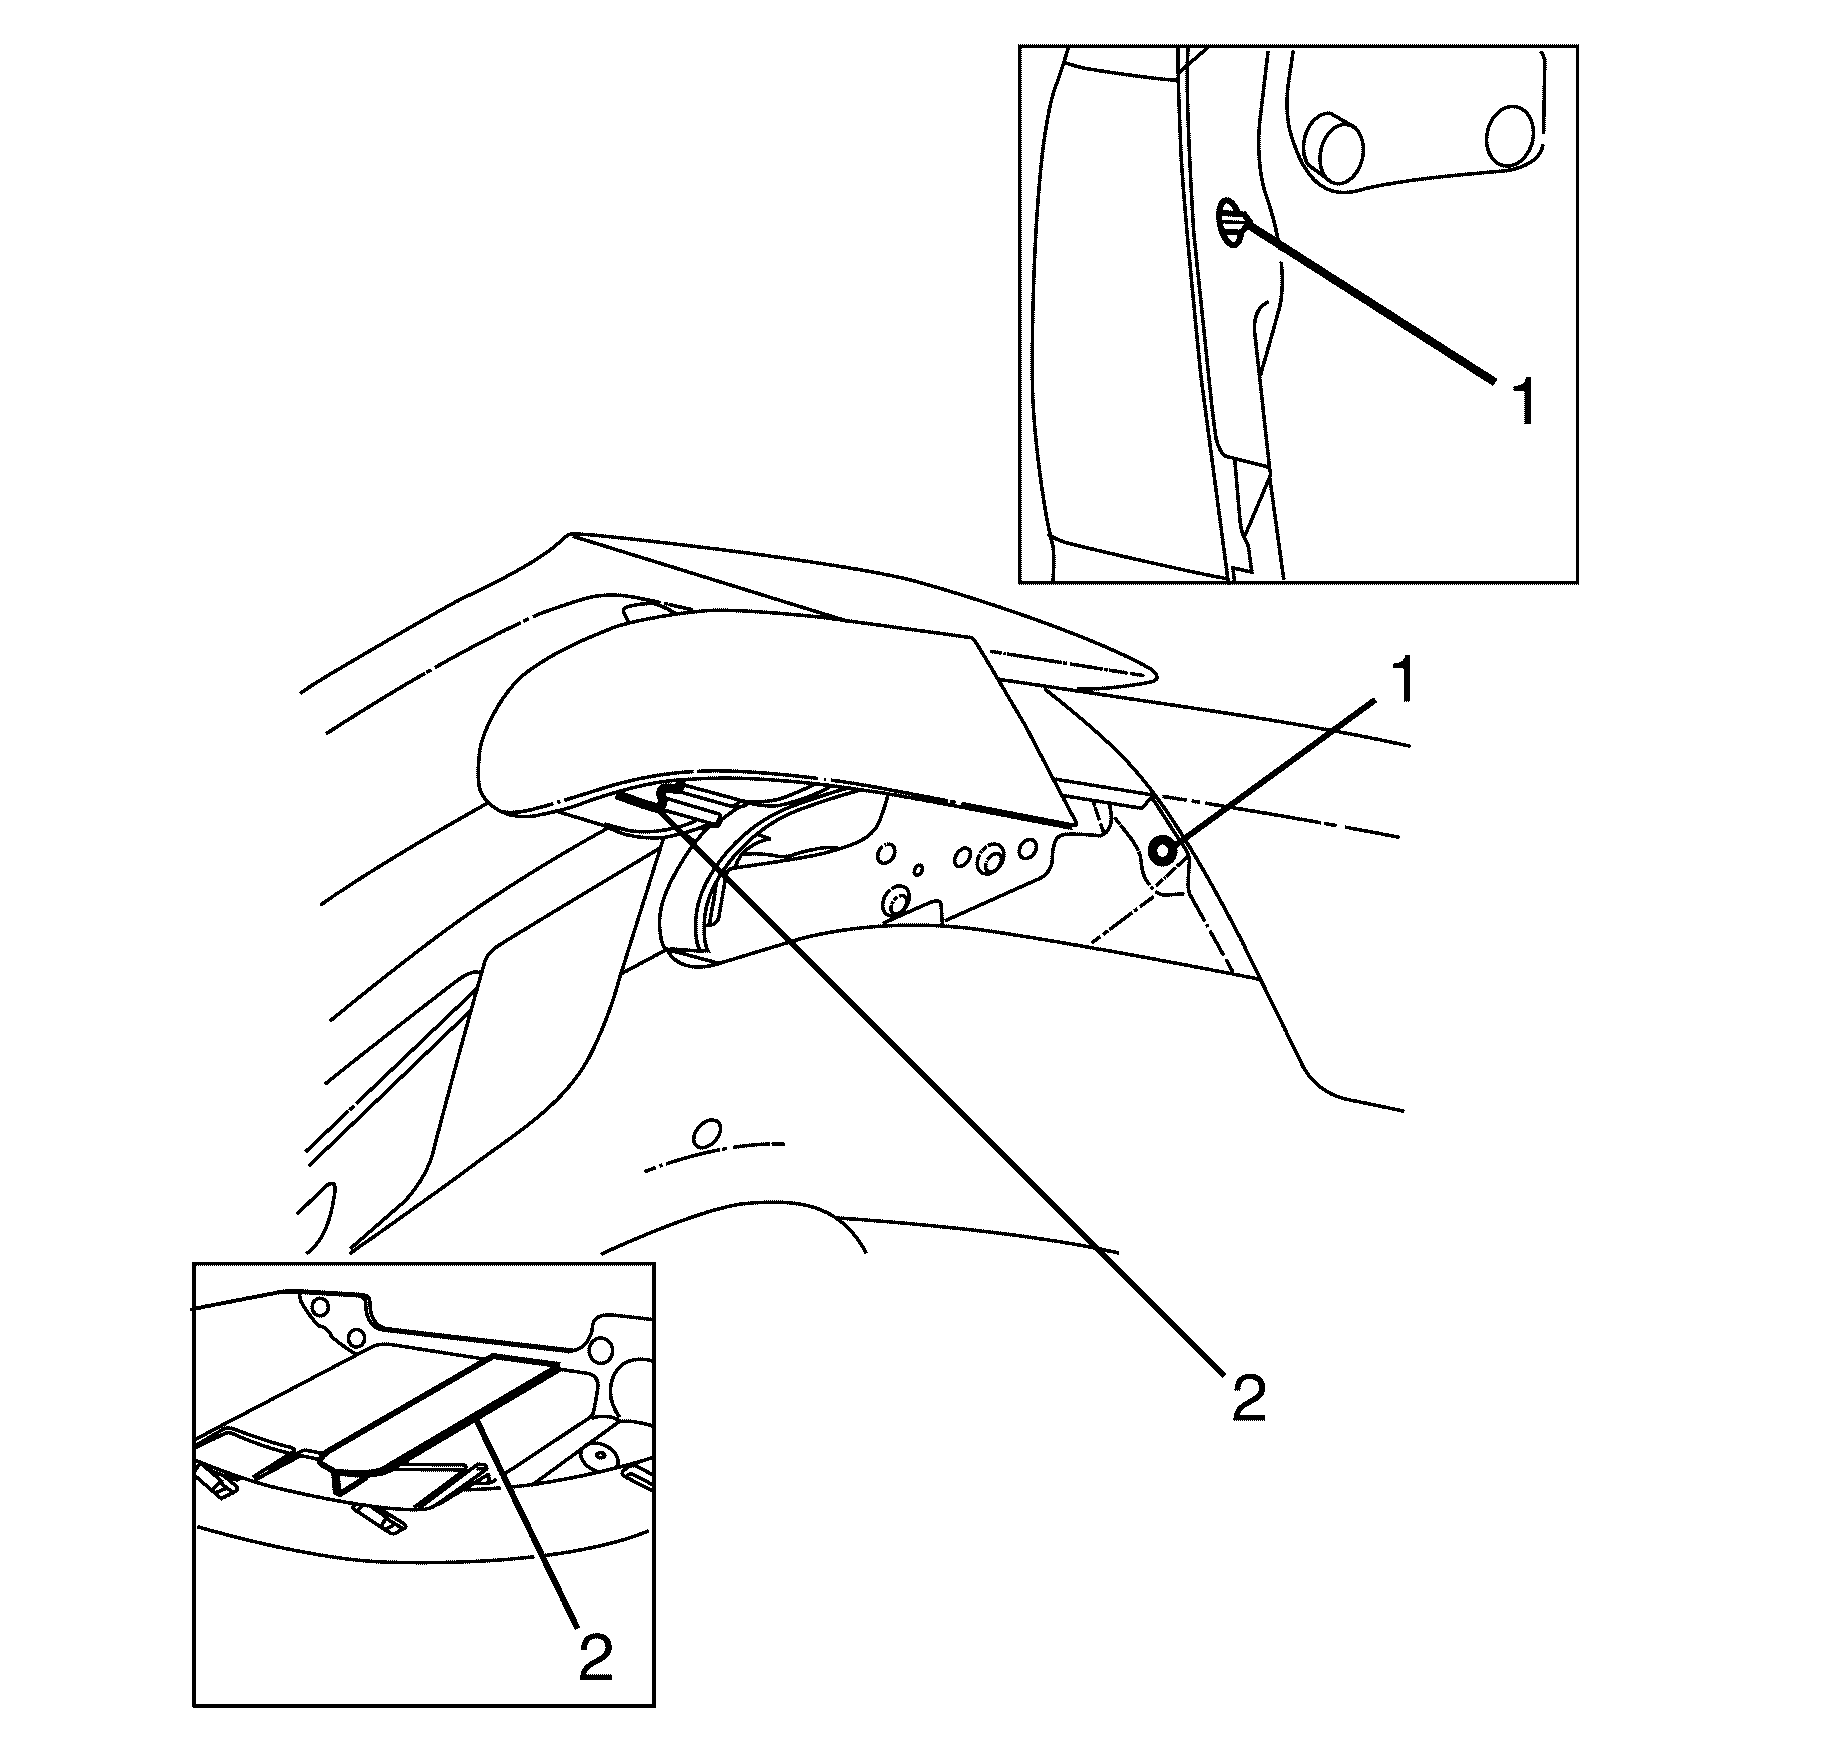
Important: Make sure that the wiring harness is not trapped or crimped when installing the tail lamp.
Important: Make sure the tail lamp sealing surface is clean to avoid damage to the painted vehicle surface and to prevent water leaks.
Notice: Refer to Fastener Notice in the Preface section.

Tighten
Tighten the nuts to 3.0 Nm (27 lb in).
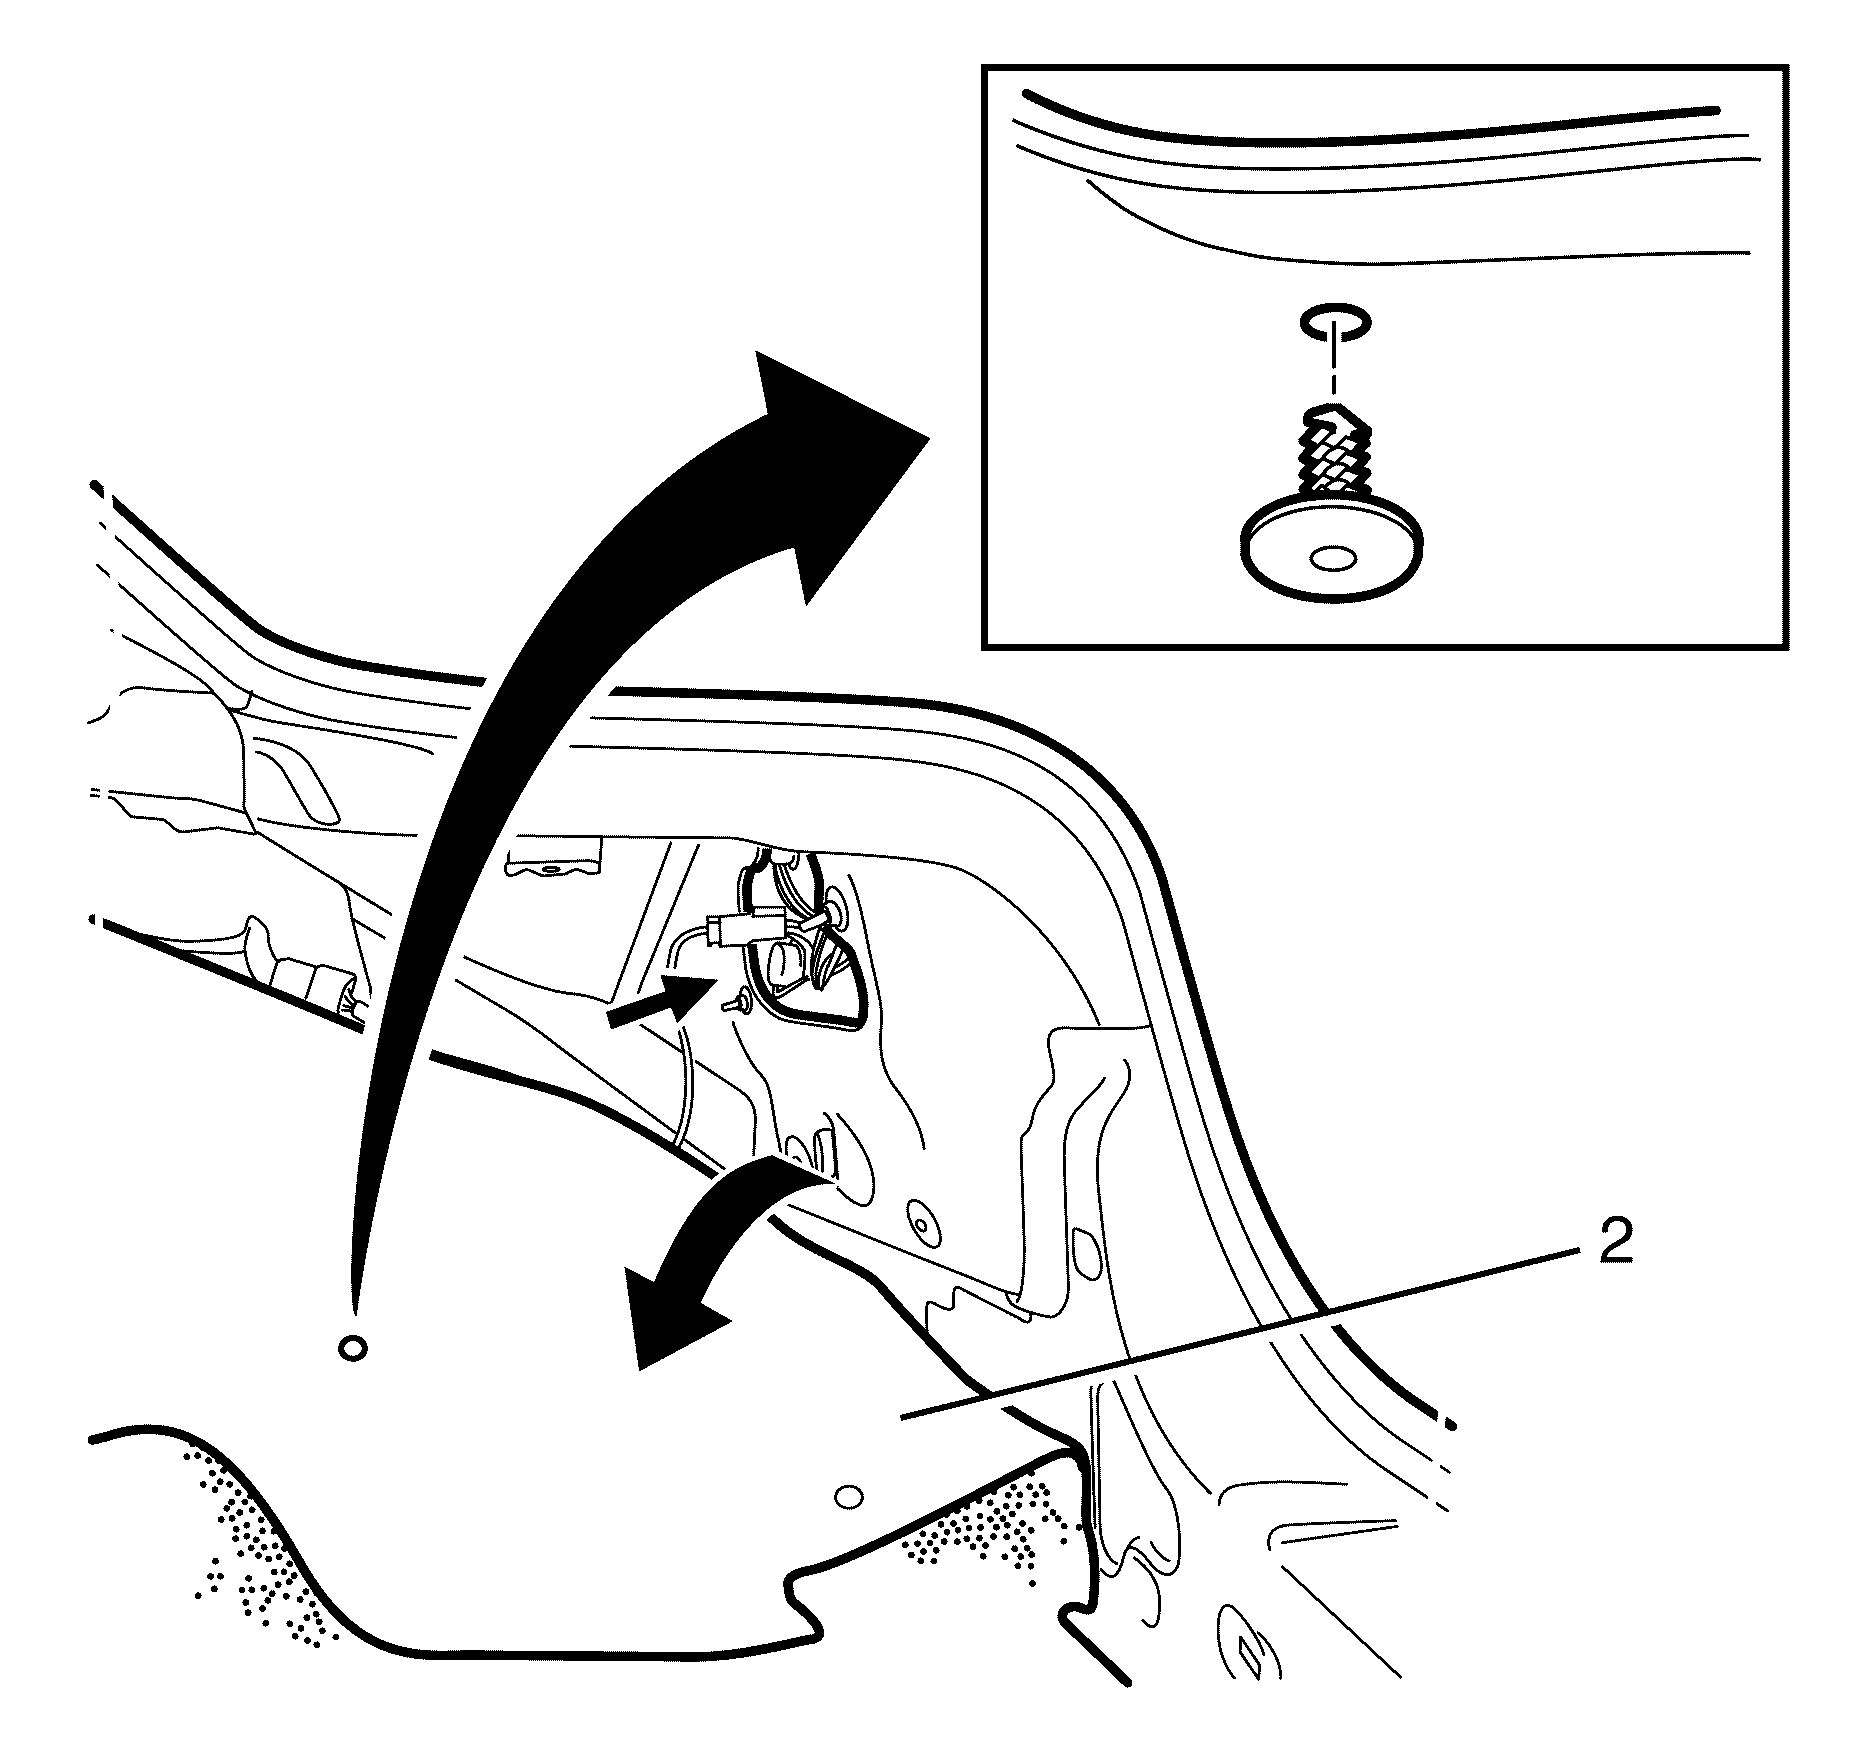

Important: Push the rear end trim finish panel (1) down to engage the retaining clips.
