Outer Door Frame Sectioning General Sectioning
Important: This procedure does not apply to the front hinge pillar. For the front hinge pillar sectioning procedure refer to Outer Door Frame Sectioning .
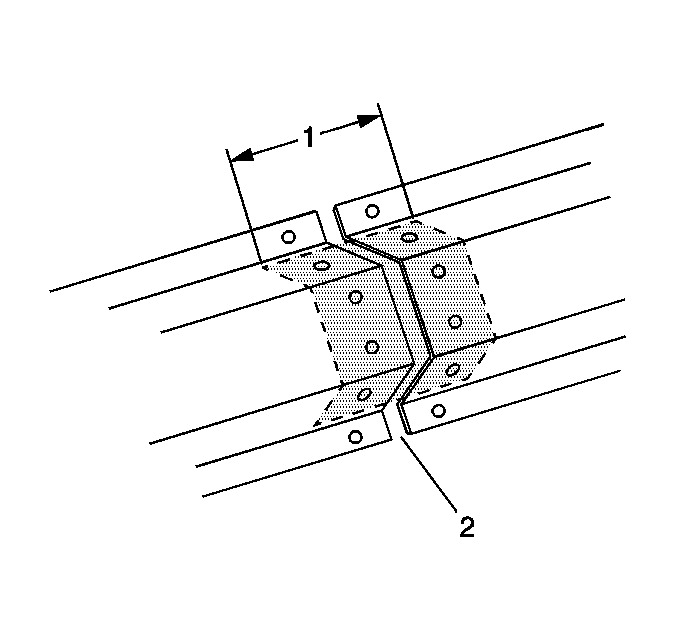
When sectioning the door frame opening in areas where there is no inner reinforcement, install a 100 mm (4 in) backing plate (1) behind the joint in order to ensure a solid and secure weld. Backing plates can be cut from the unused portion of the door frame opening service part. The specific areas to be sectioned are determined by the extent of the damage to the vehicle. In order to ensure a secure weld, the sectioning joints should have a gap of approximately 1½ times the thickness of the metal (2). Trim the parts as necessary in order to achieve the gap. Make certain to plug weld the backing plates to both the new and the original sections. This may require drawing the plate flat against the sections using a screw in order to temporarily secure the joint for welding.Removal Procedure
- Remove all of the related panels and the components.
- Visually inspect and restore as much of the damage as possible to the factory specifications.
- Remove the sealers, the sound deadeners and the anti-corrosion materials as necessary.
- Before removing the damaged panel, inspect, measure and compare the service part to original part in order to choose the areas where you can best perform the sectioning.
- Cut the door frame opening where you are performing the sectioning.
- Locate, mark and drill out all factory welds. Note the number and location of welds for installation of the service part.
- Remove the damaged area of door frame opening.
Important: Sectioning should not take place in the shaded areas. Sectioning in these areas may compromise the structural integrity of the vehicle.
Important: Do not section within 100 mm (4 in) of the laser welds (1).
Important: Take care not to damage the inner panels or reinforcements.
Installation Procedure
- Measure and mark the portion of the service part necessary for replacement.
- Cut the service part at marked locations.
- Cut 100 mm (4 in) sleeves from the unused section of the service part, if necessary. Remove the flanges on both sides of the sleeve. Modify the sleeve as necessary so that the sleeve will fit under the sectioning joint.
- On the service part, drill 8 mm (5/16 in) plug weld holes as necessary in the locations noted from the original part.
- Drill plug weld holes along the sectioning cuts on both the service part and the remaining original panels. The plug weld holes should approximately 25 mm (1 in) from the edge of the cuts.
- Prepare the mating surfaces with a suitable weld-through primer. Slide the sleeves 50 mm (2 in) beneath the remaining original panels.
- Position the service part. Allow the service part to overlap the exposed 50 mm (2 in) of the sleeves. Leave a gap 1½ times the thickness of the metal for welding.
- Inspect the fit using 3 dimensional measuring.
- Plug weld accordingly with frequent measurements in order to ensure the proper fit.
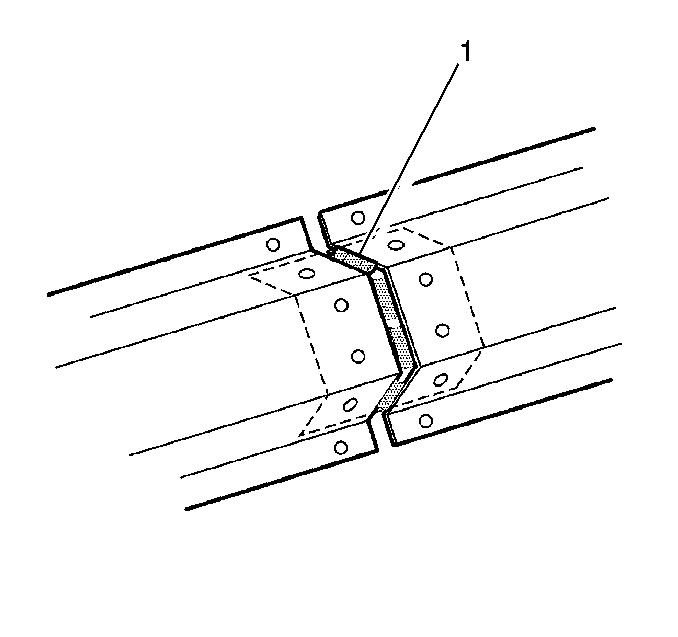
- Stitch weld along the sectioning joints (1). Make 25 mm (1 in) welds along the seam with 25 mm (1 in) gaps between the stitches.
- Complete the stitch weld. This will create a solid joint with minimal heat distortion.
- Clean and prepare welded surfaces.
- Apply approved anti-corrosion primer.
- Install all of the related panels and the components.
Important: In any sections are damaged beyond recognition, space plug weld holes every 40 mm (1½ in) apart.
Important: Prior to refinishing, refer to GM P/N 4901MD-98 Refinish Manual for recommended products.
Outer Door Frame Sectioning Hinge Pillar Sectioning
Removal Procedure
- Remove all of the related panels and the components.
- Visually inspect and restore as much of the damage as possible to factory specifications.
- Remove the sealers, the sound deadeners and the anti-corrosion materials as necessary.
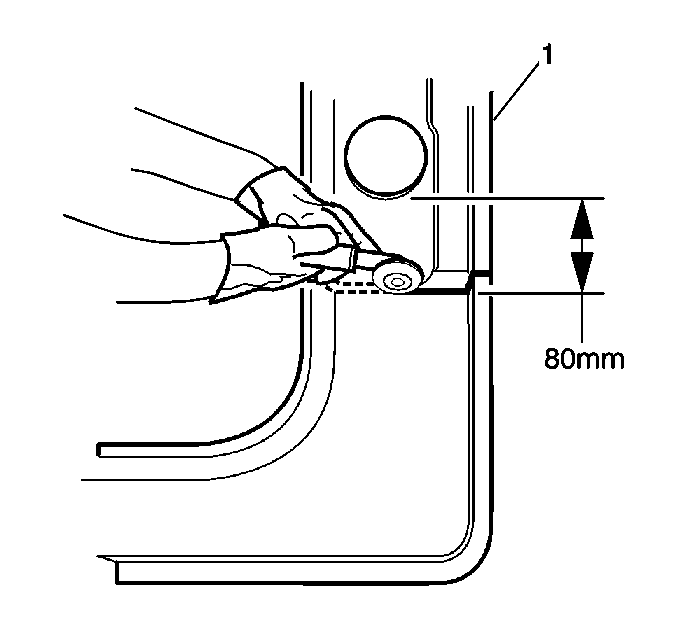
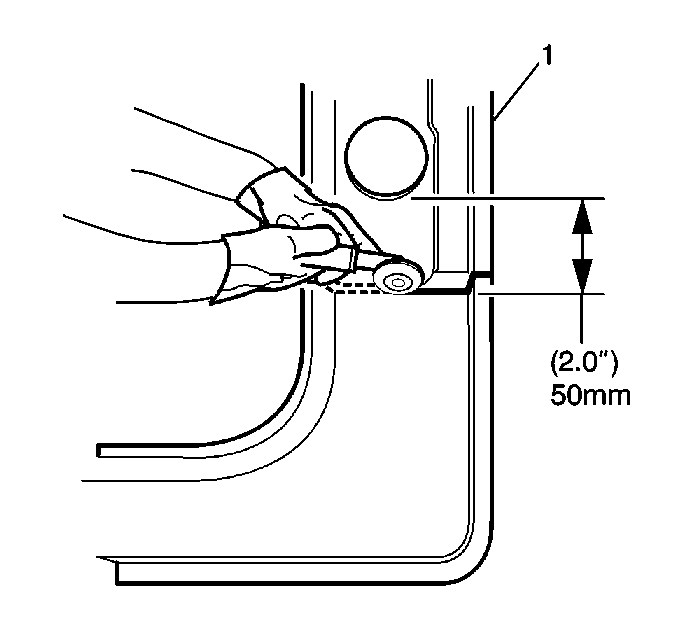
- On the original panel (1), measure 80 mm (3 1/8 in) down from the large wiring harness hole in the hinge pillar. Mark a horizontal line. Cut the hinge pillar along the line, taking care not to damage the inner panel.
- Perform additional sectioning procedures as necessary in order to remove the damaged areas of the door frame opening.
- Locate, mark and drill out all of the necessary factory welds. Note the number of welds for the installation of the service section.
- Remove the damaged section of the door frame opening.
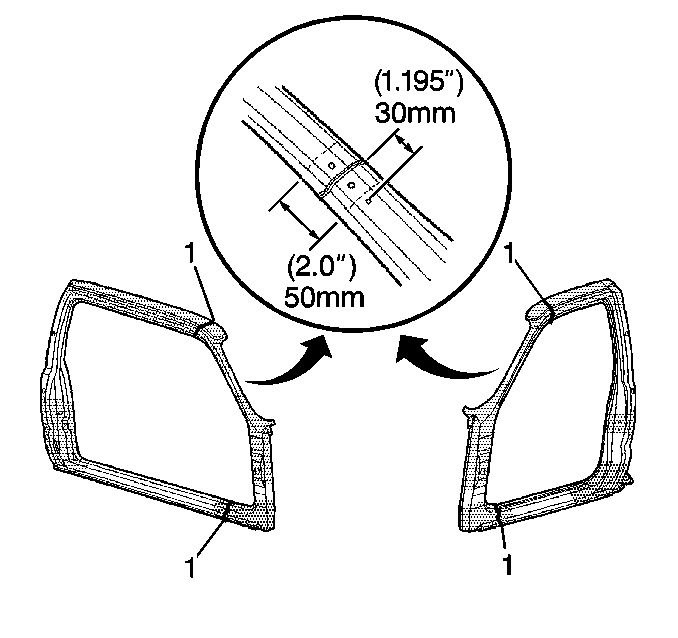
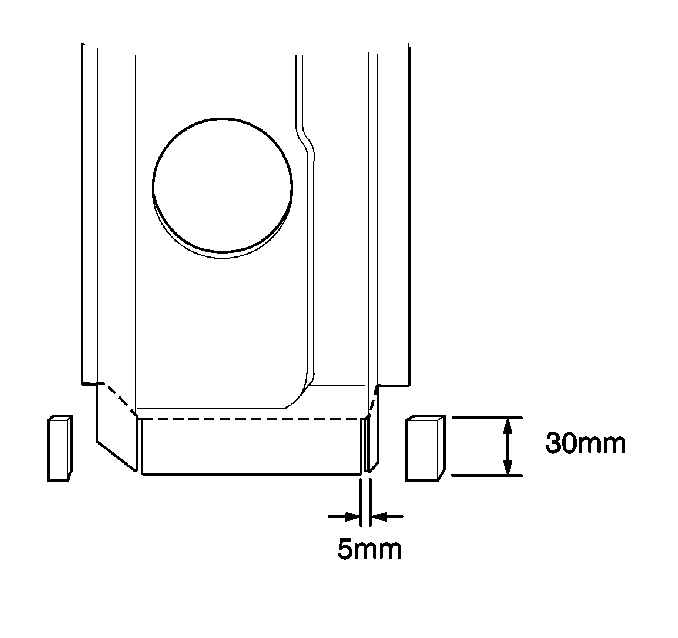
- Cut and remove 30 mm (1 3/16 in) from the flanges on either side of the remaining section of the original hinge pillar in order to create 30 mm (1 3/16 in) tabs. Cut 5 mm (3/16 in) wide gaps in the bottom corners.
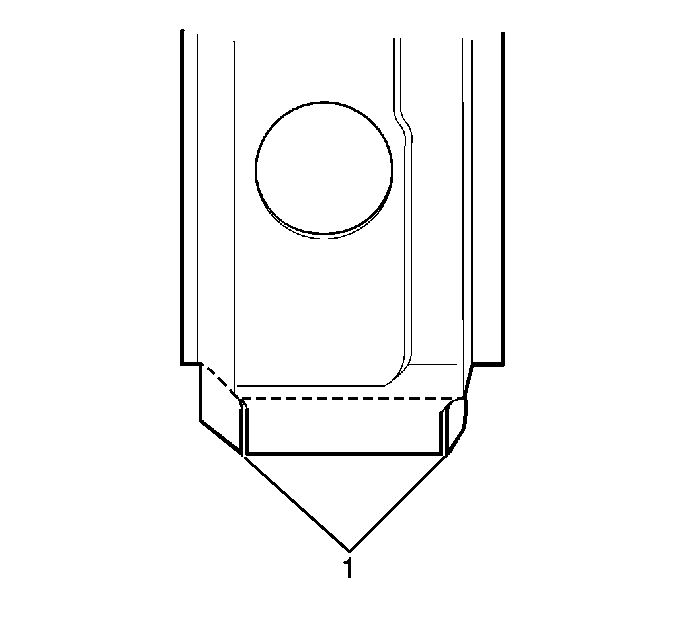
- Step the tabs inward in order to allow the door frame opening service section to fit over the original hinge pillar. Weld the tabs together along the edges (1).
Important: The metal of the hinge pillar is of a heavy gauge. Create the tabs using the appropriate tools.
Installation Procedure
- On the service part (1), measure 50 mm (2 in) down from the large wiring harness hole in the hinge pillar. Mark a horizontal line.
- Cut the hinge pillar along the line.
- Perform additional sectioning procedures as necessary in order to remove the unused areas of the service part.
- Drill 8 mm (5/16 in) plug weld holes as necessary in the locations noted from the original panel.
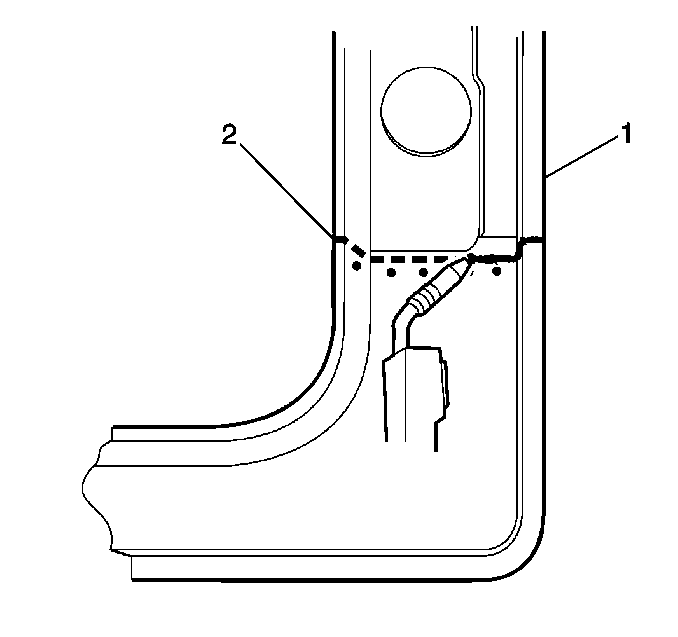
- Drill plug weld holes (1) along the hinge pillar sectioning line of the service part (2). The plug weld holes should be approximately 15 mm (9/16 in) from the edge of the cut.
- Drill plug weld holes (1) along the hinge pillar sectioning line of the service part (2). The plug weld holes should be approximately 15 mm (9/16 in) from the edge of the cut.
- Prepare the mating surfaces with a suitable weld-through primer. Position the service section over the stepped tab on the original hinge pillar (1). Allow 30 mm (1 3/16 in) of overlap (2).
- Inspect the fit using 3 dimensional measuring.
- Plug weld accordingly with frequent measurements in order to ensure the proper fit.
- Complete all of the other welds and the sectioning procedures as necessary.
- Clean and prepare the welded surfaces.
- Apply approved anti corrosion primer.
- Apply the sealers. Refinish the welded surfaces as necessary.
- Install all of the related panels and the components.
Important: In any area damaged beyond recognition, space plug weld holes every 40 mm (1½ in) apart.

Important: Prior to refinishing, refer to GM P/N 4901MD-98 Refinish Manual for recommended products.
Outer Door Frame Sectioning Windshield Area Sectioning
Removal Procedure
Important: When sectioning the door frame opening in the windshield area, you must install a 50 mm (2 in) backing plate behind the sectioning joint in order to ensure a solid and secure weld. The sectioning joints should have a gap of approximately 1½ times the thickness of the metal. Trim the parts as necessary in order to achieve the proper gap. Make certain to plug weld the backing plate to both the new and the original part. This may require drawing the plate flat against the sections. Use a screw in order to temporarily secure the joint for welding.
- Remove all of the related panels and the components.
- Visually inspect and restore as much of the damage as possible to the factory specifications.
- Remove the following items as necessary:
- Inspect, measure and compare the service part to the original part before you remove the damaged panel.
- Scribe the location where you will perform the sectioning.
- Perform all of the other sectioning procedures as necessary. Refer to Outer Door Frame Sectioning .
- Cut the door frame opening at the sectioning locations.
- Locate, mark and drill out all of the factory welds. Note the number and the location of the welds for installation of the service part.
- Remove the damaged area of the door frame opening.
Important: Sectioning is only recommended for the outer panel. If any inner panel is damaged beyond repair, replace the inner panel at the factory seams.
| • | The sealers |
| • | The sound deadeners |
| • | The anti-corrosion materials |

Important: Perform sectioning in the windshield area 30 mm (1 3/16 in) above the third trim mounting hole.
Important: Take care not to damage the inner panels or reinforcements.
Installation Procedure
- On the service part, mark the cut lines at the sectioning locations.
- Cut the service panel at the sectioning locations.
- Cut a 50 mm (2 in) sleeve from the unused section of the service part.
- Modify the sleeve as necessary so that the sleeve will fit under the sectioning joint.
- Drill 8 mm (5/16 in) plug weld holes on the service part, as necessary, in the locations noted from the original part.
- Drill a plug weld hole along the sectioning cuts, on both the service part and the original panel. Drill the he plug welds holes approximately 15 mm (19/32 in) from the edge of the cuts.
- Prepare the mating surfaces with a suitable weld-through primer.
- Slide the sleeve 25 mm (1 in) beneath the remaining original panel.
- Position the service part. Allow the service part to overlap the exposed 25 mm (1 in) of the sleeve. Leave a gap one and one half times the thickness of the metal.
- Trim the parts as necessary in order to achieve the proper gap.
- Inspect the fit using 3 dimensional measuring equipment.
- Plug weld the service part to the vehicle accordingly. Use frequent measurements in order to ensure the proper fit.
- Stitch weld along the sectioning joint.
- Clean and prepare the welded surfaces.
- Apply approved anti-corrosion primer.
- Refinish the welded surfaces as necessary.
- Install all of the related panels and the components.
Important: In any area damaged beyond recognition, space plug the weld holes every 40 mm (1½ in) apart.
Important: Prior to refinishing, refer to GM P/N 4901 MD-98 Refinish Manual for recommended products.
