Removal Procedure
Tools Required
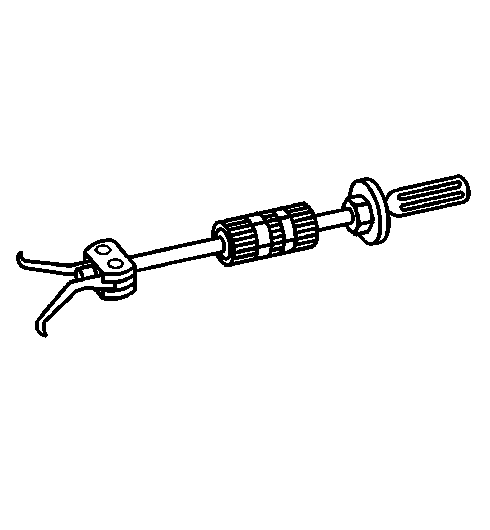
| • | J 26941 Pinion
Shaft and Countergear Bearing Cup Remover |
- Raise and suitably support the vehicle. Refer to
Lifting and Jacking the Vehicle
in General Information.
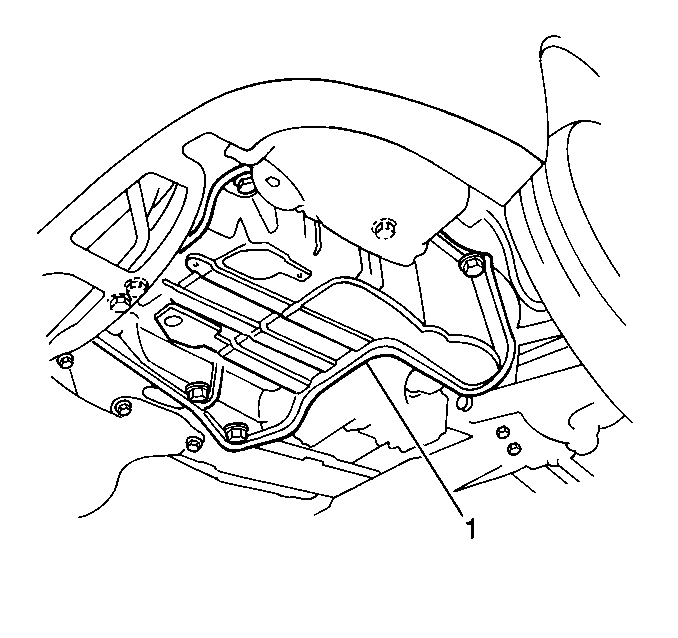
- Remove the 6 bolts
and the left splash shield (1) from the vehicle.
- Remove the front tire and wheel. Refer to
Tire and Wheel Removal and Installation
in Tires and Wheels.
- Remove the drive axle from the vehicle. Refer to
Wheel Drive Shaft Replacement
in Wheel Drive Shafts.
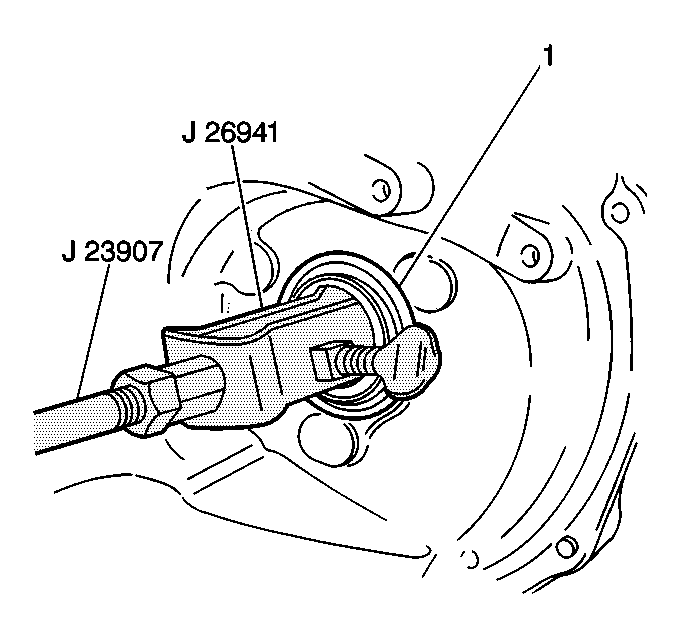
- Remove the drive axle
shaft fluid seal (1) from the transaxle using J 26941
with J 23907
.
- Inspect the differential-side joint surface of the drive axle
assembly where the drive axle makes contact with the drive axle shaft fluid
seal.
The surface should be smooth and free of any burrs or scarring which
may damage the drive axle shaft fluid seal.
If damage to the differential-side joint is evident, replace the differential-side
joint.
Installation Procedure
Tools Required
| • | J 35553 Differential
Side Bearing Seal Installer |
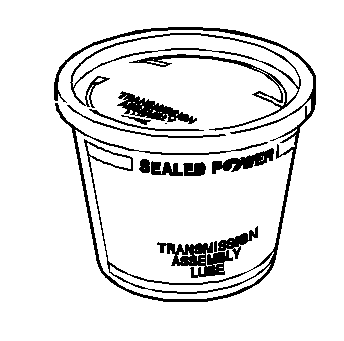
| • | J 36850 Transmission
Assembly Lubricant |
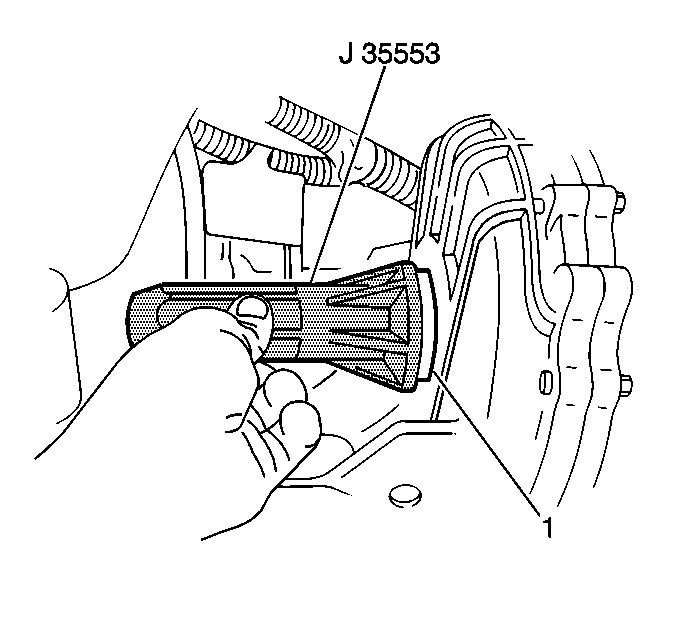
- Install the new drive
axle shaft fluid seal (1) into the transaxle using the following tools:
| • | For the driver's side, use J 35553
and a hammer. |
| • | For the passenger's side, use a hammer and a socket. |
- Apply J 36850
to the new drive axle shaft fluid seal lip.
- Install the drive axle into the vehicle. Refer to
Wheel Drive Shaft Replacement
in Wheel Drive Shafts.
- Install the front tire and wheel. Refer to
Tire and Wheel Removal and Installation
in Tires and Wheels.
Notice: Use the correct fastener in the correct location. Replacement fasteners
must be the correct part number for that application. Fasteners requiring
replacement or fasteners requiring the use of thread locking compound or sealant
are identified in the service procedure. Do not use paints, lubricants, or
corrosion inhibitors on fasteners or fastener joint surfaces unless specified.
These coatings affect fastener torque and joint clamping force and may damage
the fastener. Use the correct tightening sequence and specifications when
installing fasteners in order to avoid damage to parts and systems.
- Install the left
splash shield (1) to the vehicle. Secure the splash shield with the
6 bolts.
Tighten
Tighten the left splash shield bolts to 5 N·m (44 lb in).
- Lower the vehicle.
- Refill the transaxle, as necessary. Refer to
Transmission Fluid Check
.
