Master Cylinder Overhaul 2.0L Non-ABS, 2.5L Non-ABS
Disassembly Procedure
Caution: Wear safety glasses in order to avoid eye damage.
Caution: Refer to Brake Fluid Irritant Caution in the Preface section.
Caution: Refer to Brake Fluid Caution in the Preface section.
Notice: Refer to Filling the Master Cylinder Notice in the Preface section.
Notice: Refer to Honing the Master Cylinder Notice in the Preface section.
Notice: Refer to Master Cylinder Body Notice in the Preface section.
- Remove the reservoir (2) from the master cylinder (4). Refer to Master Cylinder Reservoir Replacement .
- Remove the master cylinder from the booster. Refer to Master Cylinder Replacement .
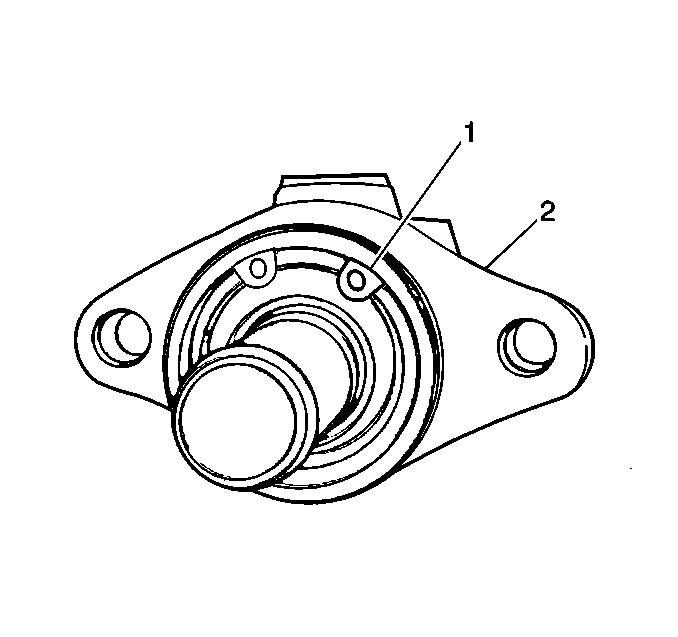
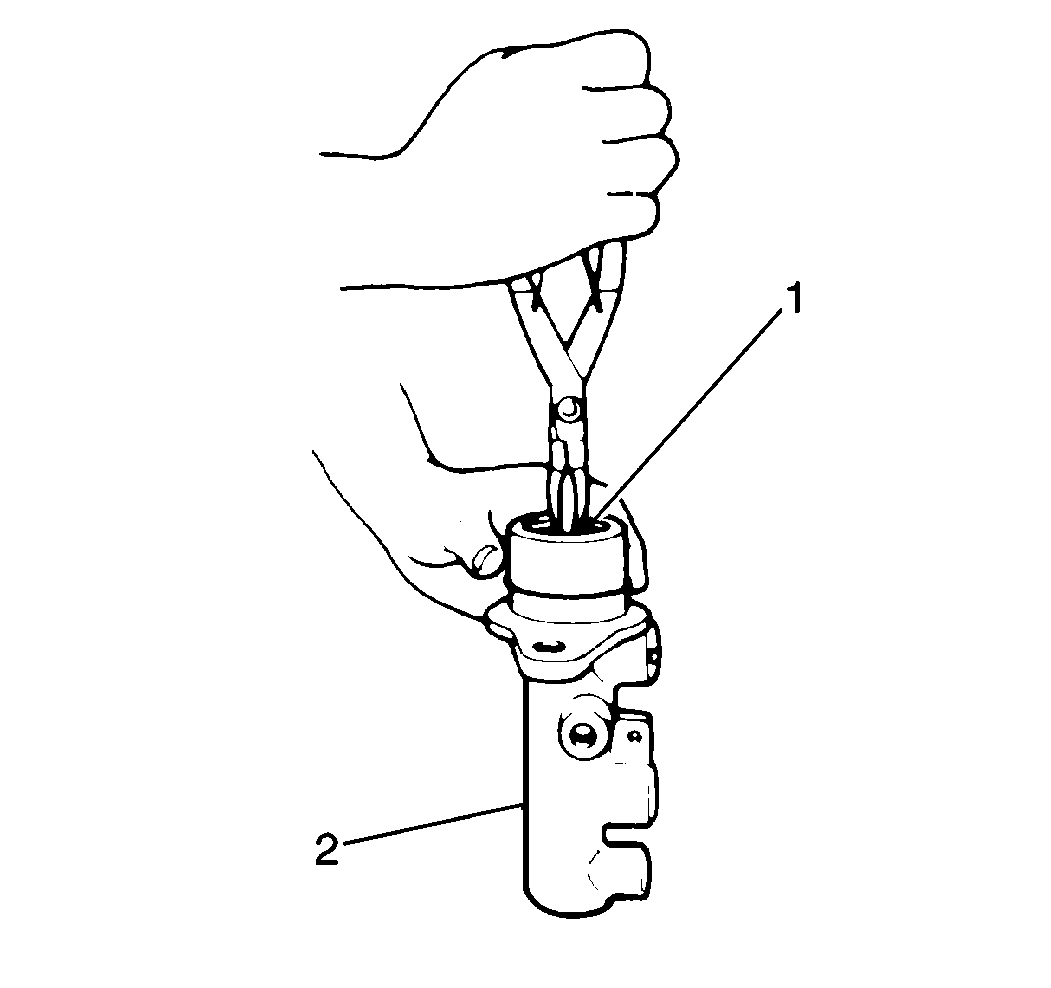
- Remove the piston stopper snap ring (1) from the master cylinder (2).
- Remove the piston stopper.
- Remove the cylinder cup.
- Remove the plate.
- Pull the primary piston assembly and the O-ring carefully from the master cylinder in order to prevent damage to the inside of the master cylinder wall.
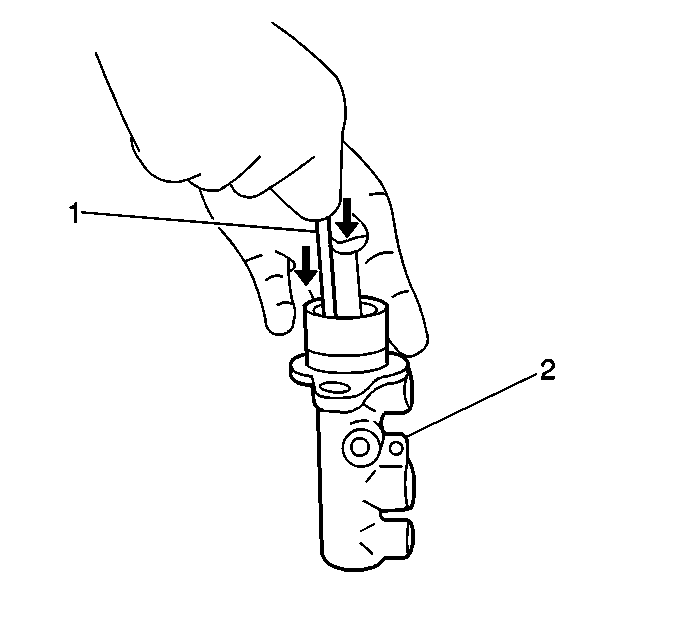
- Remove the secondary piston stopper bolt and the washer from the master cylinder.
- Remove the secondary piston assembly by blowing compressed air into the secondary piston stopper bolt hole.
- Remove the piston cup and the secondary piston pressure cup.
- Remove the spring.
- Inspect the components for wear or damage. Replace the components if necessary.
- Wash disassembled parts with brake fluid.
- Inspect the master cylinder bore for scoring or corrosion. Replace a damaged master cylinder.
- Rinse the cylinder in clean brake fluid. Shake excess rinsing fluid from the cylinder.

Caution: Do not place your fingers in front of the piston in order to catch or protect the piston while applying compressed air. This could result in serious injury.
Notice: Do not use lubricated compressed air on brake parts as damage to rubber components may result.
Important: DO NOT reuse piston cups.
Important: DO NOT use a cloth in order to dry the cylinder, because lint from a cloth will stick to the cylinder bore surfaces.
Assembly Procedure
- Install the spring to the master cylinder (2).
- Install the following to the master cylinder:
- Install the O-ring and the primary piston to the master cylinder.
- Install the plate.
- Install the new cylinder cup.
- Install the piston stopper.
- Depress and install the piston stopper snap ring into the master cylinder (2).
- With the pistons pushed entirely inside the cylinder, install the piston stopper bolt.
- Install the master cylinder to the brake booster. Refer to Master Cylinder Replacement .
- Apply a thin coat of brake fluid around the new grommets (3), and install the grommets to the master cylinder (4).
- Install the reservoir. Refer to Master Cylinder Reservoir Replacement .
| • | The new piston cup |
| • | The secondary piston assembly |
| • | The new secondary piston pressure cup |
Notice: Refer to Fastener Notice in the Preface section.
Tighten
Tighten the stopper bolt to 10 N·m (88.5 lb in).
Master Cylinder Overhaul ABS
Disassembly Procedure
Caution: Refer to Brake Fluid Irritant Caution in the Preface section.
Caution: Refer to Brake Fluid Caution in the Preface section.
Notice: Refer to Filling the Master Cylinder Notice in the Preface section.
Notice: Refer to Honing the Master Cylinder Notice in the Preface section.
Notice: Refer to Master Cylinder Body Notice in the Preface section.
- Remove the reservoir (2) from the master cylinder (4). Refer to Master Cylinder Reservoir Replacement .
- Remove the master cylinder from the booster. Refer to Master Cylinder Replacement .
- Remove the piston stopper snap ring (1) from the master cylinder (2).
- Remove the piston stopper.
- Remove the cylinder cup.
- Remove the plate.
- Pull the primary piston assembly carefully from the master cylinder in order to prevent damage to the inside of the cylinder wall.
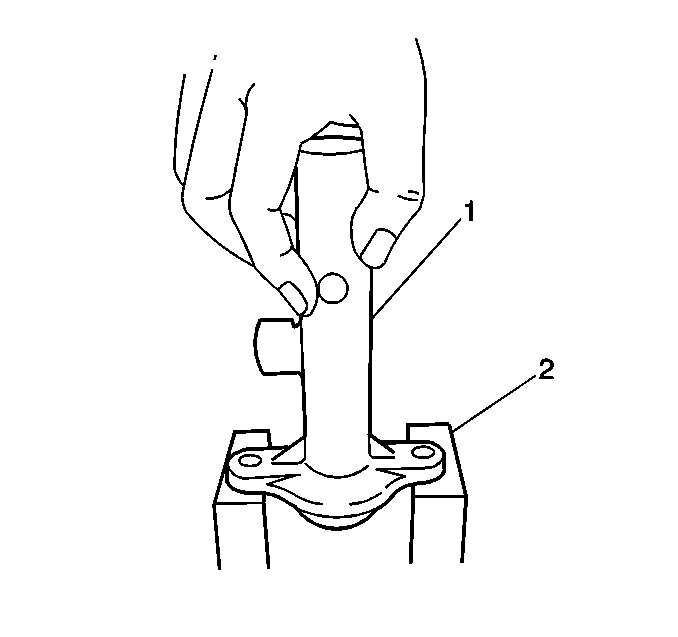
- Remove the secondary piston assembly carefully from the master cylinder (1) by tapping the flange on a piece of wood (2) or two soft objects.
- Remove the secondary piston pressure cup.
- Remove the piston cup.
- Remove the O-ring.
- Inspect the components for wear or damage. Replace the components if necessary.
- Wash disassembled parts with brake fluid.
- Inspect the master cylinder bore for scoring or corrosion. Replace a damaged master cylinder.
- Rinse the cylinder in clean brake fluid. Shake excess rinsing fluid from the cylinder.
Important: DO NOT reuse piston cups.
Important: Do NOT use a cloth in order to dry the cylinder, because lint from a cloth will stick to the cylinder bore surfaces.
Assembly Procedure
- Install the O-ring to the master cylinder (2).
- Install the following to the master cylinder:
- Install the primary piston assembly to the master cylinder.
- Install the plate.
- Install the cylinder cup.
- Install the piston stopper.
- Depress and install the piston stopper snap ring into the master cylinder (2).
- Install the master cylinder to the brake booster. Refer to Master Cylinder Replacement .
- Apply a thin coat of brake fluid around the new grommets (3), and install the grommets to the master cylinder (4).
- Install the reservoir. Refer to Master Cylinder Reservoir Replacement .
| • | The new piston cup |
| • | The secondary piston assembly |
| • | The new secondary piston pressure cup |
